
Hi guys! In this post, we’ll learn how to crochet a squared off, striped ripple baby blanket. There are instructions provided to customize the size of your blanket, so if a baby blanket isn’t what you had in mind, don’t worry!
When my friend announced that she was pregnant, I immediately reached out to ask if I could make her a baby blanket. I know it ruins the surprise, but I would rather ask to make sure that she will use/appreciate it before I make it.
As soon as I received her nod of approval, I got to work. My requirements for the blanket were as follows:
- Easy and relaxing (I was going through a hard time, and this was all I had the bandwidth for)
- Gender neutral (she hadn’t revealed the gender)
- Colorful
- Only a few ends to weave in, so the blanket could be thrown in the wash multiple times without it unraveling.
- Soft enough for a baby’s skin
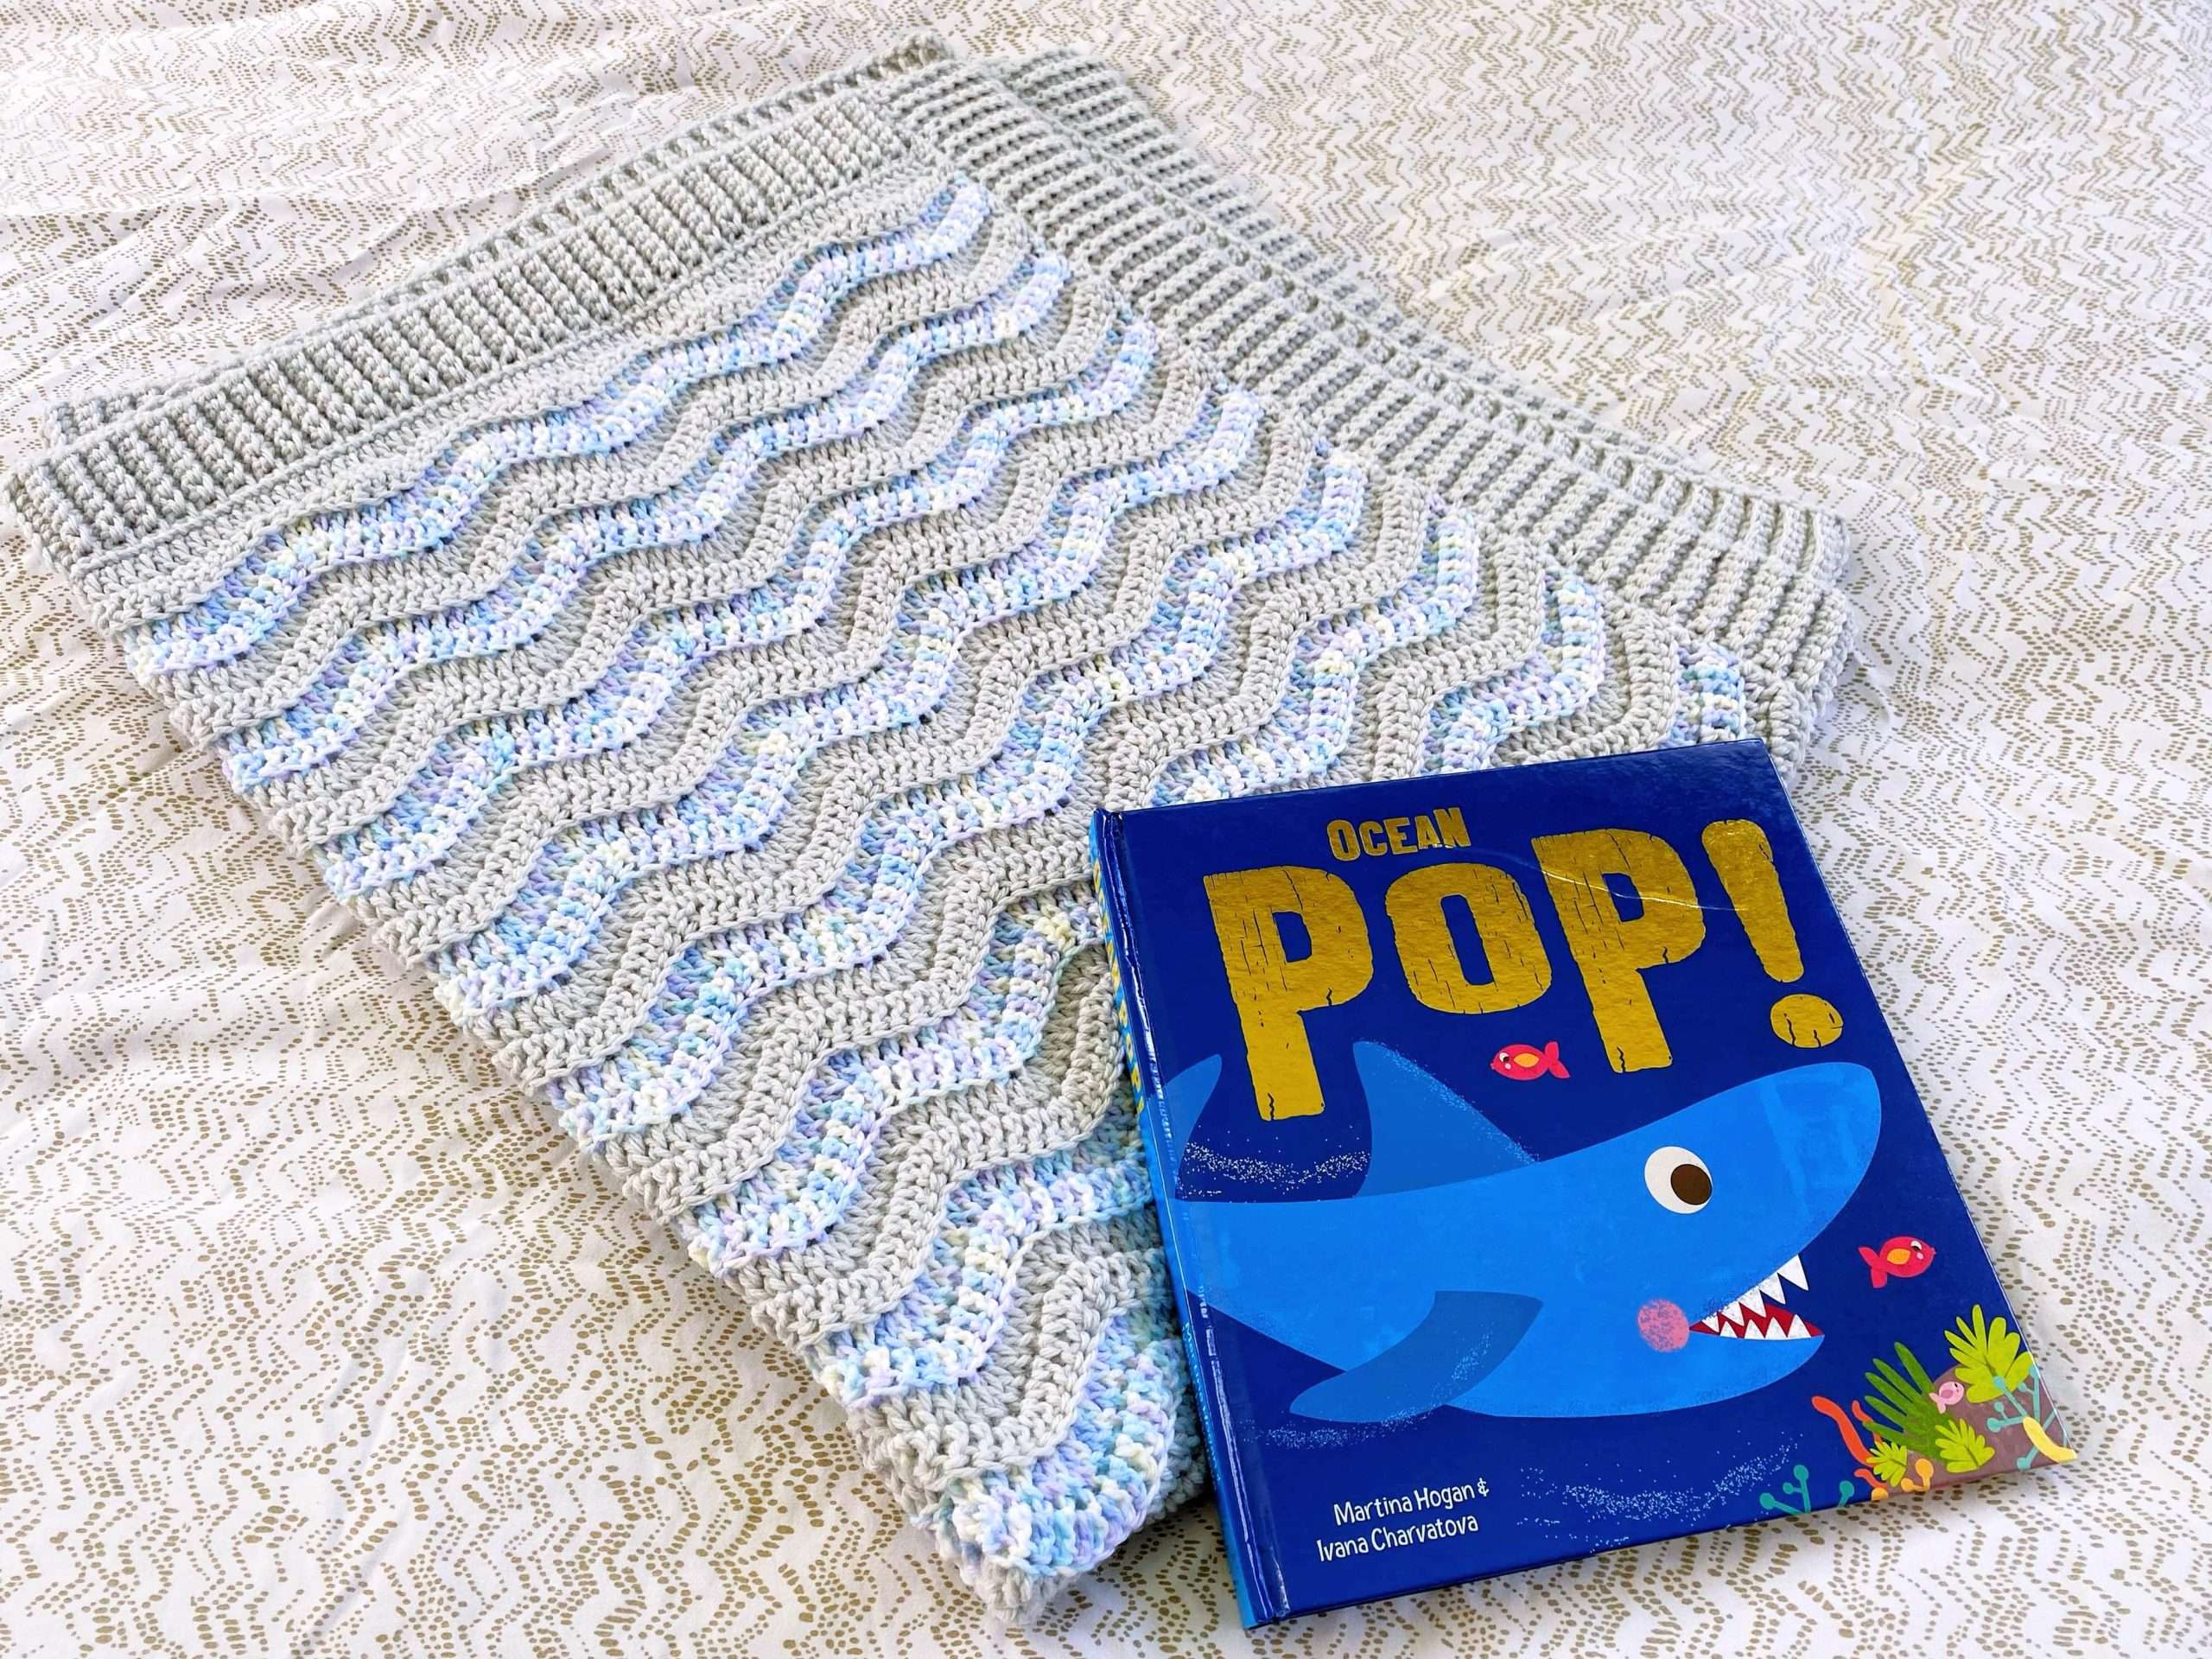
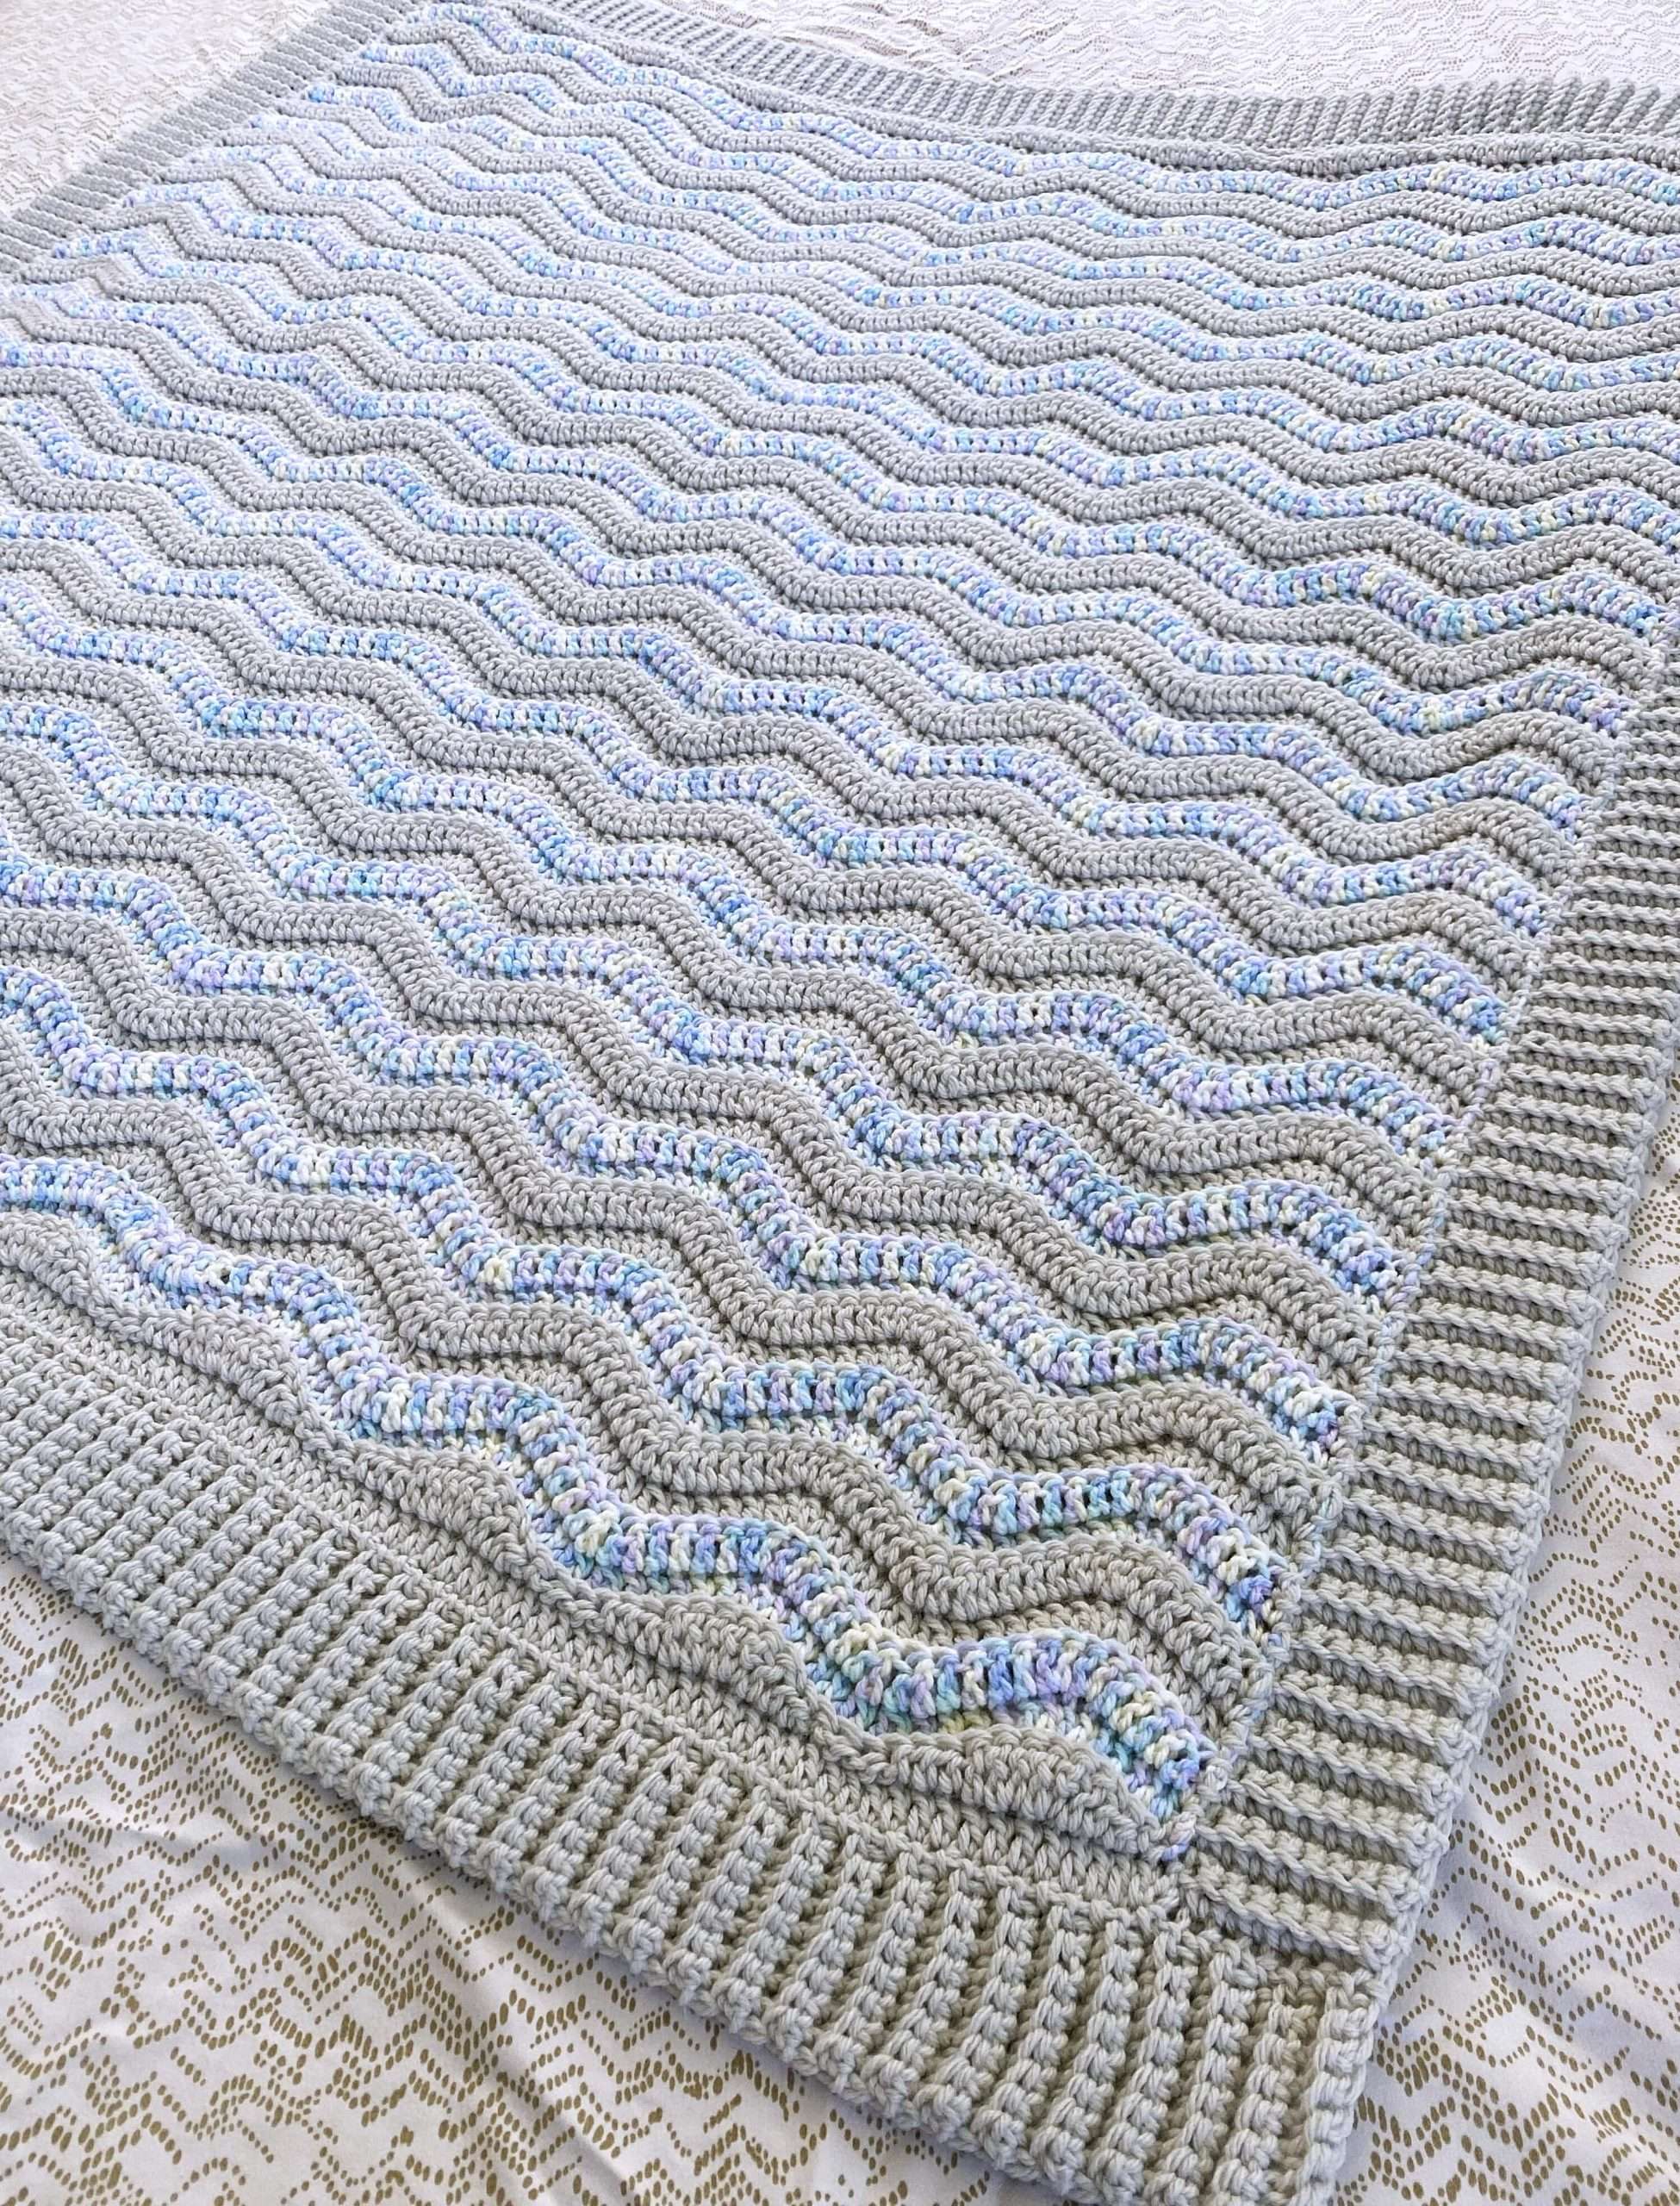
The Making Waves Ripple Baby Blanket meets all of these requirements. It’s soft, textured, plush, and after the first 3 rows are established, it’s an easy one-row repeat style of blanket.
Colour changes happen at the end of every second row, so the yarn can be carried up the side of the blanket to ensure that there are only a couple of ends to weave in at the end of the project.
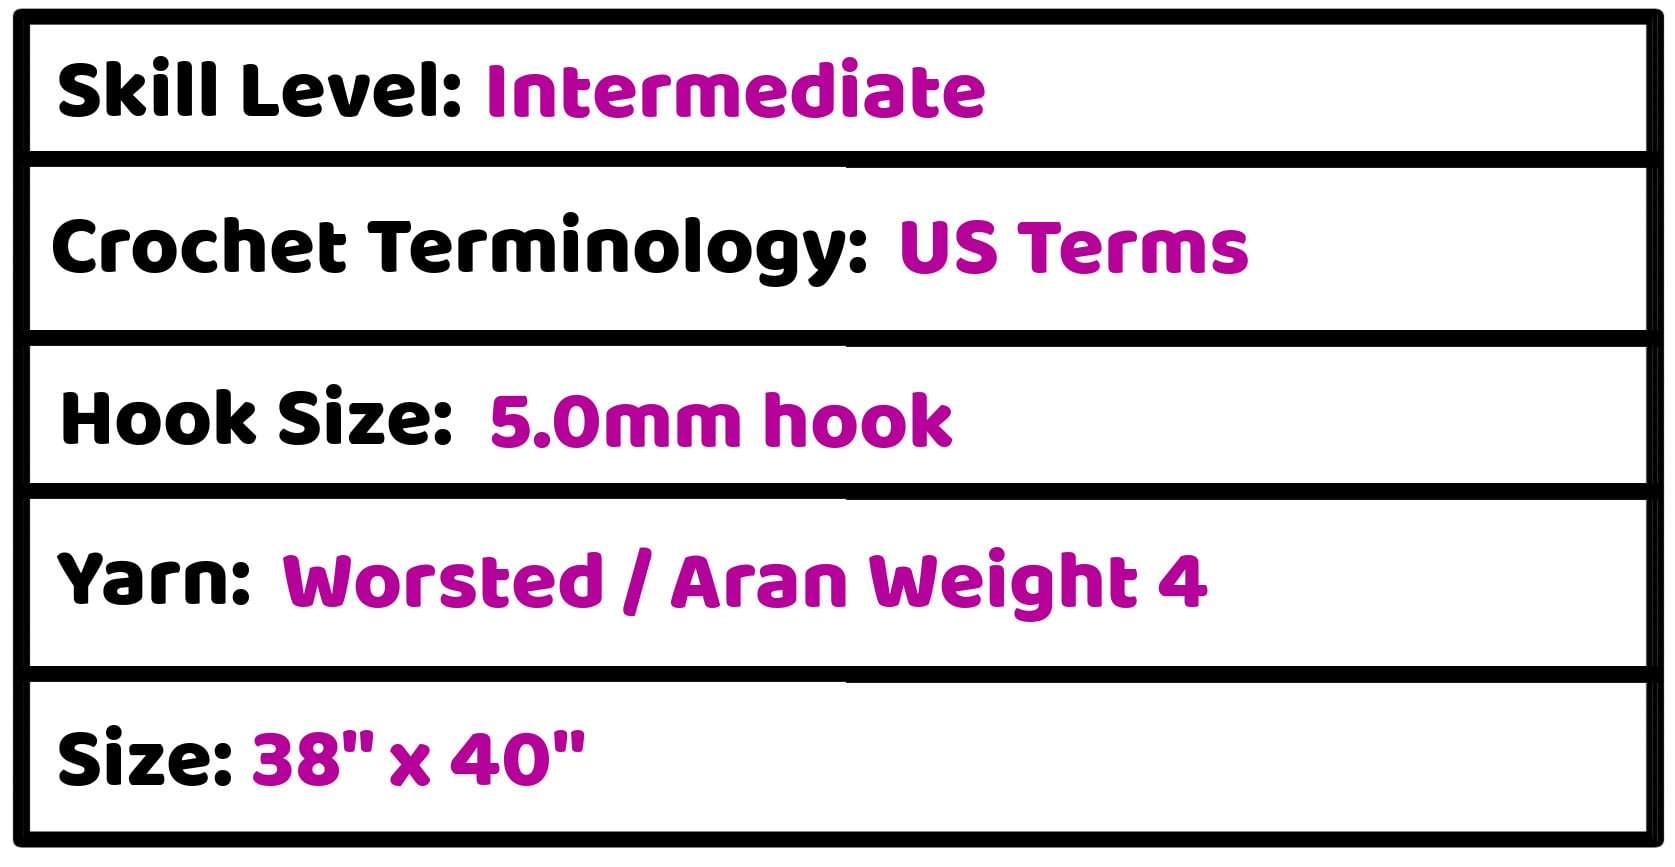
Below, you’ll find the free pattern for the ripple baby blanket size (38″ x 40″), but instructions are also provided to create a custom sized blanket.
I hope you enjoy making and gifting this blanket to your loved one(s)!
If you prefer to print the pattern, the ad-free printable PDF includes a step-by-step pictures and instructions for 7 blanket sizes (Baby, Lapghan, Small, Medium and Large Throw, Queen, and King)!
Pin this Ripple Crochet Baby Blanket – HERE!
Don’t have time to make this adorable ripple baby blanket yet? No problem! Pin it for later, so that you can find it when you’re ready to start crocheting.

This post contains affiliate links that support the content on ThisPixieCreates. Find more information about affiliate links, as well as my Privacy & Disclosures Policy here.
Things to Love about this Blanket:
- After the first 3 rows, it becomes a one-row repeat blanket, so it’s easy and relaxing.
- Unlike traditional ripple or wavy blankets, this blanket has a flat/rectangular top and bottom edge, which makes it easy to add your favourite border.
- You can change up the colours (and number of colours) to suit your needs.
- The size of this blanket is easy to customize, so you can create your perfect size.
- Working into the back loops of each stitch creates a simple ripple texture that is soft and plush.
Materials:
- 5.0mm crochet hook
- Scissors
- Yarn Needle
- Stitch Markers or Safety Pins
- Steamer / Spray Bottle
- Straight Pins / Blocking Pins
- Blocking Mat / Foam
Yarn Note:
I used two different yarn weights in this ripple baby blanket: a DK (Weight 3) and a worsted (Weight 4) yarn. The DK Weight is a variegated yarn in a standard DK thickness, and the Worsted Weight is a solid colour yarn that’s on the thinner side. The difference in weight creates plush, cozy waves. For your blanket, you can choose to use 2 different weights, 2 DK Weights, or 2 Worsted Weights; this blanket will work with any combination.
Yarn:
- Lion Brand Pound of Love, Weight 4 Medium Worsted Yarn (100% Premium Acrylic, 1020 yd / 932 m, 16 oz / 454 g)
- Colour: Elephant Grey (2 Skeins)
- Lion Brand Baby Soft, Weight 3 DK Yarn (100% Premium Acrylic, 367 yd / 335 m, 4 oz / 113 g)
- Colour: Pastel Print (2 Skeins)
Yardage:
- Colour A – 1200 yds / 1097 m
- Colour B – 700 yds / 640 m
- Total – 1900 yds / 1737 m

Abbreviations:
- Ch – chain
- St – stitch
- BLO – back loop only (see tutorial below)
- Sl st – slip stitch
- Sl2tog – slip stitch 2 together (see tutorial below)
- Sc – single crochet
- Hdc – half double crochet
- Dc – double crochet
- Mdc – modified double crochet (see tutorial below)
- Dc2tog – double crochet 2 stitches together (see tutorial below)
- YO – yarn over
- RS – right side
- WS – wrong side
Gauge: Approximately 15.5 sts x 7 rows = 4” x 4”
Trouble with Gauge?
- If your gauge is too small (4” = more than 15.5 sts or 7 rows), try using a thicker weight 4 yarn or a larger crochet hook.
- If your gauge is too big (4” = less than 15.5 sts or 7 rows), try using a thinner weight 4 yarn or a smaller crochet hook. You can also try adjusting your tension.
Pattern Measurement:
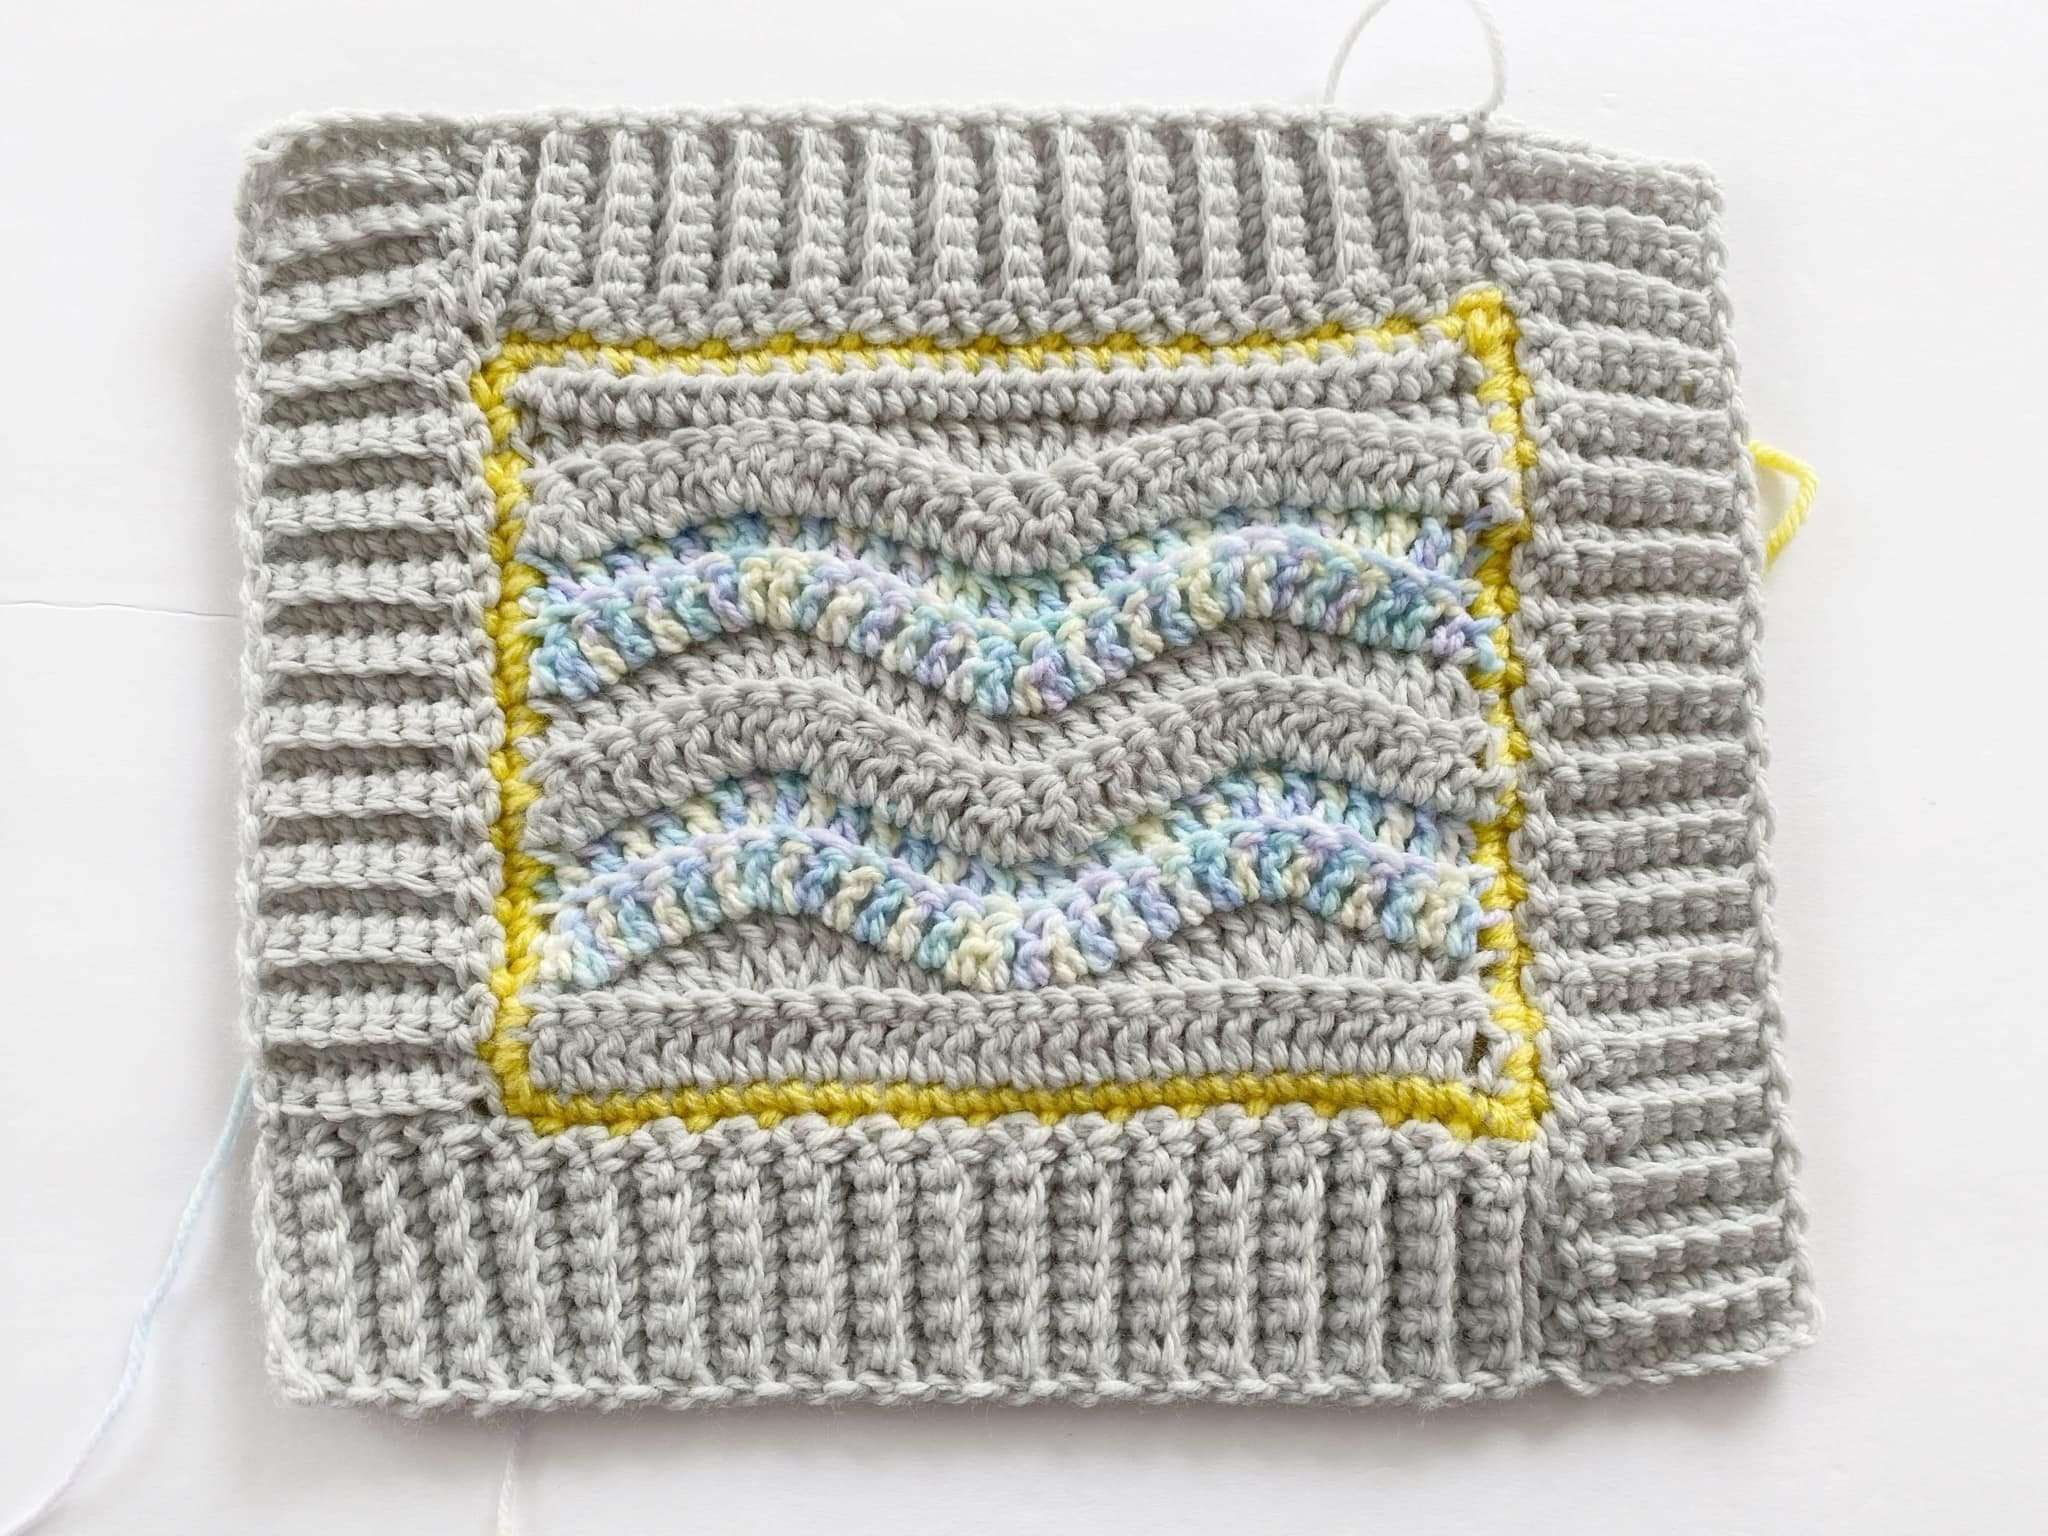
The Making Waves Blanket is a baby blanket size that measures approximately 36″ wide x 38″ long without the border, and 38″ x 40″ with the border. The ribbed border adds 2″ to the length and width of the blanket.
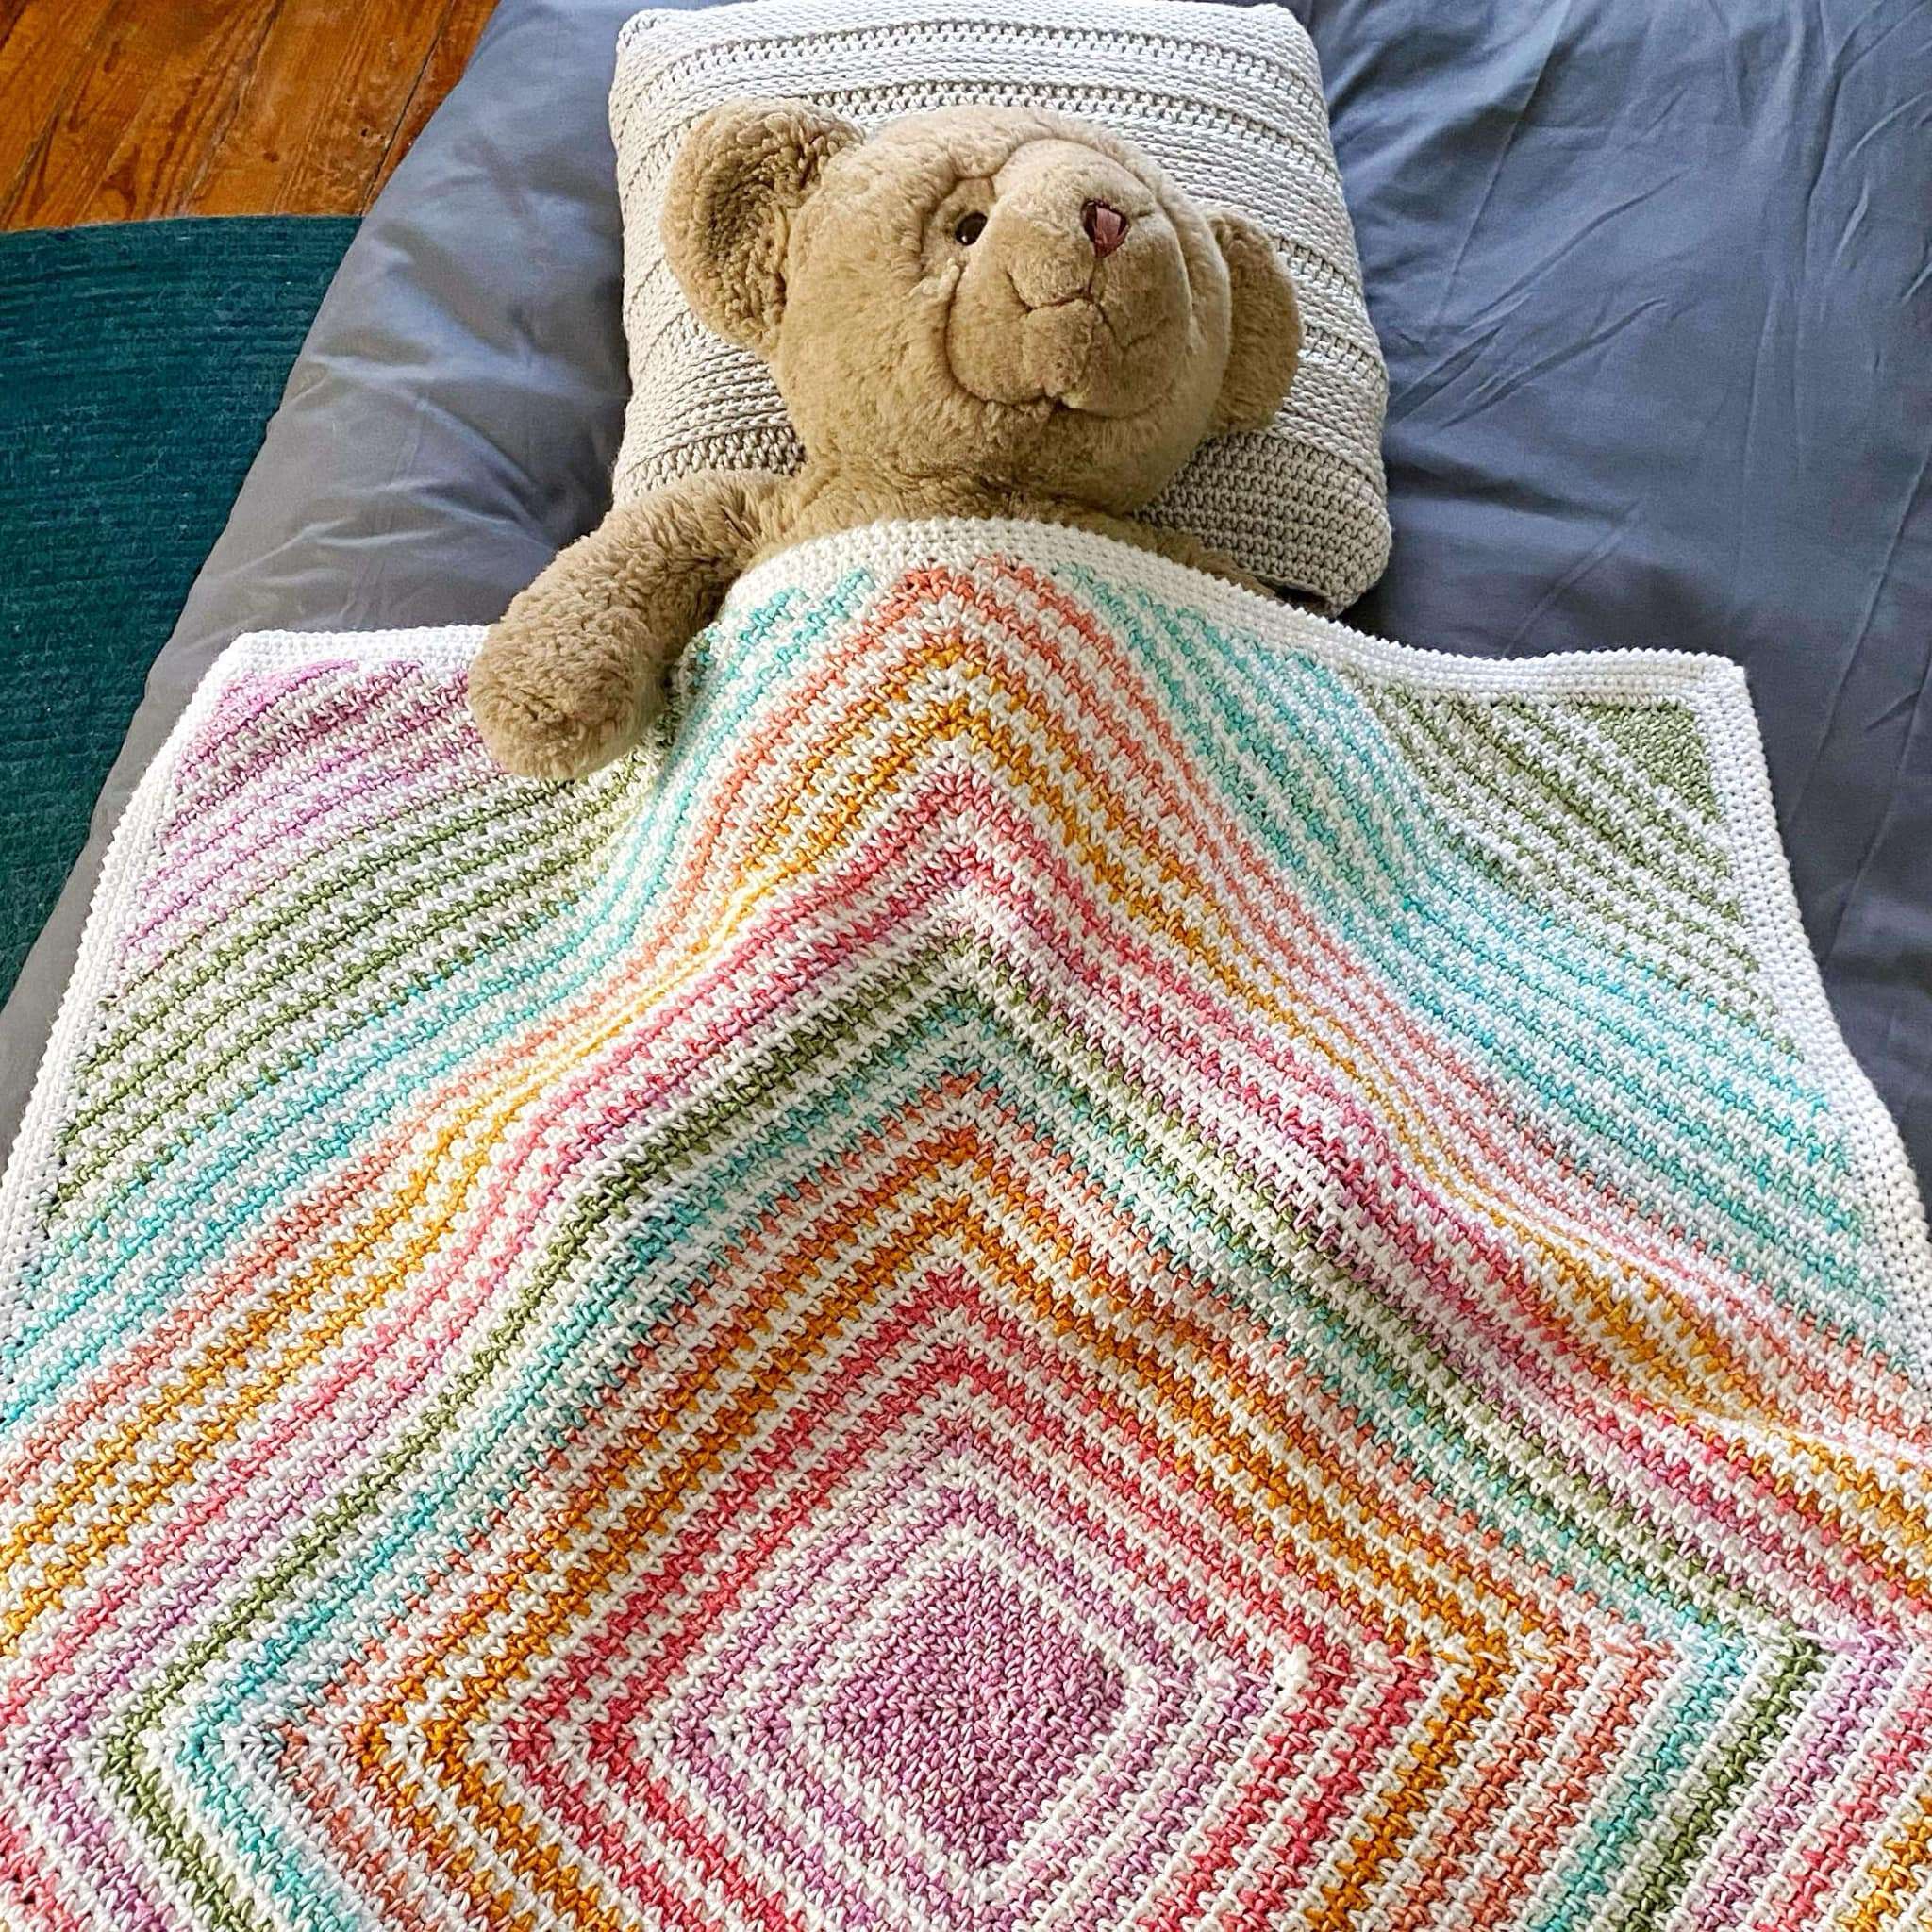
Other Baby Blankets You’ll Love!


Customize the Size of Your Blanket:
To make the blanket smaller or larger, follow the instructions below:
- Width: Ch a multiple of 14 + 2. This means, chain a multiple of 14, until satisfied with the width of the blanket, then add 2 chains.
- Ex. Ch 156 = 14 x 11 + 2. We chained 14 a total of 11 times, then added 2 additional chains.
- Length: Repeat Row 3, until satisfied with the length of the blanket, then square off the blanket with the “Second Last Row” and “Last Row”. The final 3 rows of the blanket should be worked in Colour A for symmetry.
This blanket has been added to the 20+ Crochet Blanket Bundle on Etsy and Ravelry. If you purchased the bundle through Ravelry, then you should receive an email with a link to download your pattern; if you purchased through Etsy, check the Google Drive bundle to download your pattern.
Special Stitches/Techniques:
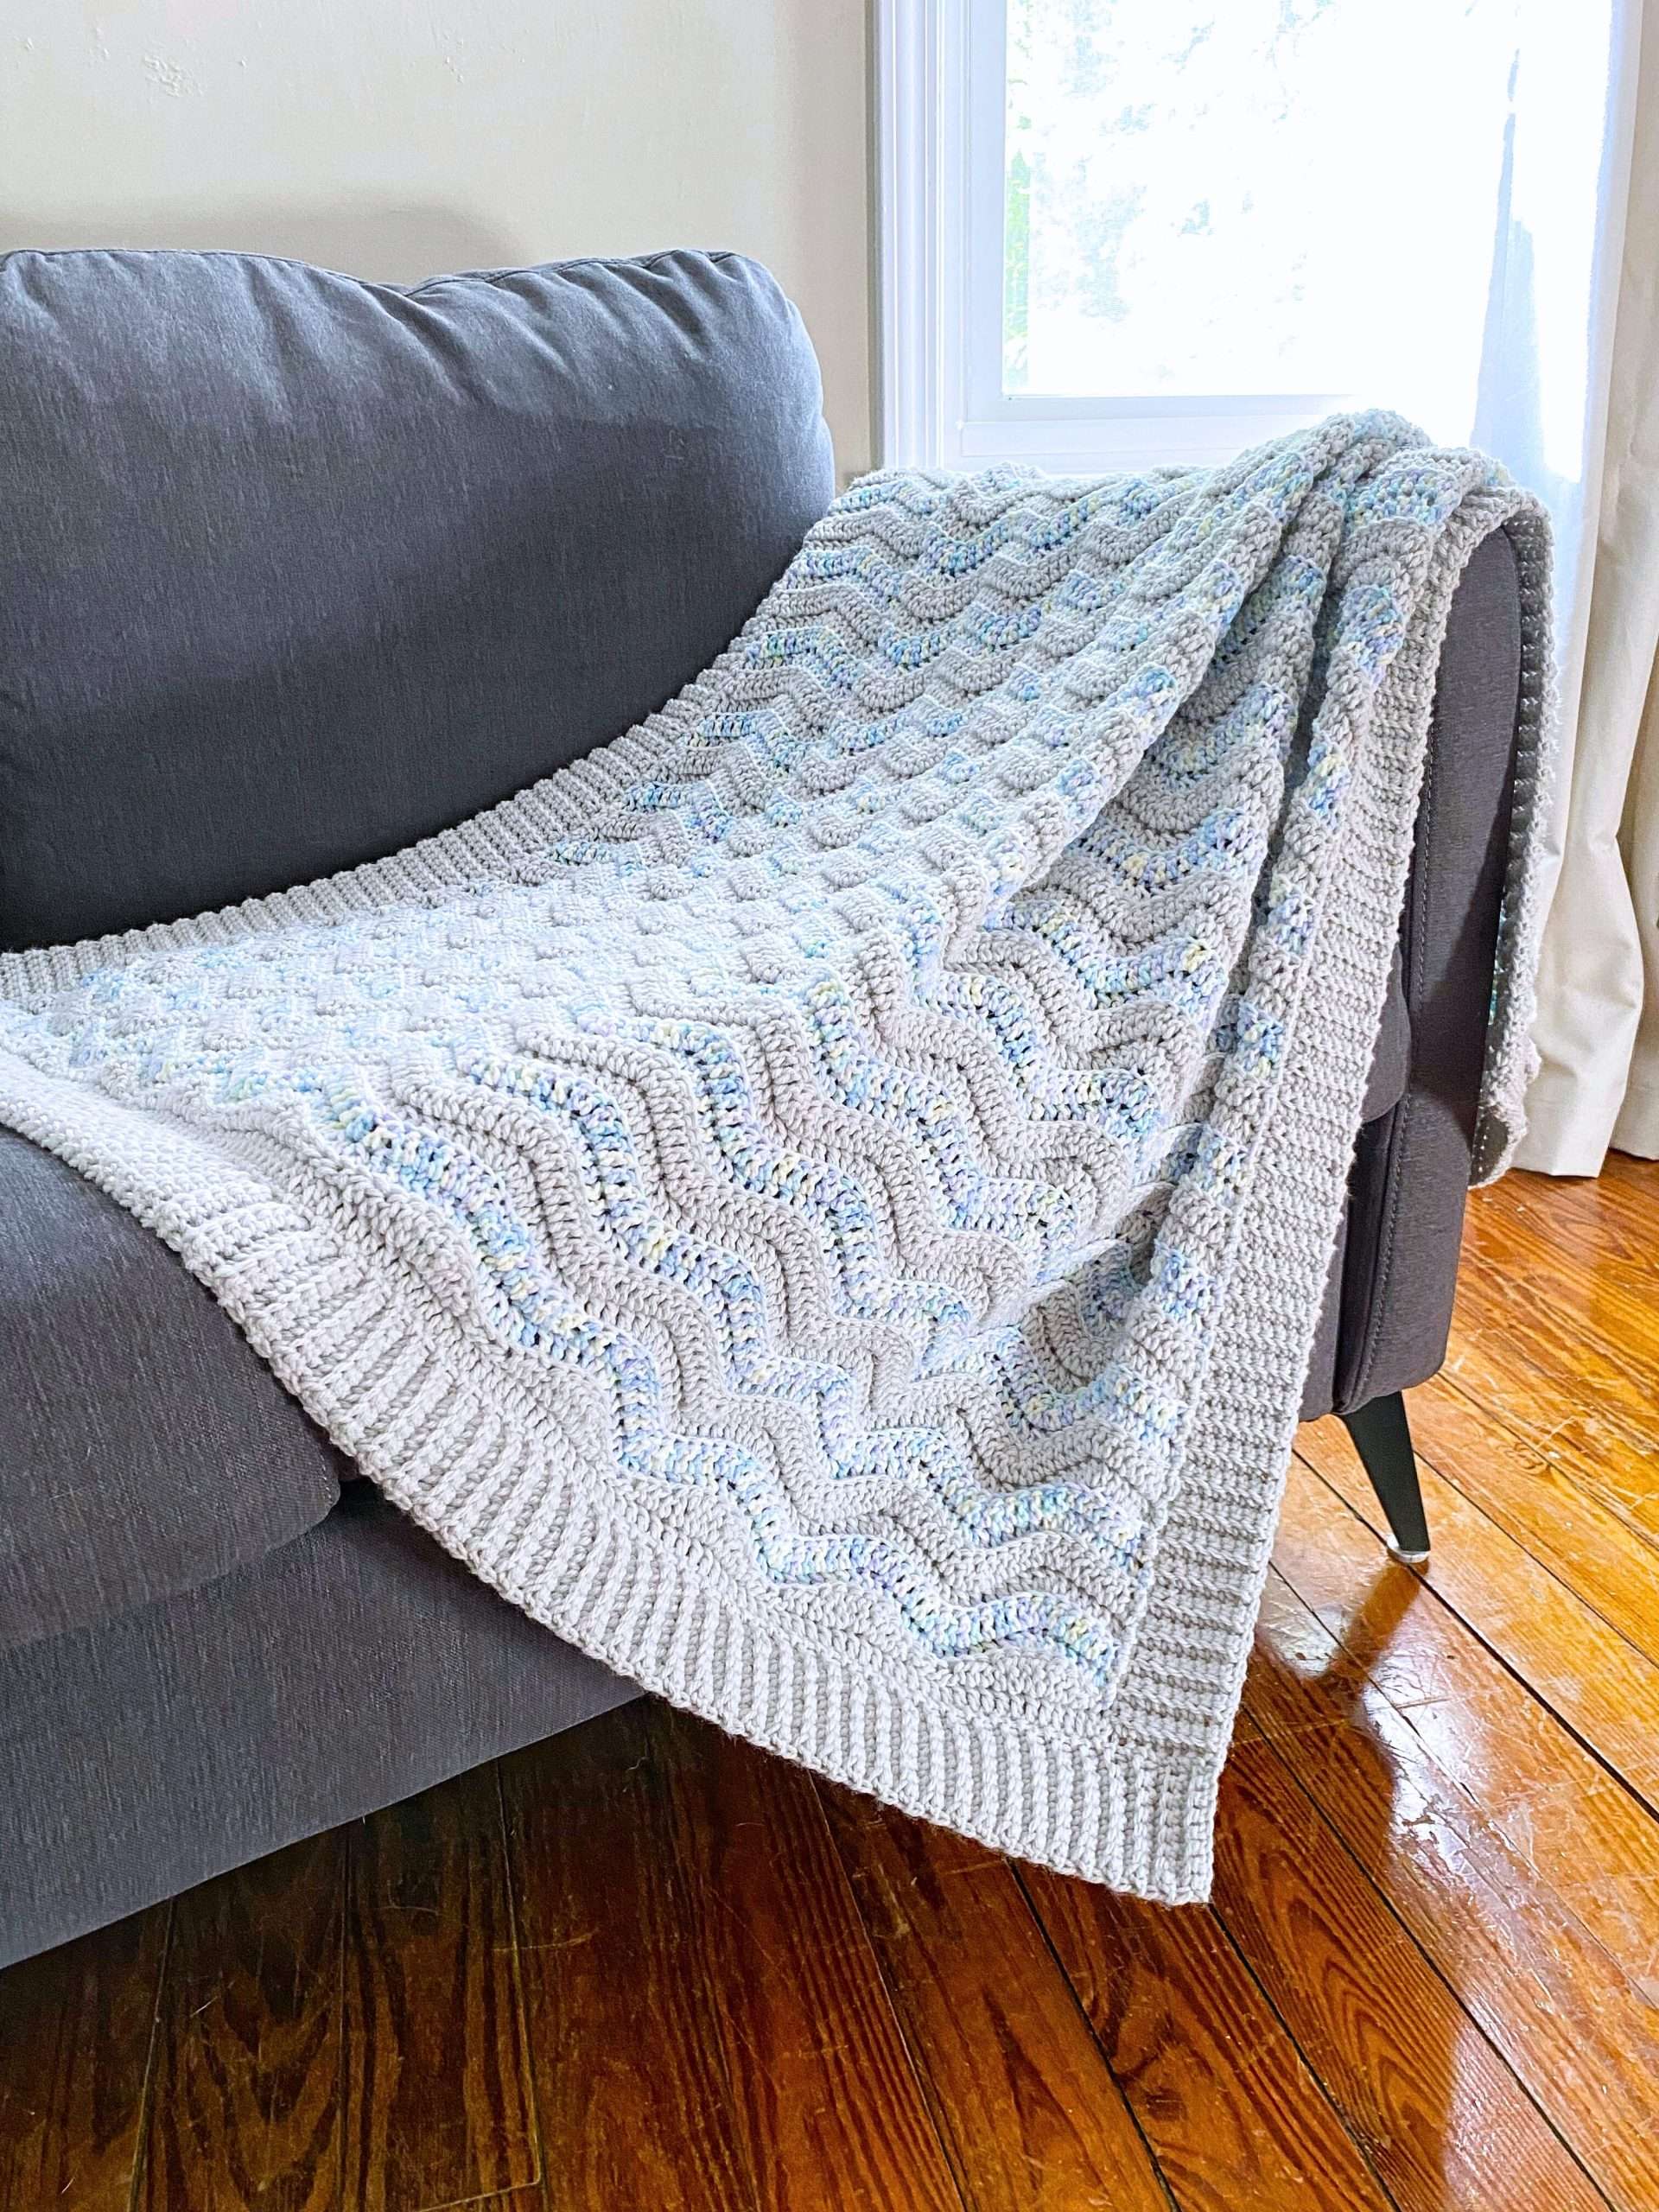
Modified Double Crochet (Mdc):
The modified double crochet is a cross between a double crochet and a triple crochet stitch – it’s shorter and tighter than a triple crochet, and taller than a double crochet.
- YO and insert hook into the indicated st. (Pictures 1 & 2)
- YO and draw up a loop – there are 3 loops on the hook. (Picture 3)
- YO and pull through the first loop only – there are 3 loops remaining. (Picture 4)
- [YO and pull through 2 loops] 2 times. (Pictures 5 & 6)
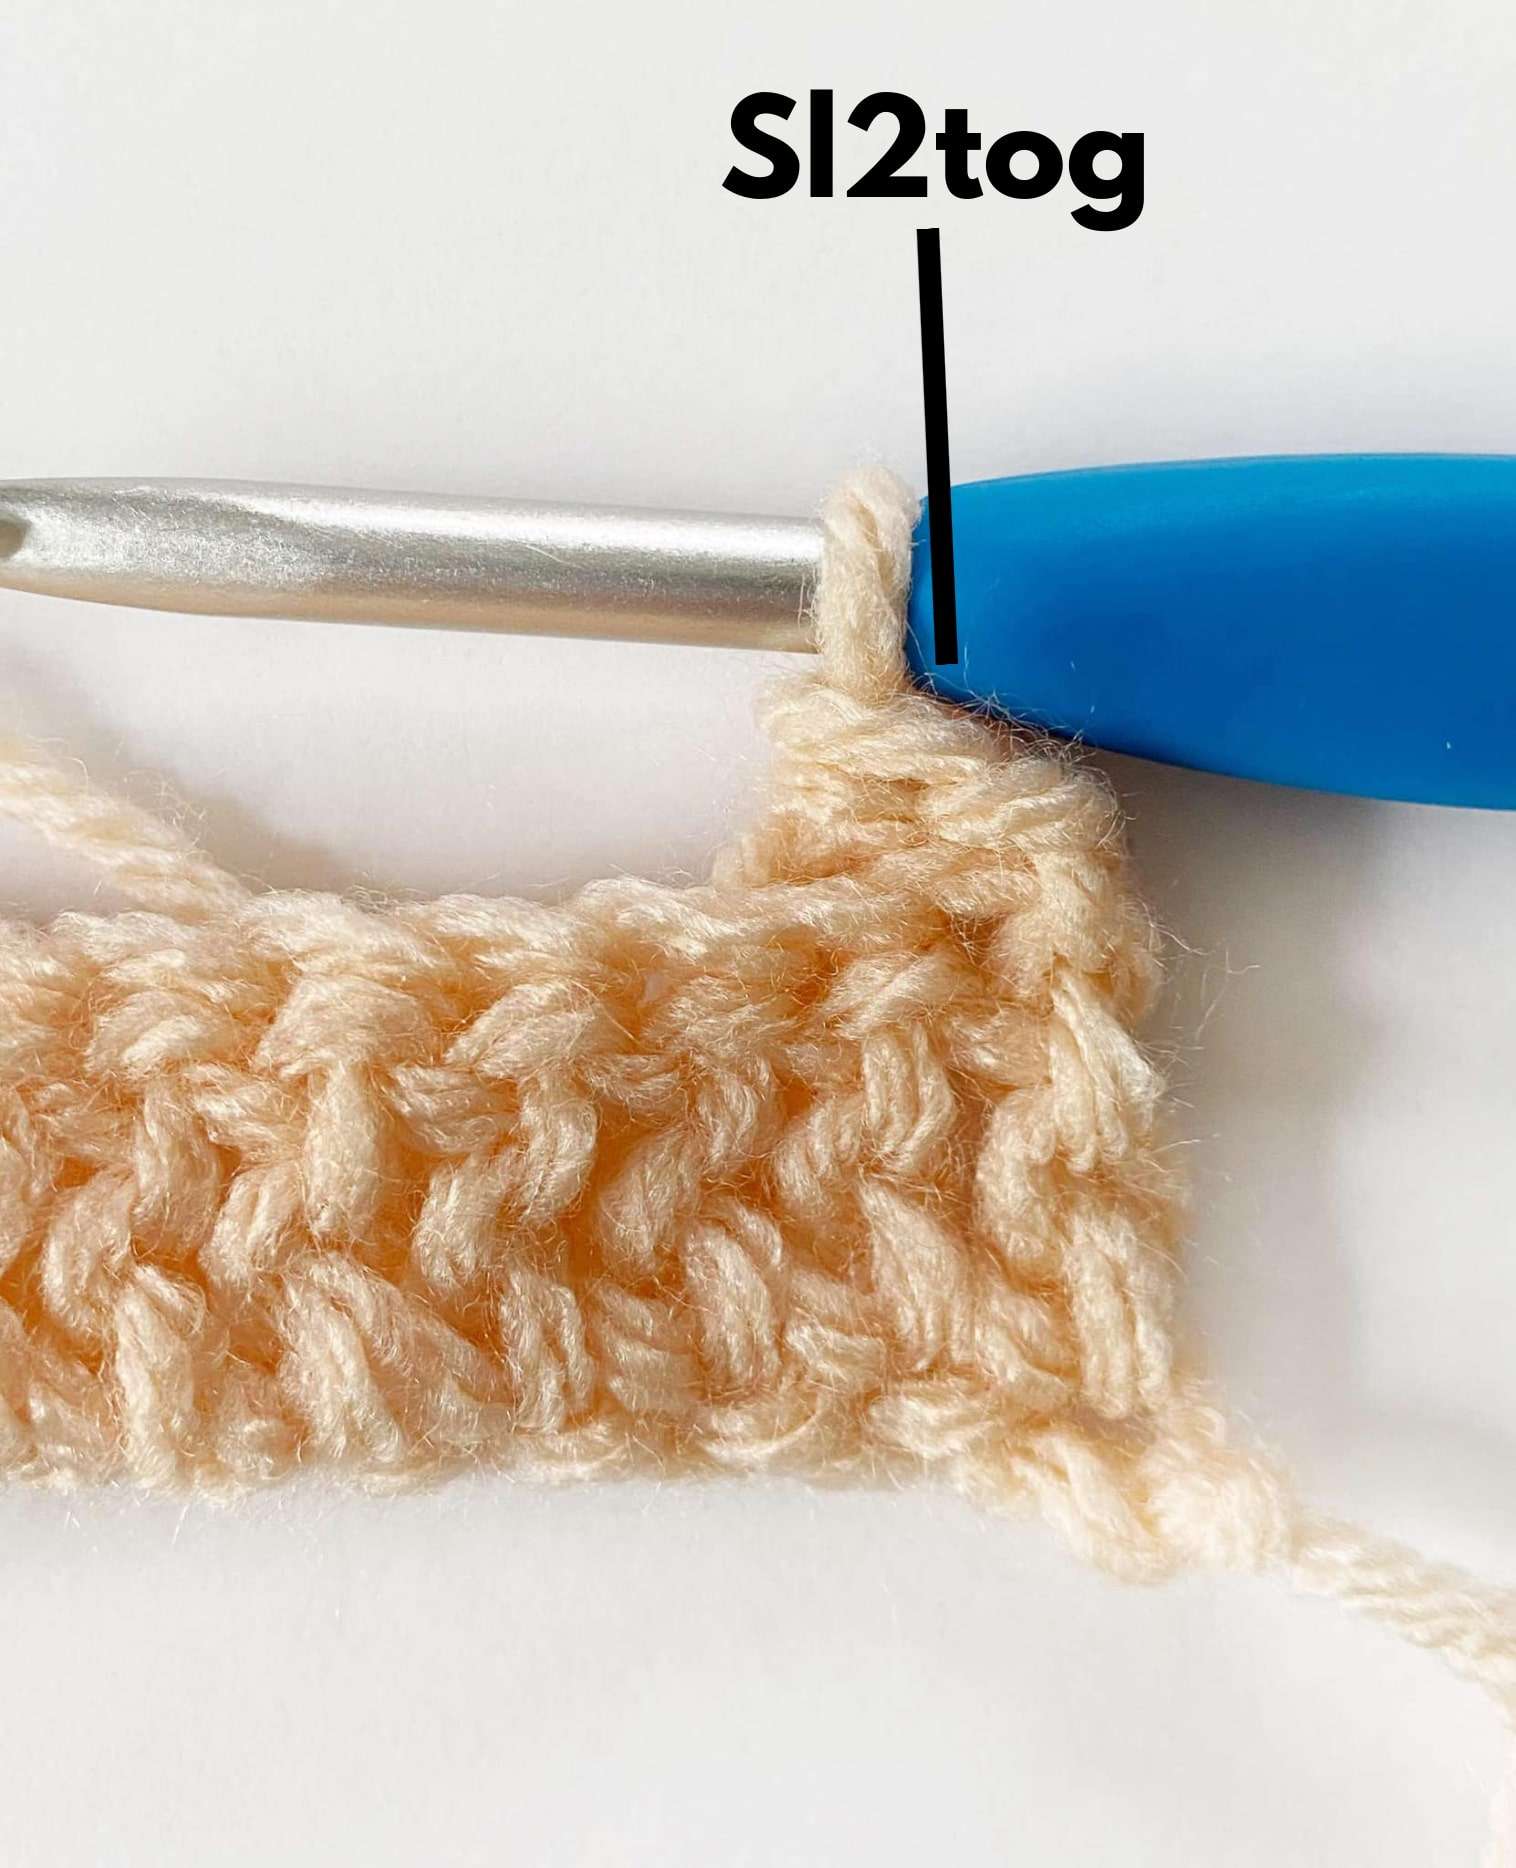
Slip Stitch 2 Stitches Together (Sl2tog):
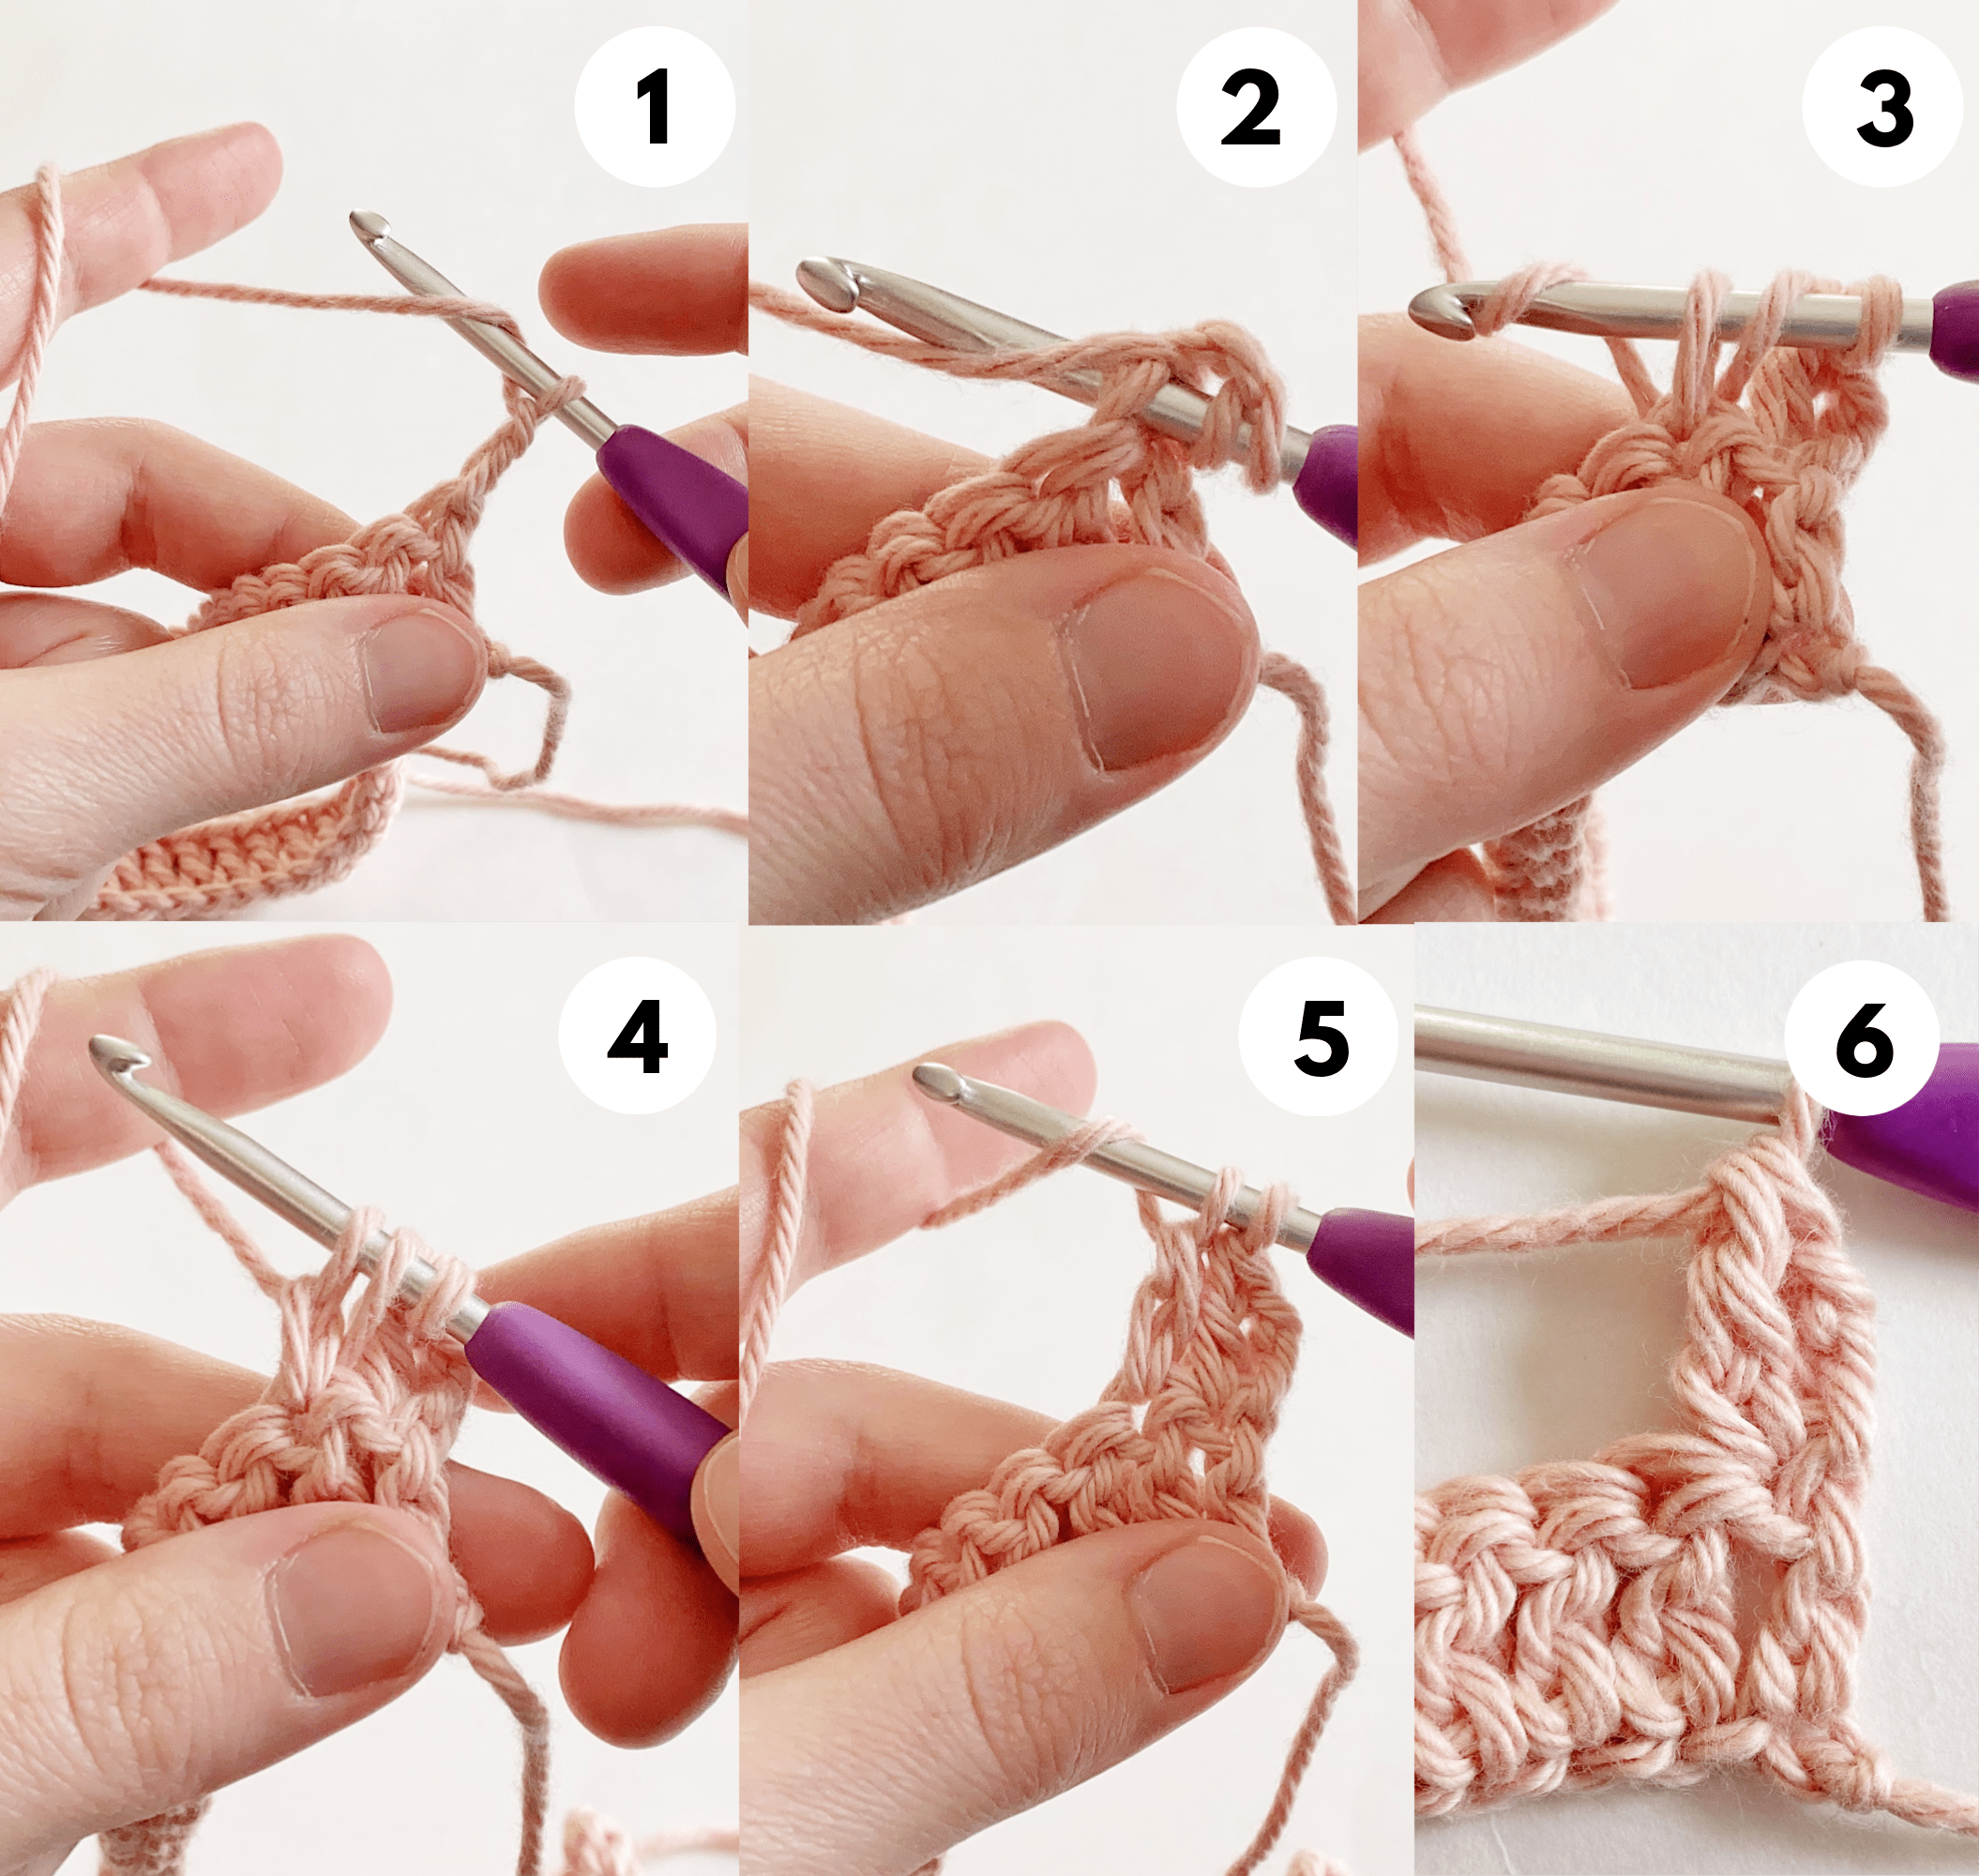
The sl2tog is a decrease stitch where we make 1 slip stitch across 2 stitches. This means we lose one stitch or make a decrease.
- Insert hook into the first indicated st. (Picture 2)
- YO and draw up a loop – there should be 2 loops on the hook. (Picture 3)
- Insert hook into the second indicated st. (Picture 4)
- YO and pull through the stitch and the 2 loops on the hook. (Pictures 5, 6, & 7)
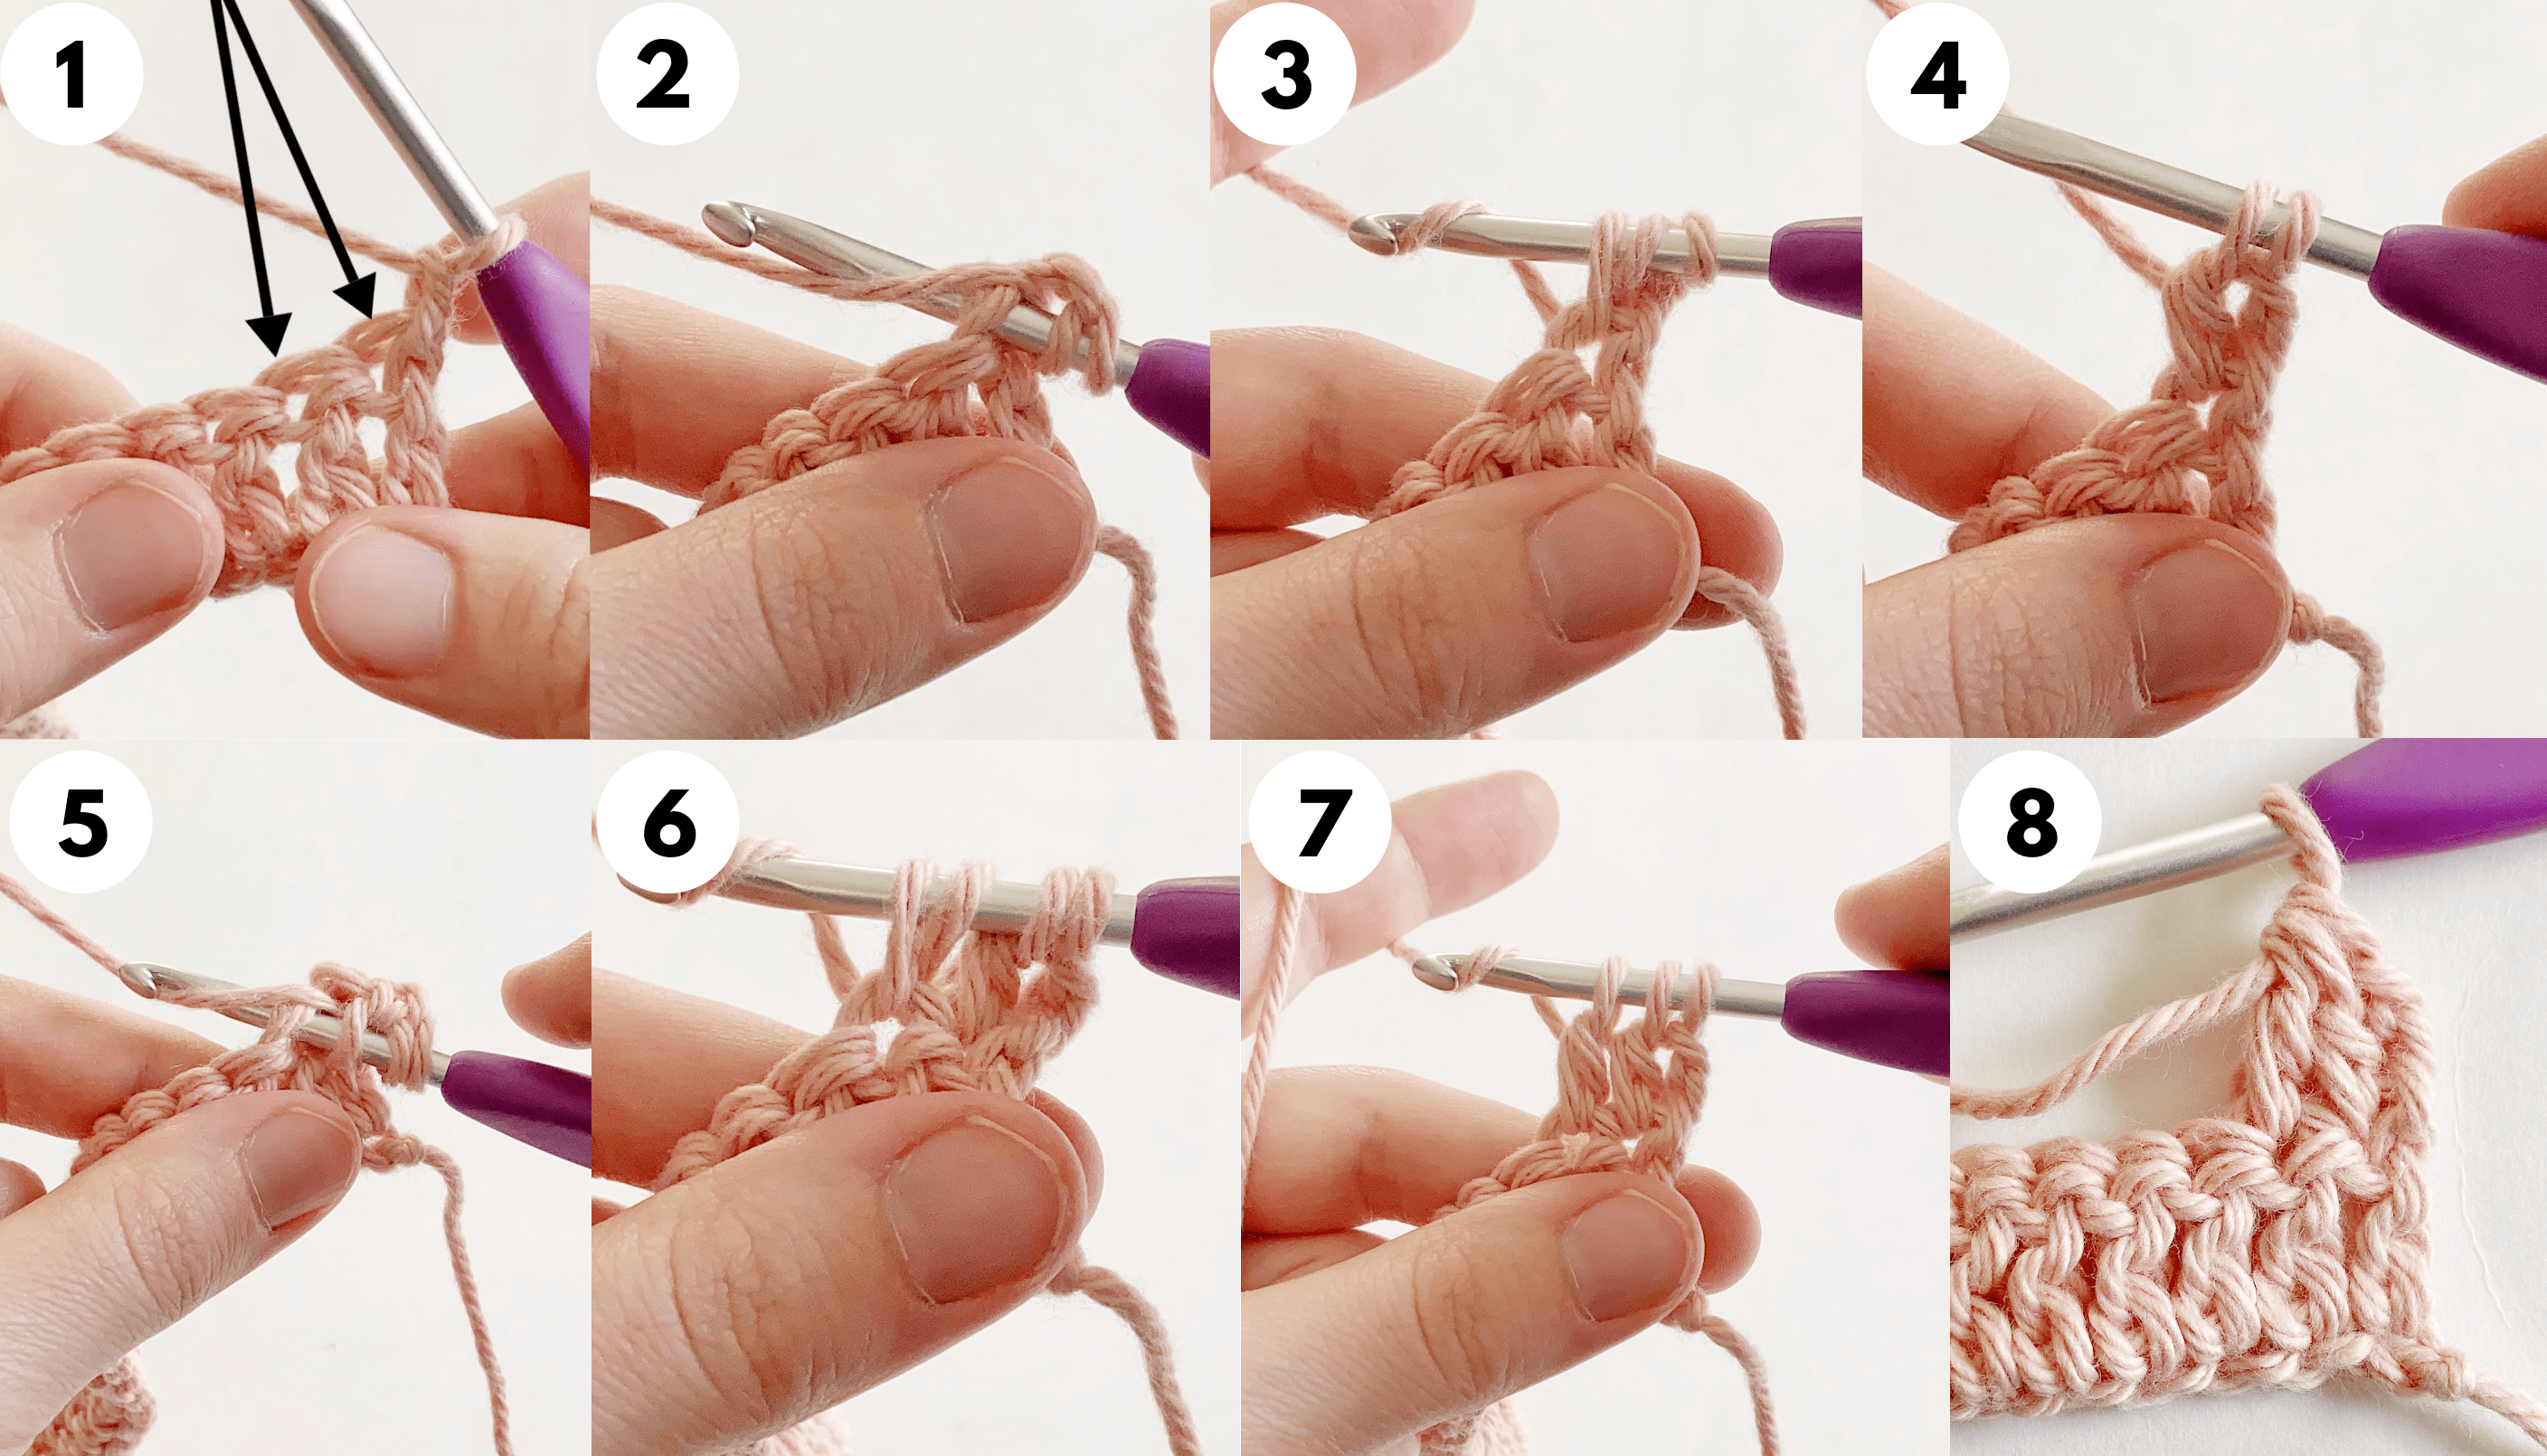
Double Crochet 2 Stitches Together (Dc2tog):
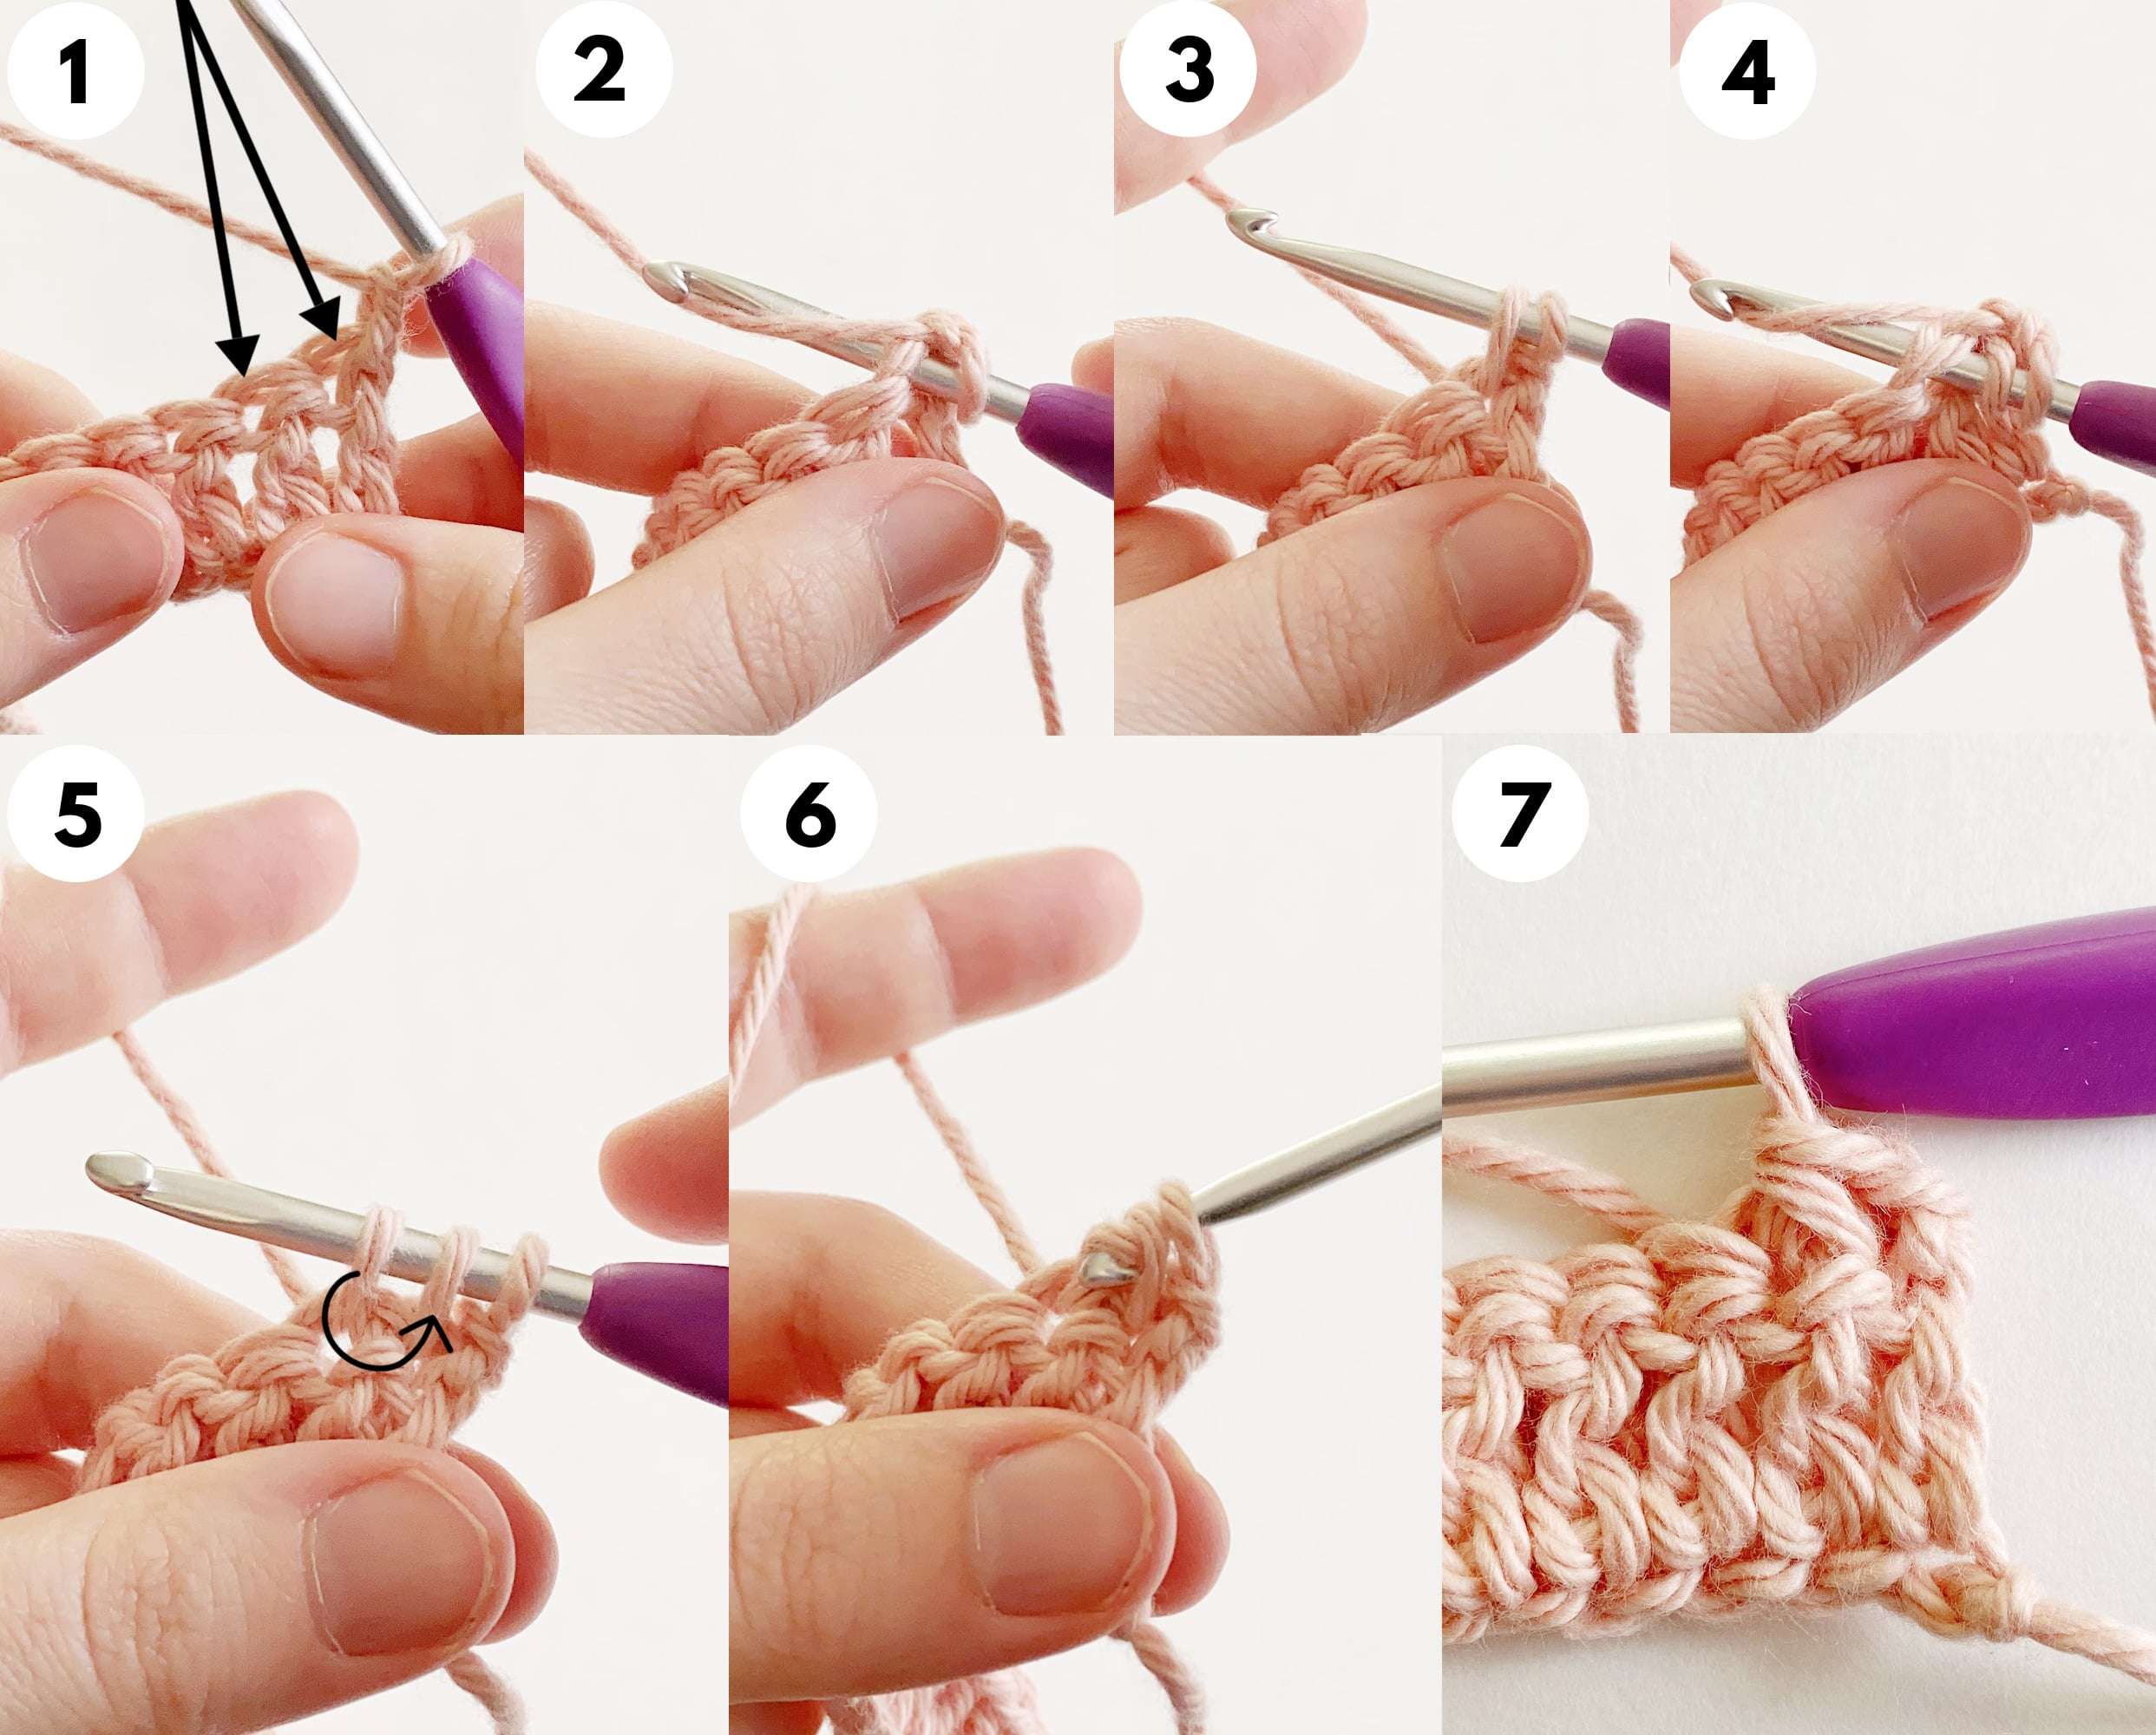
The dc2tog is a decrease stitch where we make 1 double crochet across 2 stitches. This means we lose one stitch or make a decrease.
- YO and insert hook into the first indicated st. (Picture 2)
- YO and draw up a loop – there should be 3 loops on the hook. (Picture 3)
- YO and pull through the first two loops – there are 2 loops remaining. (Picture 4)
- YO and insert hook into the second indicated st. (Picture 5)
- YO and draw up a loop – there should be 4 loops on the hook. (Picture 6)
- YO and pull through the first two loops – there are 3 loops remaining. (Picture 7)
- YO and pull through all 3 loops. (Picture 8)
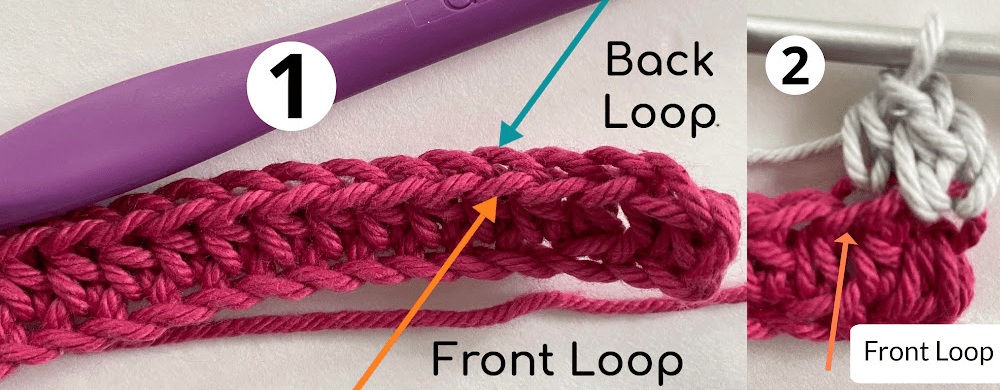
Back Loop Only (BLO):
- Every crochet stitch has a front and back loop. (Picture 1)
- Normally, we crochet into BOTH the front and back loop of a st unless stated otherwise.
- For the back loop only (BLO), make a st into just the back loop of the st. If done correctly, you can still see the front loop of the st. (Picture 2)
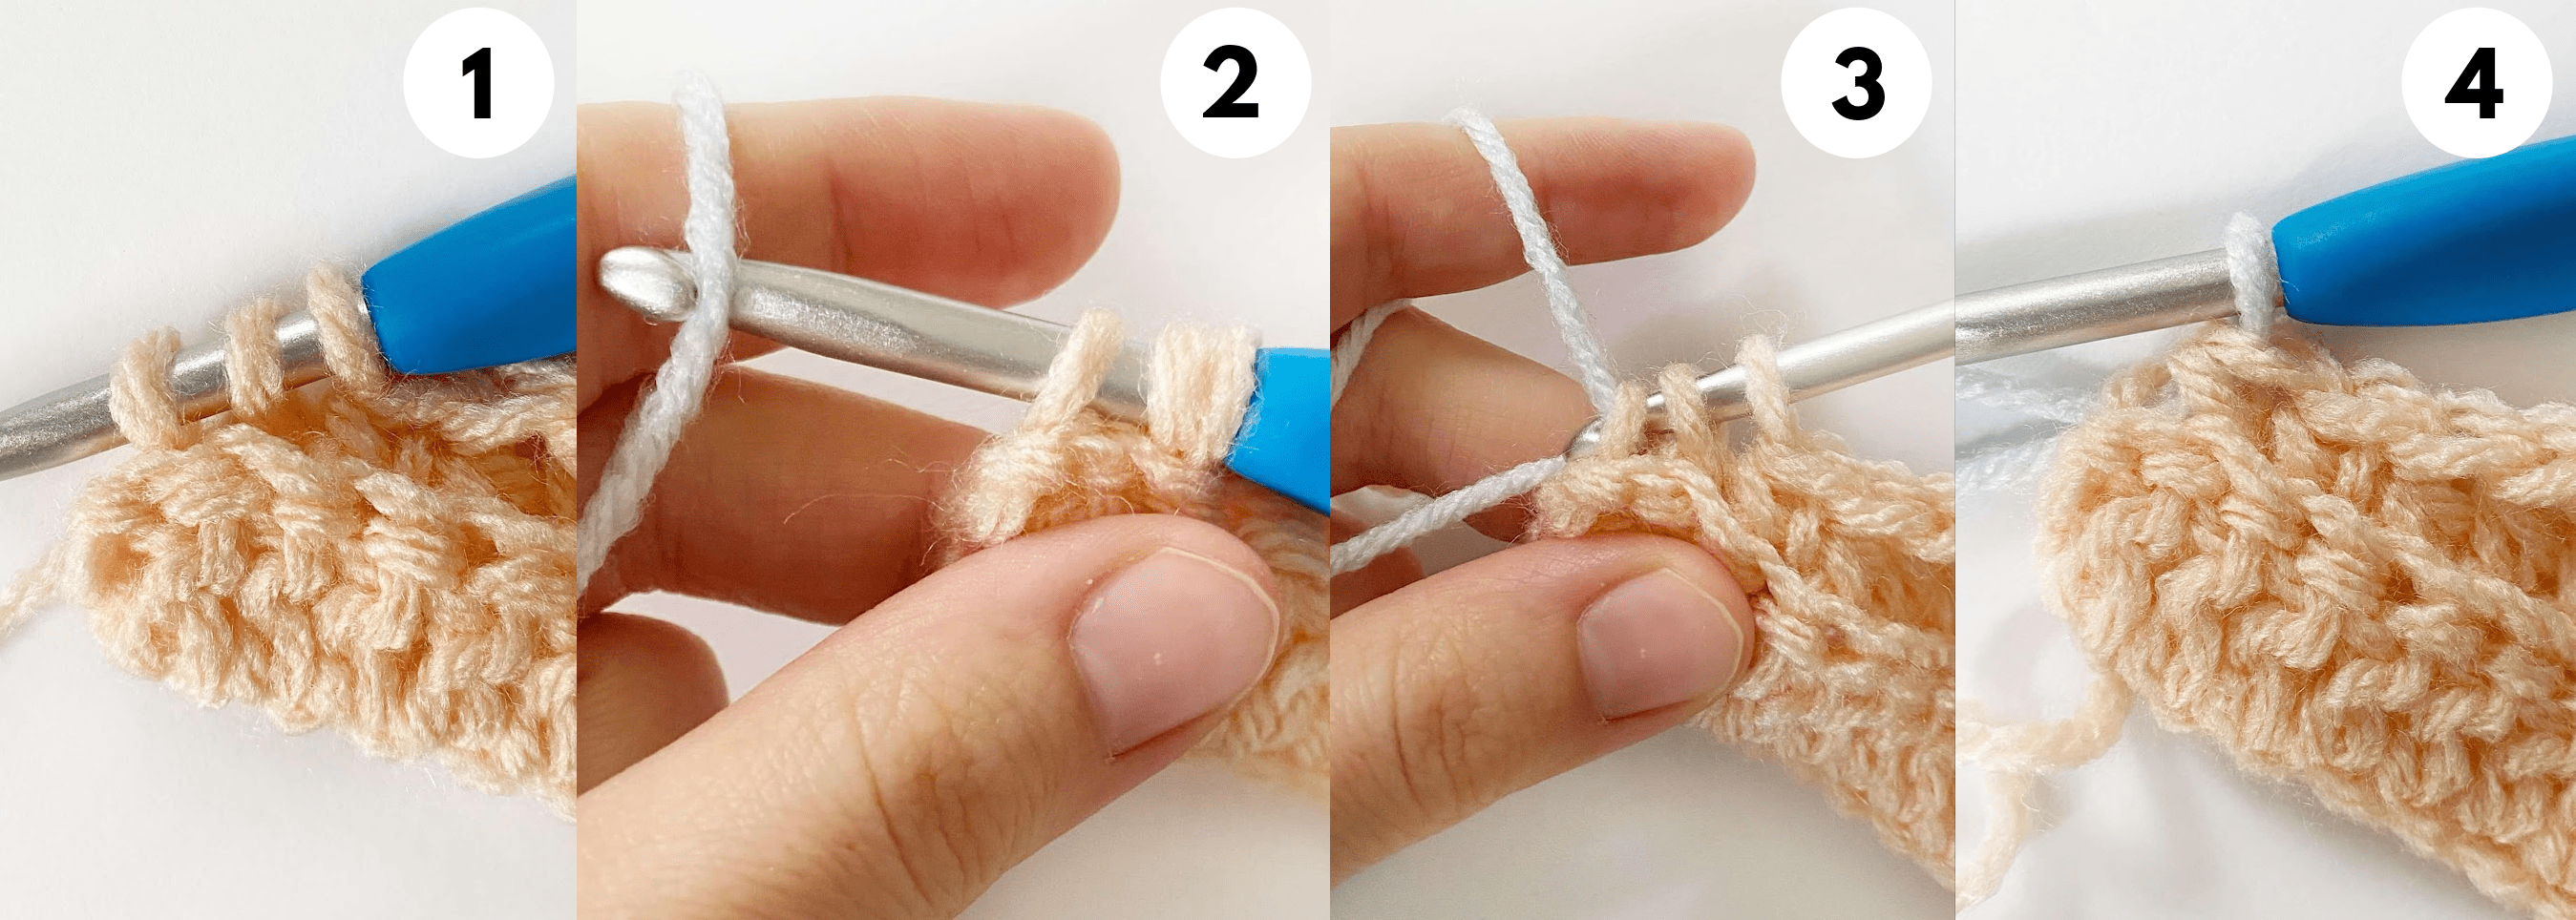
Changing Colour Tutorial – Row 2:
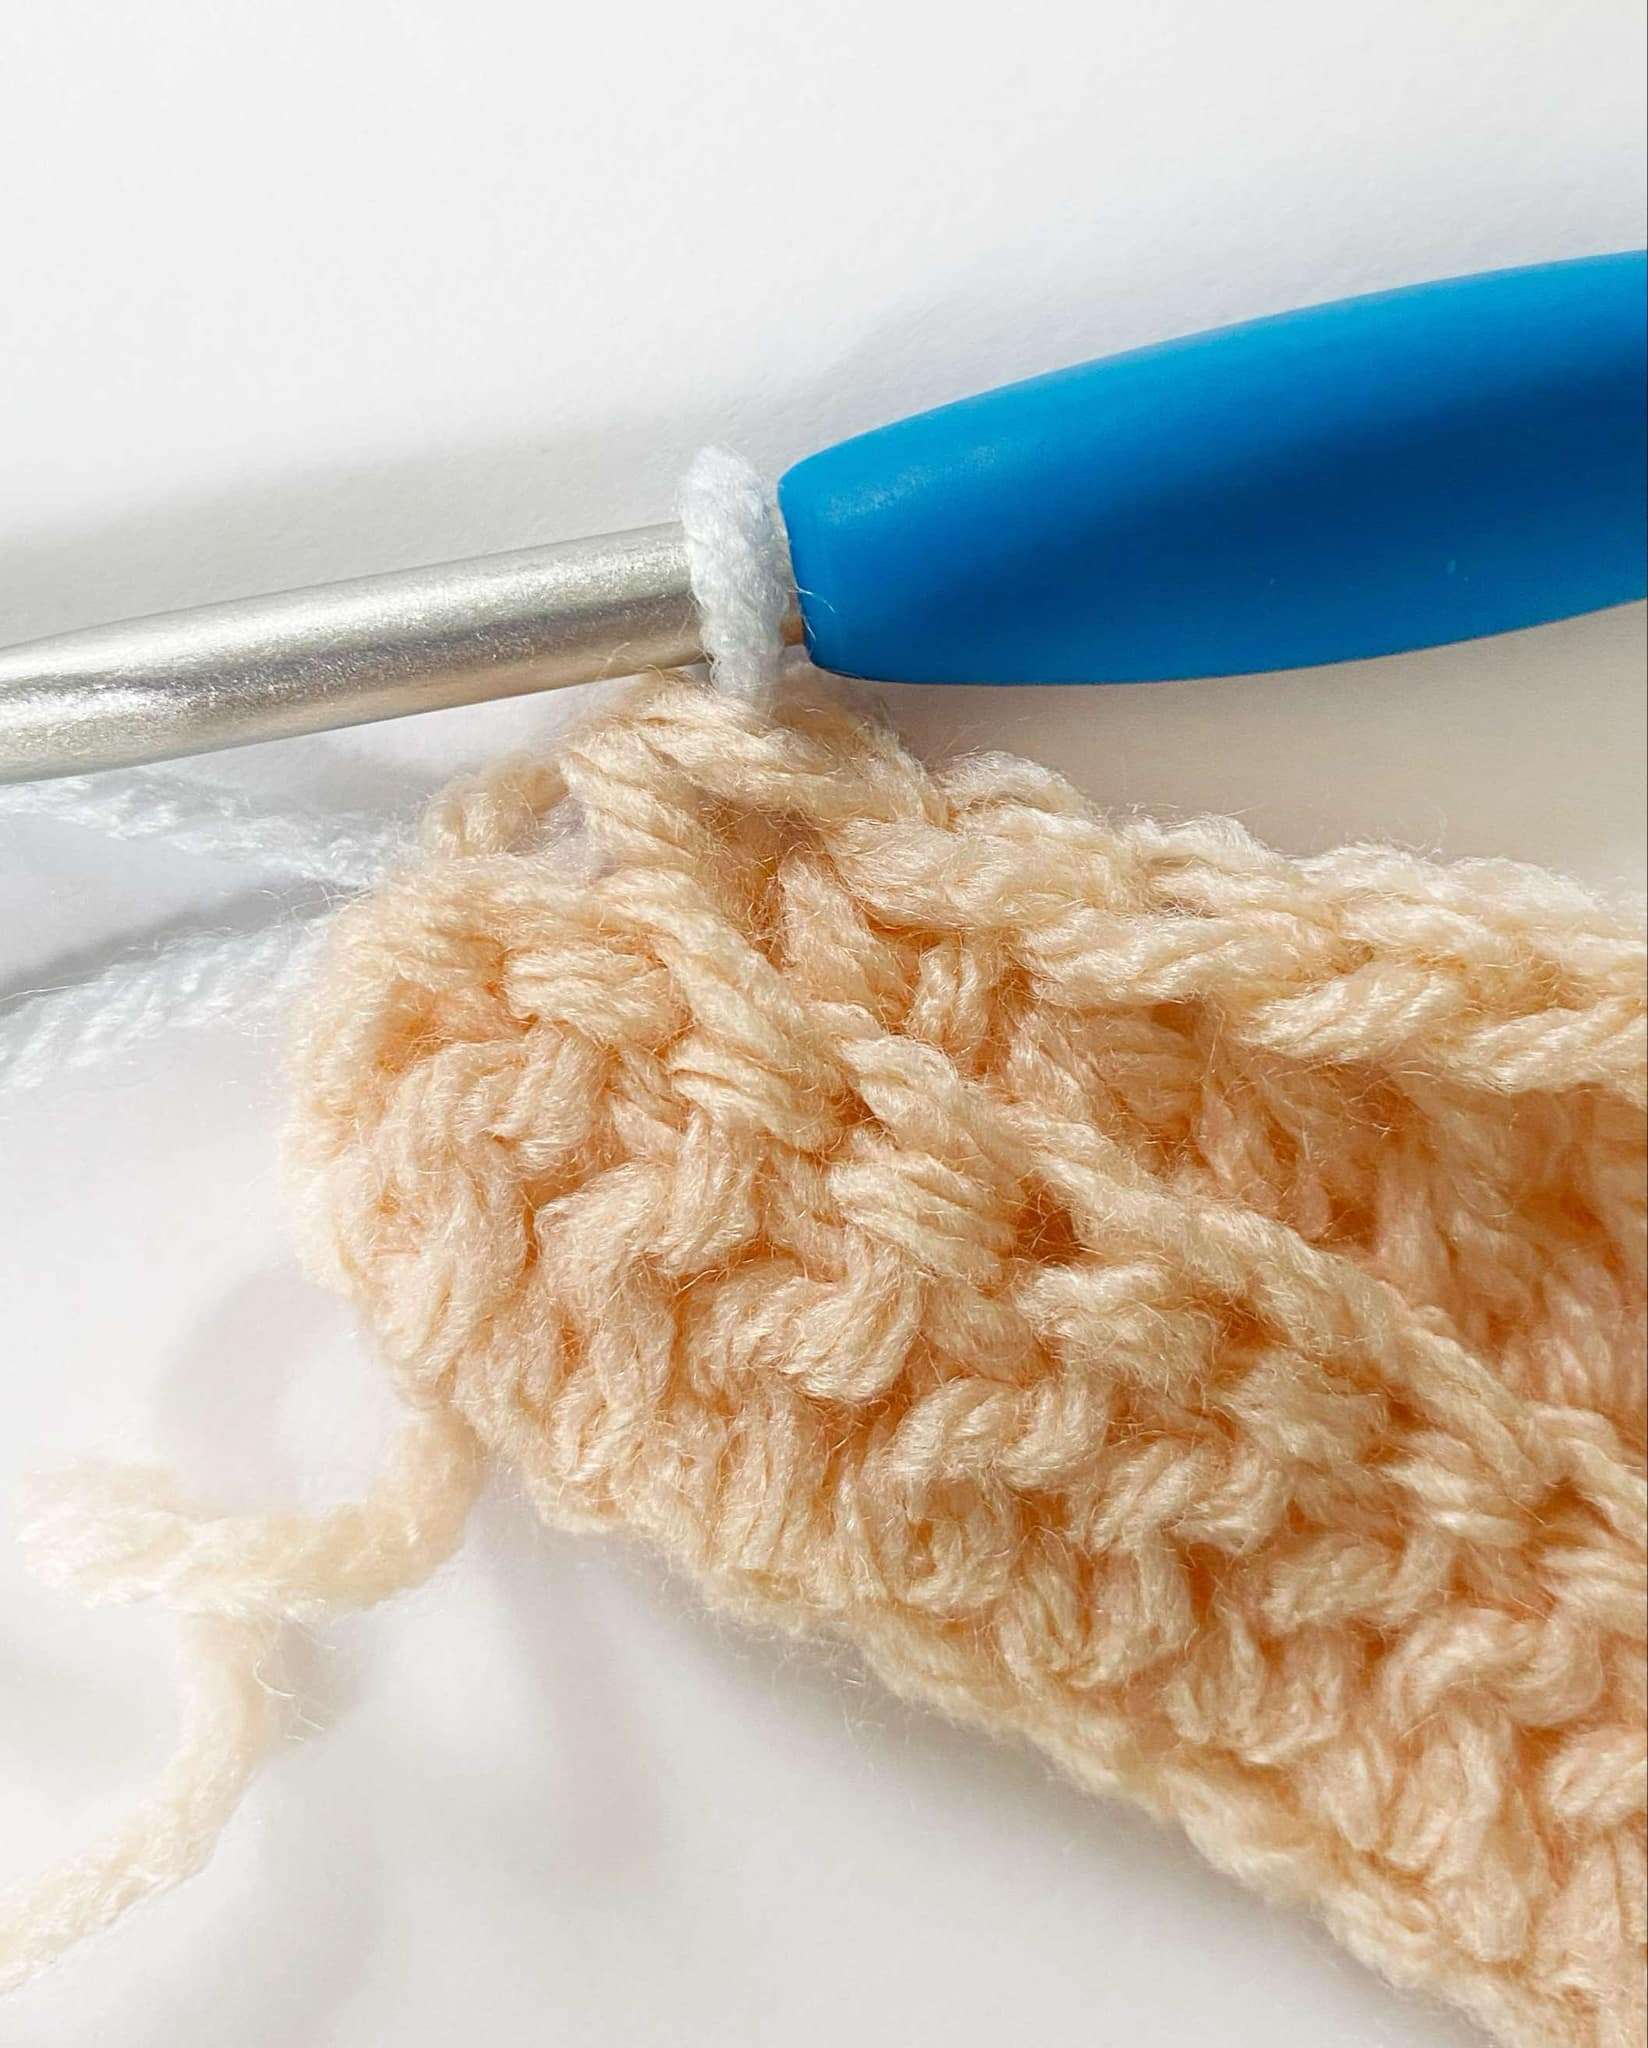
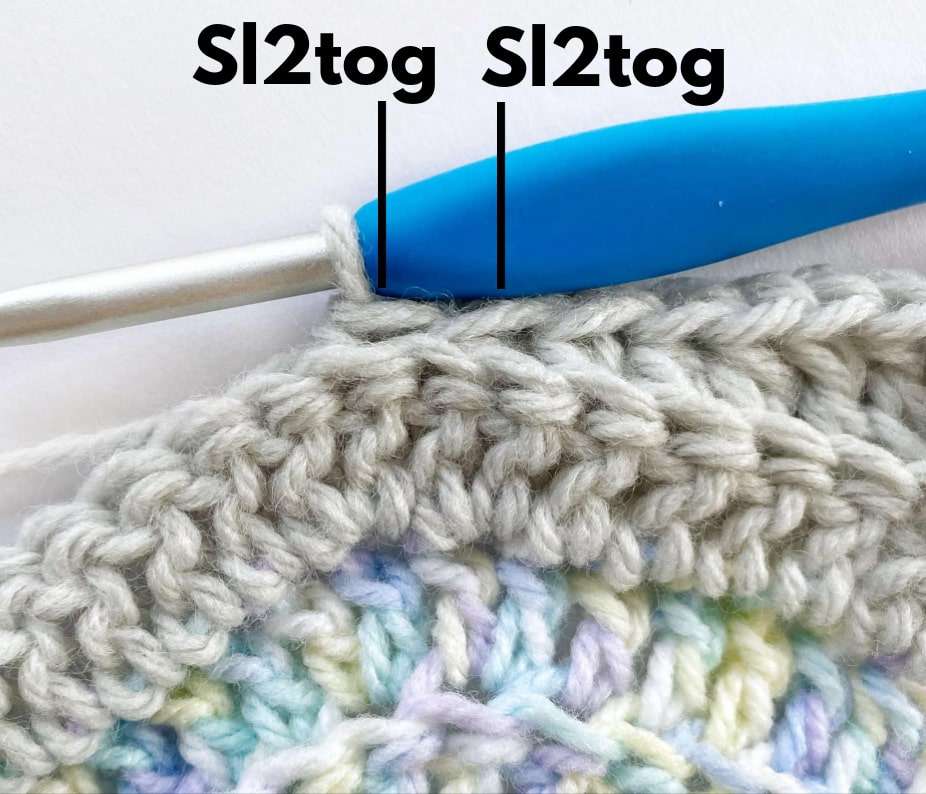
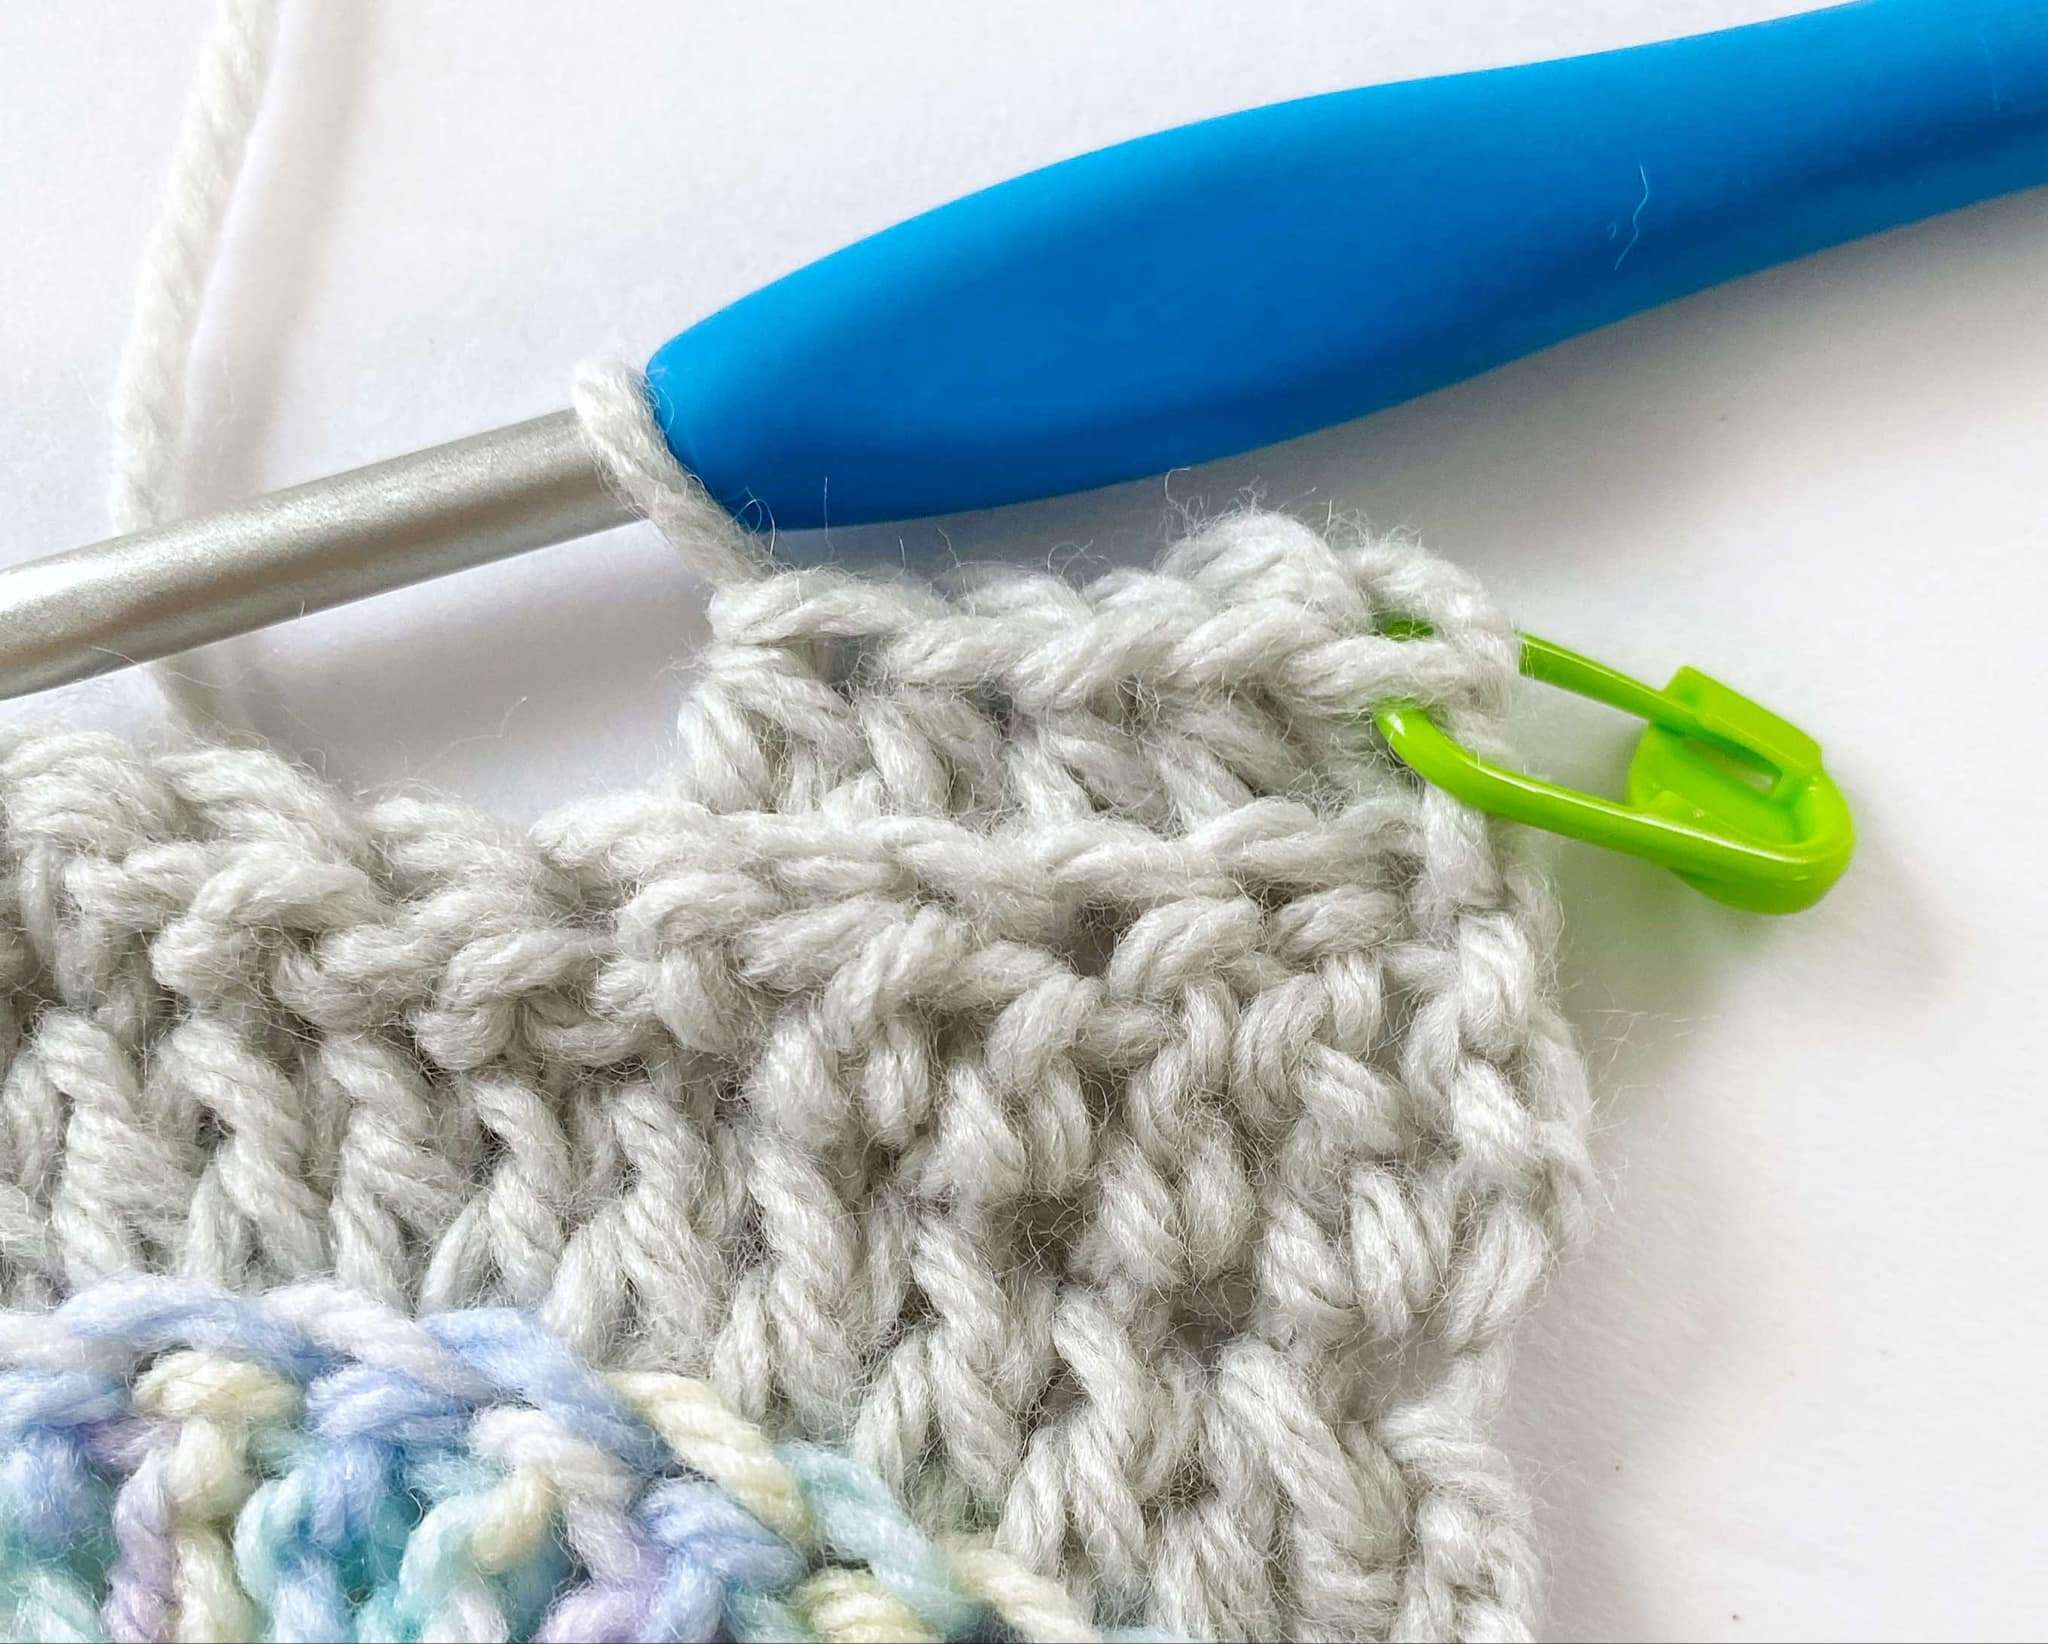
The colour change happens at the end of Row 2 in the last st (sl2tog) of the row.
- With the current colour, insert hook into the second last st. YO and draw up a loop – there should be 2 loops on the hook.
- Insert hook into the last st, and drop the current colour. Pick up the new colour with your hook. (Picture 1 & 2)
- With the new colour, YO and pull through the st and the 2 loops on the hook. Leave the previous colour attached to your blanket because you will need it for future rows. (Pictures 2, 3, & 4)
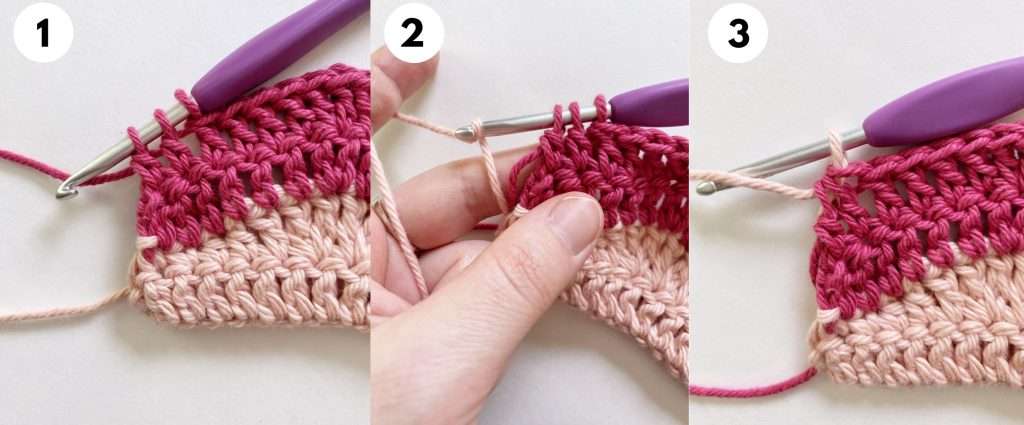
Changing Colour Tutorial – Rows 4 and on:
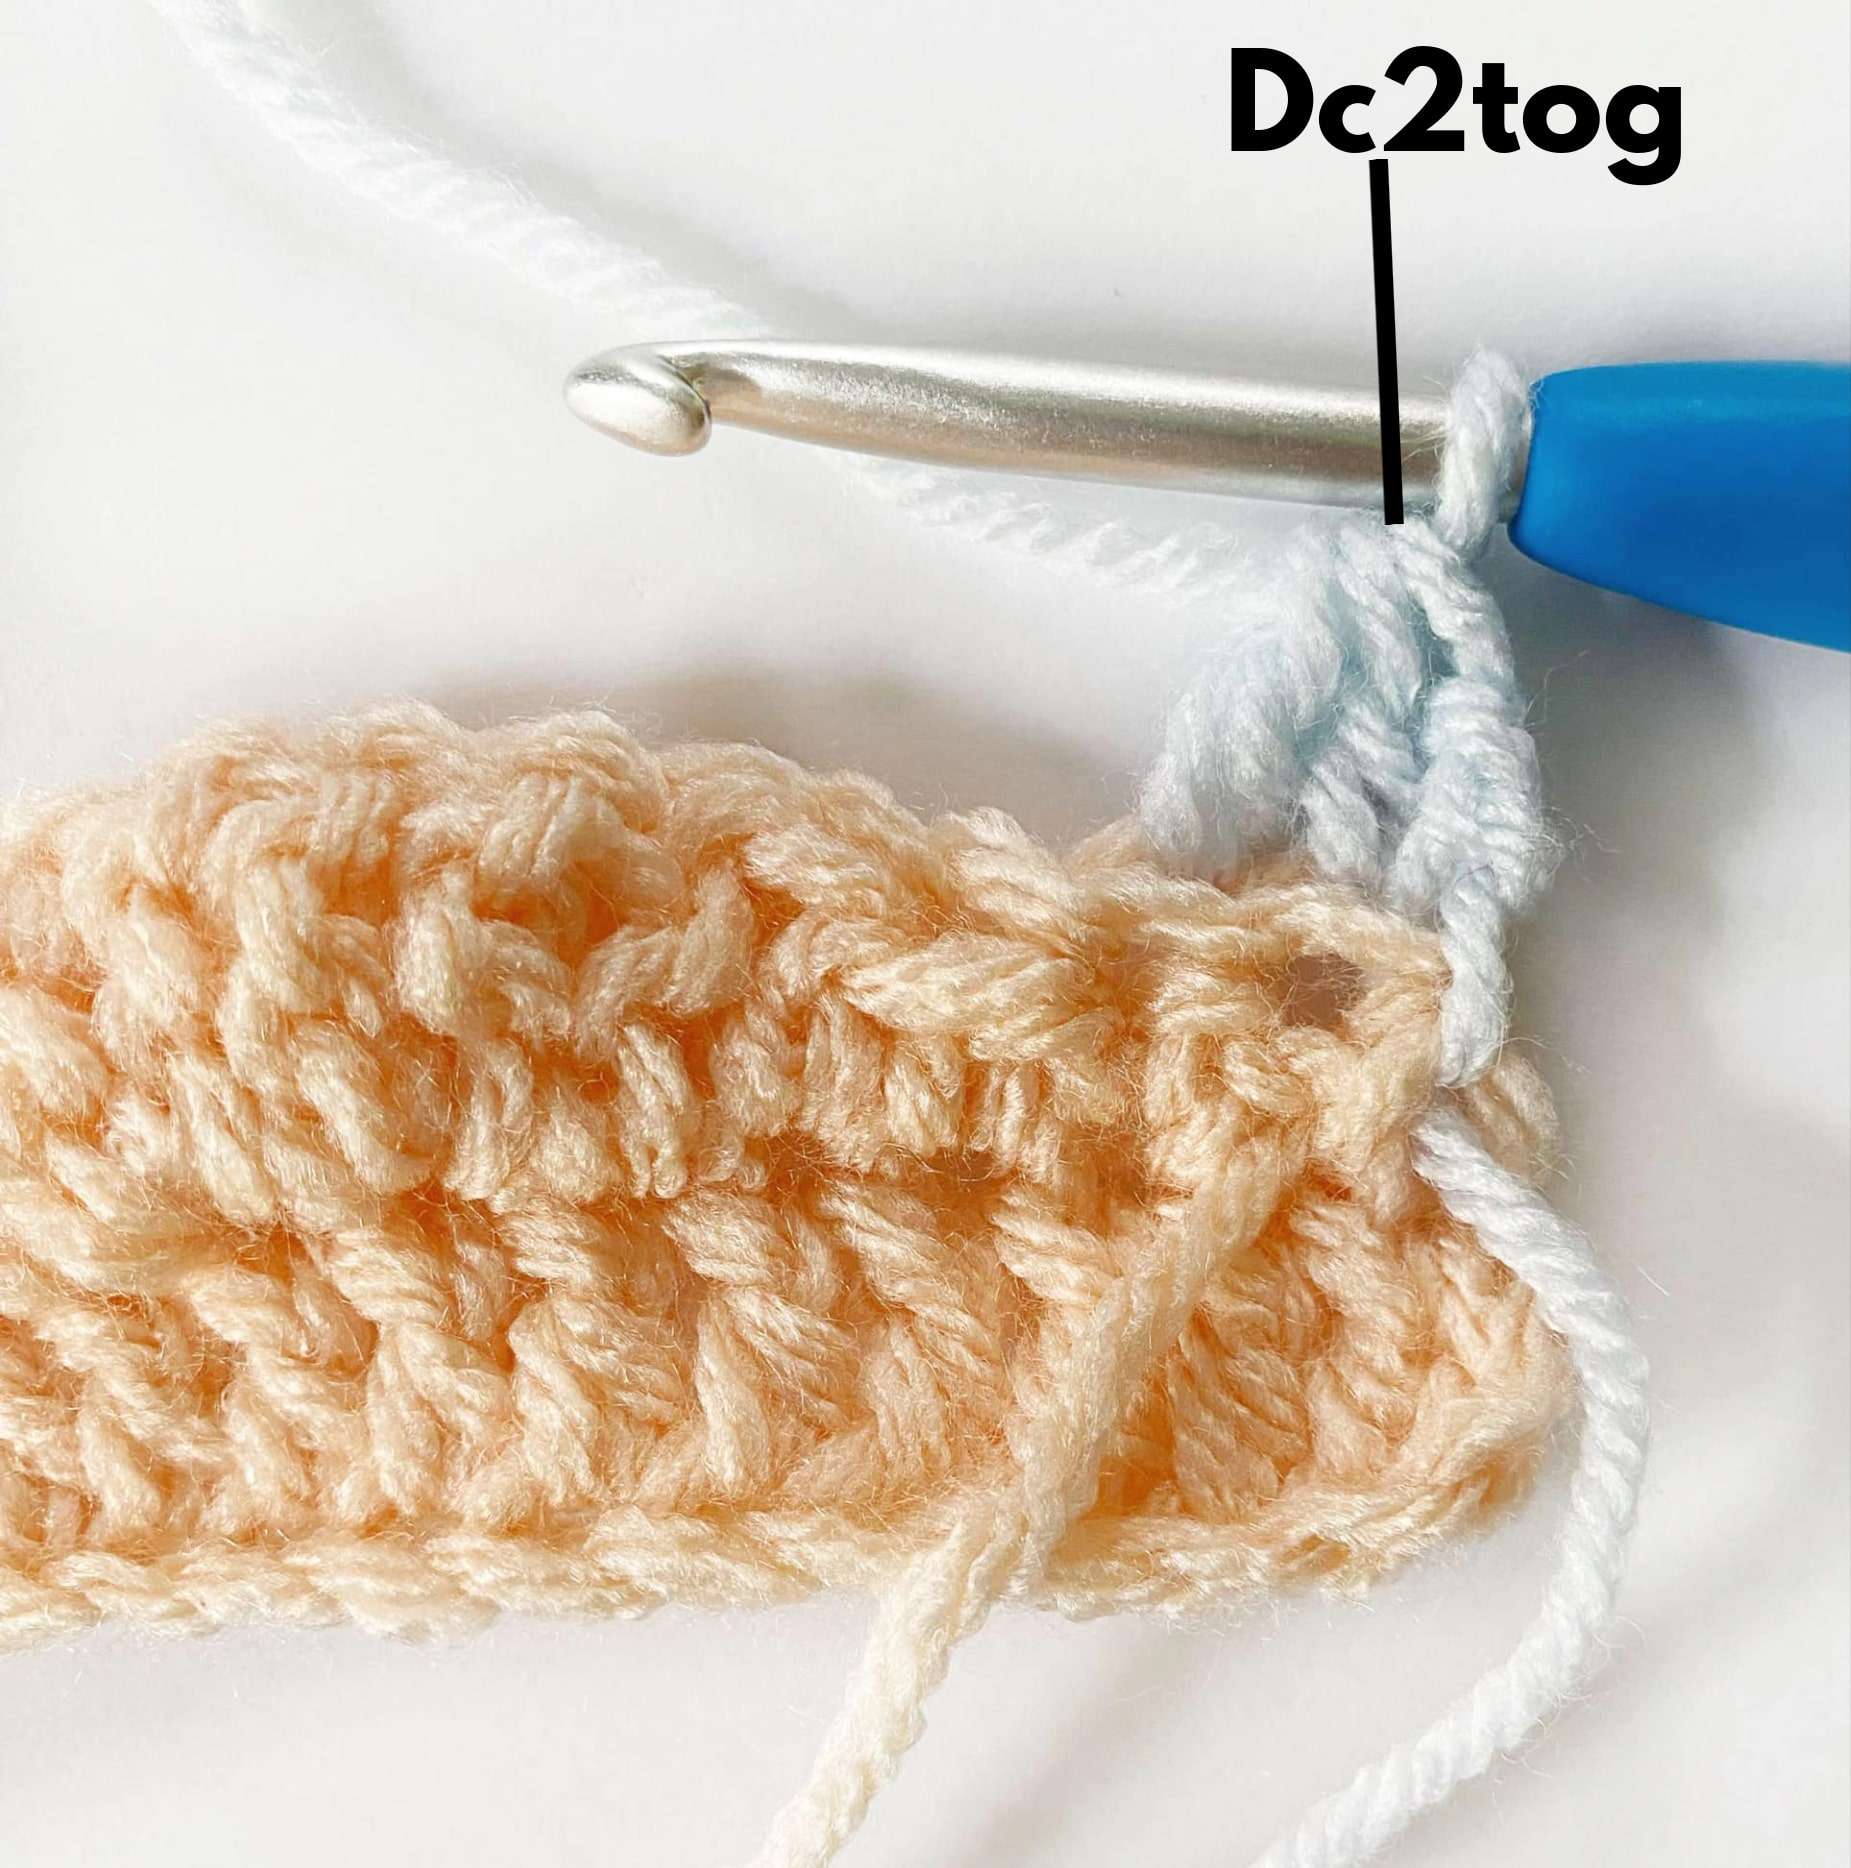
This blanket changes colour every 2 rows. The colour change happens in the final YO of the last st (dc2tog) of the row.
- Before completing the final YO of the last st of the row, drop the current colour, and pick up the new colour with your hook – it should be hanging from your blanket. (Pictures 1 & 2)
- YO and pull through the remaining 3 loops on hook to complete the st. (Picture 3)
- Leave the previous colour attached to your blanket because you will need it for future rows. This ensures that you will have less ends to weave in at the end of the project.
Pattern:
Notes:
- The beginning ch of each row does not count as a st.
- *Tip: To help you maintain your stitch count, mark the first and last st of each row with a stitch marker.
- Colours are carried up the side of the blanket, so that there are less ends to weave in at the end. Colour changes happen in the last st before the final YO of every second row (see tutorial for changing colour above).
- After Row 1, each row is worked into the BLO of each st across.
- The ripple baby blanket is reversible, which means it looks the same on both sides. However, odd numbered rows are considered the WS, and even numbered rows are considered the RS.
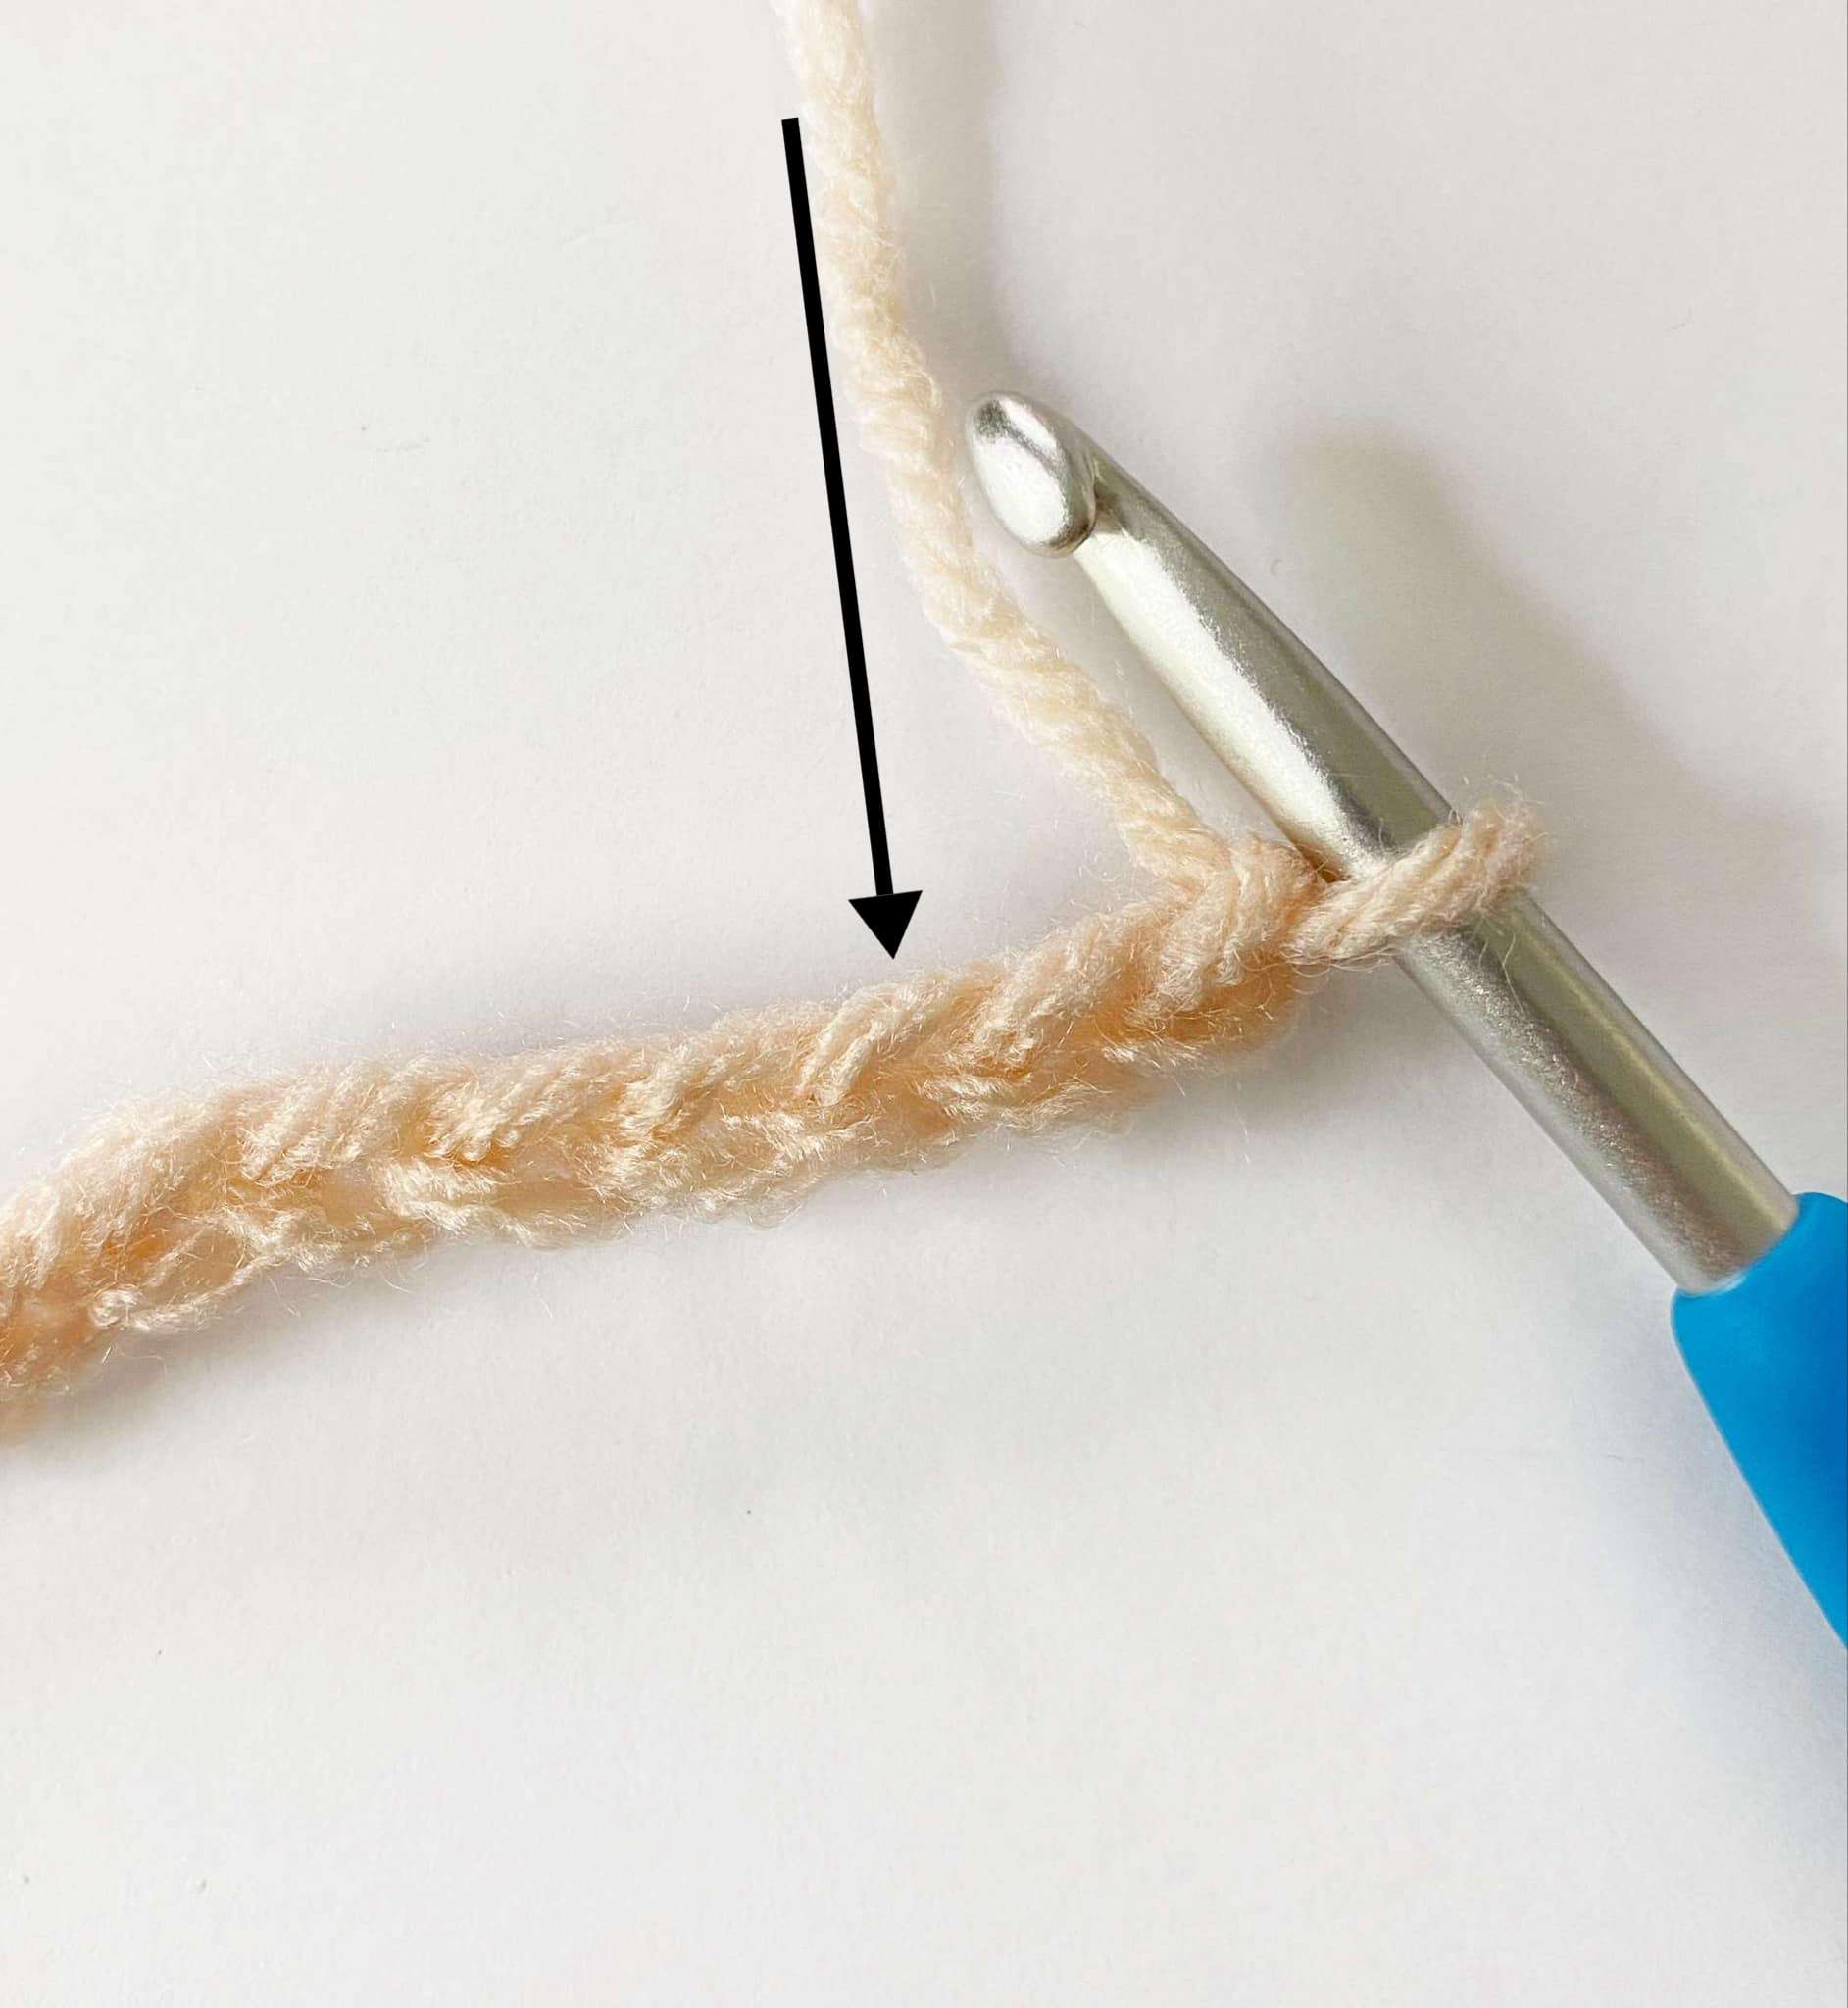
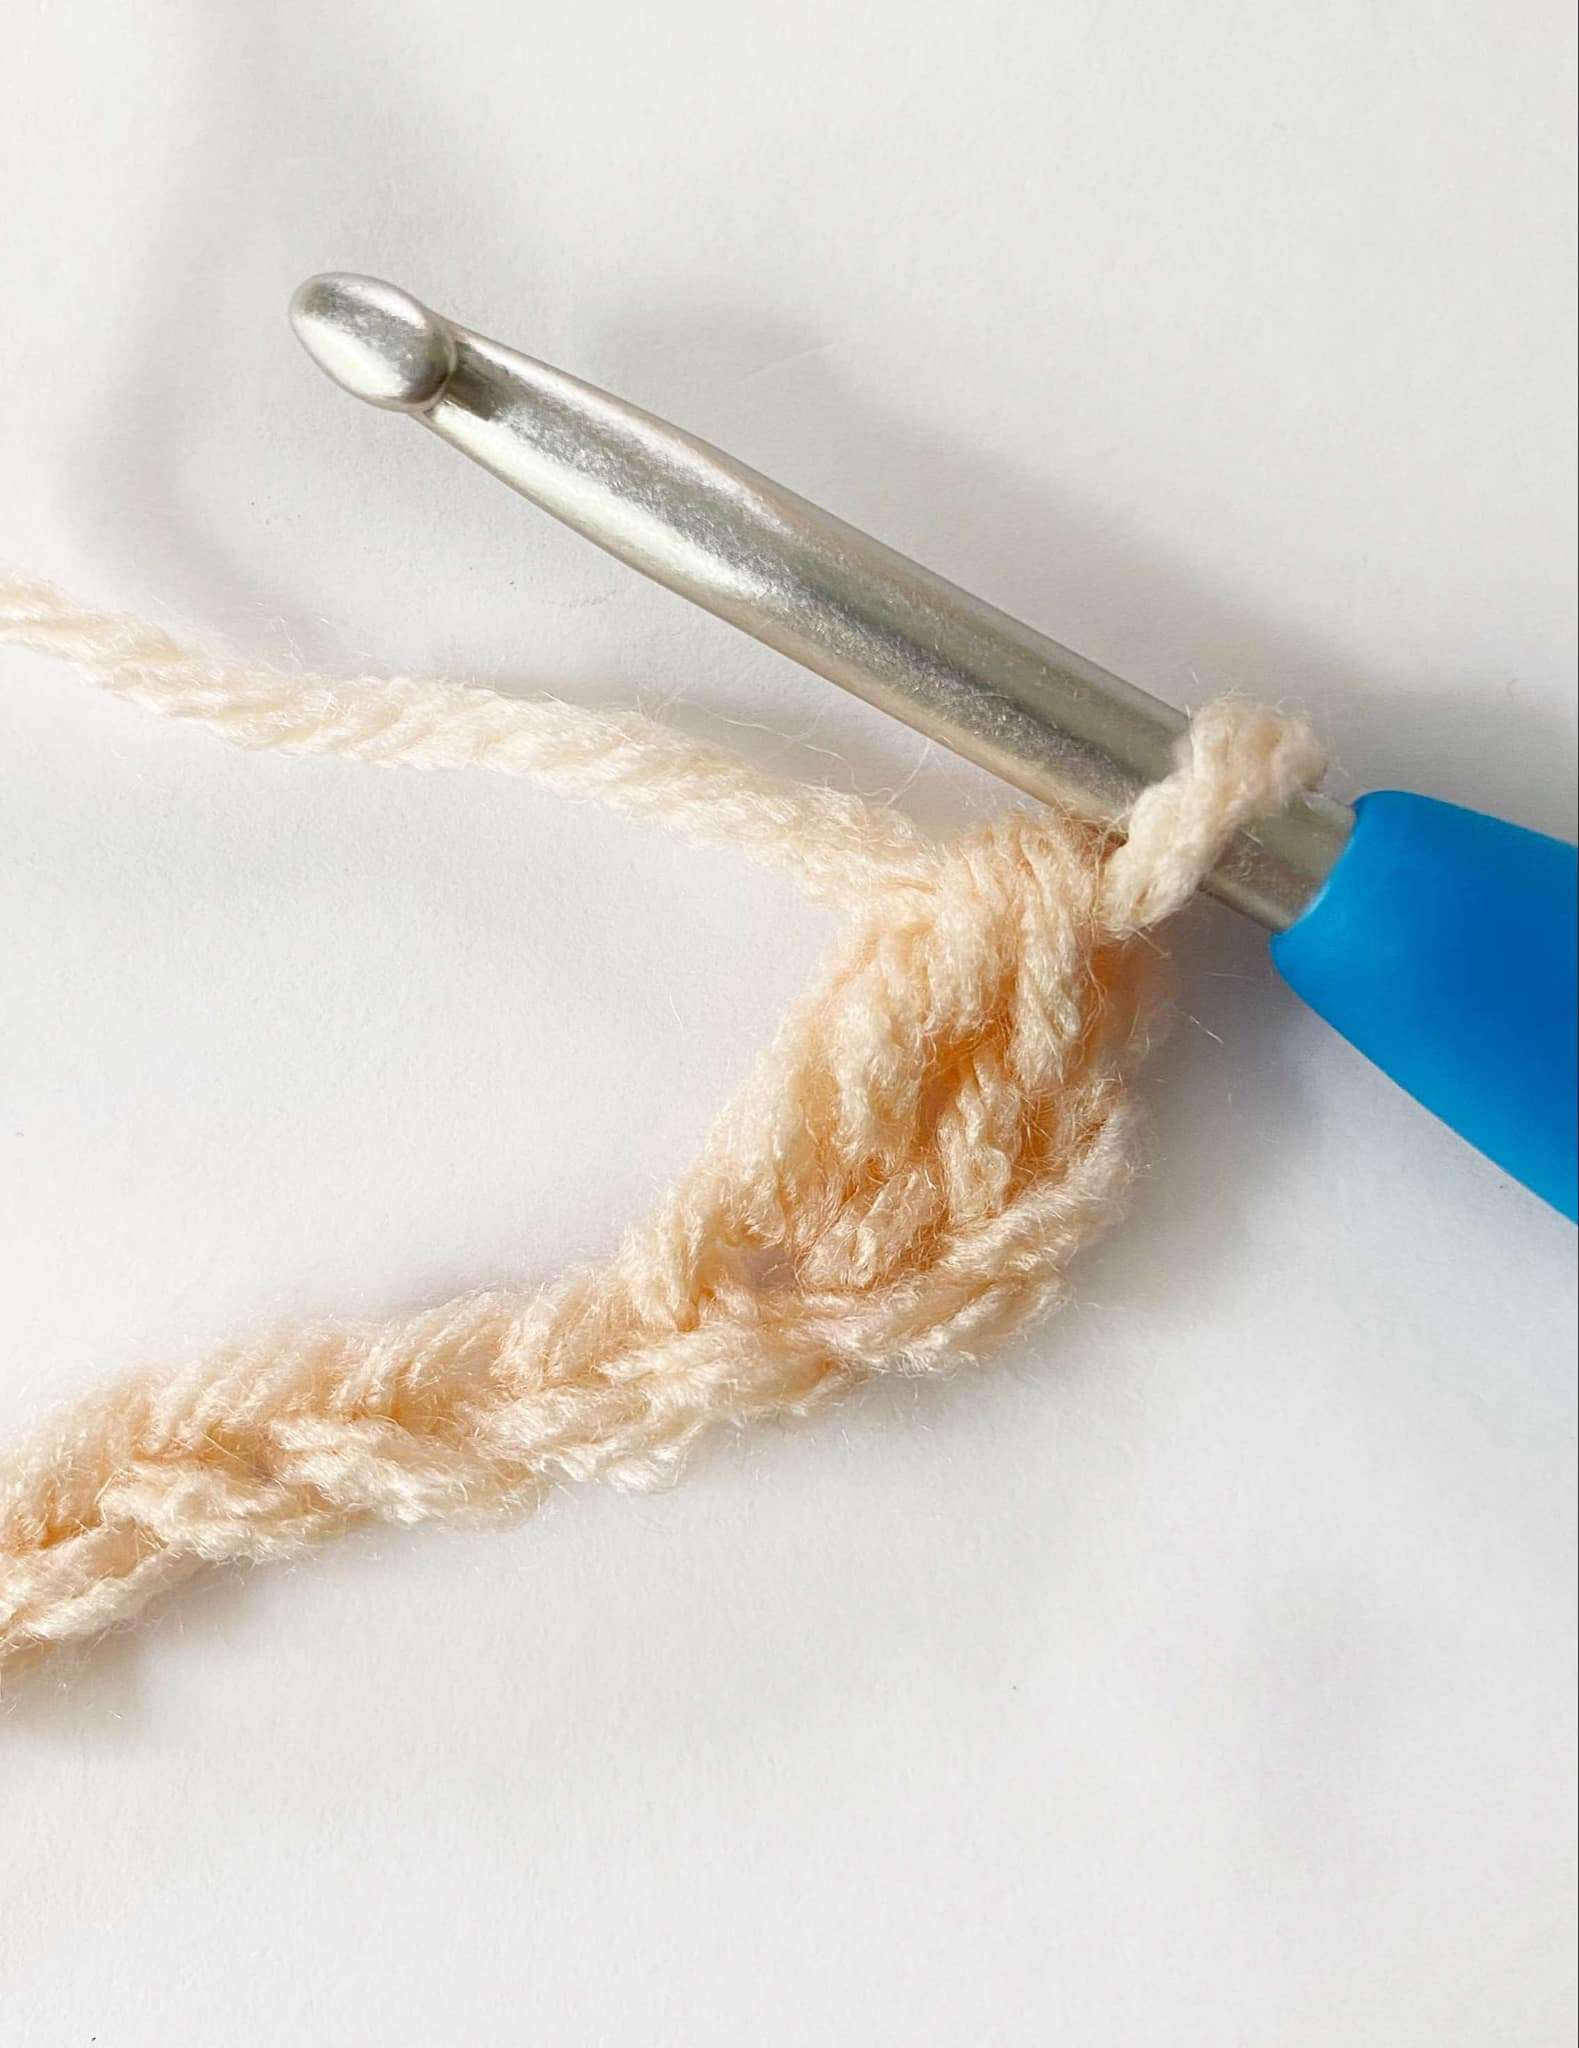
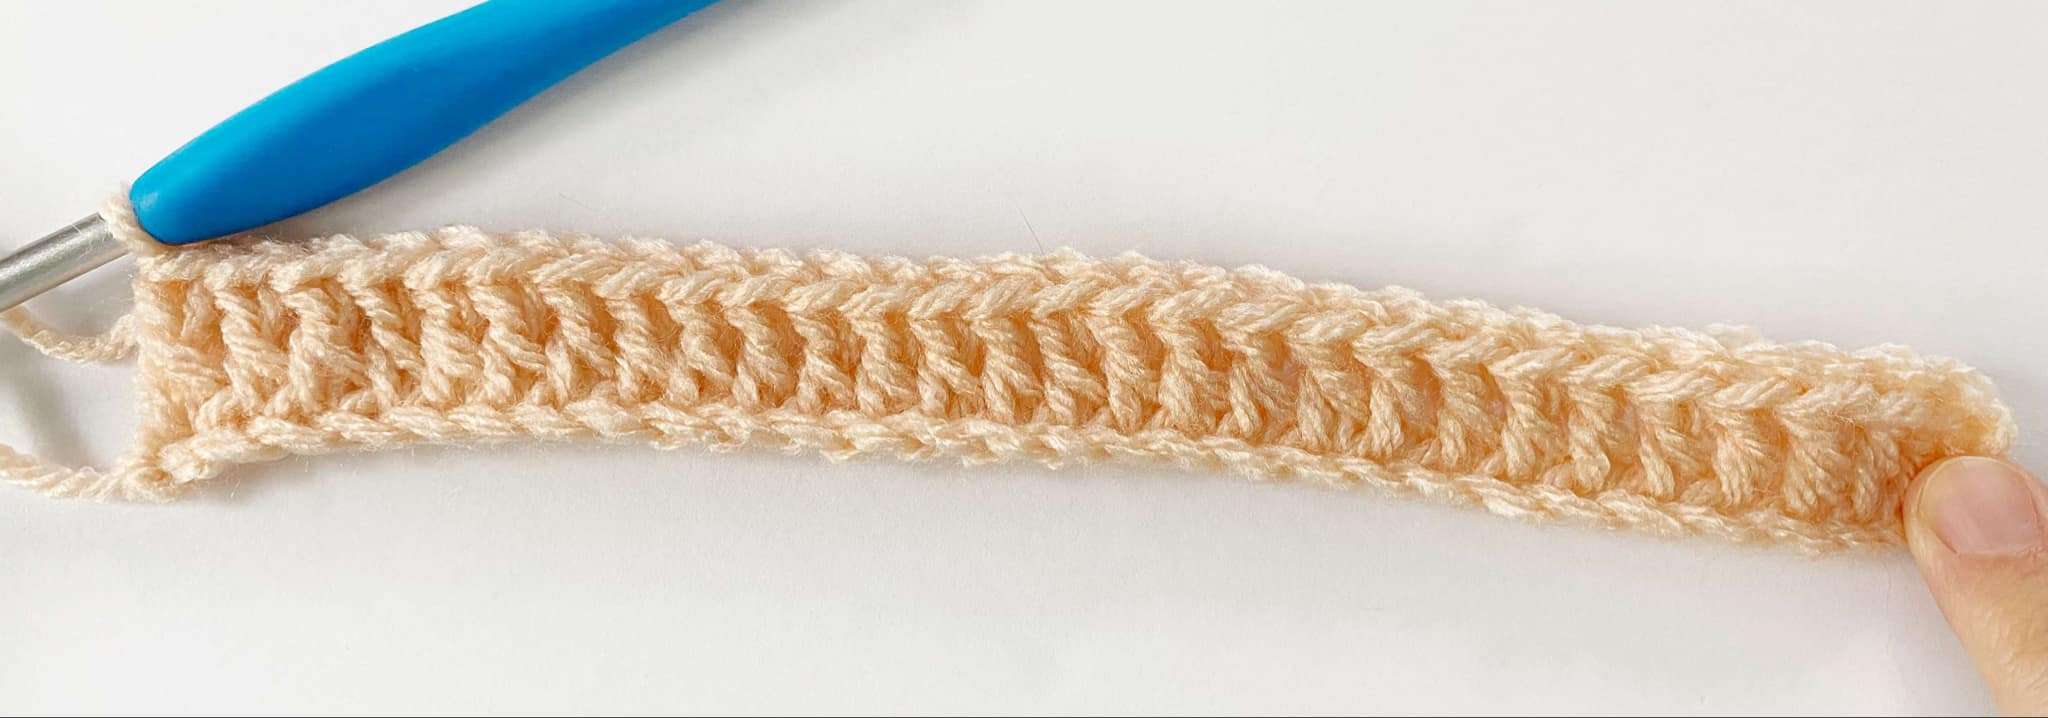
With Colour A, ch 142.
Row 1 (WS):
Dc in third ch from hook, and in each ch across. Turn.
- Stitch Count: 140 dc
Row 2 (RS):
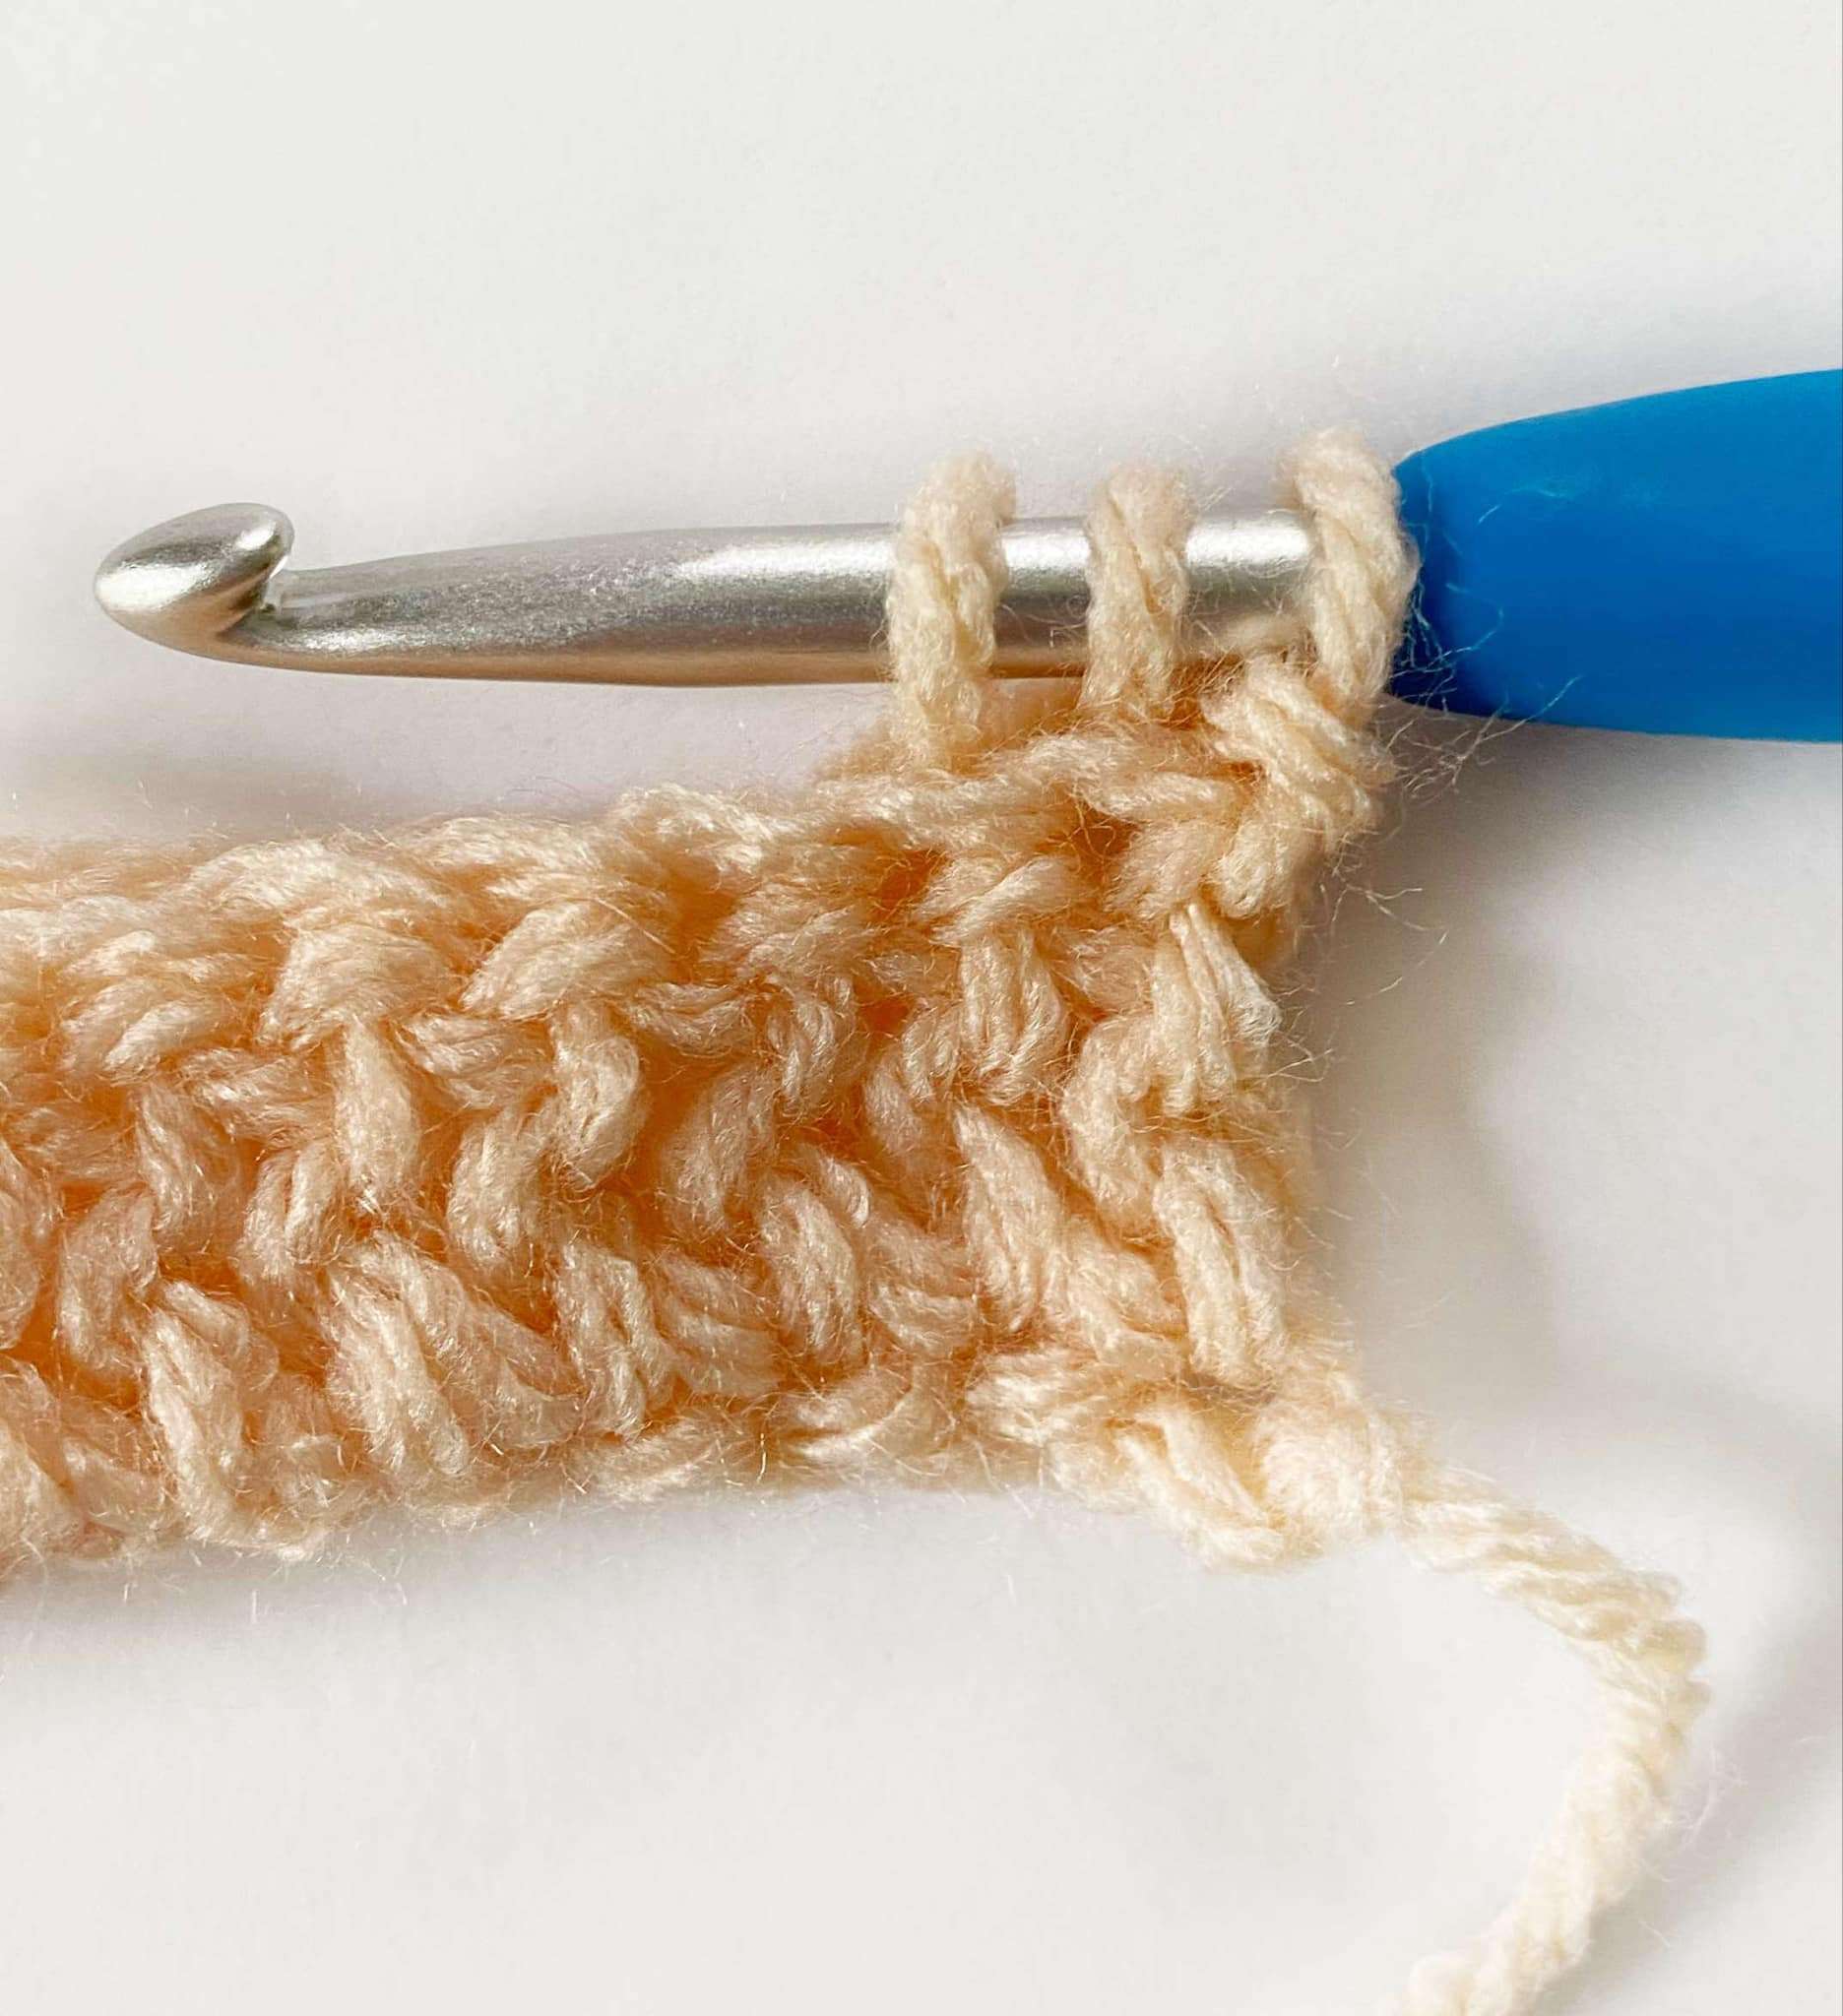
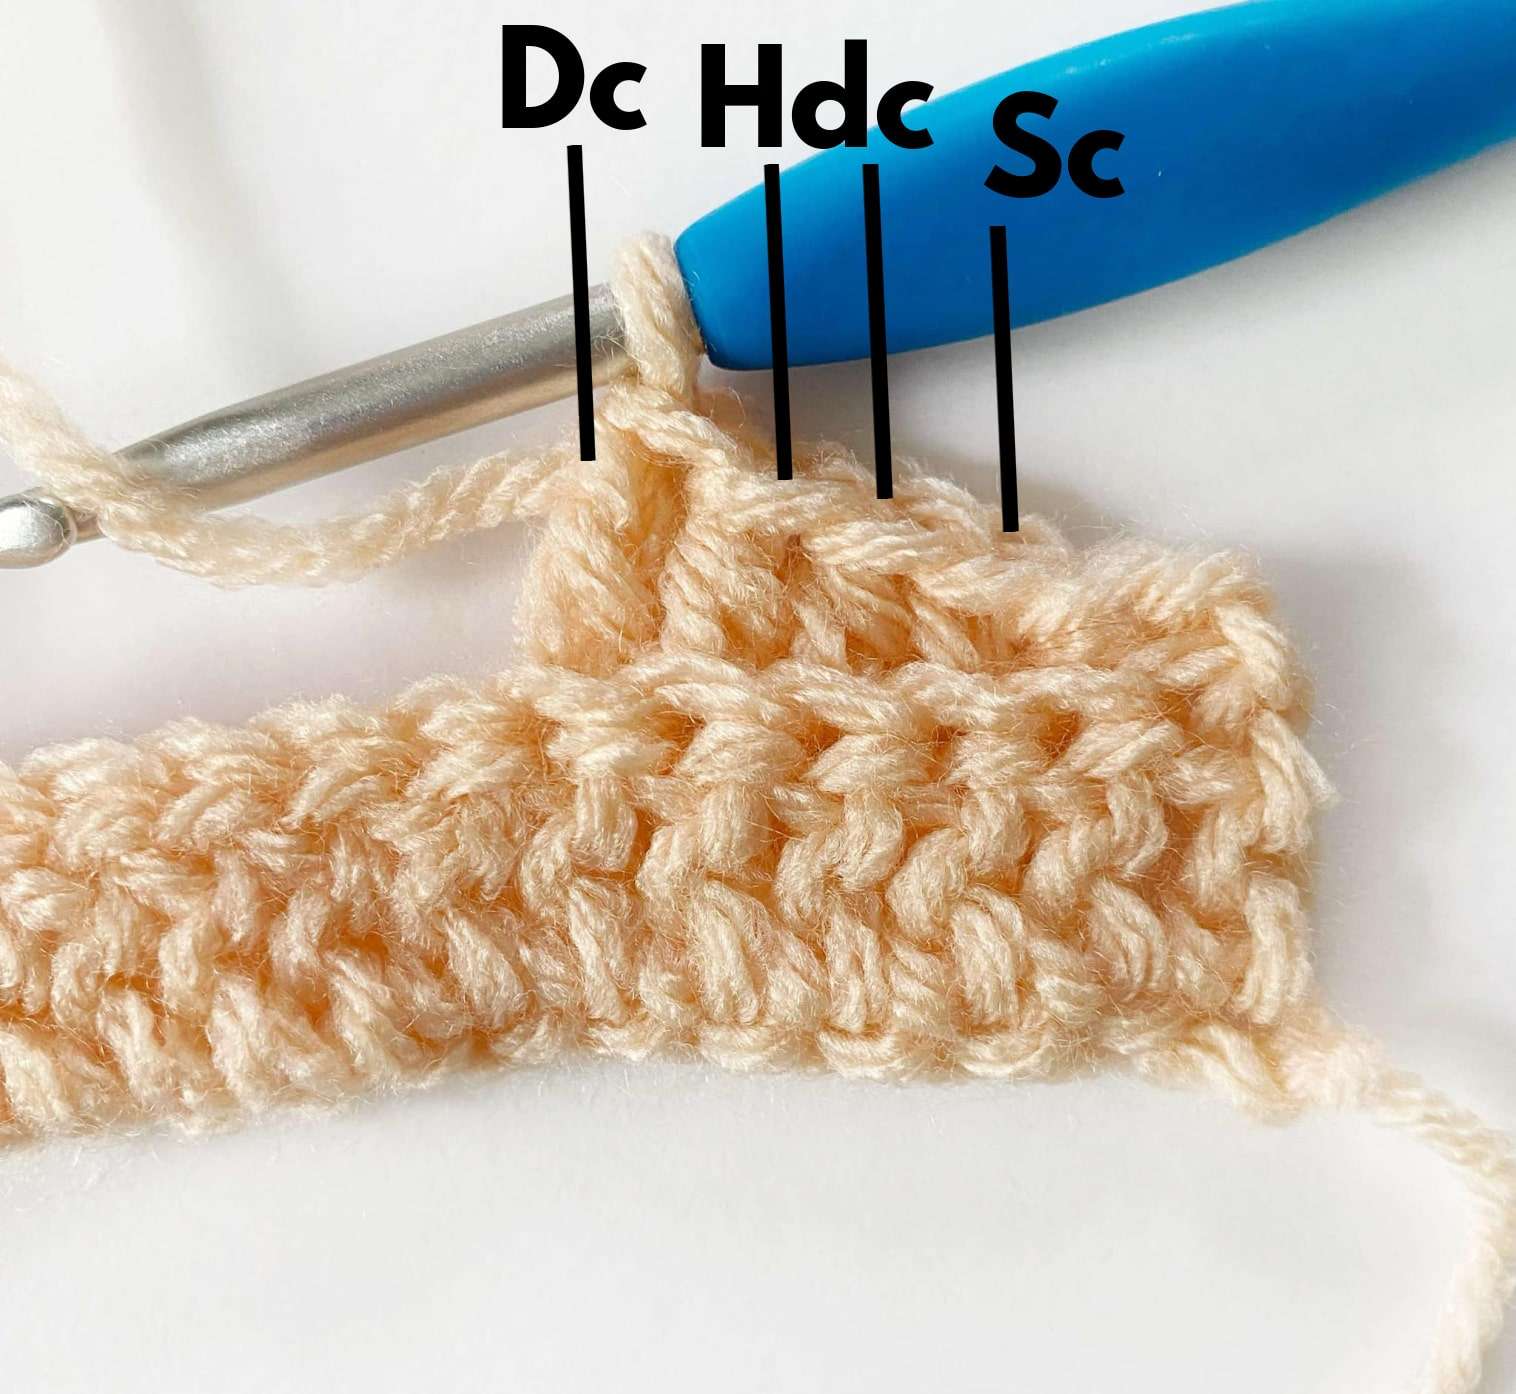
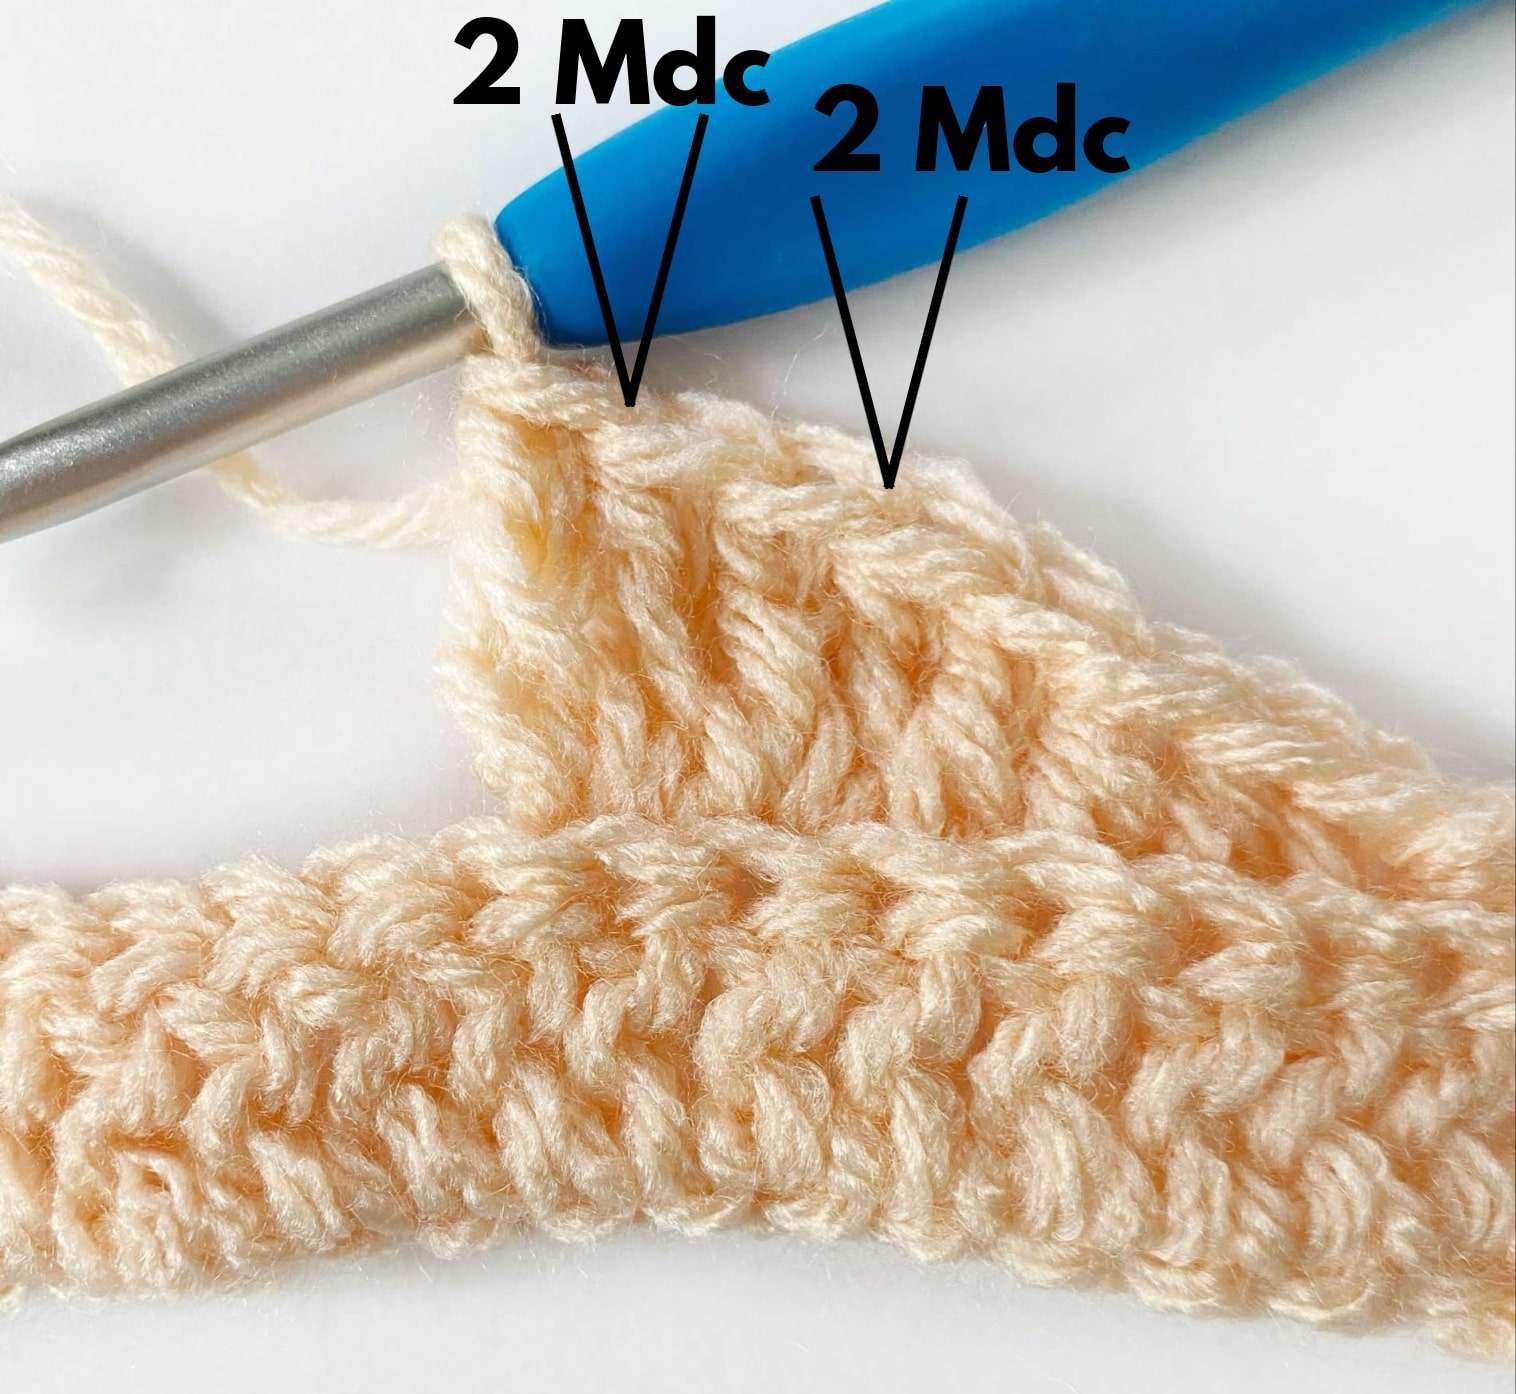
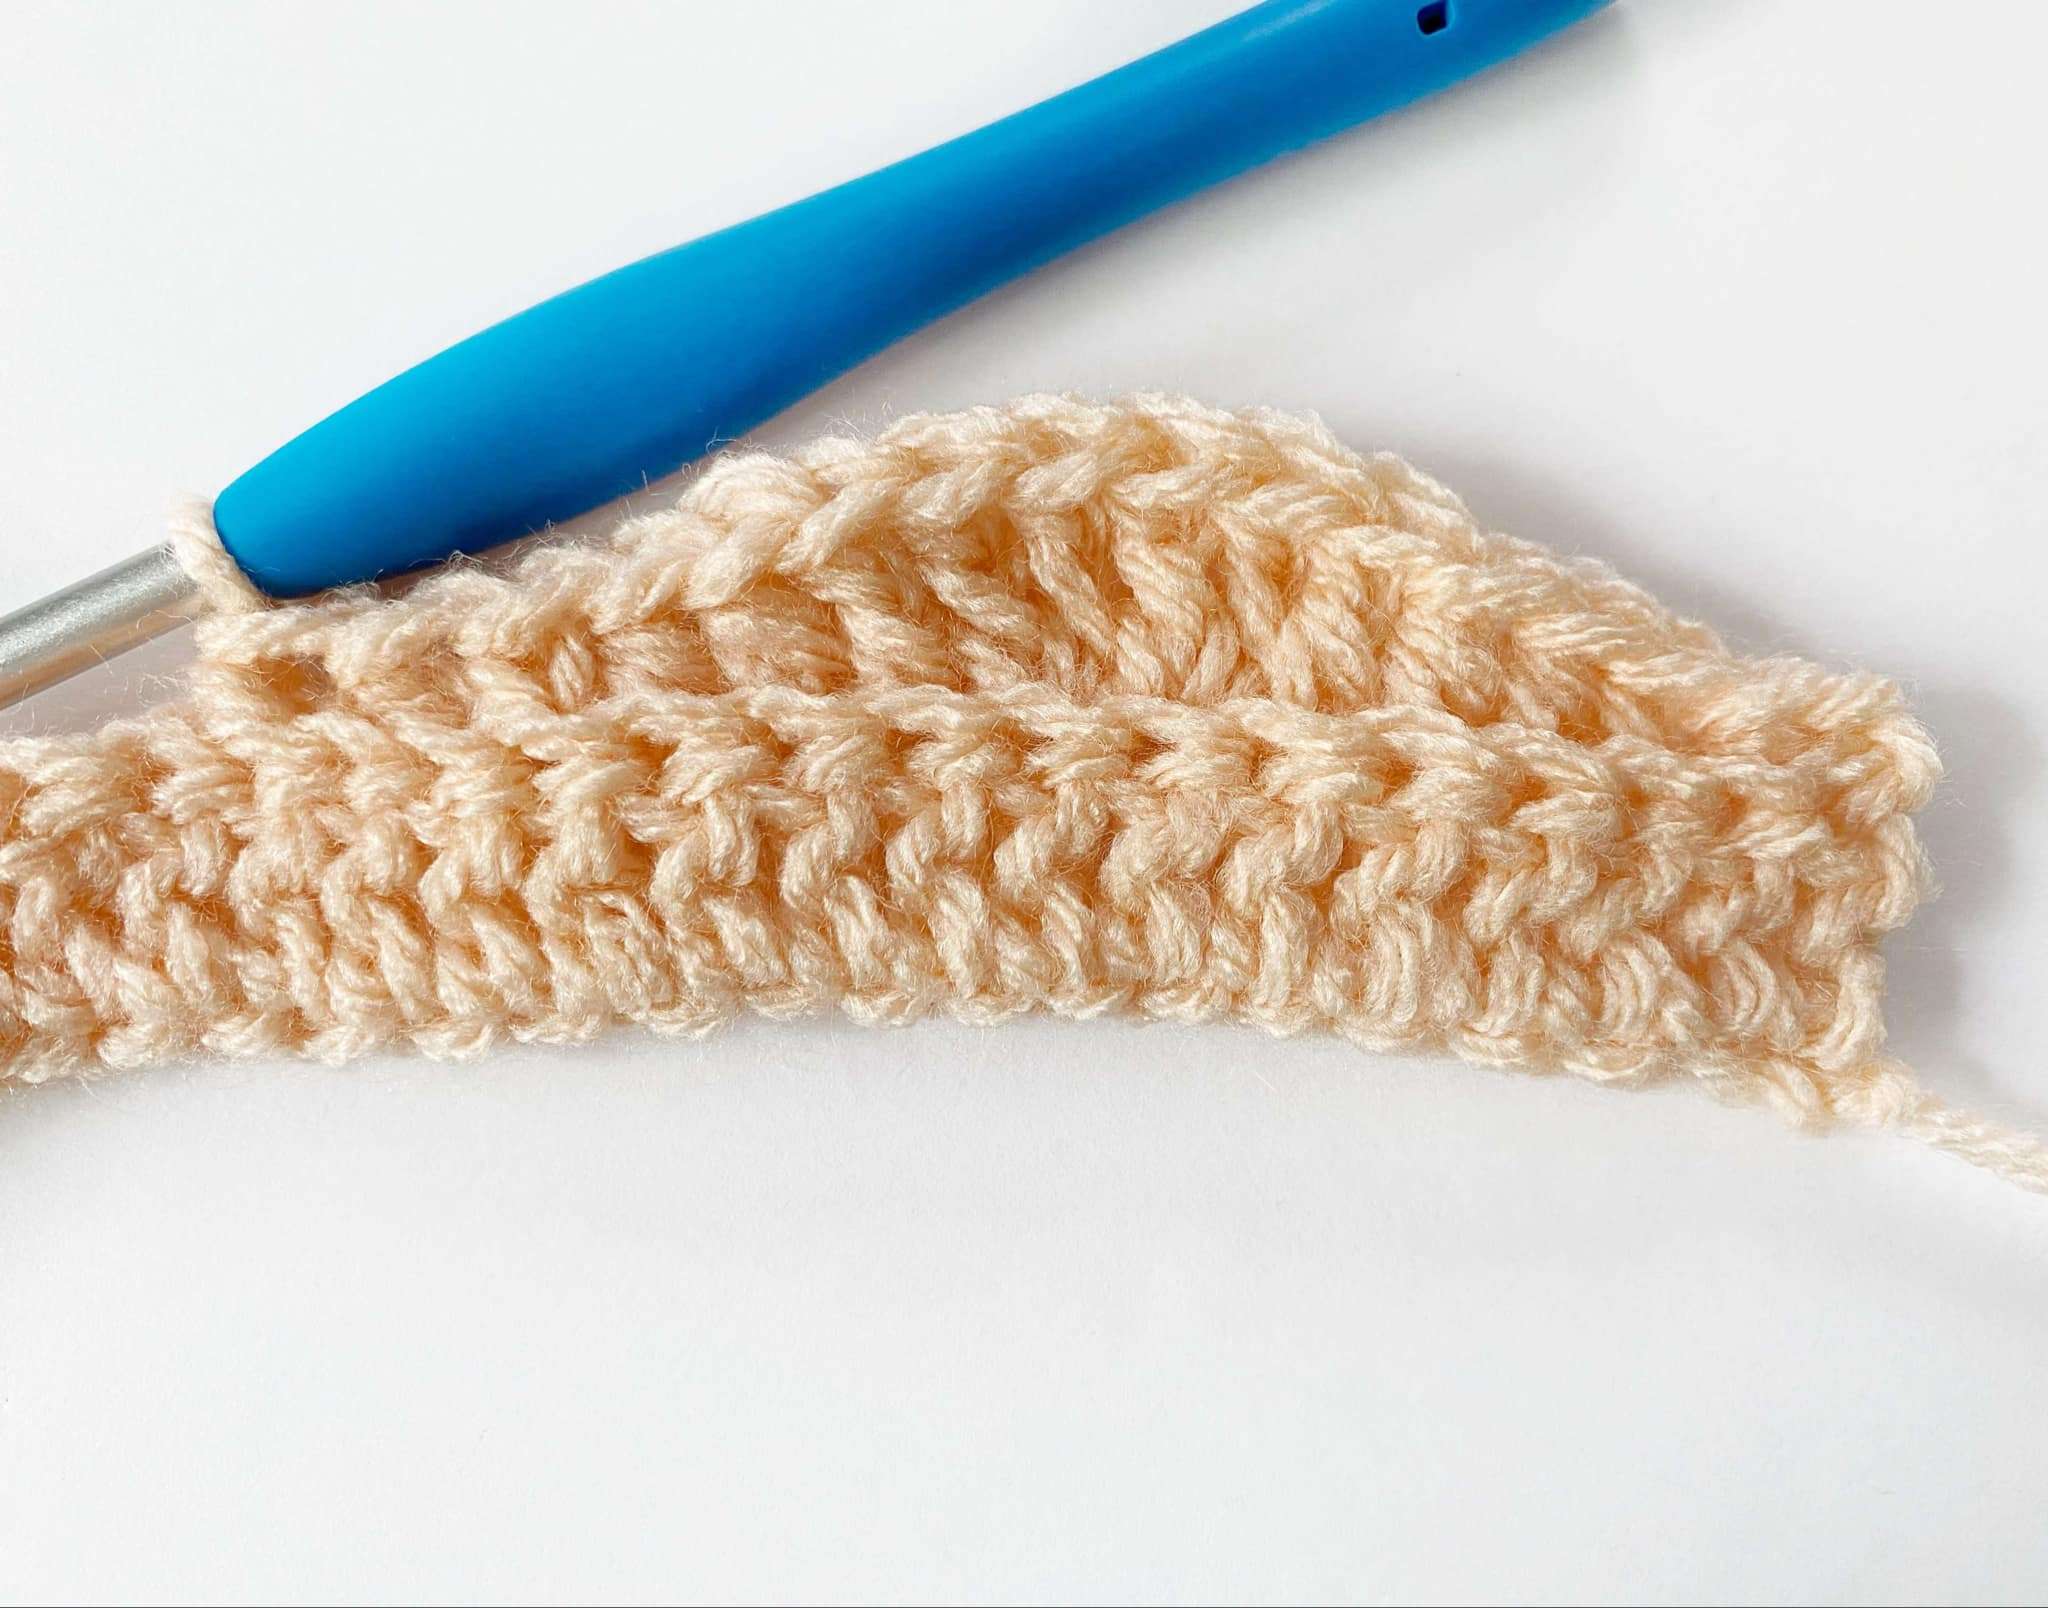
Ch 1, in BLO {sl2tog, sc in next st, hdc in next 2 sts, dc in next st, [2 Mdc in next st] 2 times, dc in next st, hdc in next 2 sts, sc in next st, sl2tog} 10 times. Turn.
- Stitch Count: 140 sts (10 waves)
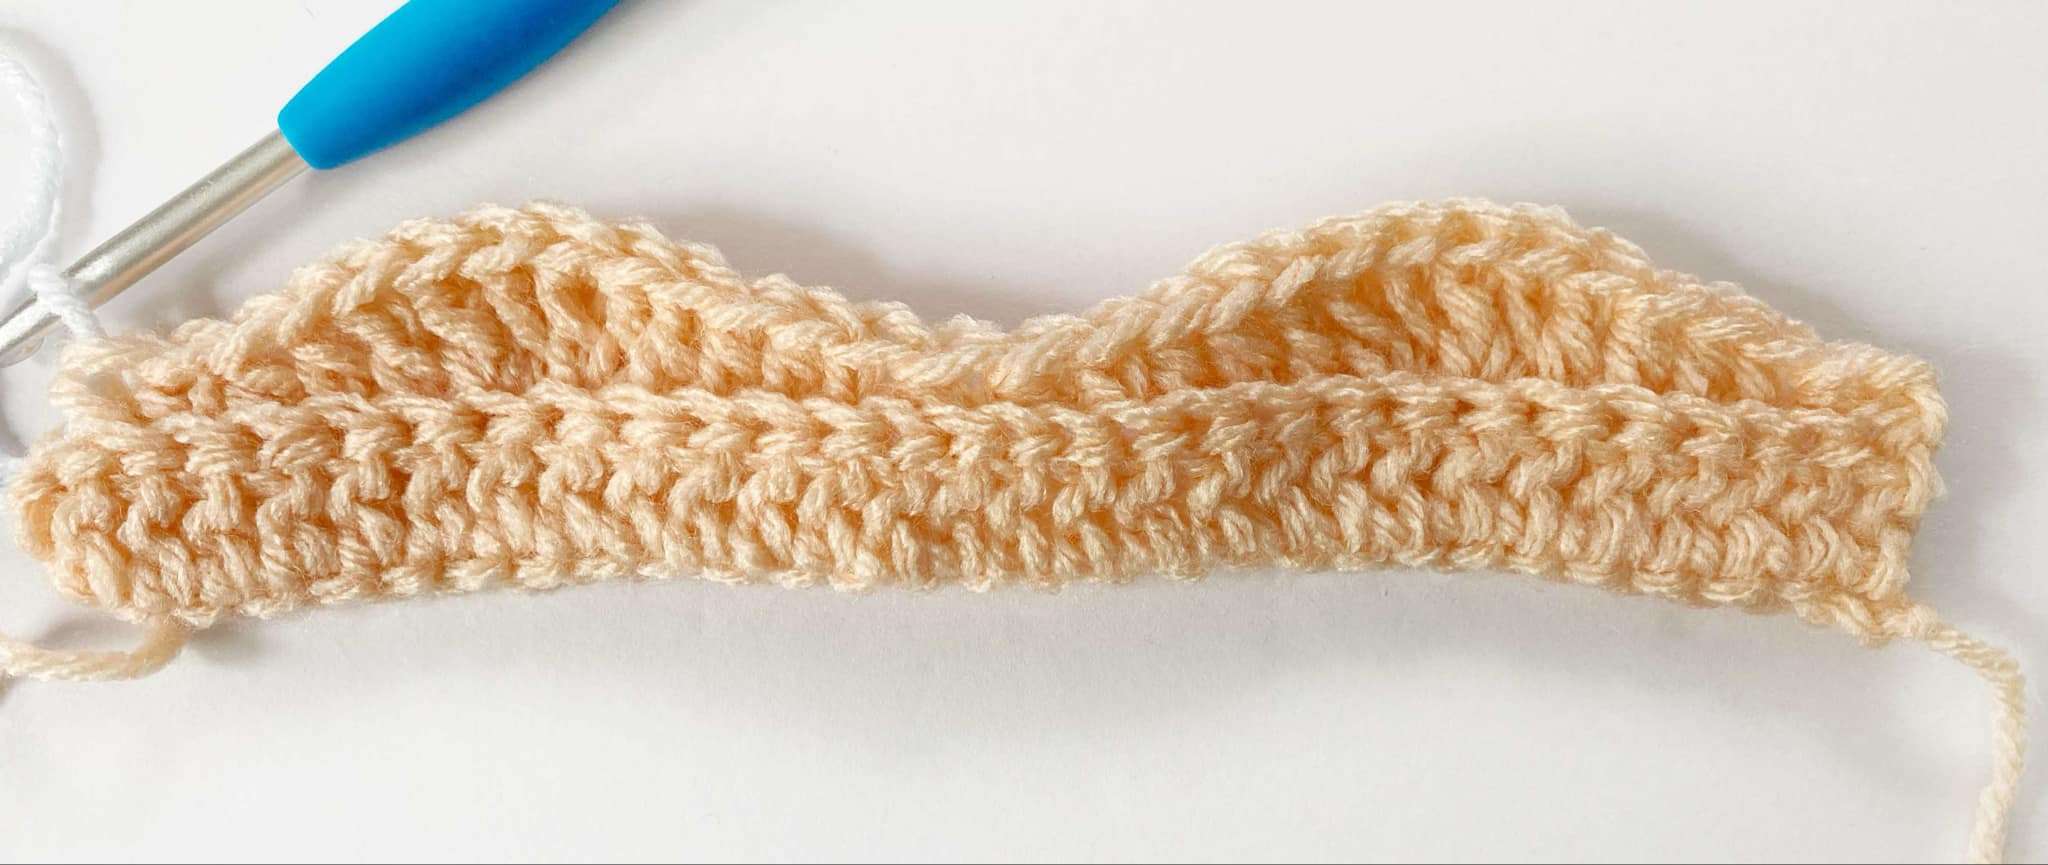
Row 3 (WS):
With Colour B, ch 2, in BLO {dc2tog, dc in next 4 sts, [2 dc in next st] 2 times, dc in next 4 sts, dc2tog} 10 times. Turn.
- Stitch Count: 140 dc (10 waves)
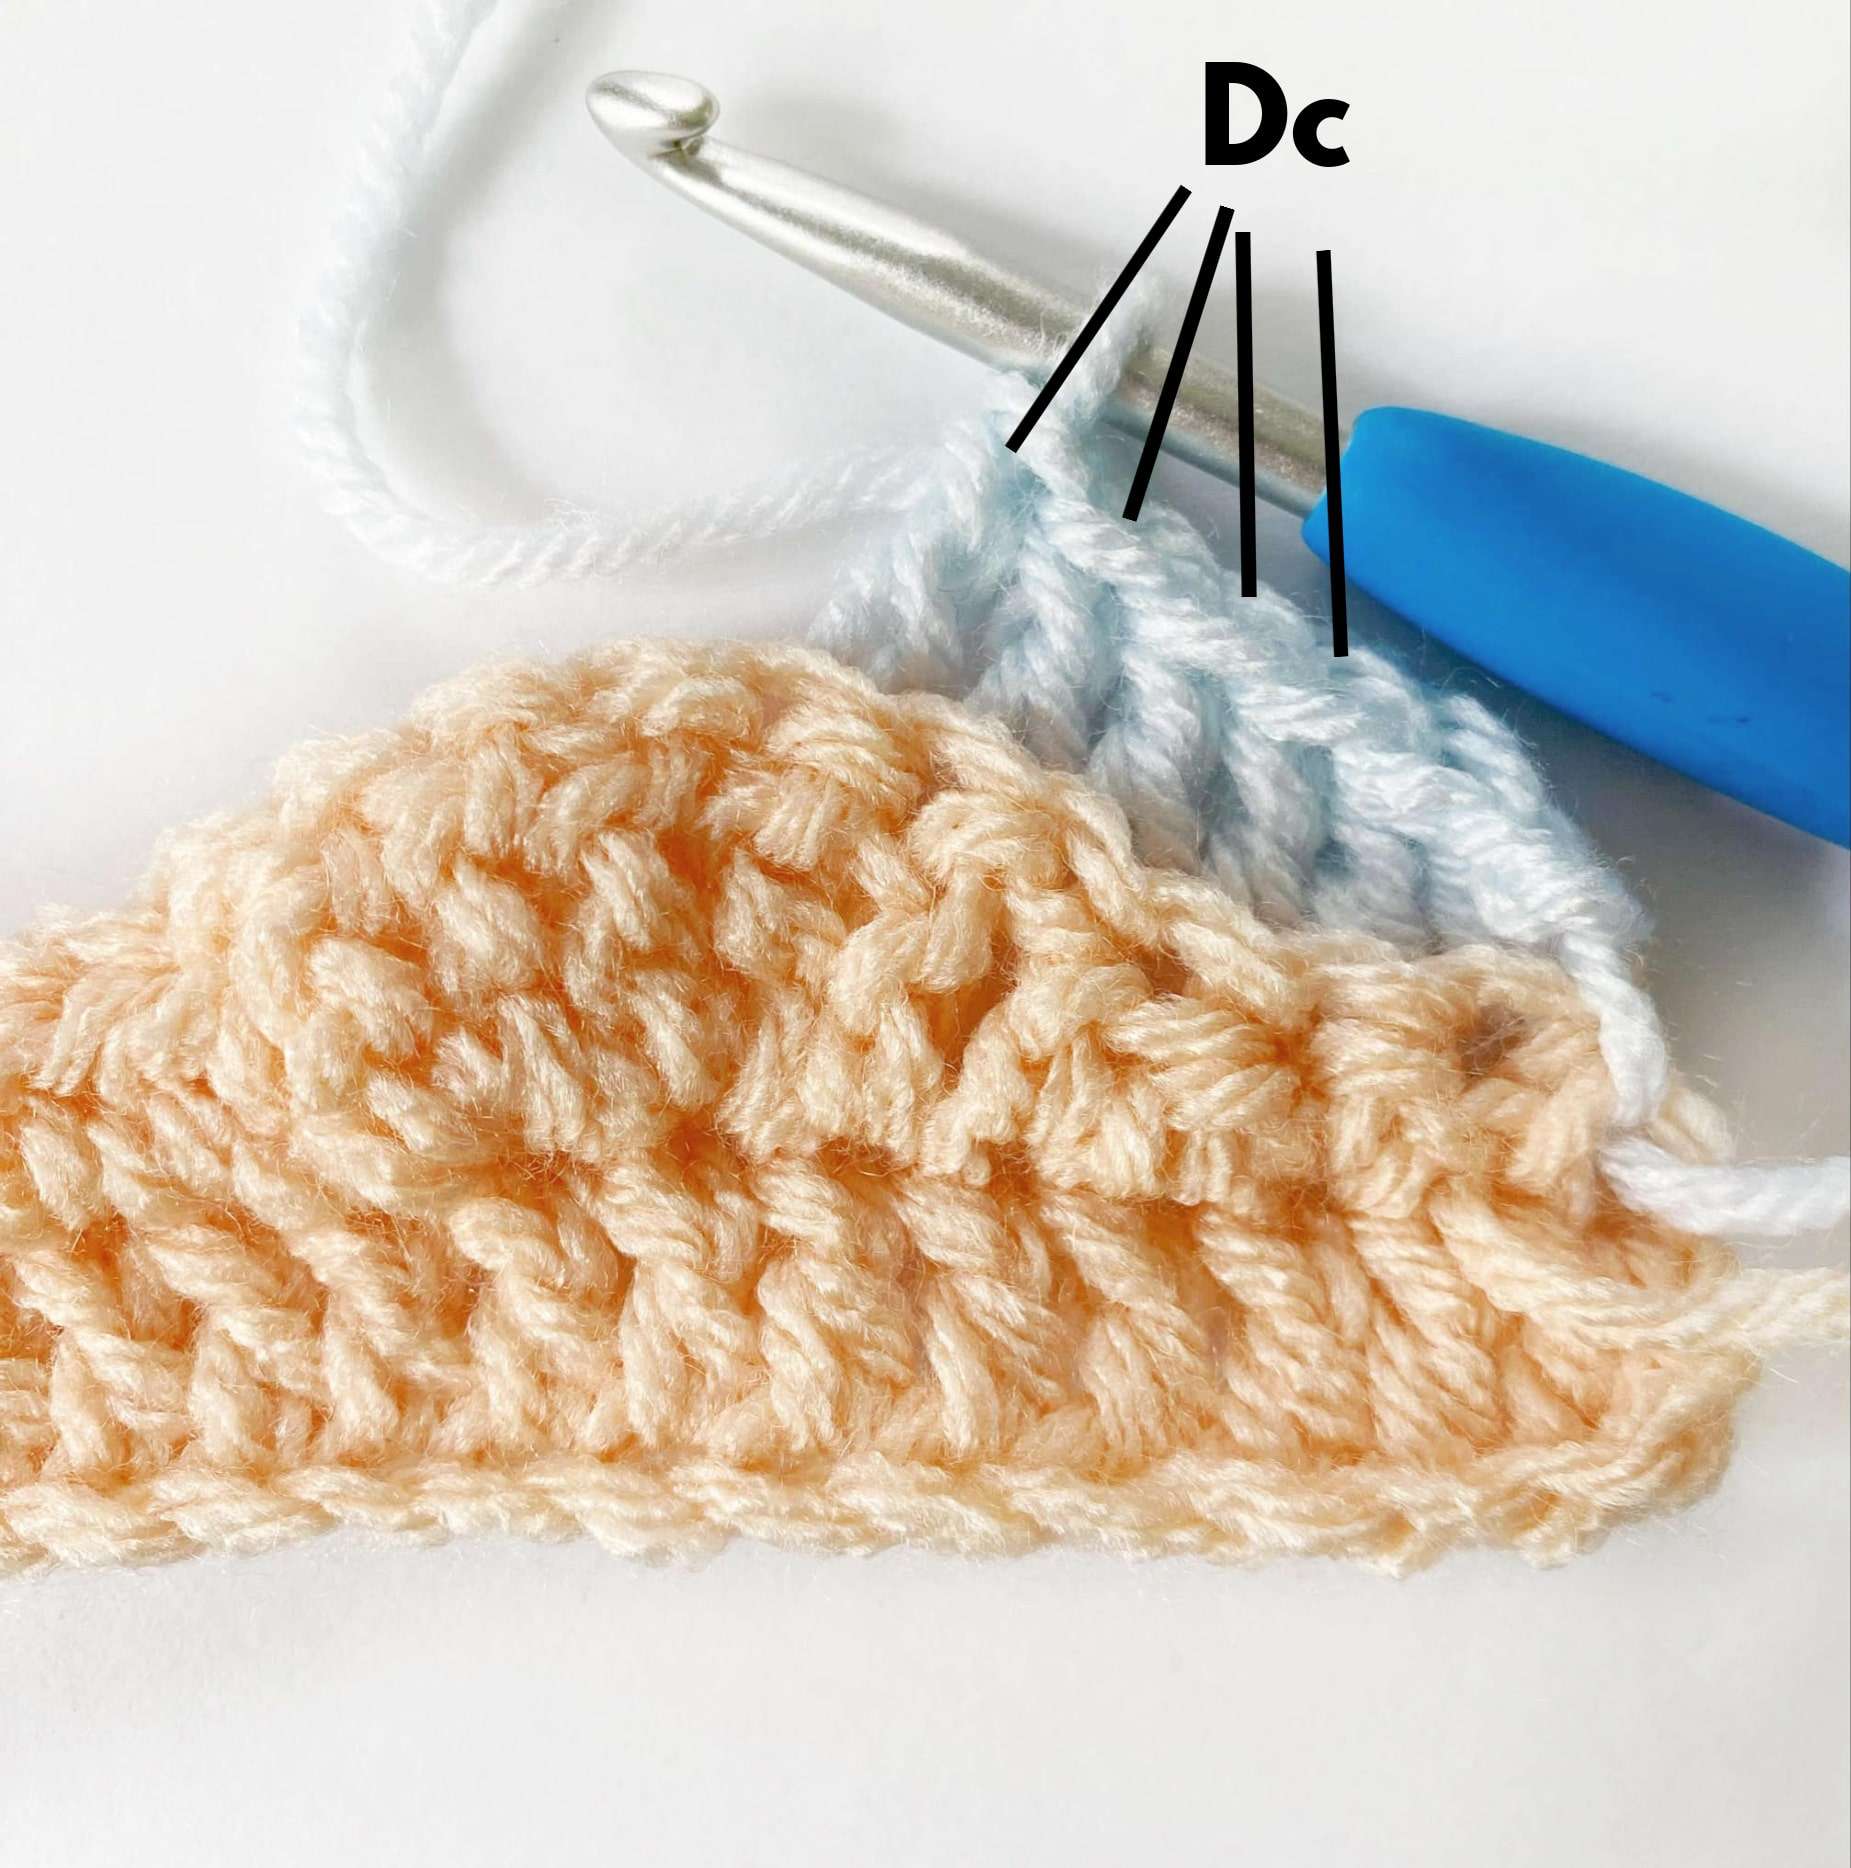
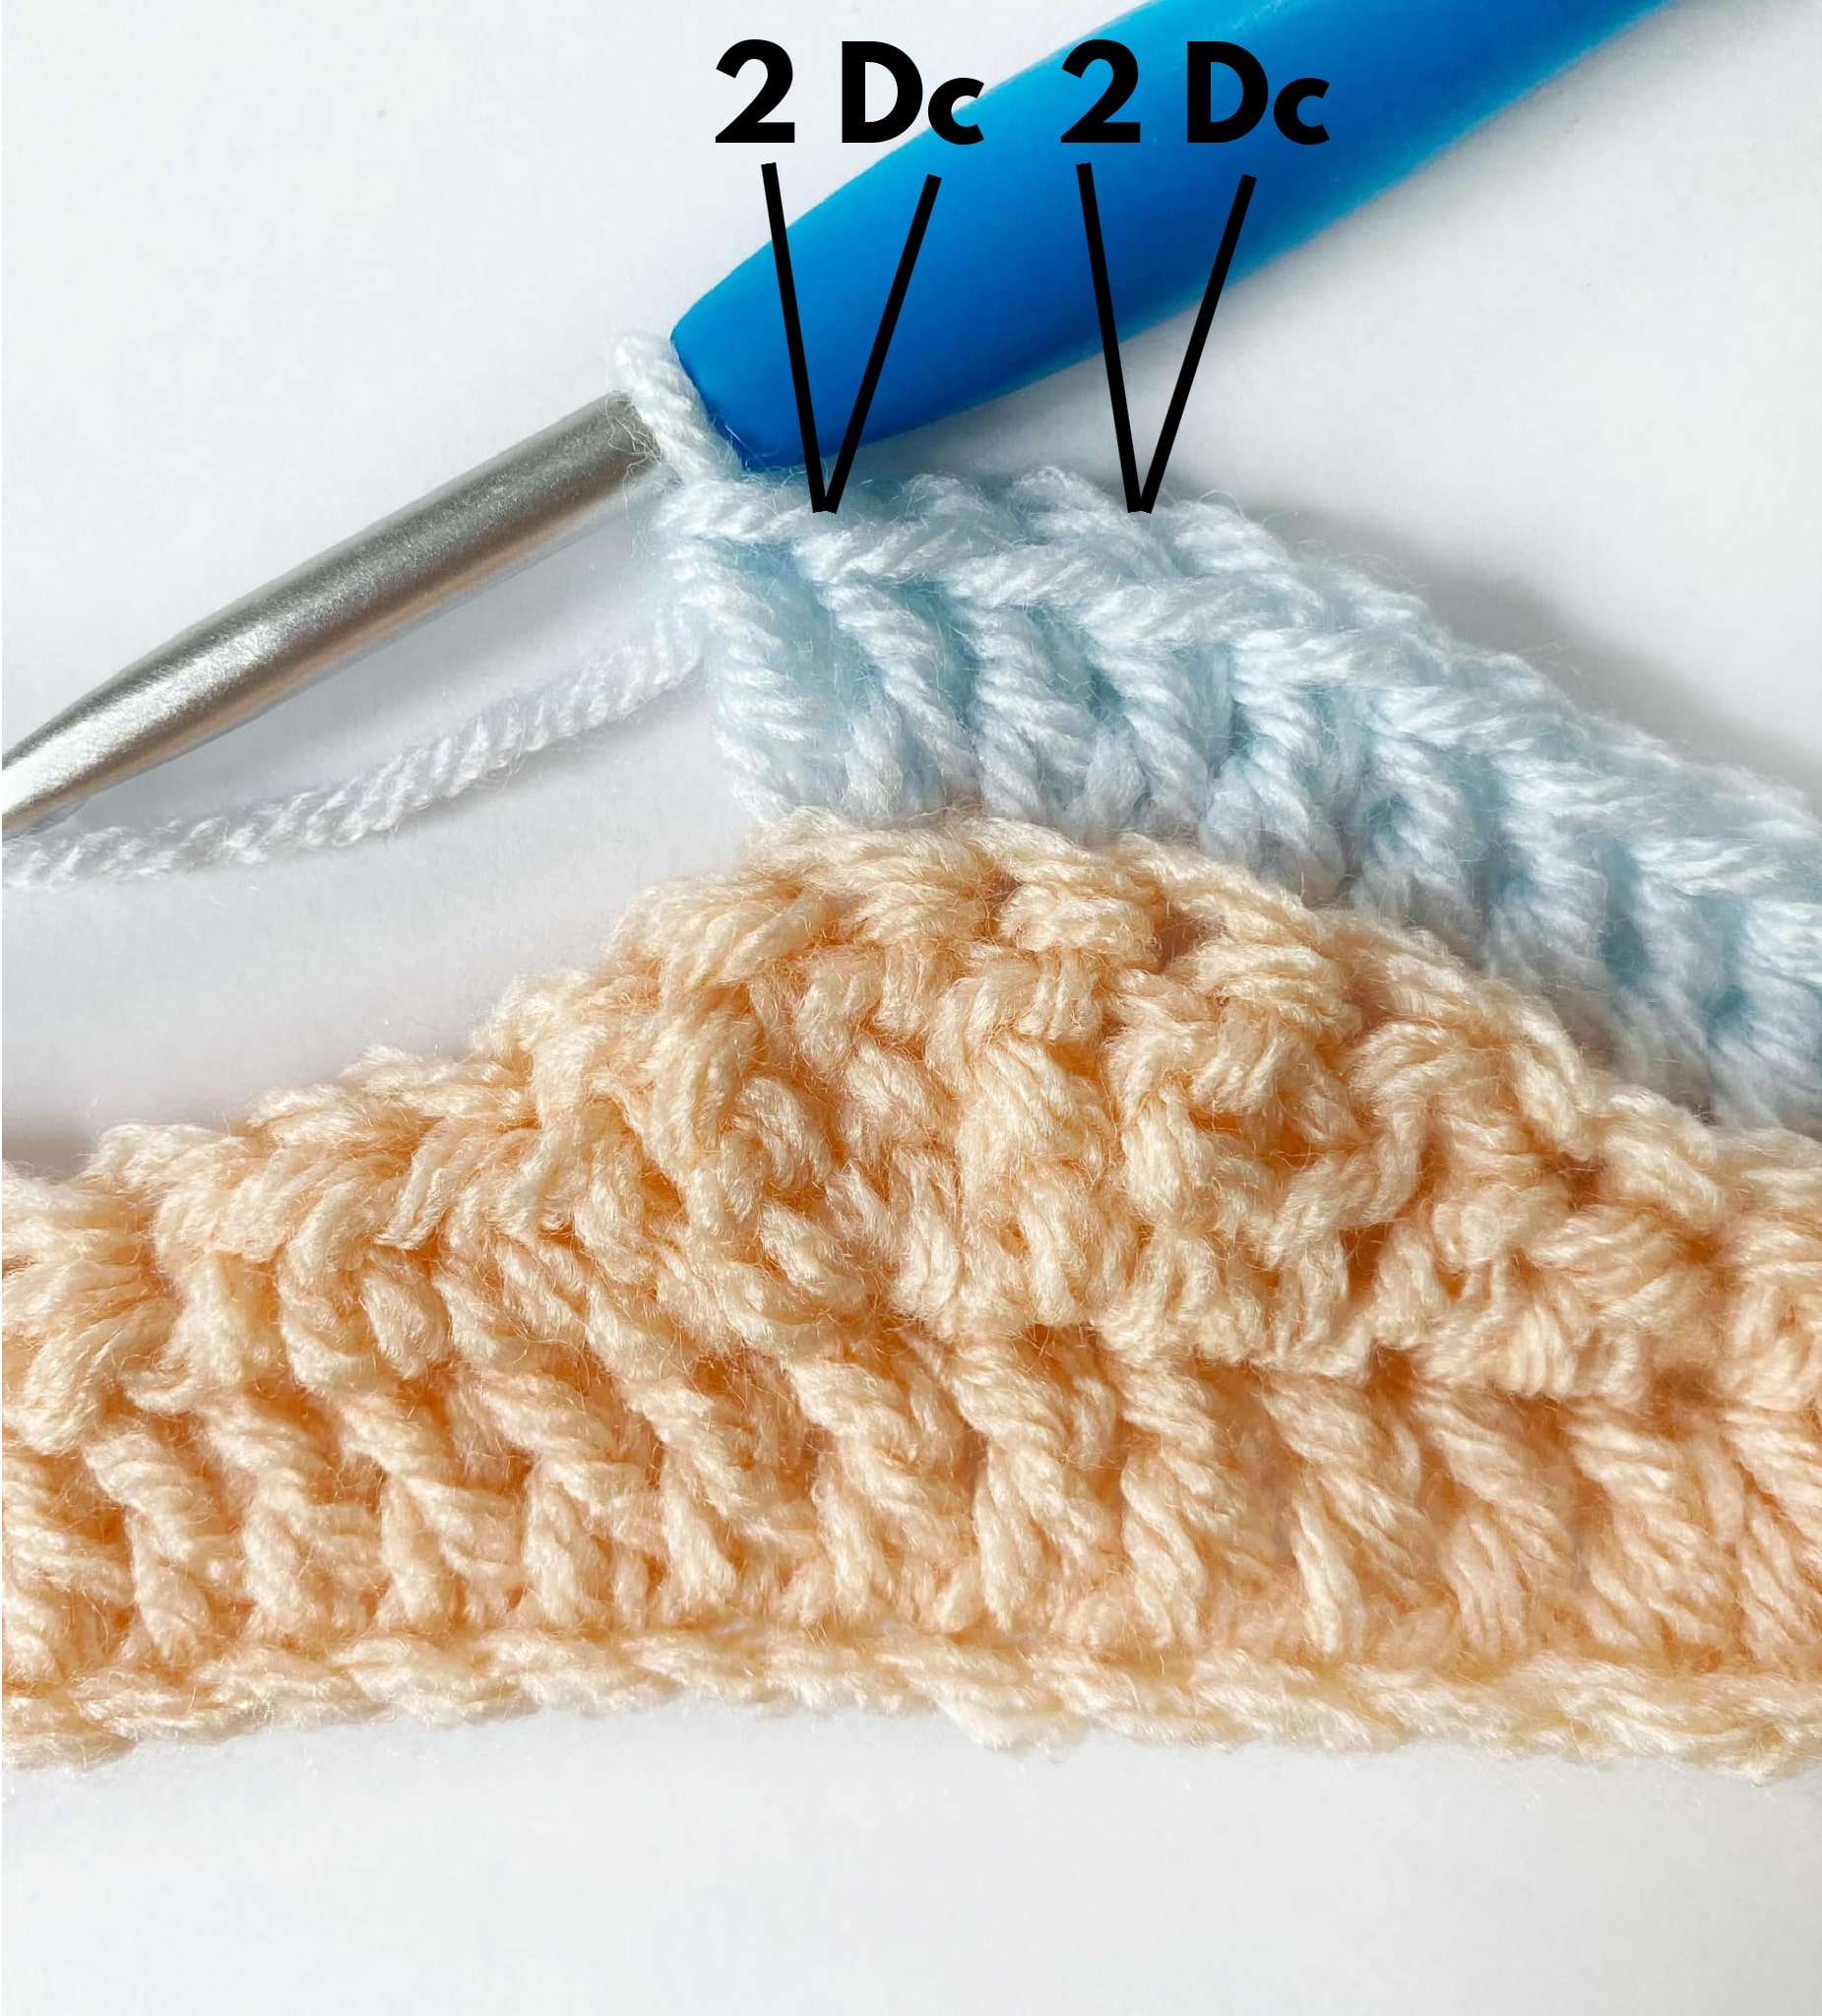
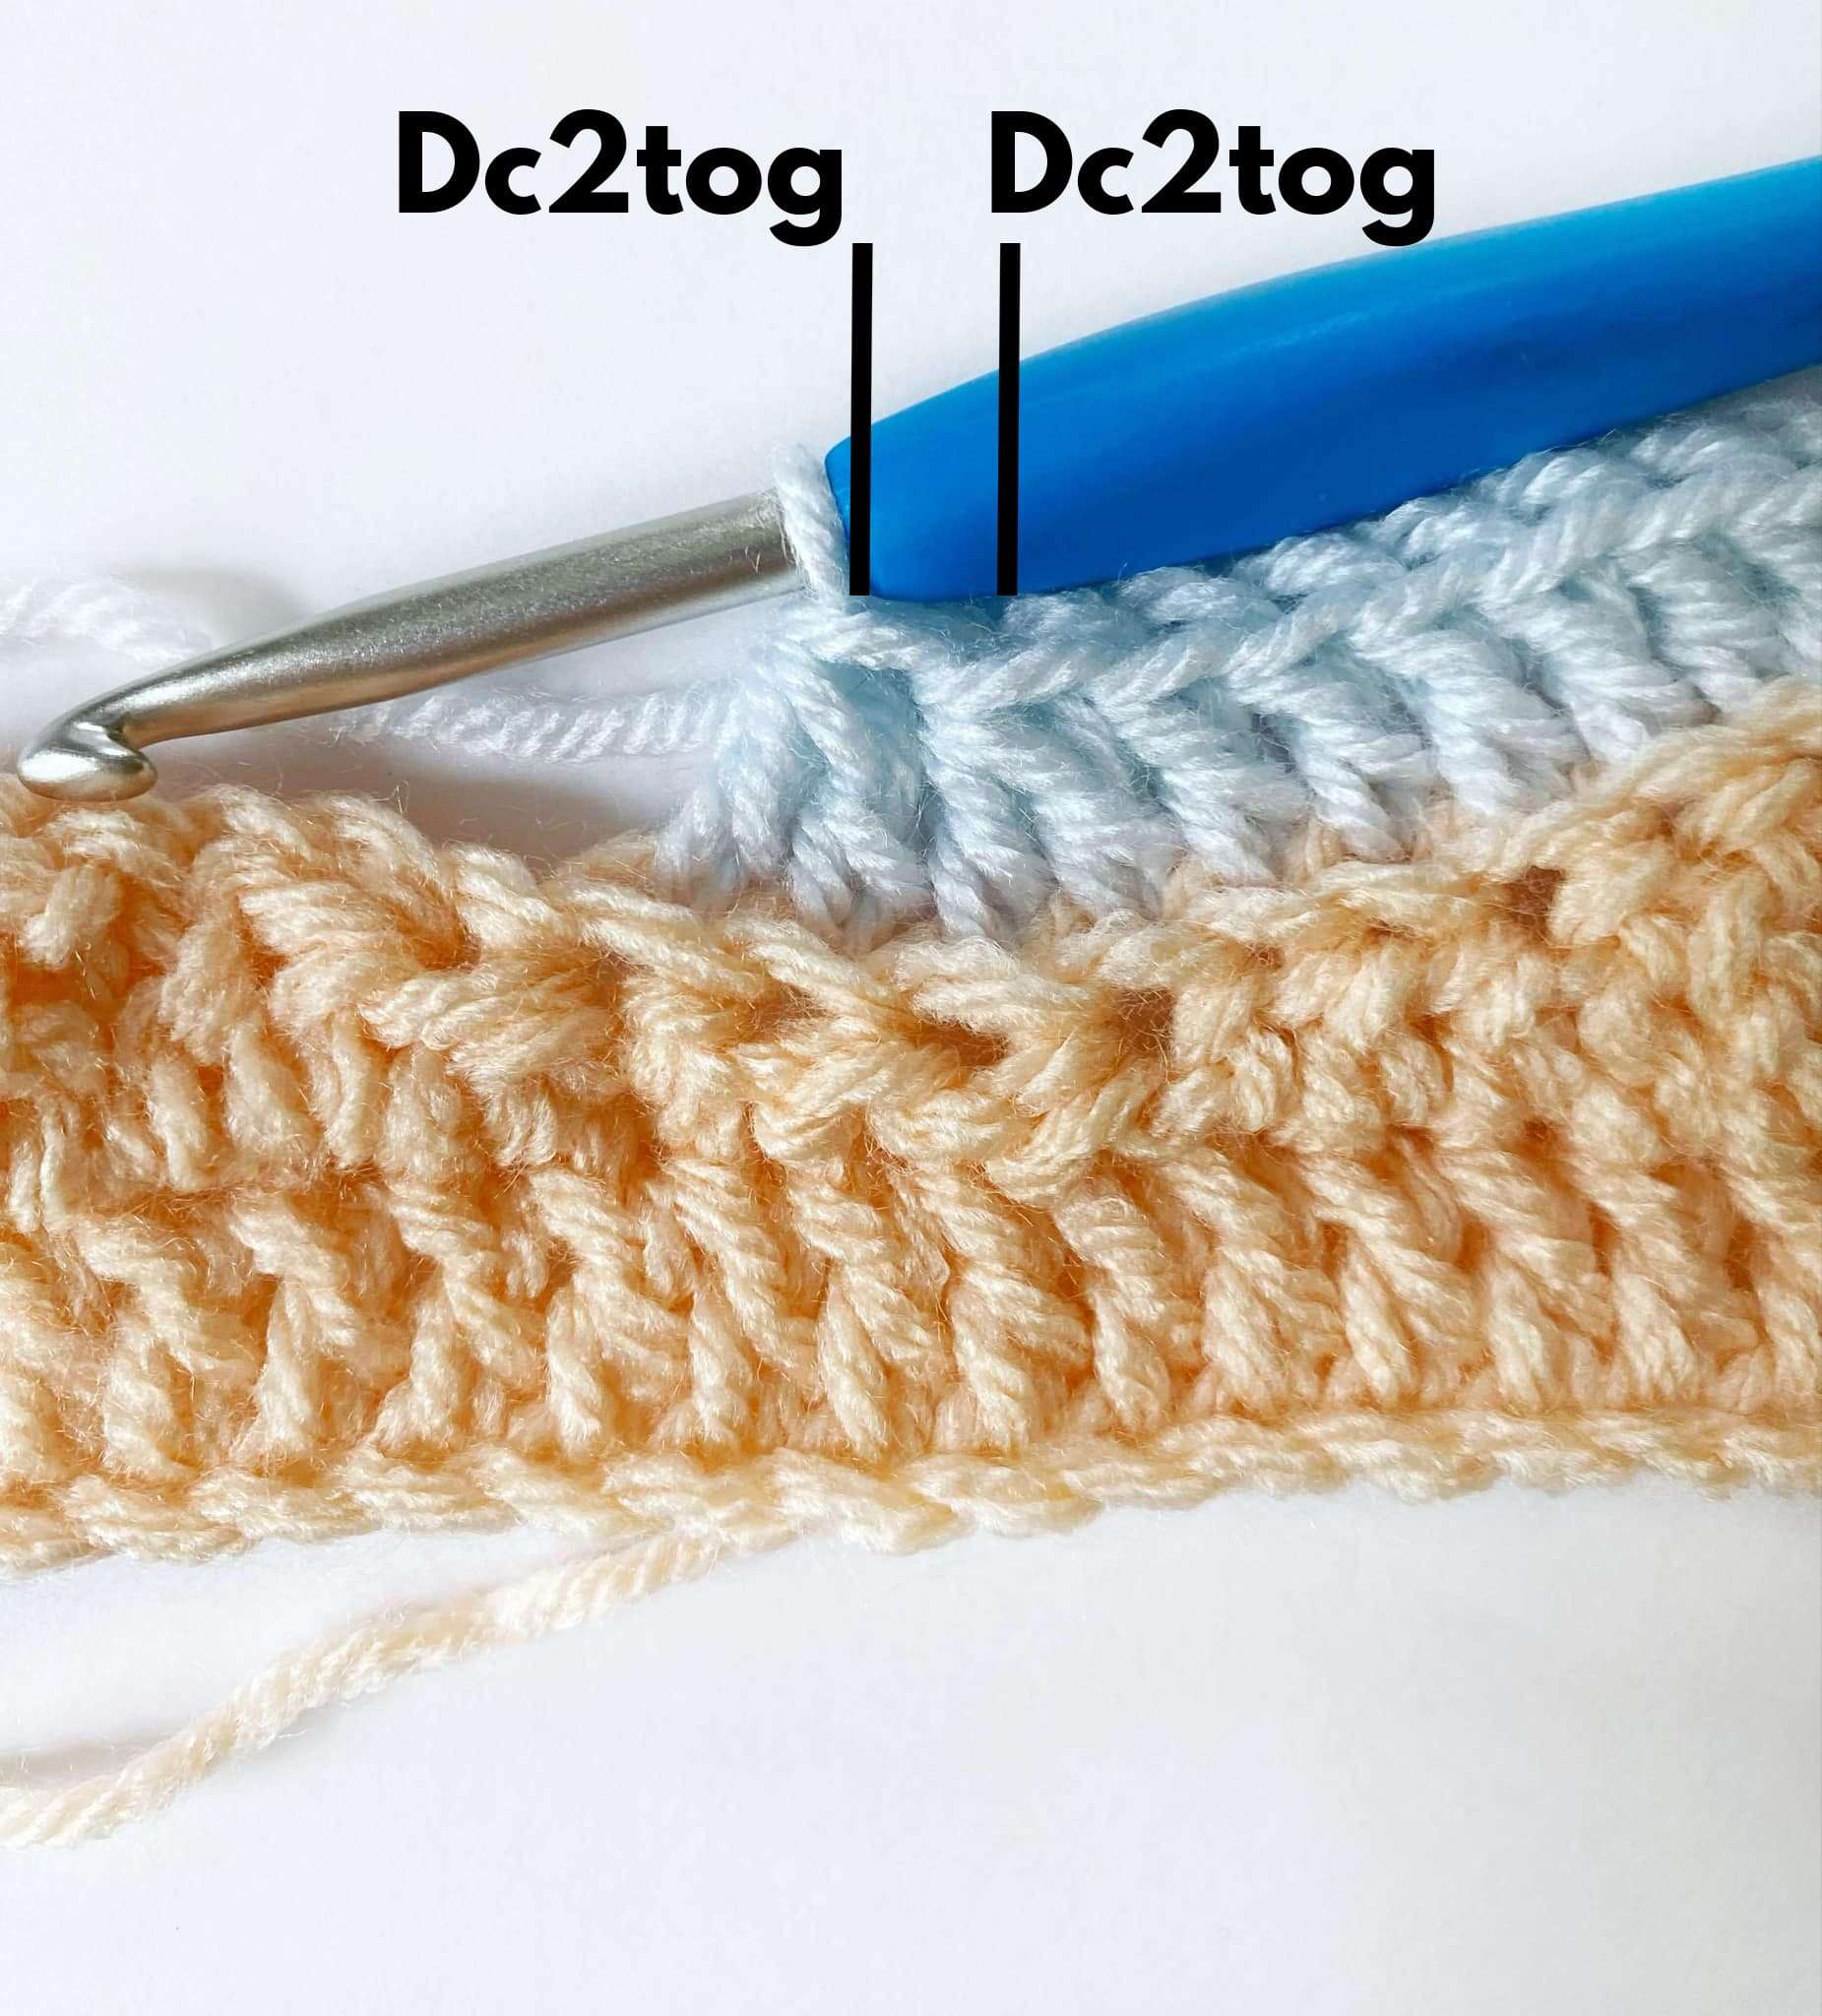
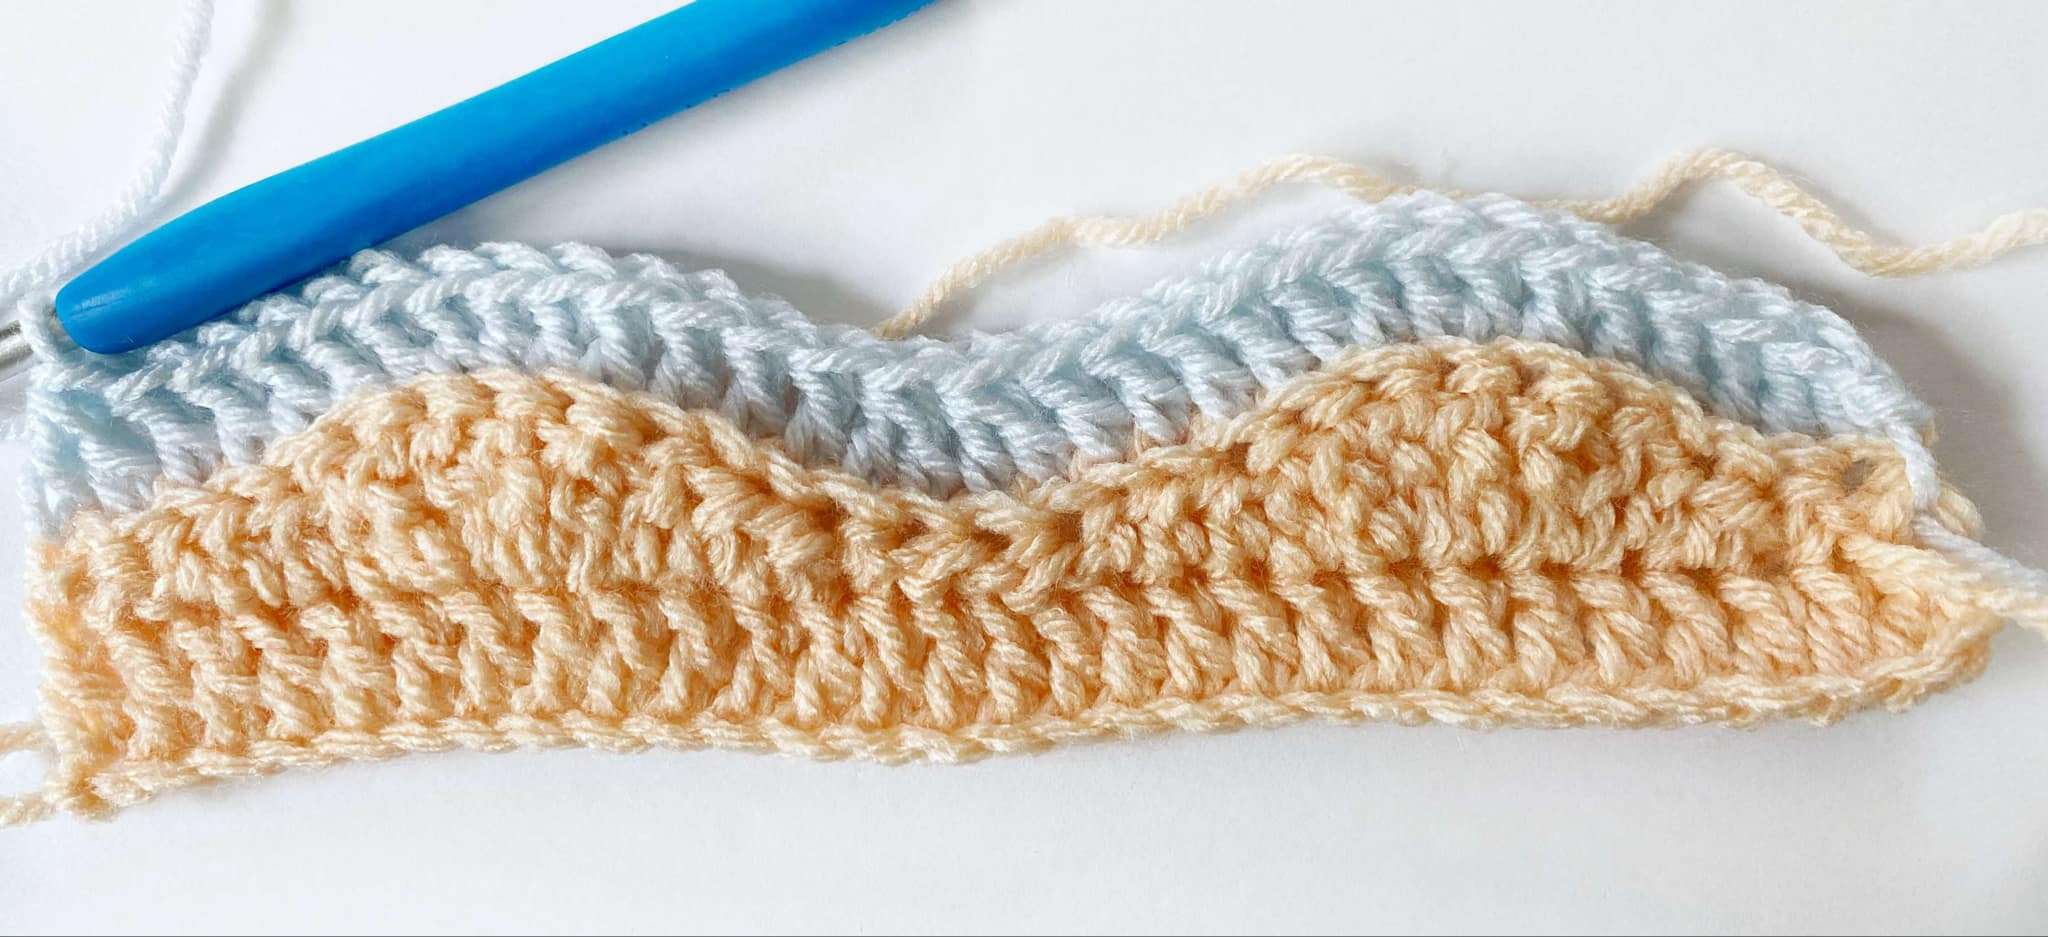
Rows 4 – 65:
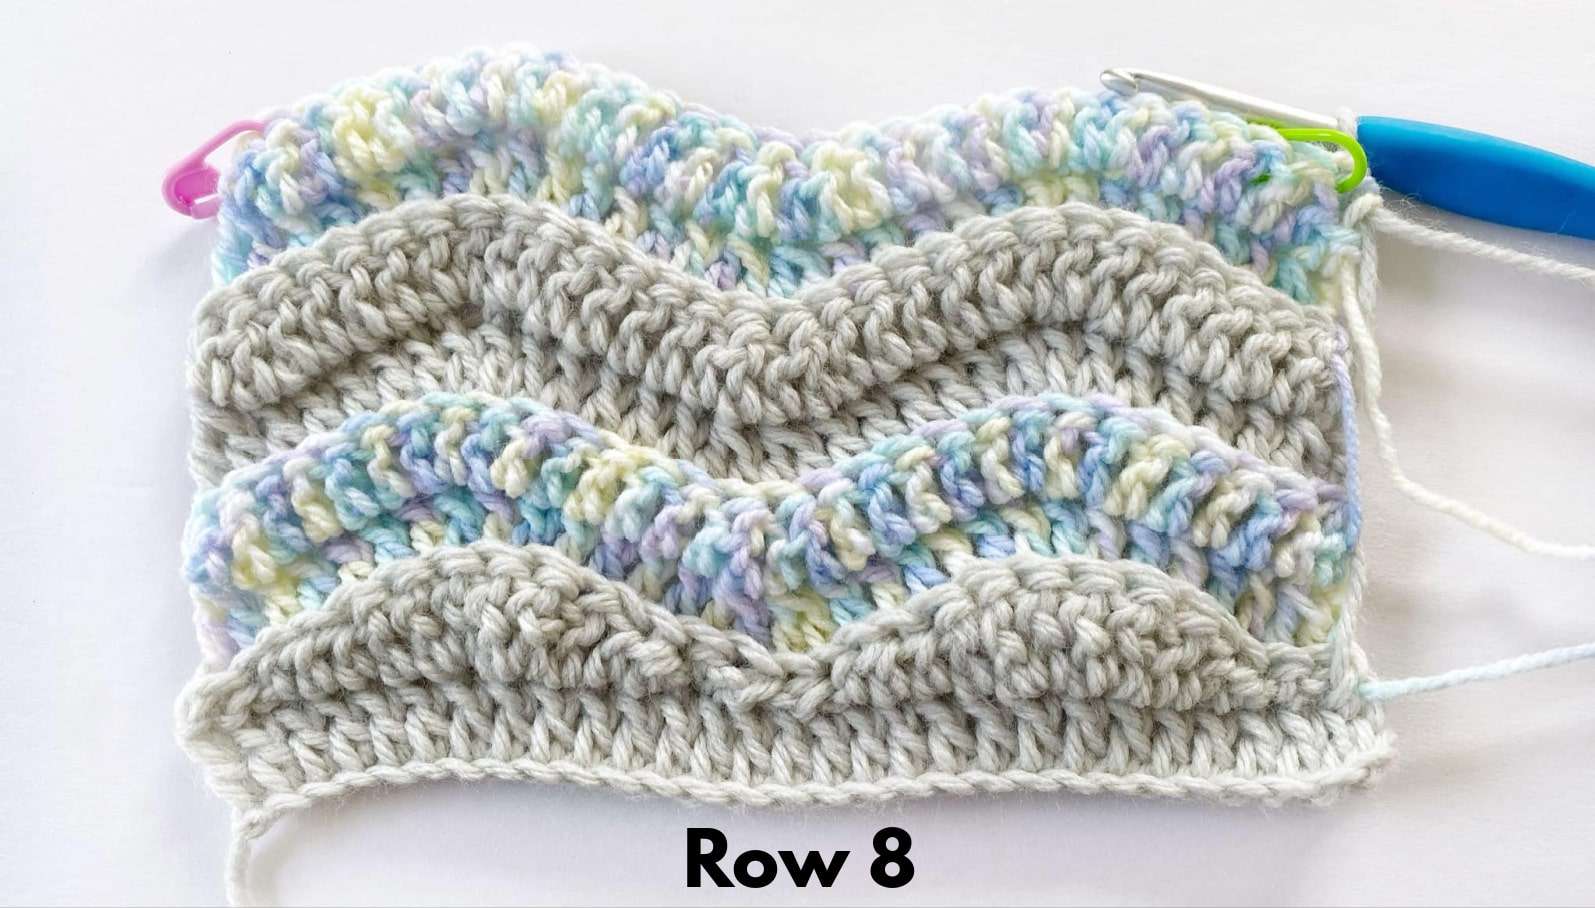
Repeat Row 3, while changing colour at the end of every second row (Row 4, 6, 8, 10…). Alternate between Colours A and B, and leave each colour attached, so you can easily pick it up at the next colour change (see tutorial for changing colour above).
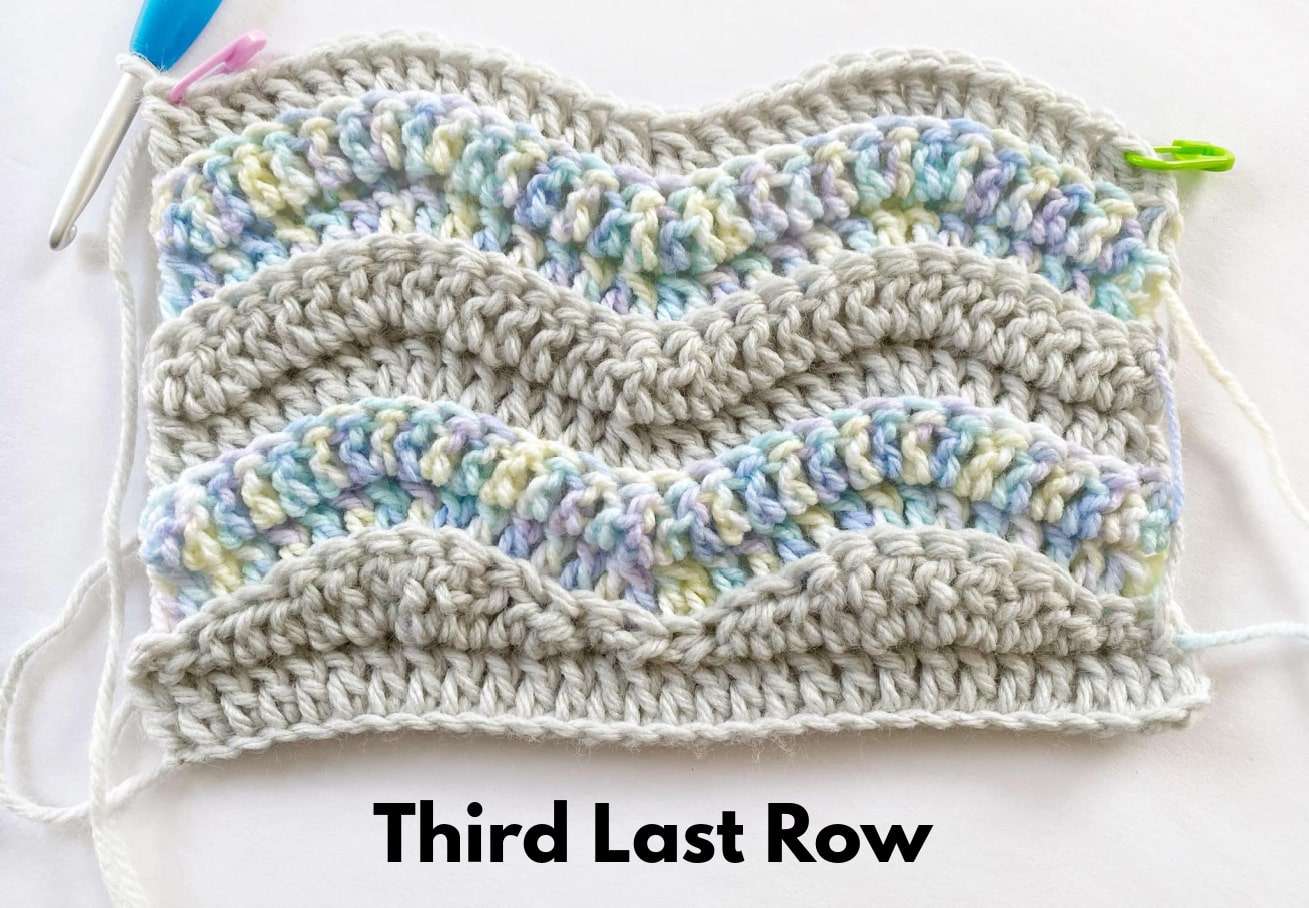
Row 65 (or “third last row”) should be worked in Colour A.
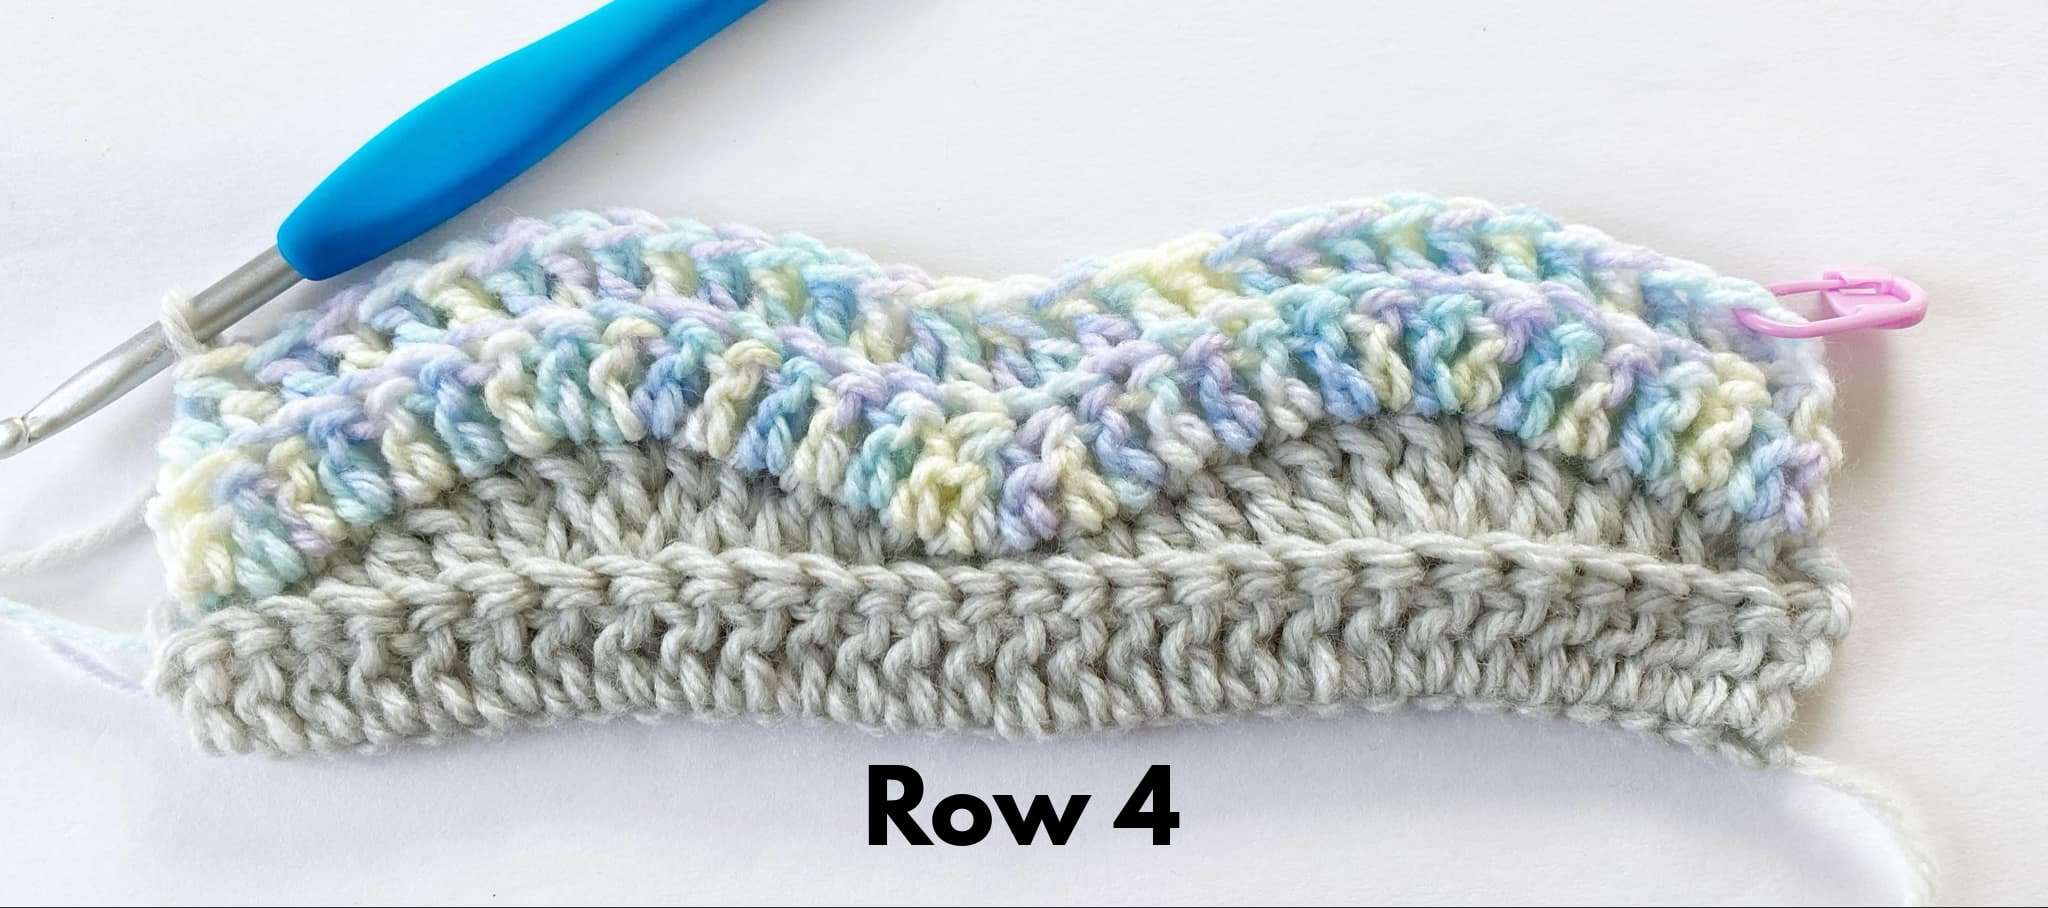
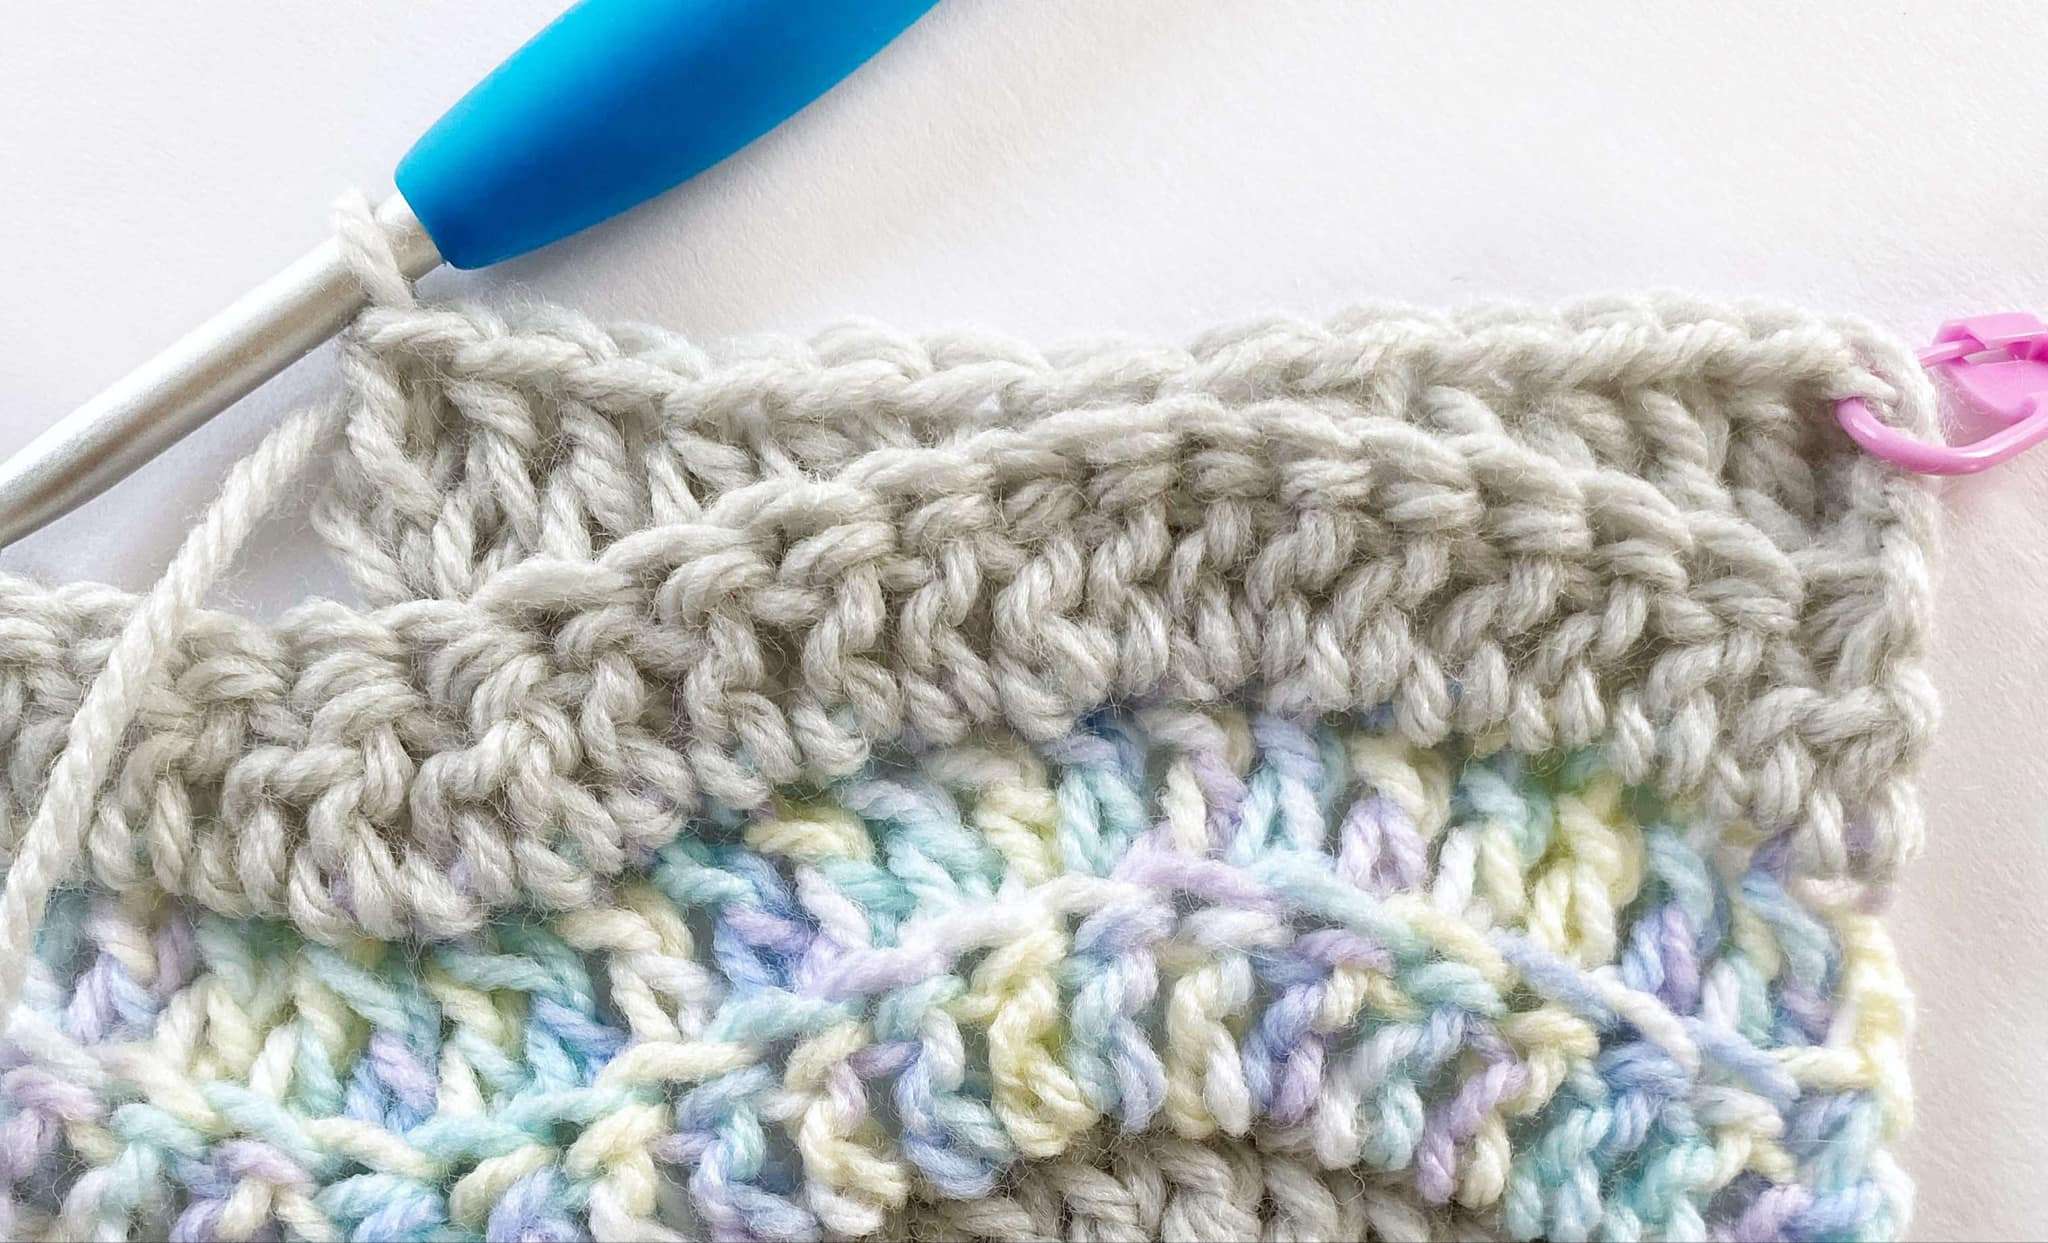
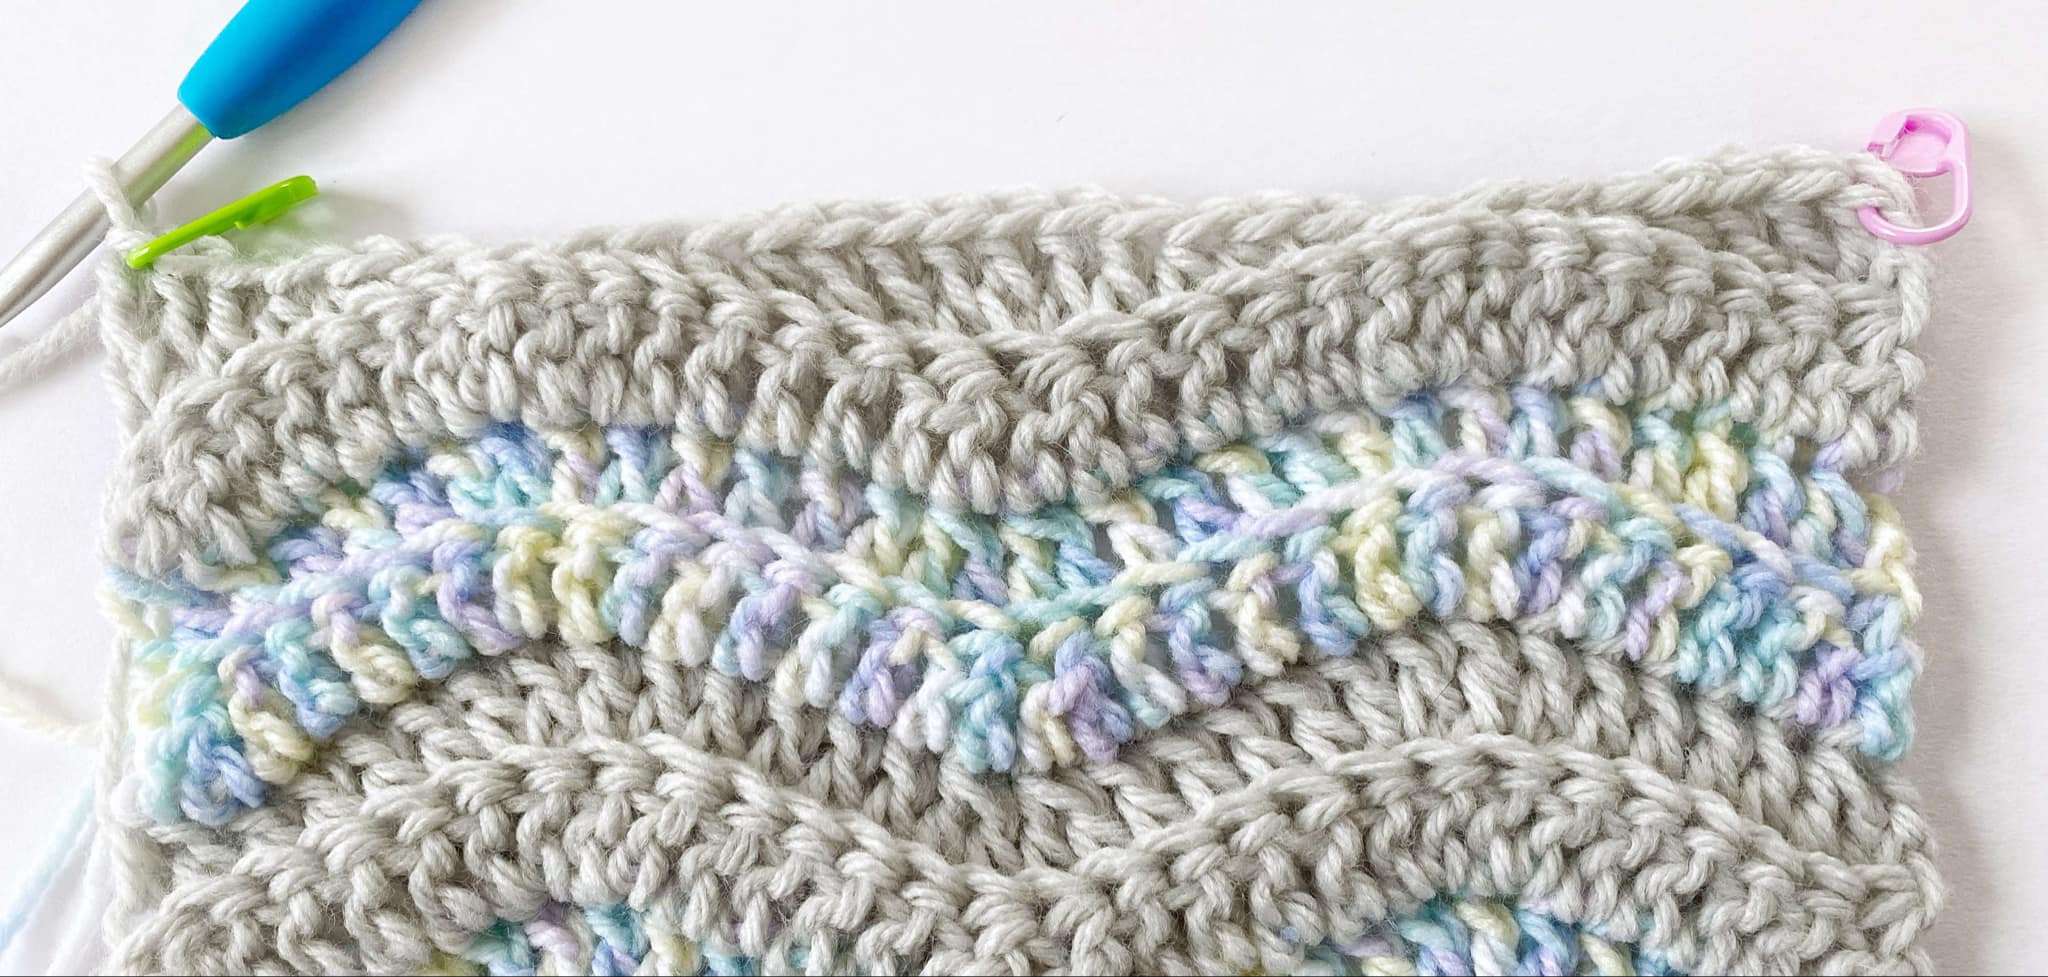
Second Last Row (Row 66):
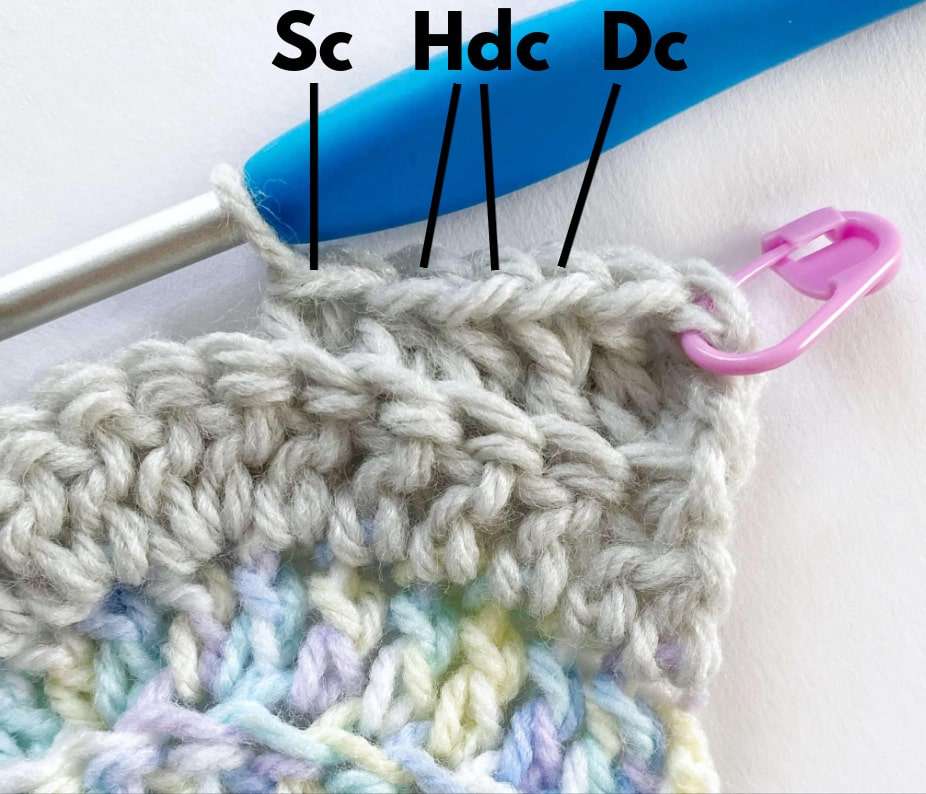
With Colour A, ch 2, in BLO {2 Mdc in st, dc in next st, hdc in next 2 sts, sc in next st, sl2tog 2 times, sc in next st, hdc in next 2 sts, dc in next st, 2 Mdc in next st} 10 times. Turn.
- Stitch Count: 140 sts
Last Row (Row 67):
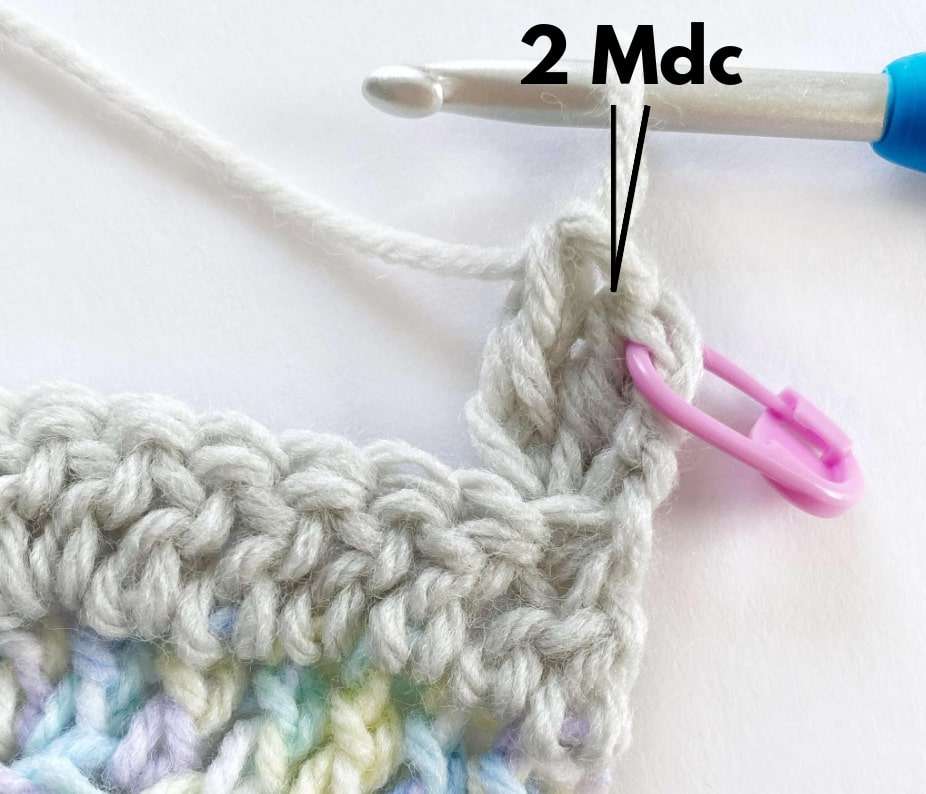
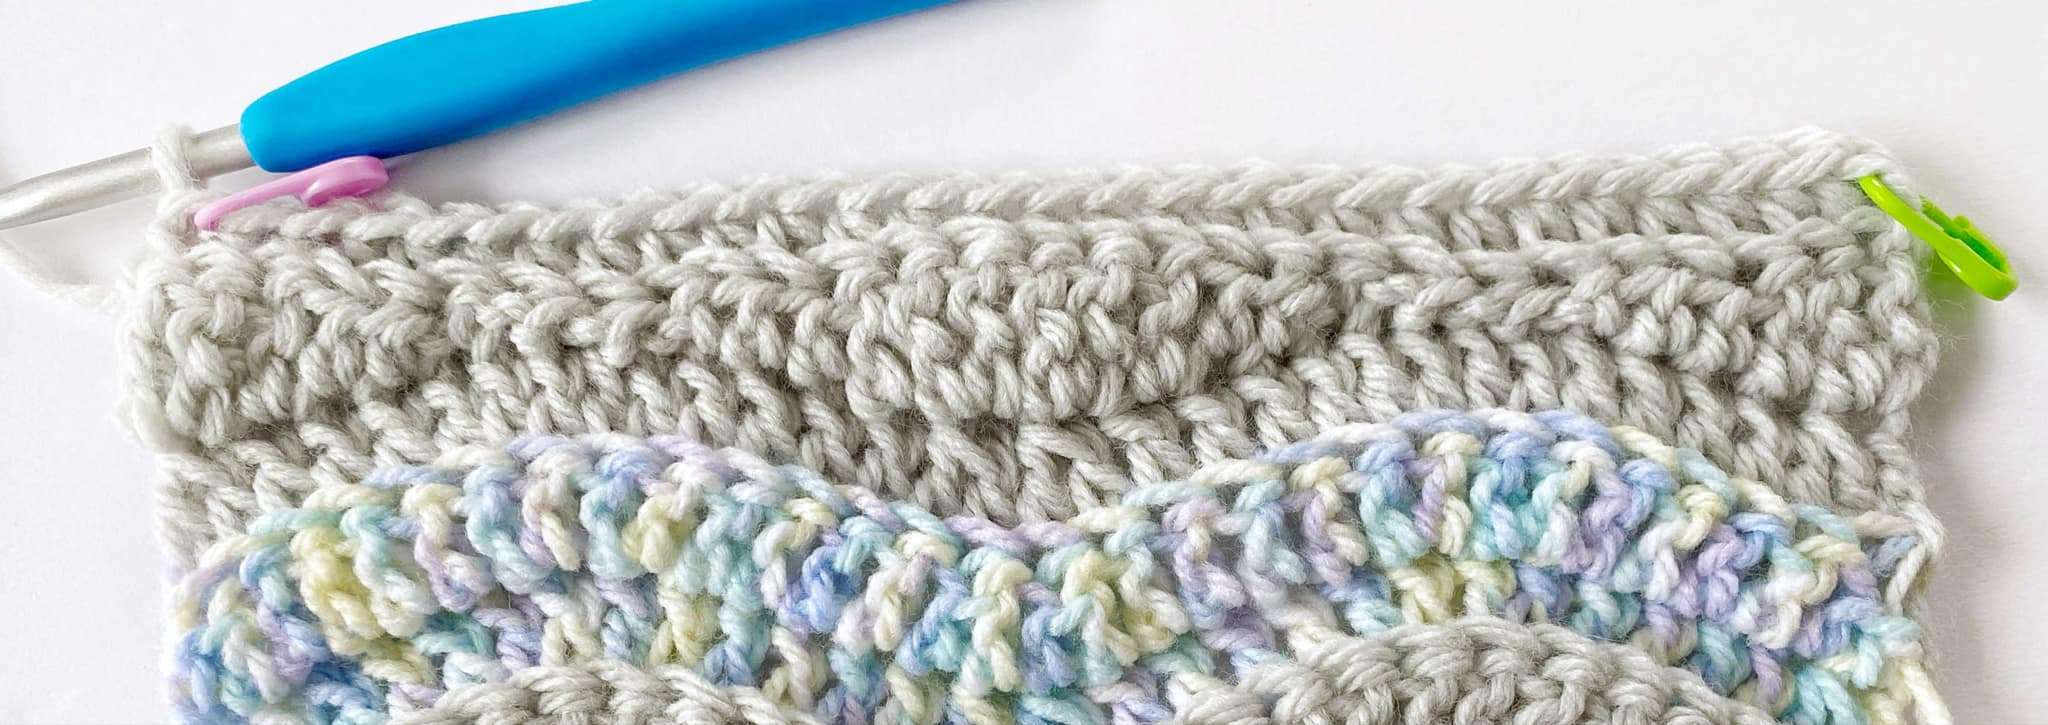
With Colour A, ch 1, hdc in BLO of each st across. Do not fasten off. Proceed to the border with Colour A still attached to the blanket.
- Stitch Count: 140 hdc
Border:
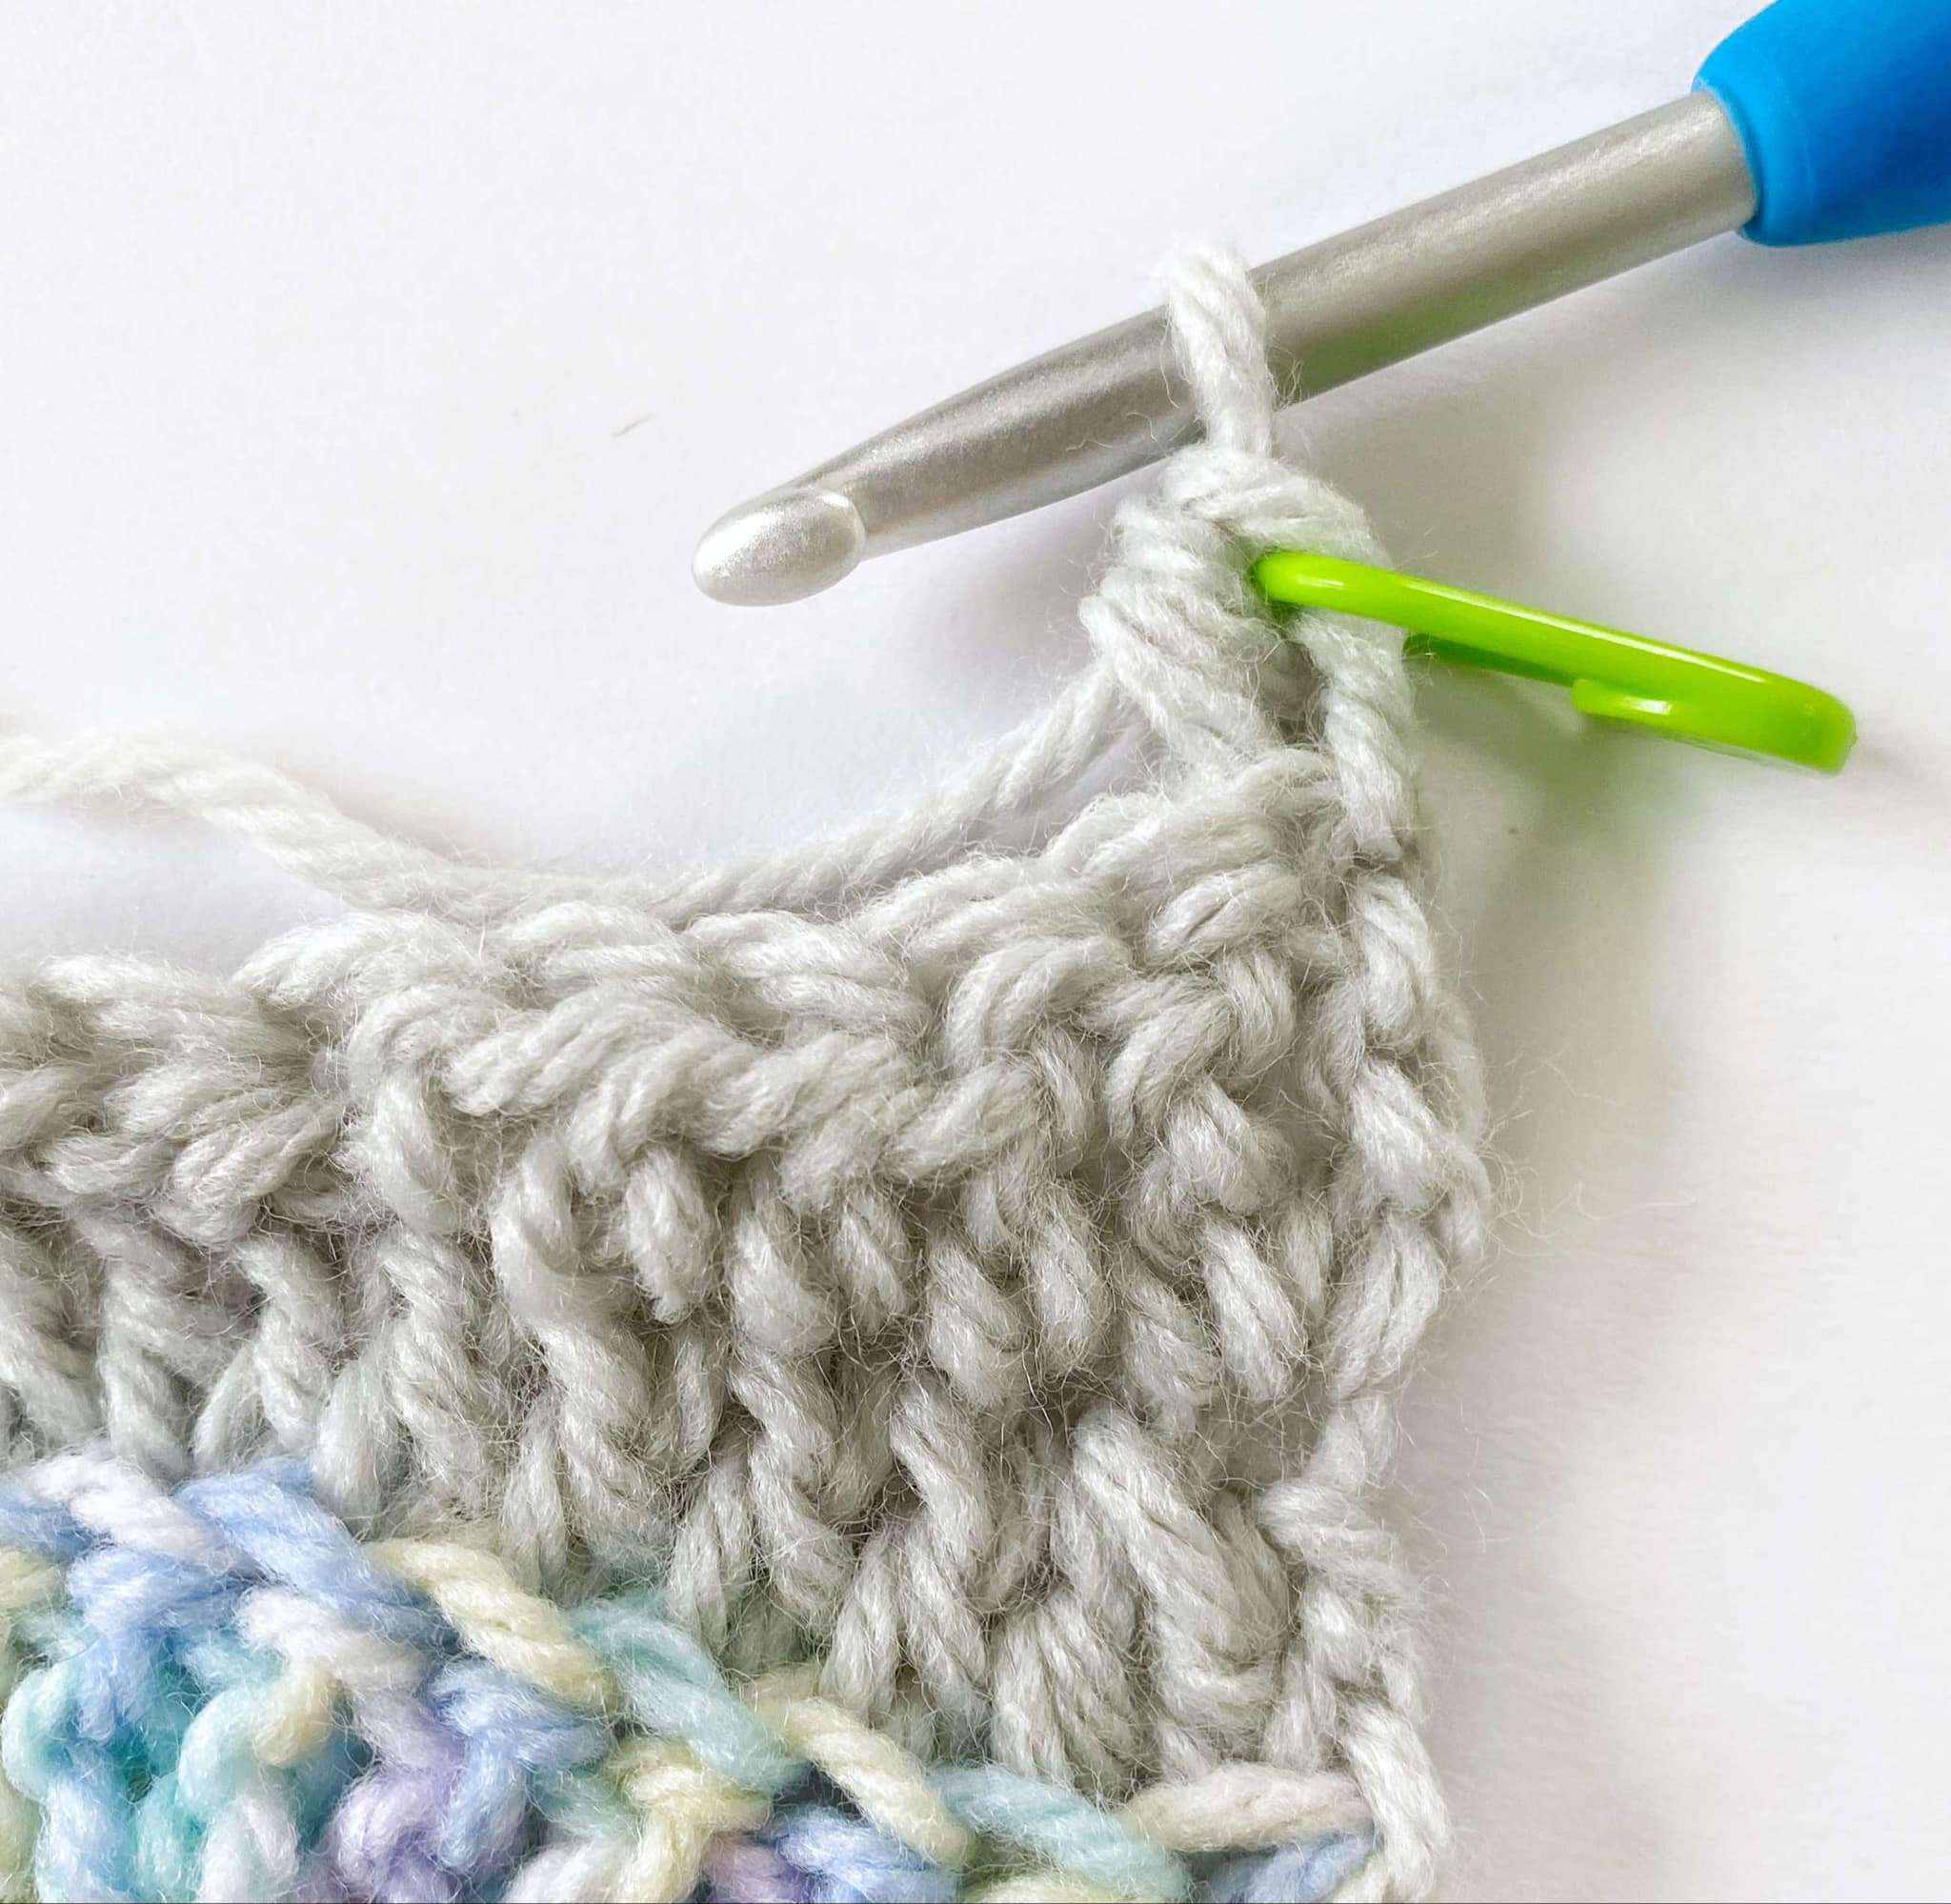
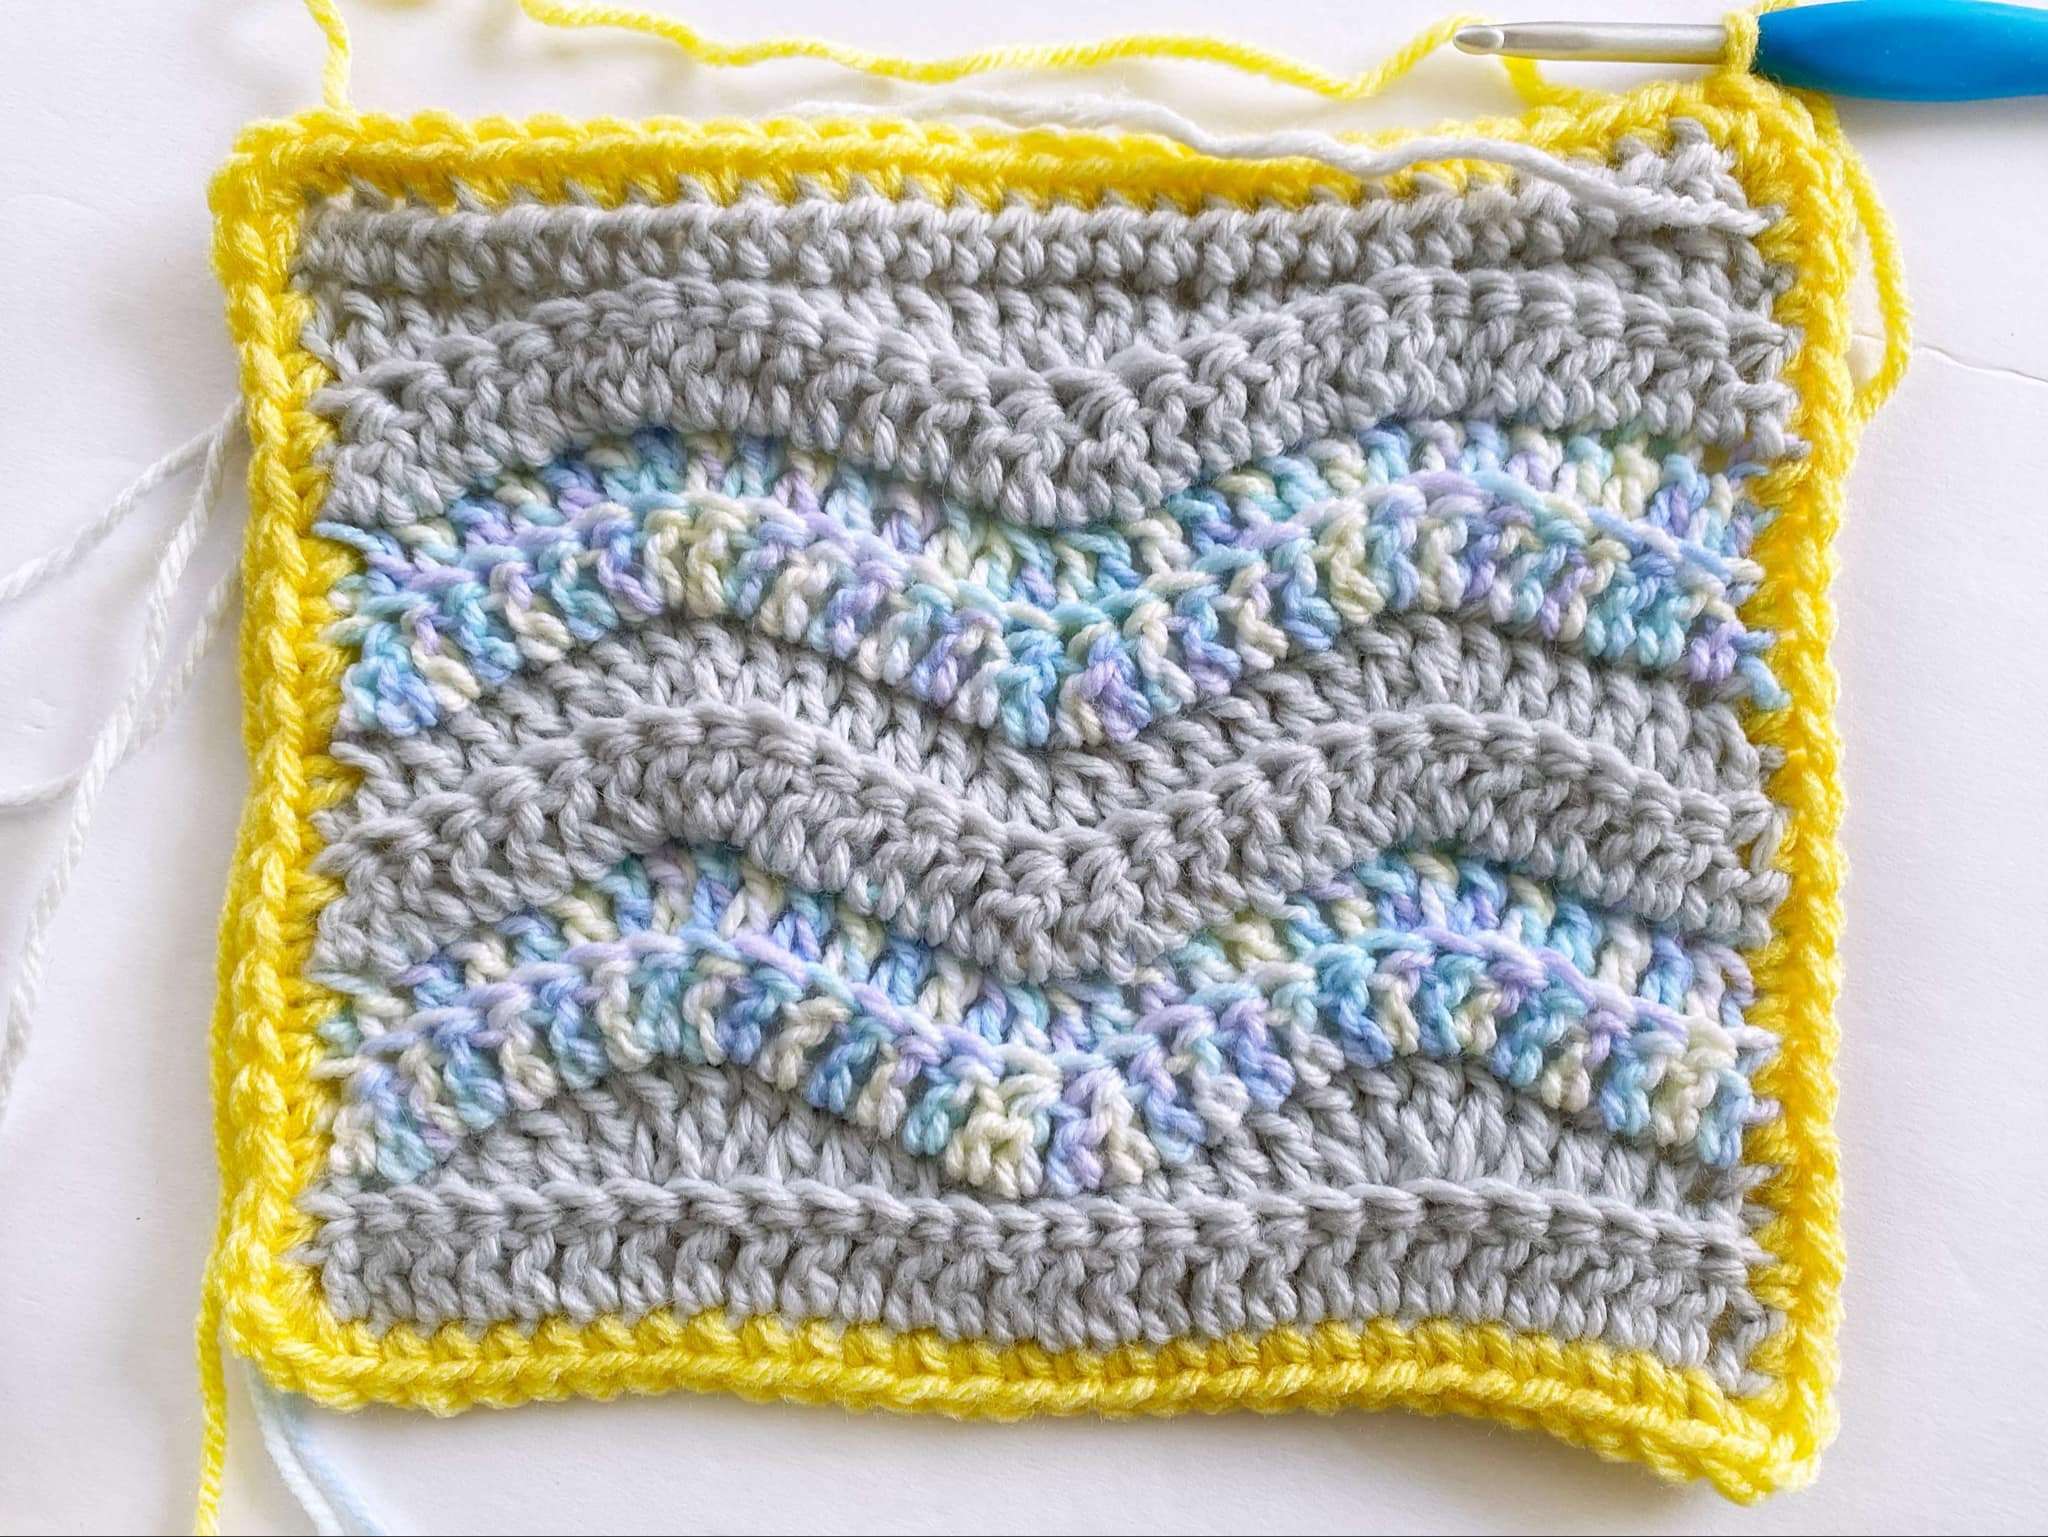
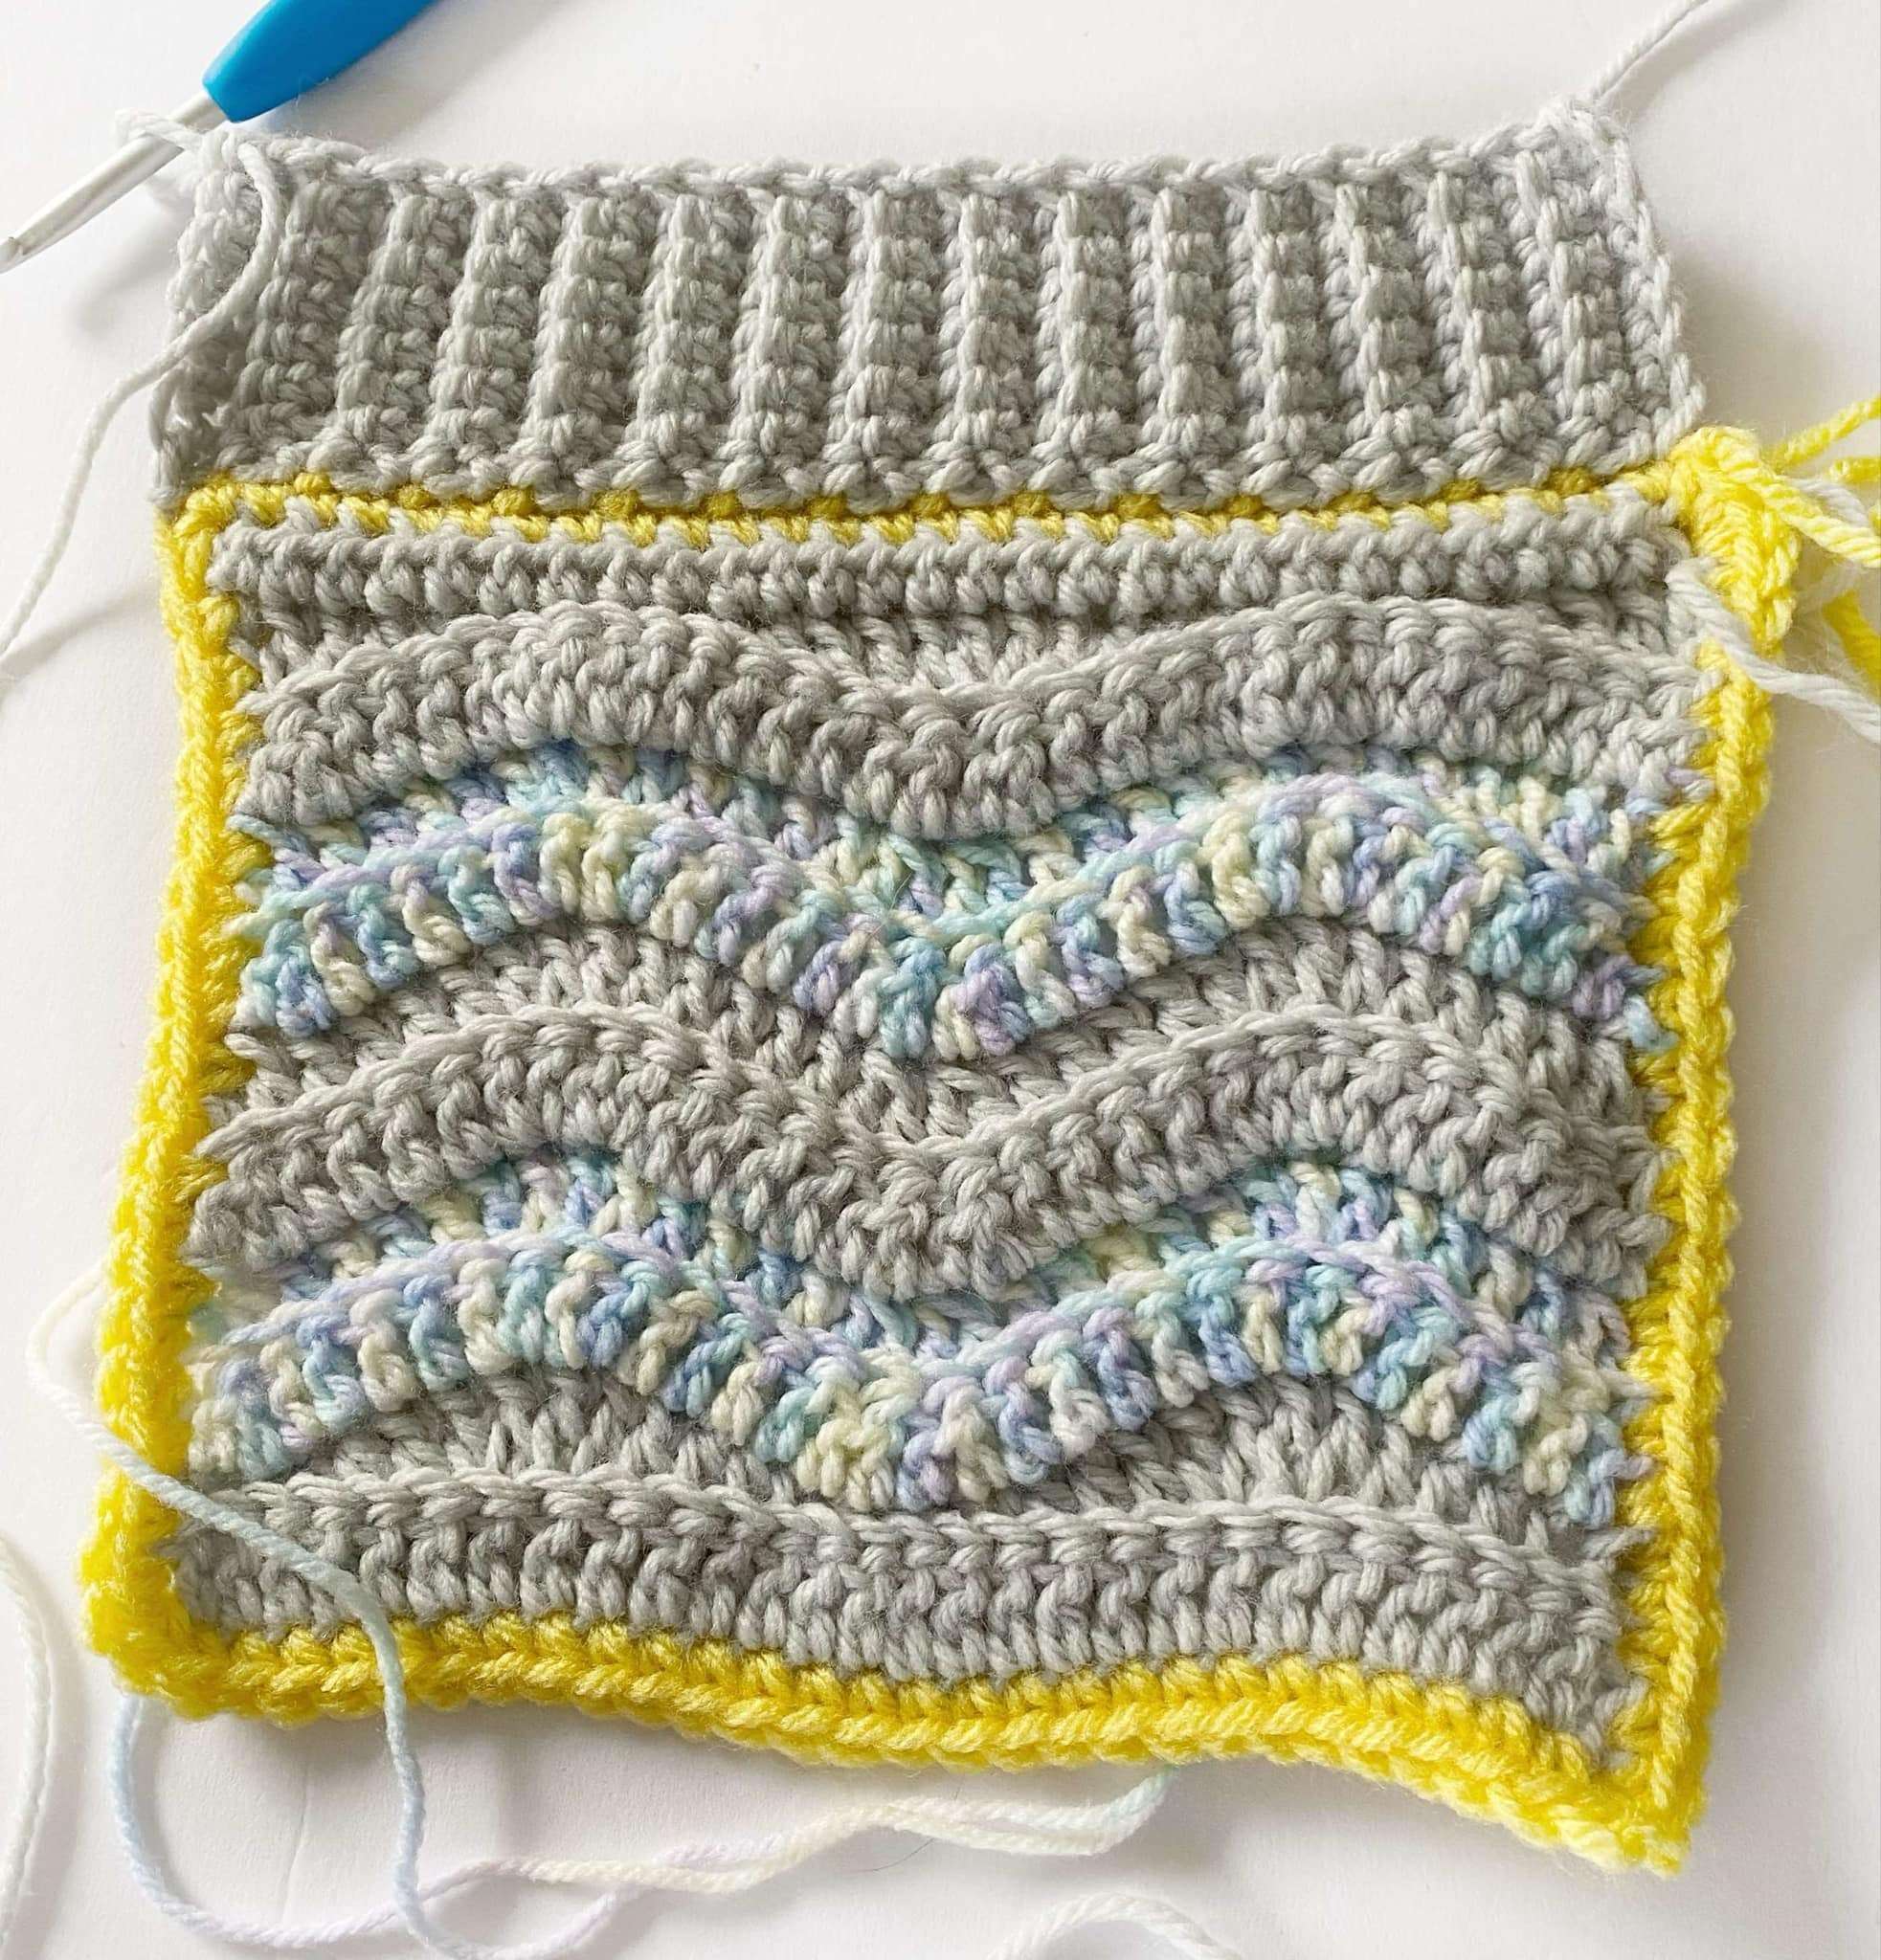
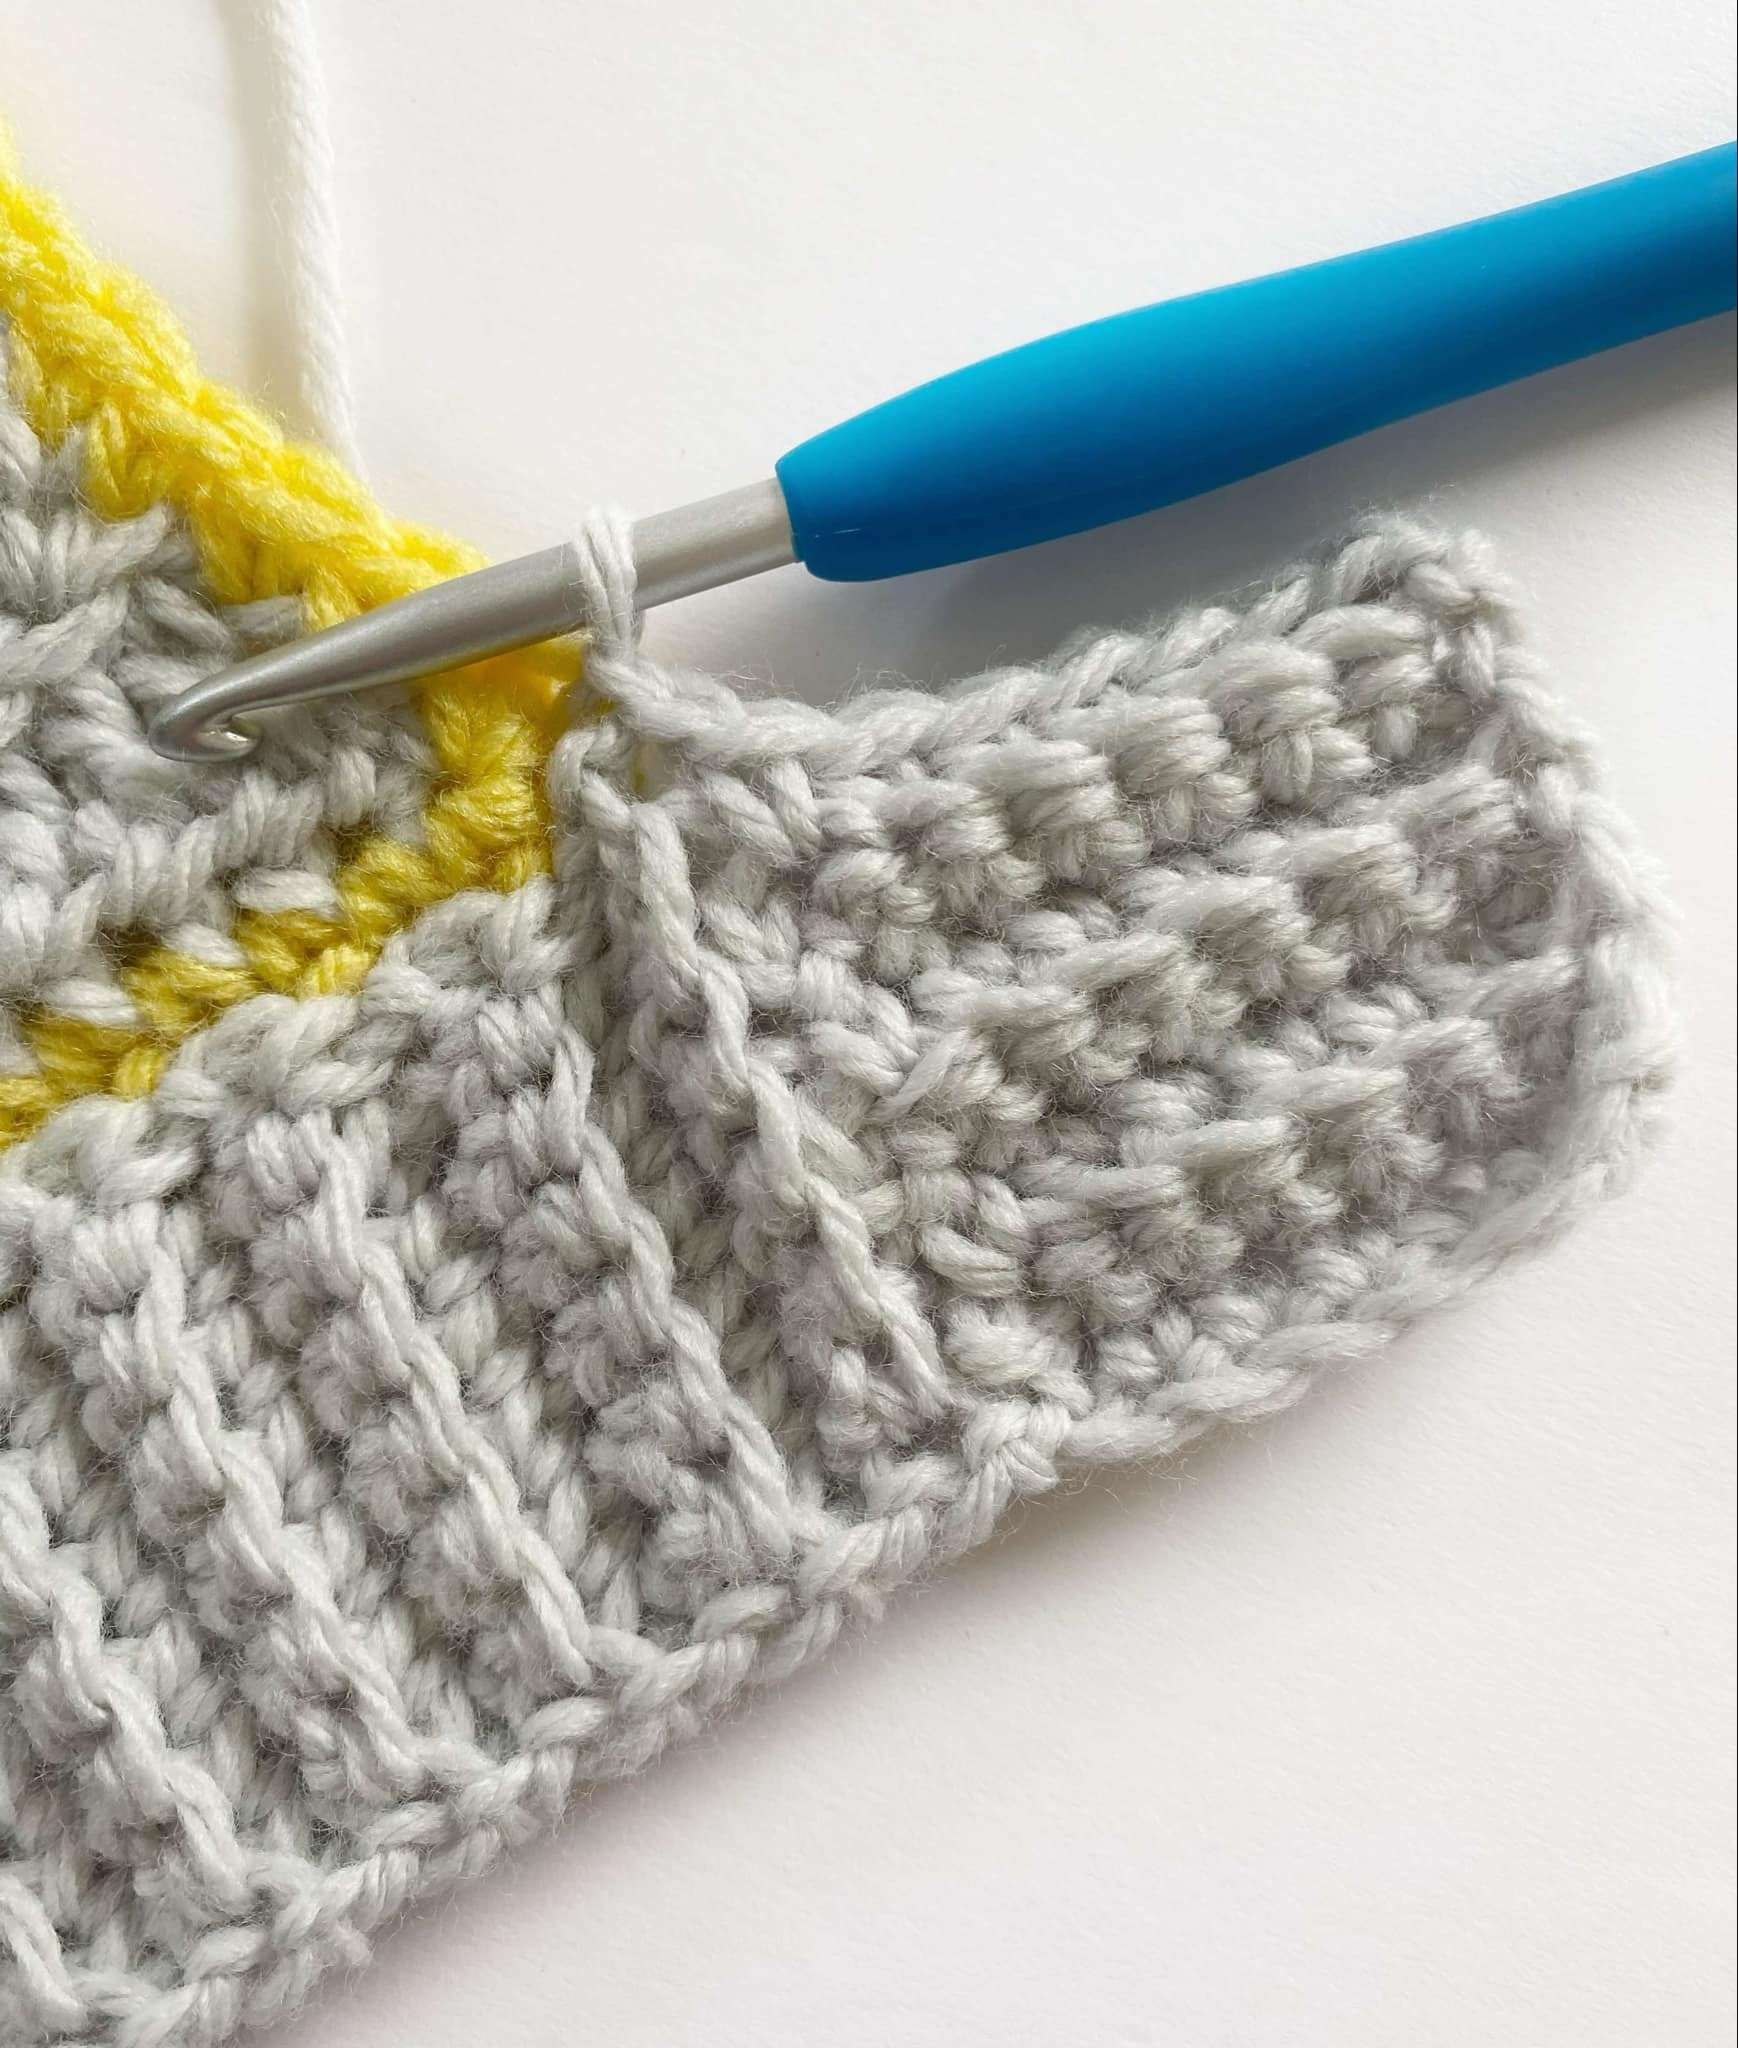
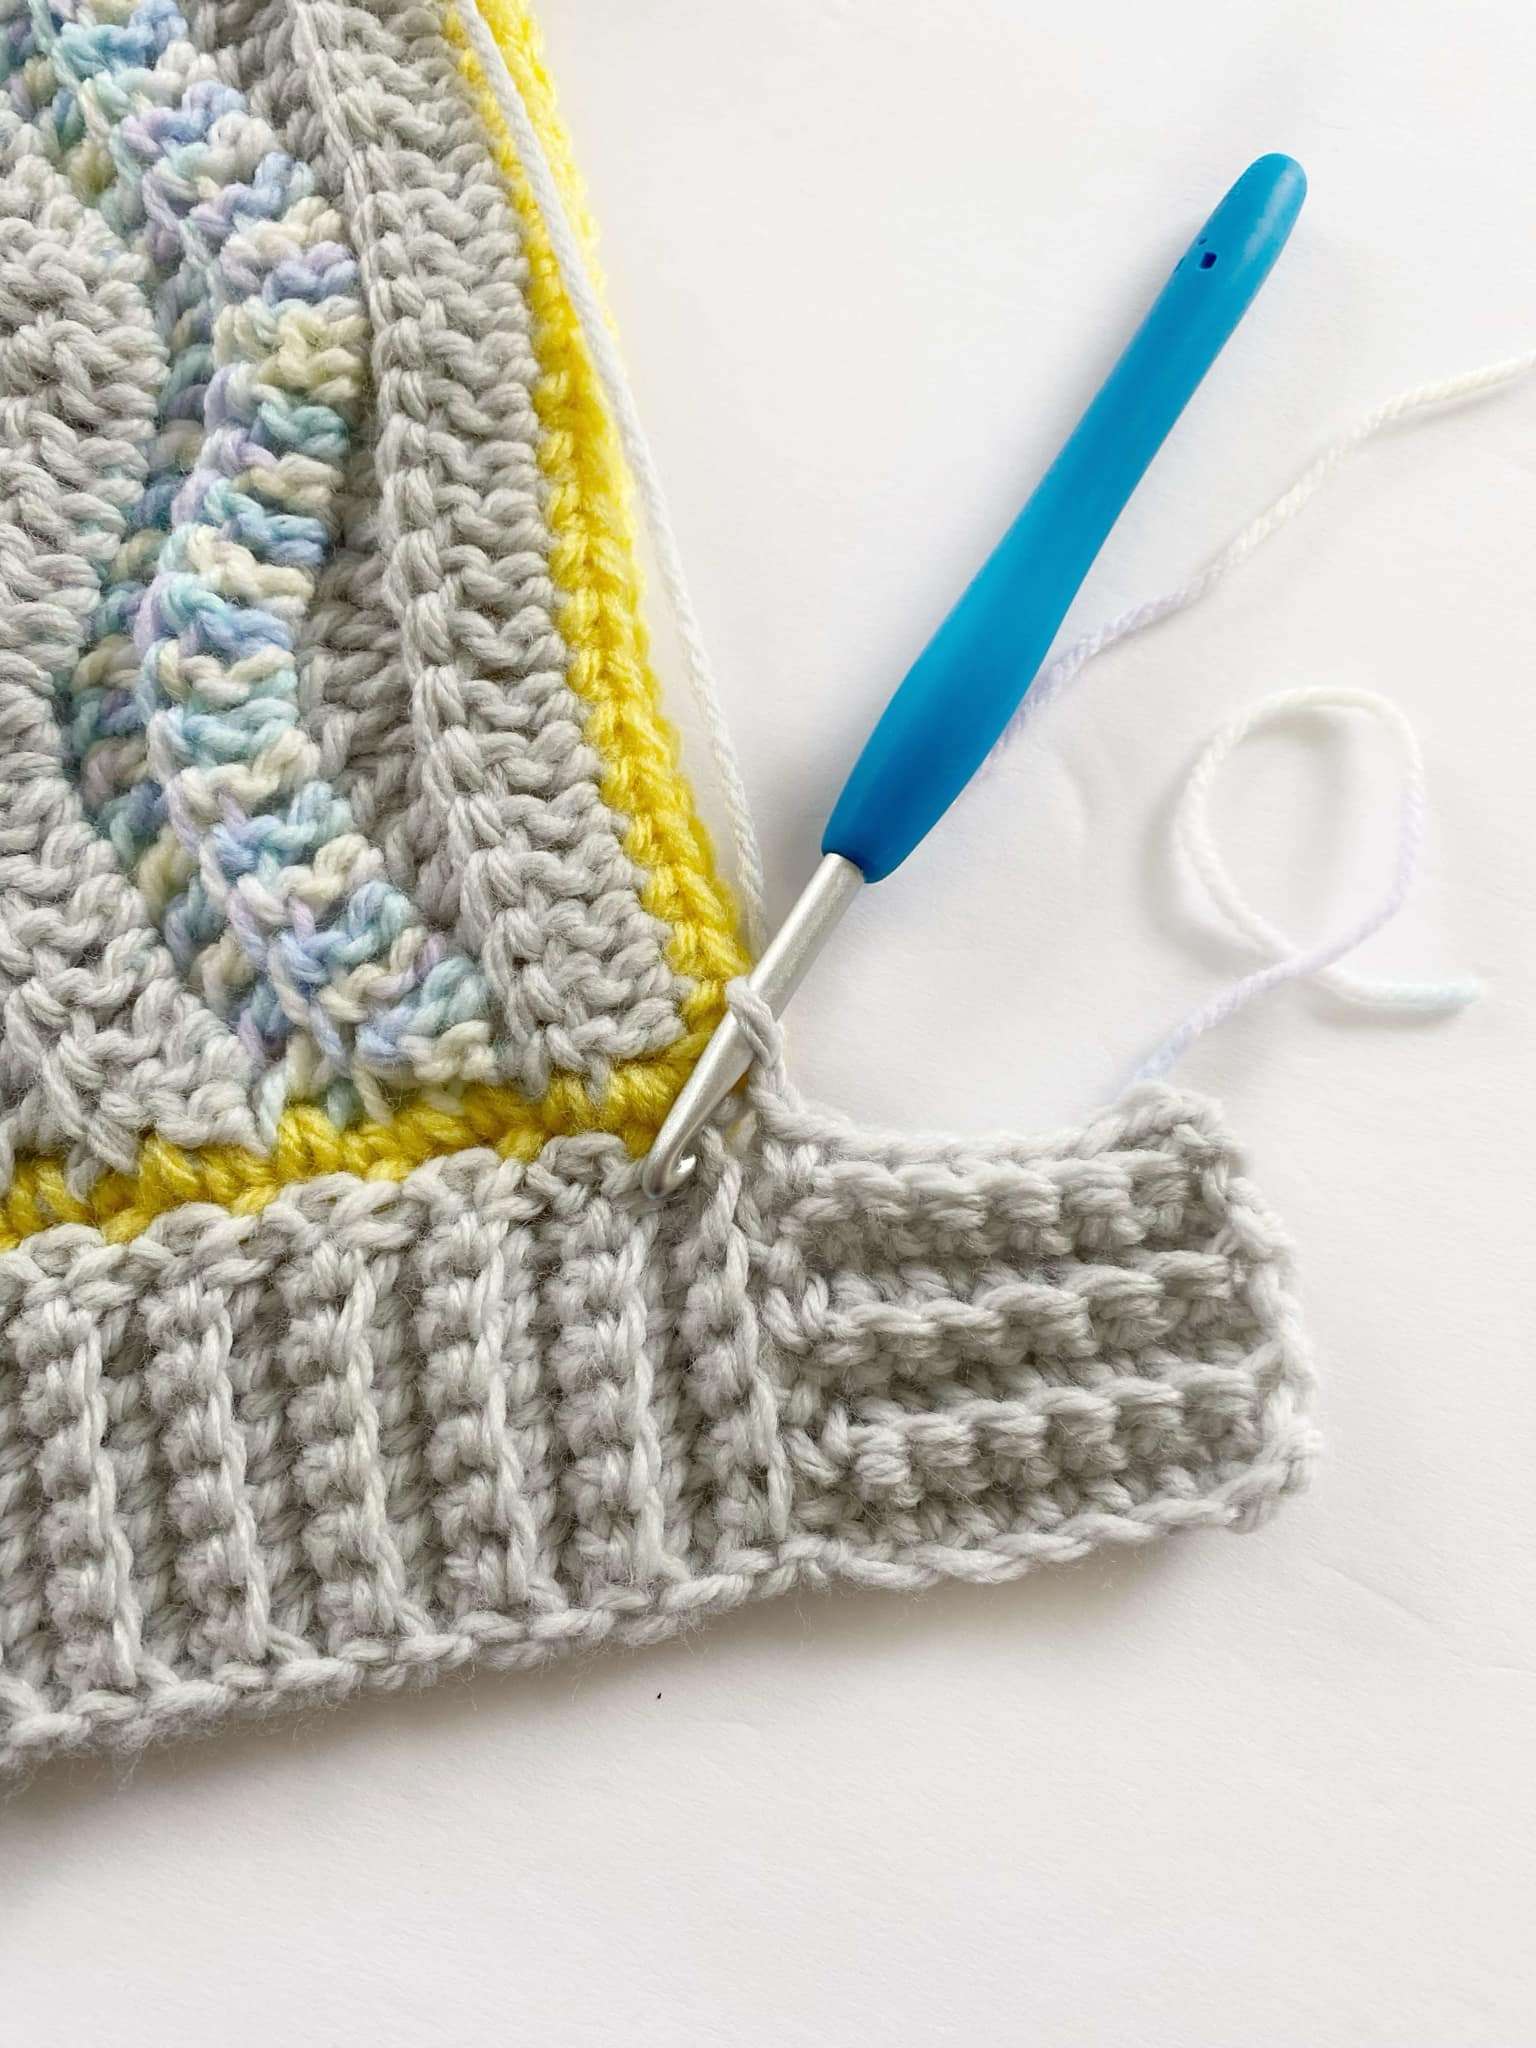
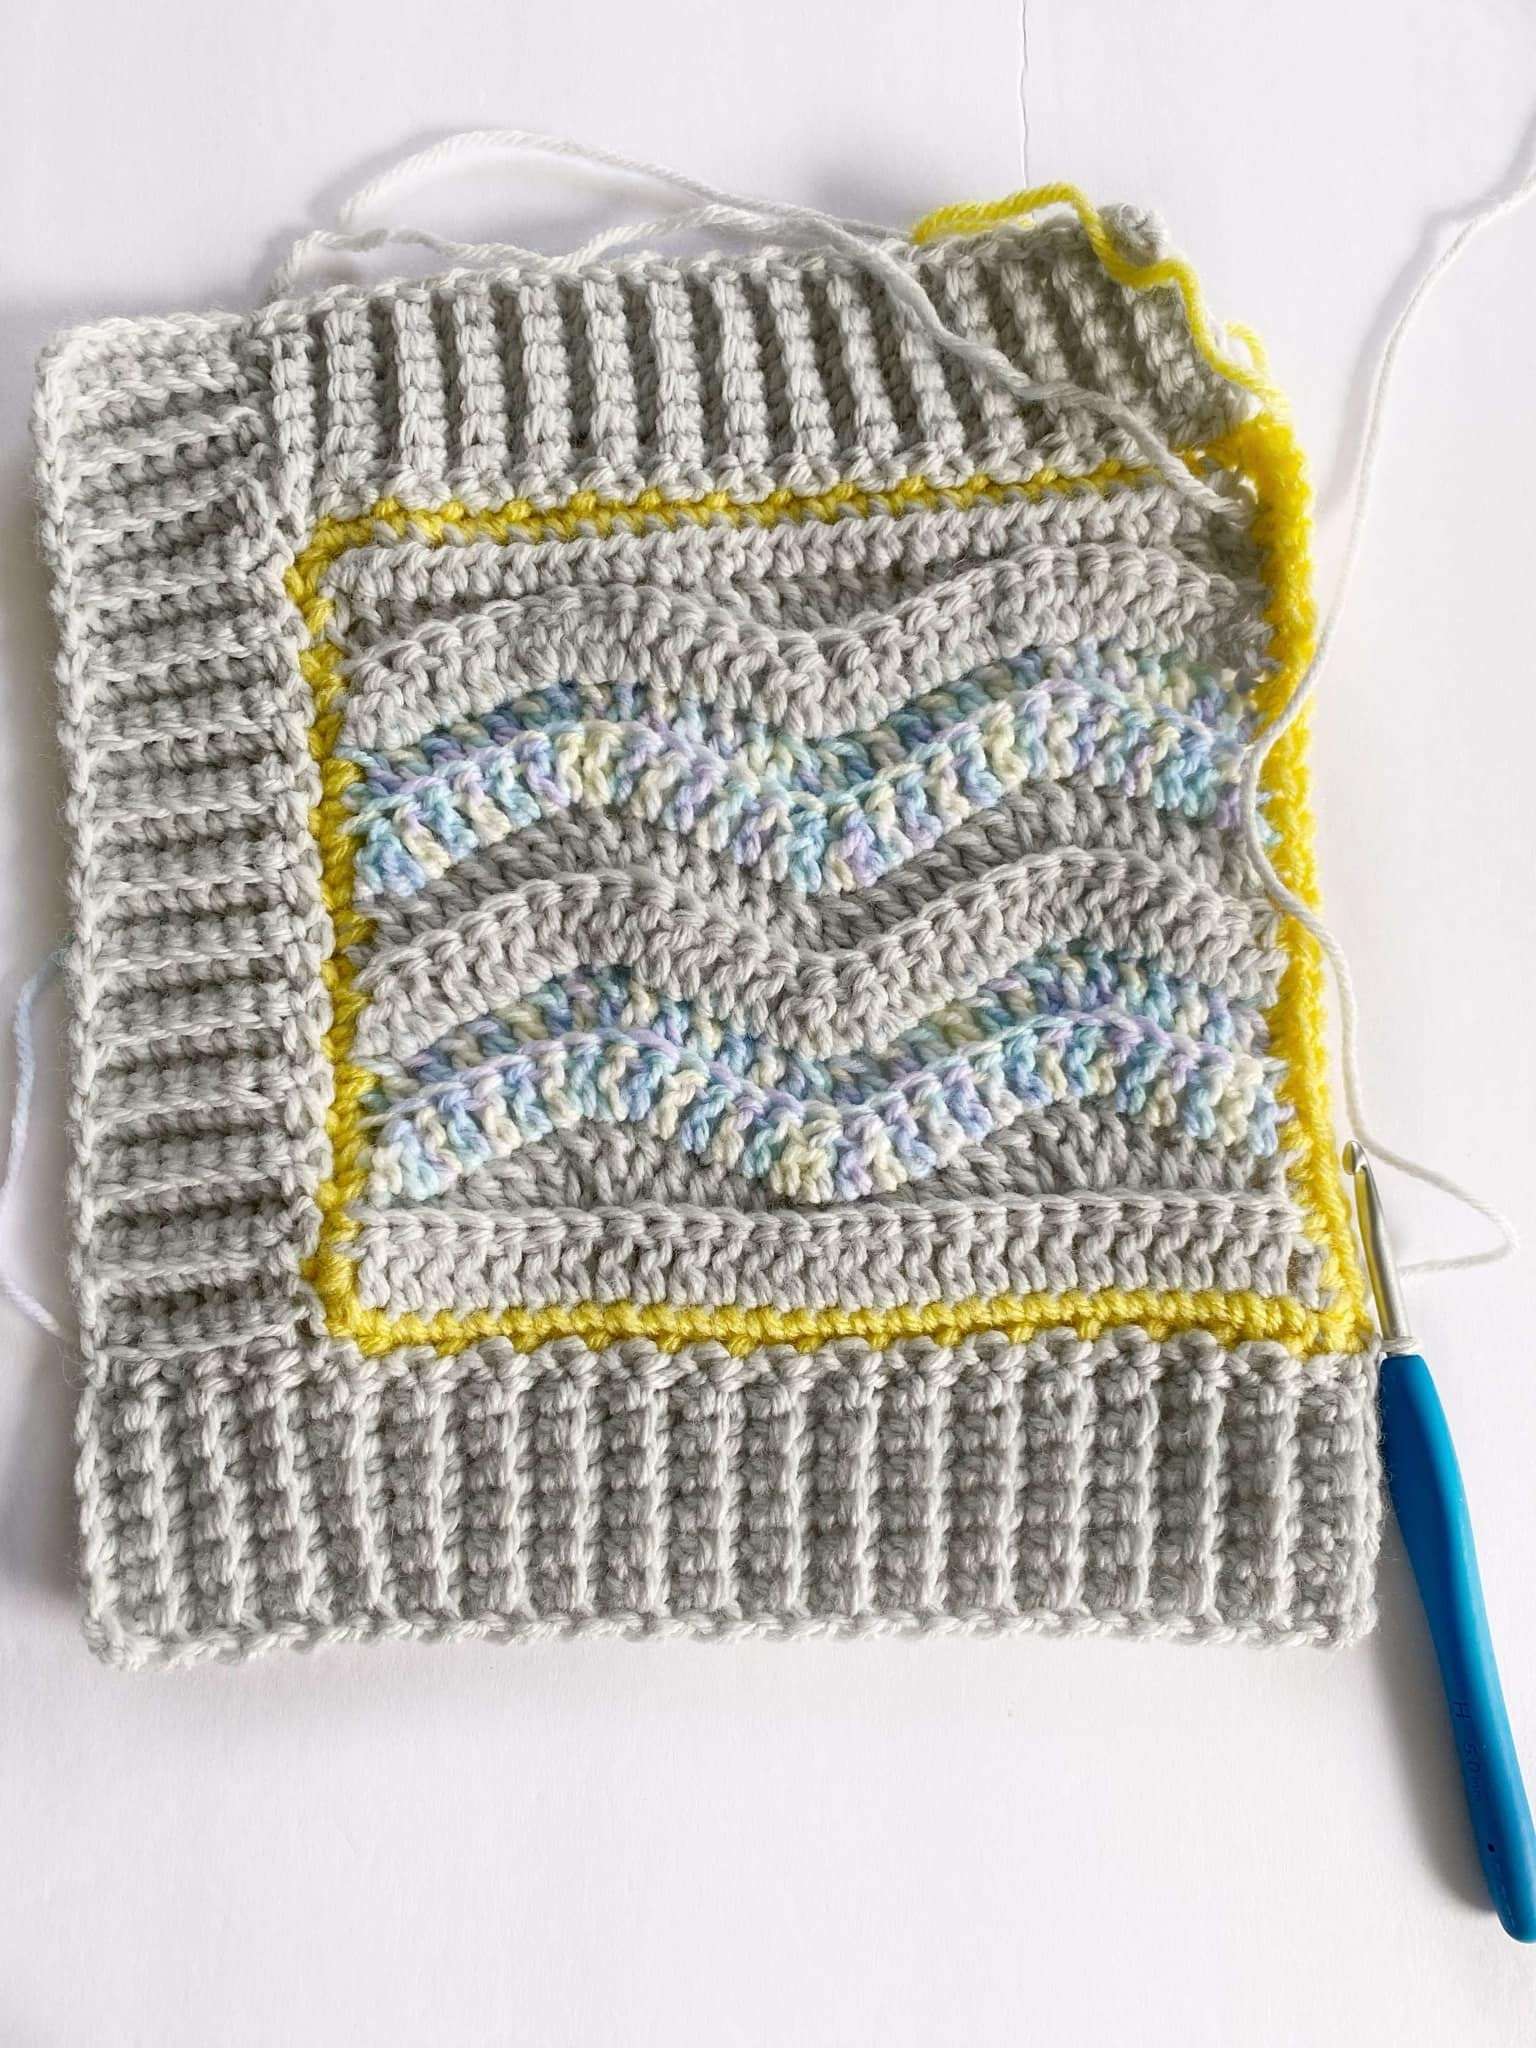
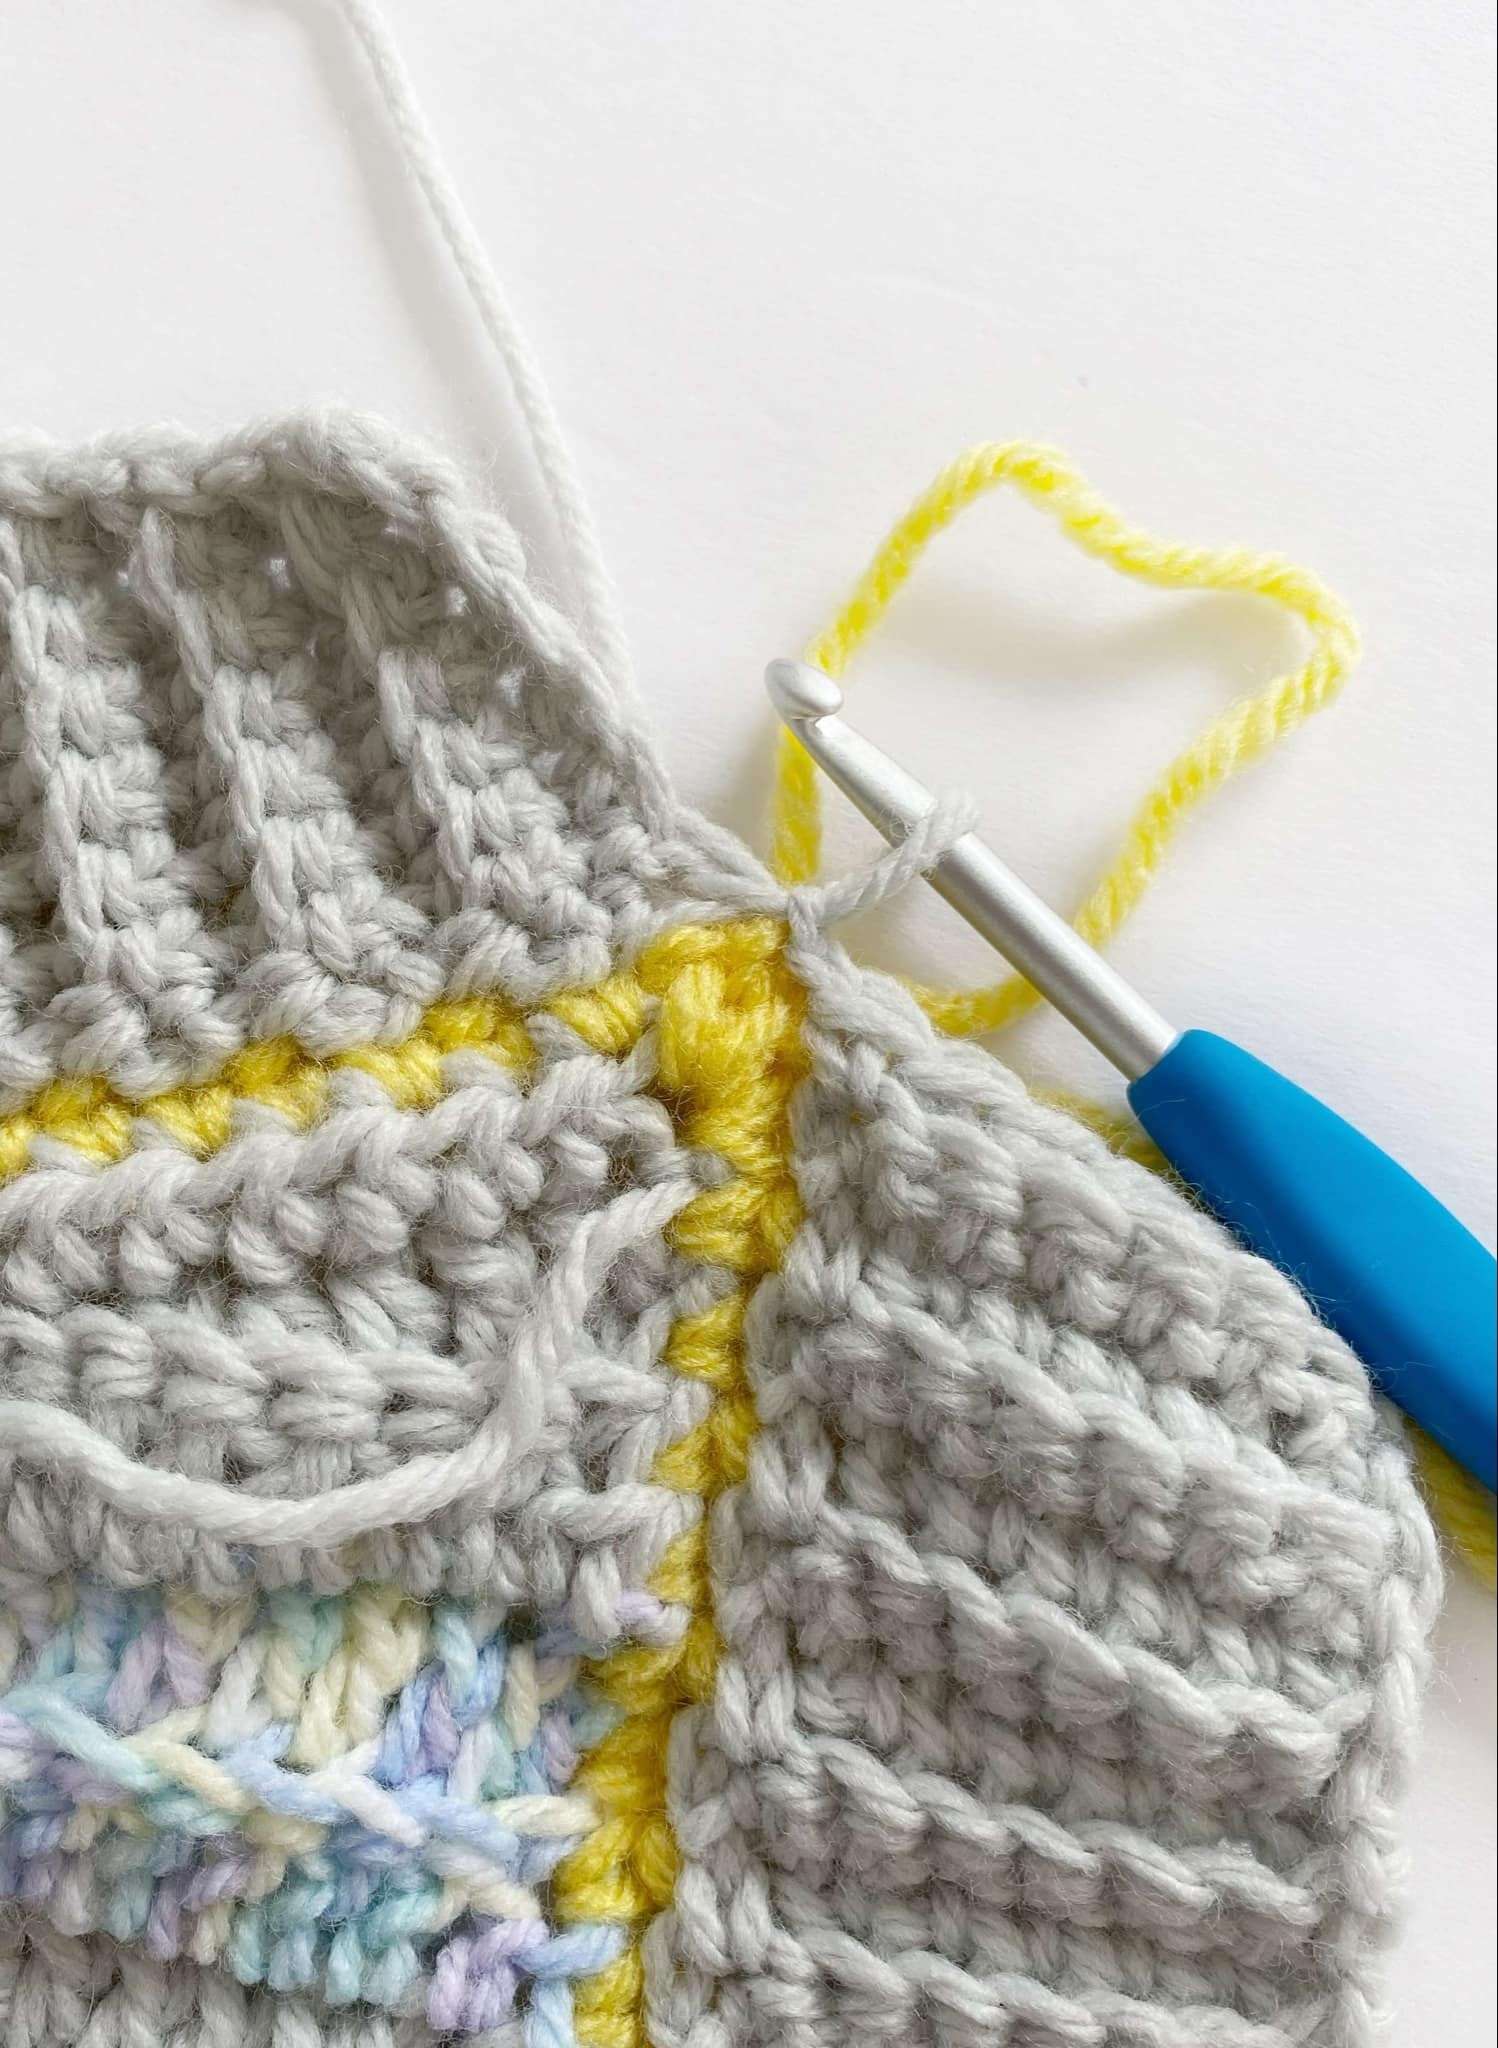
- The ribbed border is crocheted in back and forth rows, in the following order: top, left side, bottom, right side. Each row of the ribbing is joined to the body of the blanket with a sl st.
- Turn your work, so the RS of the blanket is facing you.
Rnd 1:
- Start in the top-right corner of the blanket using Colour A.
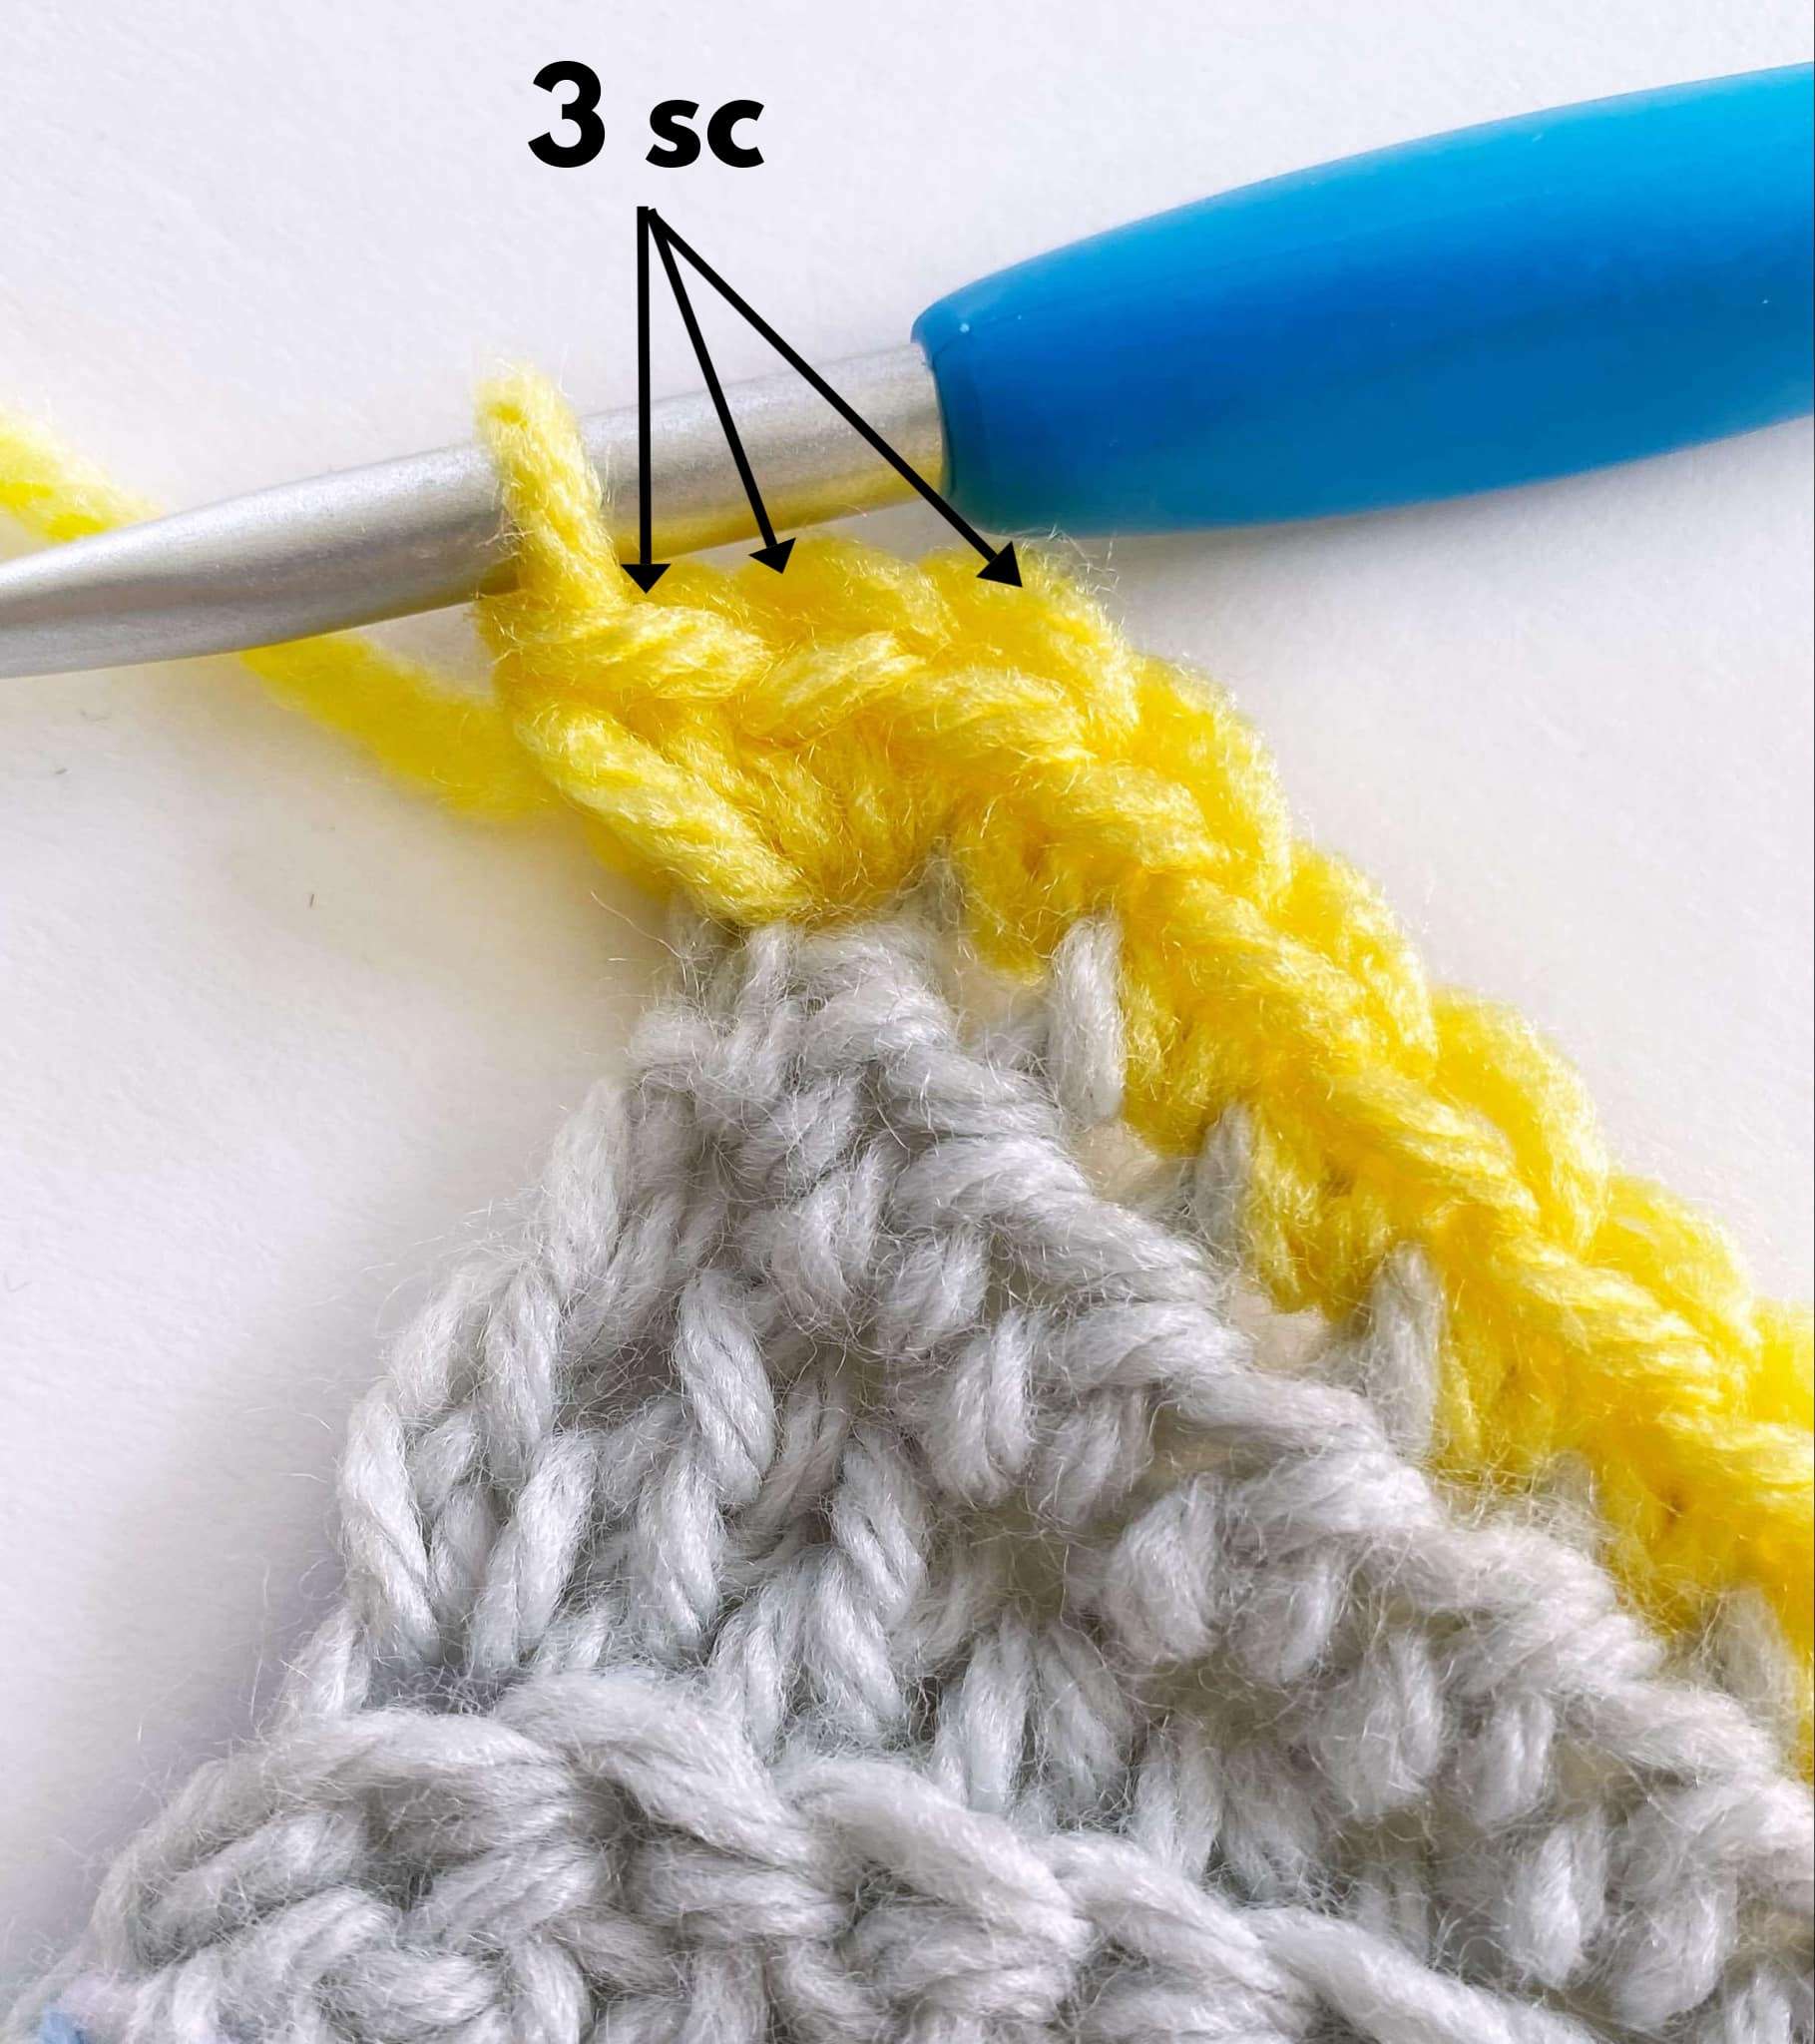
- Ch 1, sc in each st across the top of the blanket. 3 sc into last st (corner).
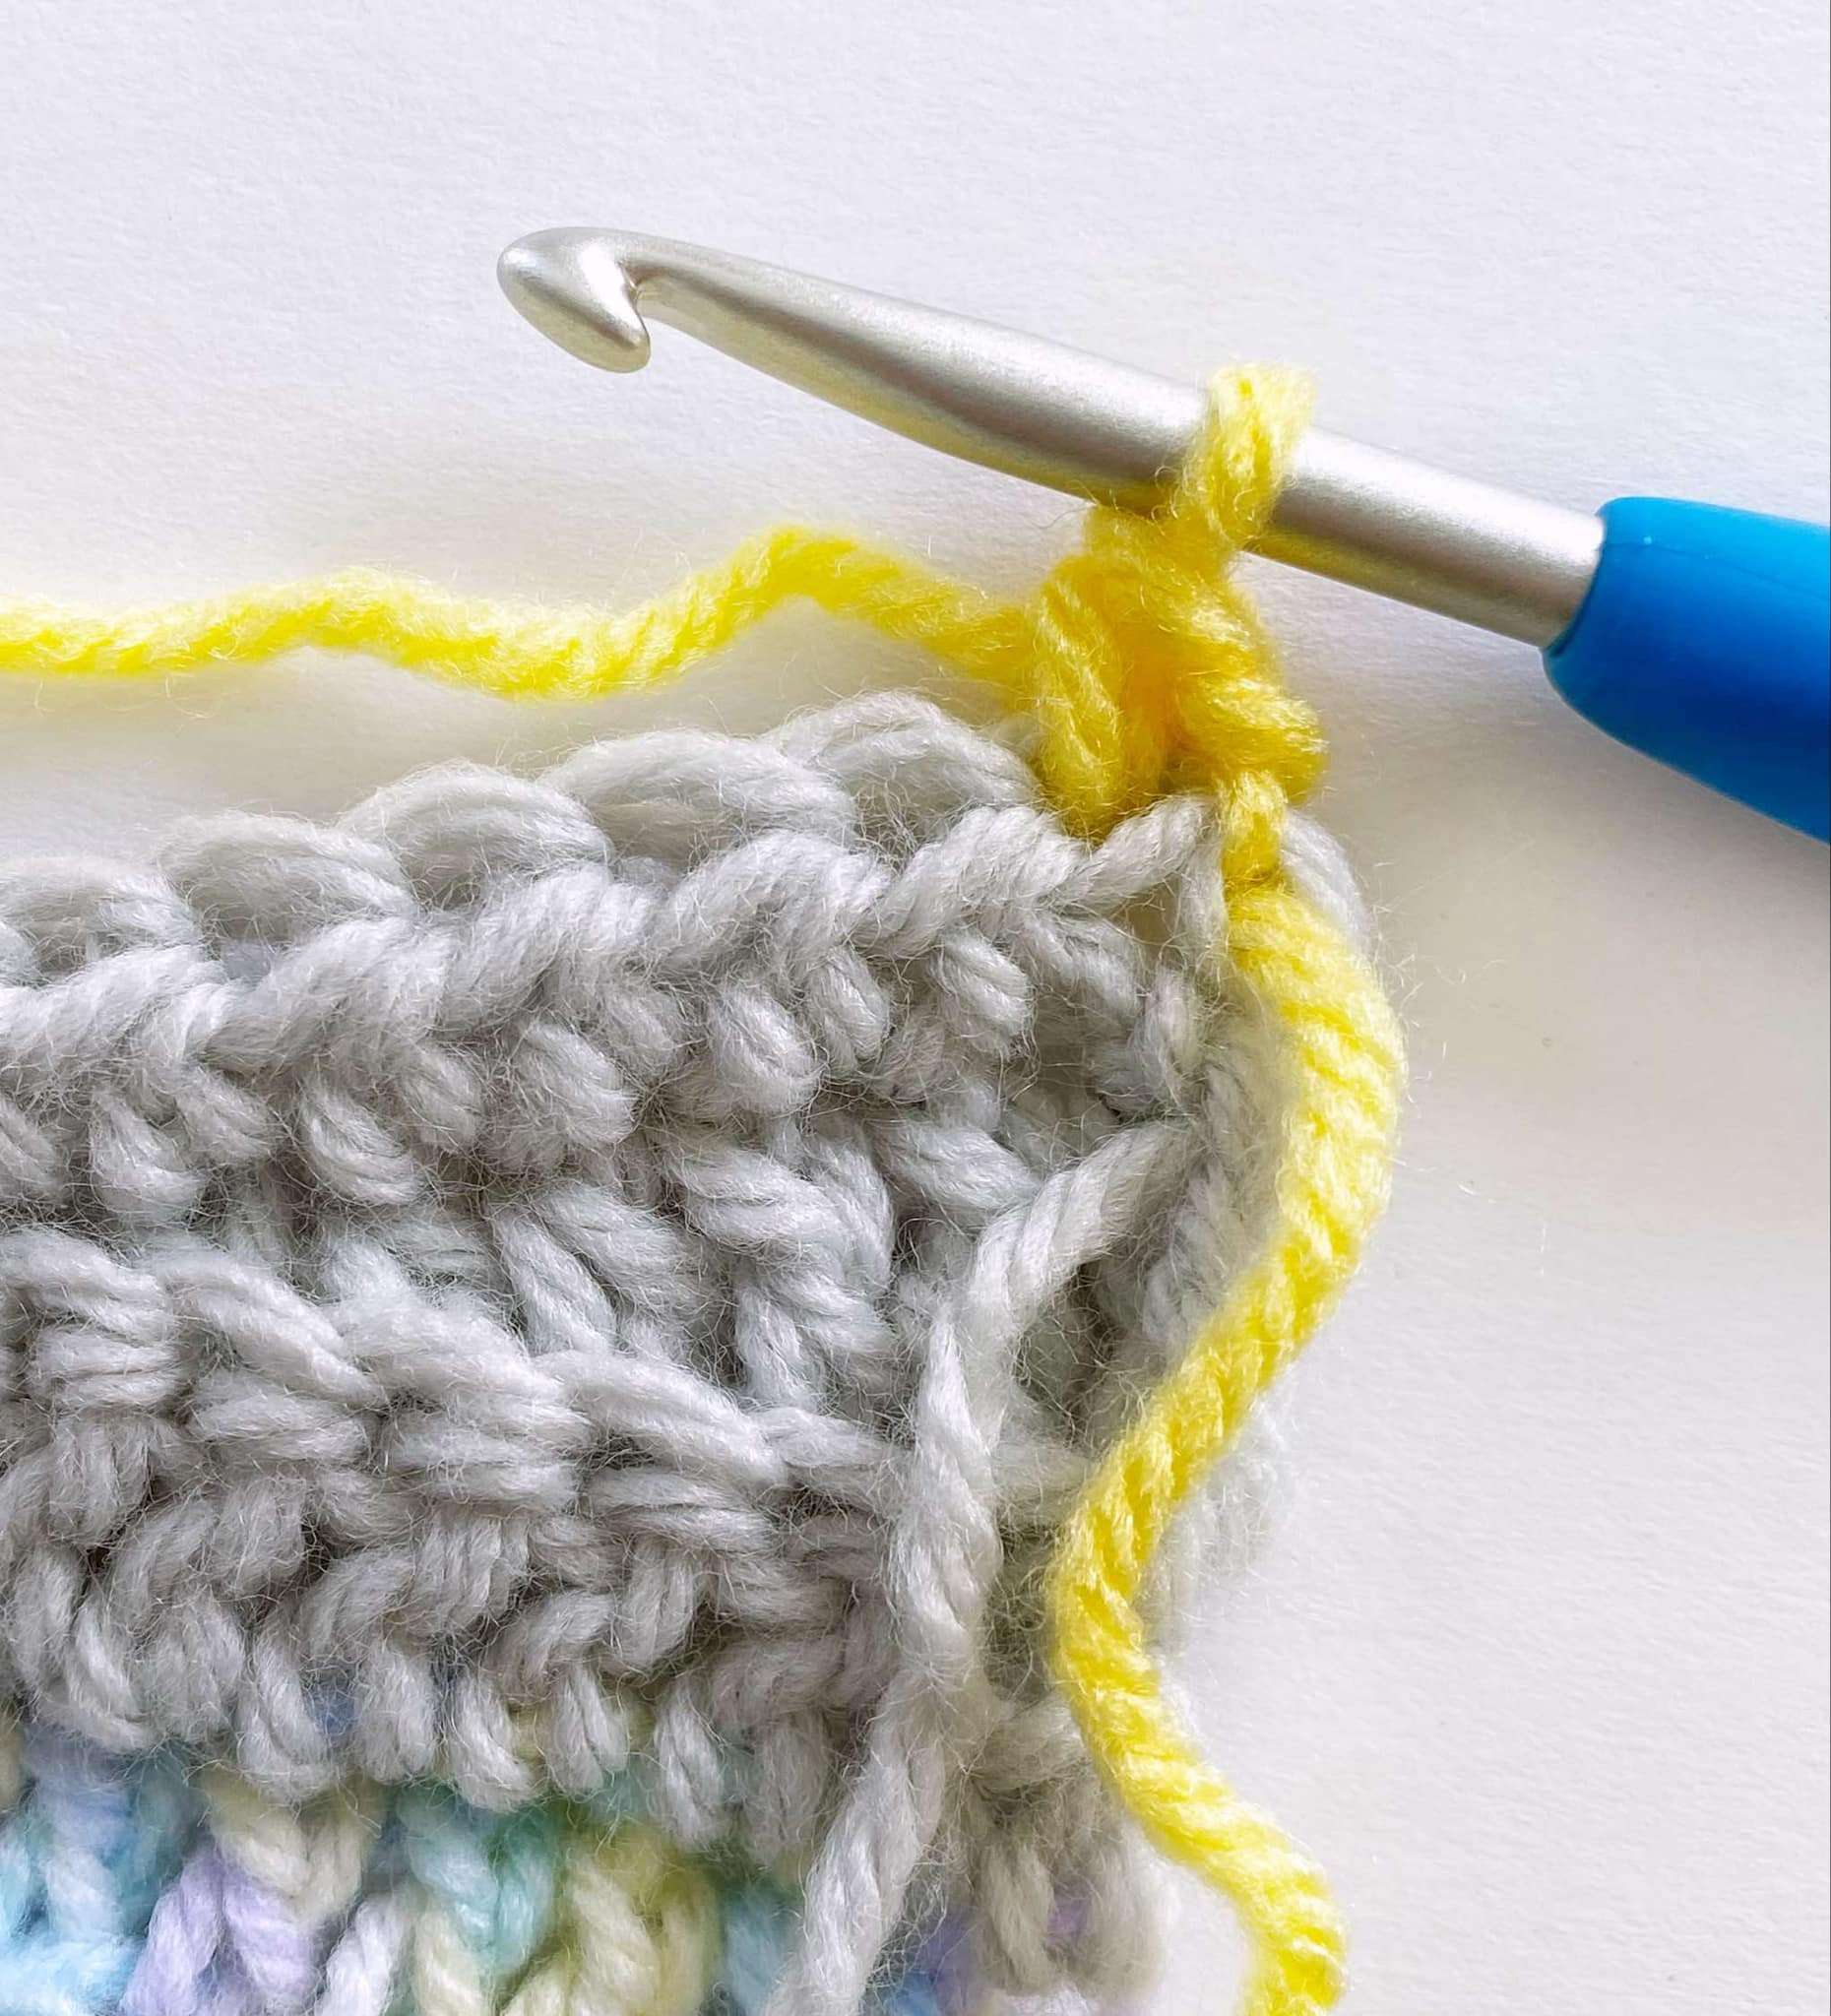
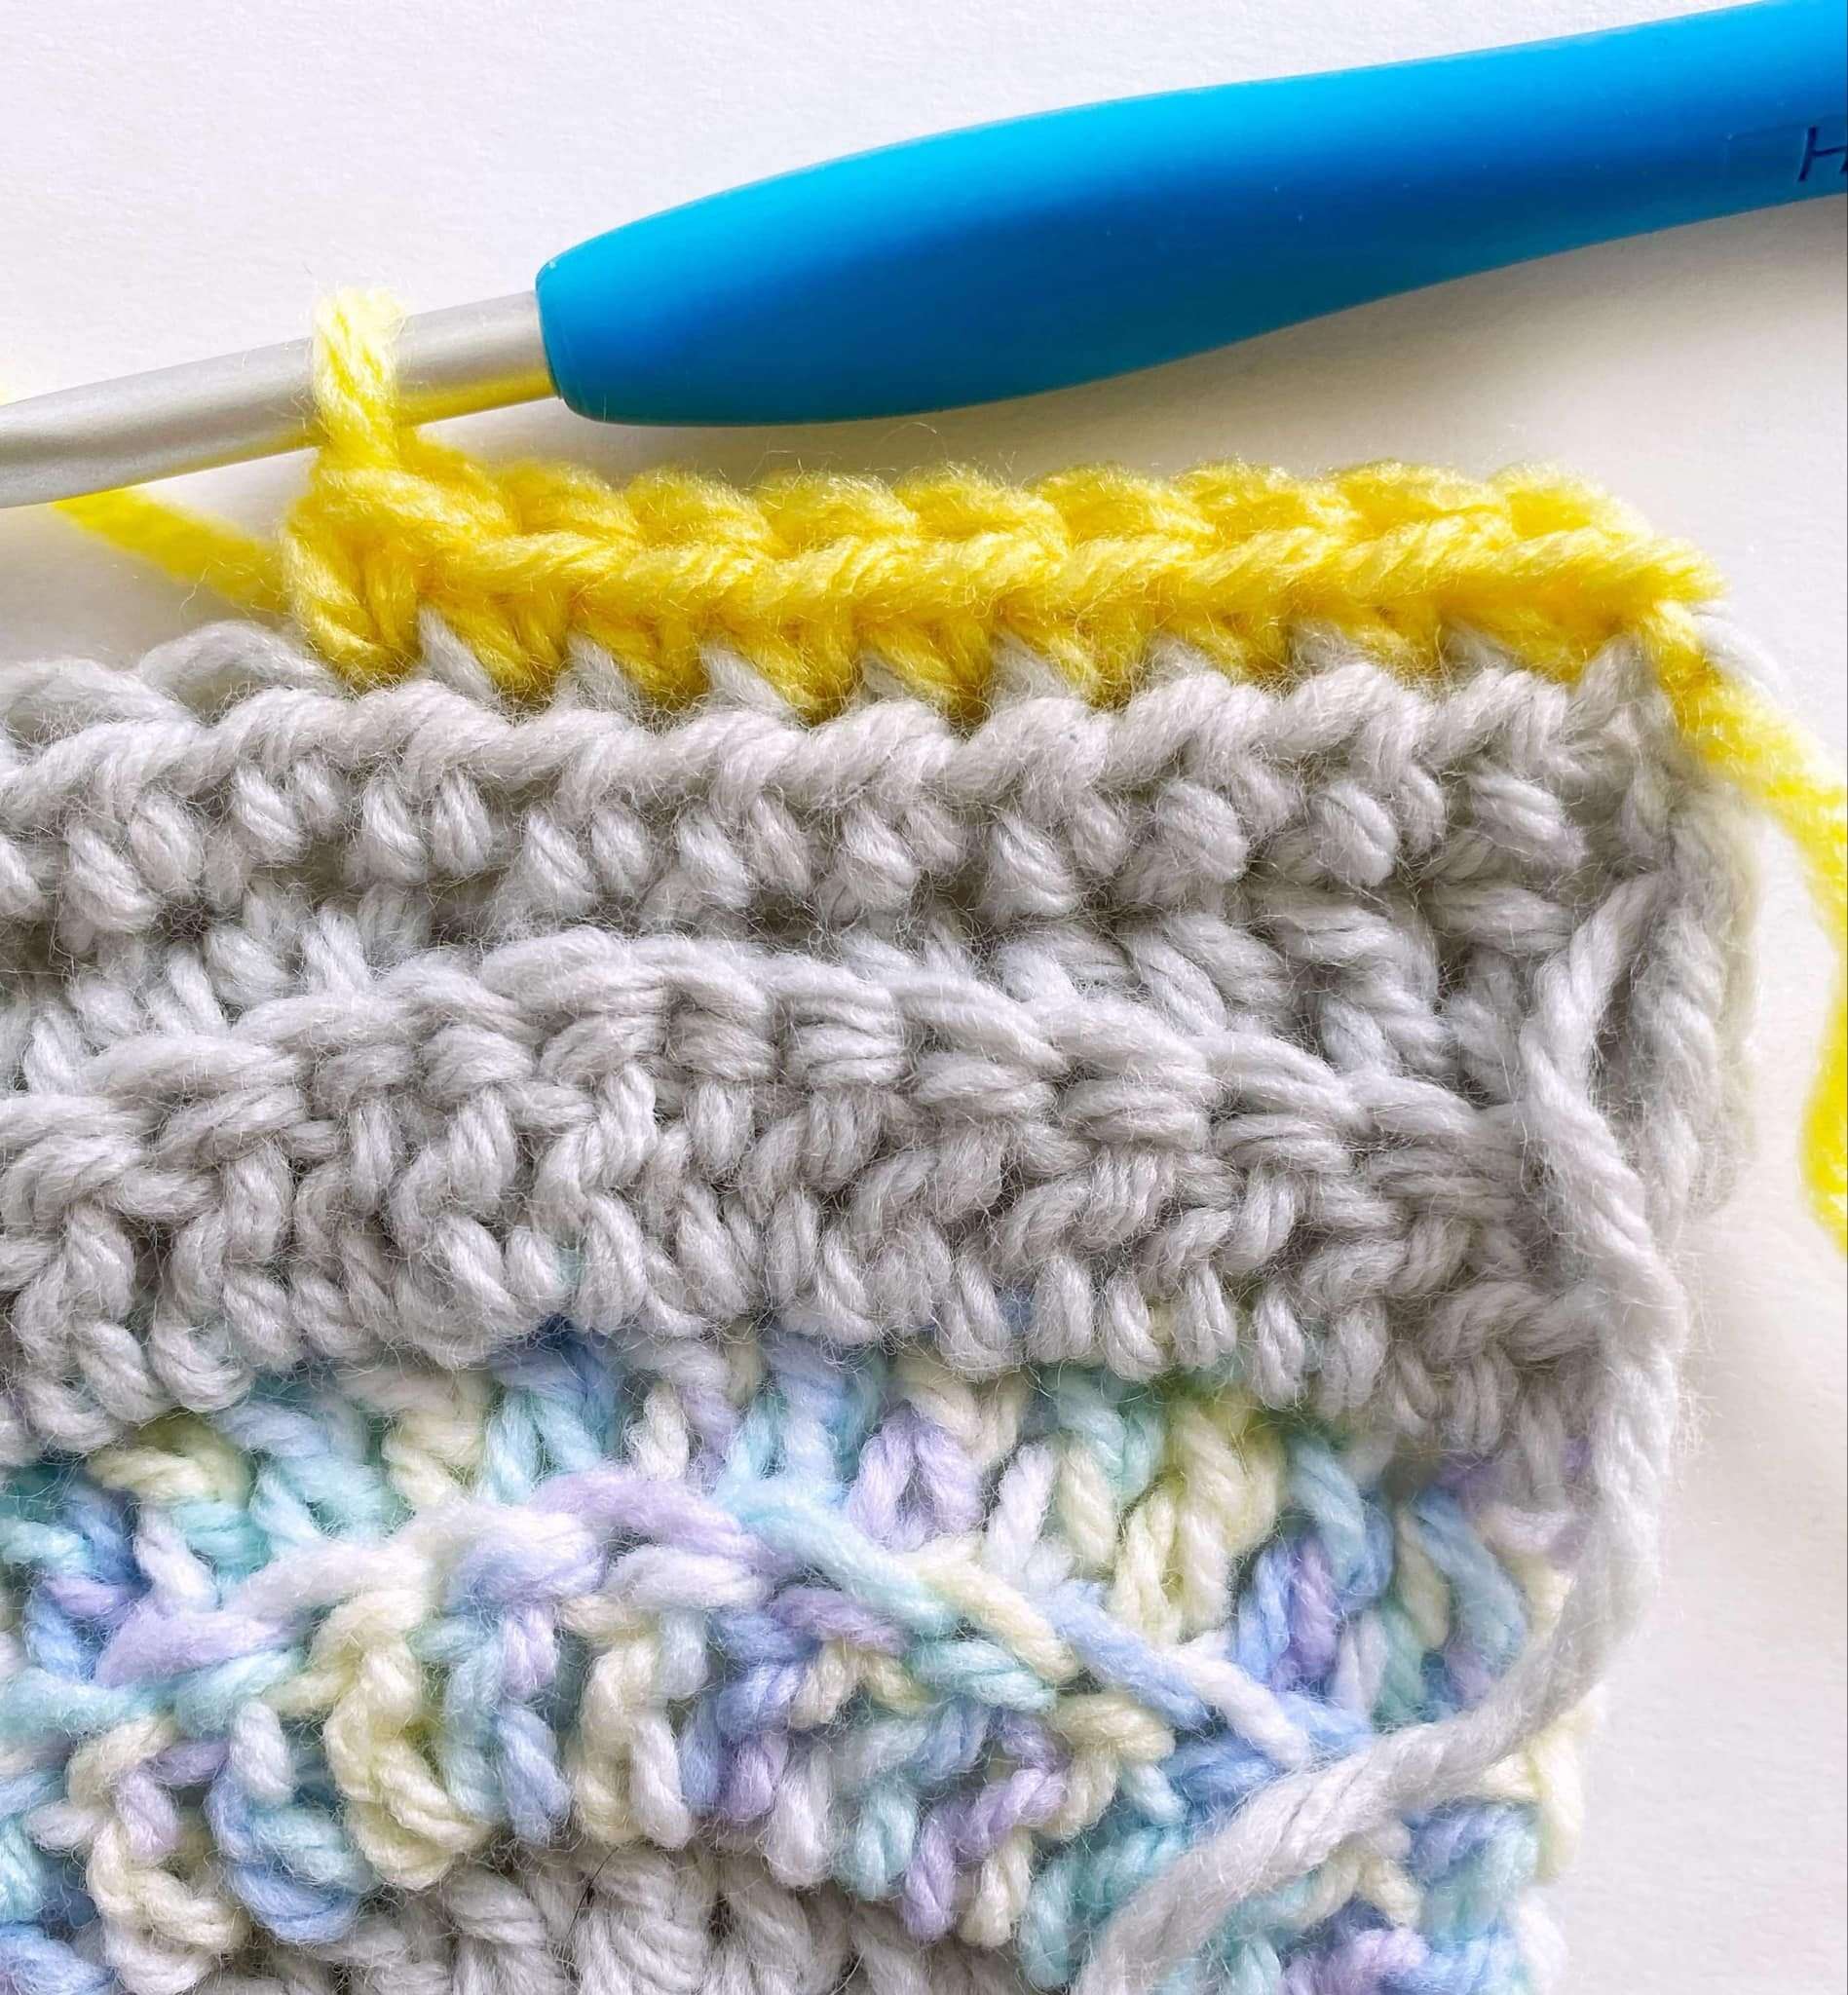
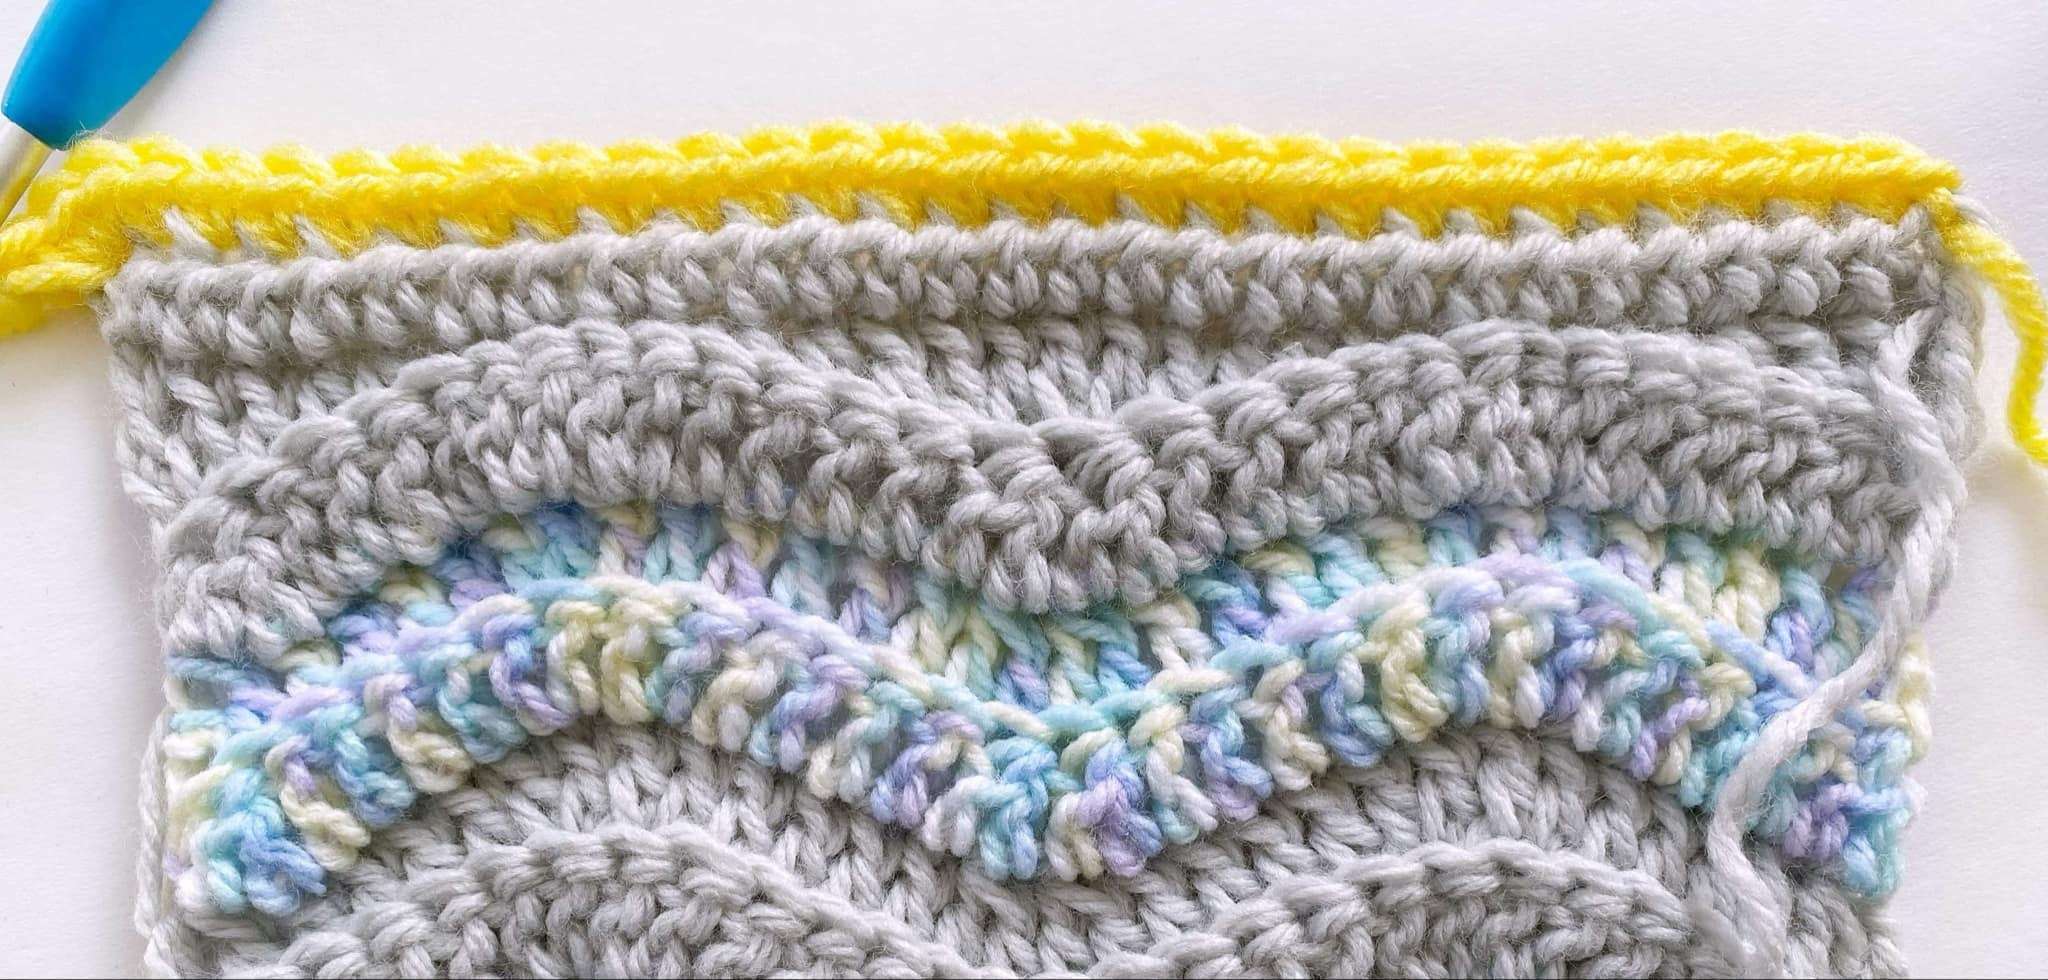
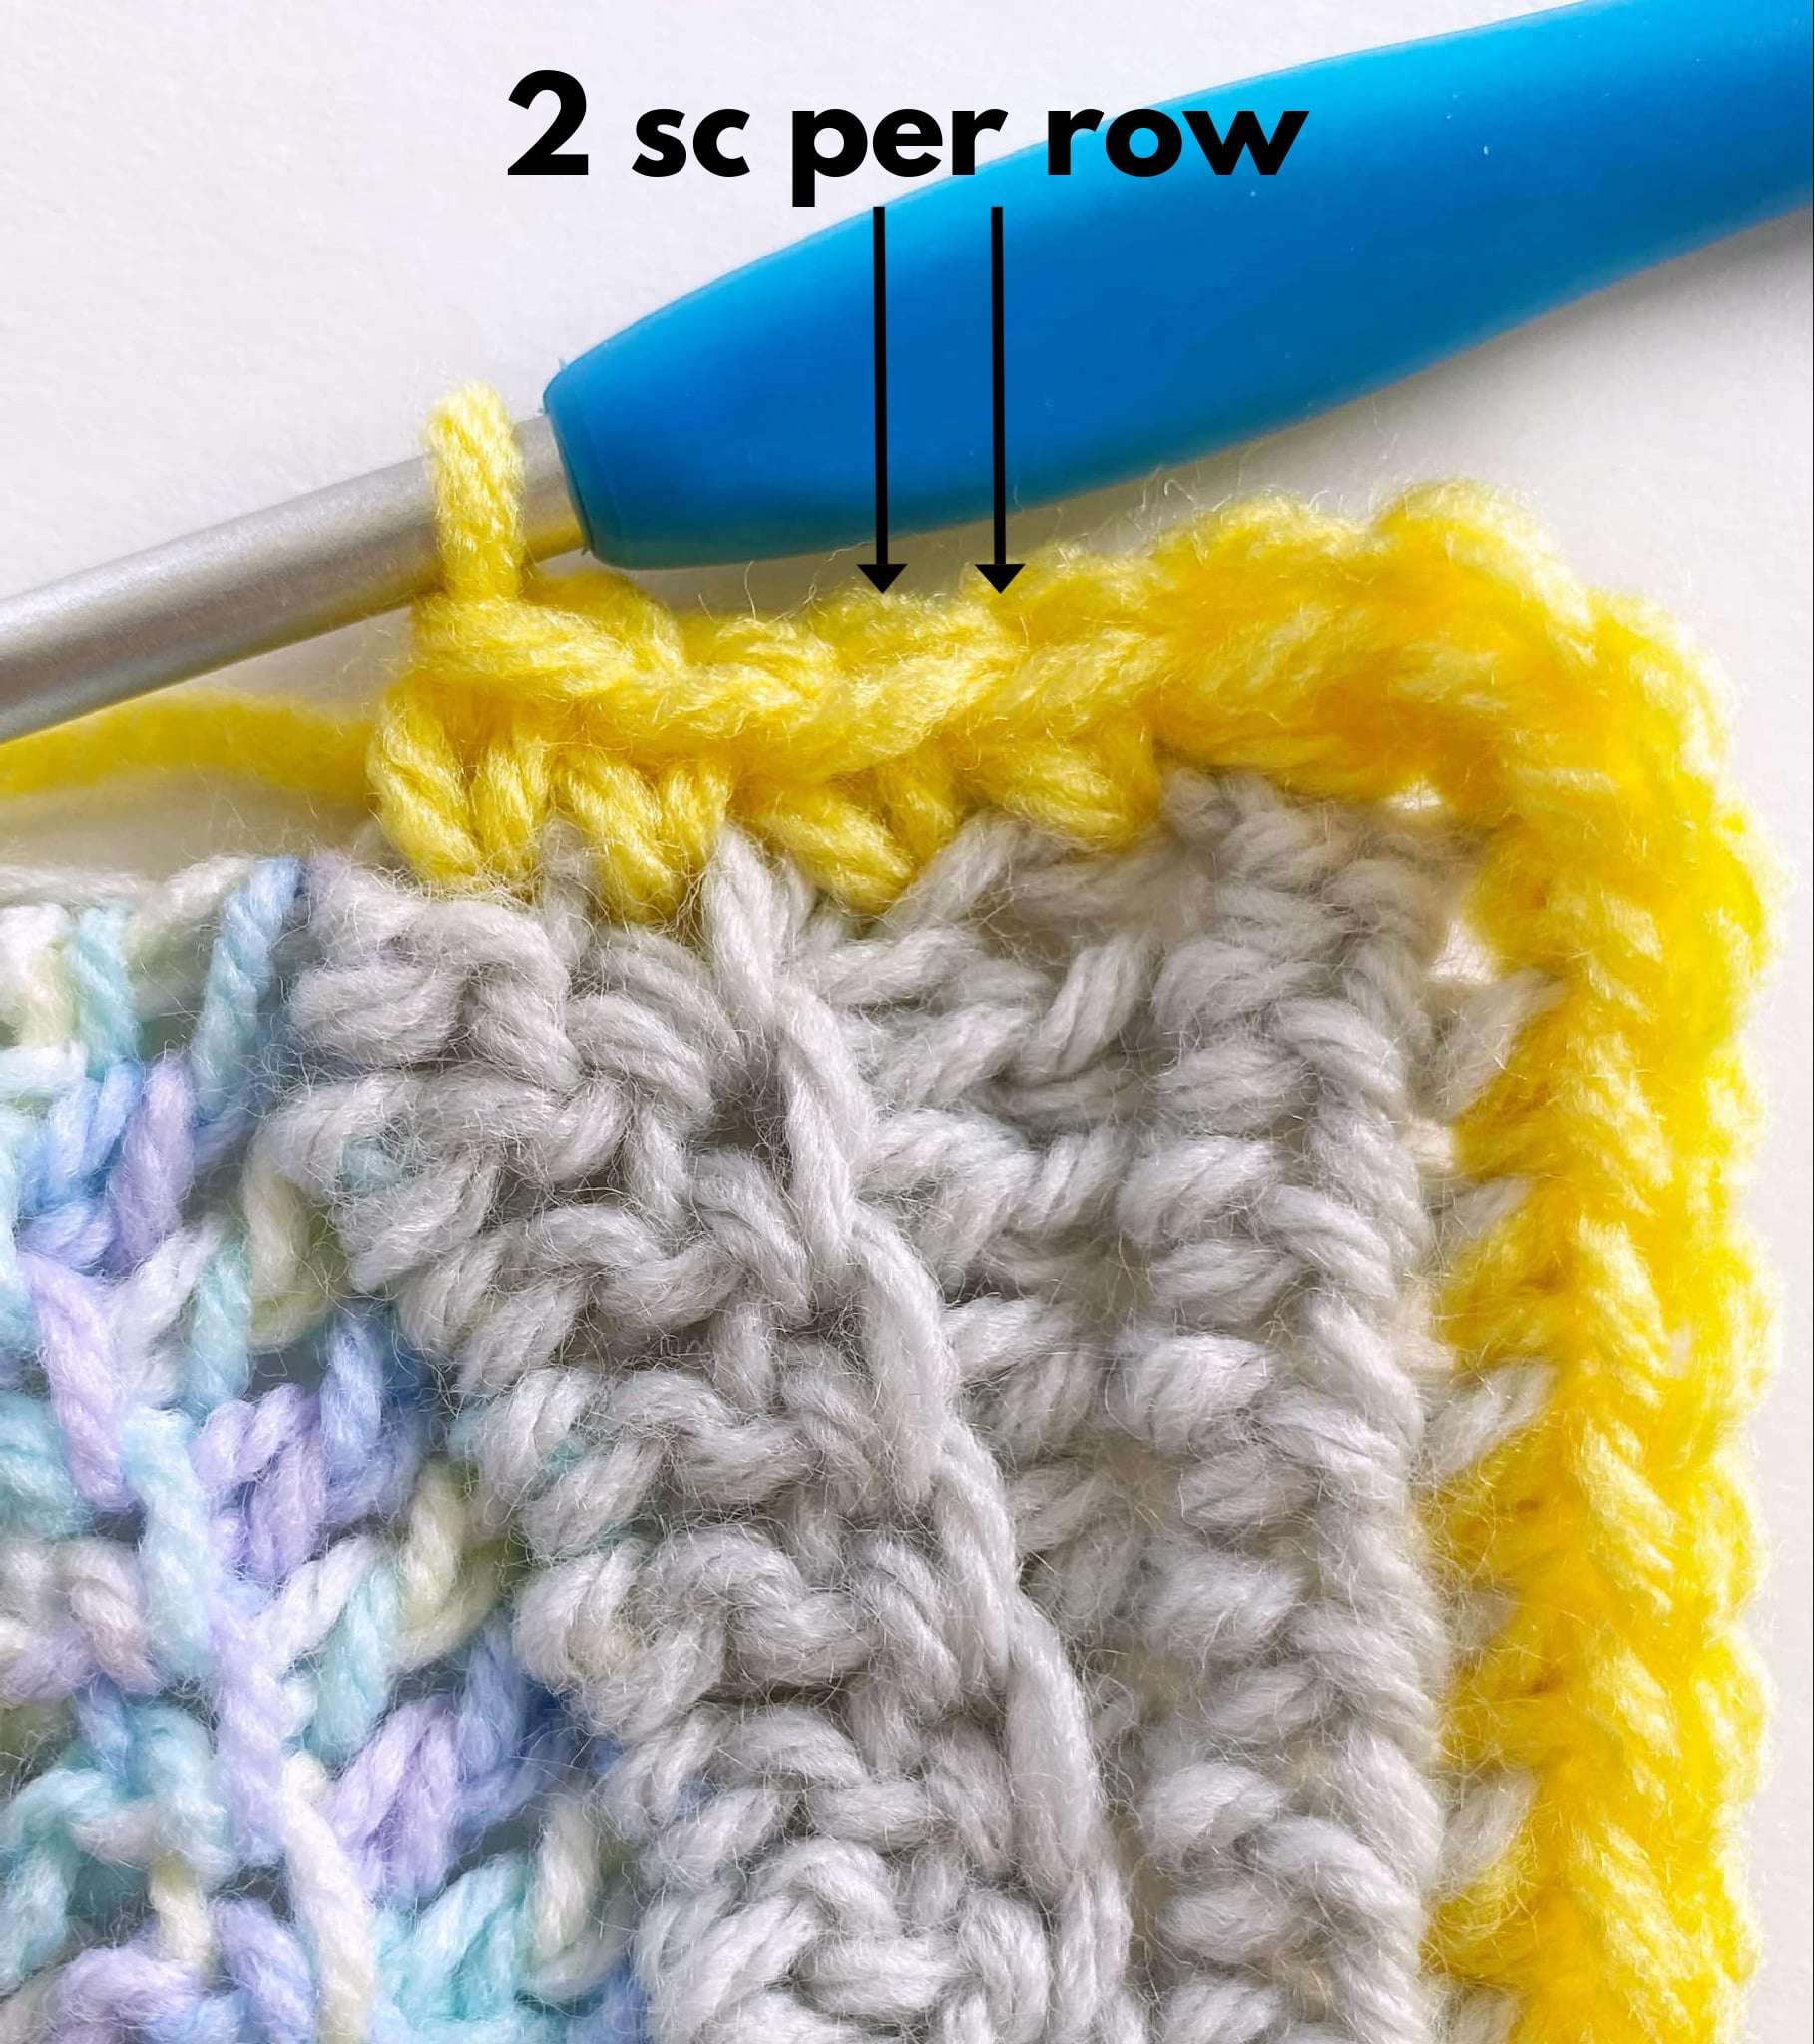
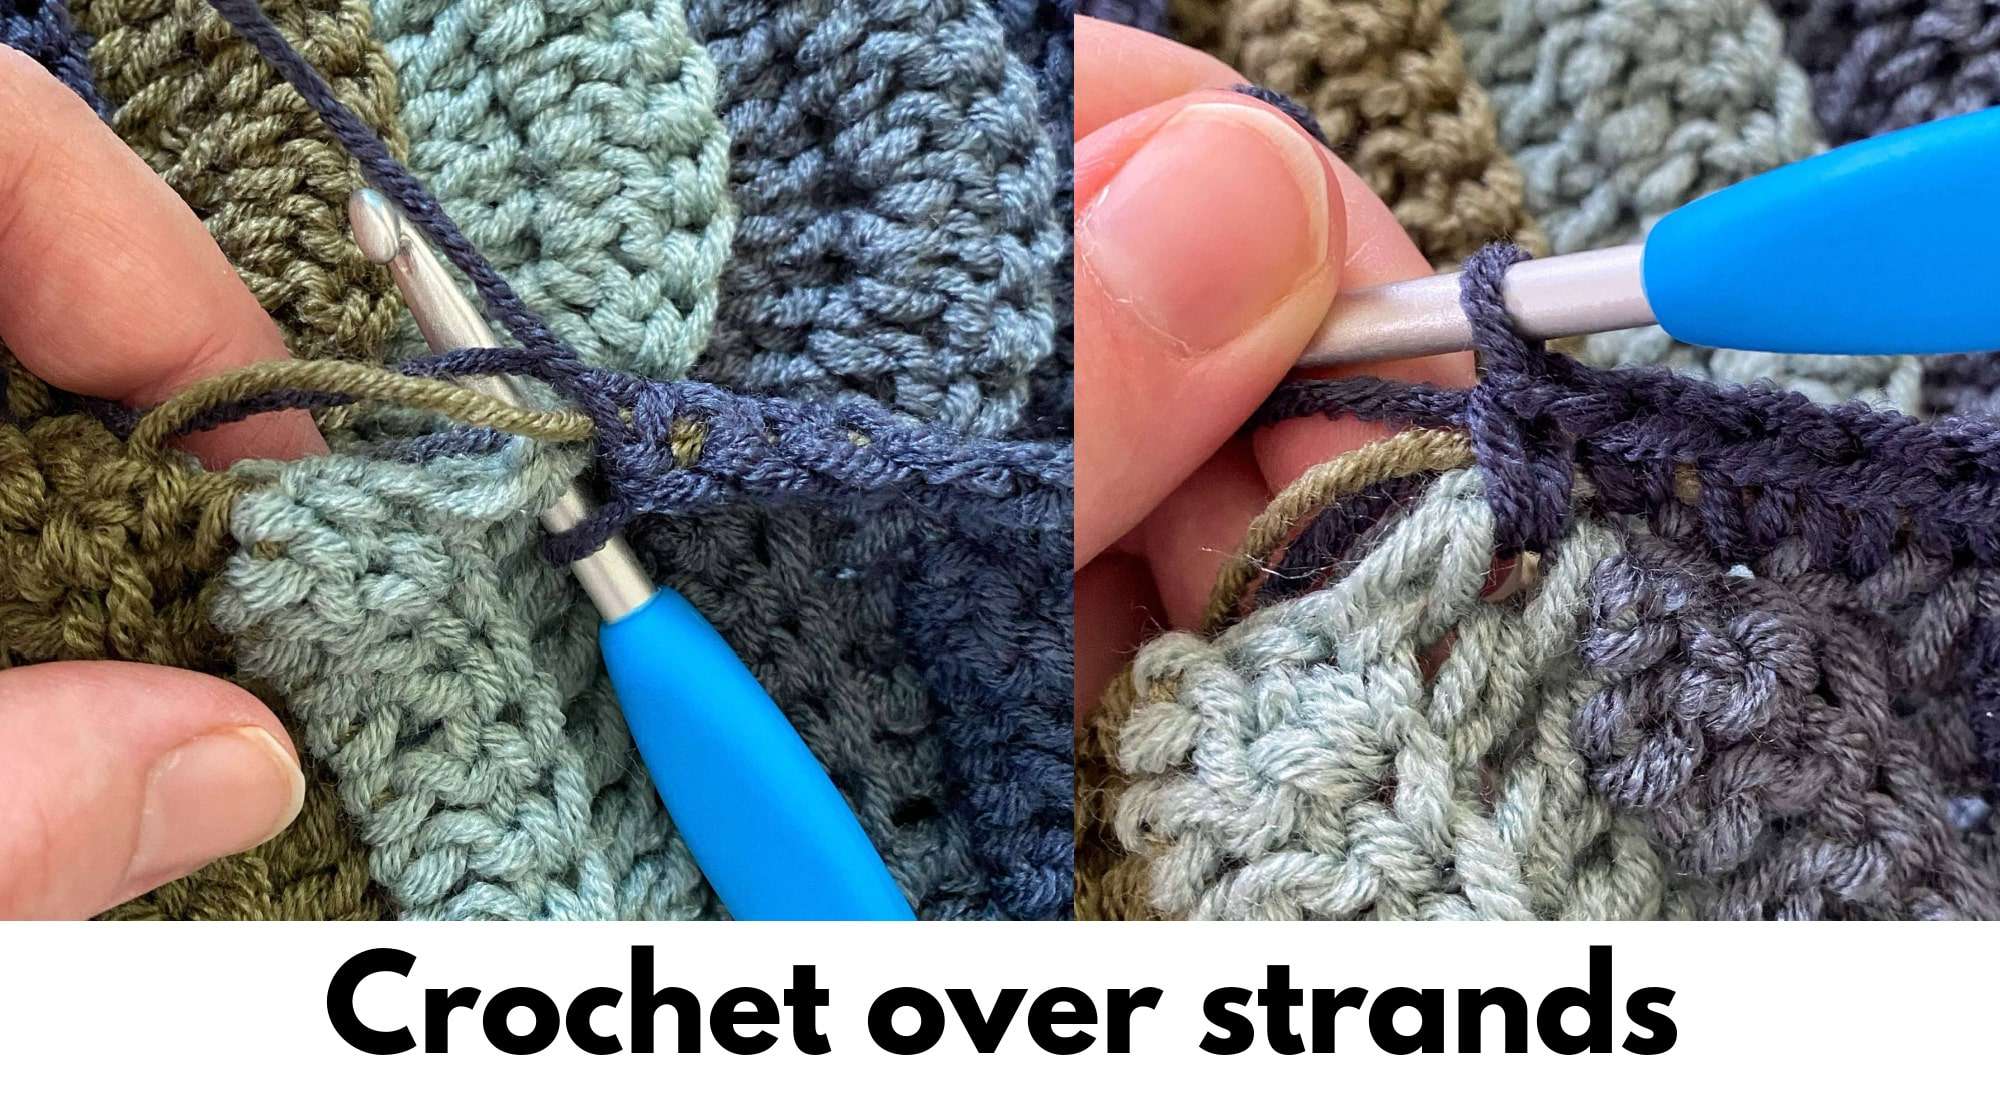
- 2 sc into the side of each row across the left-side of the blanket, making sure to crochet over top of the carried colour strands on the side of the blanket to lock them in place.
- 3 sc into the last row (corner).
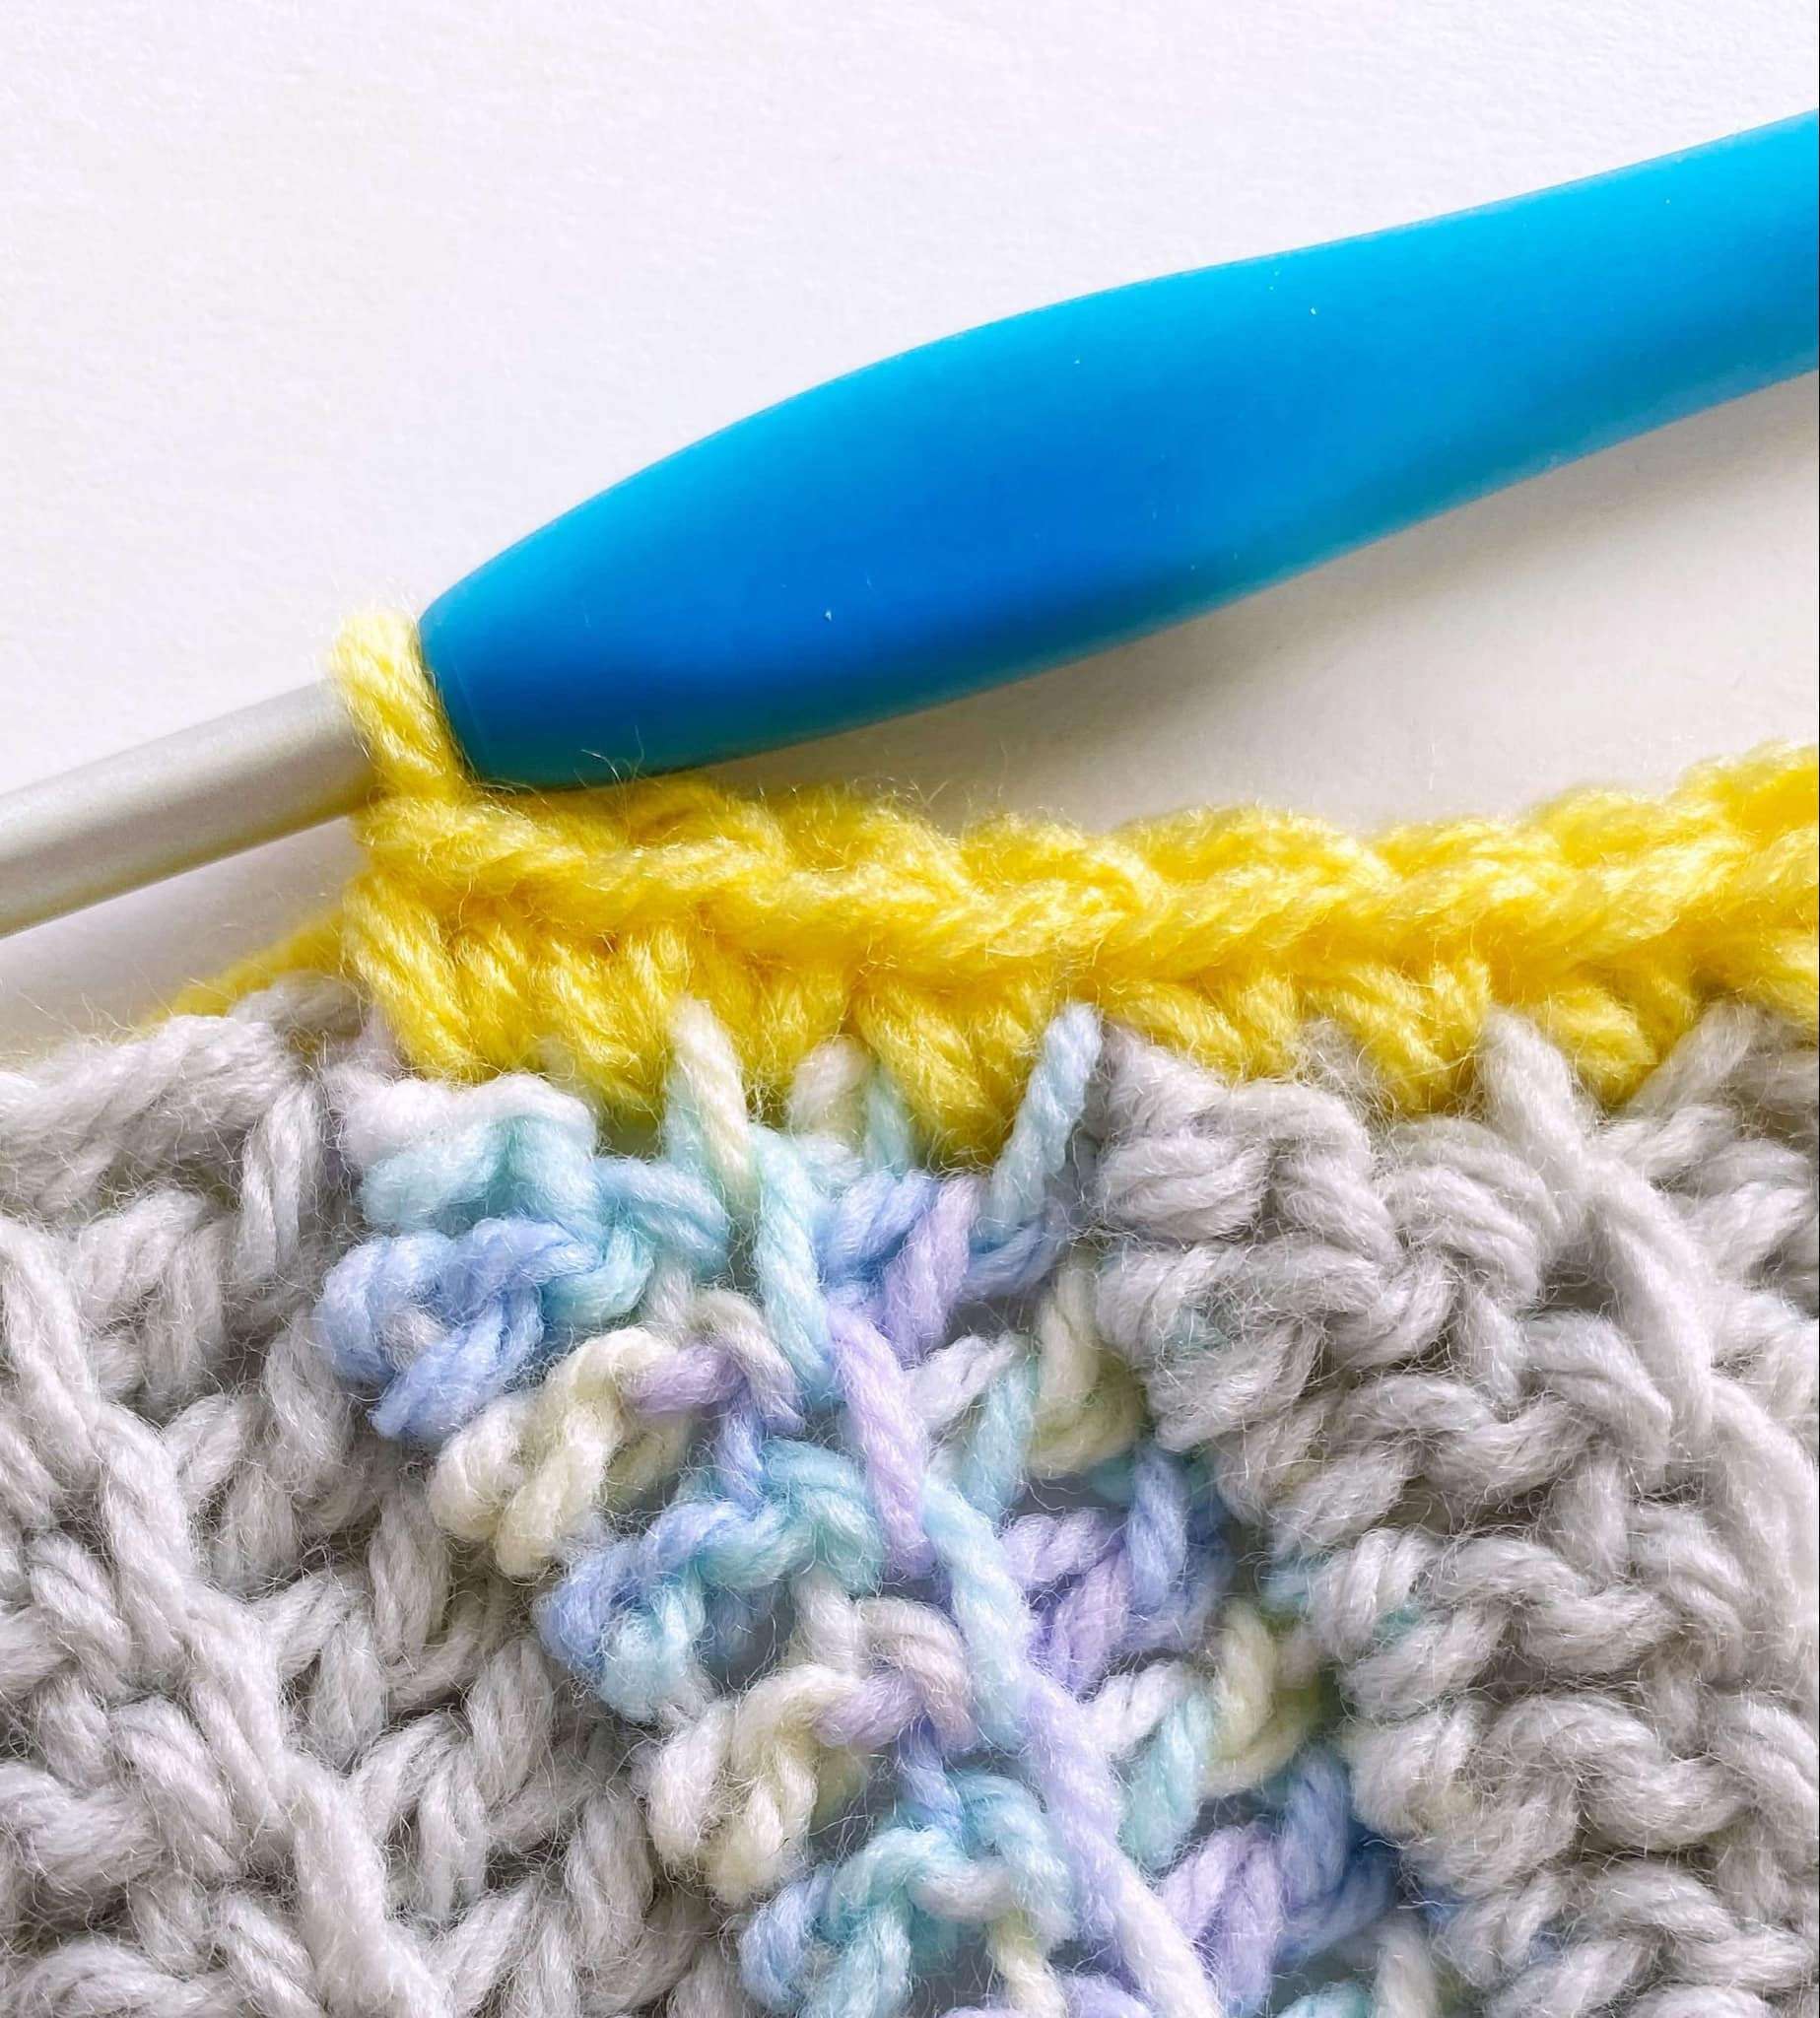
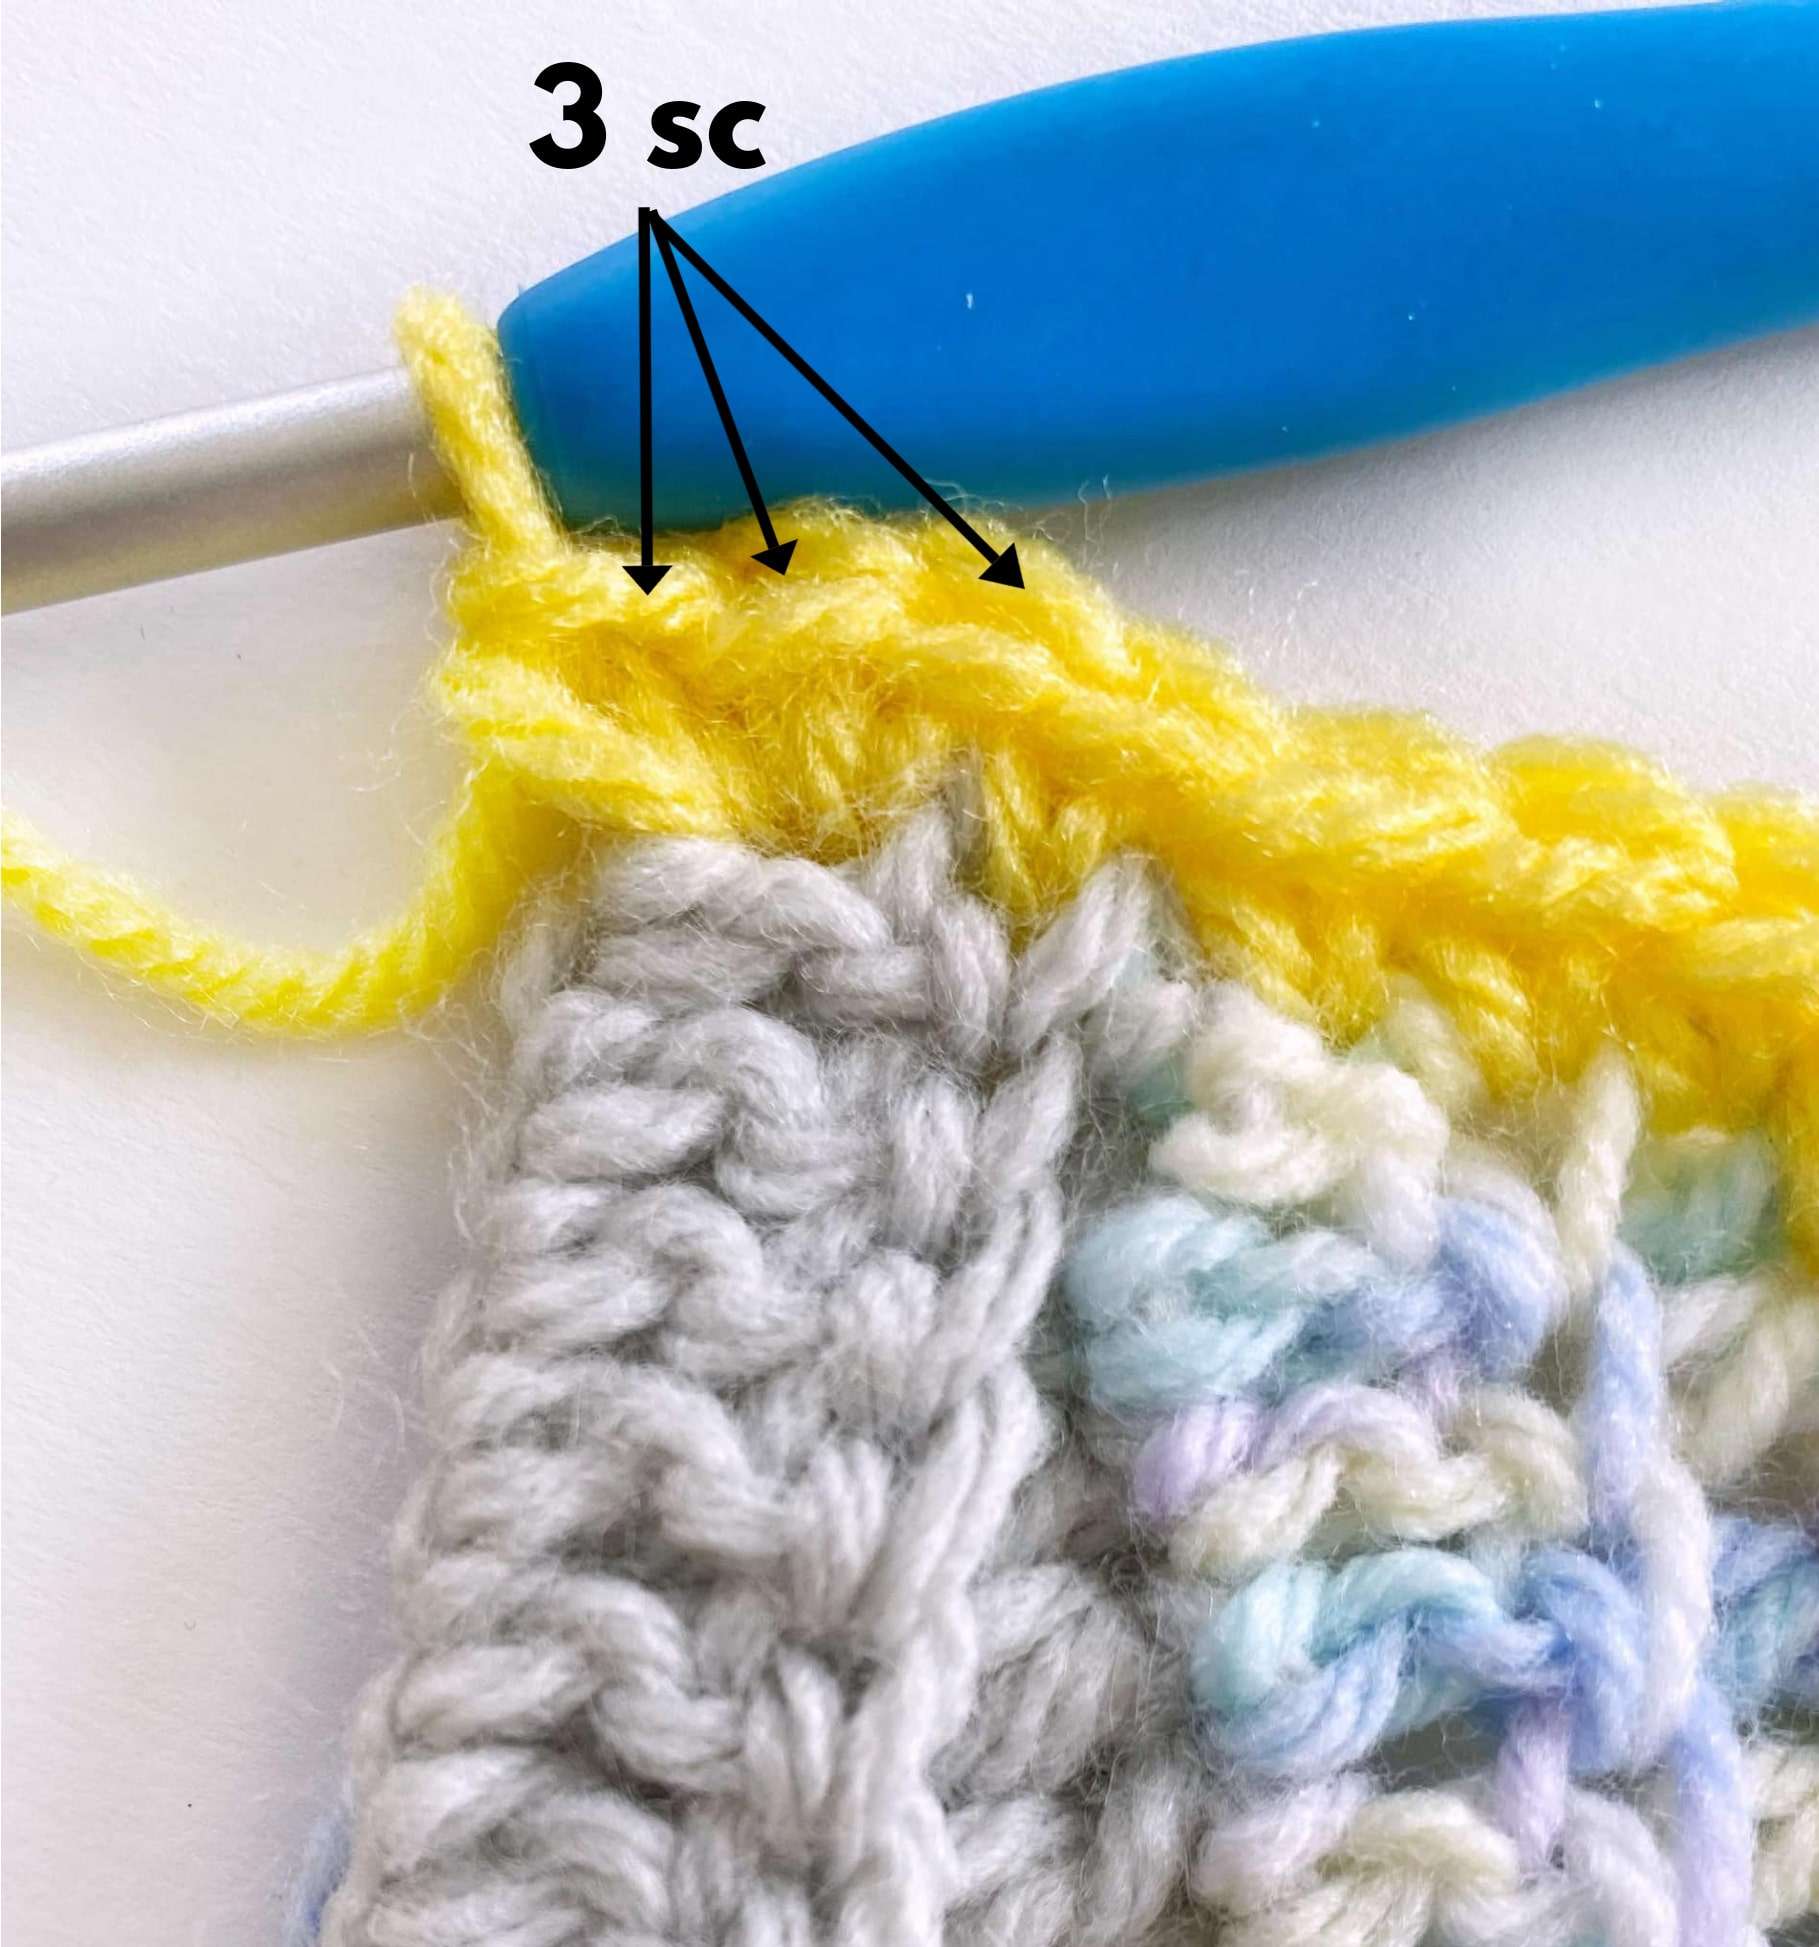
- Sc into the bottom of each ch across the bottom of the blanket. 3 sc into last ch (corner).
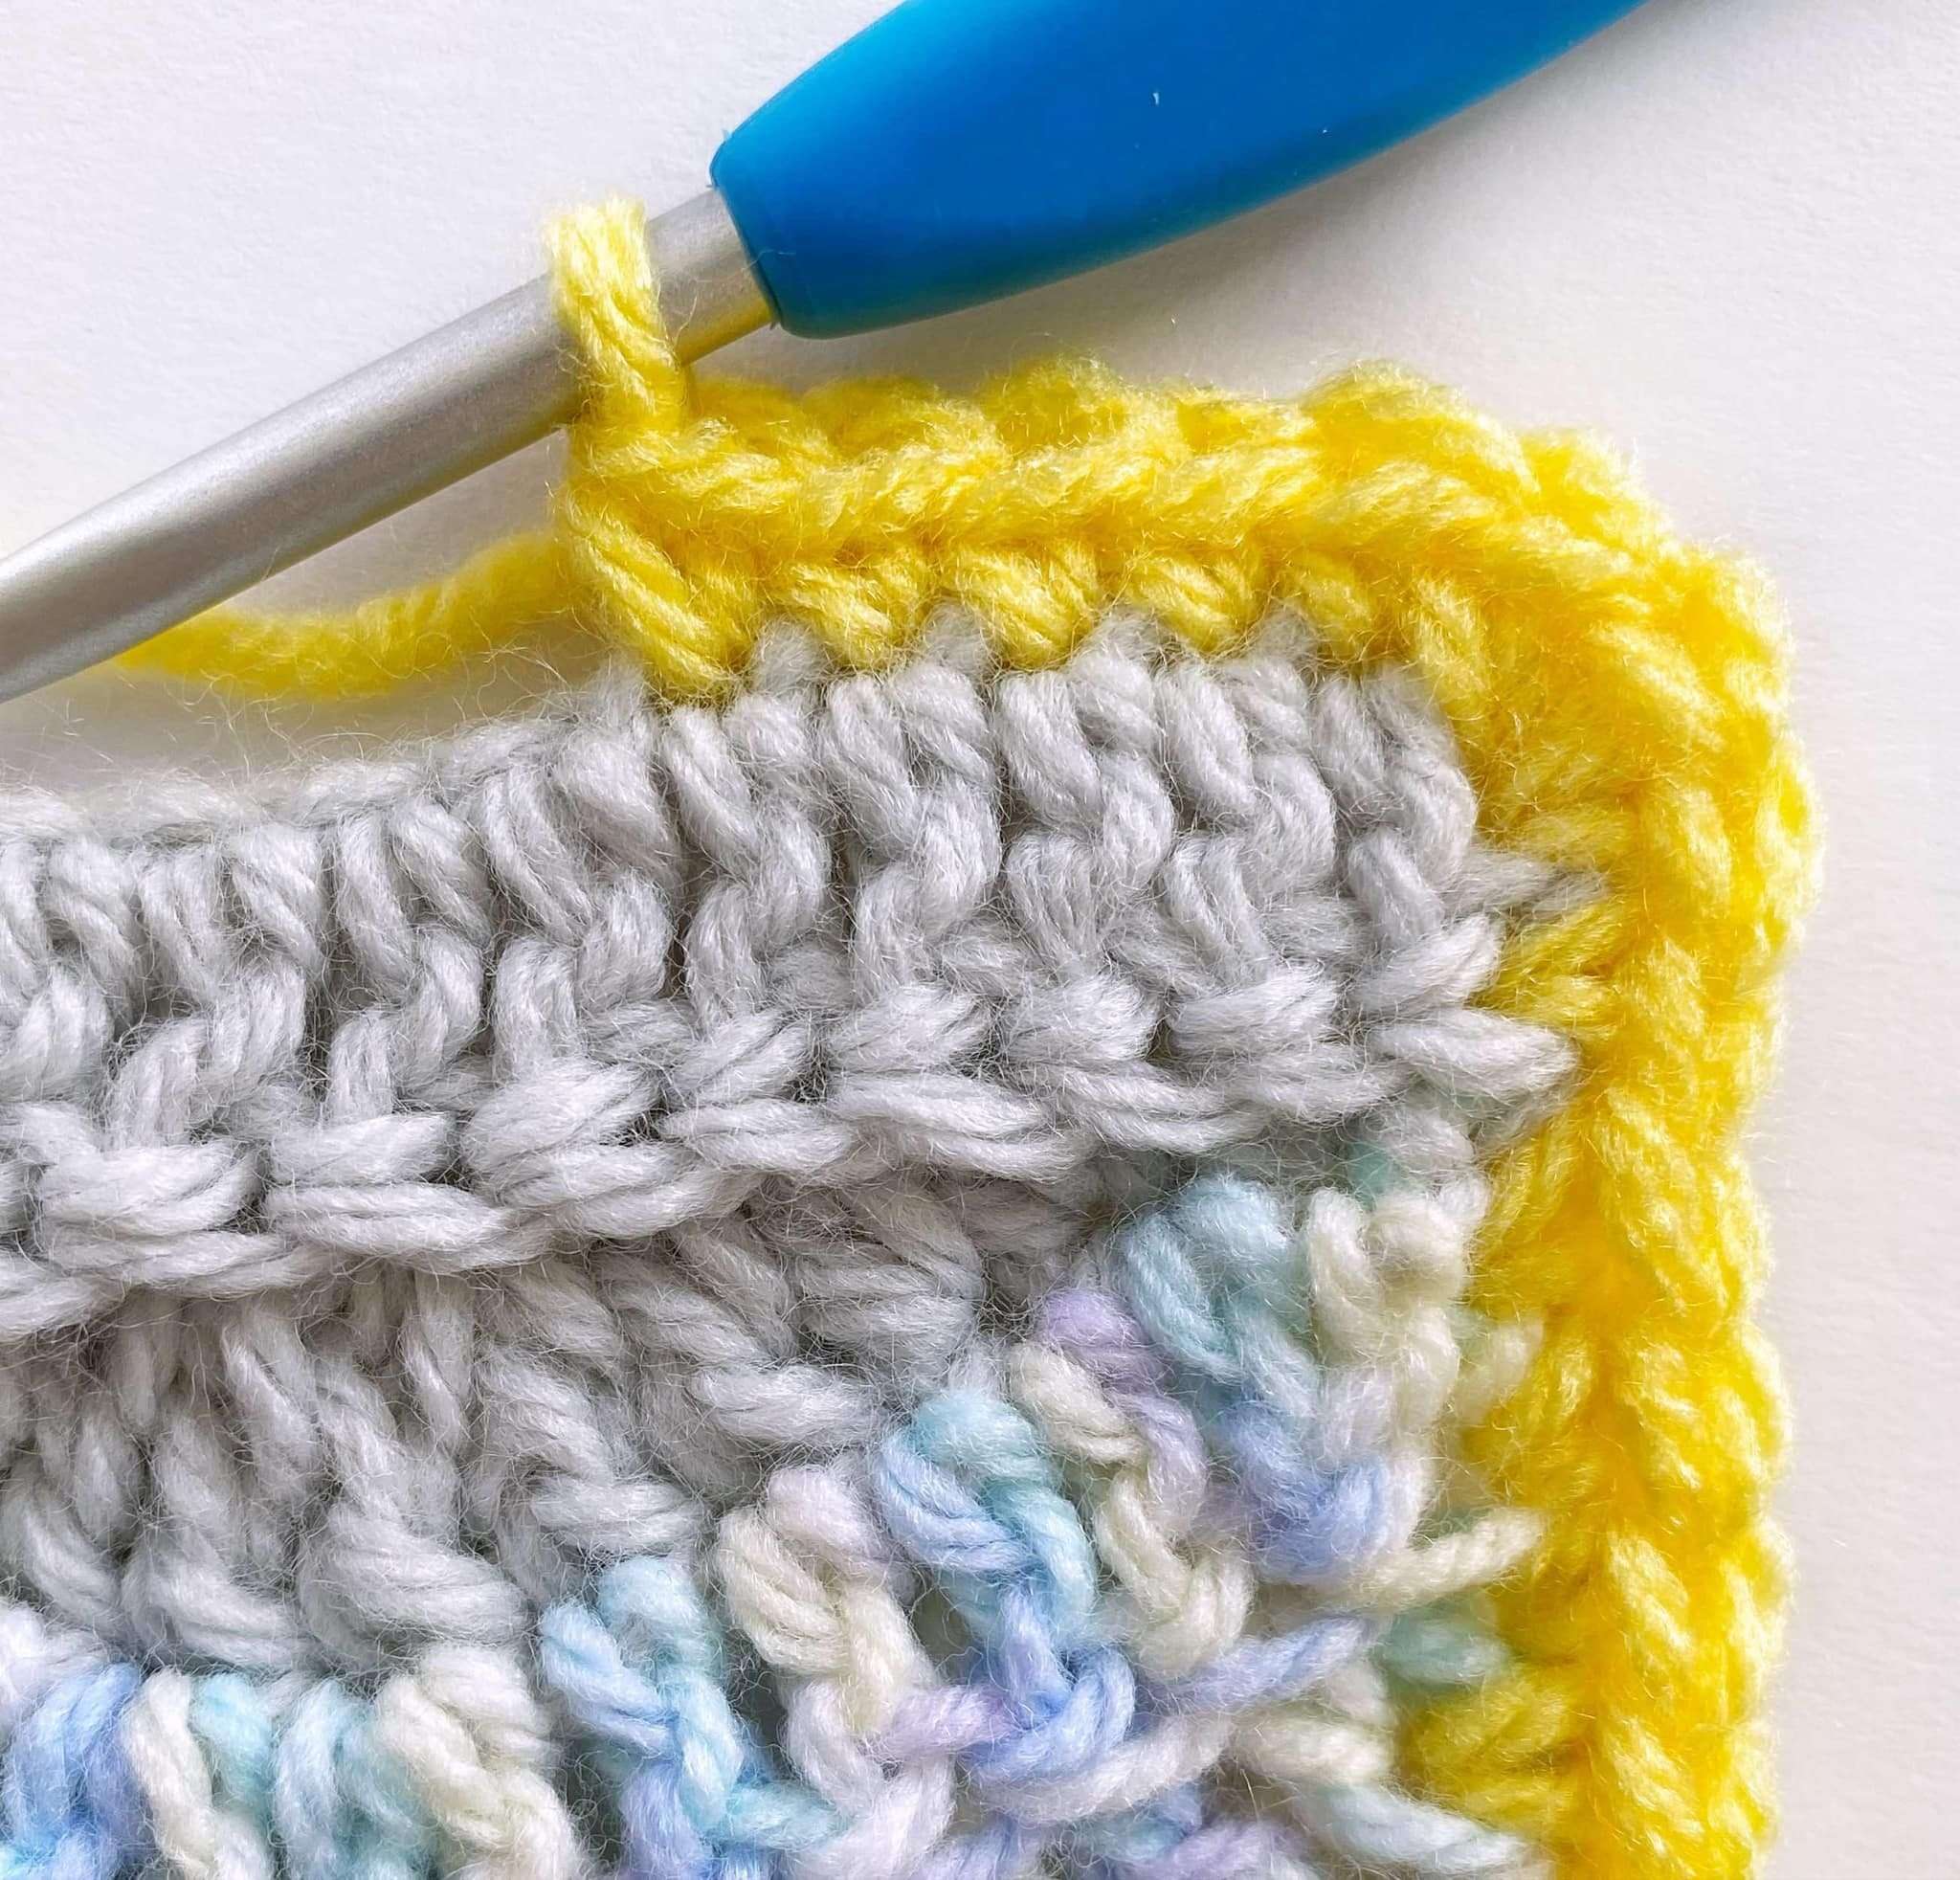
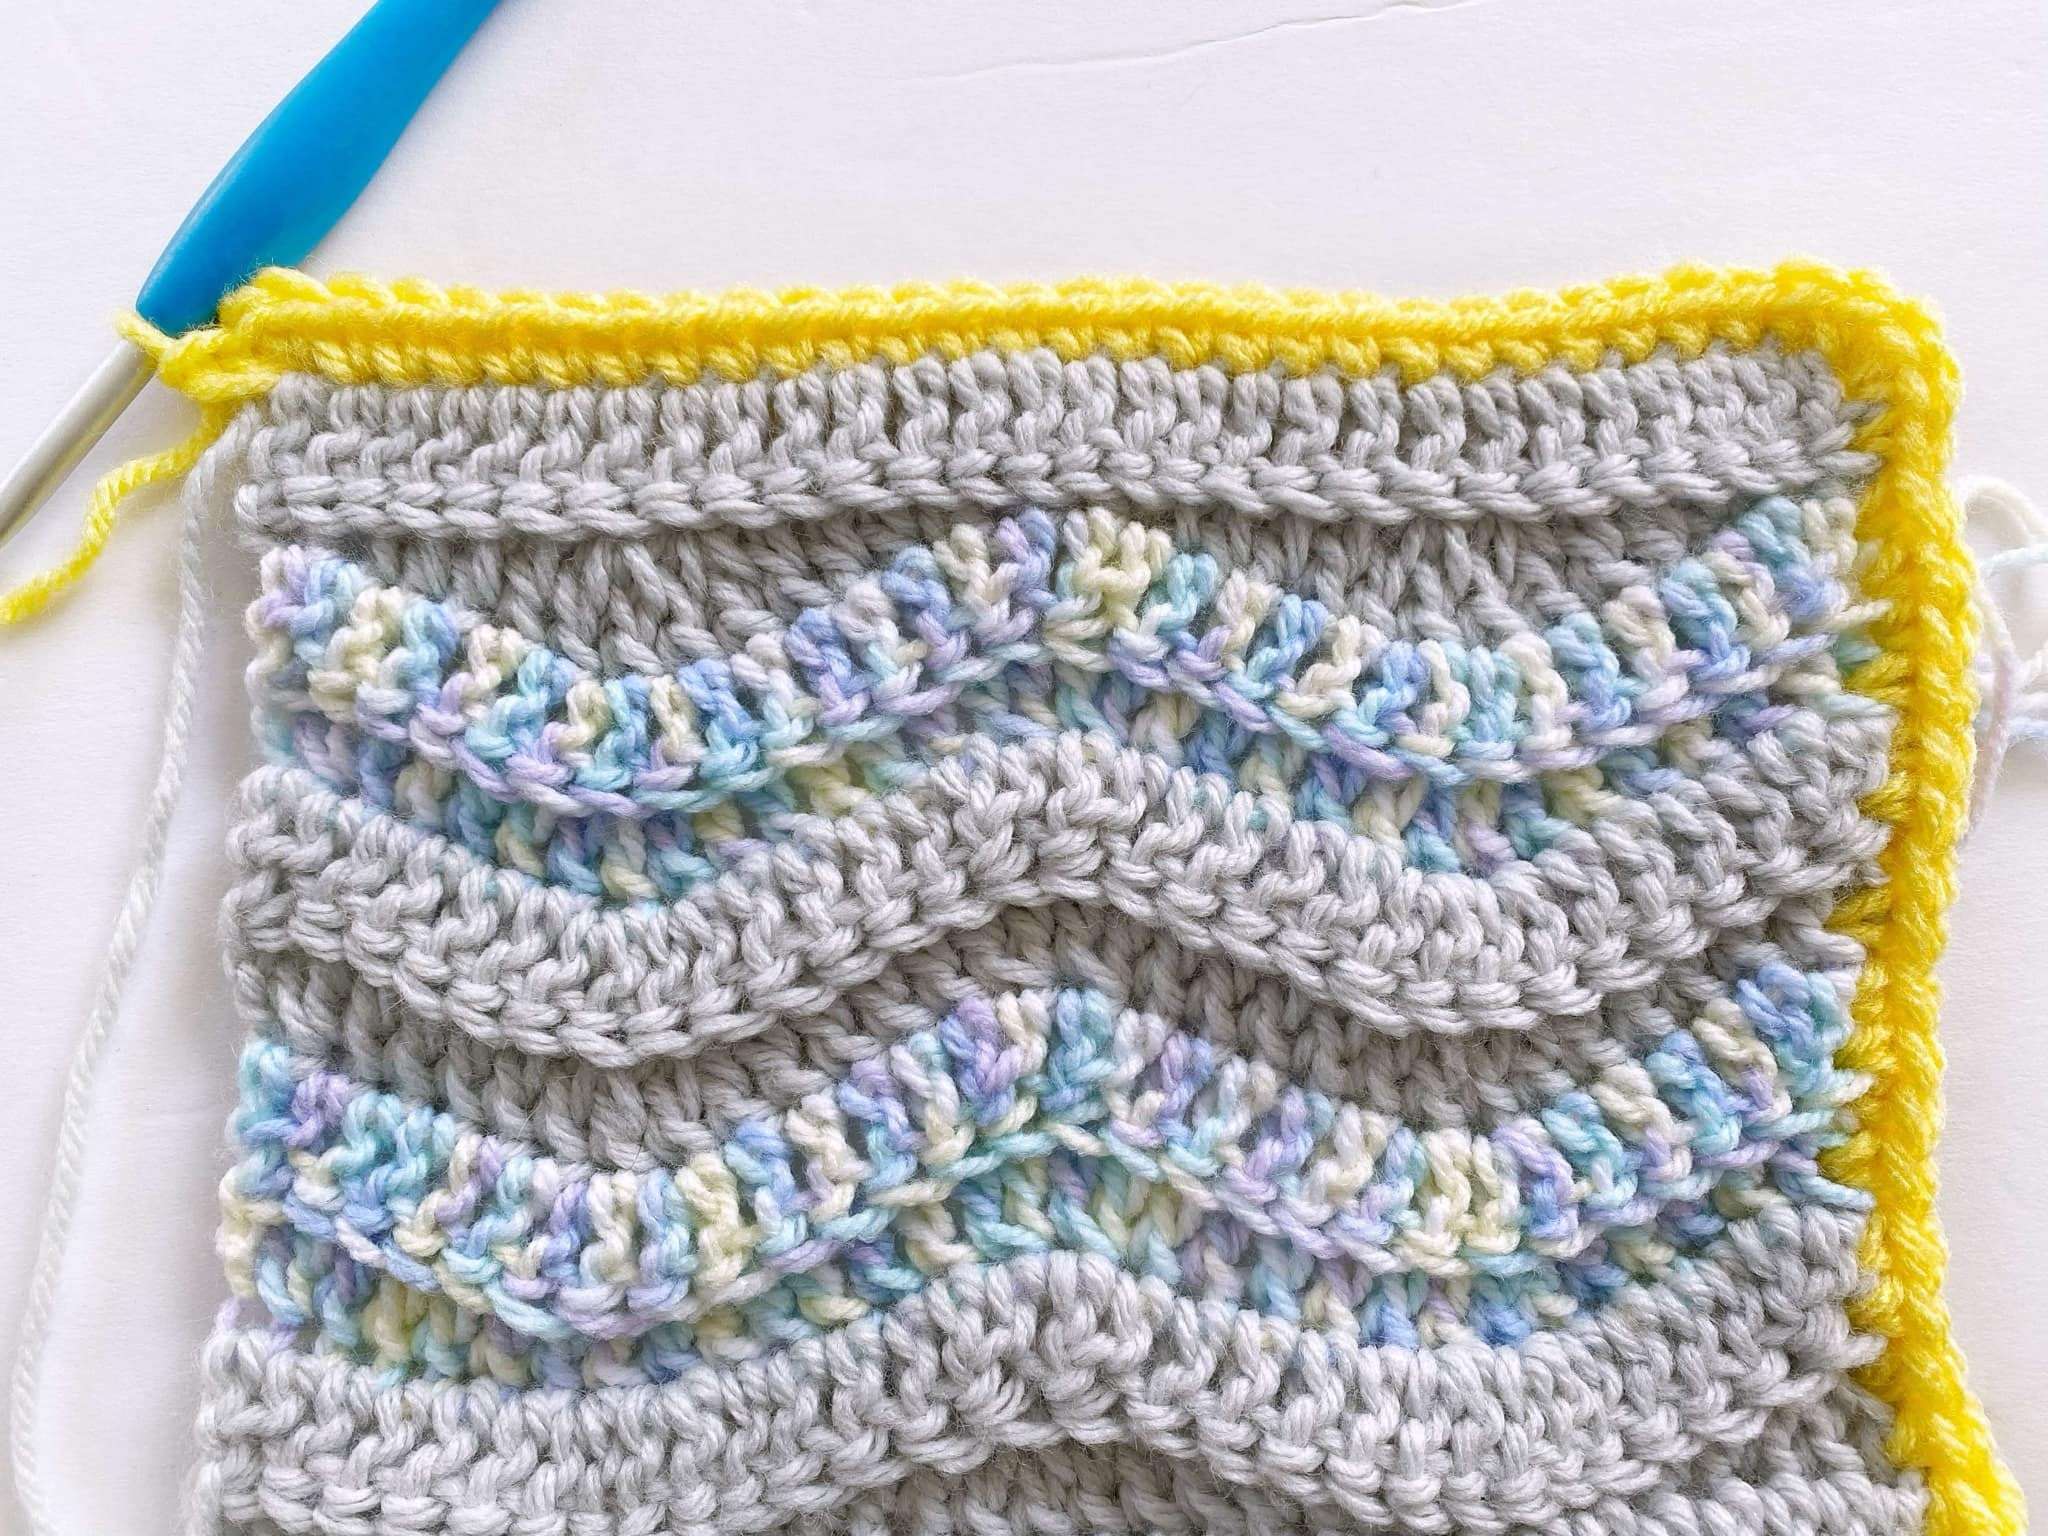
- 2 sc into the side of each row across the right-side of the blanket. 3 sc into the last row (corner).
- Sl st into the first sc of the rnd to join.
Ribbing:
Top:
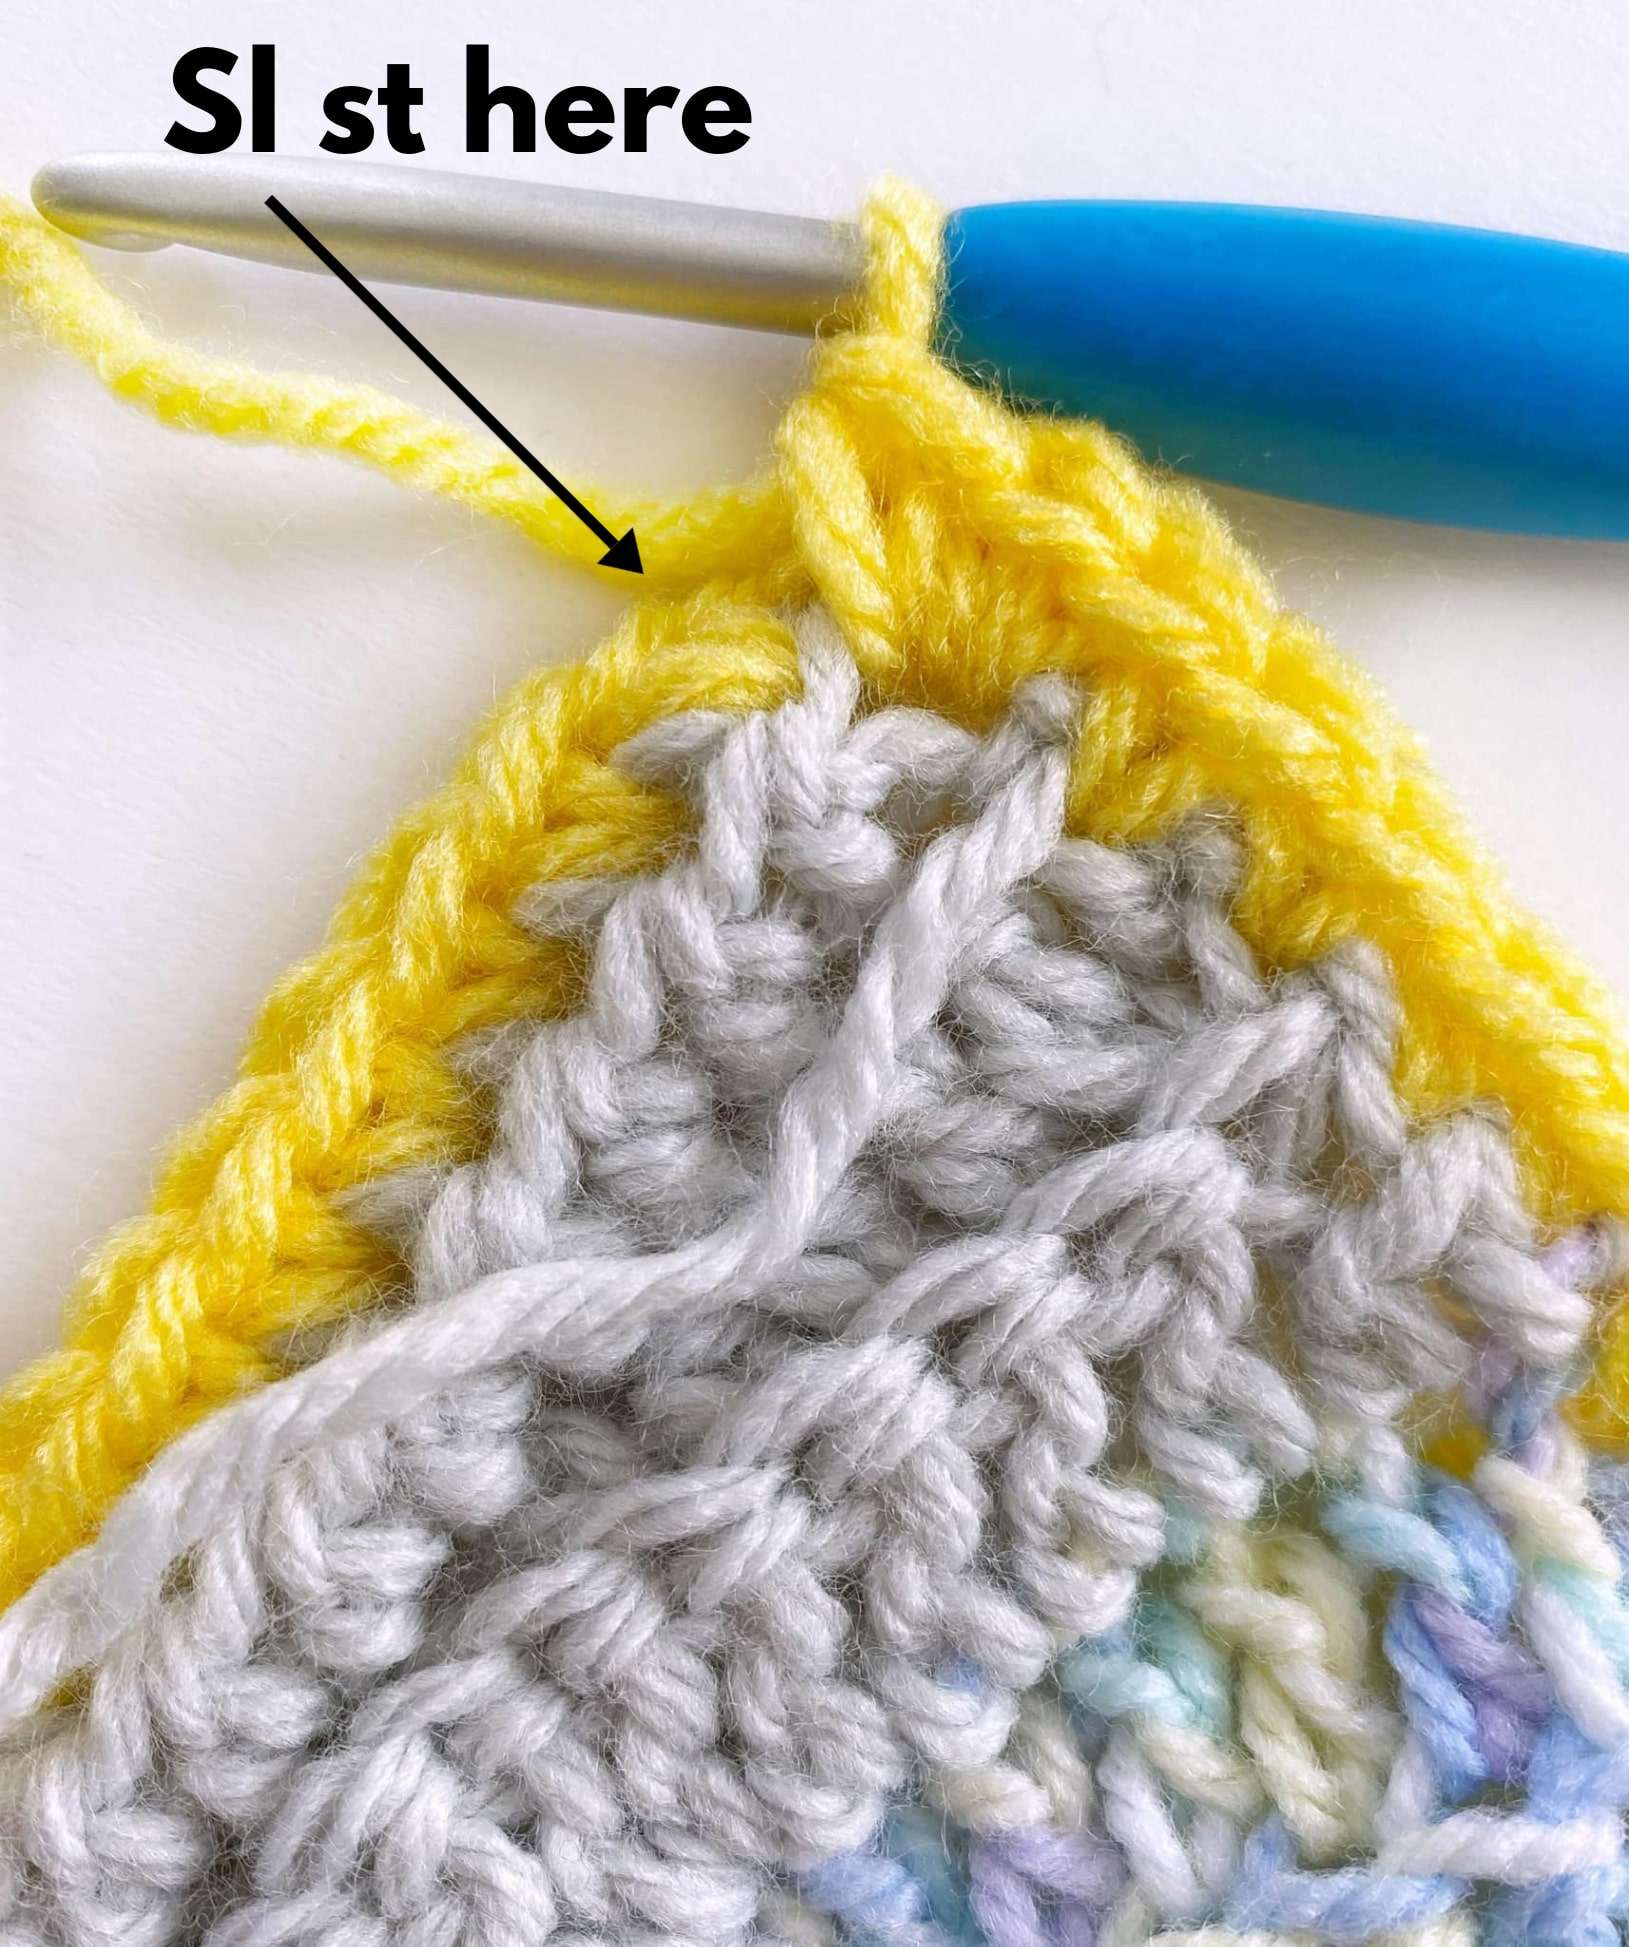
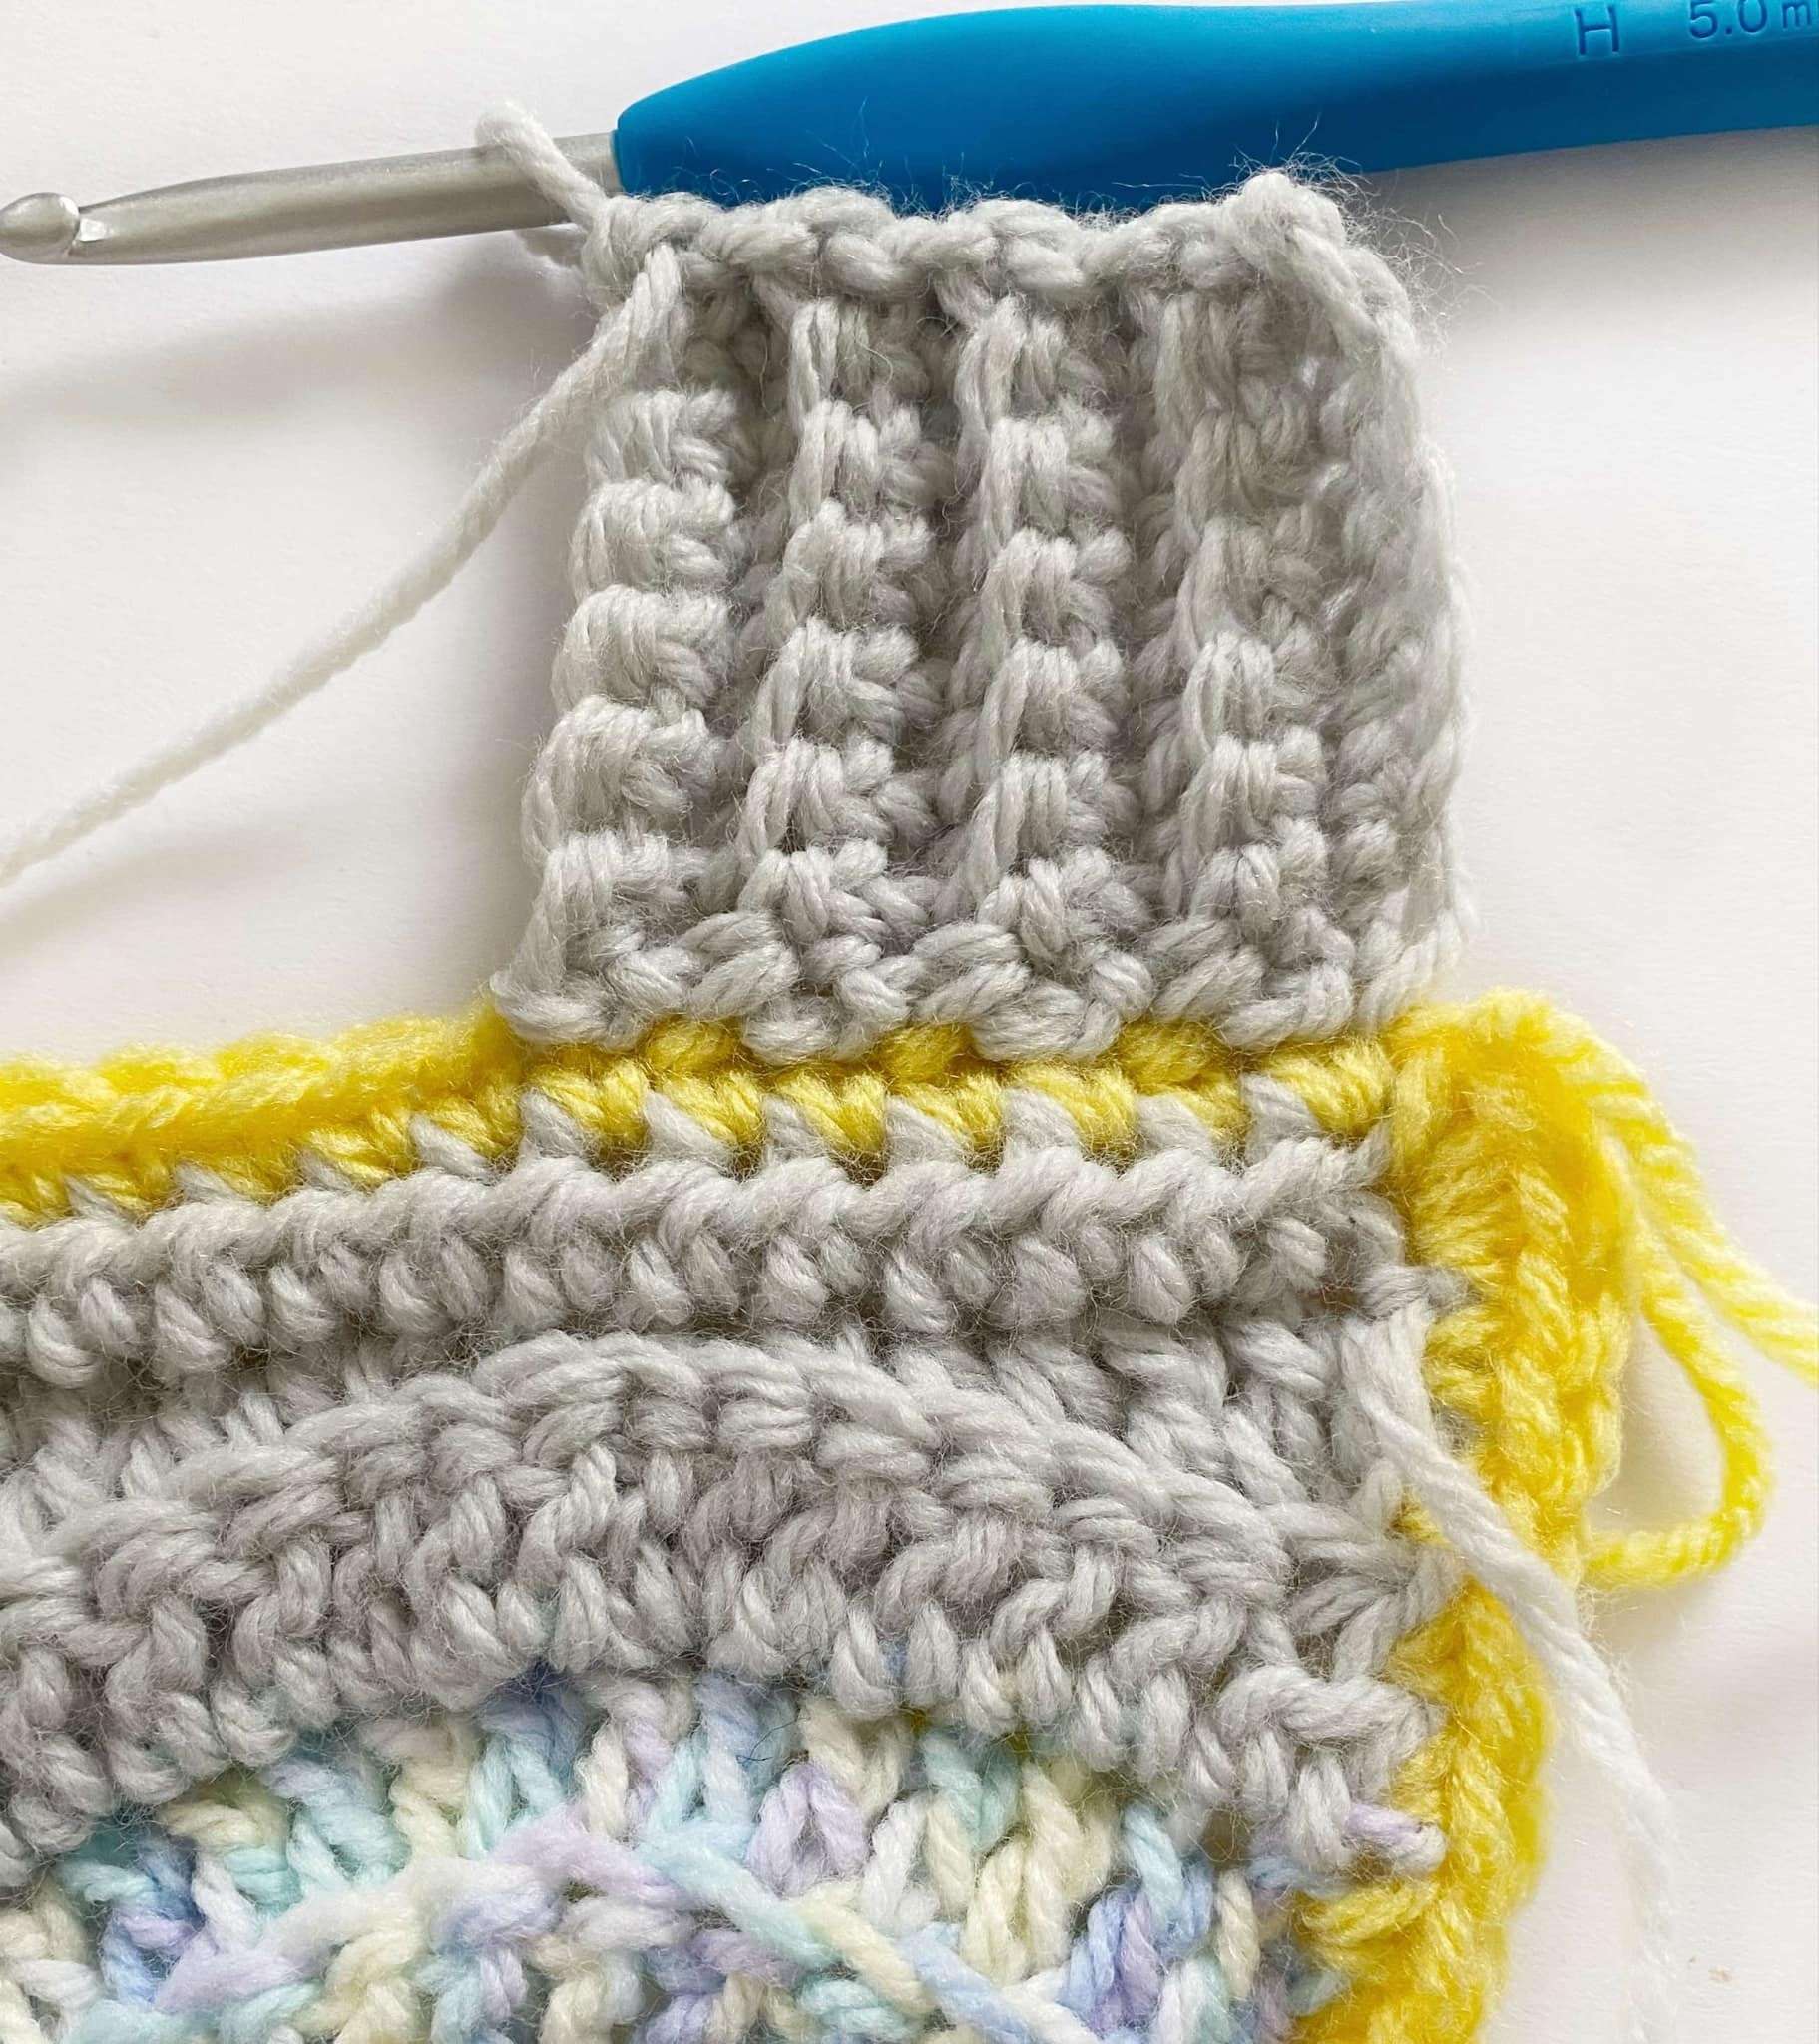
The ribbing is worked across the top of the blanket into each st across. The ribbing starts in the first st of Rnd 1 (where we made the sl st join).
Start in the top-right corner of the blanket, using Colour A:
Row 1: Ch 9, sc in second ch from hook and in each ch across. To join the ribbing to the blanket, sl st into the first st of Rnd 1, and sl st into the next st of Rnd 1. Turn. (8 sc)
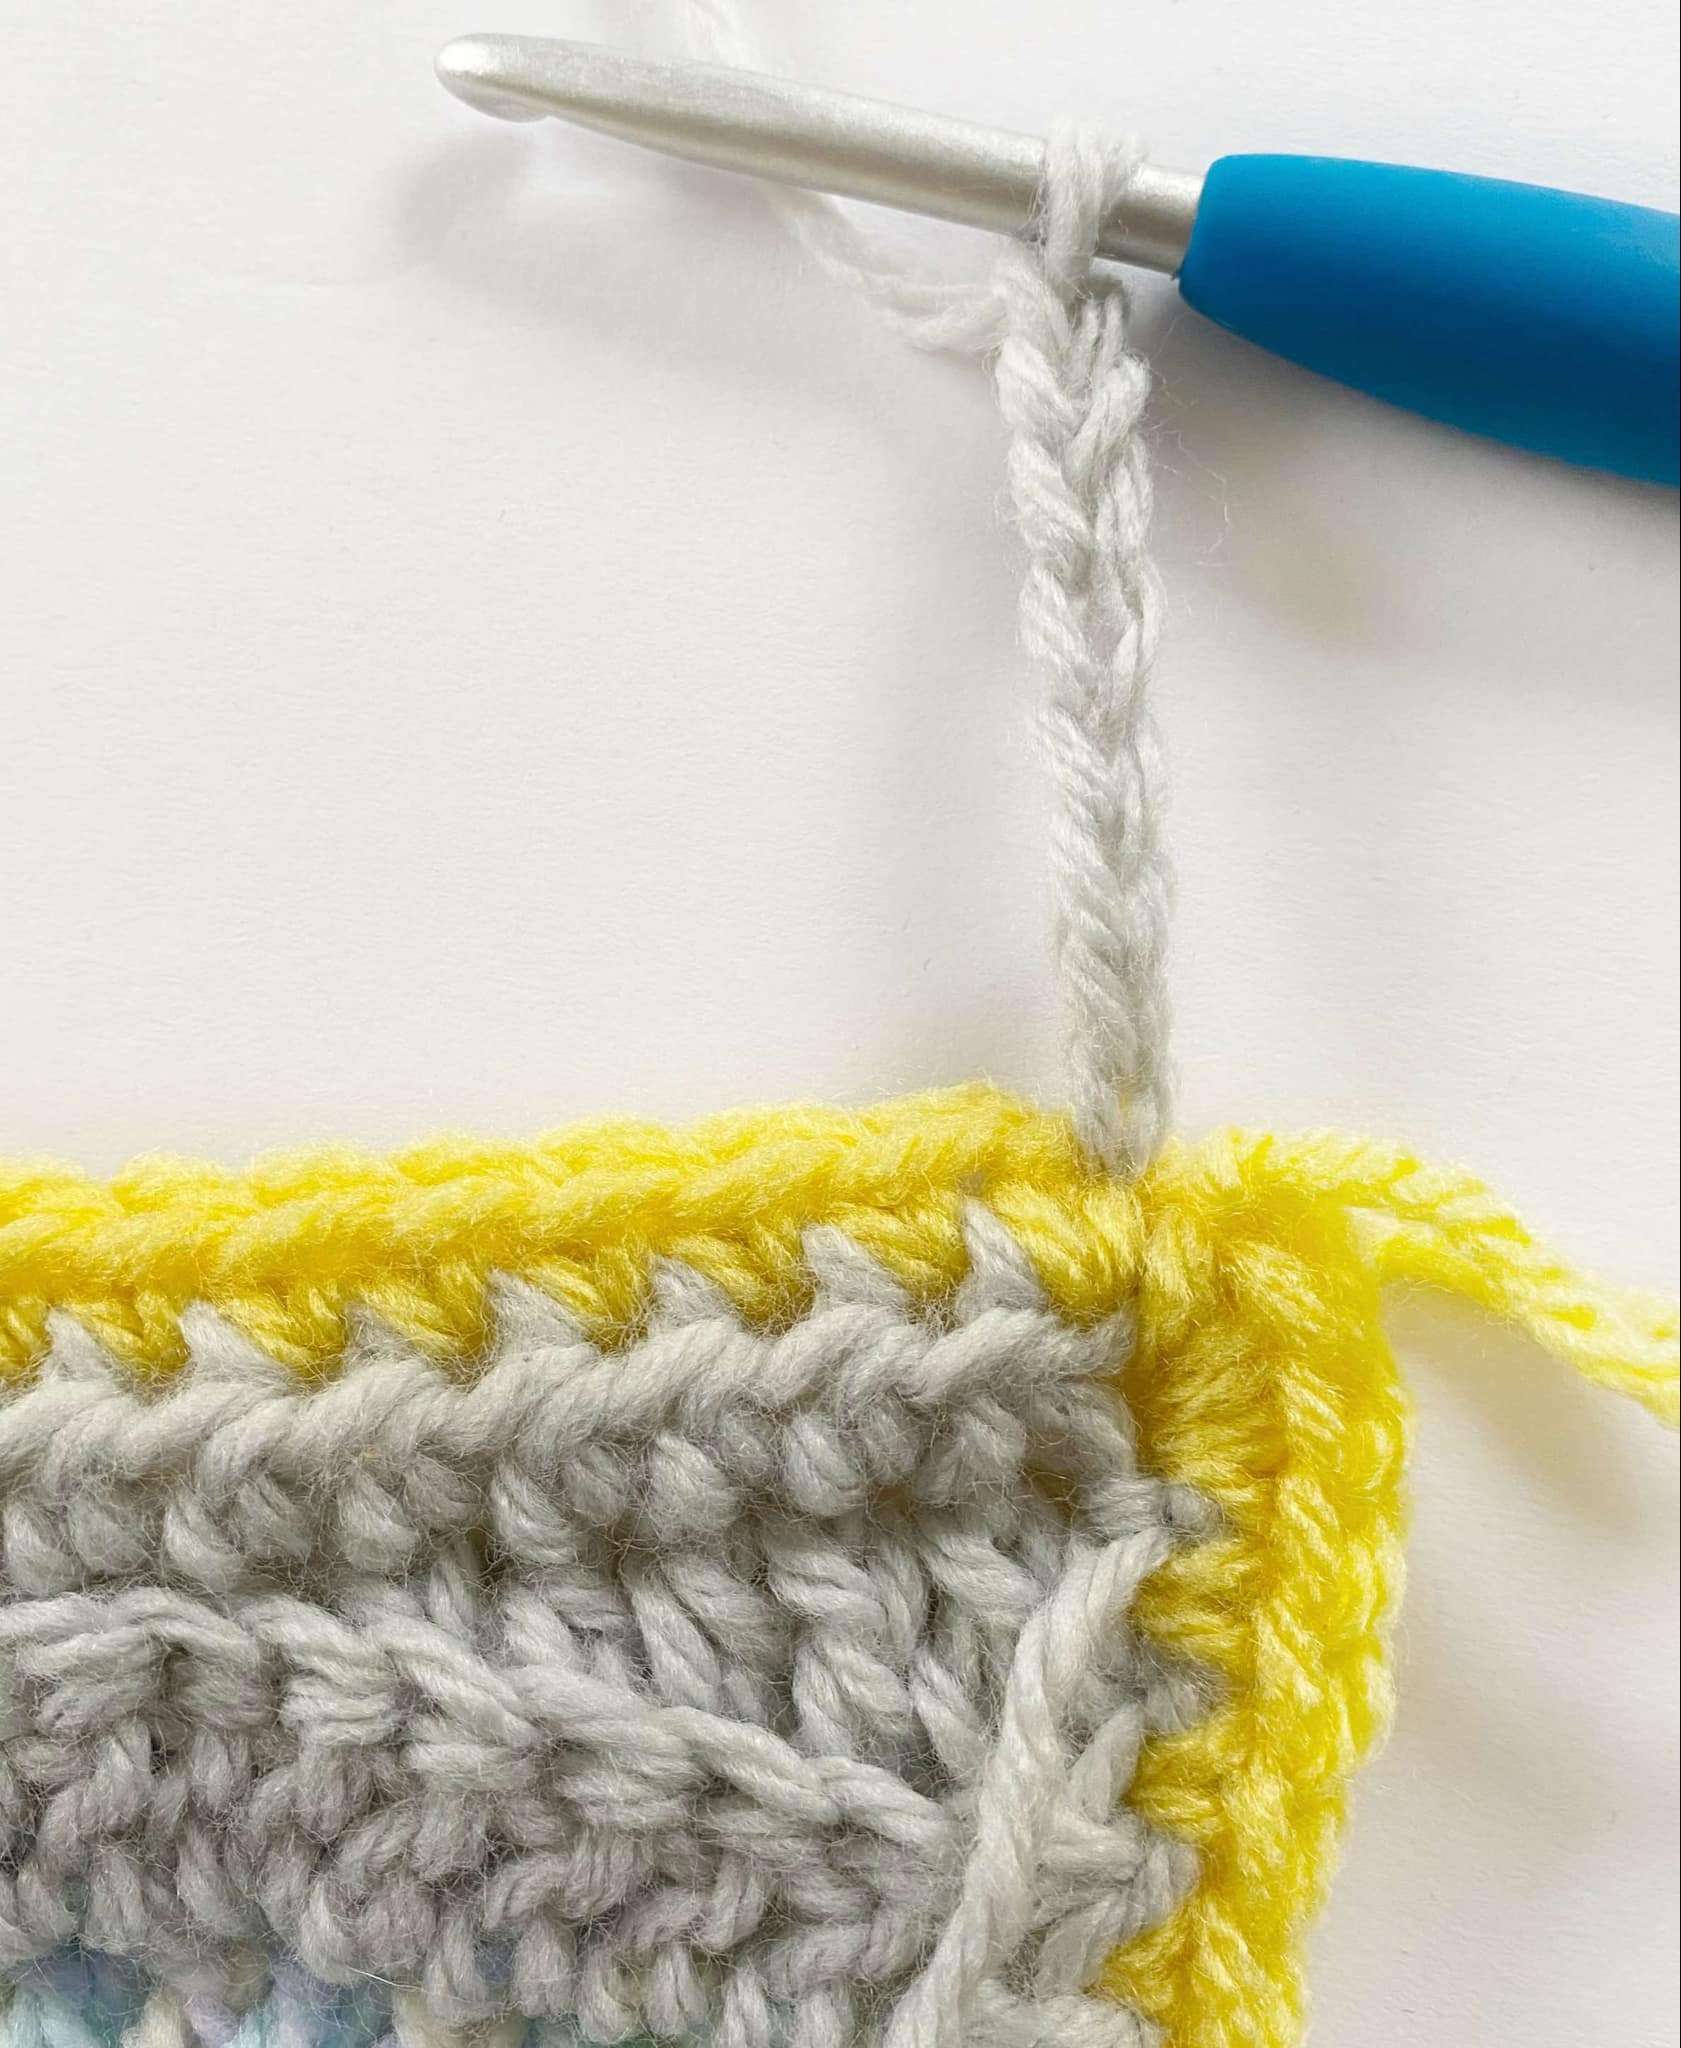
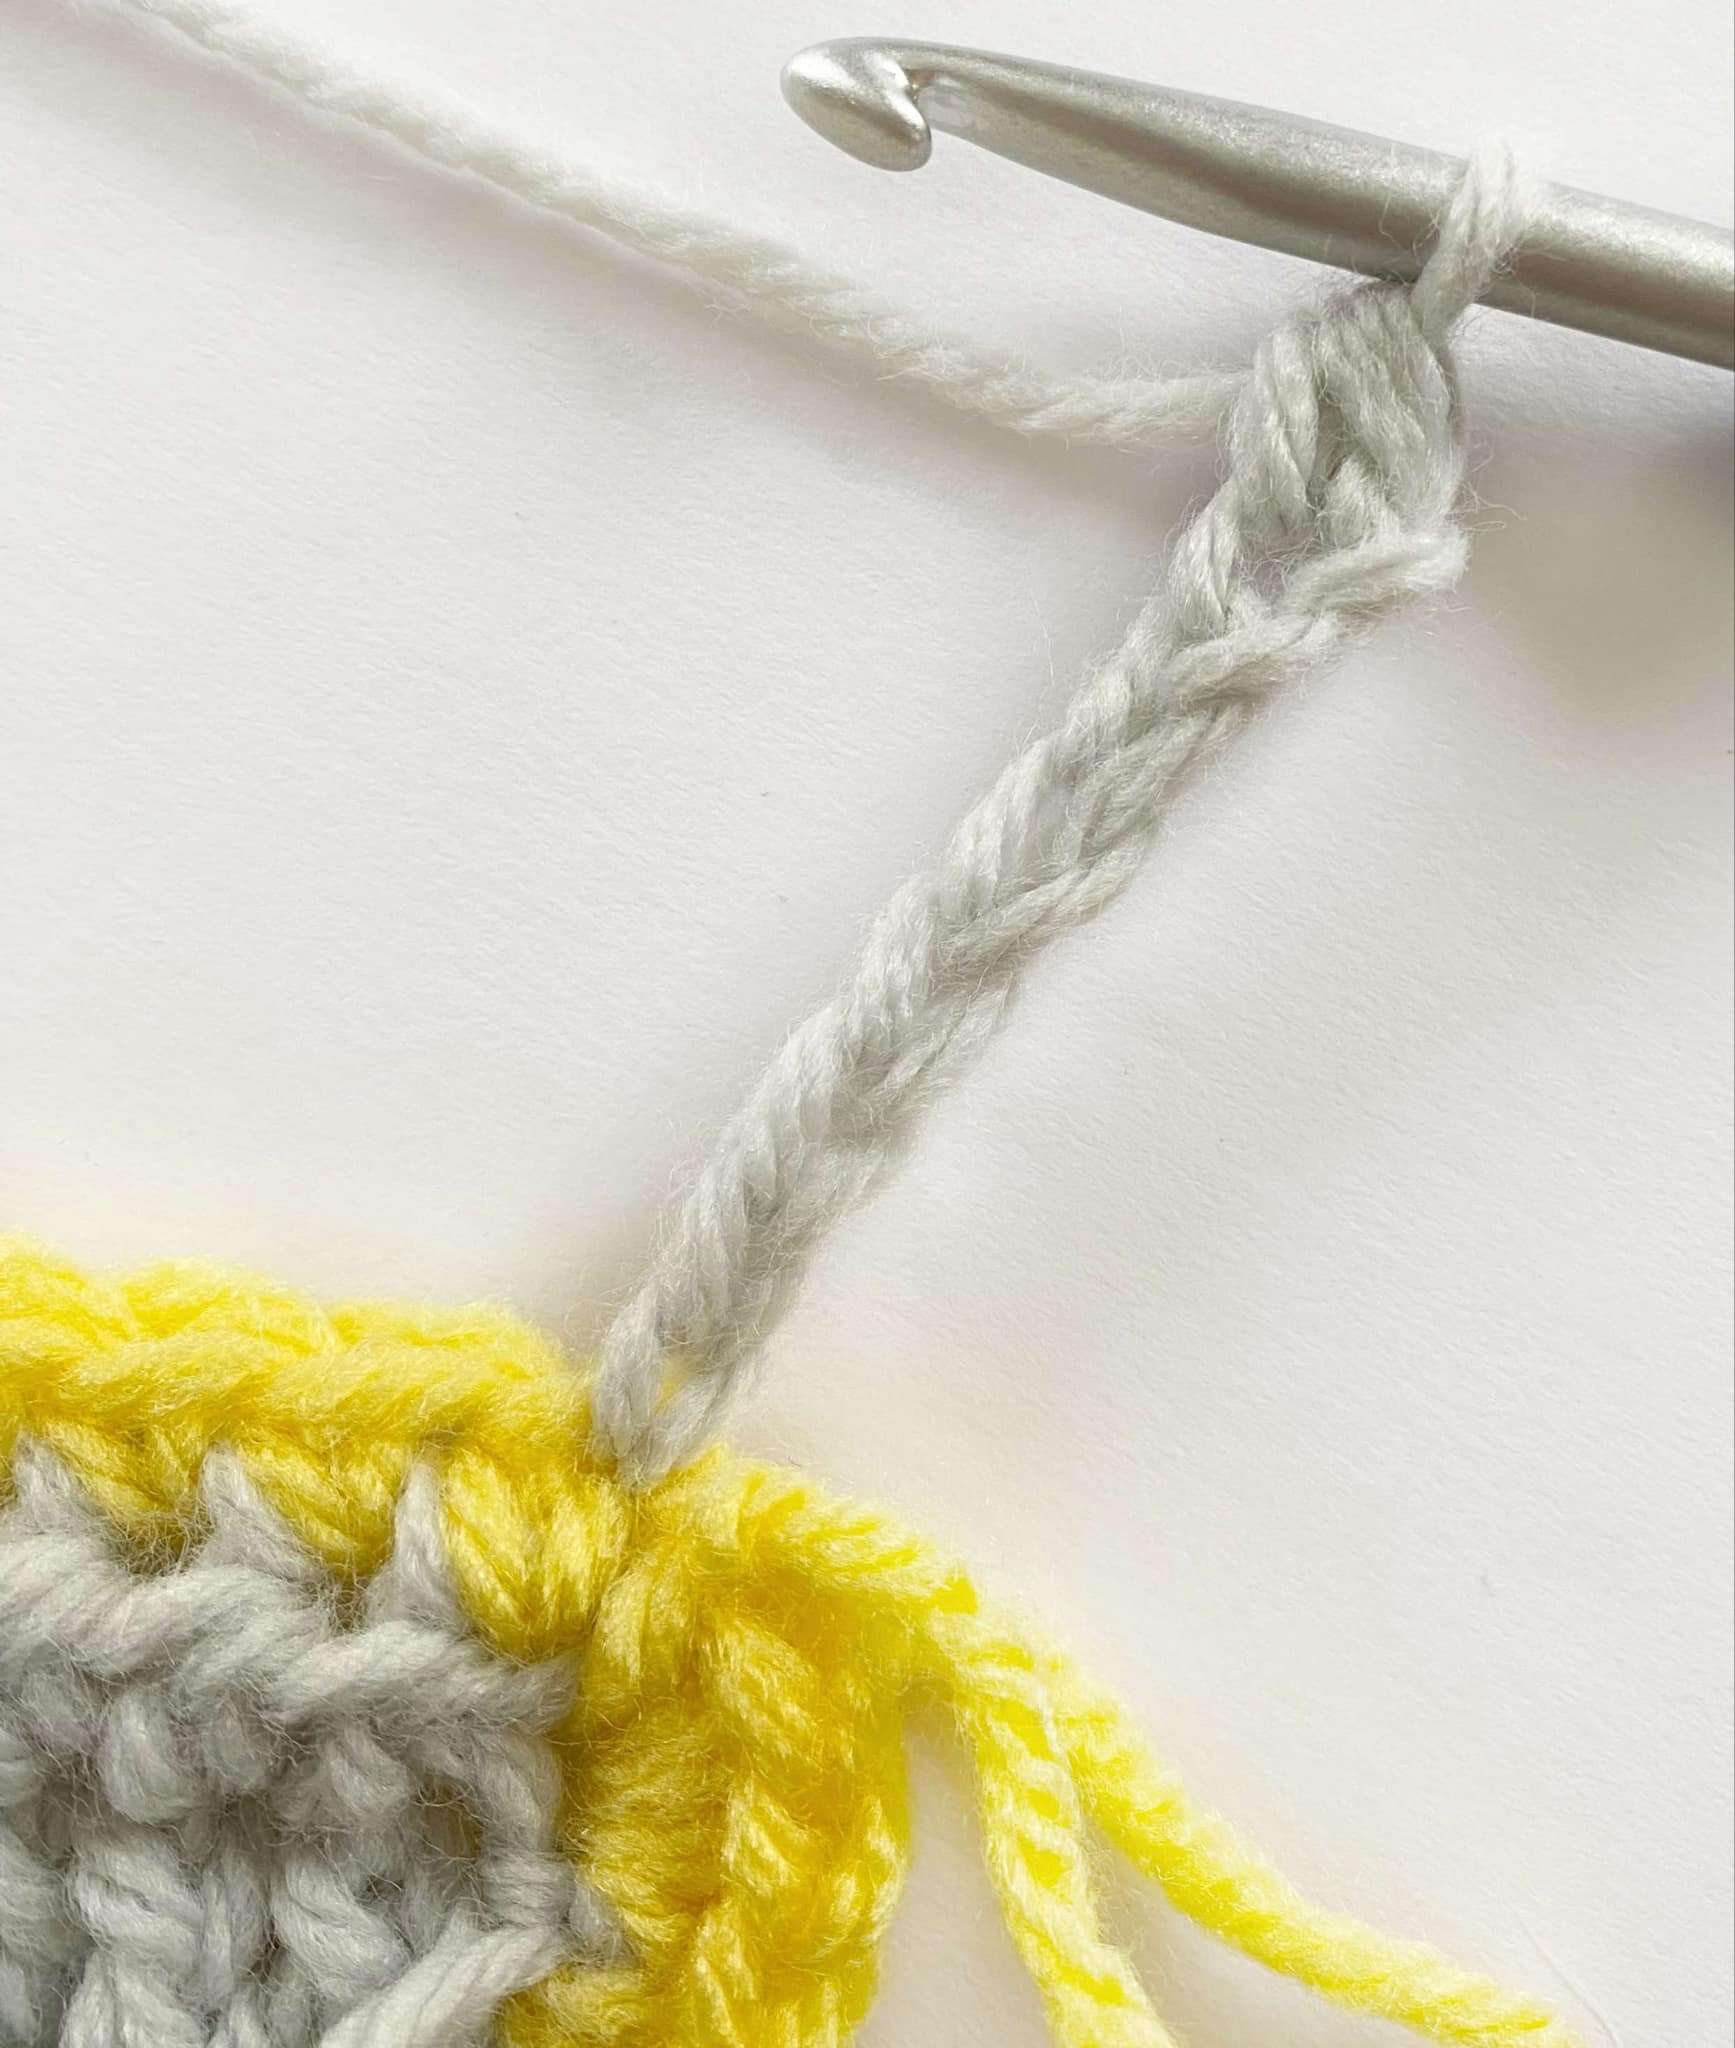
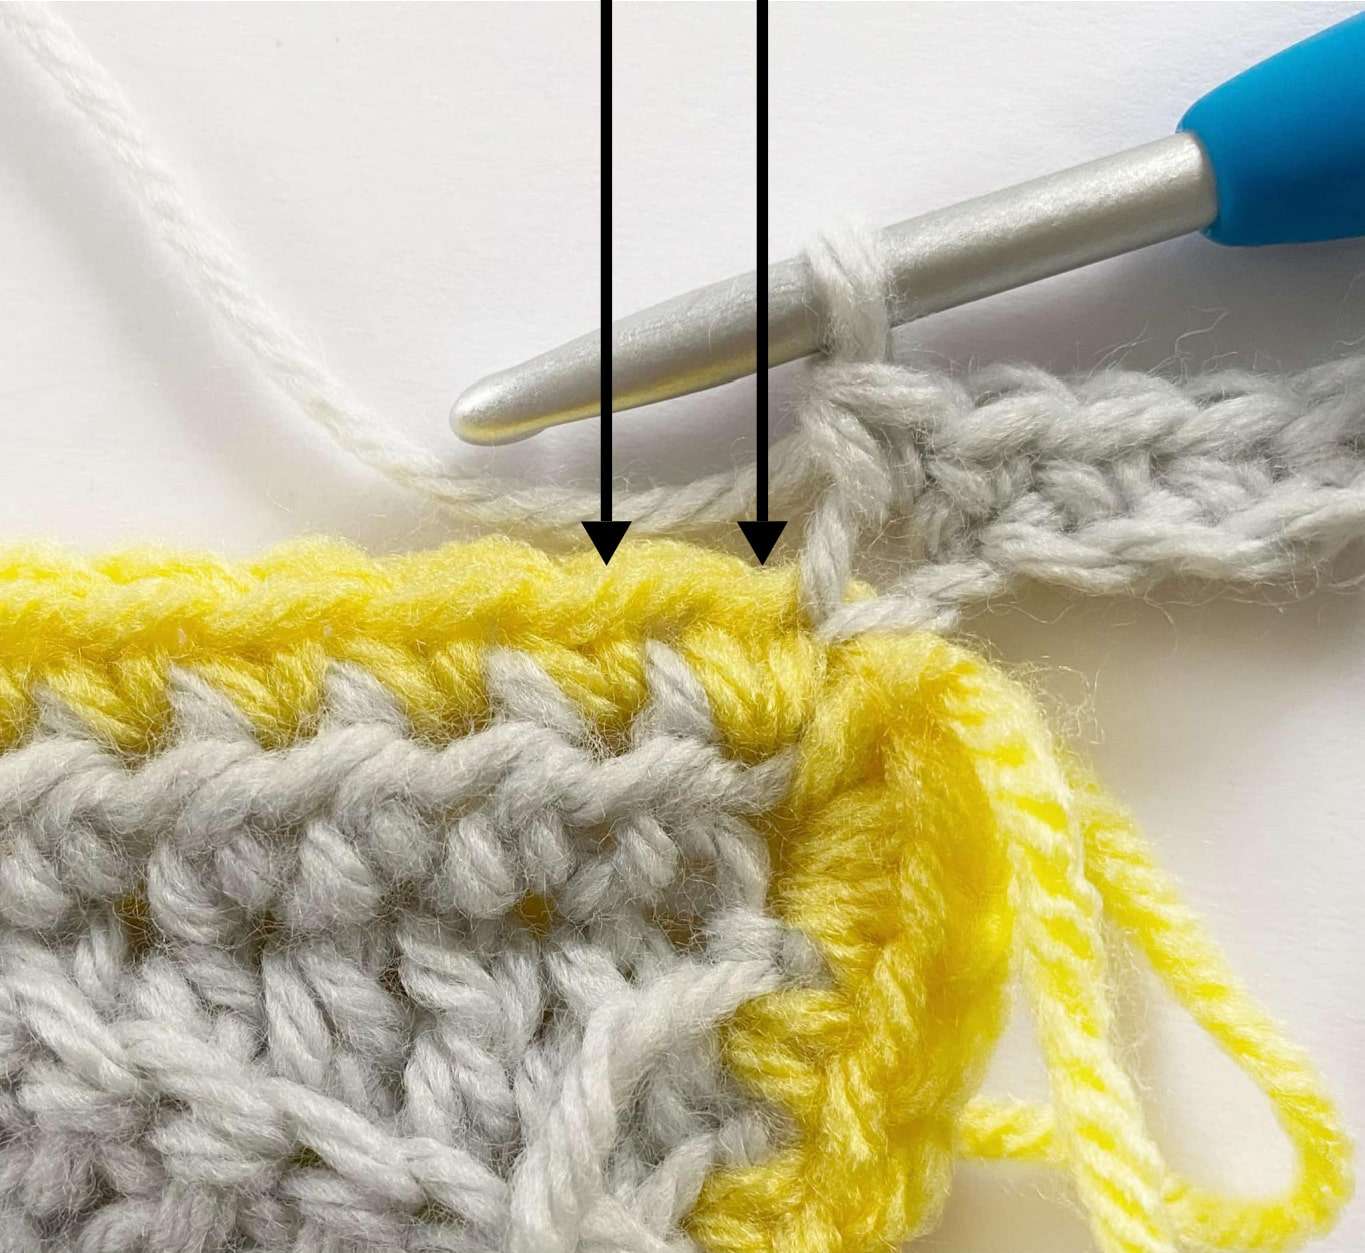
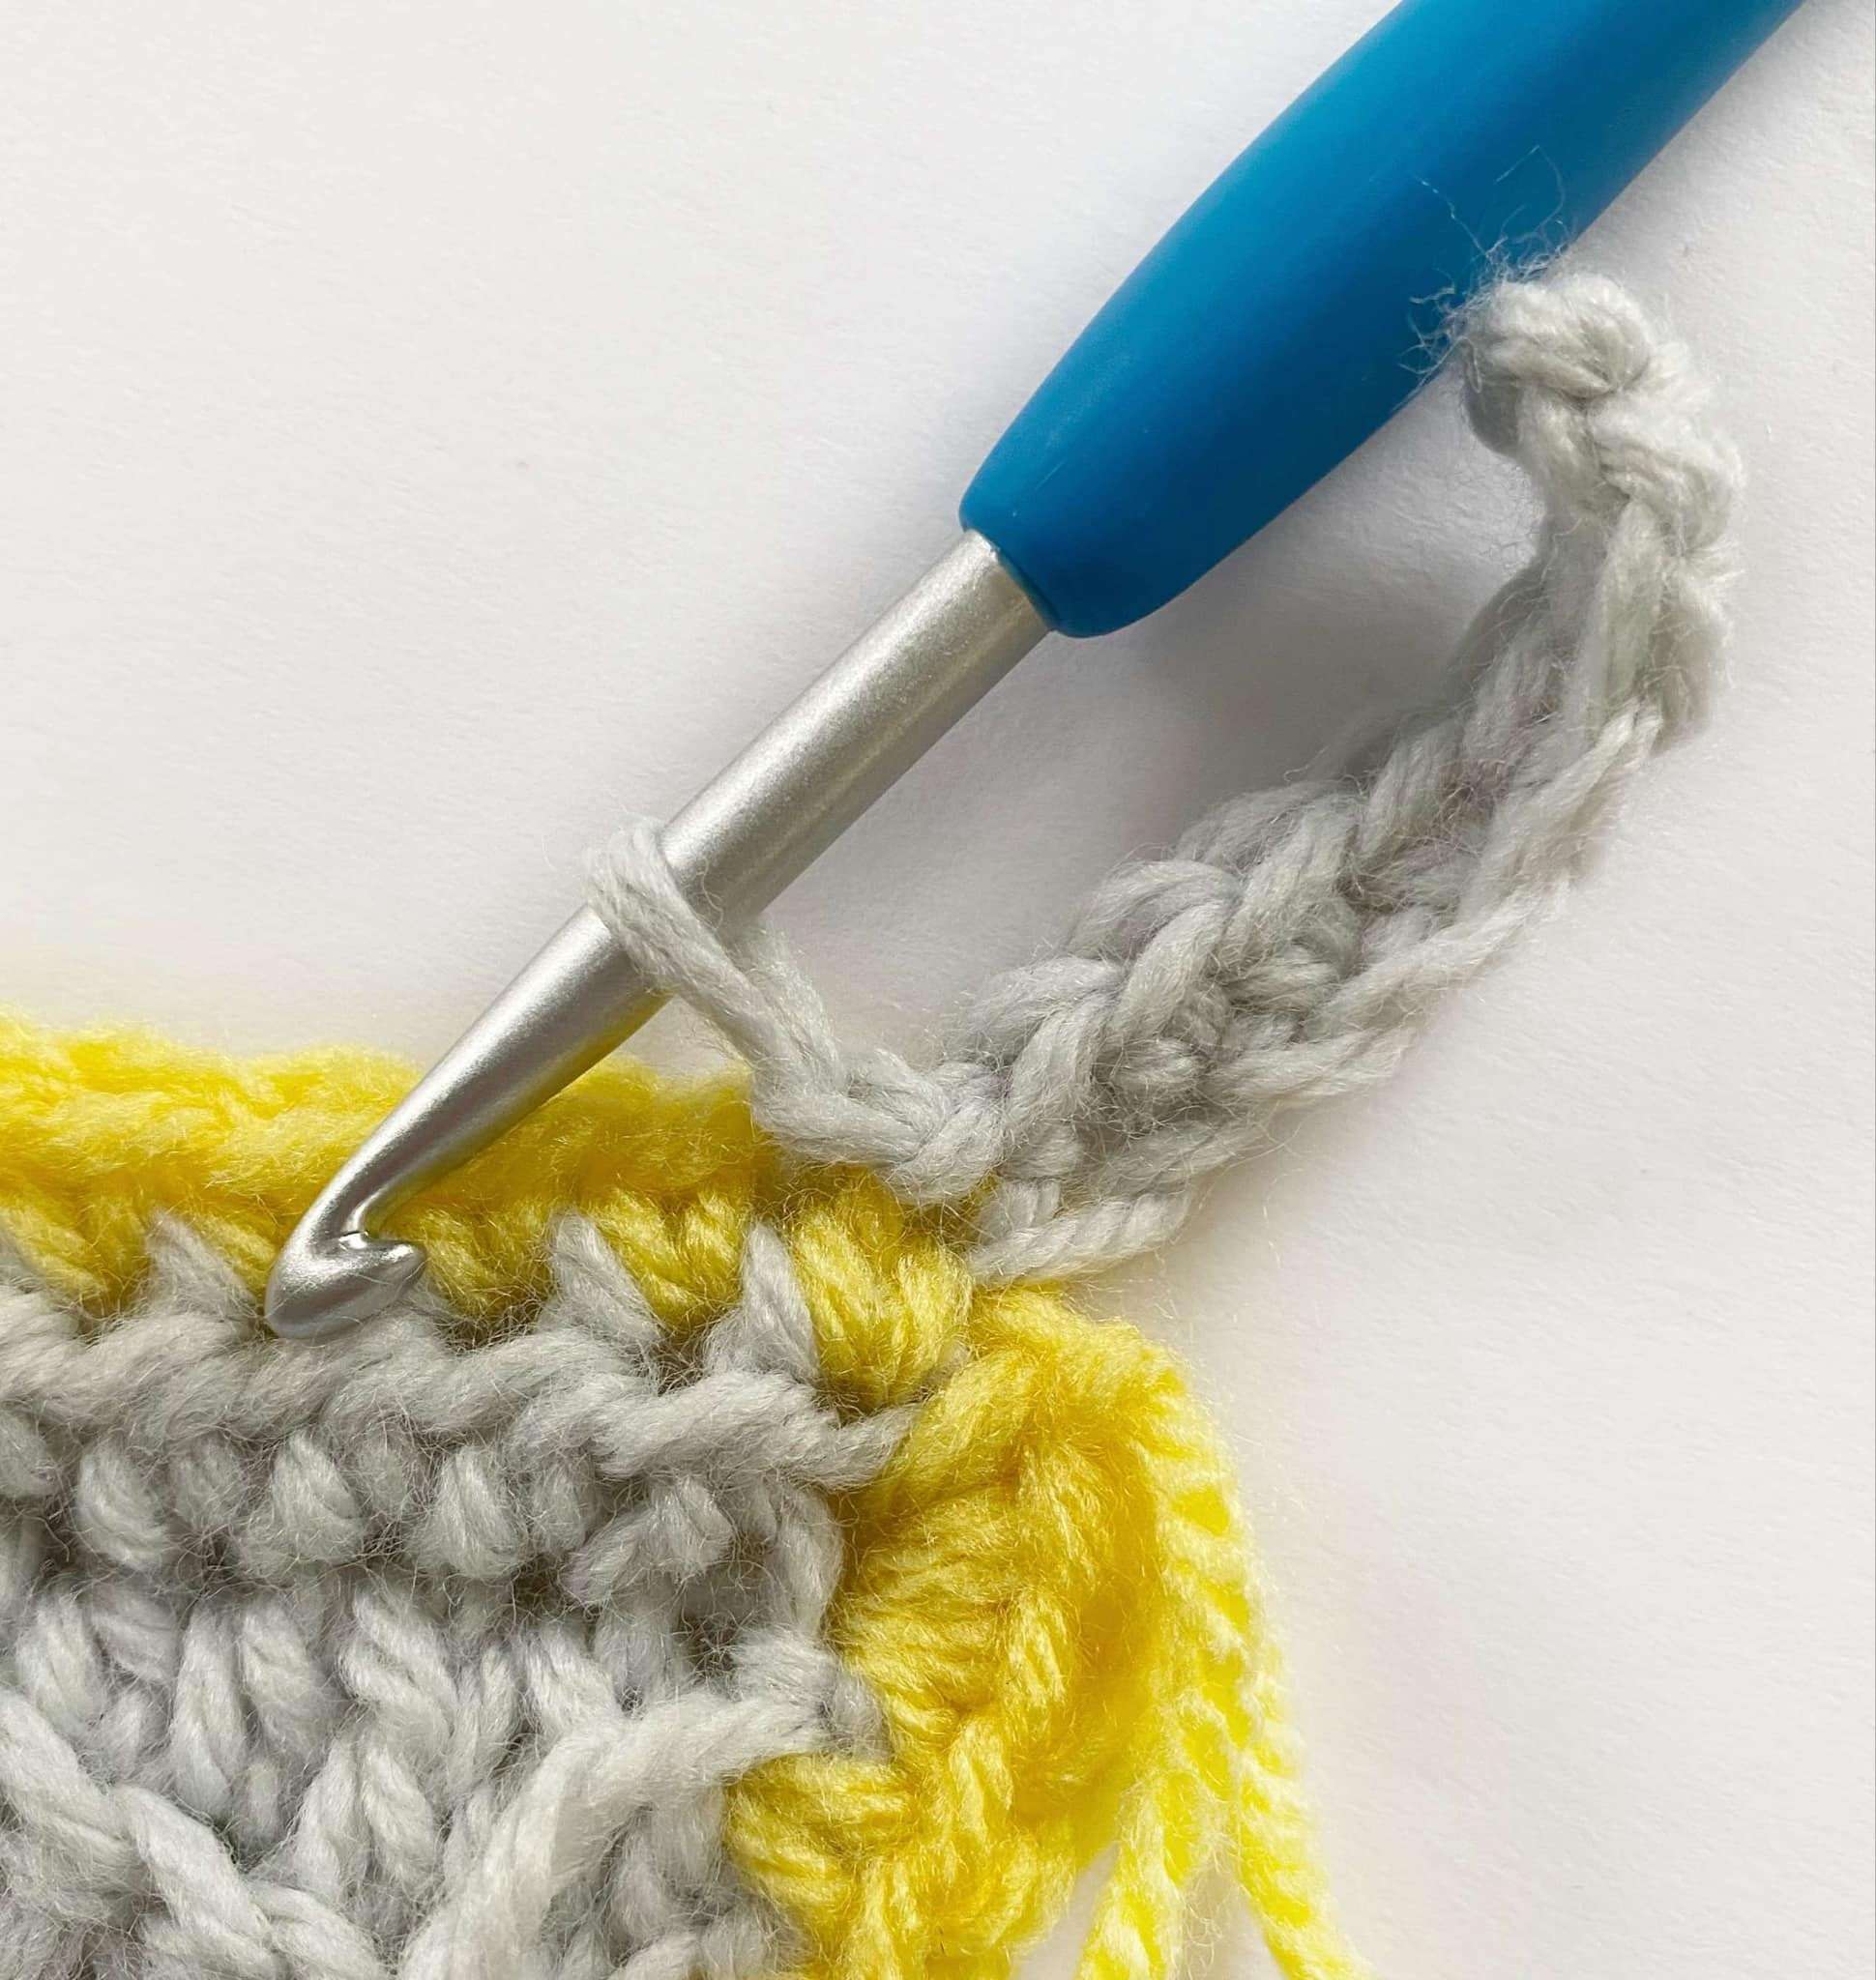
Row 2: Do not ch 1. Sc in BLO of each st across until 1 st remains, sc in both loops of last st. Turn. (8 sc)
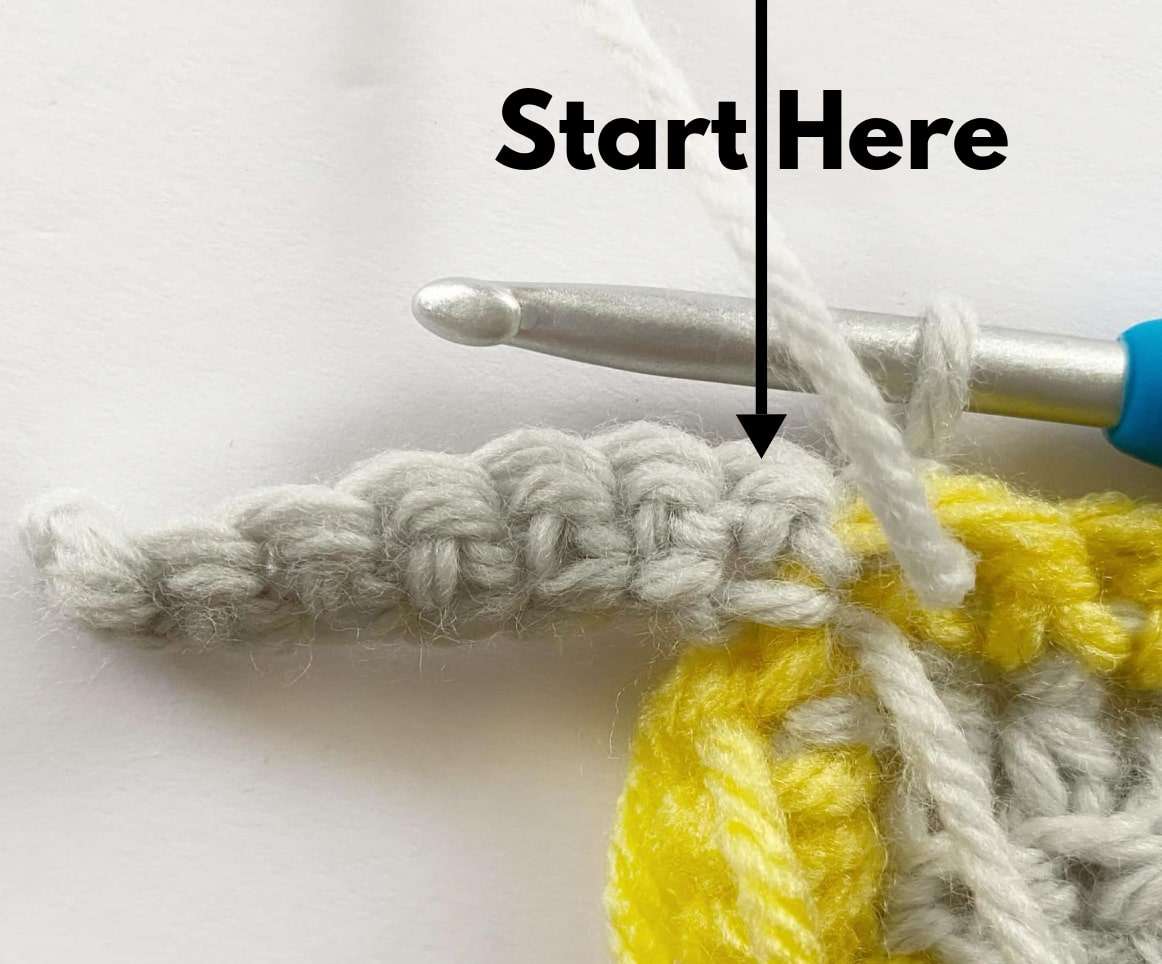
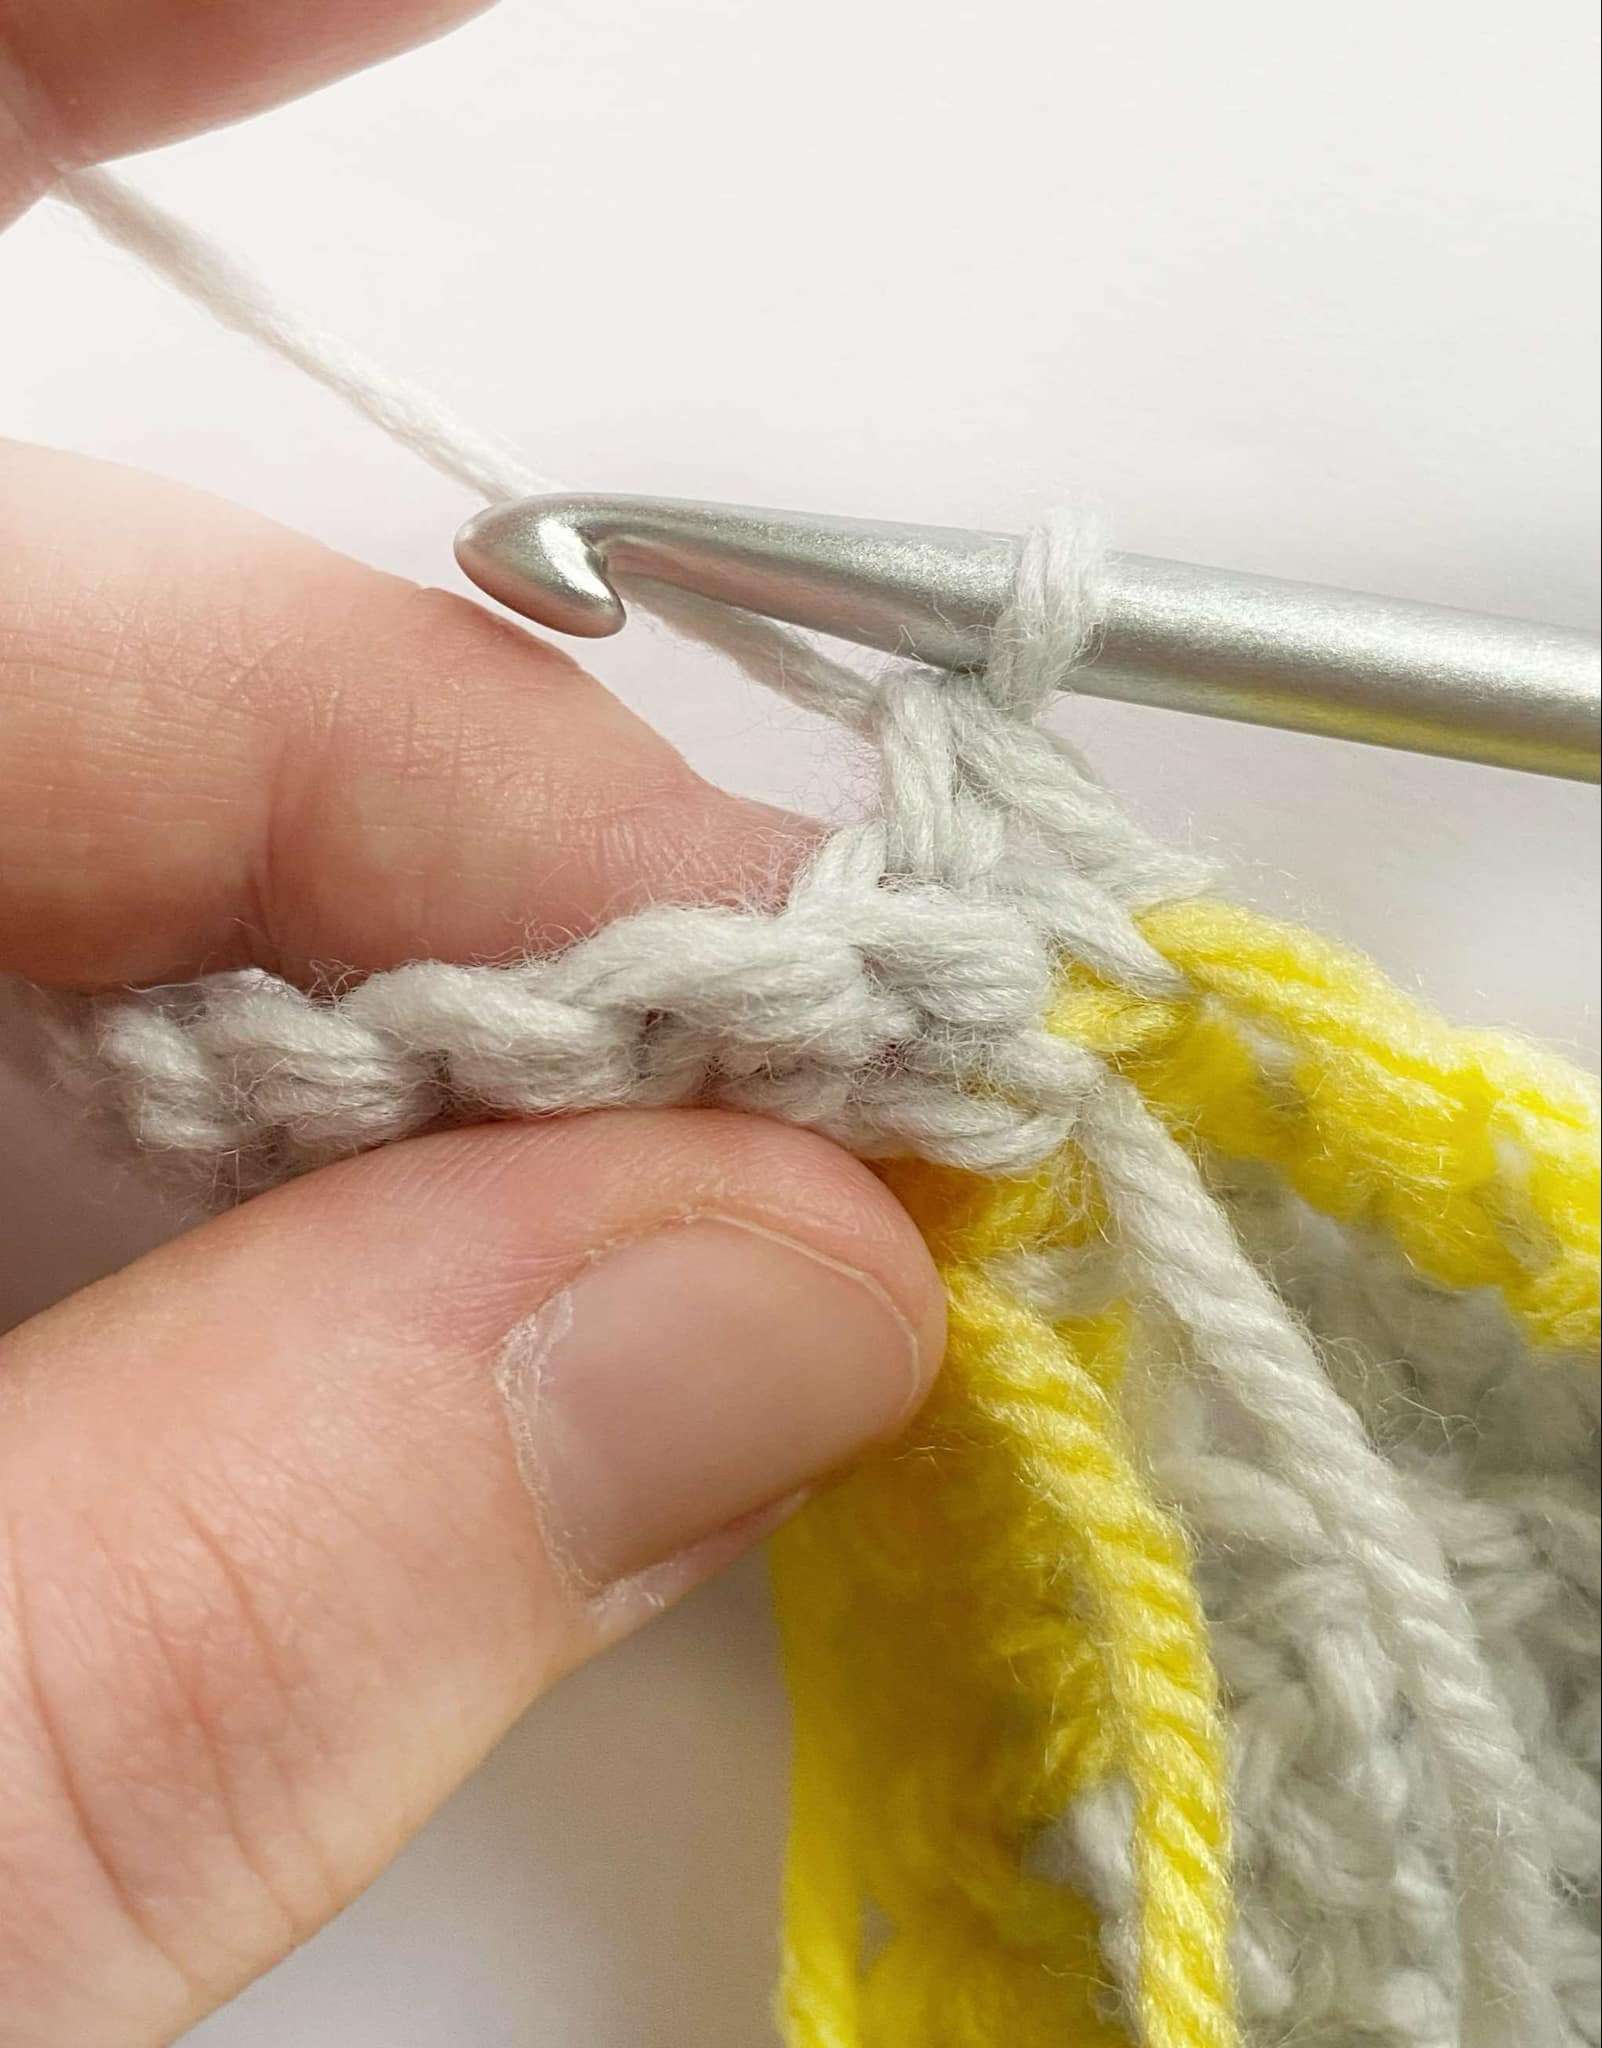
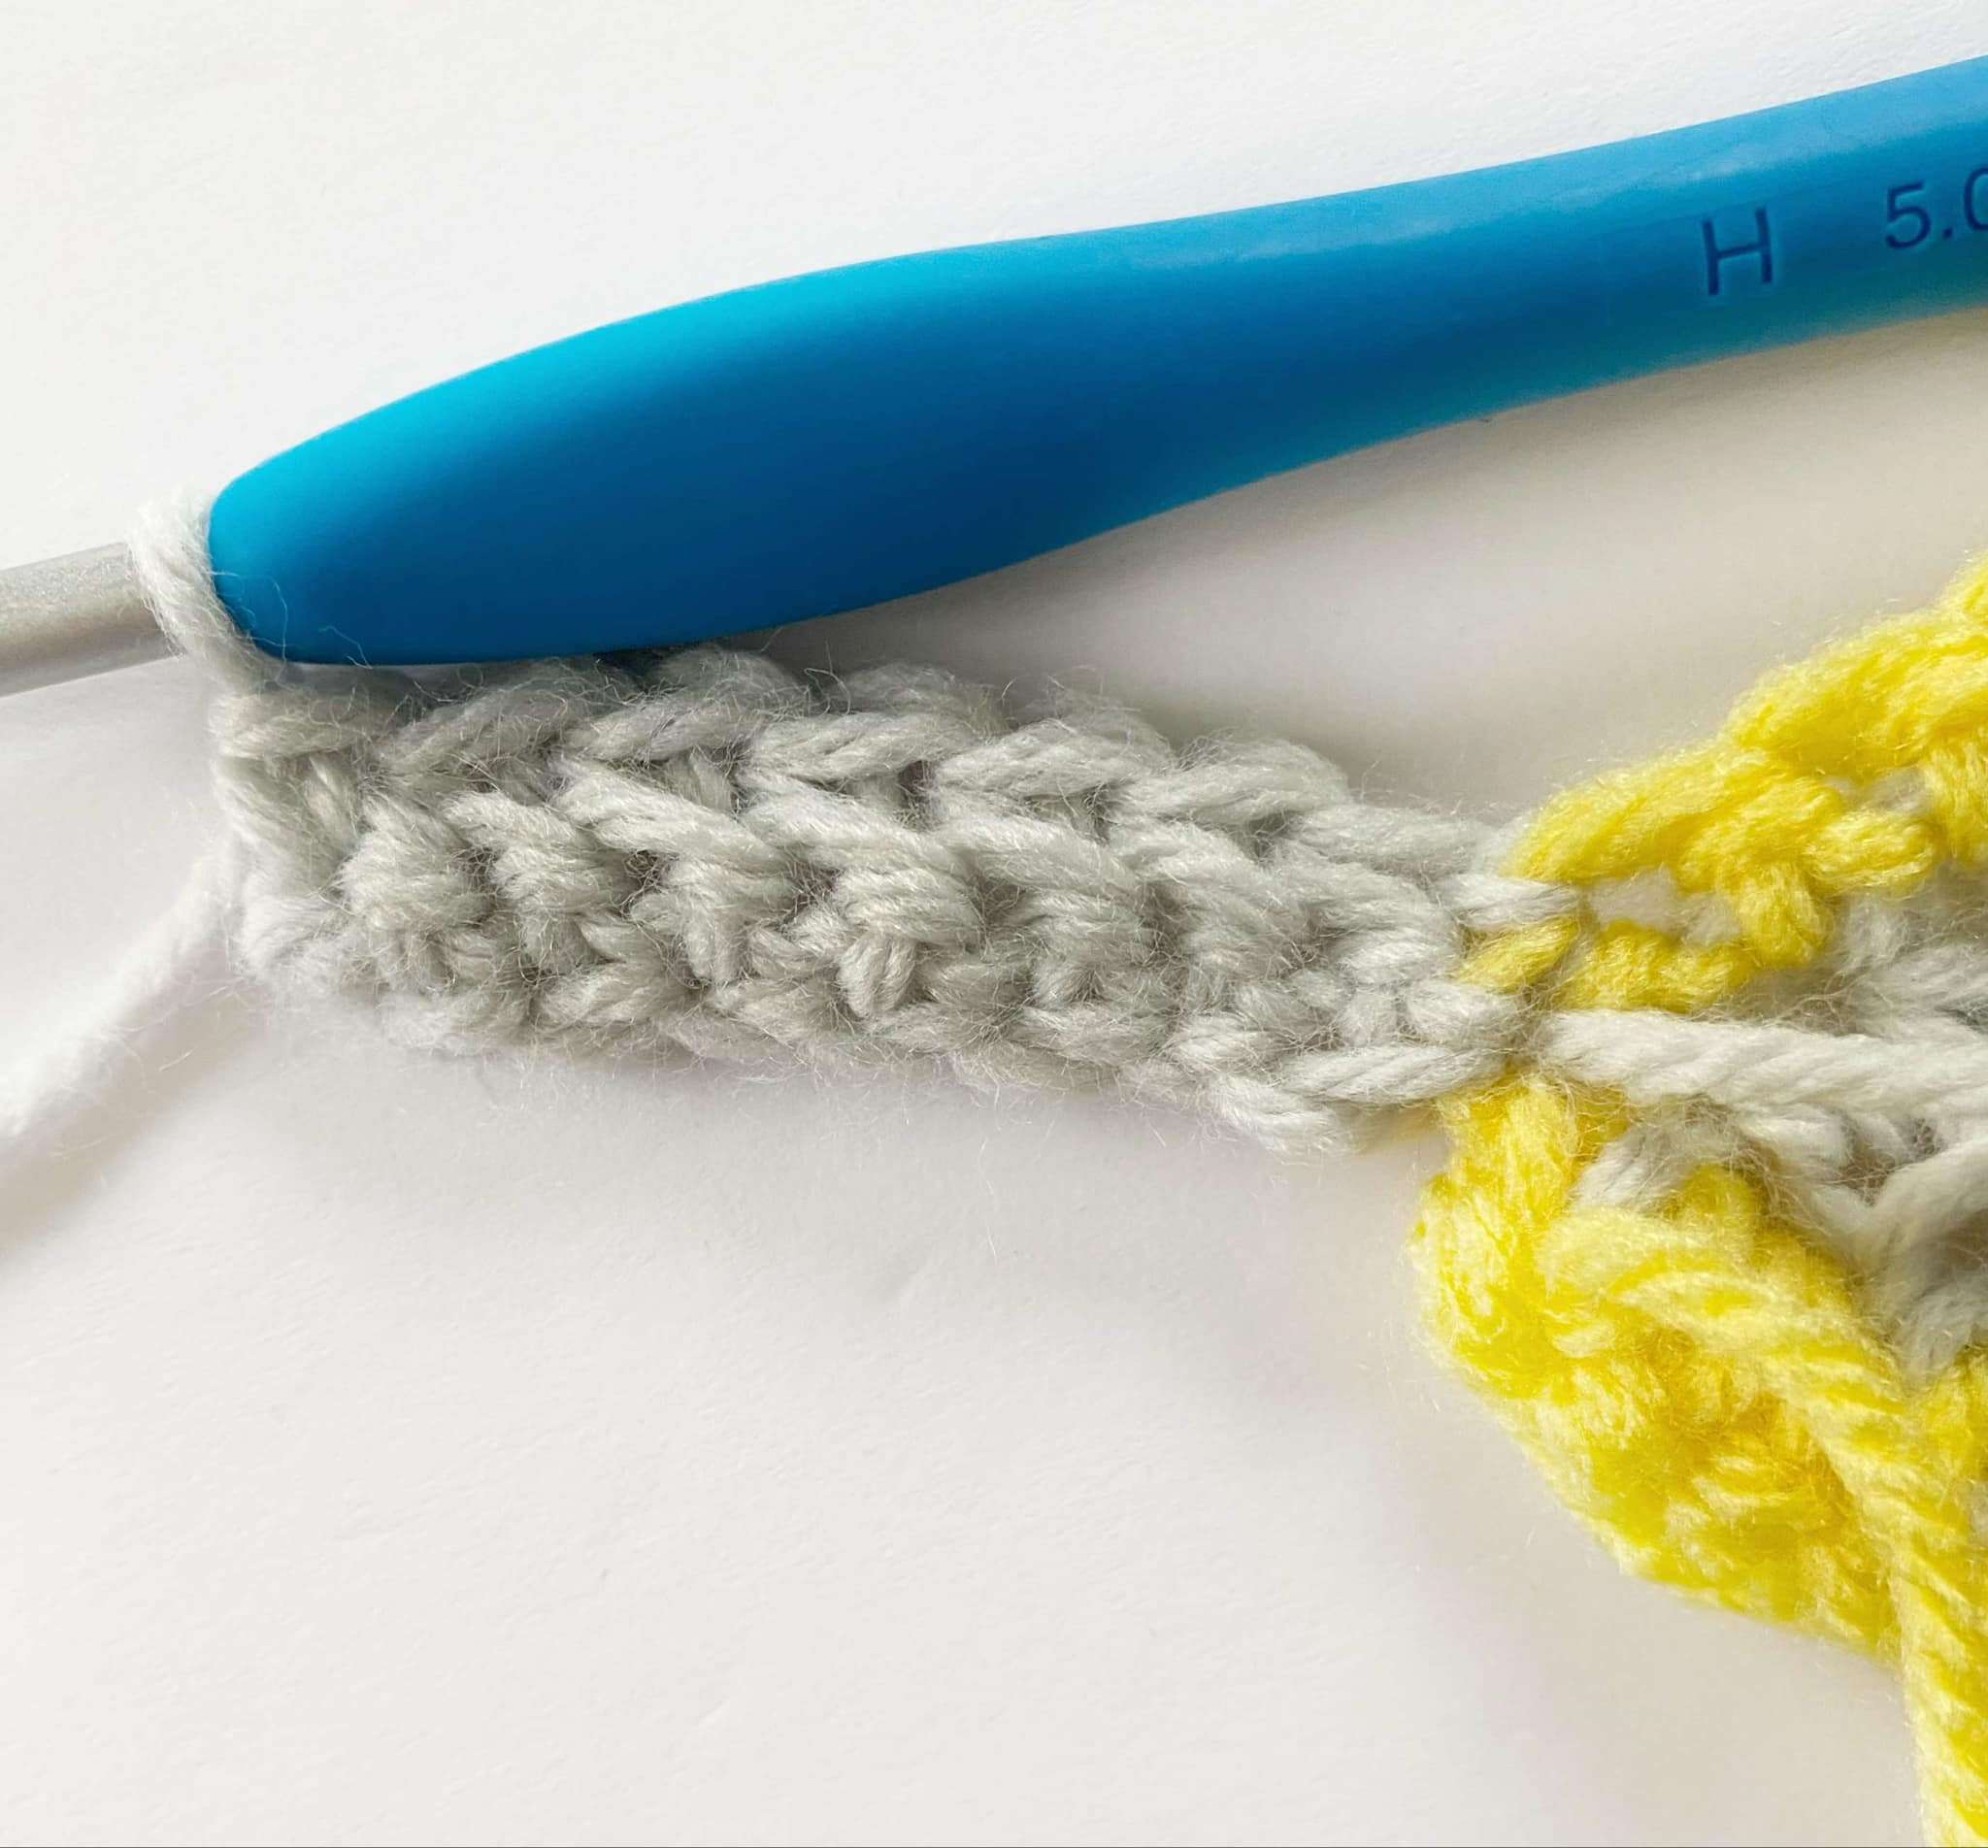
Row 3: Ch 1, sc in BLO of each st across until 1 st remains, sc in both loops of last st. Join the ribbing by making a sl st into the next 2 sts of Rnd 1. Turn. (8 sc)
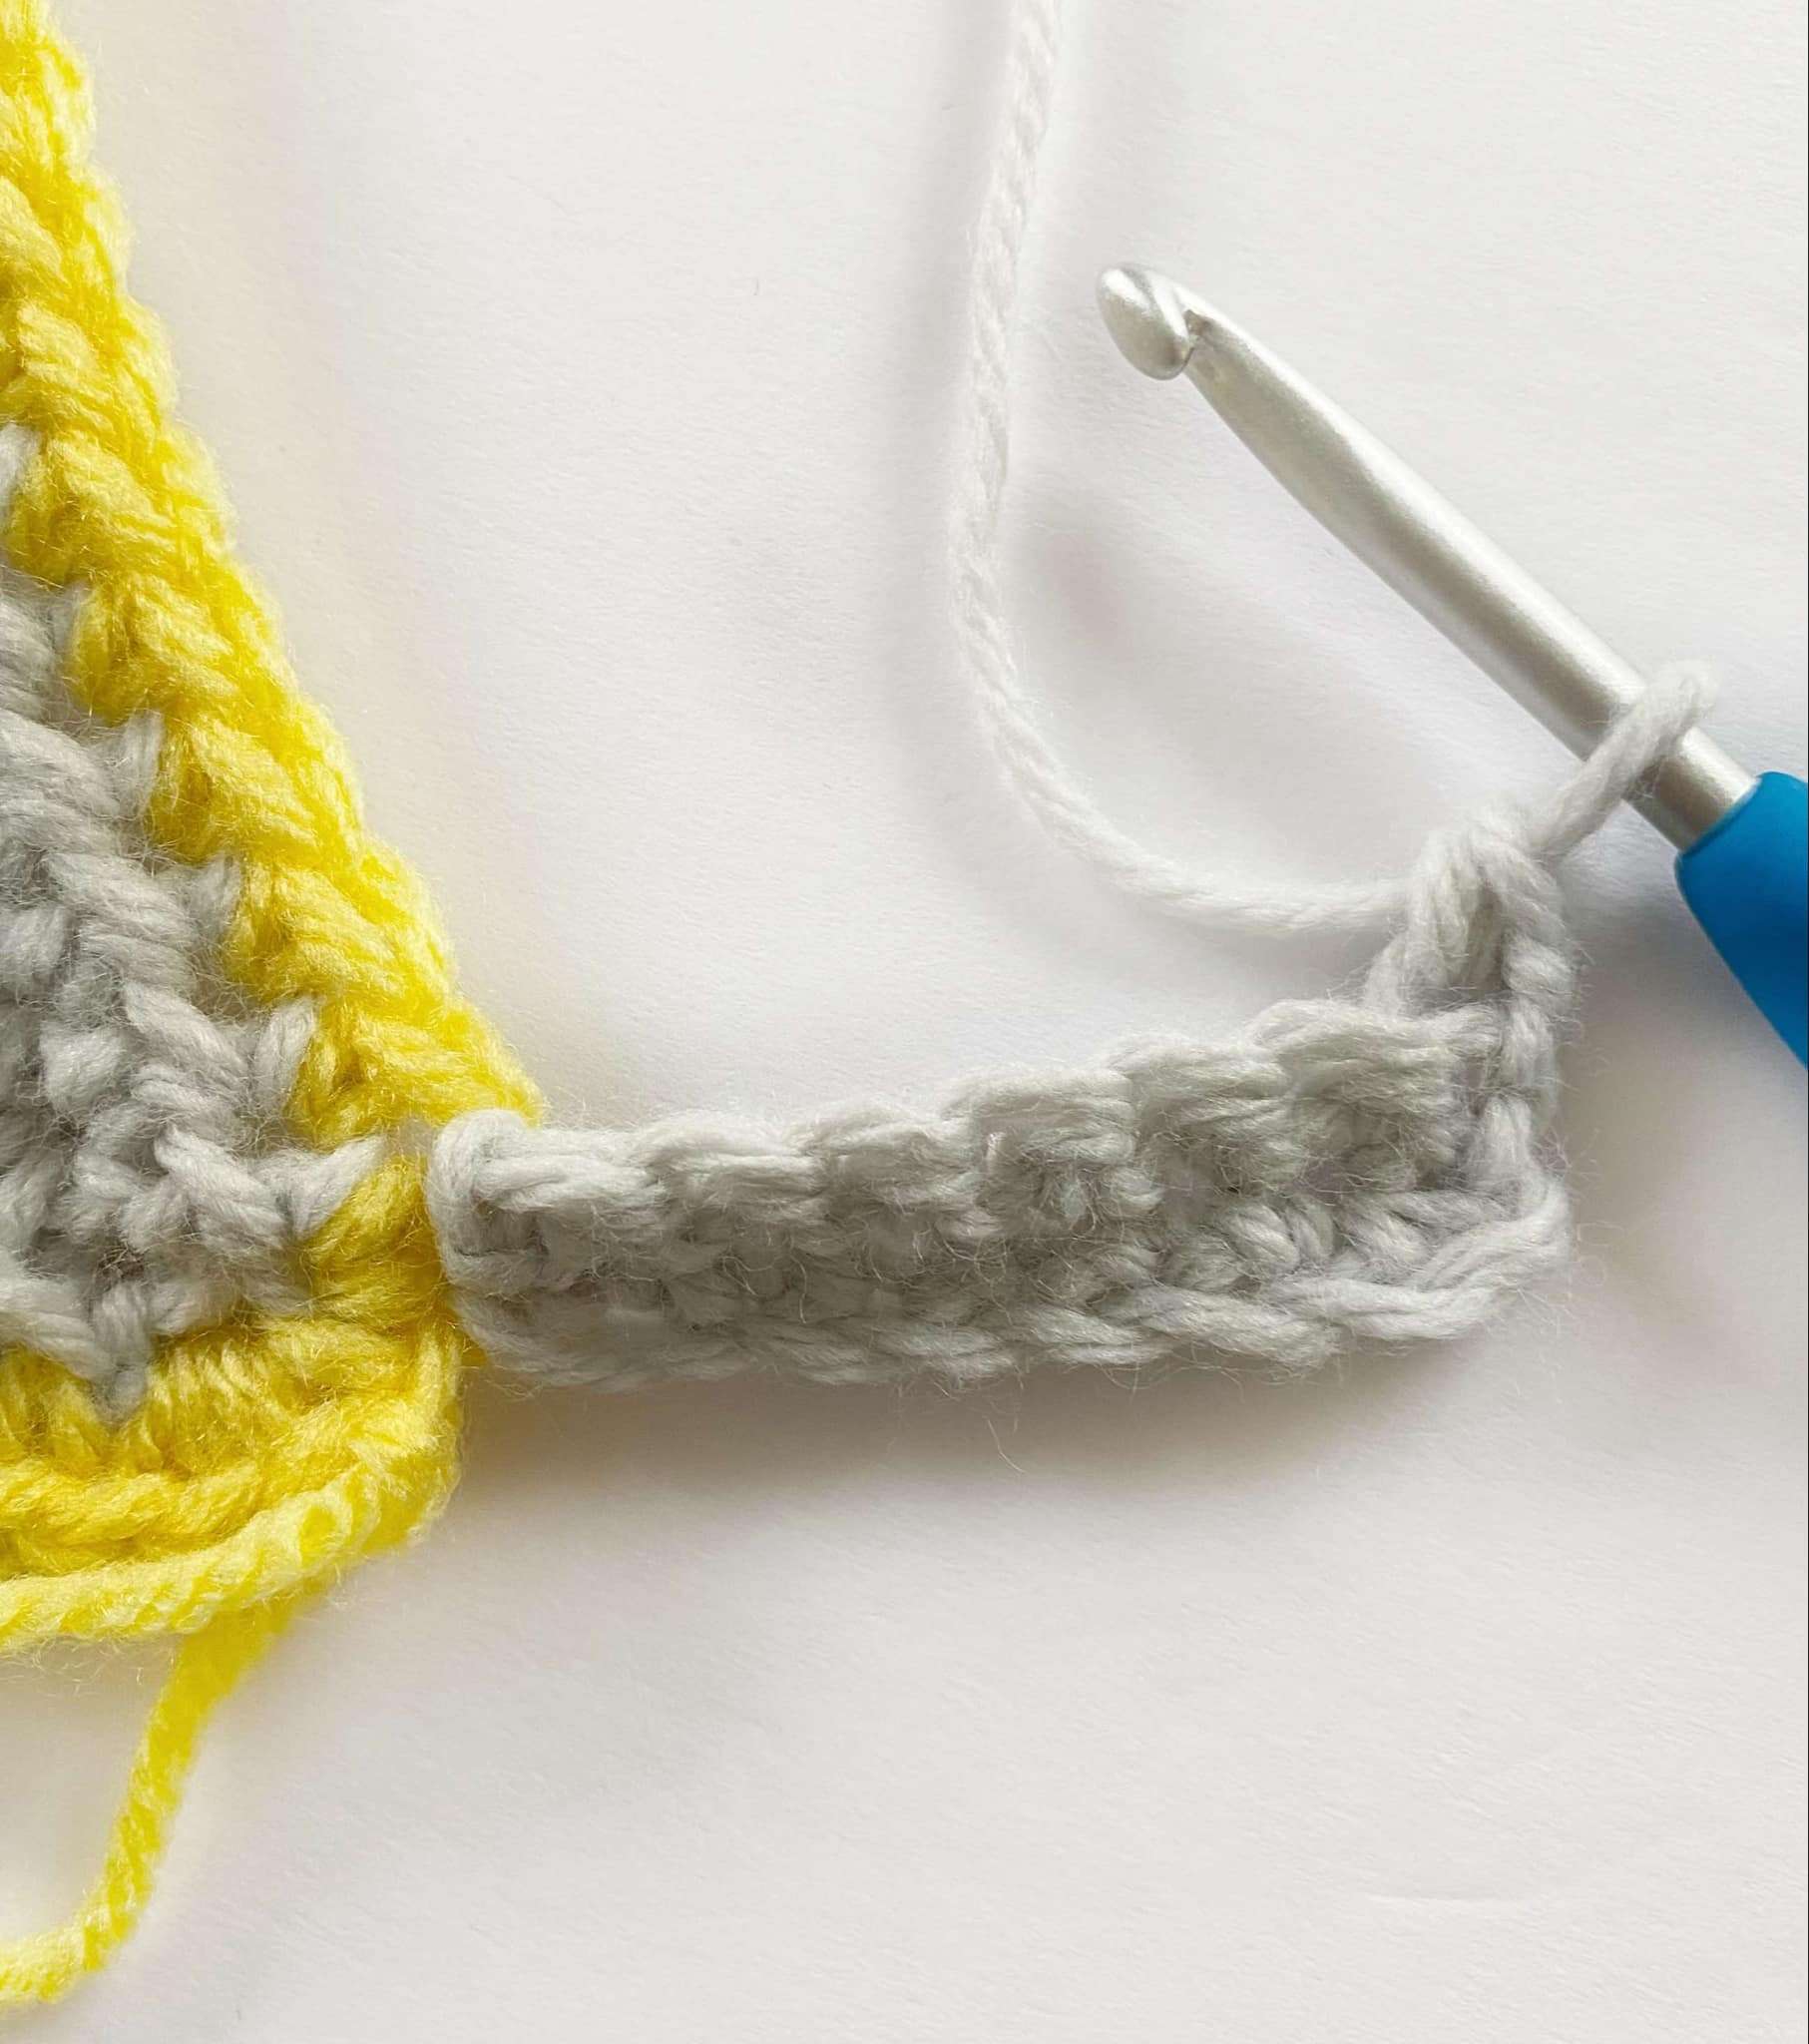
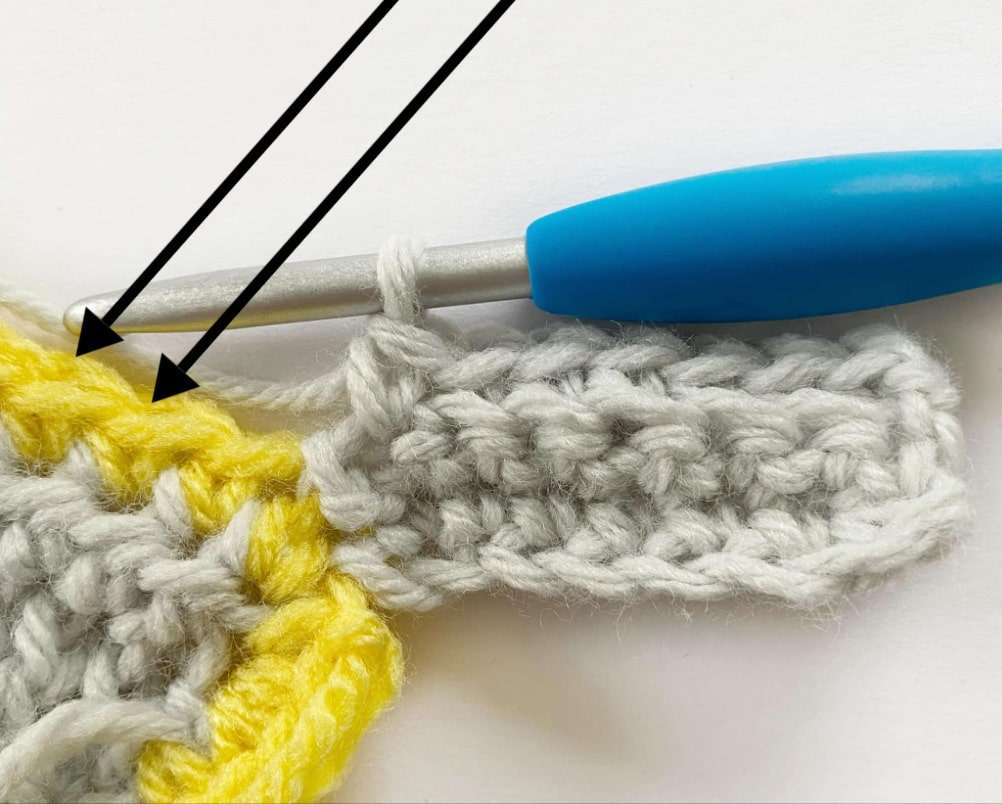
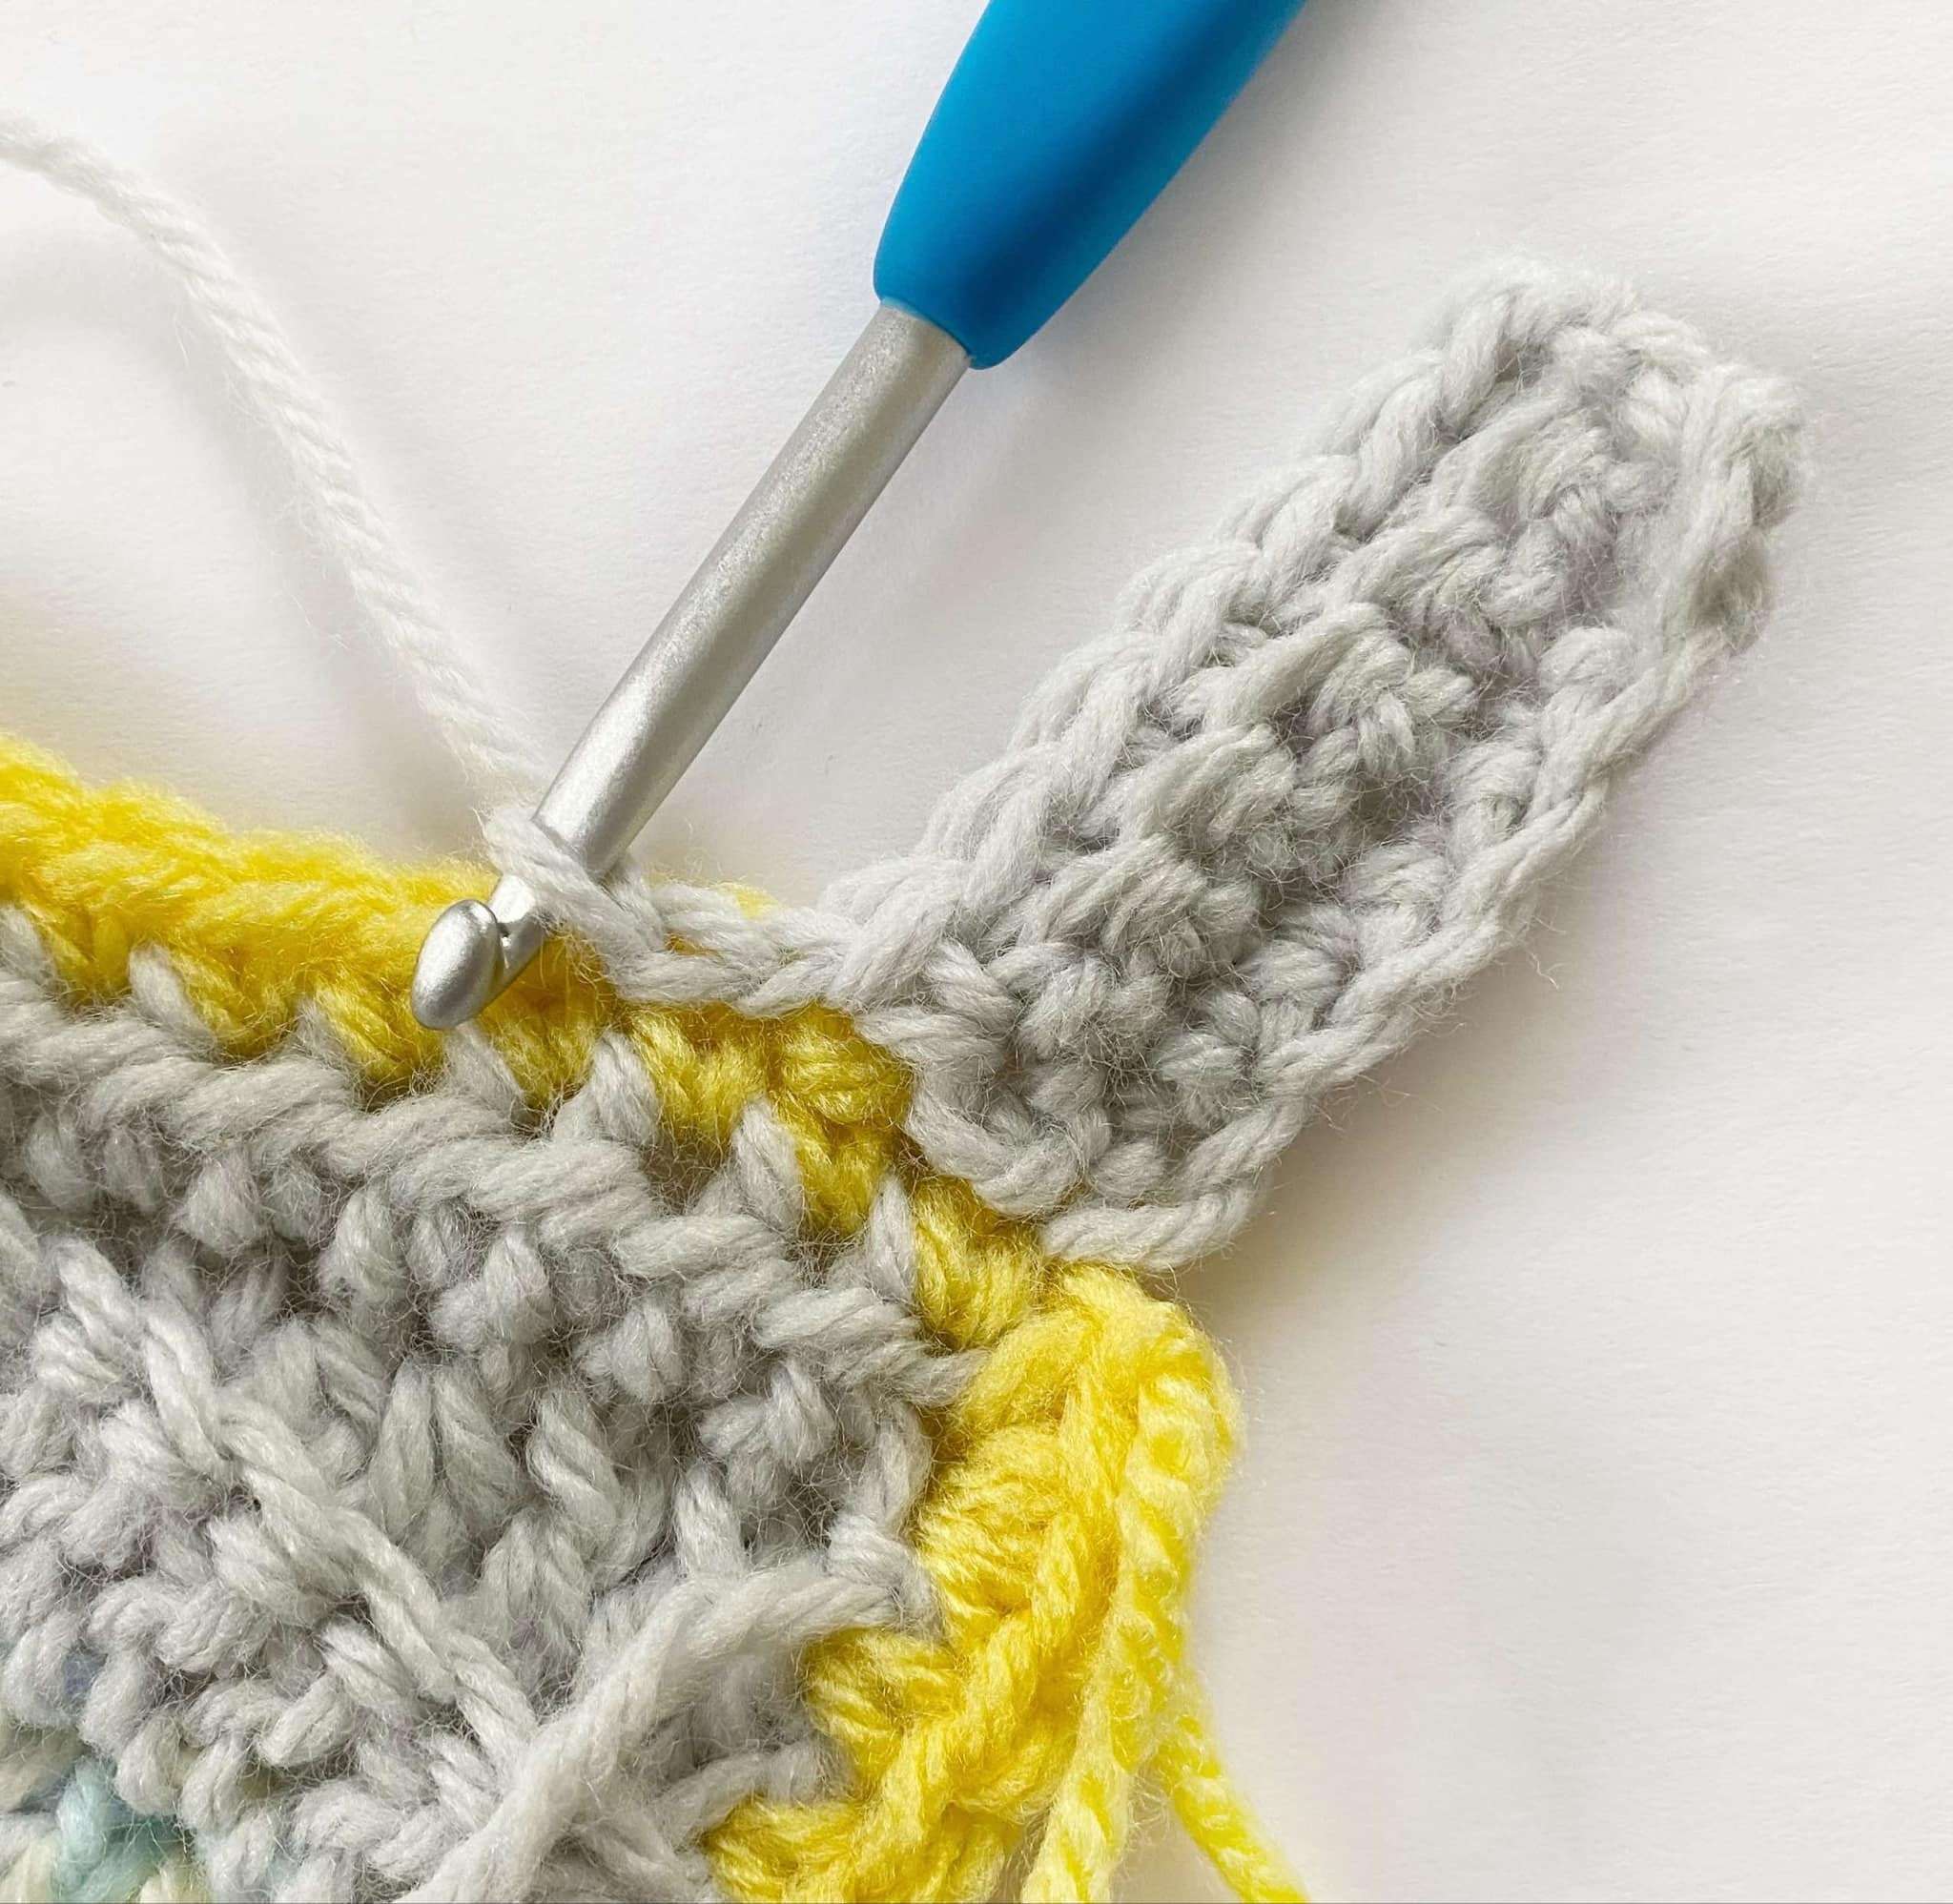
Repeat Rows 2 – 3 across the top of the blanket and all 3 sc of the corner. Rotate the blanket to work along the left-side.
Left Side:
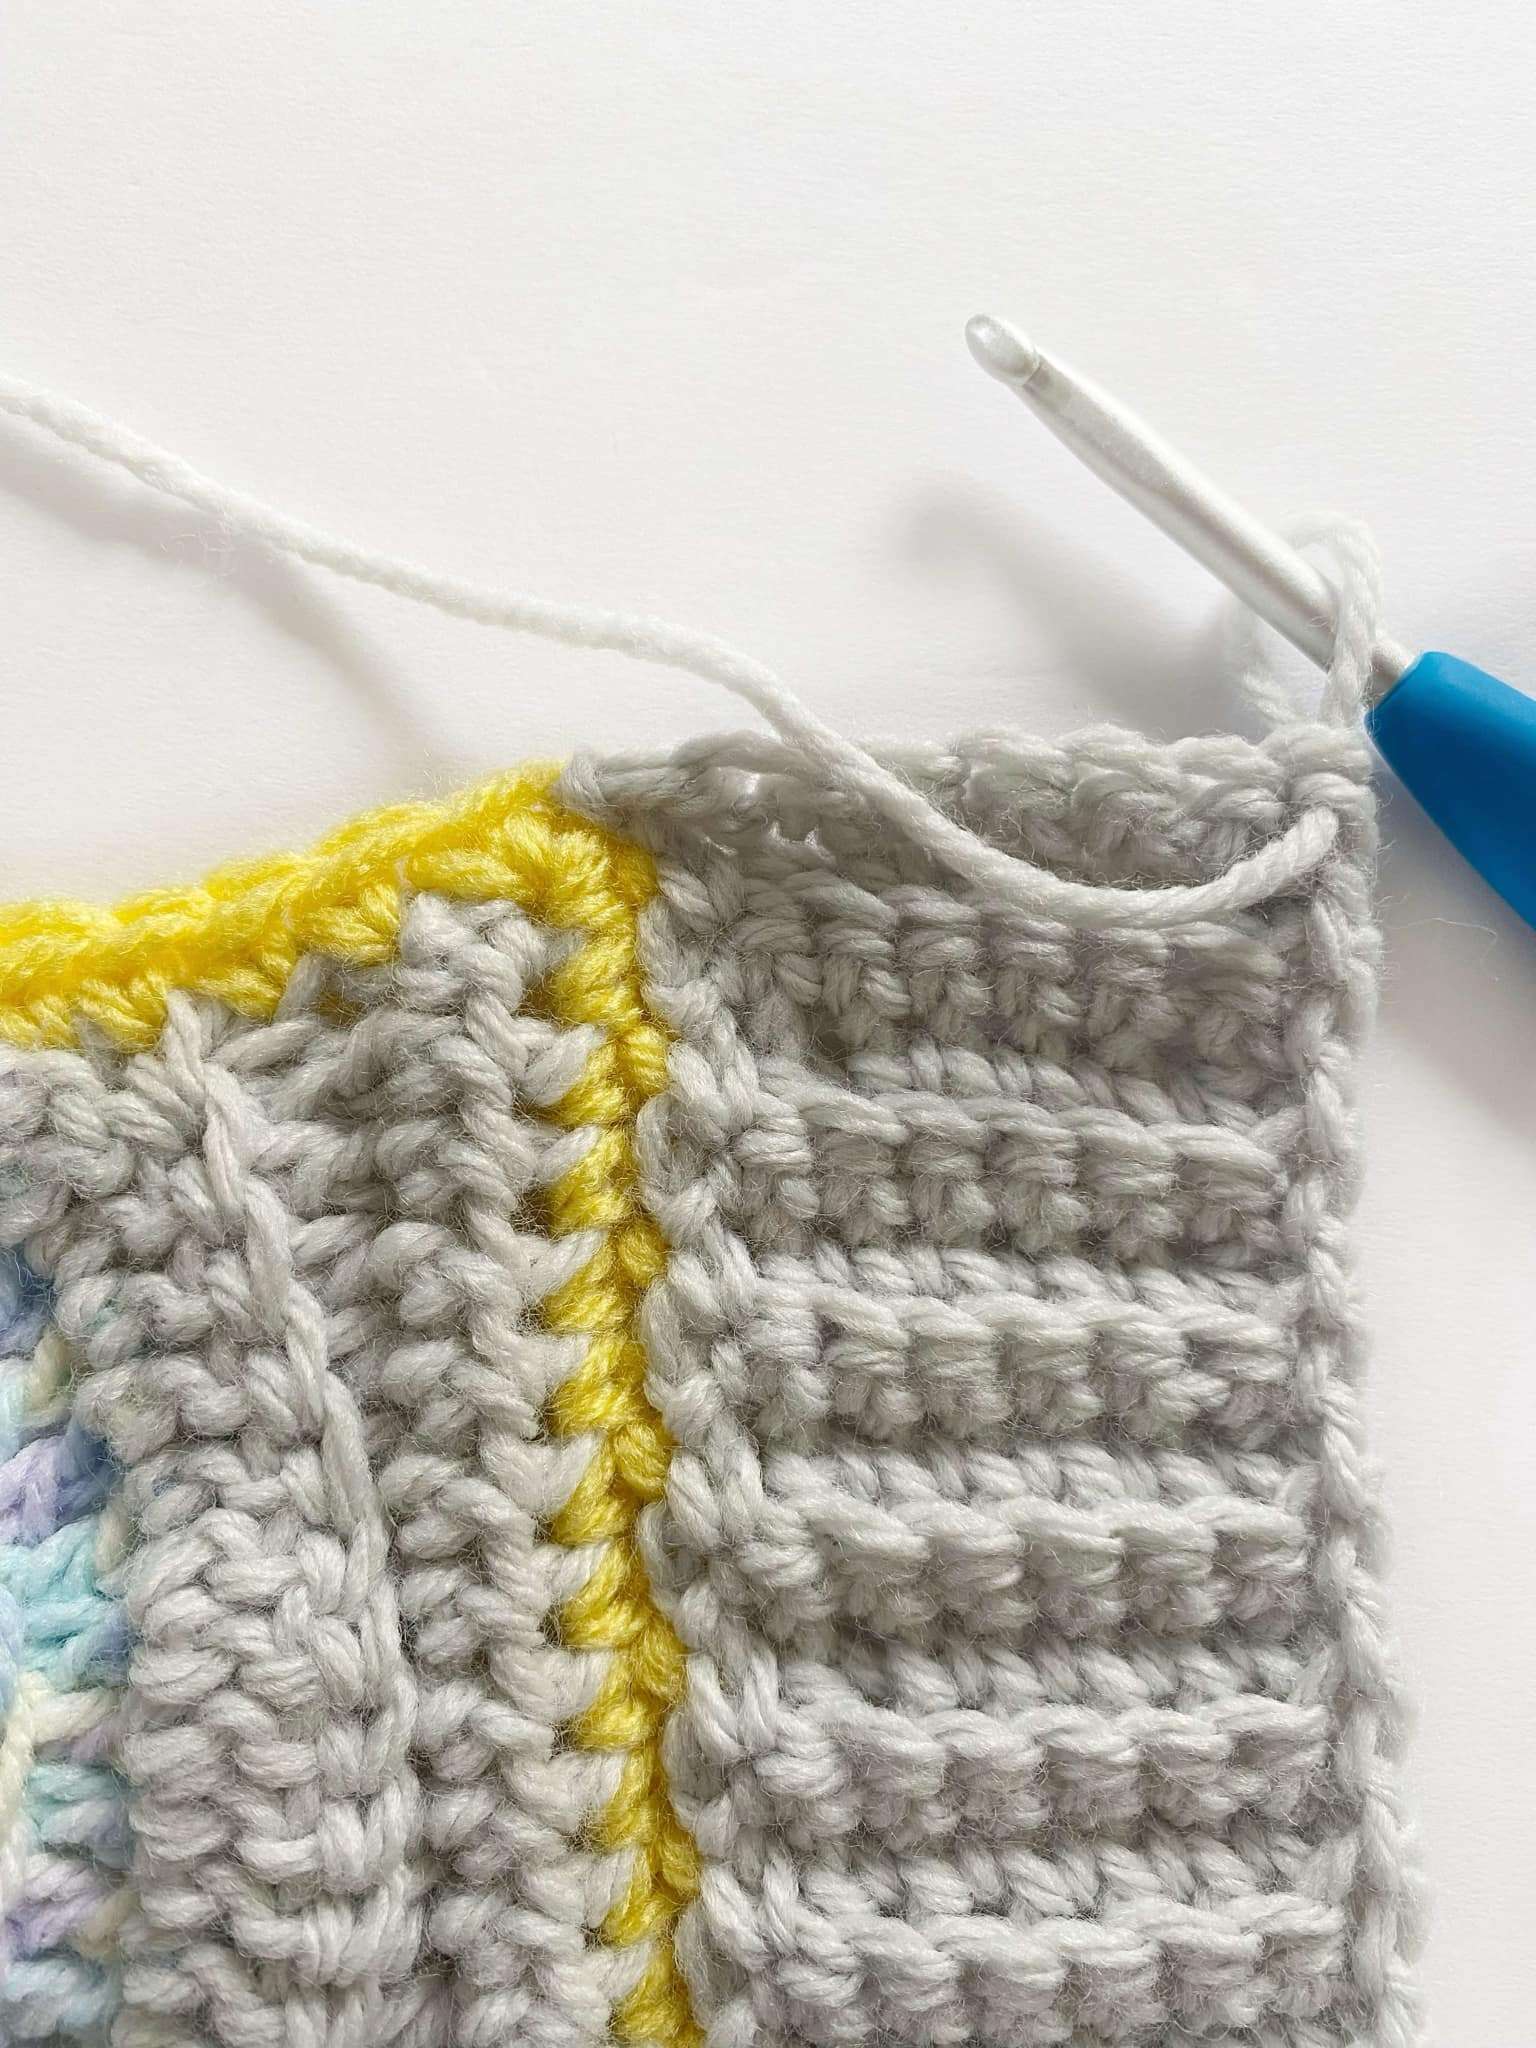
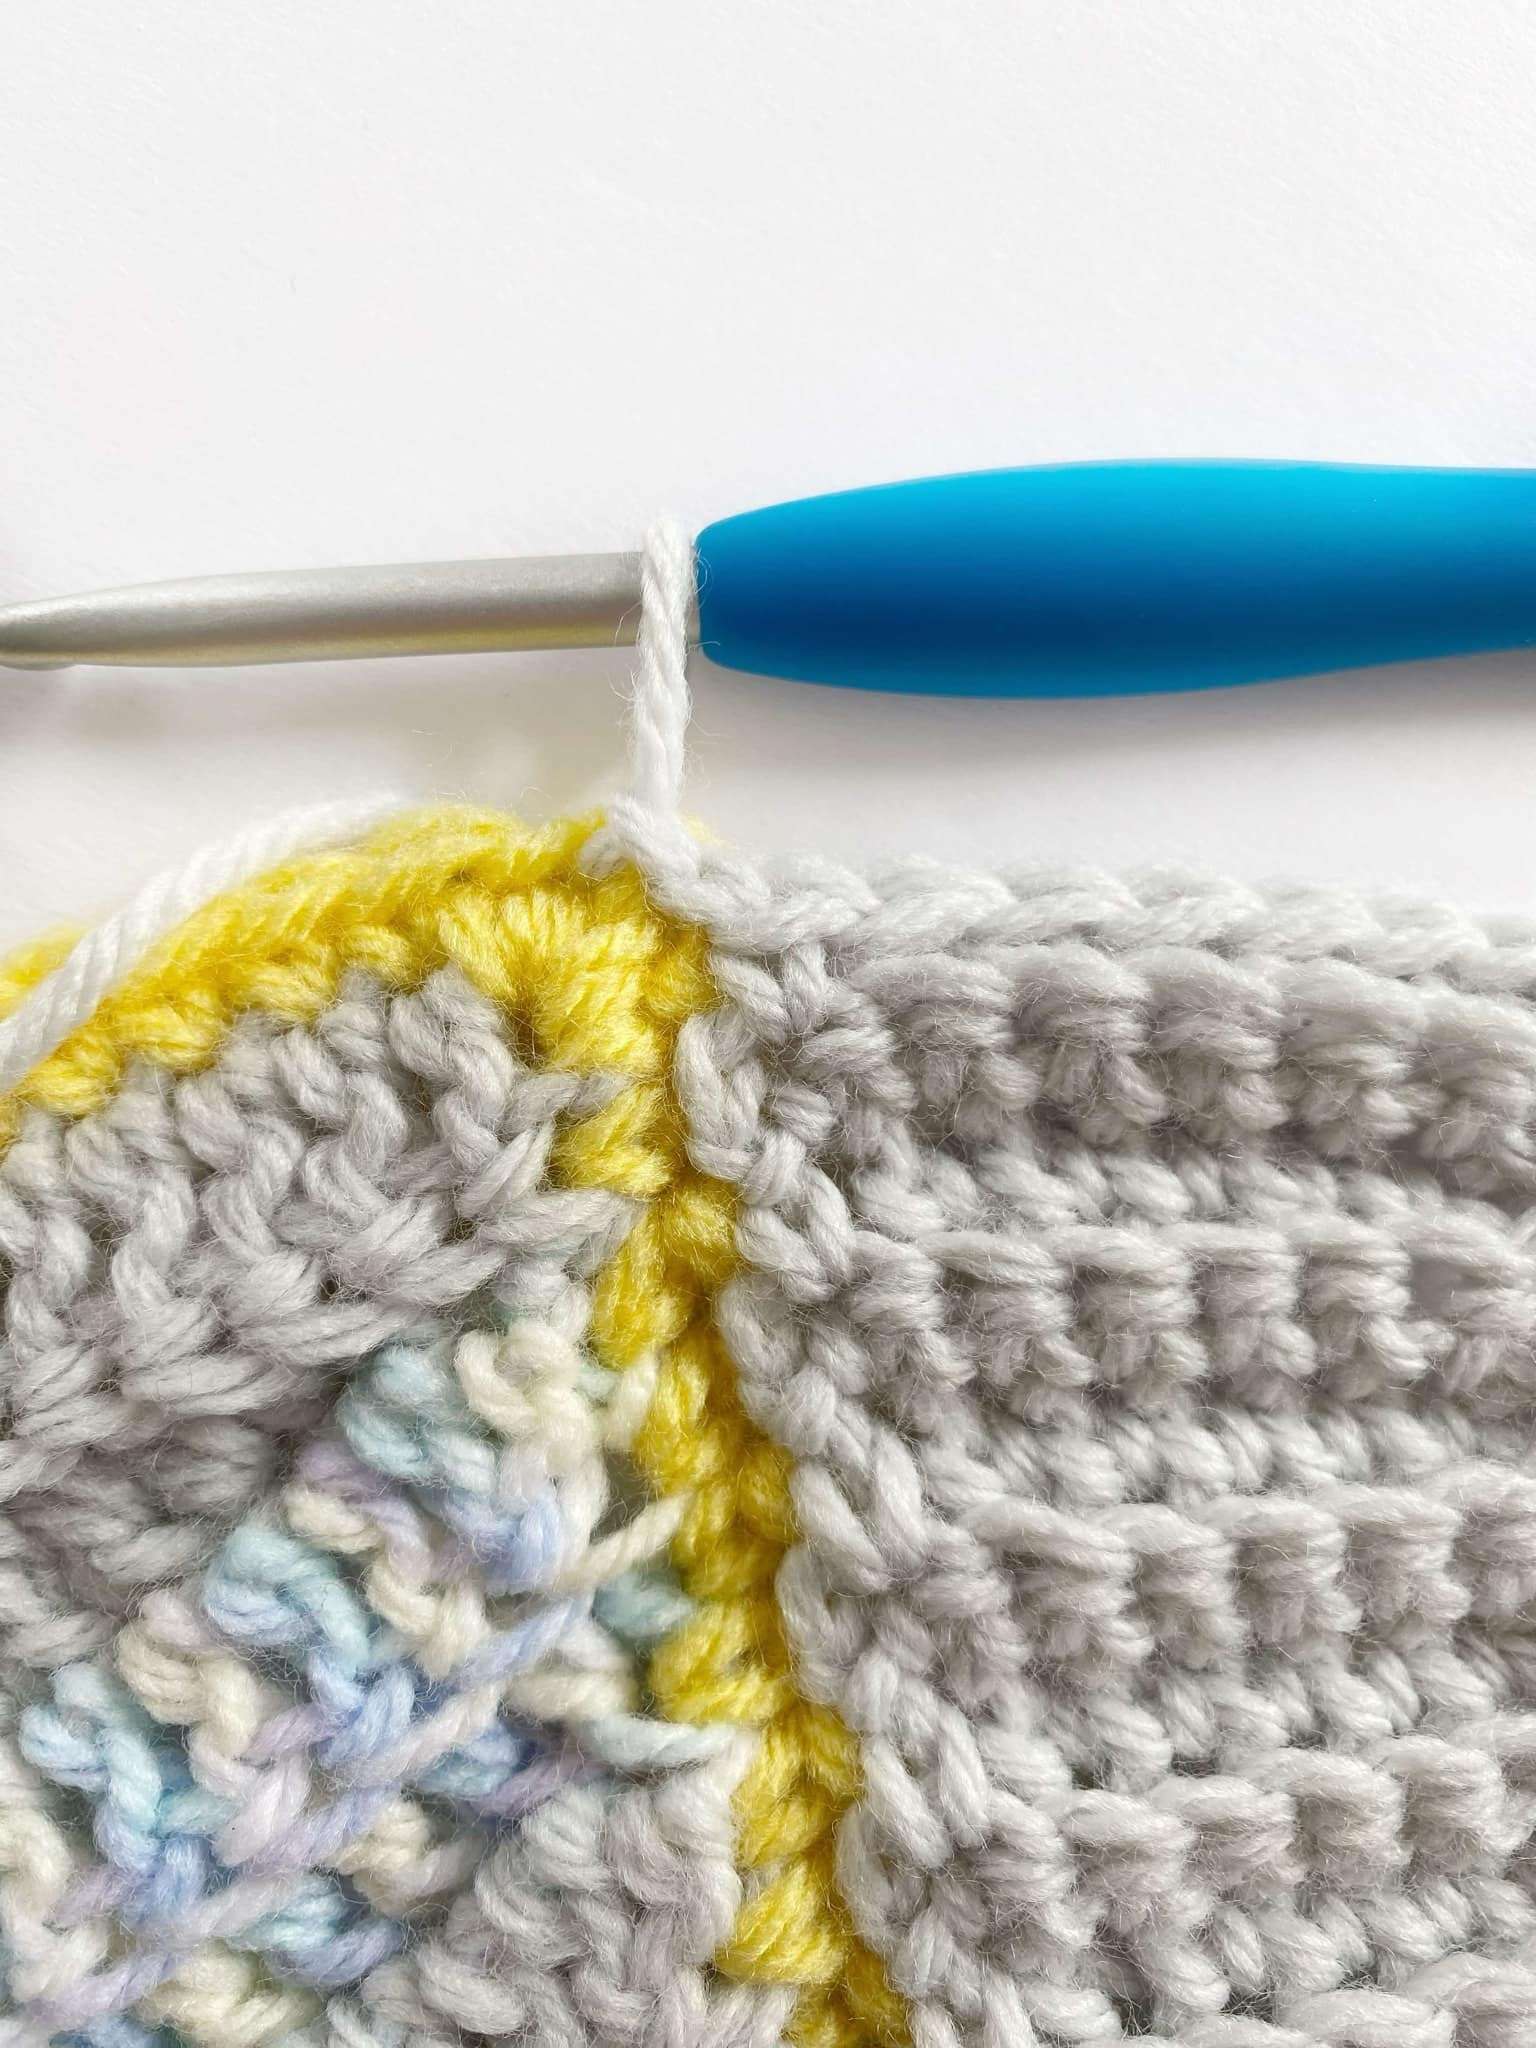
This side is worked across the side of the top ribbing, and the left side of the blanket.
Row 1: Ch 9, sc in second ch from hook and in each ch across. To join the ribbing to the blanket, sl st in BLO of first 2 sts of the top ribbed edging. Turn. (8 sc)
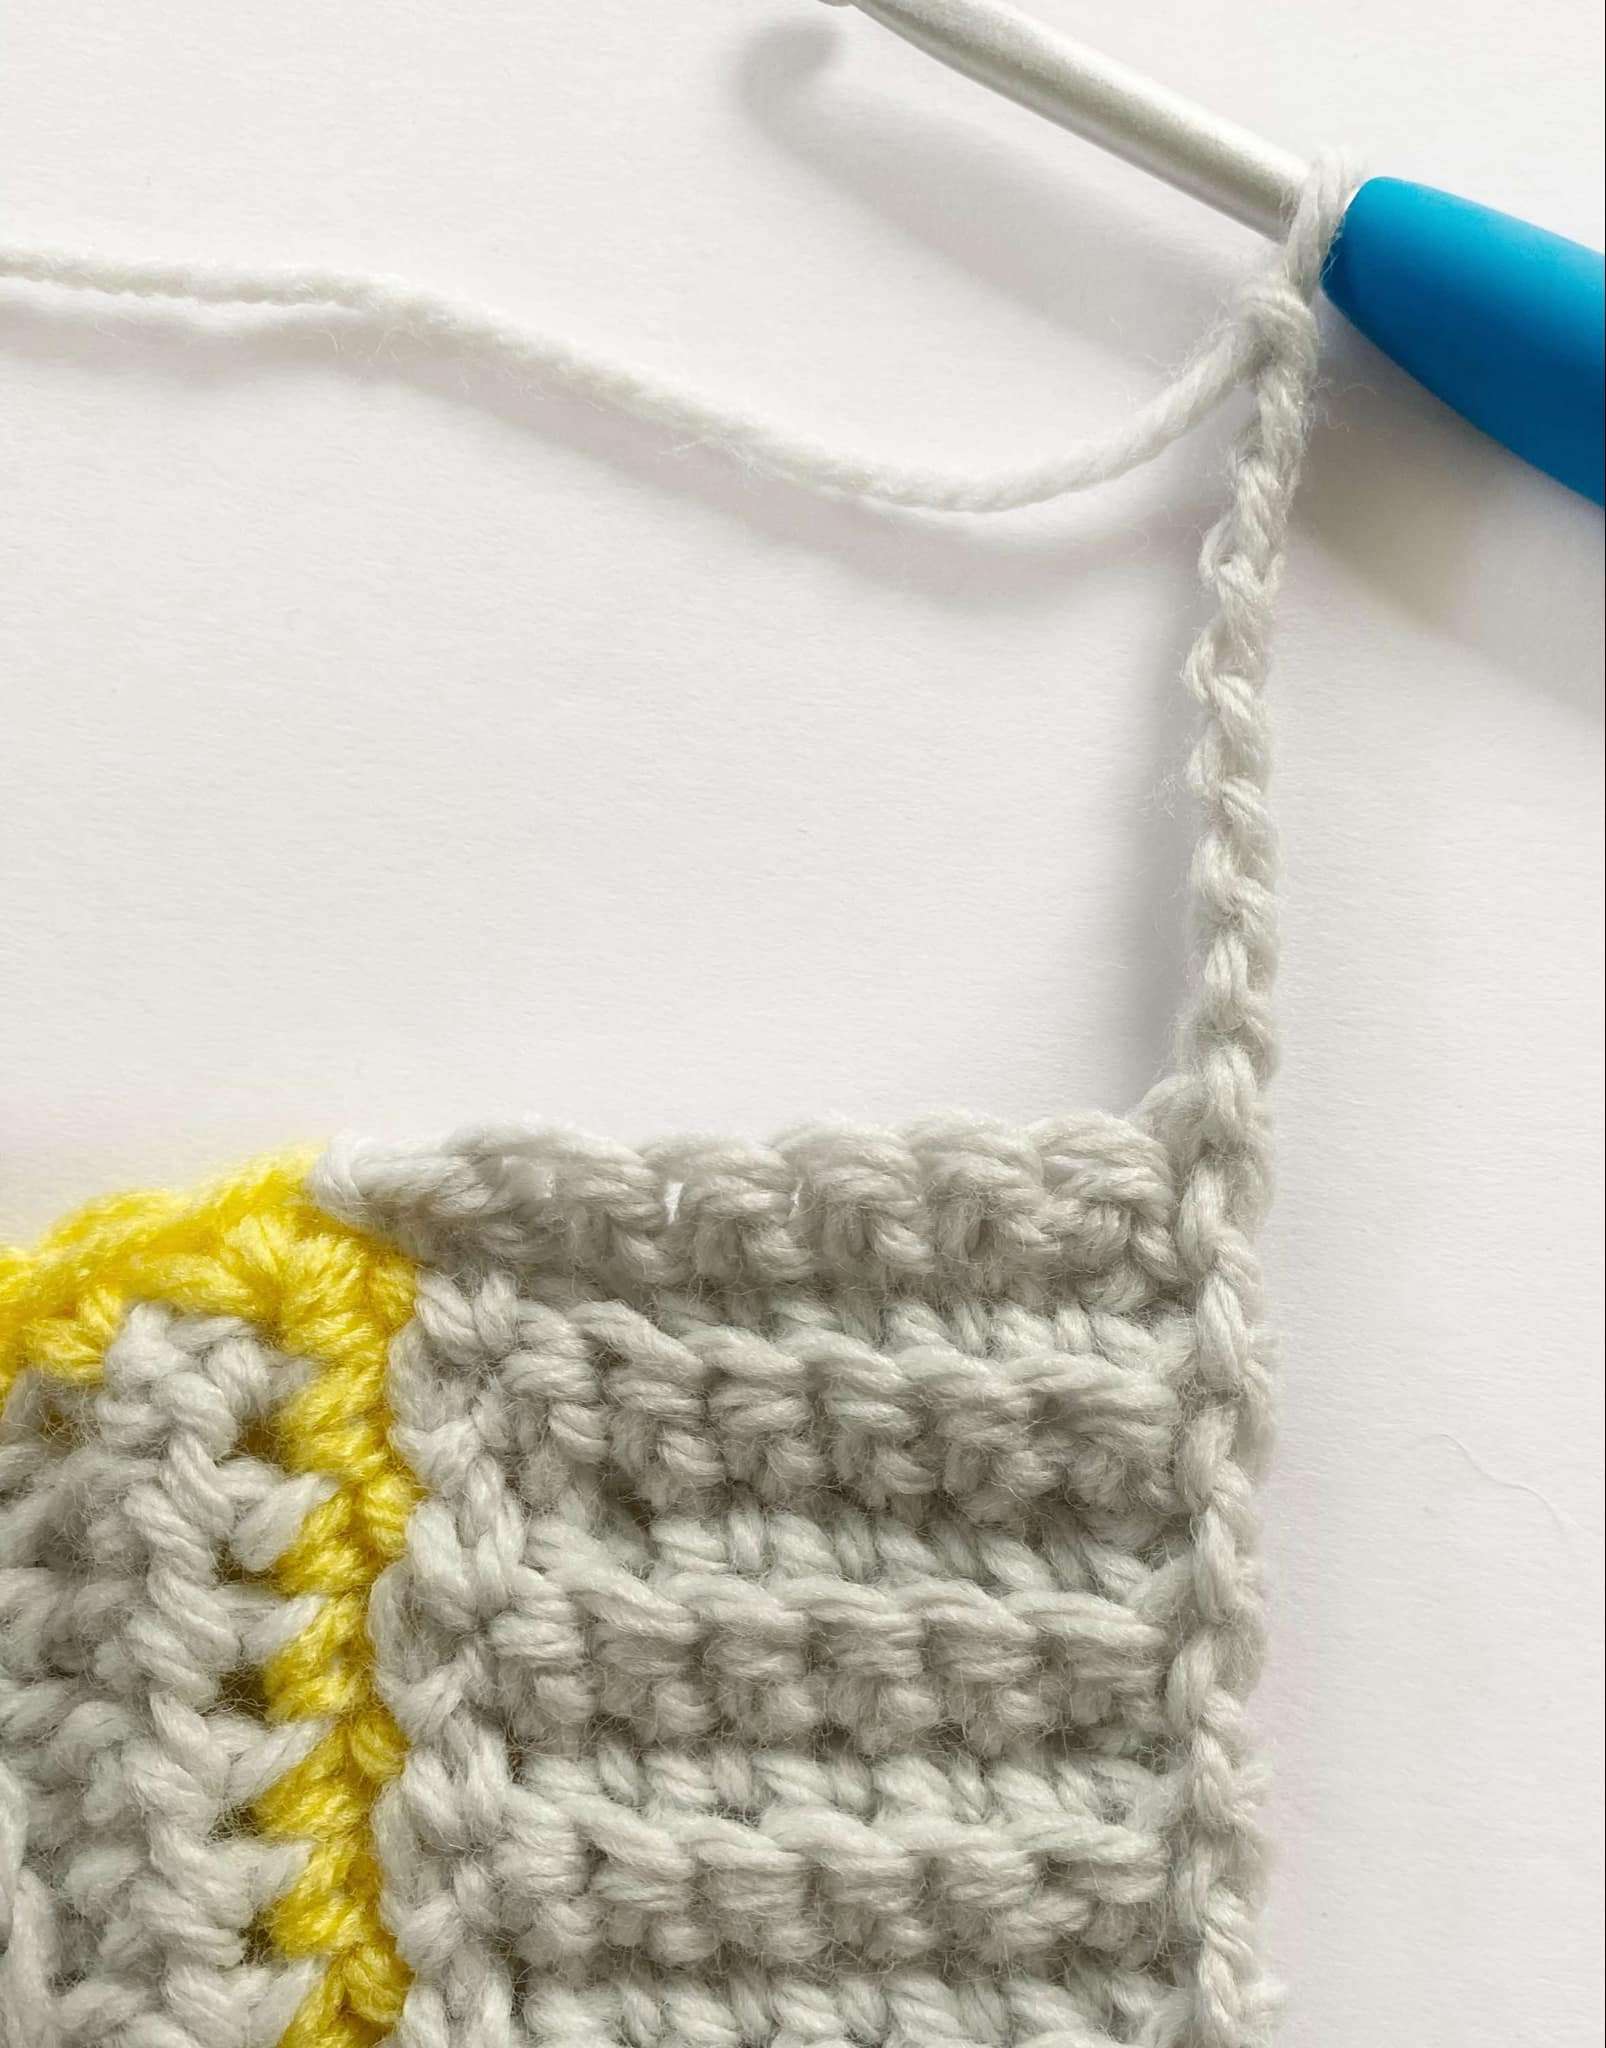
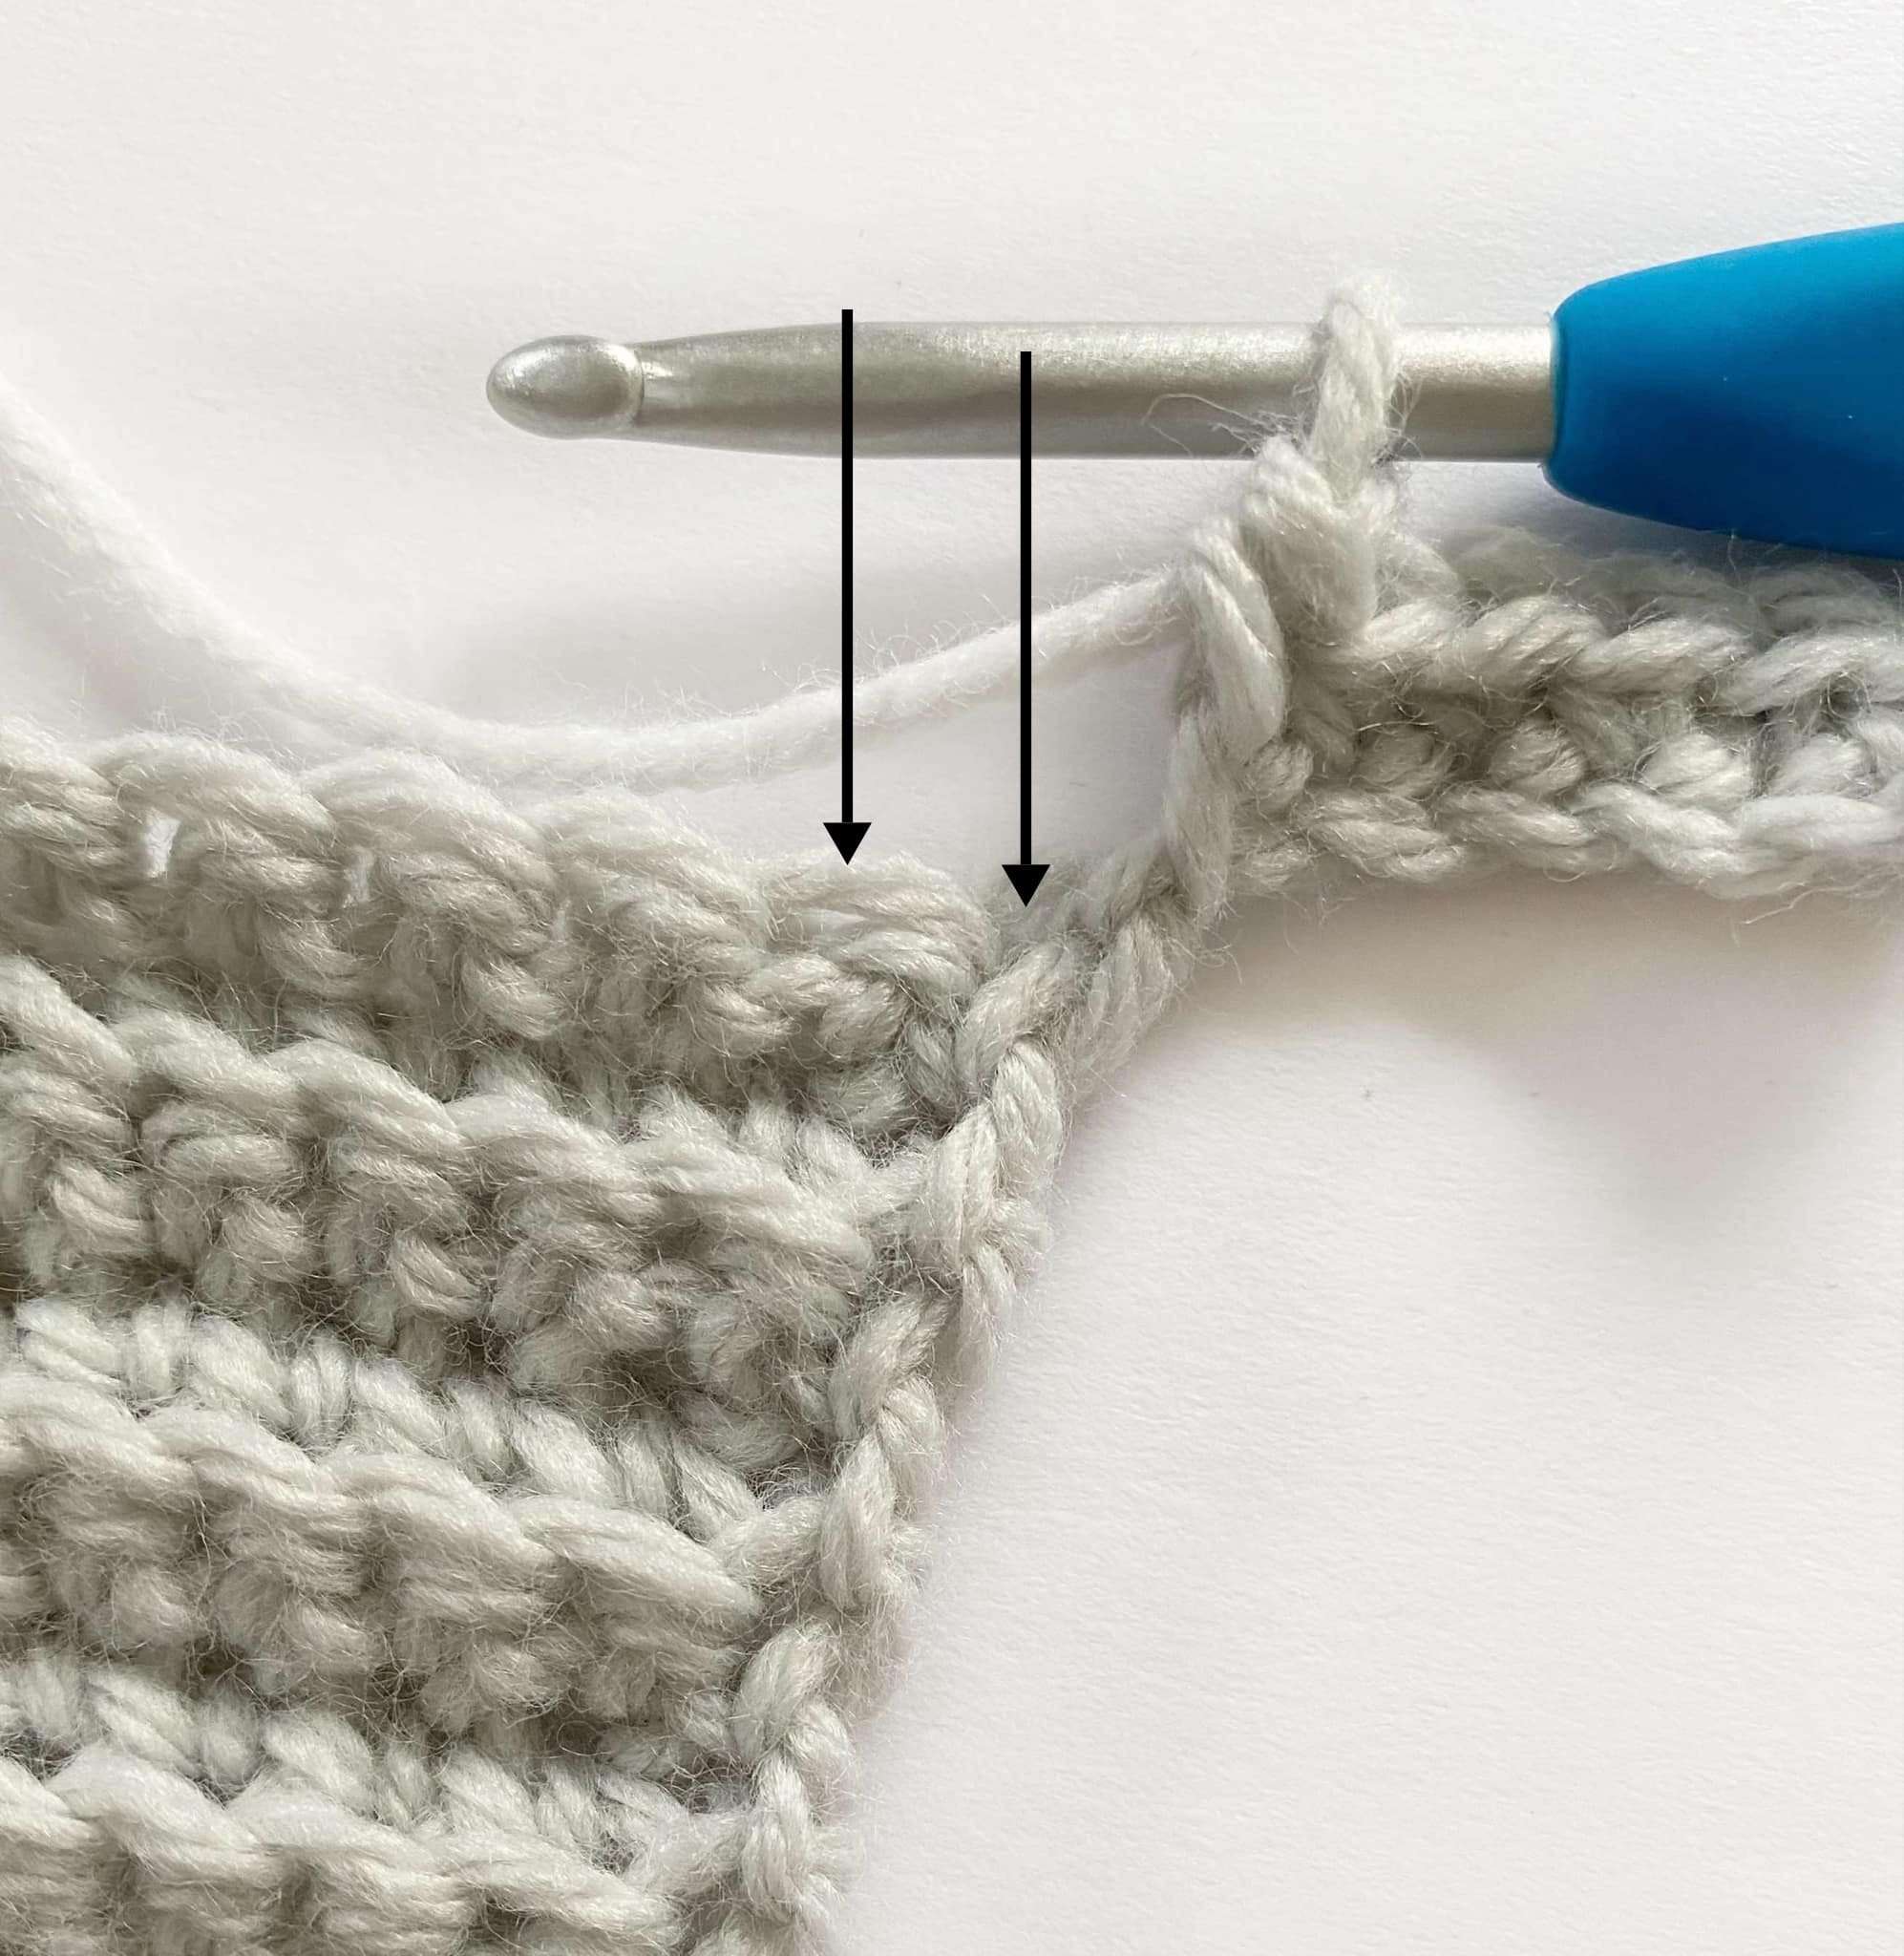
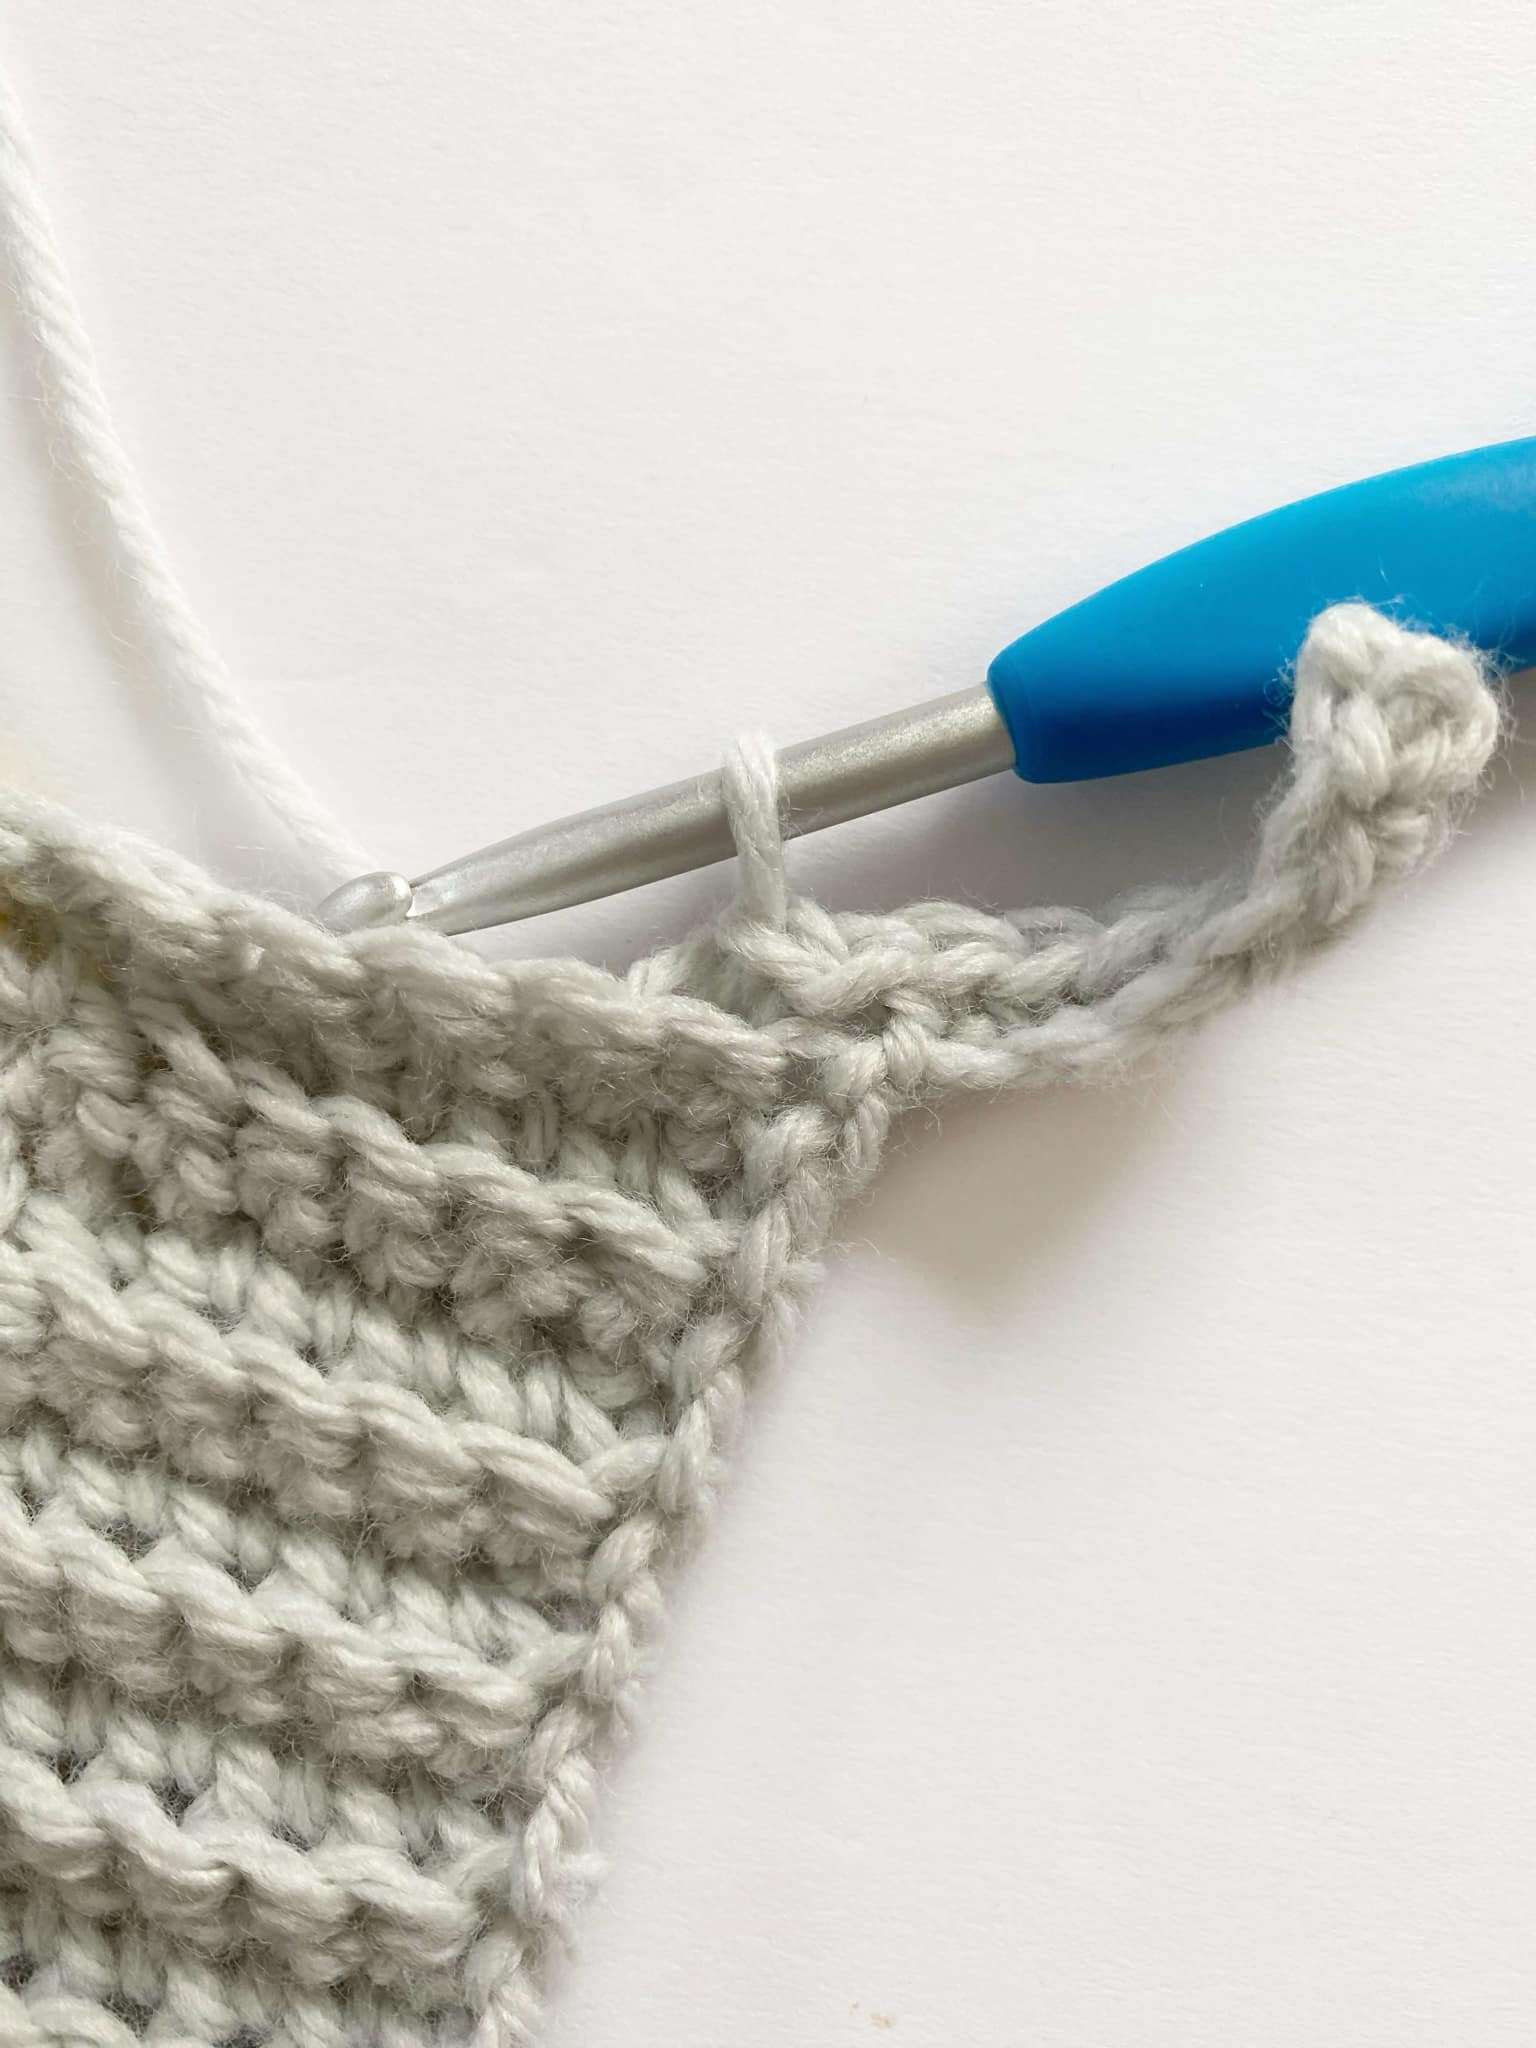
Row 2: Do not ch 1. Sc in BLO of each st across until 1 st remains, sc in both loops of last st. Turn. (8 sc)
Row 3: Ch 1, sc in BLO of each st across until 1 st remains, sc in both loops of last st. To join, sl st in BLO of next 2 sts of the top ribbed edging. Turn. (8 sc)
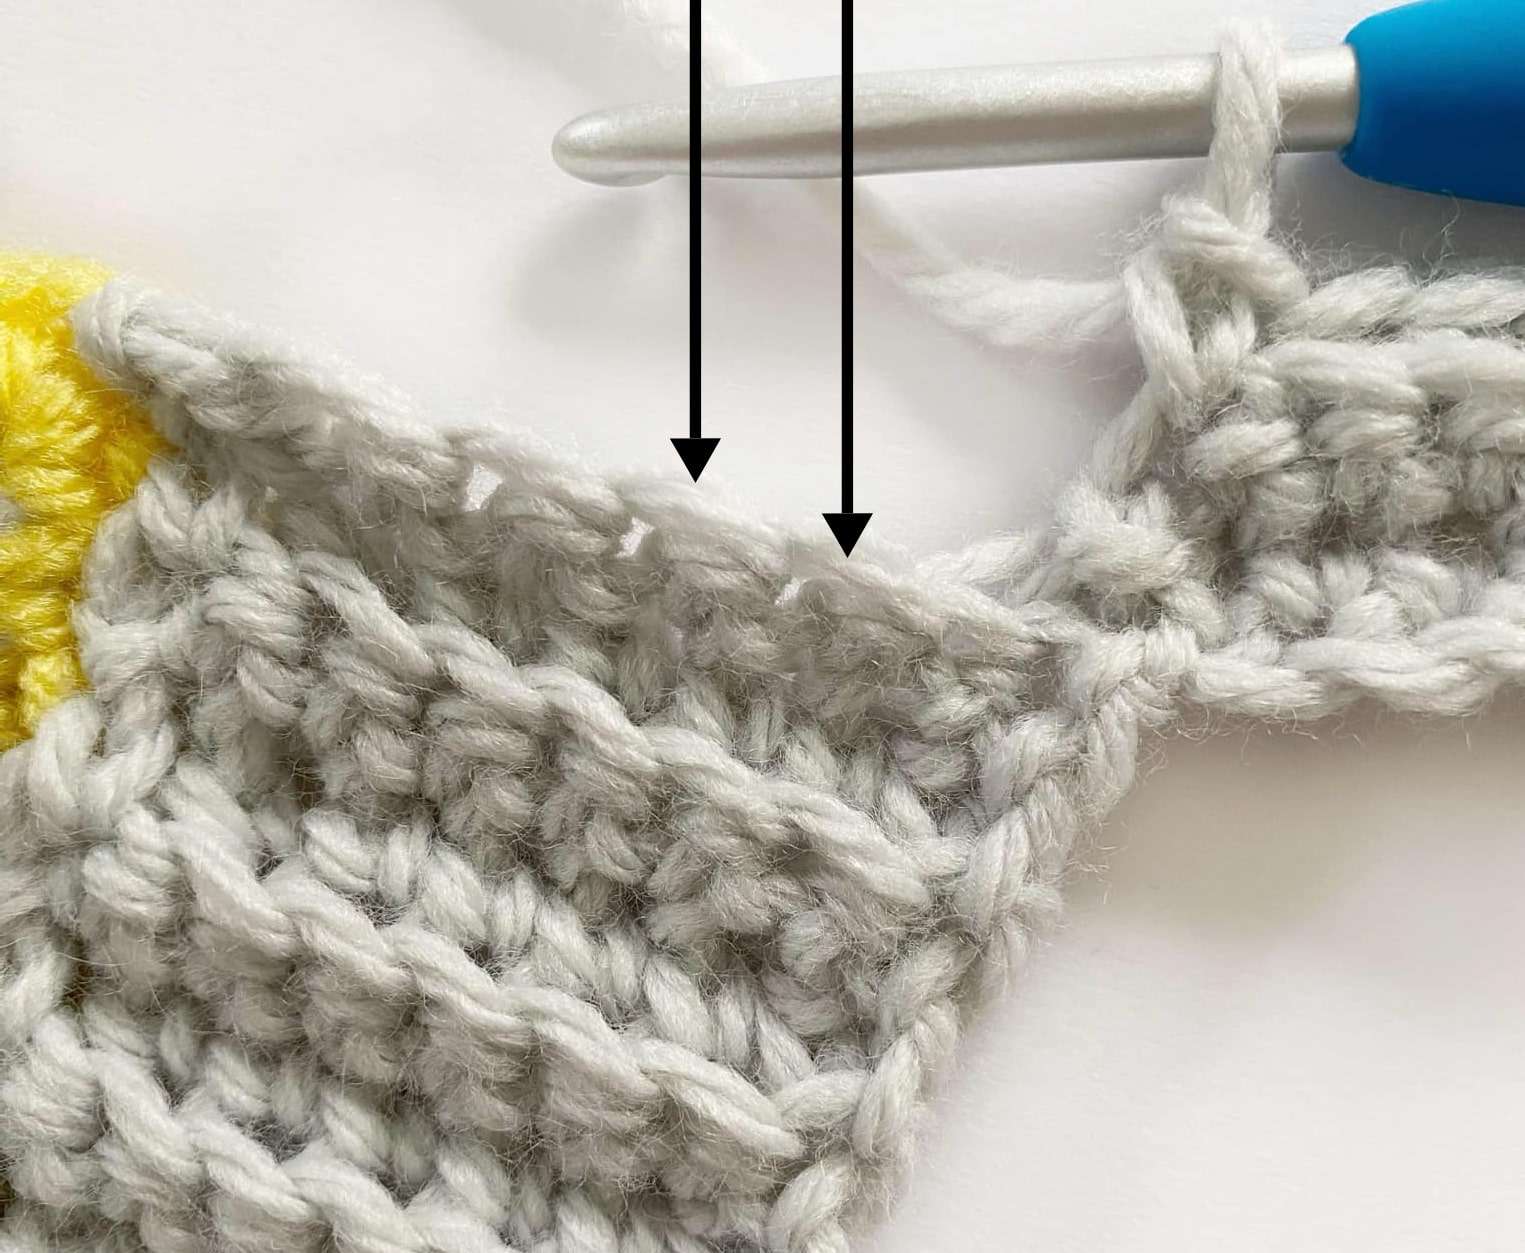
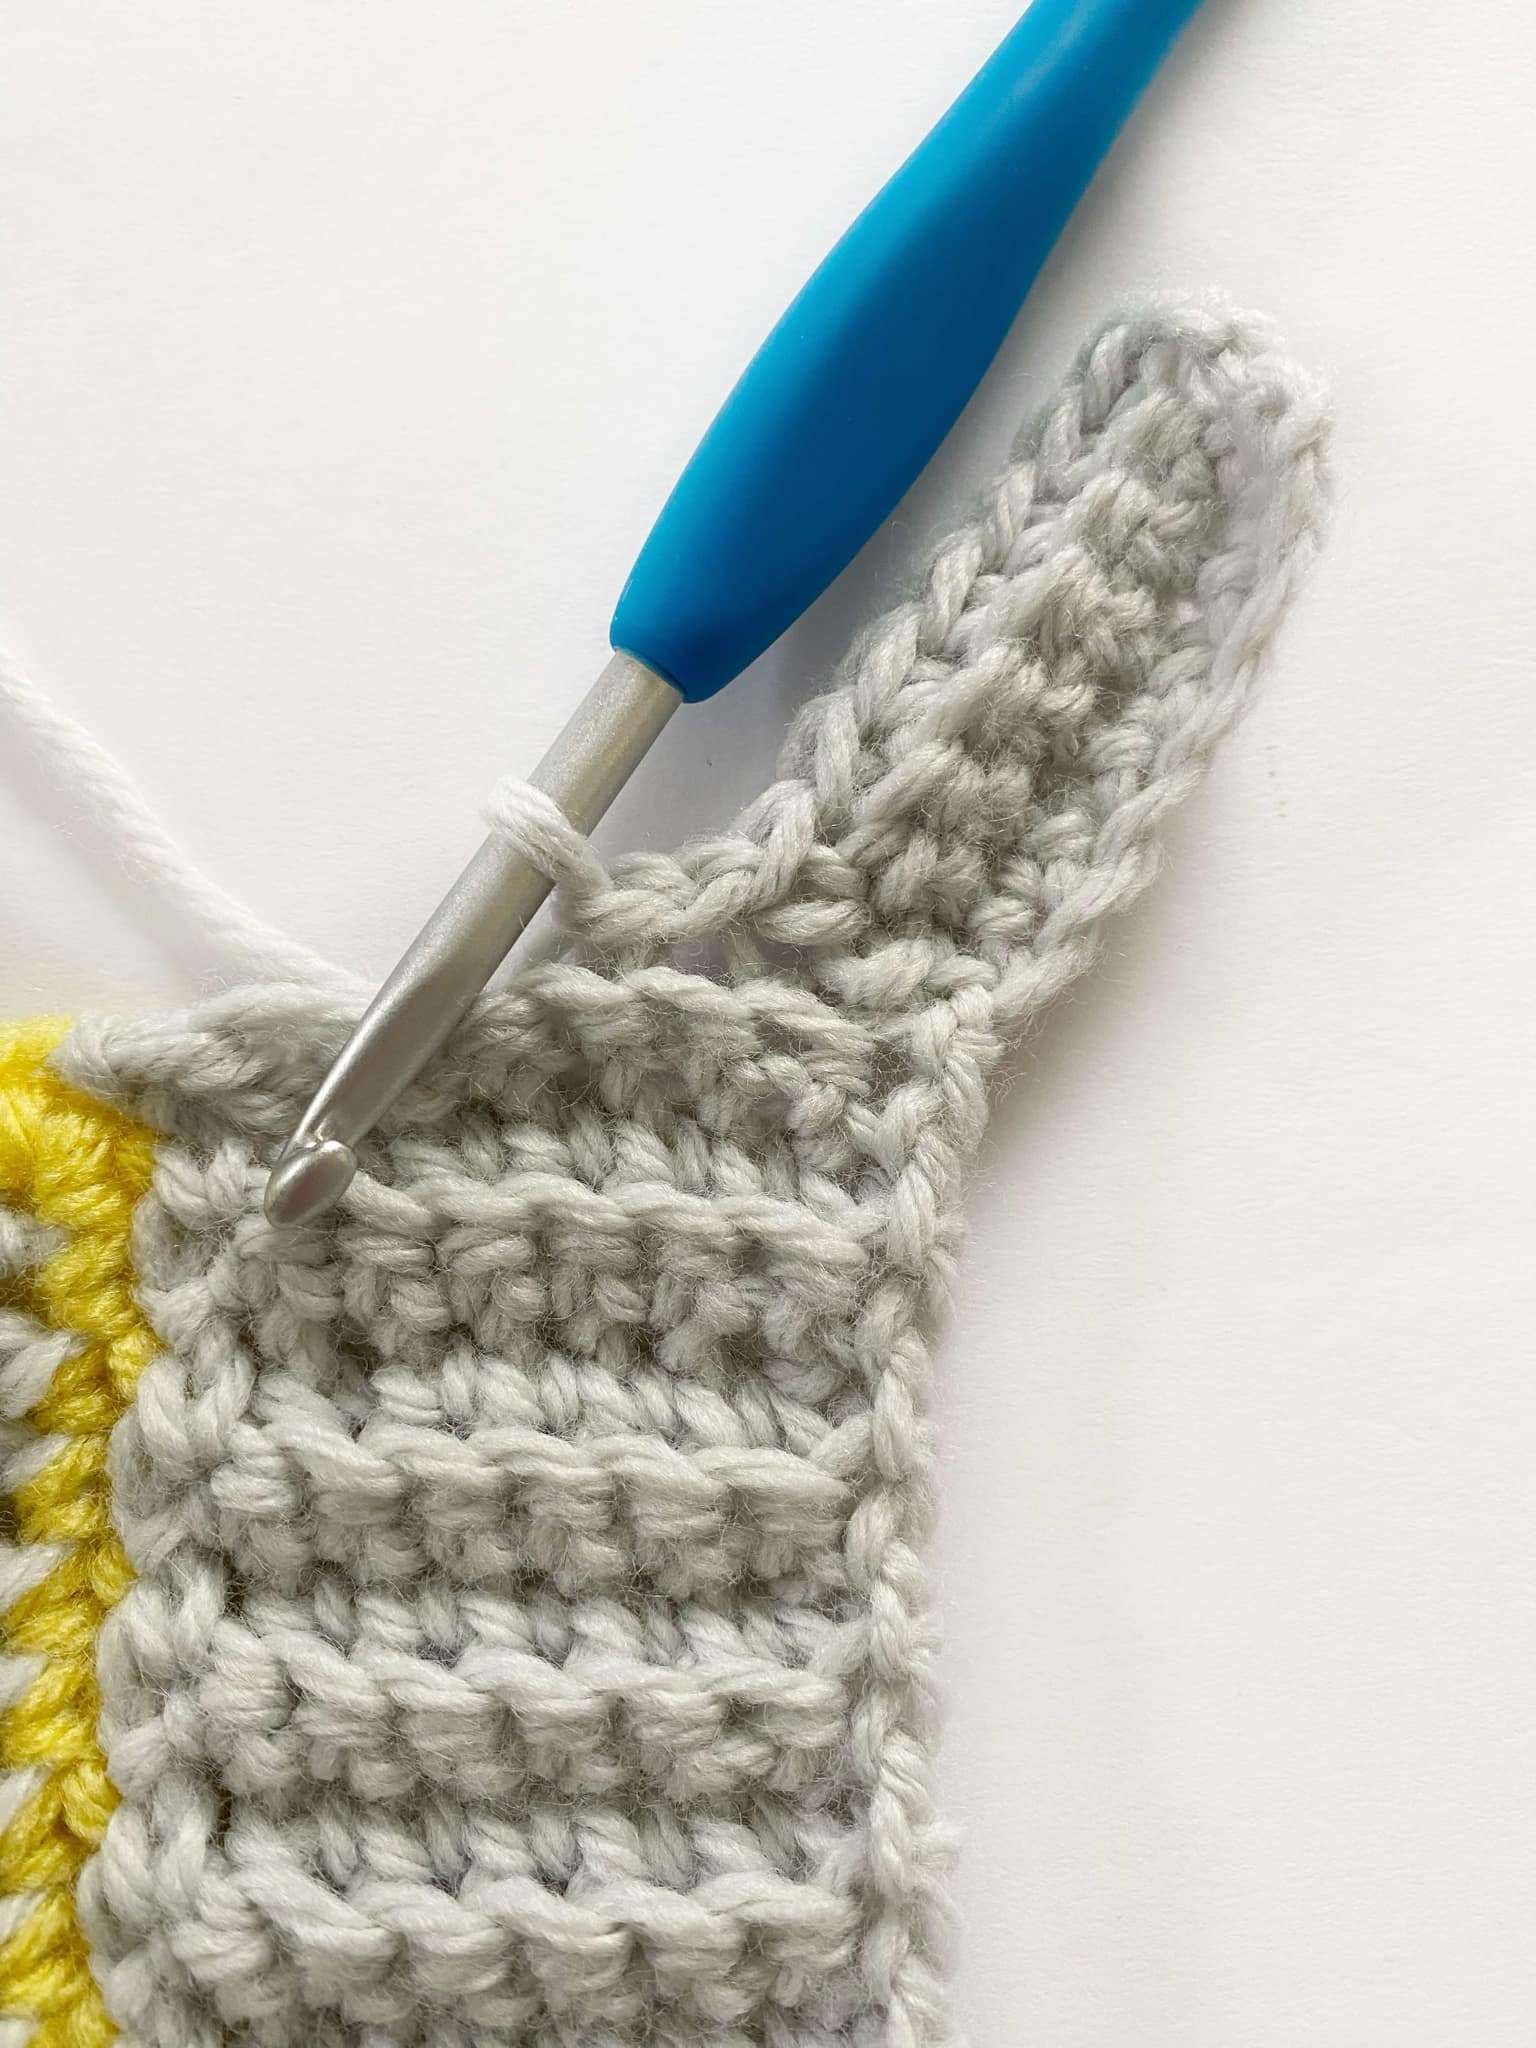
Rows 4 – 8: Repeat Rows 2 – 3. Row 8 is a Row 2 repeat.
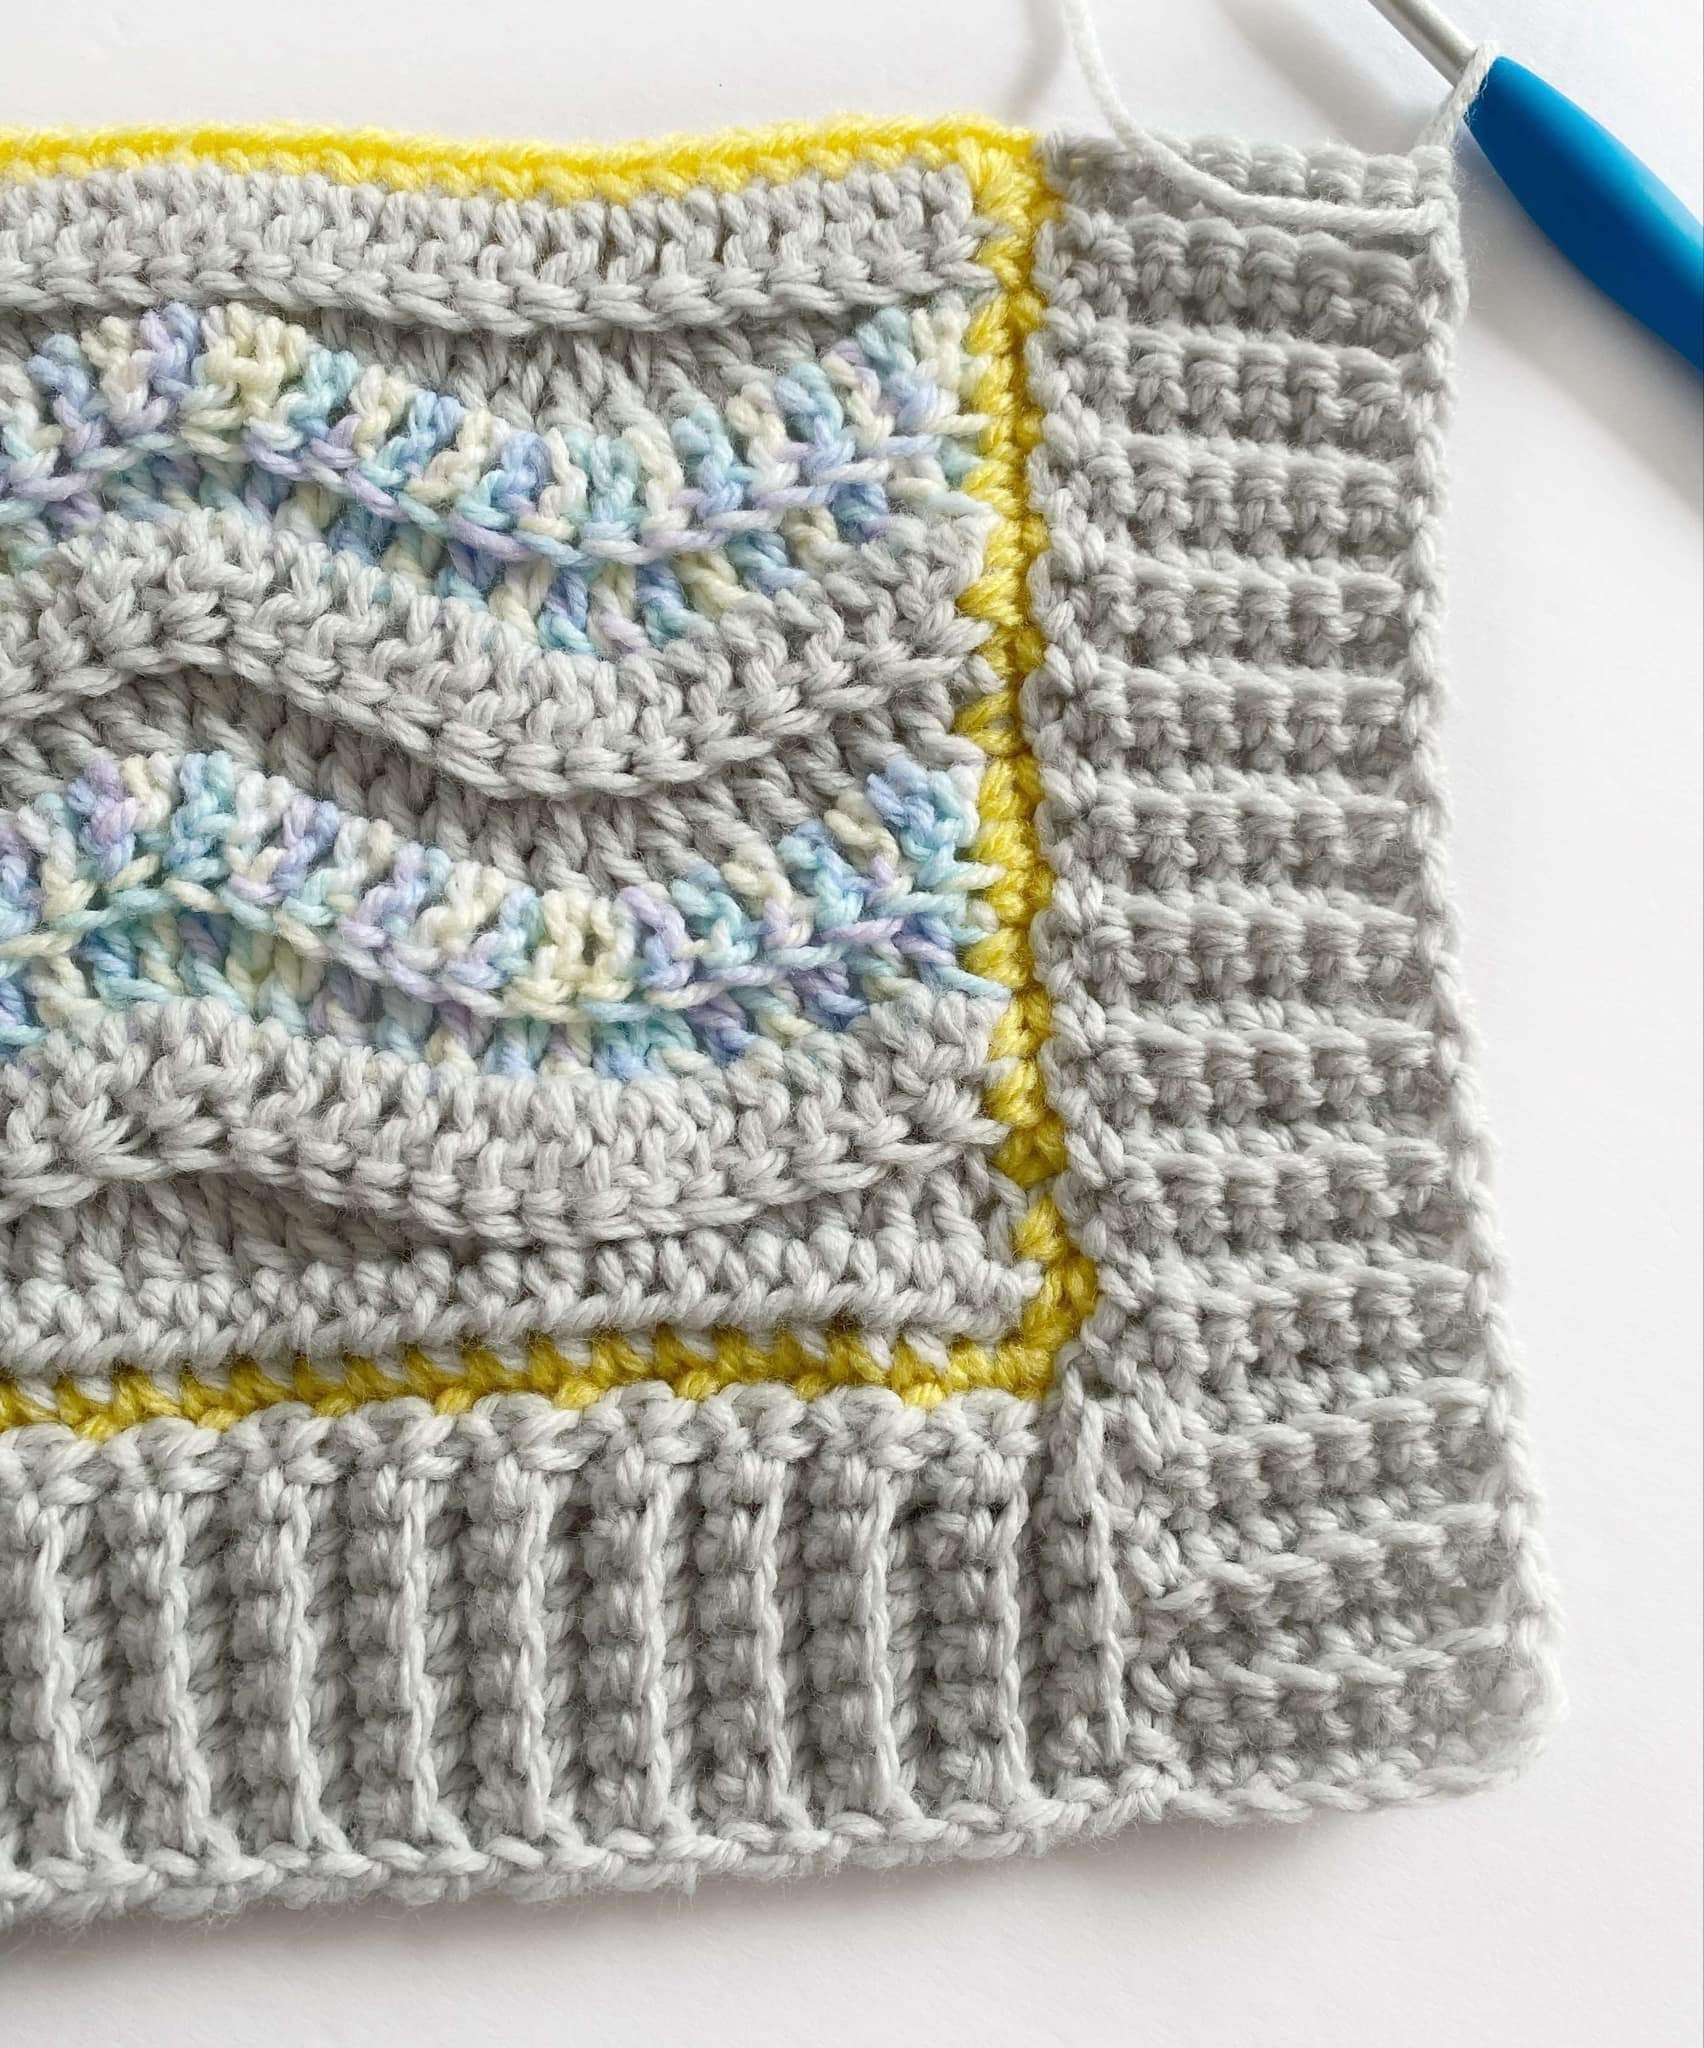
Repeat Rows 2 – 3 across the left-side of the blanket (and all 3 sc of the corner). To join the ribbing to the blanket, sl st in both loops of each sc from Rnd 1. Rotate the blanket to work along the bottom.
Bottom:
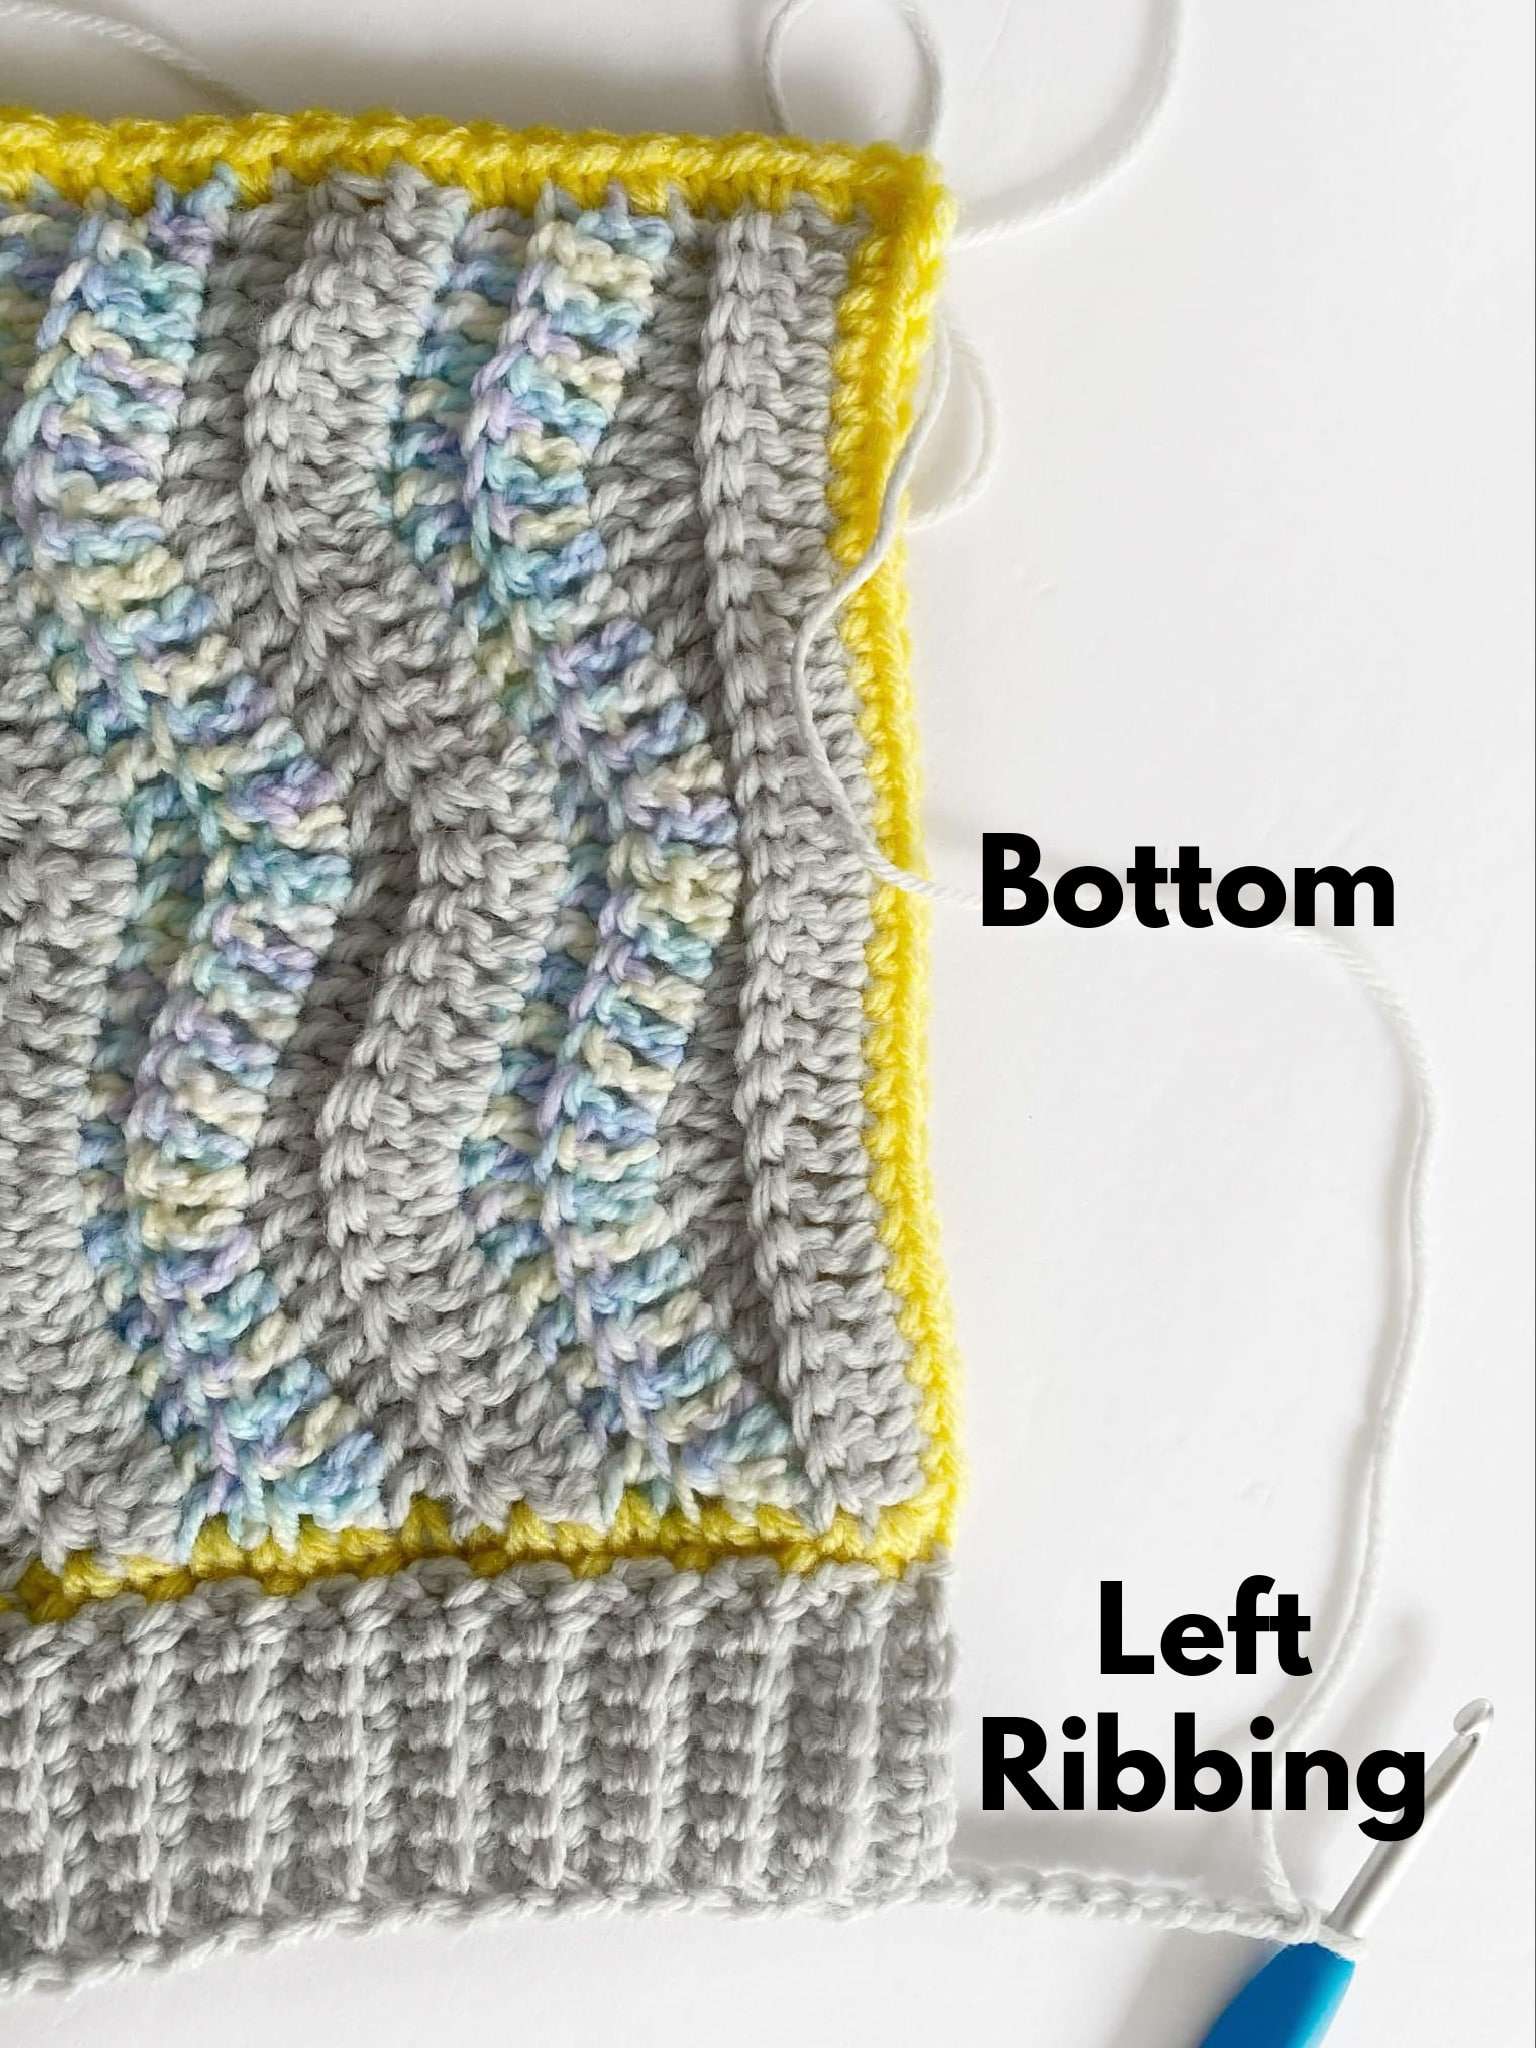
This side is worked across the top of the left ribbing, and the bottom of the blanket.
Row 1: Ch 9, sc in second ch from hook and in each ch across. To join the ribbing to the blanket, sl st in BLO of first 2 sts of the left ribbed edging. Turn. (8 sc)
Row 2: Do not ch 1. Sc in BLO of each st across until 1 st remains, sc in both loops of last st. Turn. (8 sc)
Row 3: Ch 1, sc in BLO of each st across until 1 st remains, sc in both loops of last st. To join, sl st in BLO of next 2 sts of the ribbed edging. Turn. (8 sc)
Rows 4 – 8: Repeat Rows 2 – 3. Row 8 is a Row 2 repeat.
Repeat Rows 2 – 3 across the bottom of the blanket (and all 3 sc of the corner). To join the ribbing, sl st in both loops of each sc from Rnd 1. Rotate the blanket to work along the right- side.
Right Side:
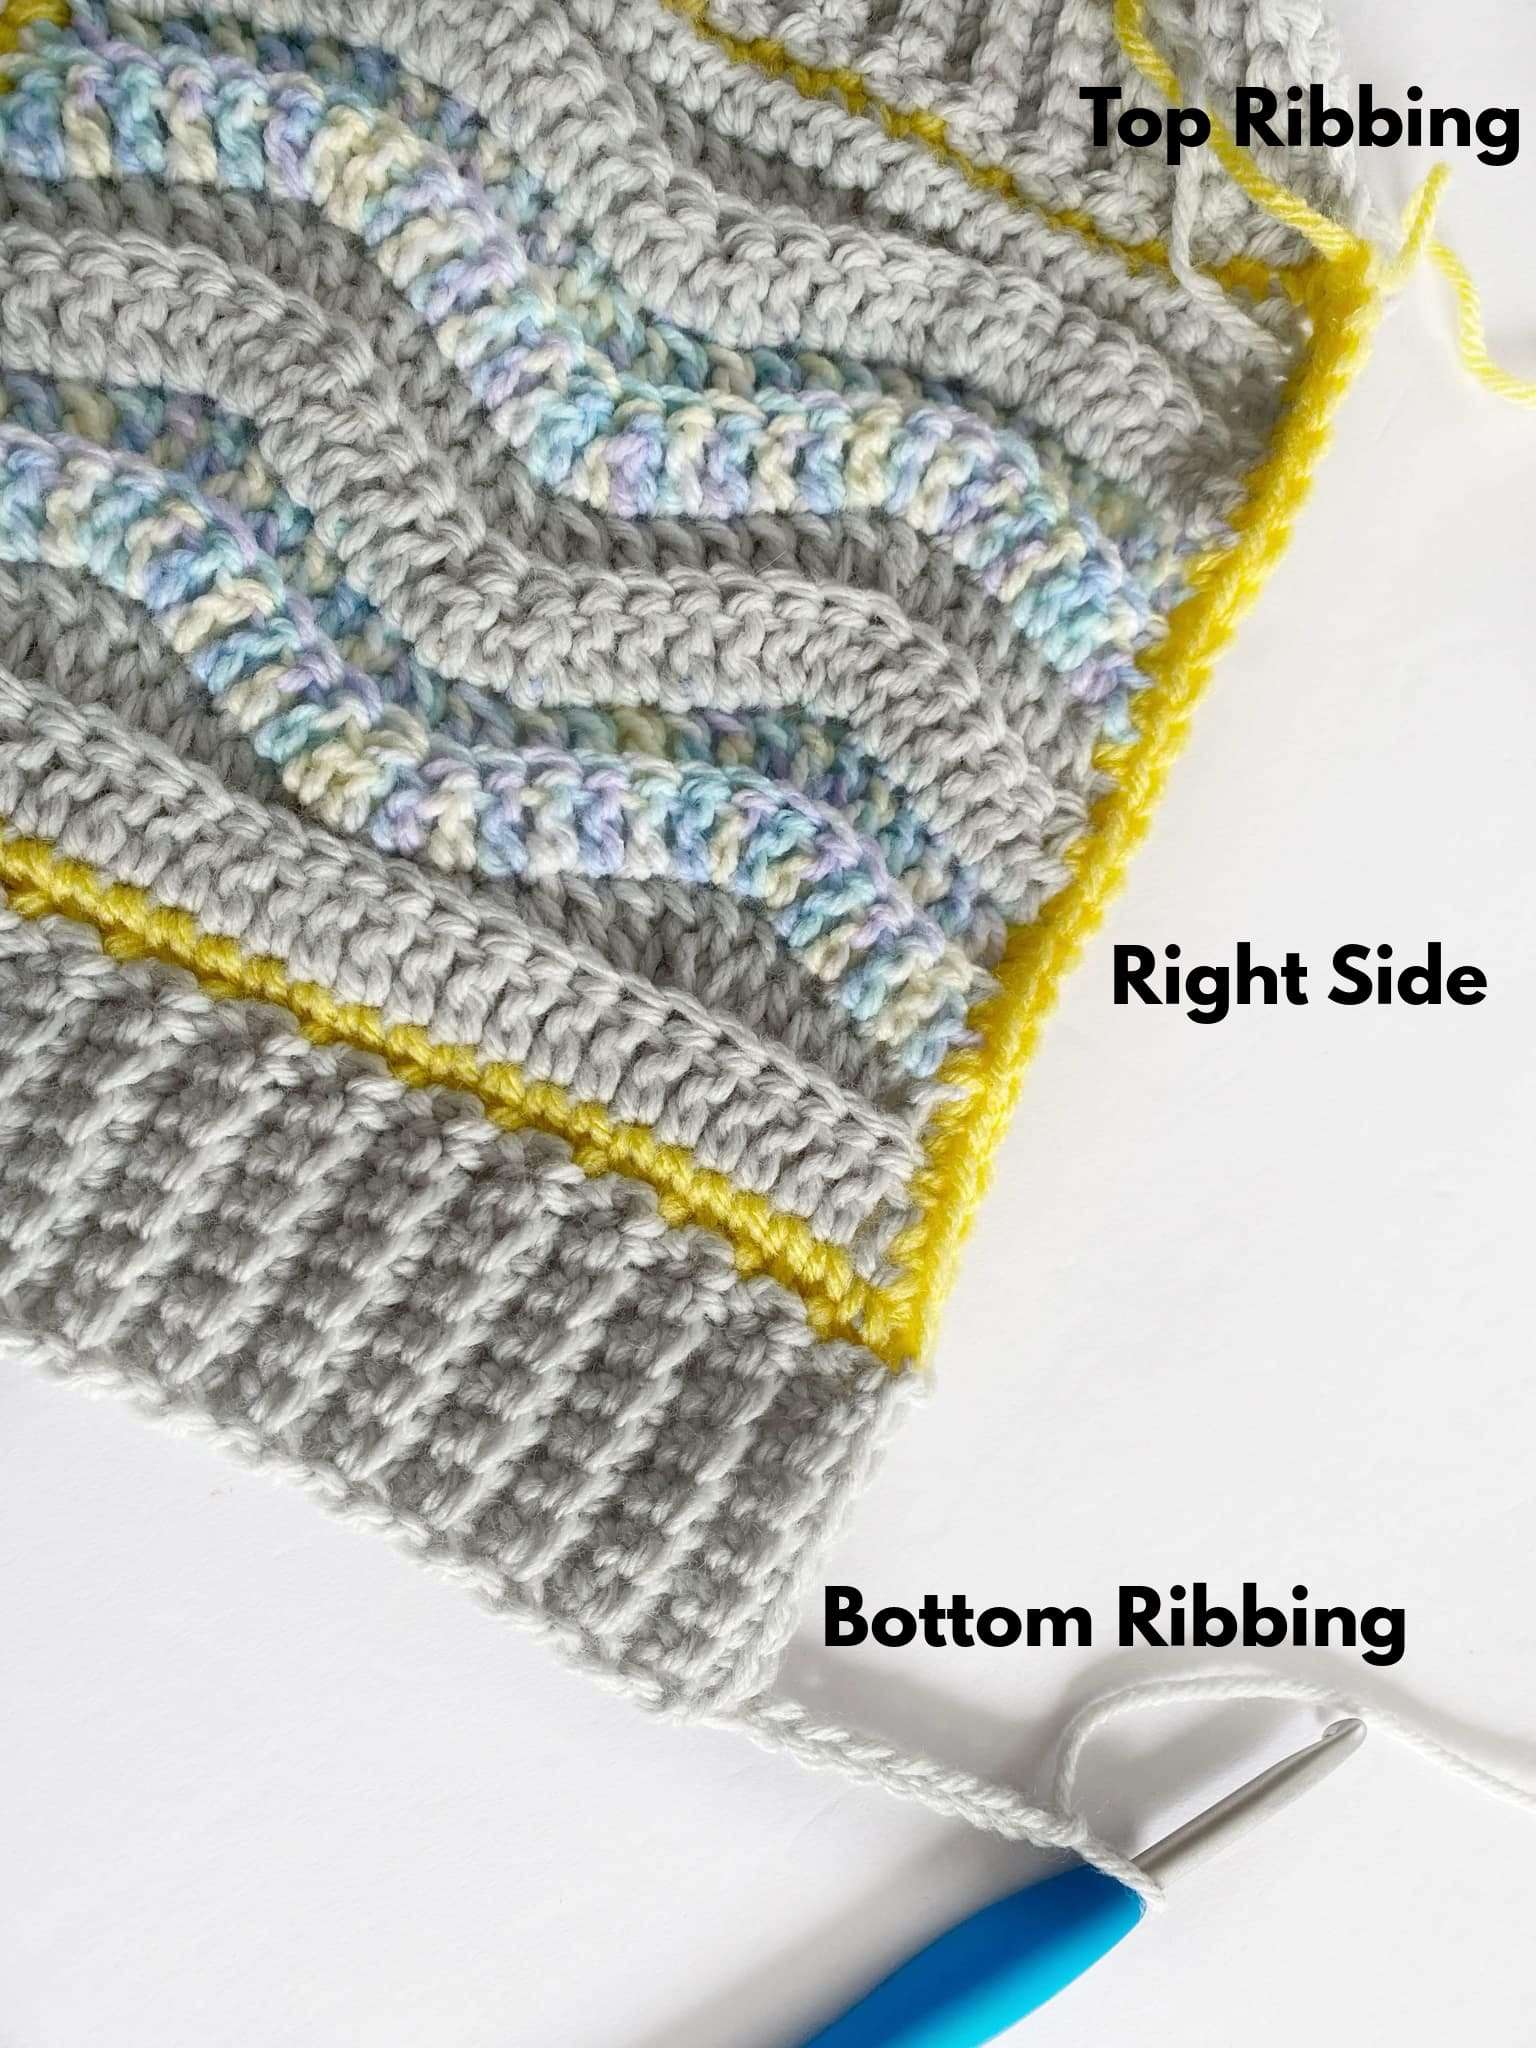
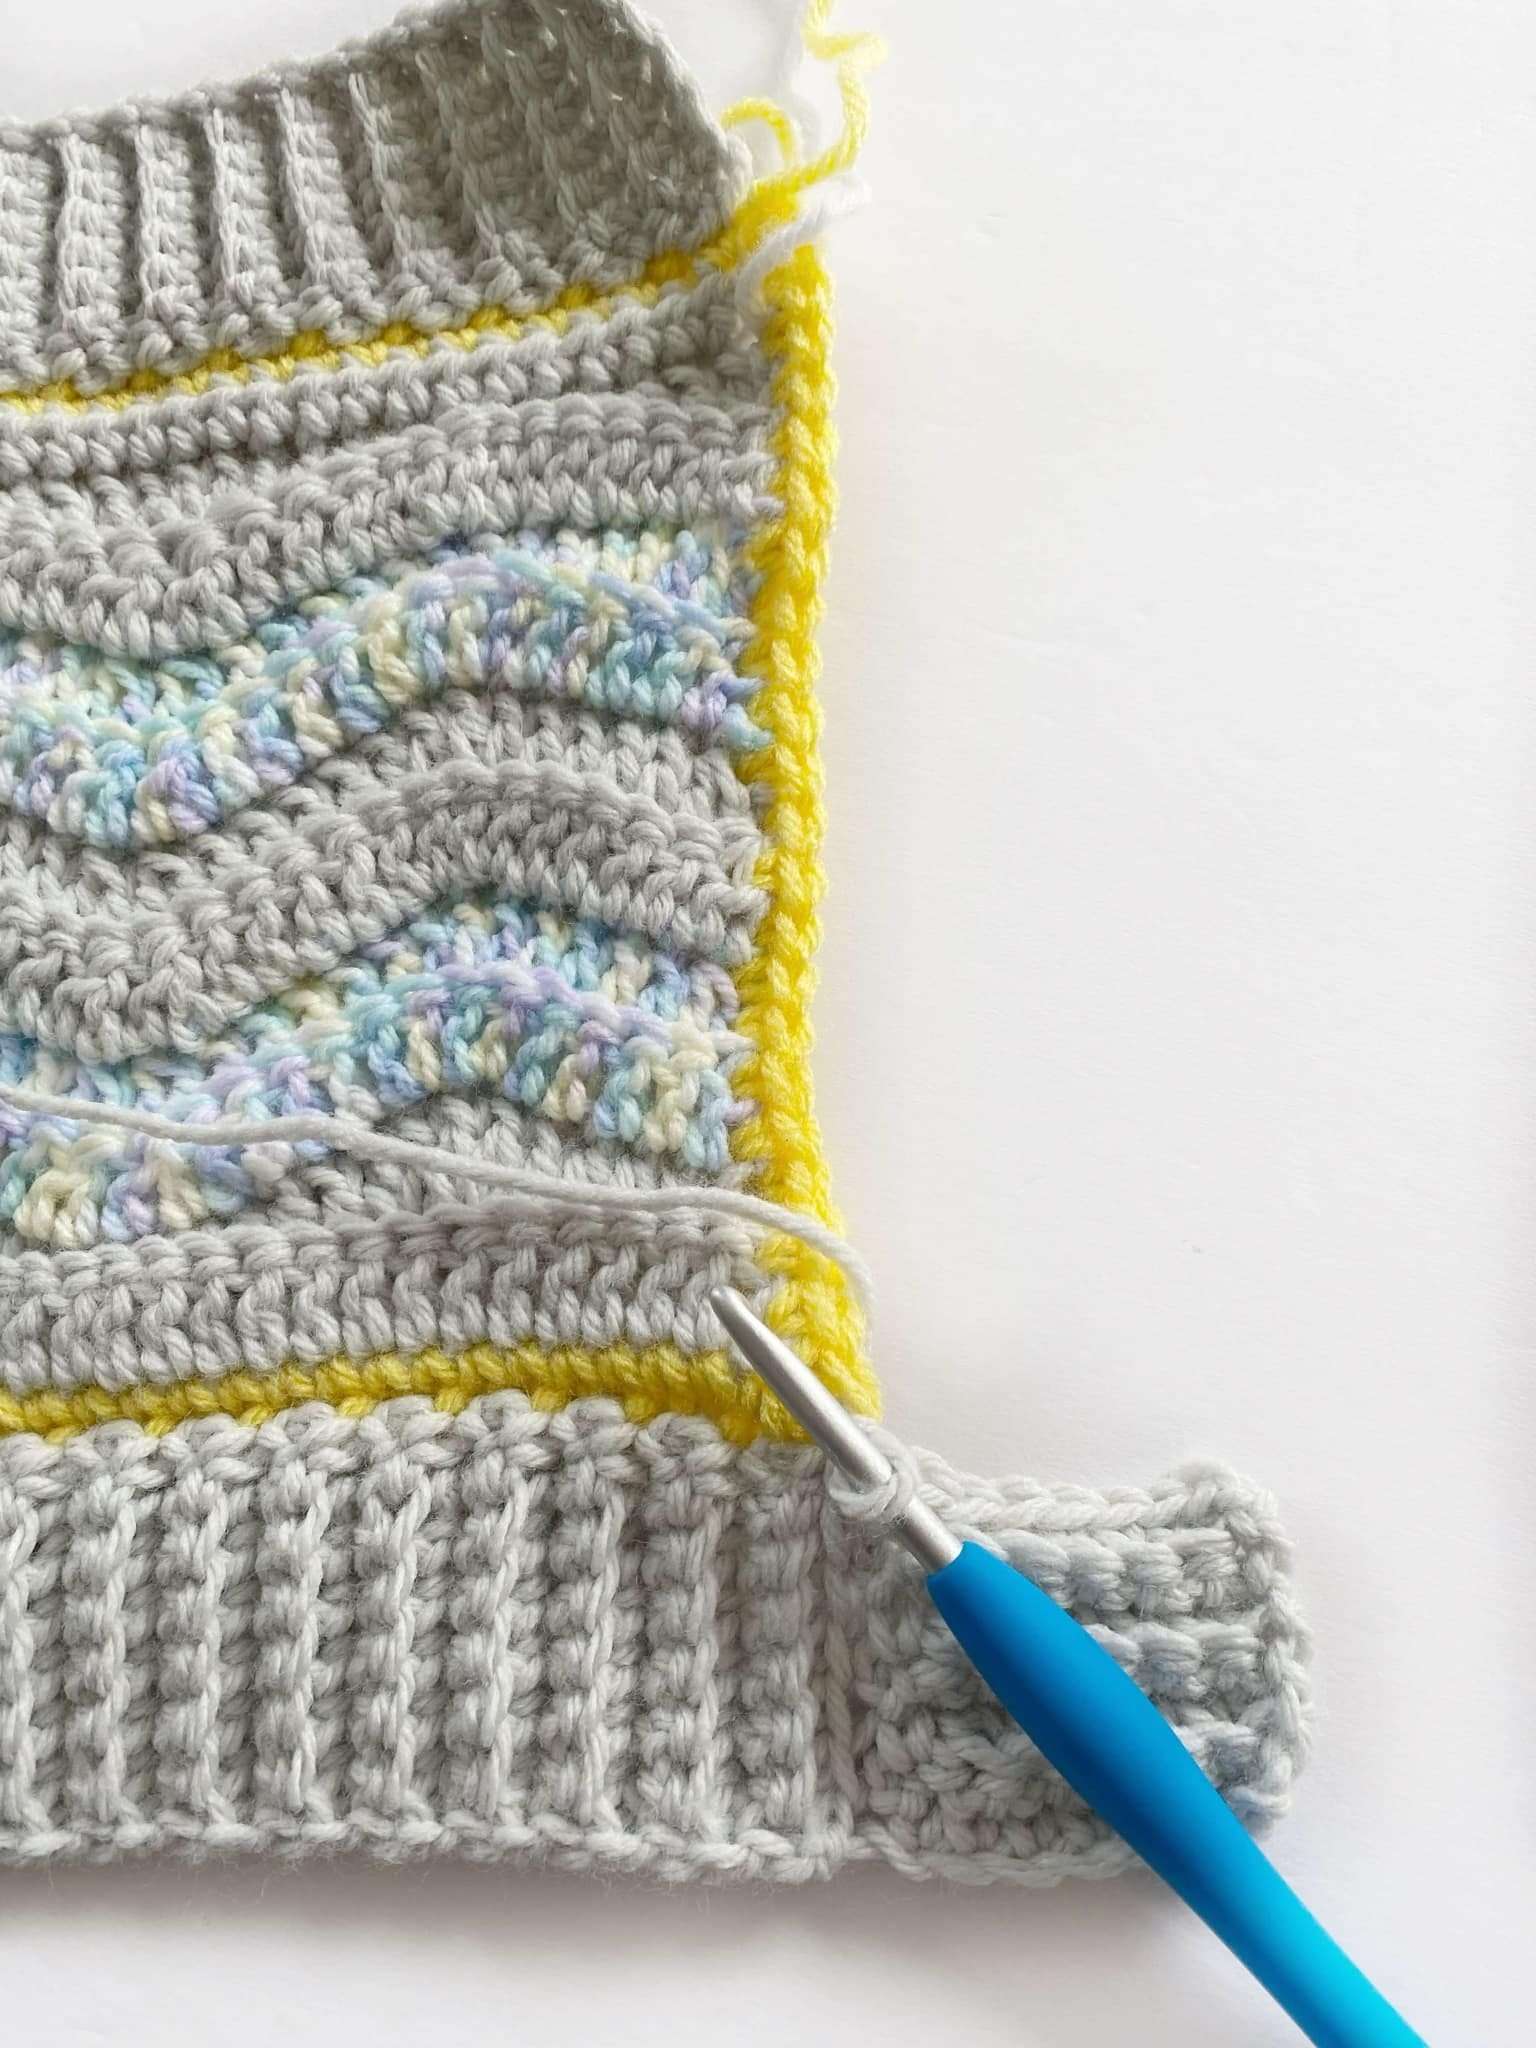
This side is worked across the bottom ribbing, the right side of the blanket, and the top ribbing.
Row 1: Ch 9, sc in second ch from hook and in each ch across. To join the ribbing to the blanket, sl st in BLO of first 2 sts of the bottom ribbed edging. Turn. (8 sc)
Row 2: Do not ch 1. Sc in BLO of each st across until 1 st remains, sc in both loops of last st. Turn. (8 sc)
Row 3: Ch 1, sc in BLO of each st across until 1 st remains, sc in both loops of last st. To join, sl st in BLO of next 2 sts of the ribbed edging. Turn. (8 sc)
Rows 4 – 8: Repeat Rows 2 – 3. Row 8 is a Row 2 repeat.
Repeat Rows 2 – 3 across the right-side of the blanket (and all 3 sc of the corner). To join the ribbing to the right side, sl st in both loops of each sc from Rnd 1.
Repeat Rows 2 – 3 across the top ribbing. To join, make a sl st into the bottom of each ch of the top ribbing.
Fasten off and weave in ends!
Blocking the Blanket:
Blocking is the process of wetting a piece of crochet to make the ends and rows straight. To block this ripple baby blanket, you will need a steamer or spray bottle, straight pins or blocking pins, and a blocking mat or foam.
Block your work by stretching out the blanket (vertically and horizontally) and placing pins along each side to hold it in place. Spray the blanket with water, or use a steamer, making sure to stay at least 2 inches away from the blanket. Gently press the water or steam into the blanket with your hands. Let the blanket dry completely before unpinning it.
Questions?
If you have any questions about the Making Waves Ripple Baby Blanket, please send me an email through my contact page. I am happy to help!
End Notes:
Yay! You just made your first Making Waves Ripple Baby Blanket. I hope you enjoy making and using your blanket! If you’d like to make more crochet blankets, explore some crochet patterns by clicking on the button below.
Disclaimer: You are welcome to sell items that you’ve made from this pattern; however, you are not allowed to use my pictures or sell my pattern as your own (Copyright @ ThisPixieCreates).
I hope you have a wonderful day!
Love, Dayna