
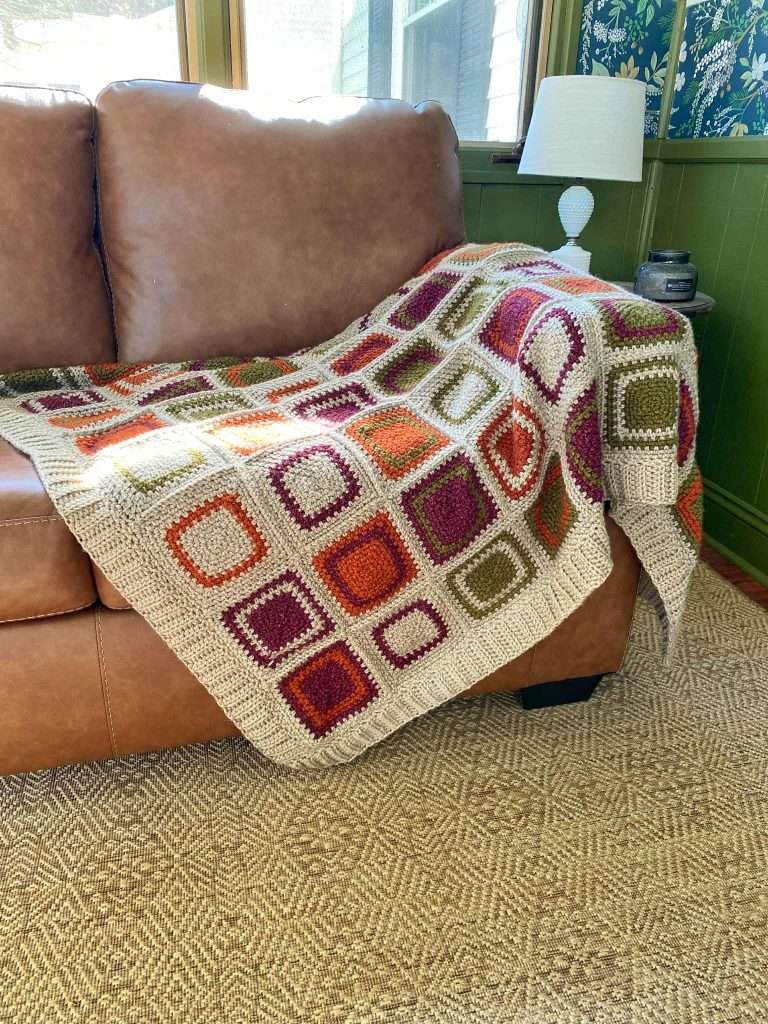
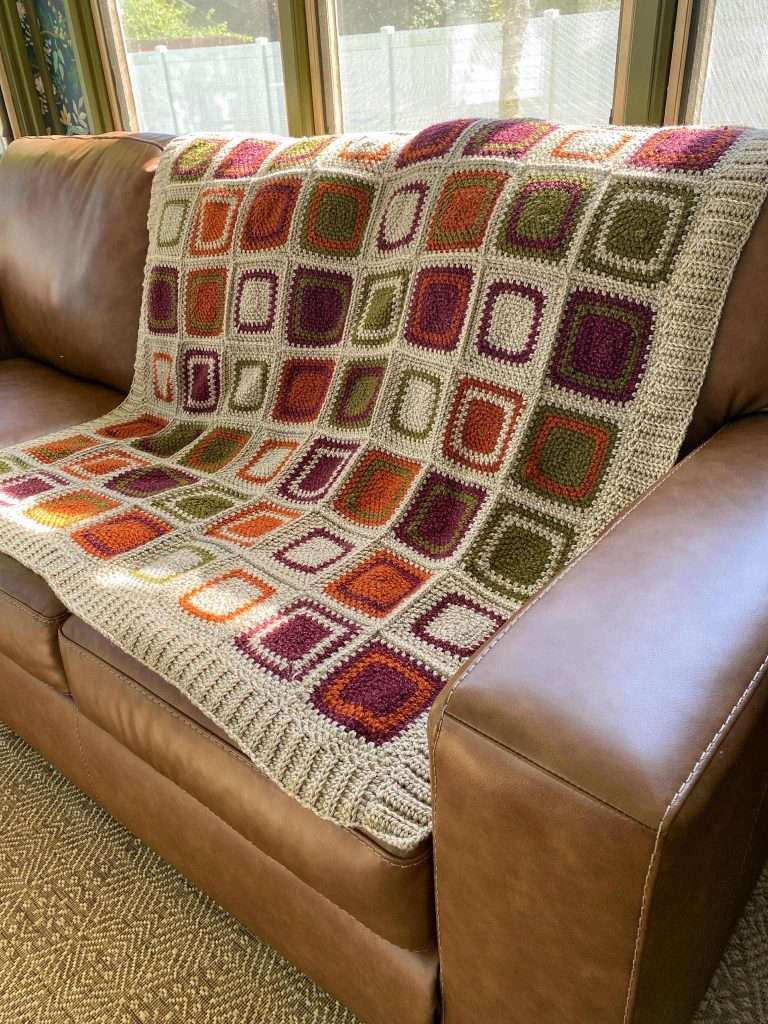
Hi guys! If you’re looking for a fun way to use up some scrap or stash yarn, want a relaxing project or something portable, then you’ll love the Disco Queen Blanket. This is a join-as-you-go style blanket made with individual moss stitch squares that are joined together at the end of the project.
This blanket is similar to the Cotton Candy Parade Blanket, with a few minor changes. I share all of the details for crocheting this blanket below: yarn, hook size, blanket diagram, and border.
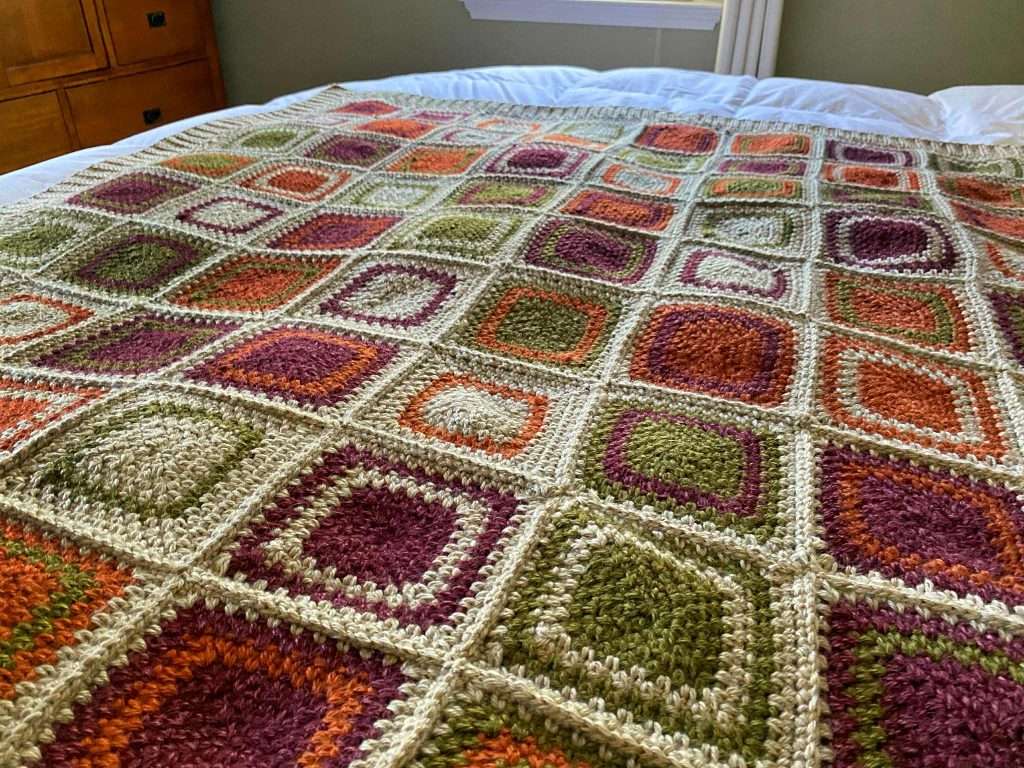
Pin this Moss Stitch Squares Crochet Blanket – HERE!
Don’t have time to make this blanket? That’s okay! Pin it for later, so you can find it when you’re ready to start crocheting.
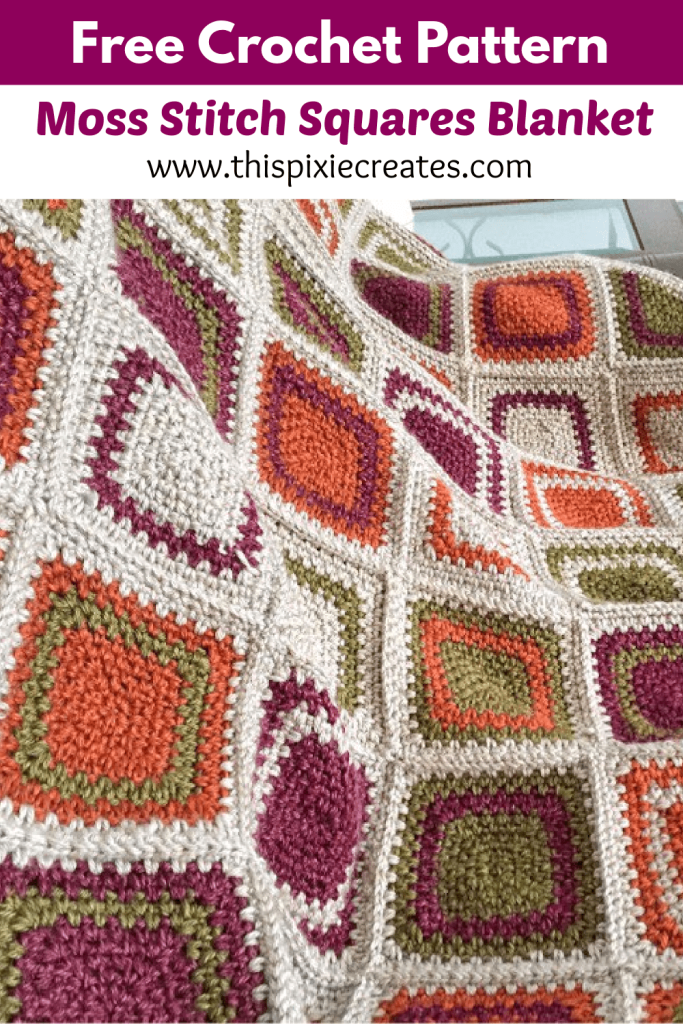
Pattern for Squares & Join-as-you-go Method:
If you’d like the pattern instructions for making the moss stitch squares and joining them together, you can find them linked below:
Changes to the Original Pattern:
The original pattern is the Cotton Candy Parade Blanket. I tweaked the pattern to create this retro moss stitch squares blanket. Here are the differences between the 2 blankets:
- Each square is made up of 12 rounds (instead of 13).
- I added a ribbed border (instead of a shell border).
- I used Lion Brand Heartland yarn in 4 colours (instead of Mandala Ombre and white).
- I made a lapghan/small throw size (instead of a baby blanket).
Yarn & Colours:
I used Lion Brand Heartland Yarn in the colours:
- Grand Canyon (A)
- Badlands (B)
- Yosemite (C)
- Joshua Tree (D)
Hook Size:
I used a 5.5mm crochet hook!
Colour Combinations for the Squares:
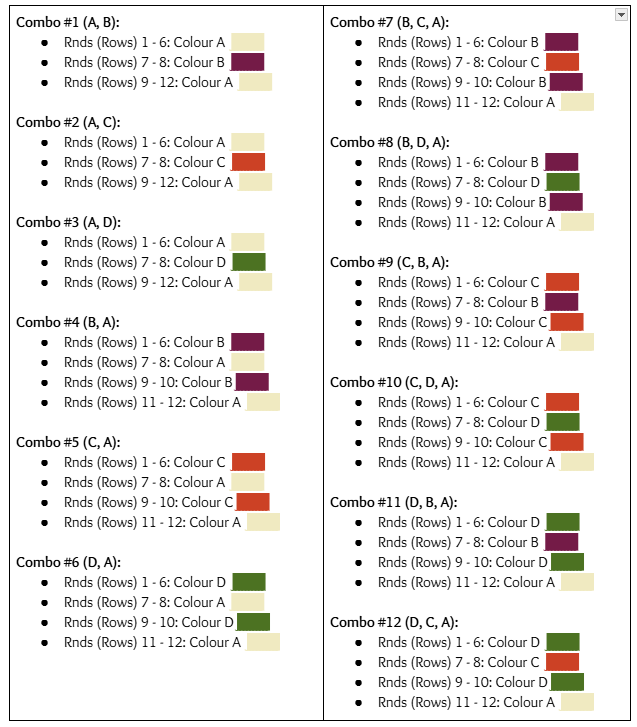
I used 4 colours to create 12 different colour combinations. You can follow the combinations below or create your own using a different number of colours. The more colours you use, the more combinations you can create.
Here are all 12 colour combinations for your squares:
Blanket Diagram:
This blanket measures approximately 50″ x 55.5″ and is 8 squares wide by 9 squares long. This means that there is a total of 72 squares.
Measurements:
- Individual square: 5.5″ wide x 5.5″ long
- Width of Blanket (without border): 44″
- Width of Blanket (with border): 50″
- Length of Blanket (without border): 49.5″
- Length of Blanket (with border): 55.5″
You can find the layout of my squares below.
- Each number represents a colour combination from the 12 shown above. Ex. 1 represents “Combo #1”, 9 represents “Combo #9”, etc.
- Make 6 squares of each colour combination (Combo #1 – 12).
| 7 | 4 | 2 | 3 | 9 | 10 | 4 | 6 |
| 1 | 9 | 1 | 5 | 6 | 8 | 5 | 10 |
| 6 | 8 | 10 | 4 | 2 | 12 | 11 | 9 |
| 12 | 5 | 3 | 11 | 9 | 3 | 4 | 2 |
| 3 | 1 | 7 | 6 | 8 | 1 | 10 | 8 |
| 6 | 11 | 10 | 1 | 12 | 9 | 5 | 3 |
| 7 | 2 | 8 | 7 | 2 | 11 | 7 | 11 |
| 12 | 4 | 5 | 3 | 4 | 6 | 8 | 5 |
| 9 | 11 | 1 | 10 | 7 | 12 | 2 | 12 |
Joining your Squares:
I made all of my squares first (72 in total), laid them out, and joined them together using the crochet join as you go method shown in the Cotton Candy Parade Blanket HERE!
You can use any join method that you prefer, including sewing your squares together using the mattress or whip stitch. I prefer to crochet my squares together because I trust my crochet skills more than my sewing skills haha.
Border:
This beautiful, ribbed border adds some coziness to your finished blanket. It’s perfect for Fall!
Before we start on the ribbing, we have to crochet 1 foundation round around the perimeter of the blanket to get it ready! You can find the instructions for “Rnd 1” in the Cotton Candy Parade Blanket here. It’s underneath the “Border” heading.
The only change to the instructions will be to [(sc, ch 1) in ch-1 sp] 11 times (instead of 12). This is because each square has 1 less round than in the original pattern.
When you’re finished with this foundation round, come back here to start your ribbing!
Ribbing Tips:
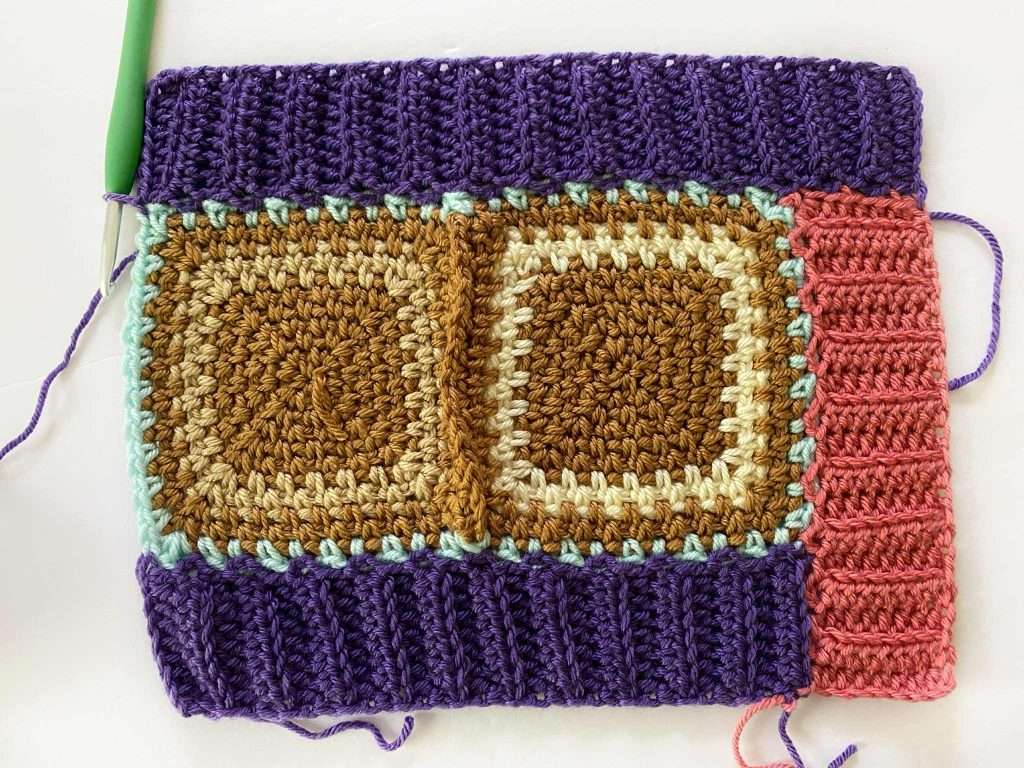
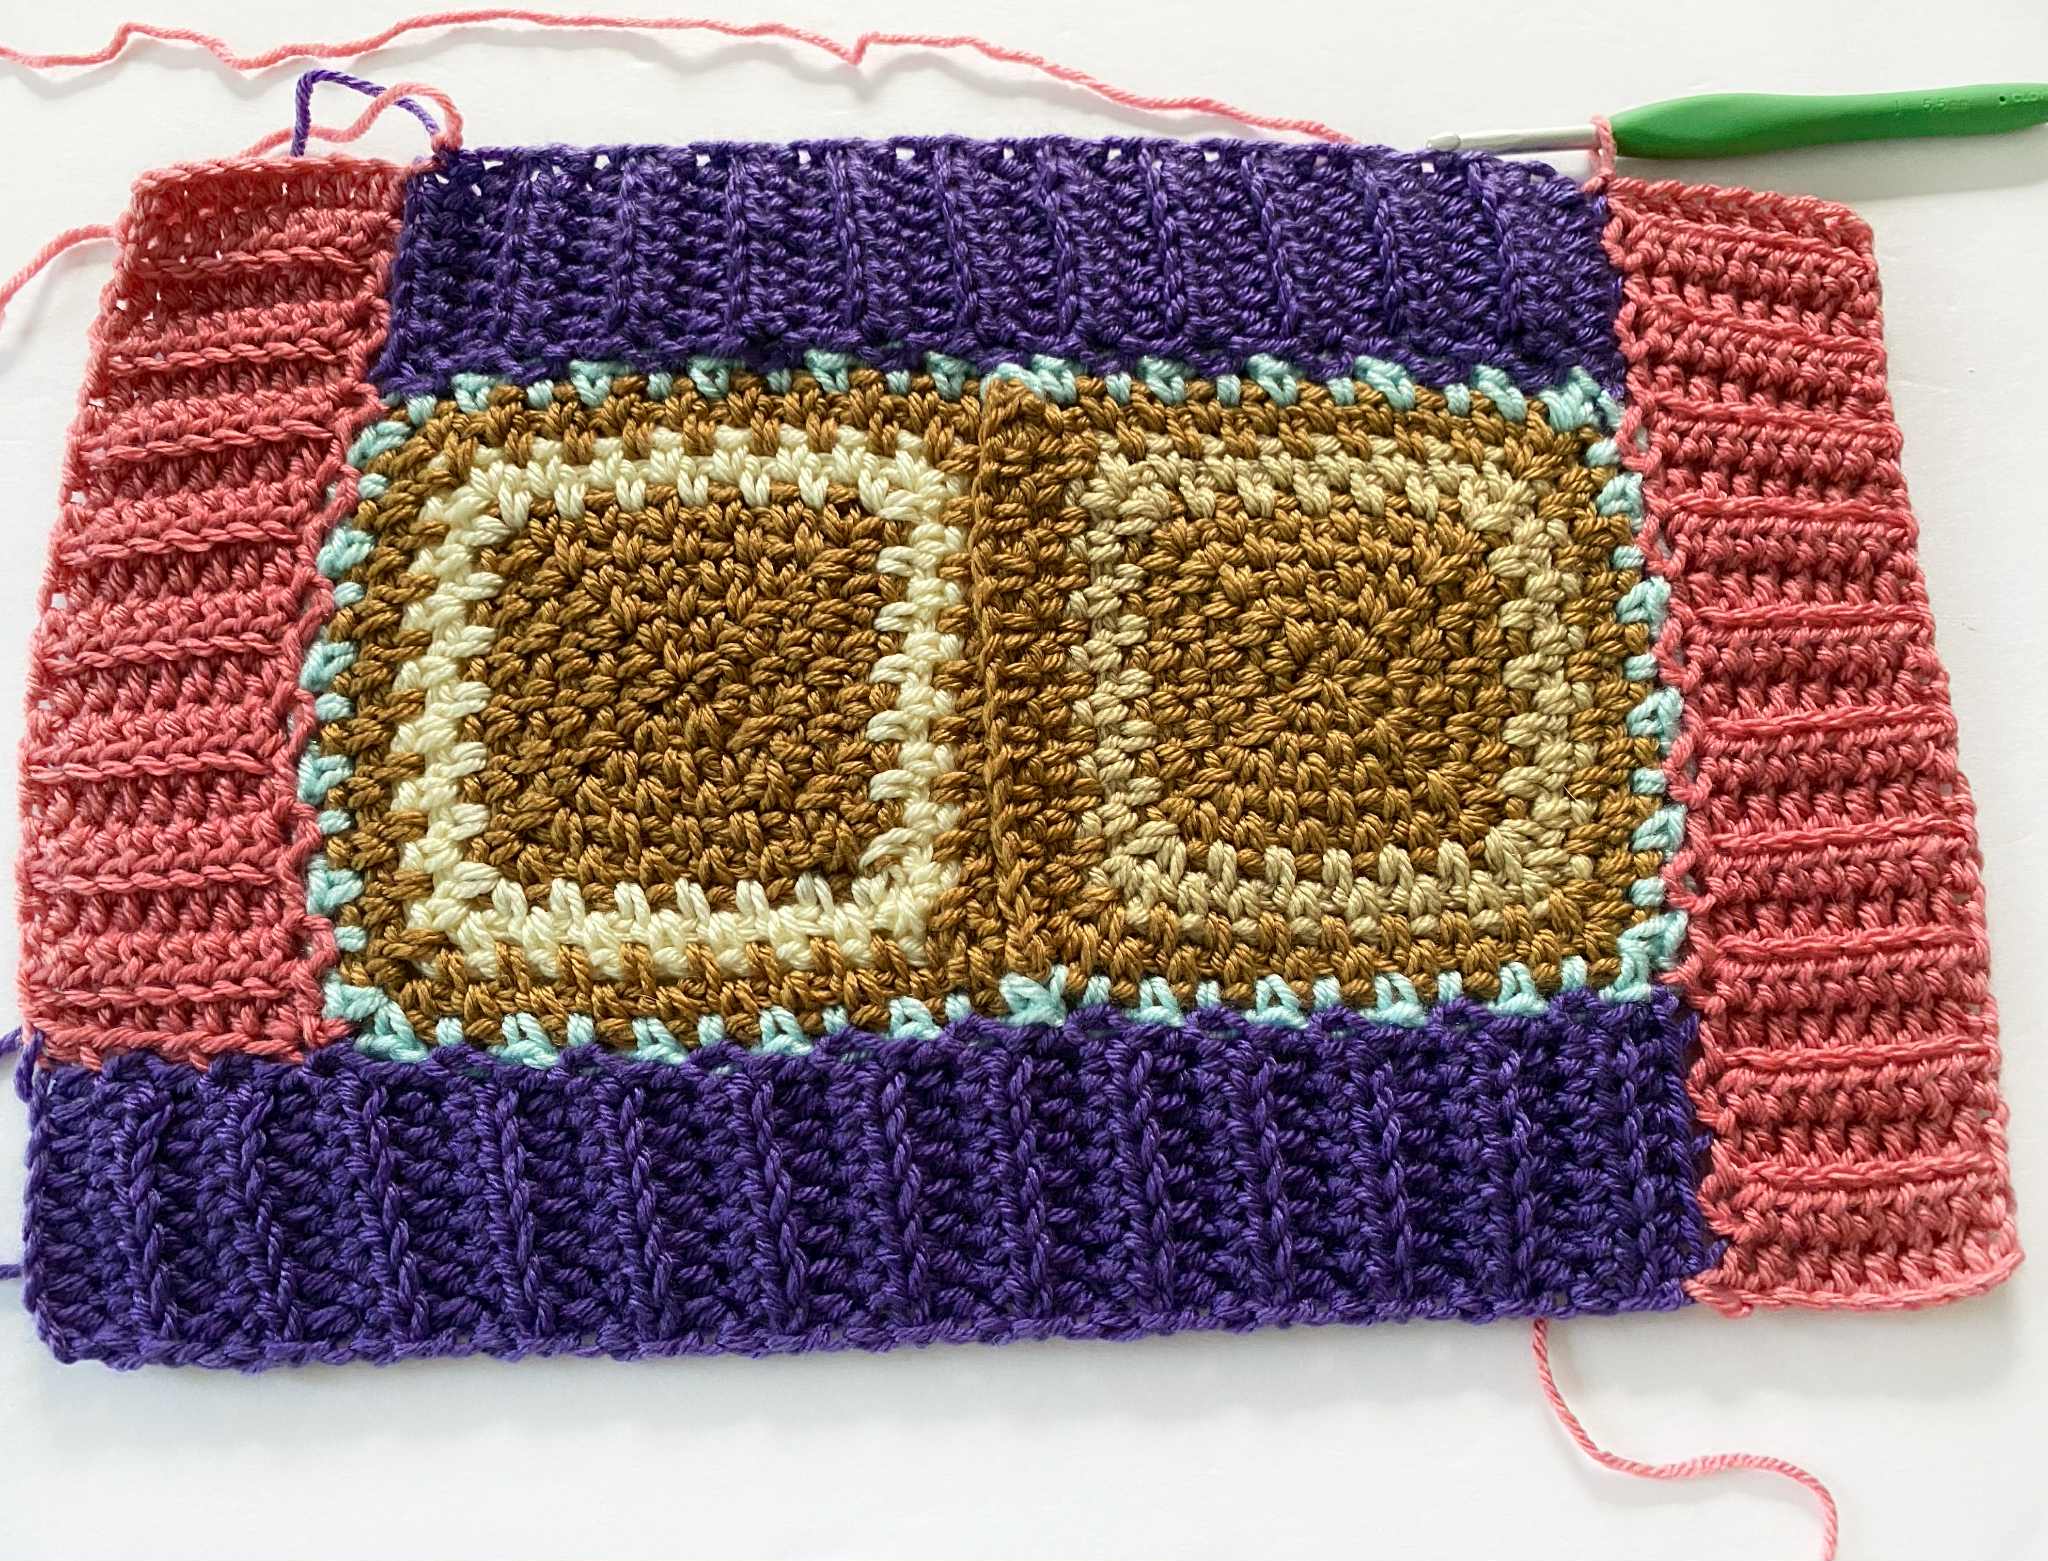
- The border is crocheted in back-and-forth rows around the perimeter of the blanket, in the following order: top, left side, bottom, right side.
- The border is crocheted in Colour A.
- Make sure the right side of the blanket is facing you, before starting the border. This is the side that the squares are joined on (you can see the ridge of the join).
- The stitch count is given at the end of each row in <>. You should always have 8 hdc.
Abbreviations:
- Ch – chain
- St – stitch
- Sp – space
- Sk – skip
- BLO – back loop only
- Sl st – slip stitch
- Hdc – half double crochet
- RS – right side
- WS – wrong side
Top:
Continue where you left off from the foundation round (Rnd 1). The ribbing starts in the top-right corner of the blanket.
Row 1 (RS): With Colour A, ch 9, hdc in second ch from hook and in each ch across. To join the ribbing to the blanket, sl st into the corner ch-2 sp of Rnd 1, and sl st into the next ch-sp of Rnd 1. Turn. <8 hdc>
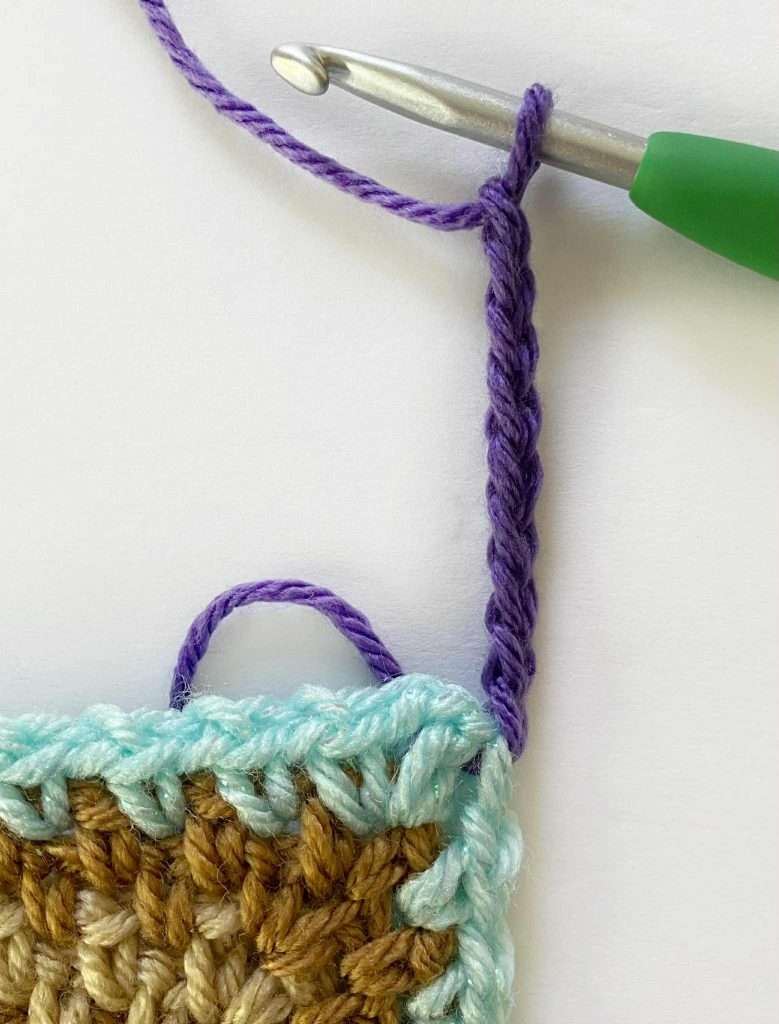
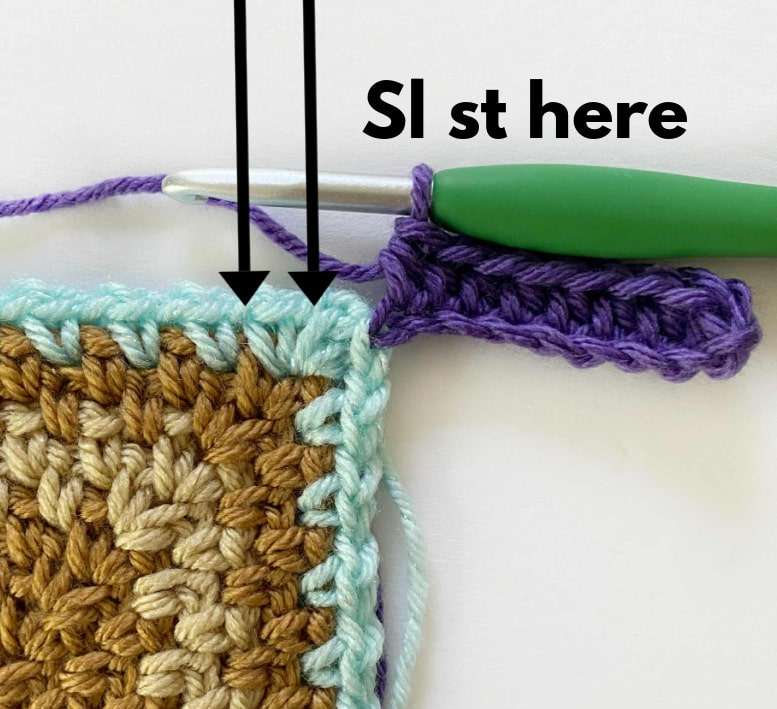
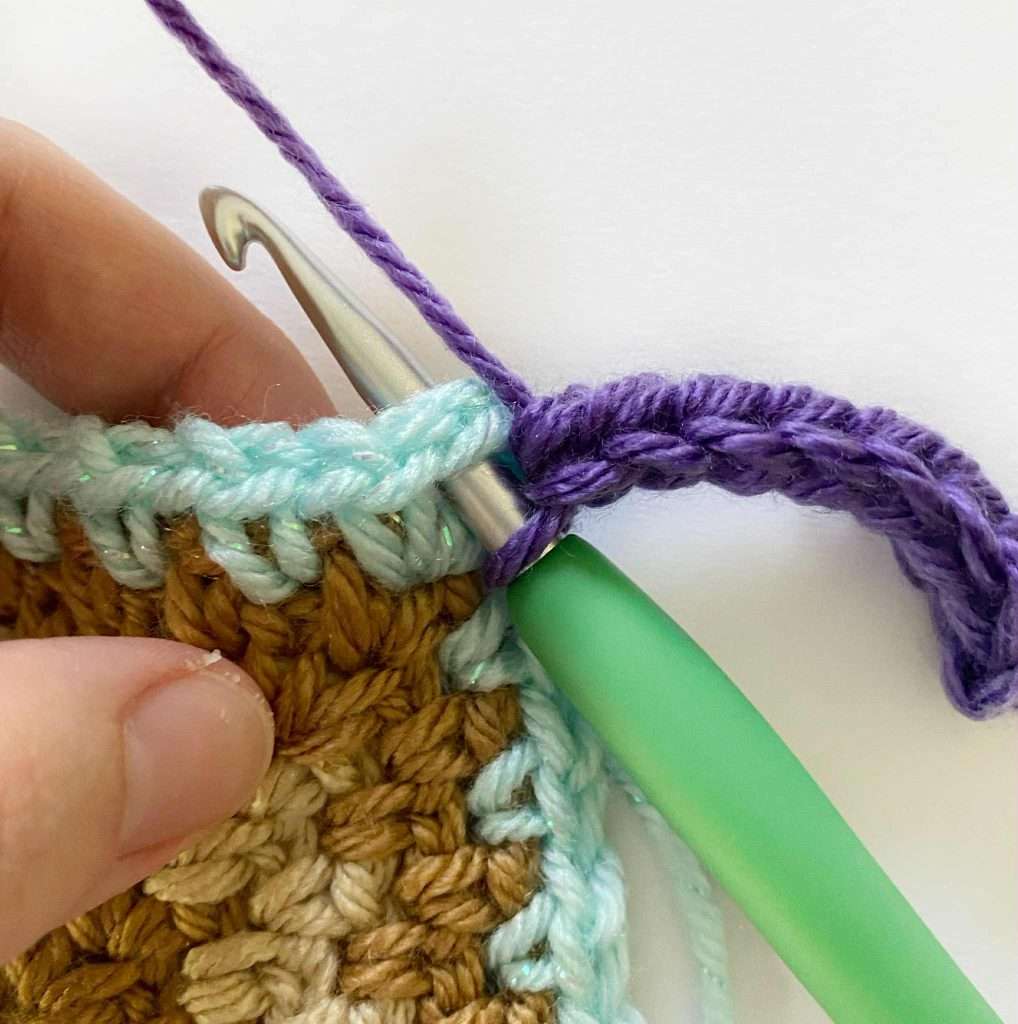
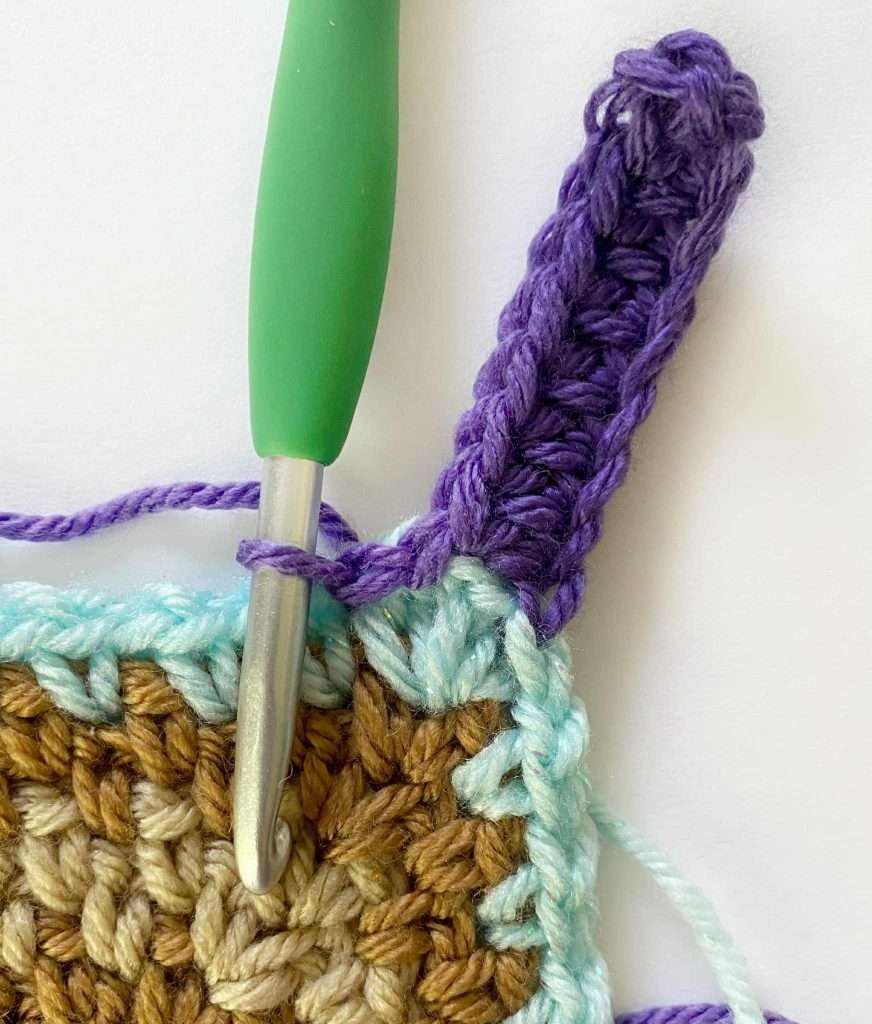
Row 2 (WS): Do not ch 1. Hdc in BLO of first 7 sts, hdc in both loops of last st. Turn. <8 hdc>
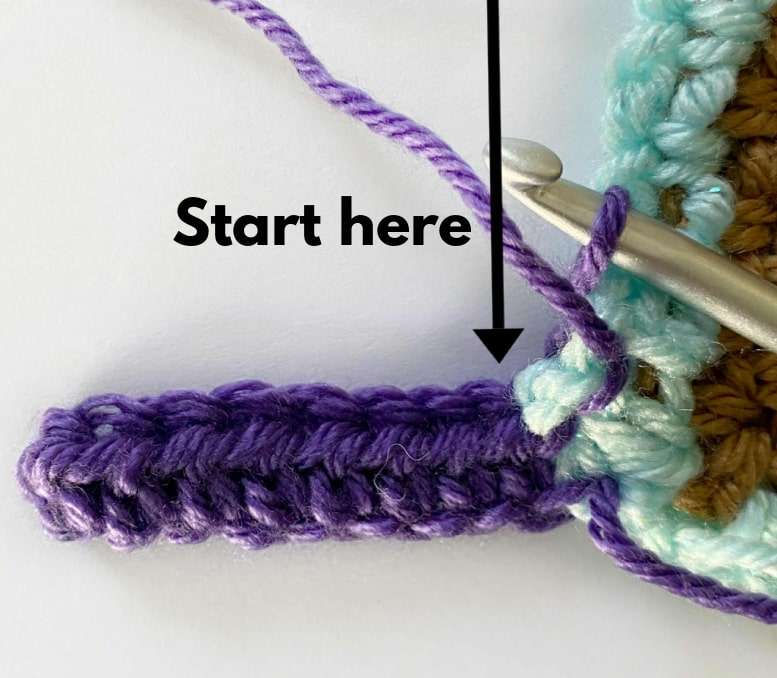
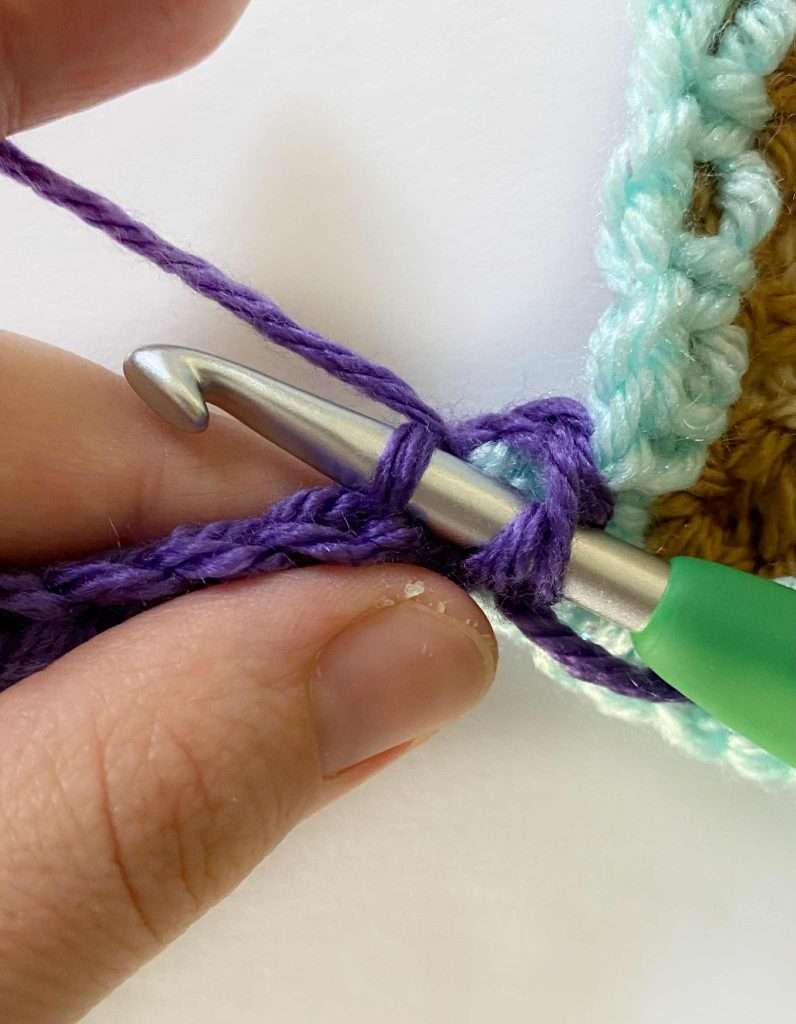
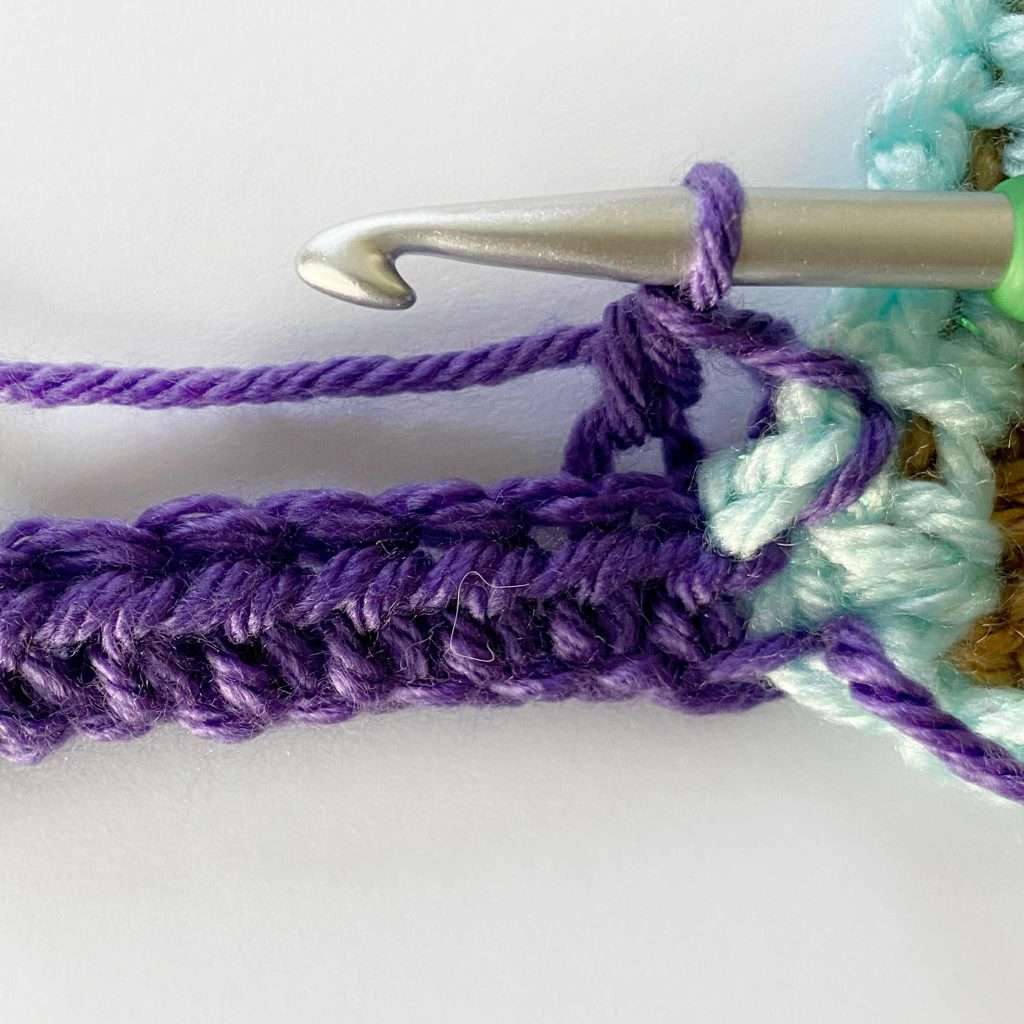
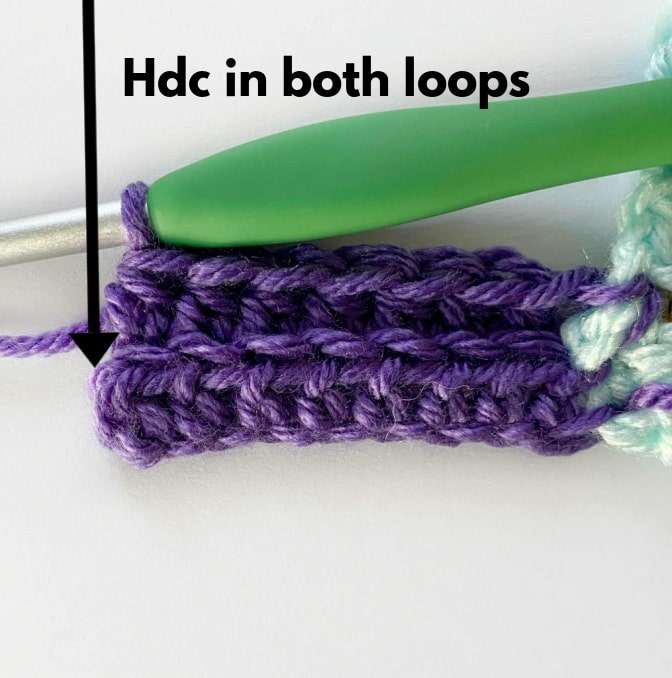
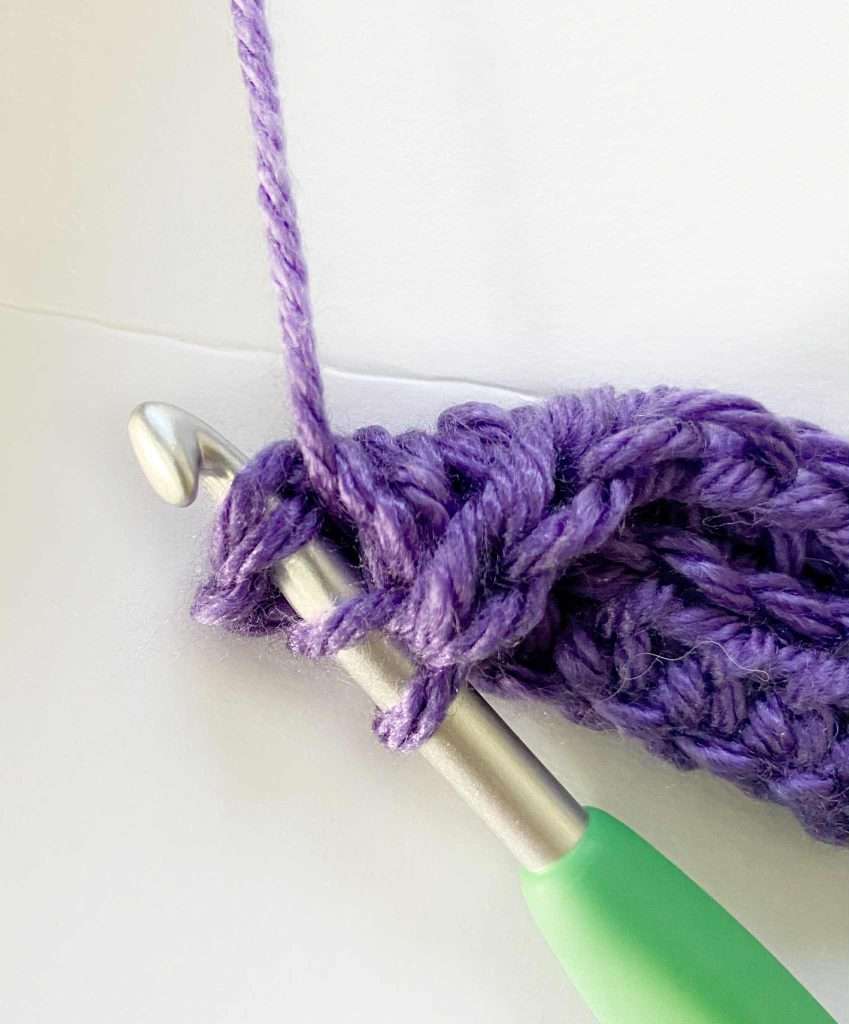
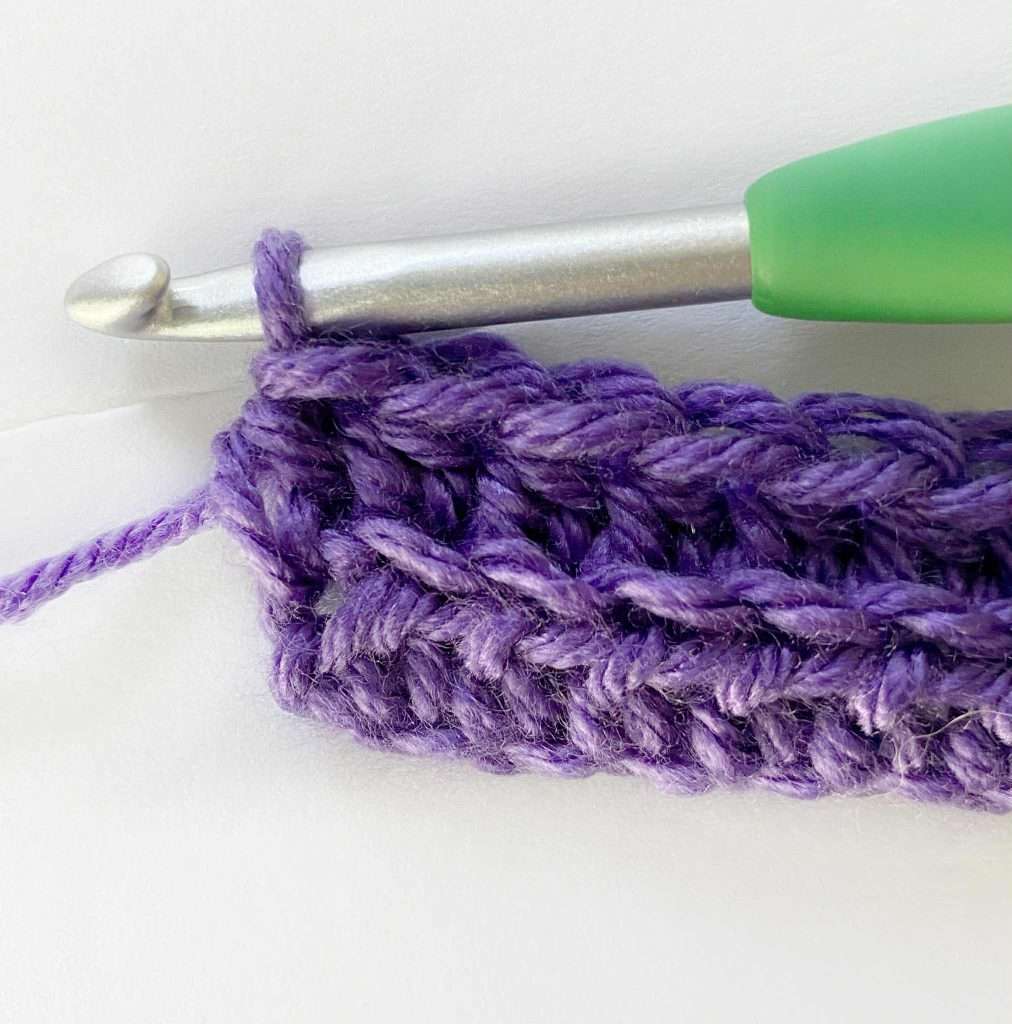
Row 3 (RS): Ch 1, hdc in BLO of first 7 sts, hdc in both loops of last st. Join the ribbing by making a sl st into the next 2 ch-sps of Rnd 1. Turn. <8 hdc>
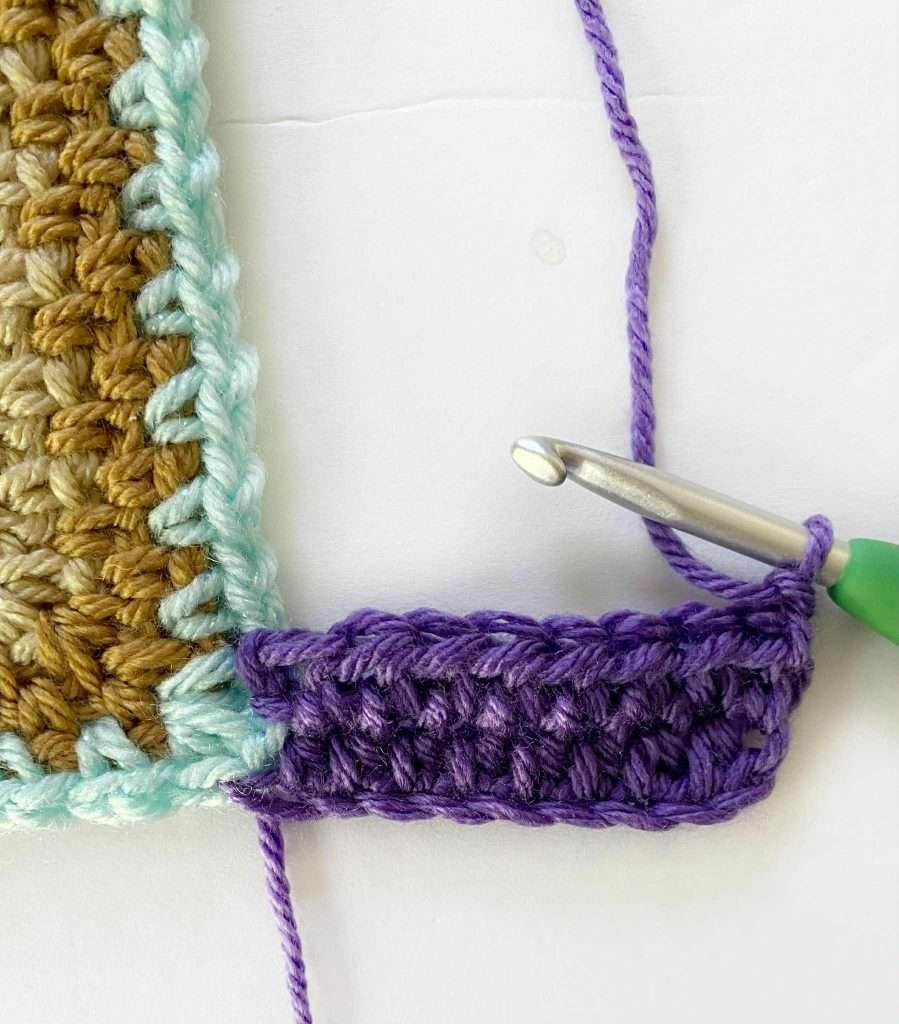
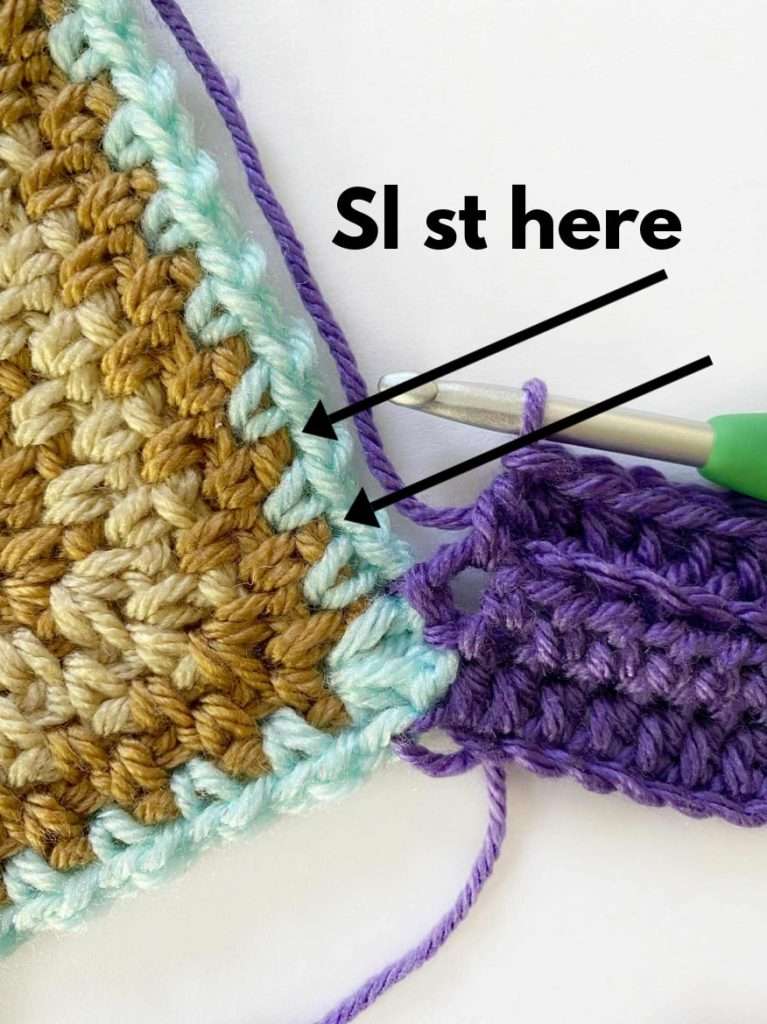
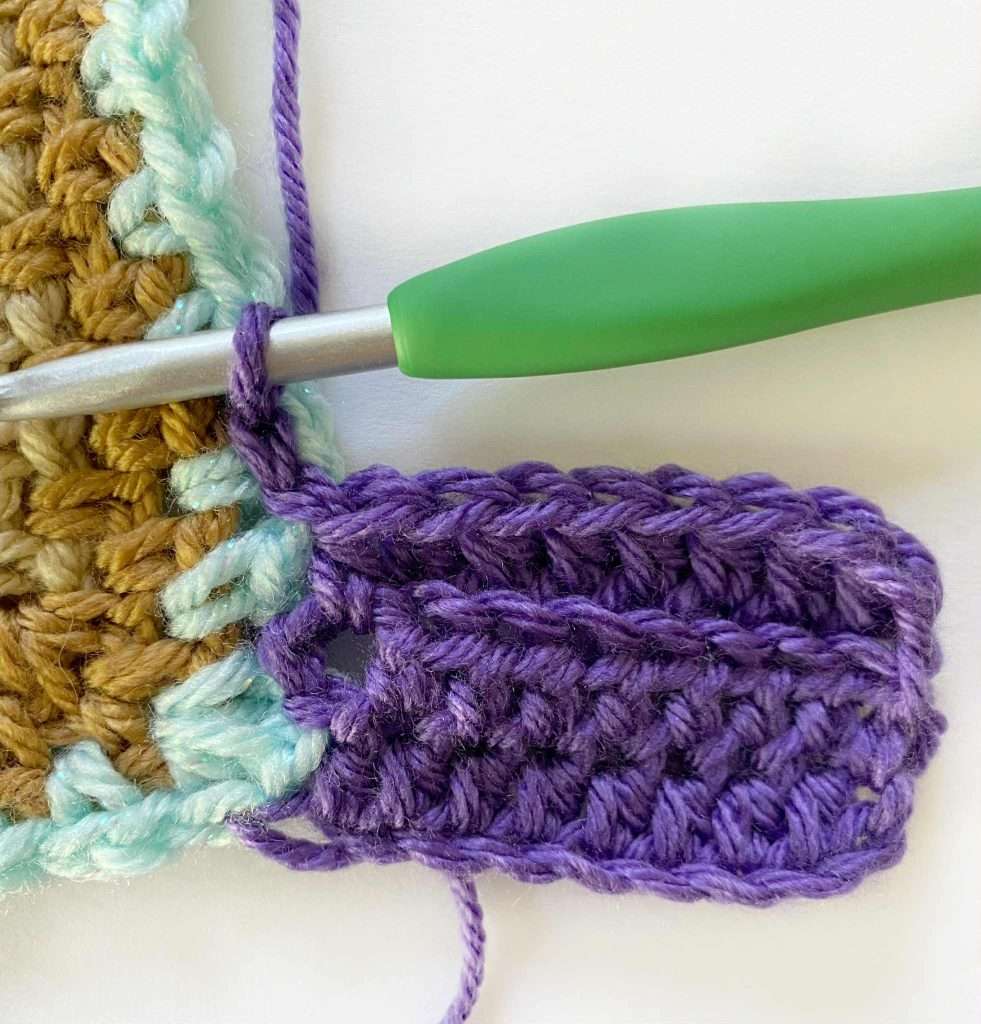
Repeat Rows 2 – 3 across the top of the blanket. The last row of ribbing should be a Row 2 repeat.
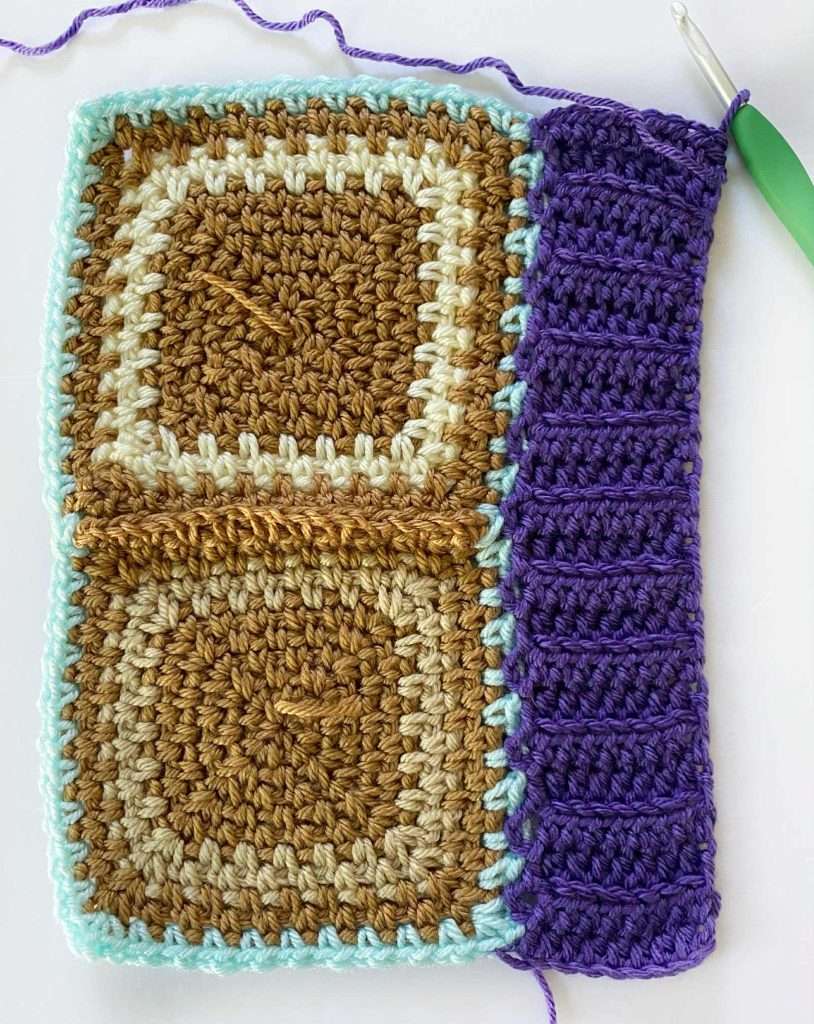
Rotate the blanket to work along the next side.
Left Side:
This side is worked across the top of the top-ribbing, and the left side of the blanket.
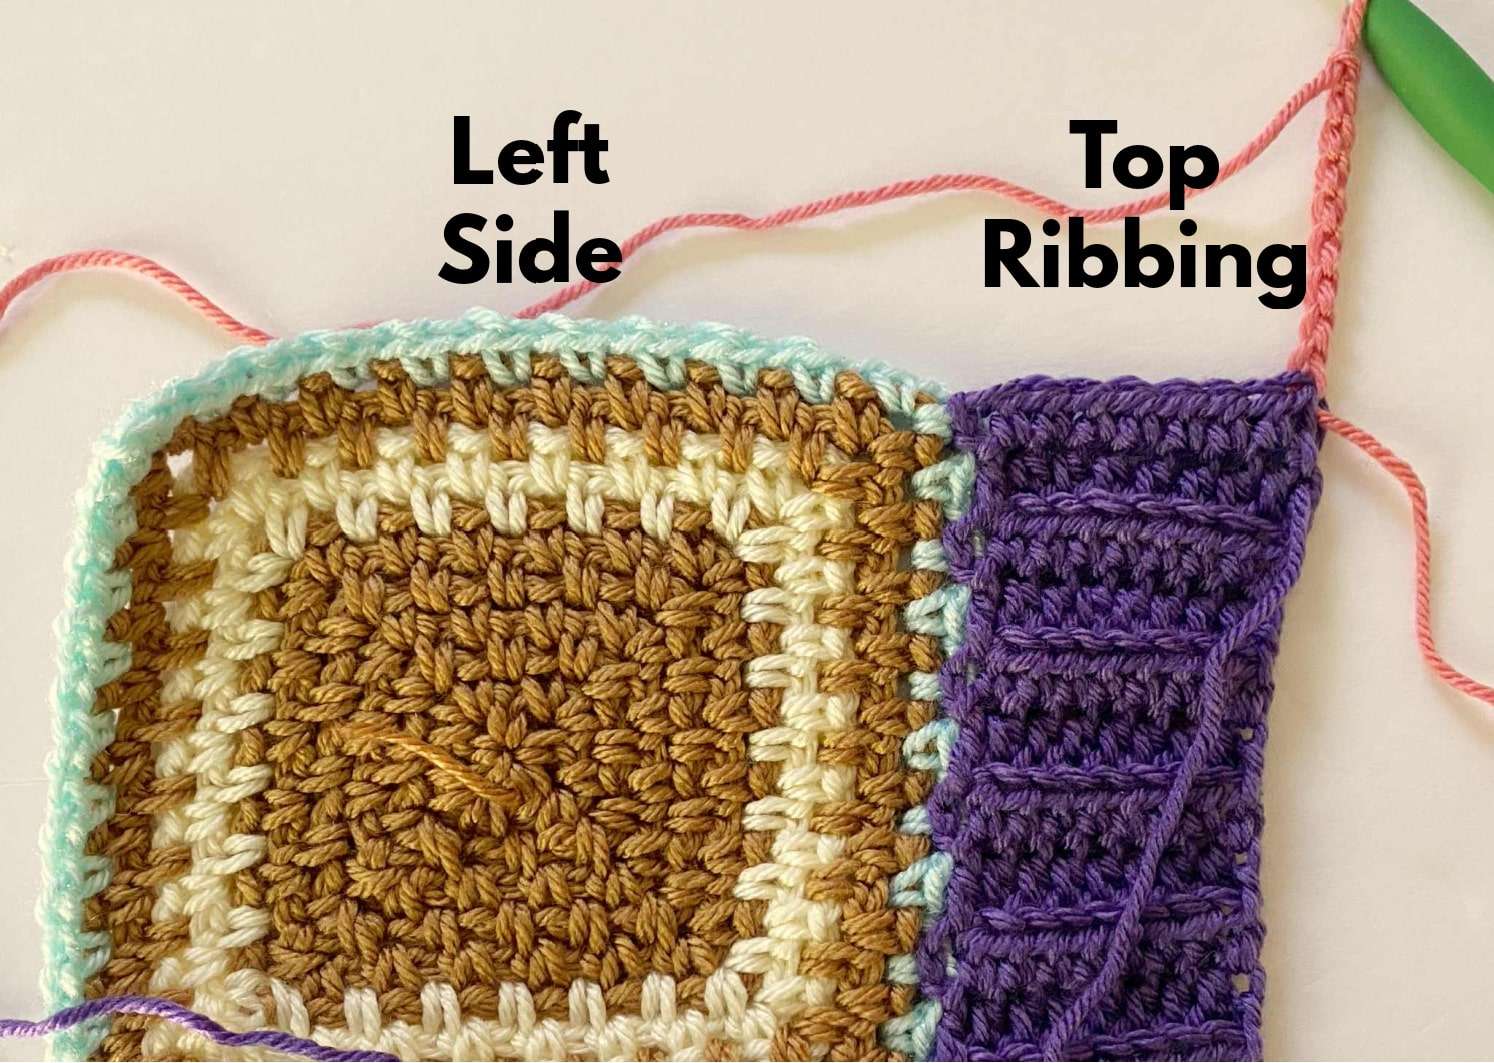
Make sure the RS of the blanket is facing you.
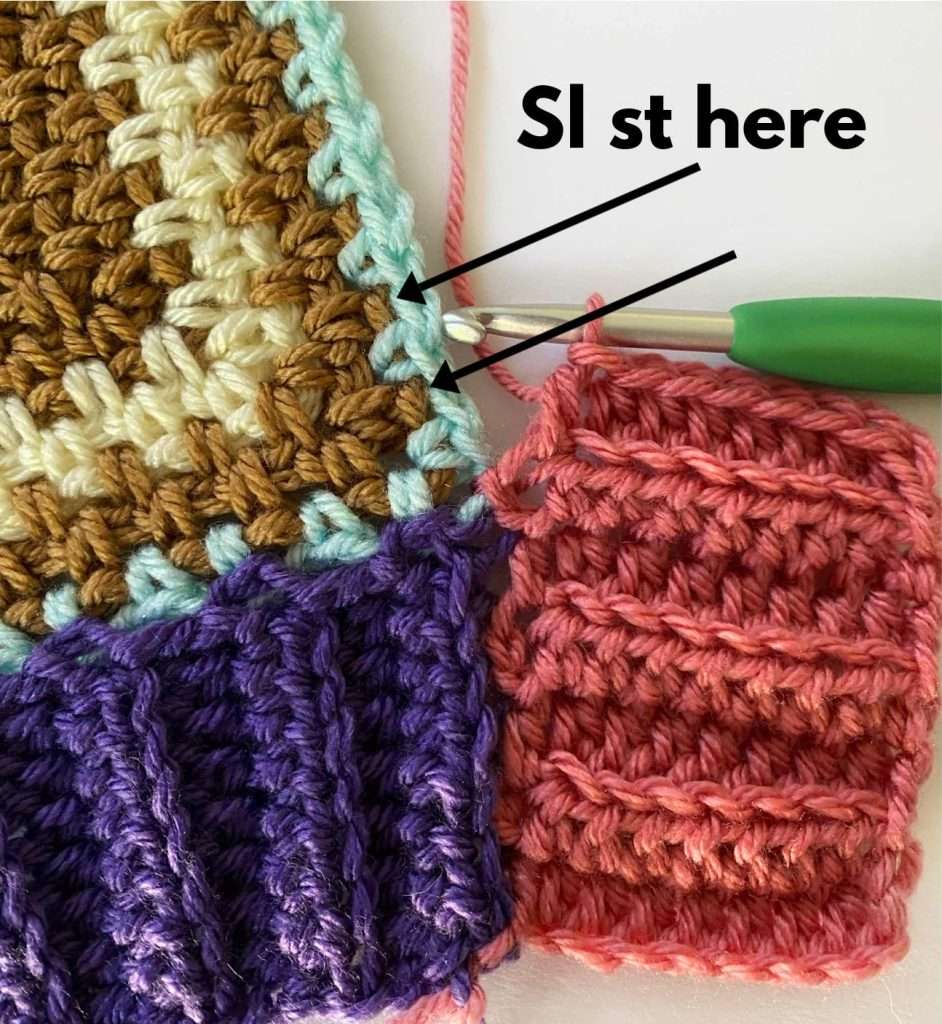
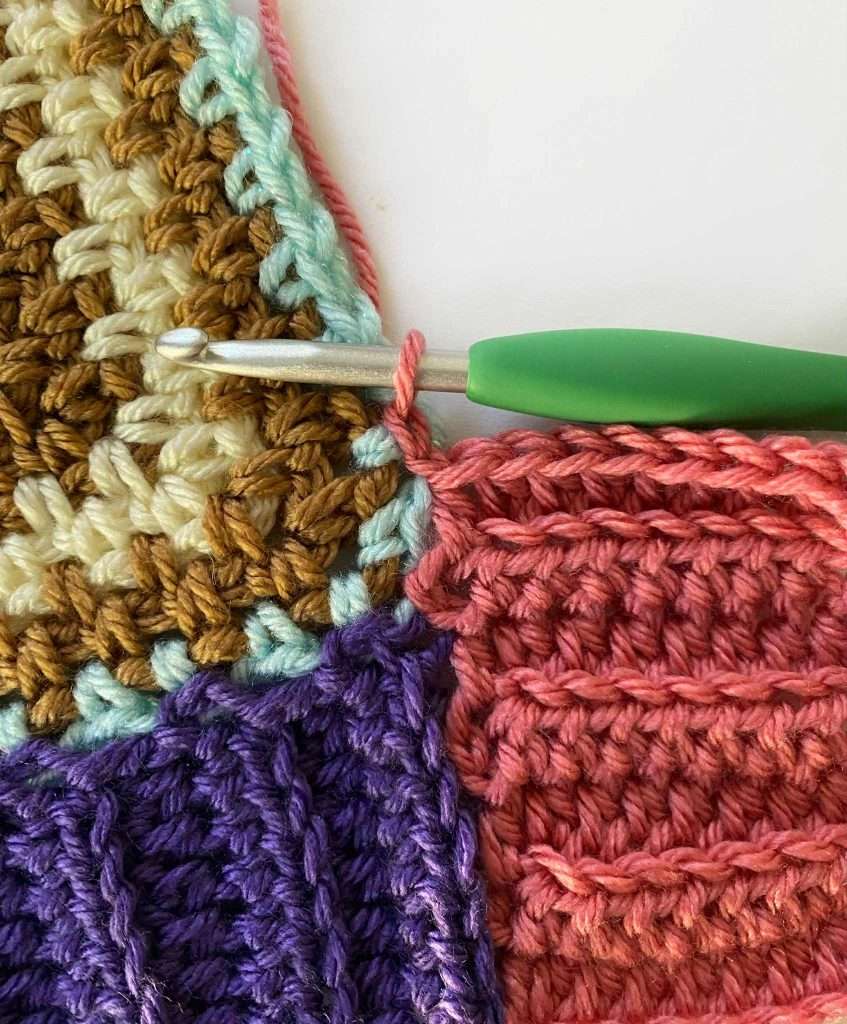
Row 1 (RS): Ch 9, hdc in second ch from hook and in each ch across. To join the ribbing to the blanket, sk first hdc, sl st in BLO of next 2 hdc of the ribbed edging. Turn. <8 hdc>
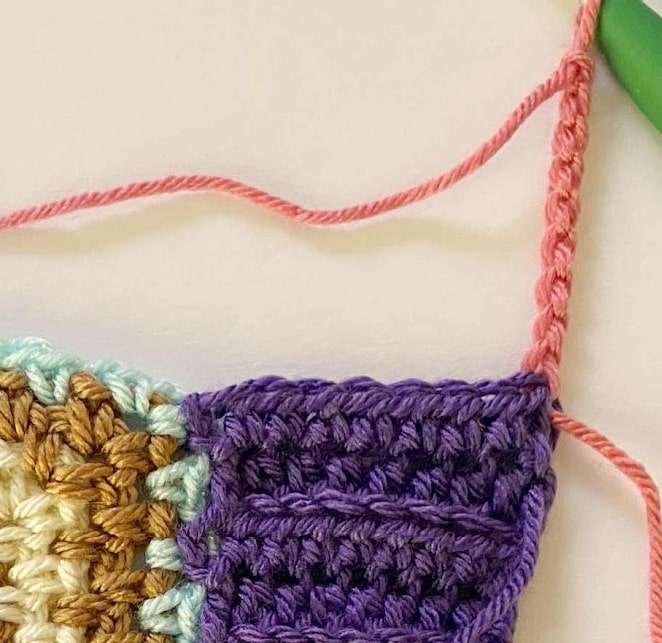
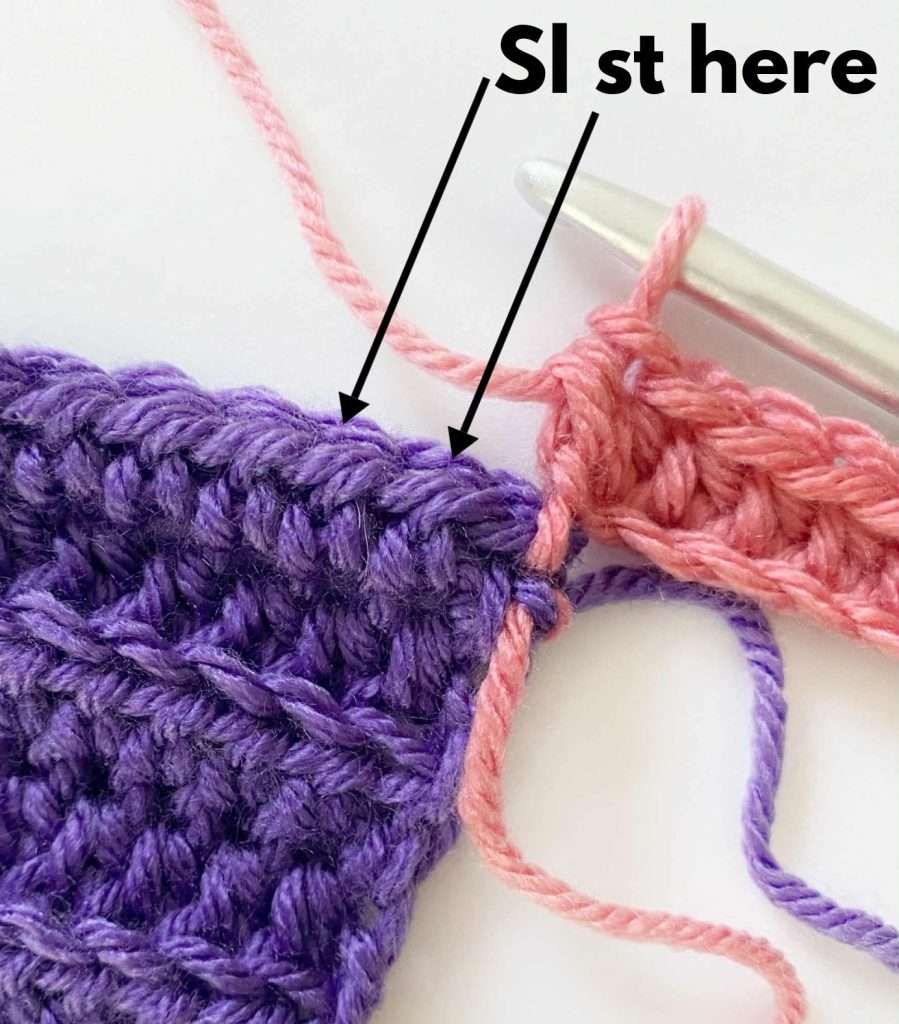
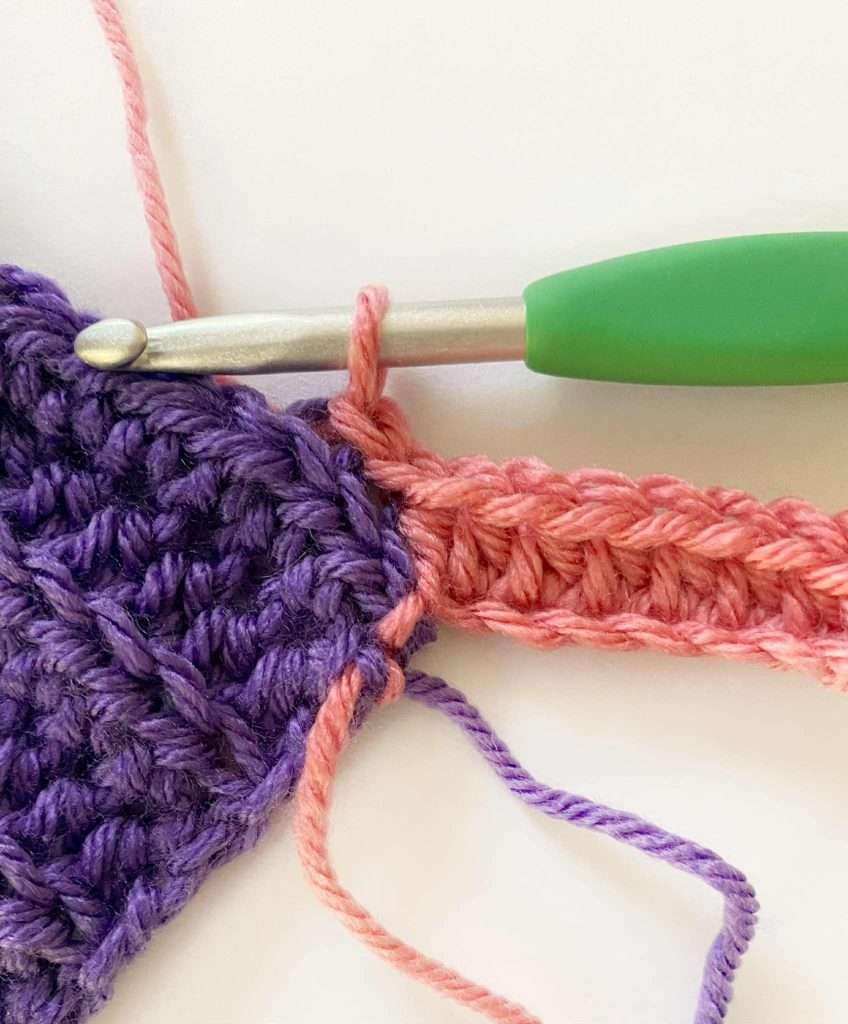
Row 2 (WS): Do not ch 1. Hdc in BLO of first 7 sts, hdc in both loops of last st. Turn. <8 hdc>
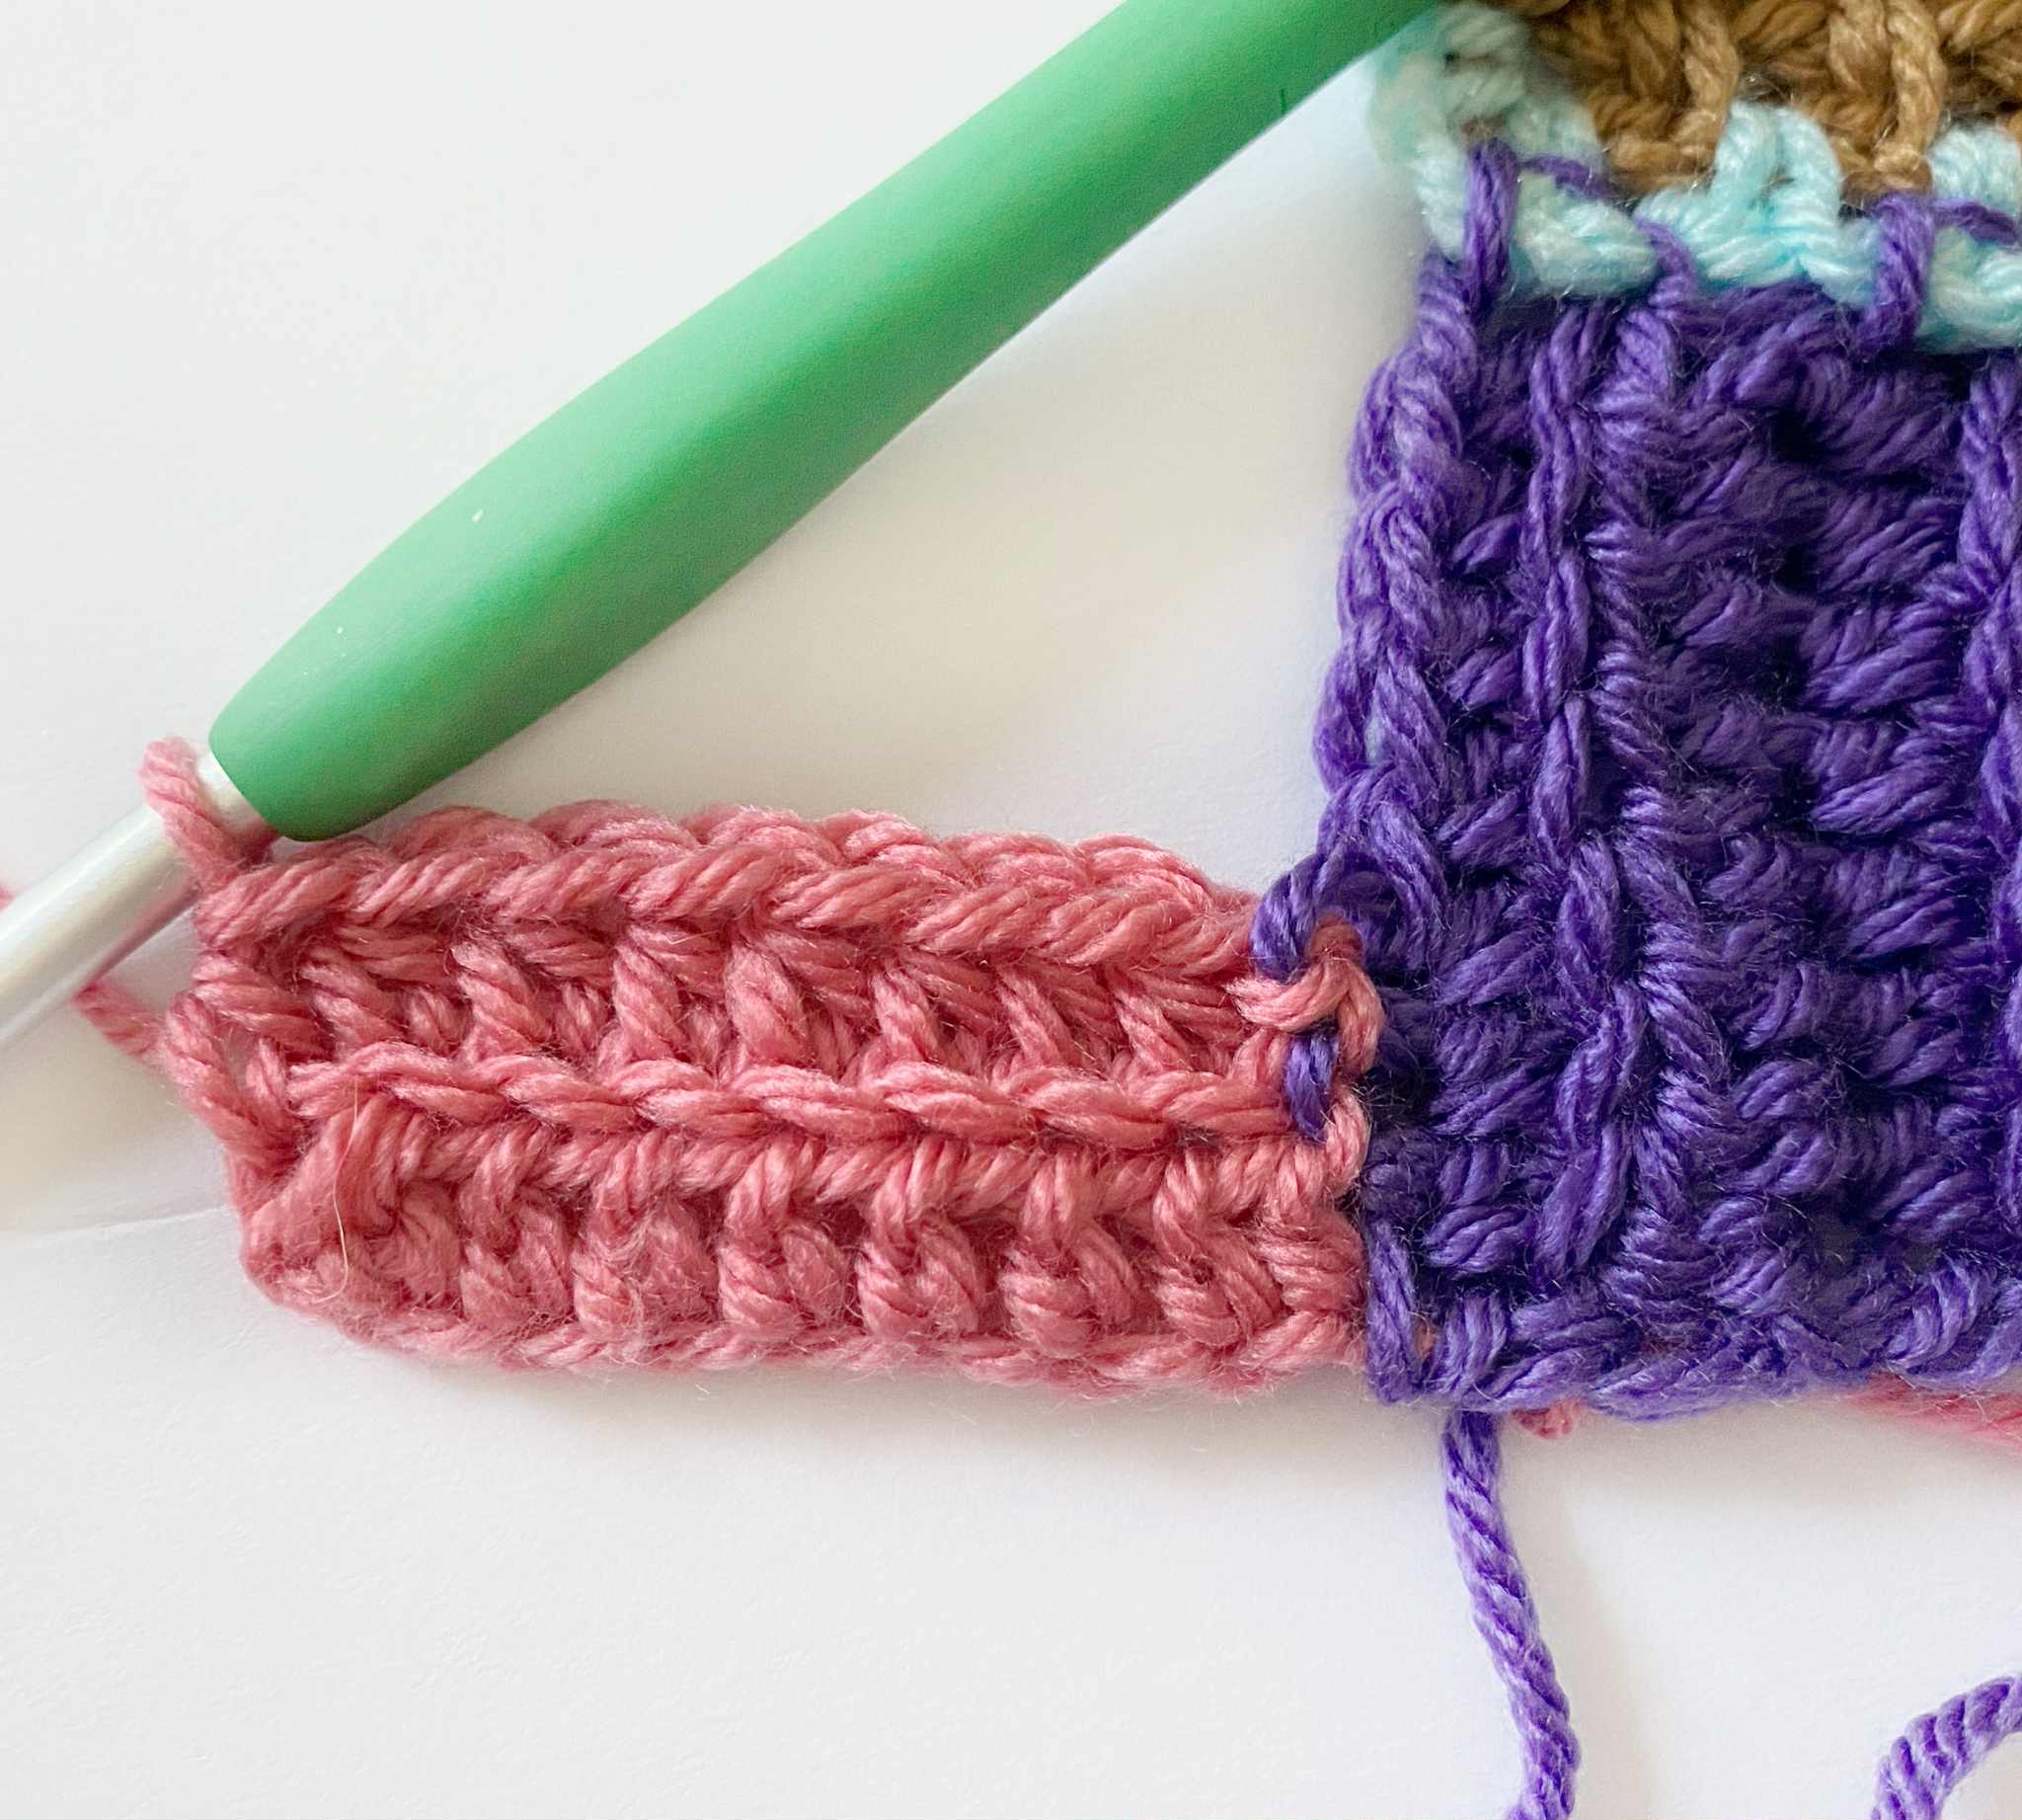
Row 3 (RS): Ch 1, hdc in BLO of first 7 sts, hdc in both loops of last st. To join, sk first hdc, and sl st in BLO of next 2 hdc of the ribbed edging. Turn. <8 hdc>
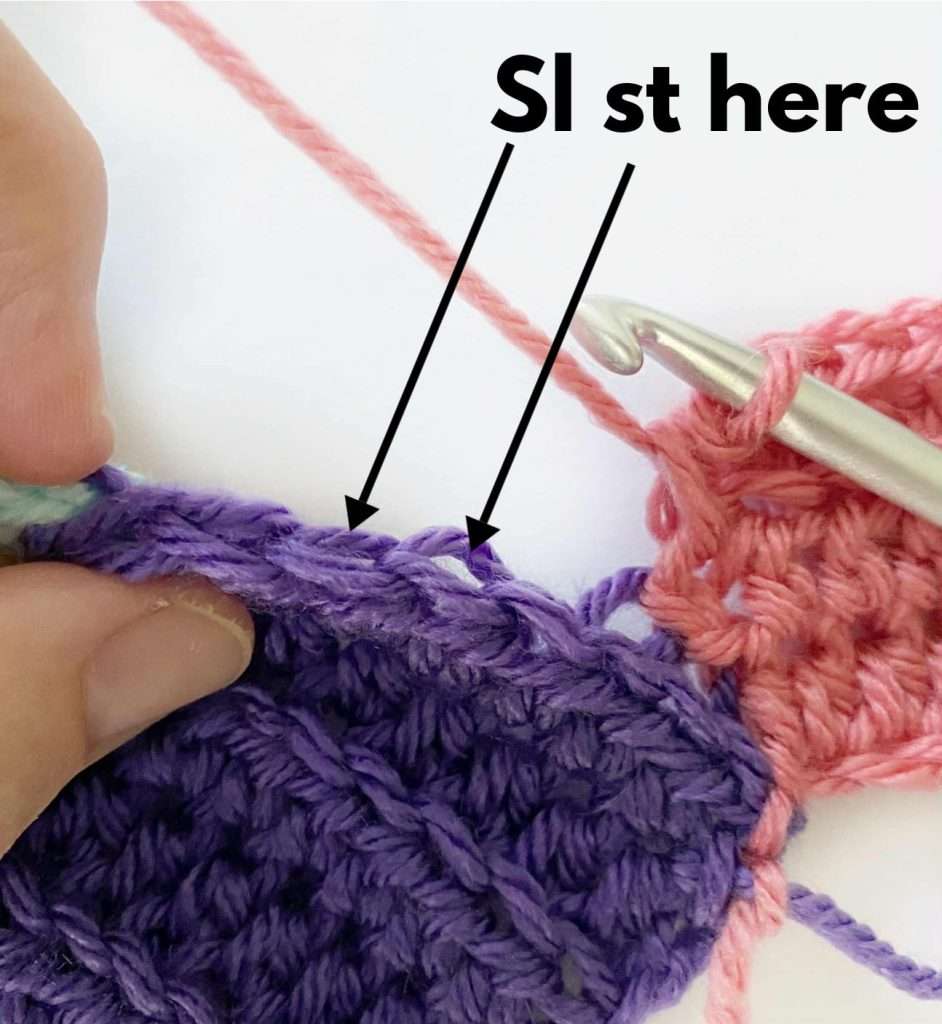
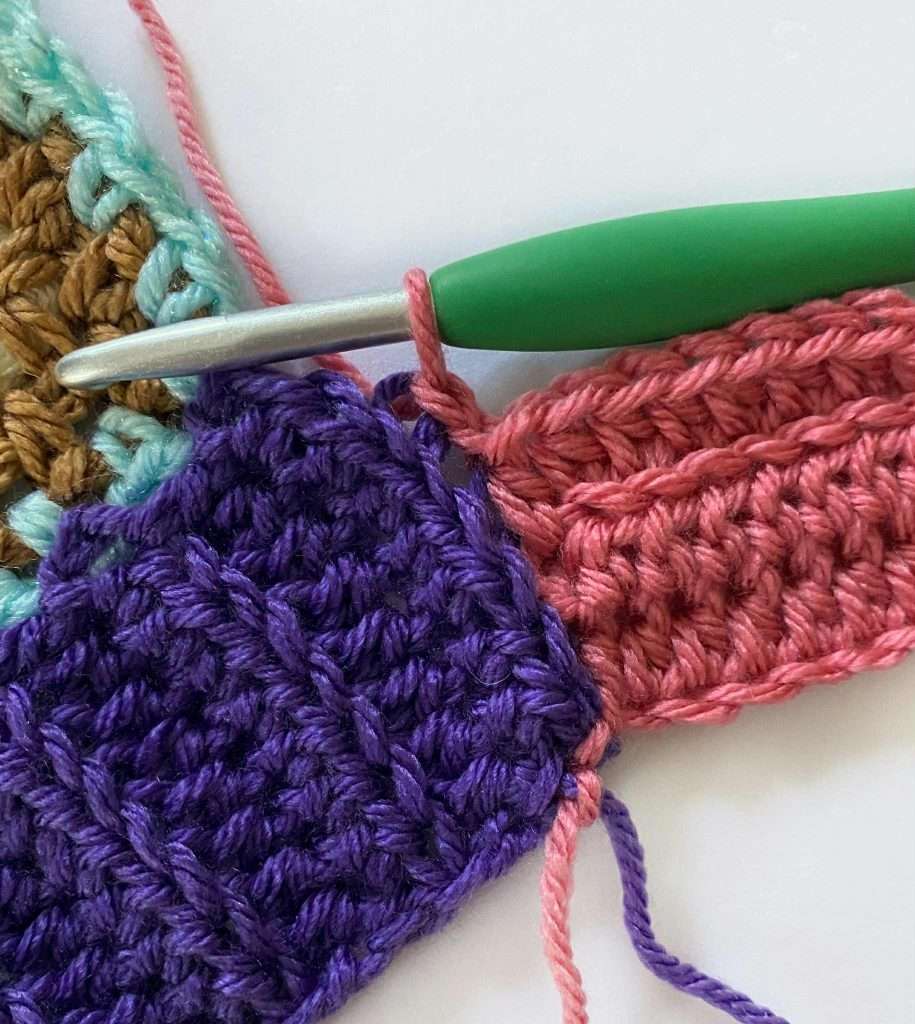
Rows 4 – 5: Repeat Rows 2 – 3.
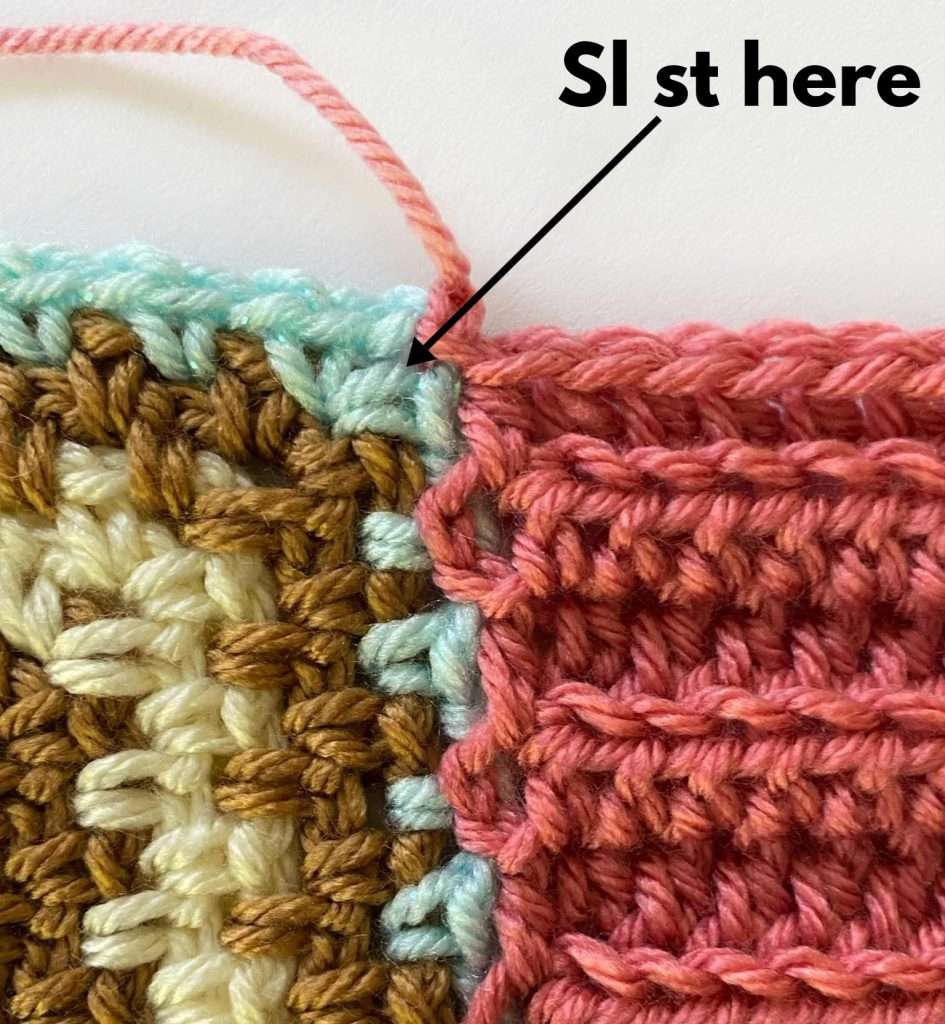
- To join at the end of Row 5: sk 1 hdc, sl st in BLO of last hdc, and sl st into the first corner ch-2 sp.
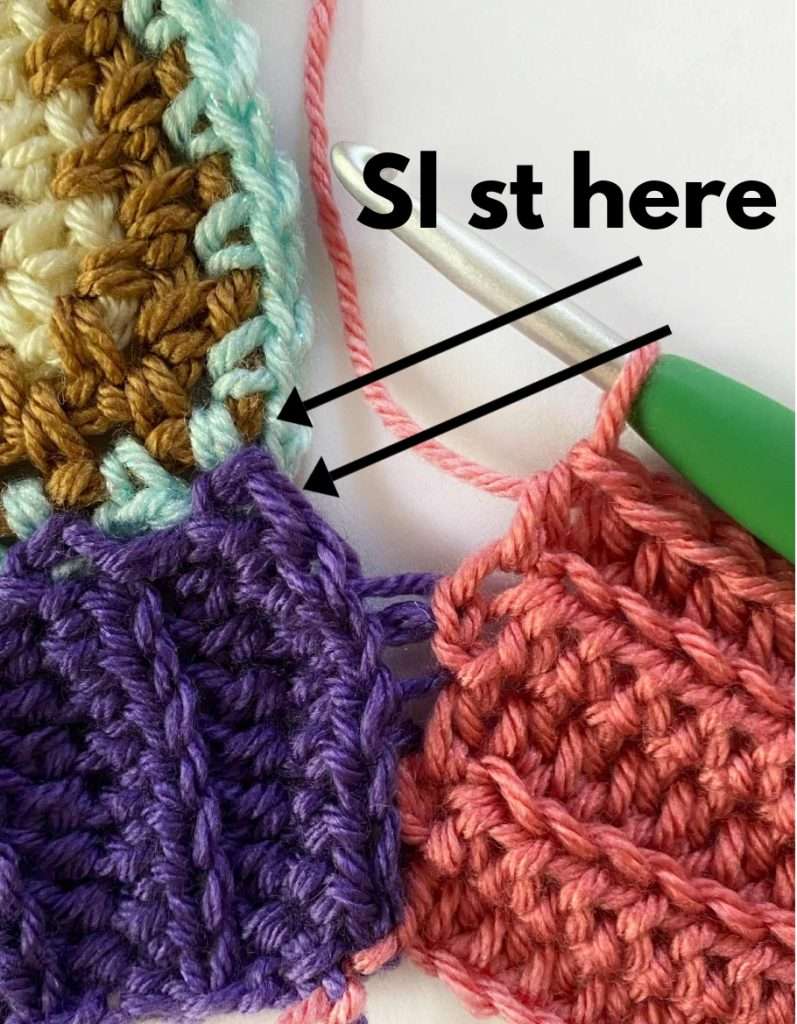
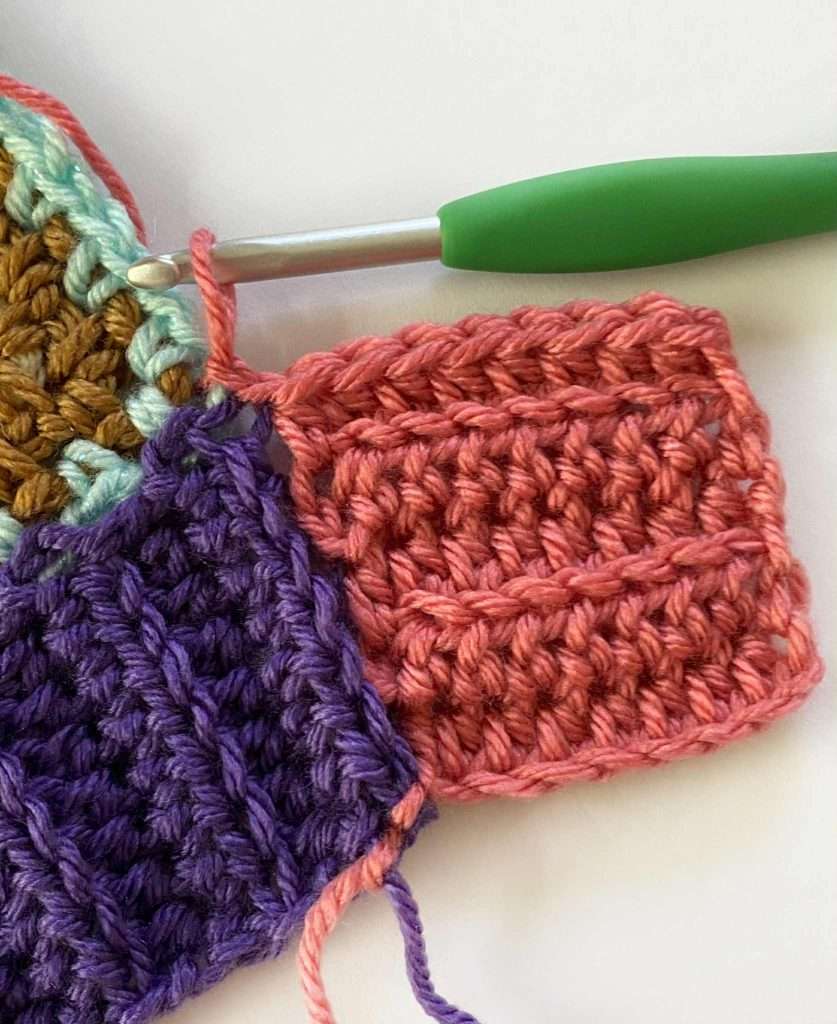
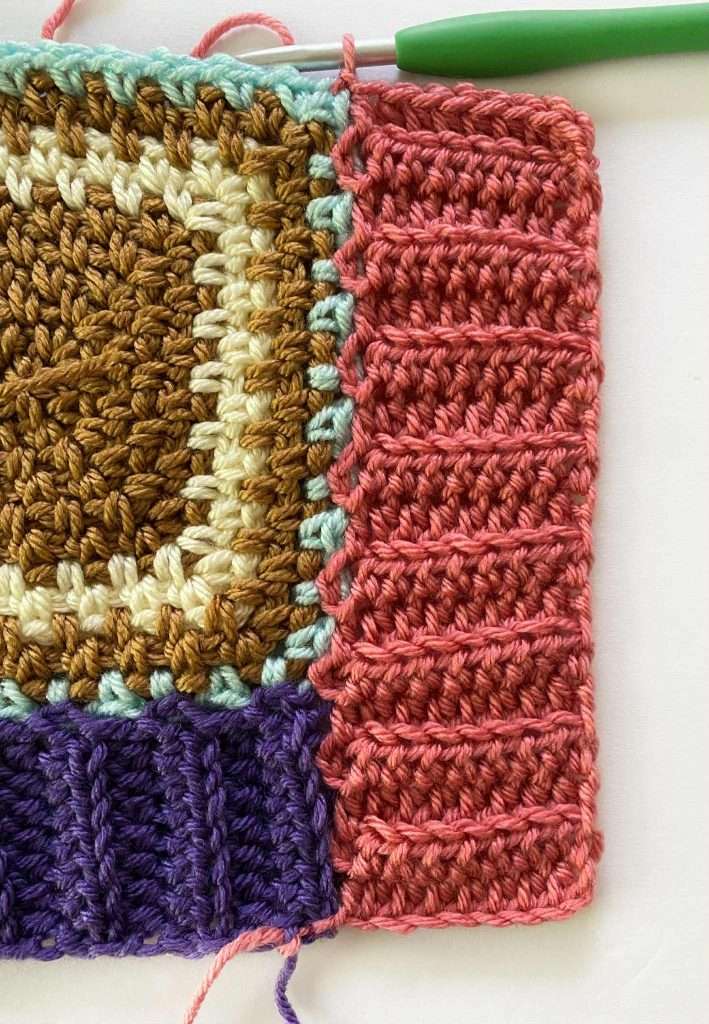
Repeat Rows 2 – 3 across the left side of the blanket, but to join the ribbing to the blanket, sl st into each ch-sp across.
The last row of ribbing should be a Row 3 repeat. To join, sl st into the corner ch-2 sp. Fasten off.
Rotate the blanket to work along the next side.
Bottom:
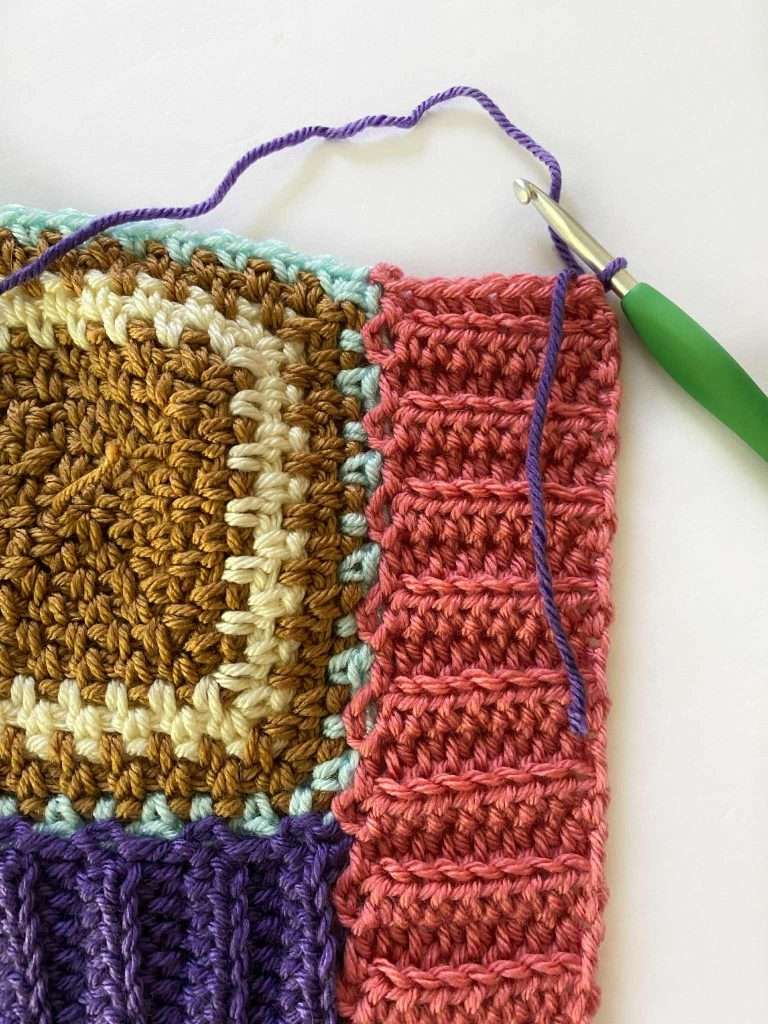
With Colour A, fasten on in the first st of the last row of ribbing on the left side.
Repeat the instructions for the “Left Side” across the bottom of the blanket.
Right Side:
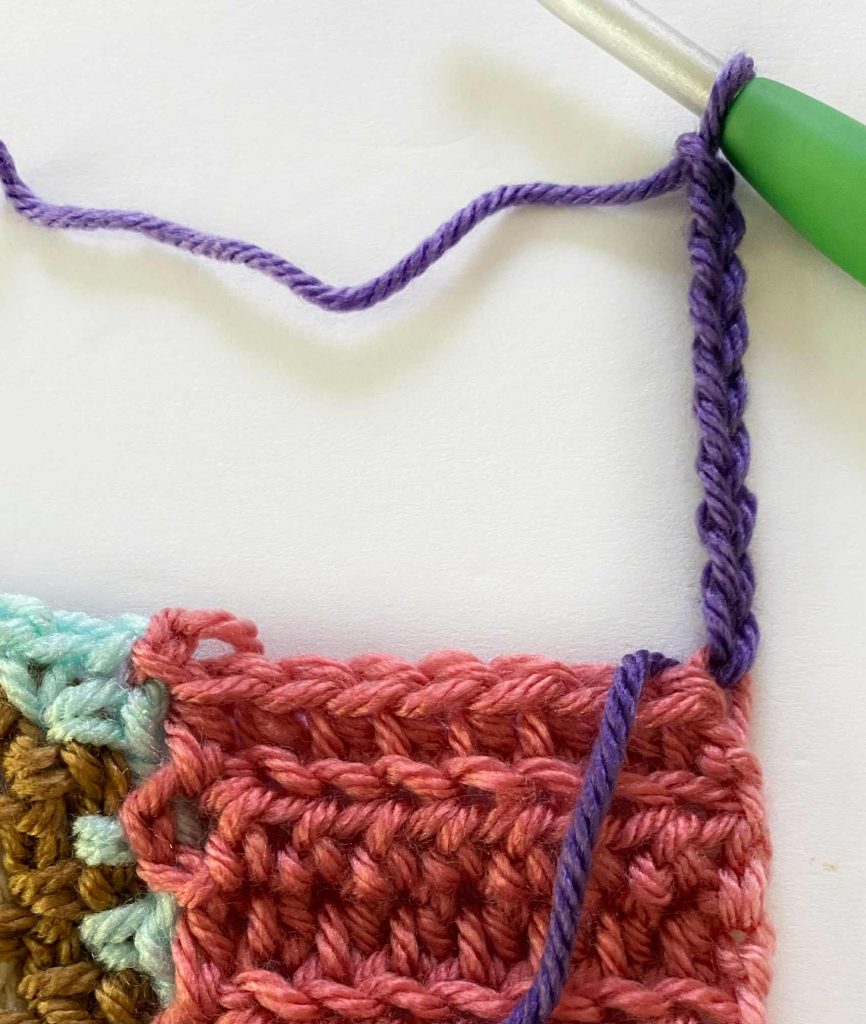
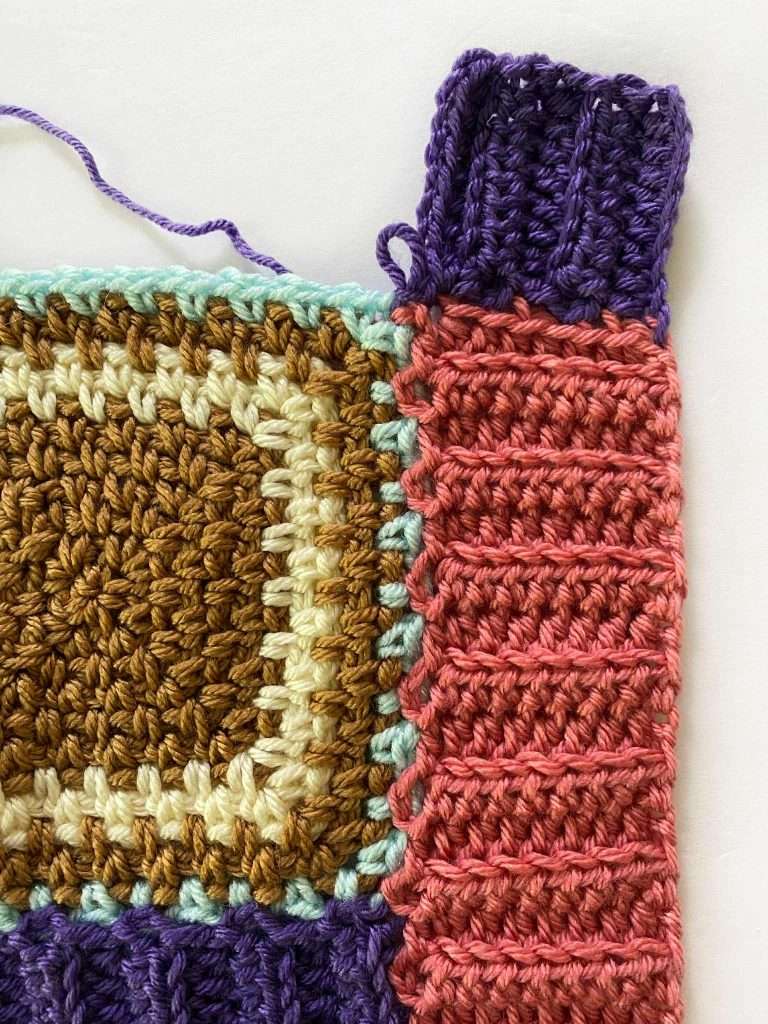
This side is worked across the top of the bottom-ribbing, the right side of the blanket, and the bottom of the top-ribbing.
With Colour A, fasten on in the first st of the last row of ribbing on the bottom.
Repeat the instructions for the “Left Side” across the right side of the blanket.
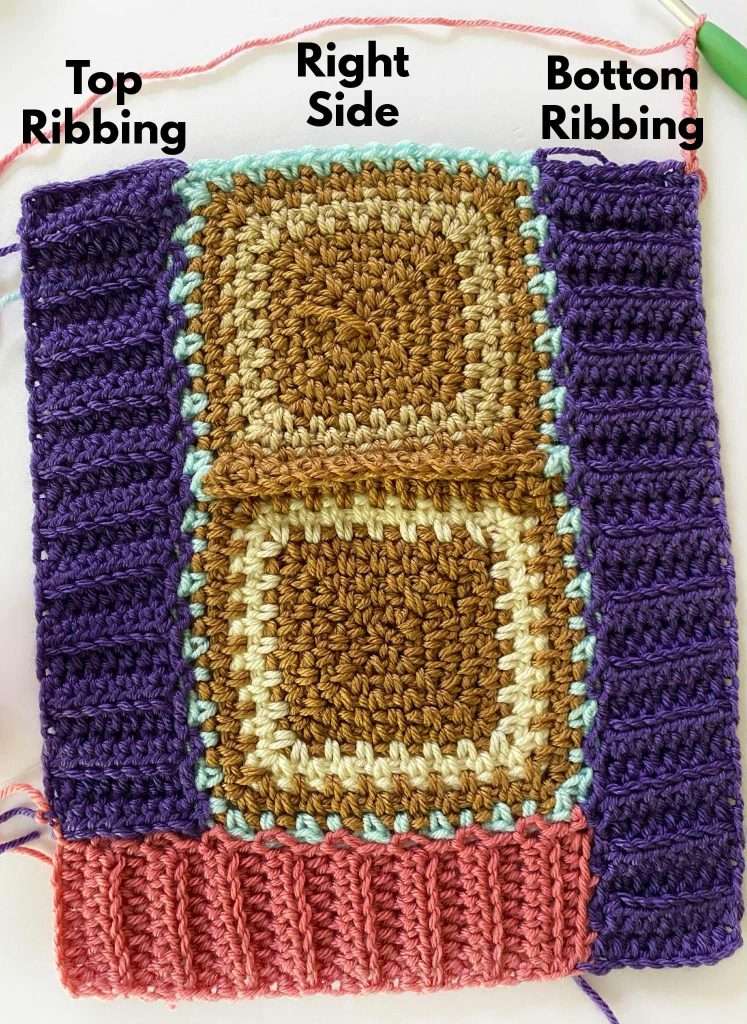
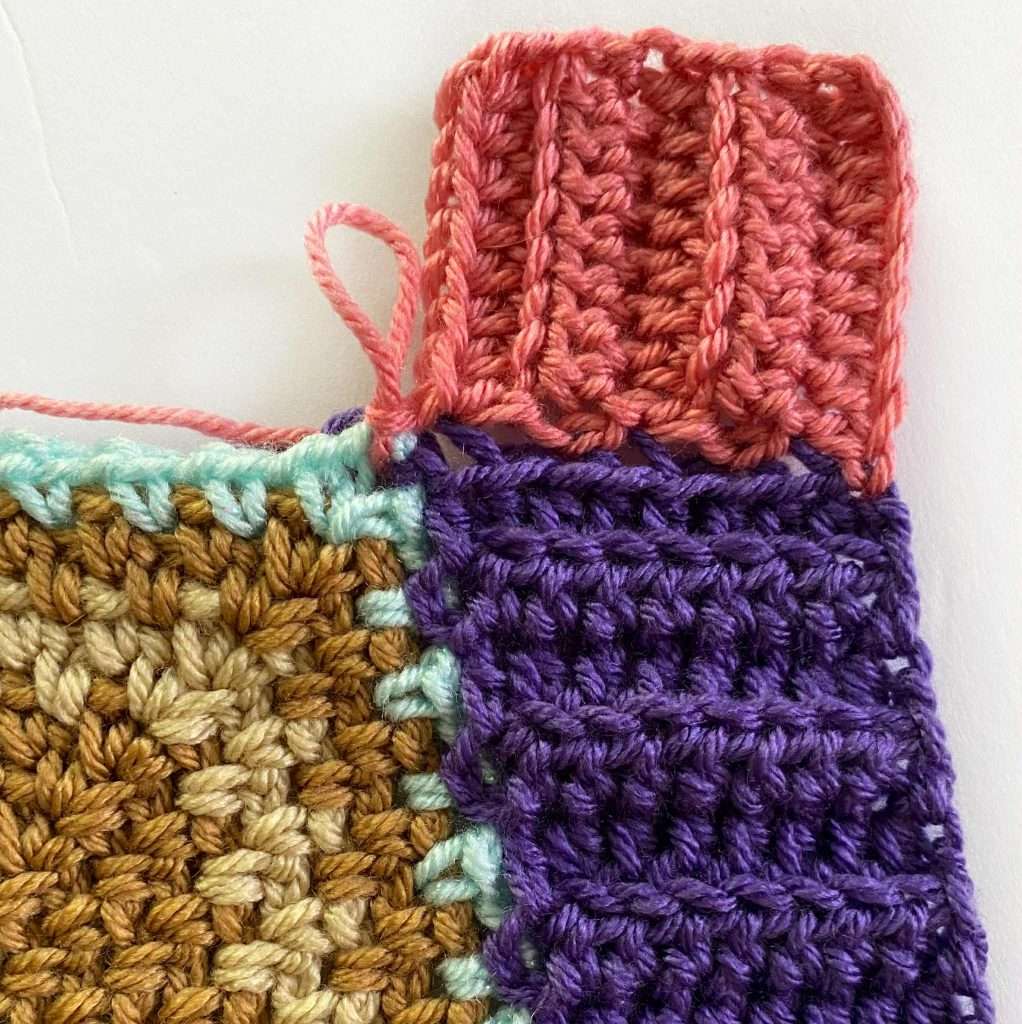
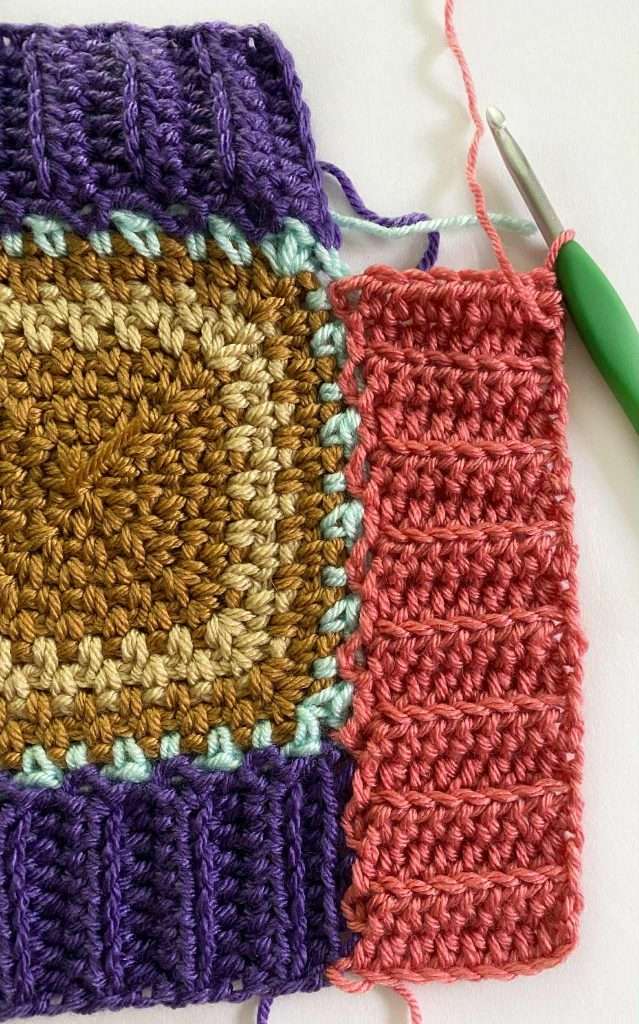
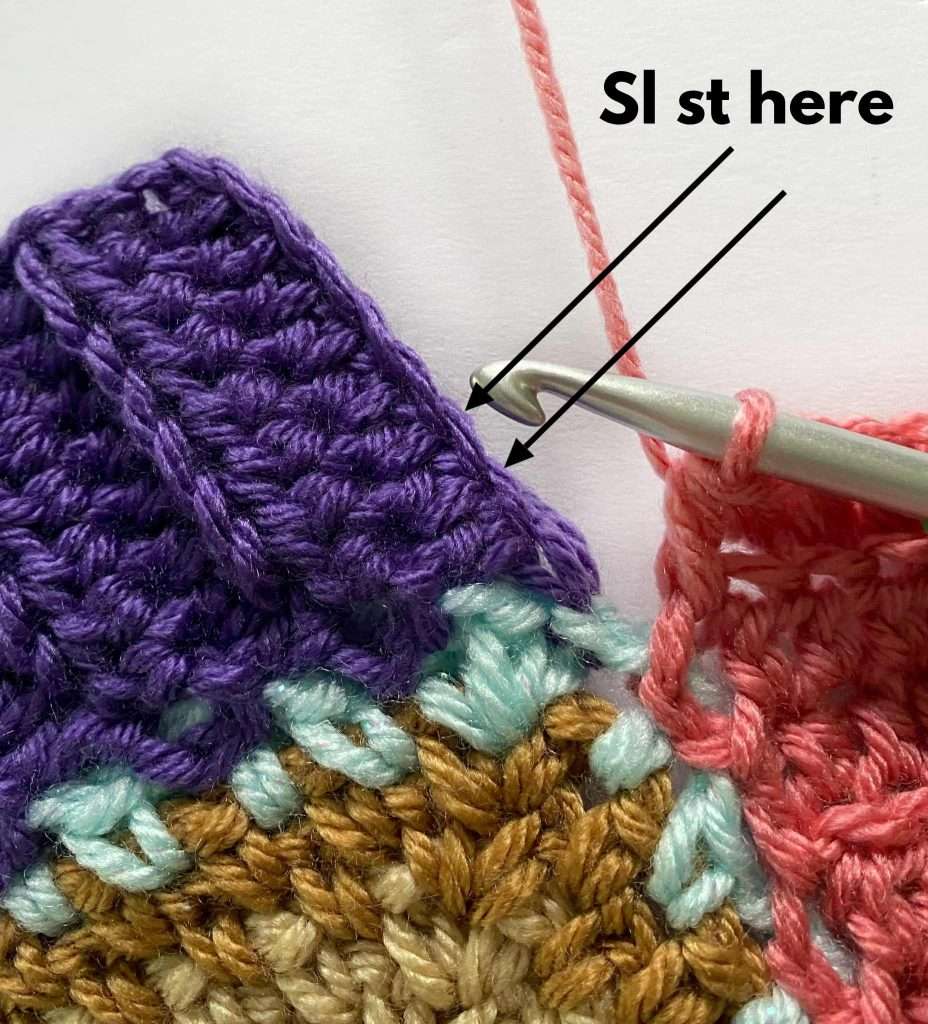
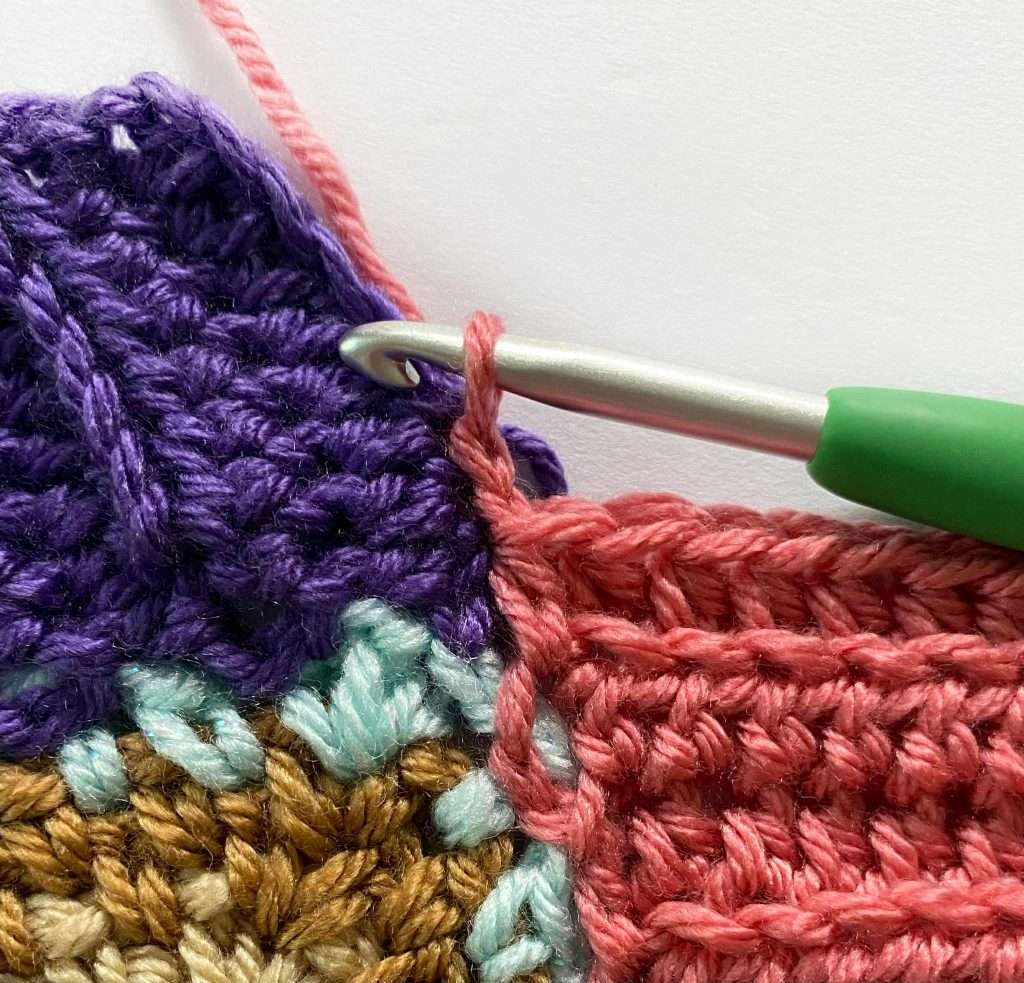
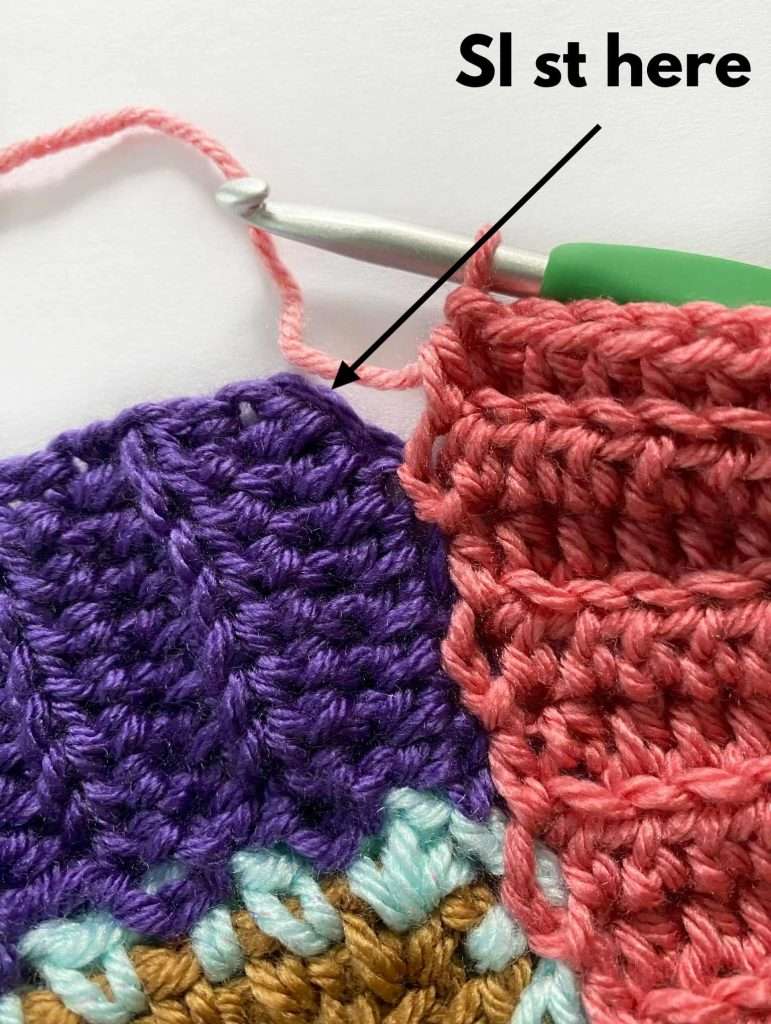
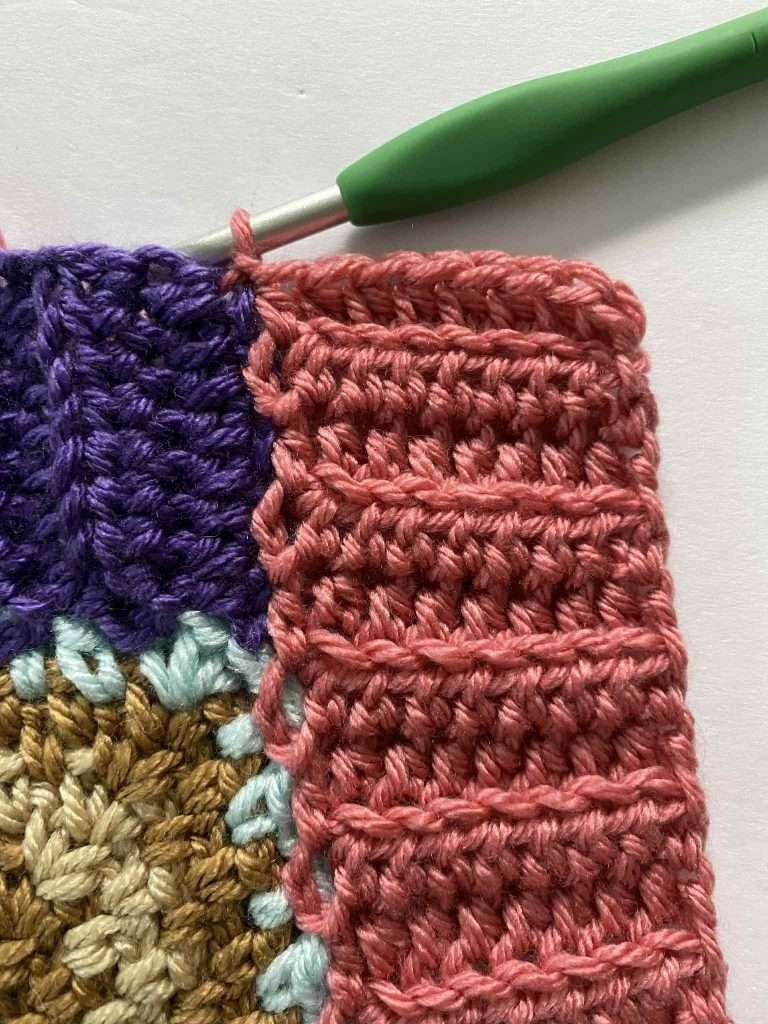
When you reach the bottom of the top-ribbing, sl st into the bottom of the chs to join, making sure to sk 1 ch before making a sl st into the next 2 chs.
The last row of the ribbing is a Row 3 repeat. Fasten off and weave in ends!
Questions?
If you have any questions about the Disco Queen Moss Stitch Squares Blanket, please send me an email through my contact page. I am happy to help!
End Notes:
Thank you for spending some time in my corner of the internet. Below, you’ll find more moss stitch crochet patterns to try. I hope you have a wonderful day, and happy crocheting!
P.S. You are welcome to sell items that you’ve made from this pattern; however, you are not allowed to use my pictures, make Youtube video tutorials for the pattern, or sell/market my pattern as your own (Copyright @ ThisPixieCreates).
Sincerely, Dayna