
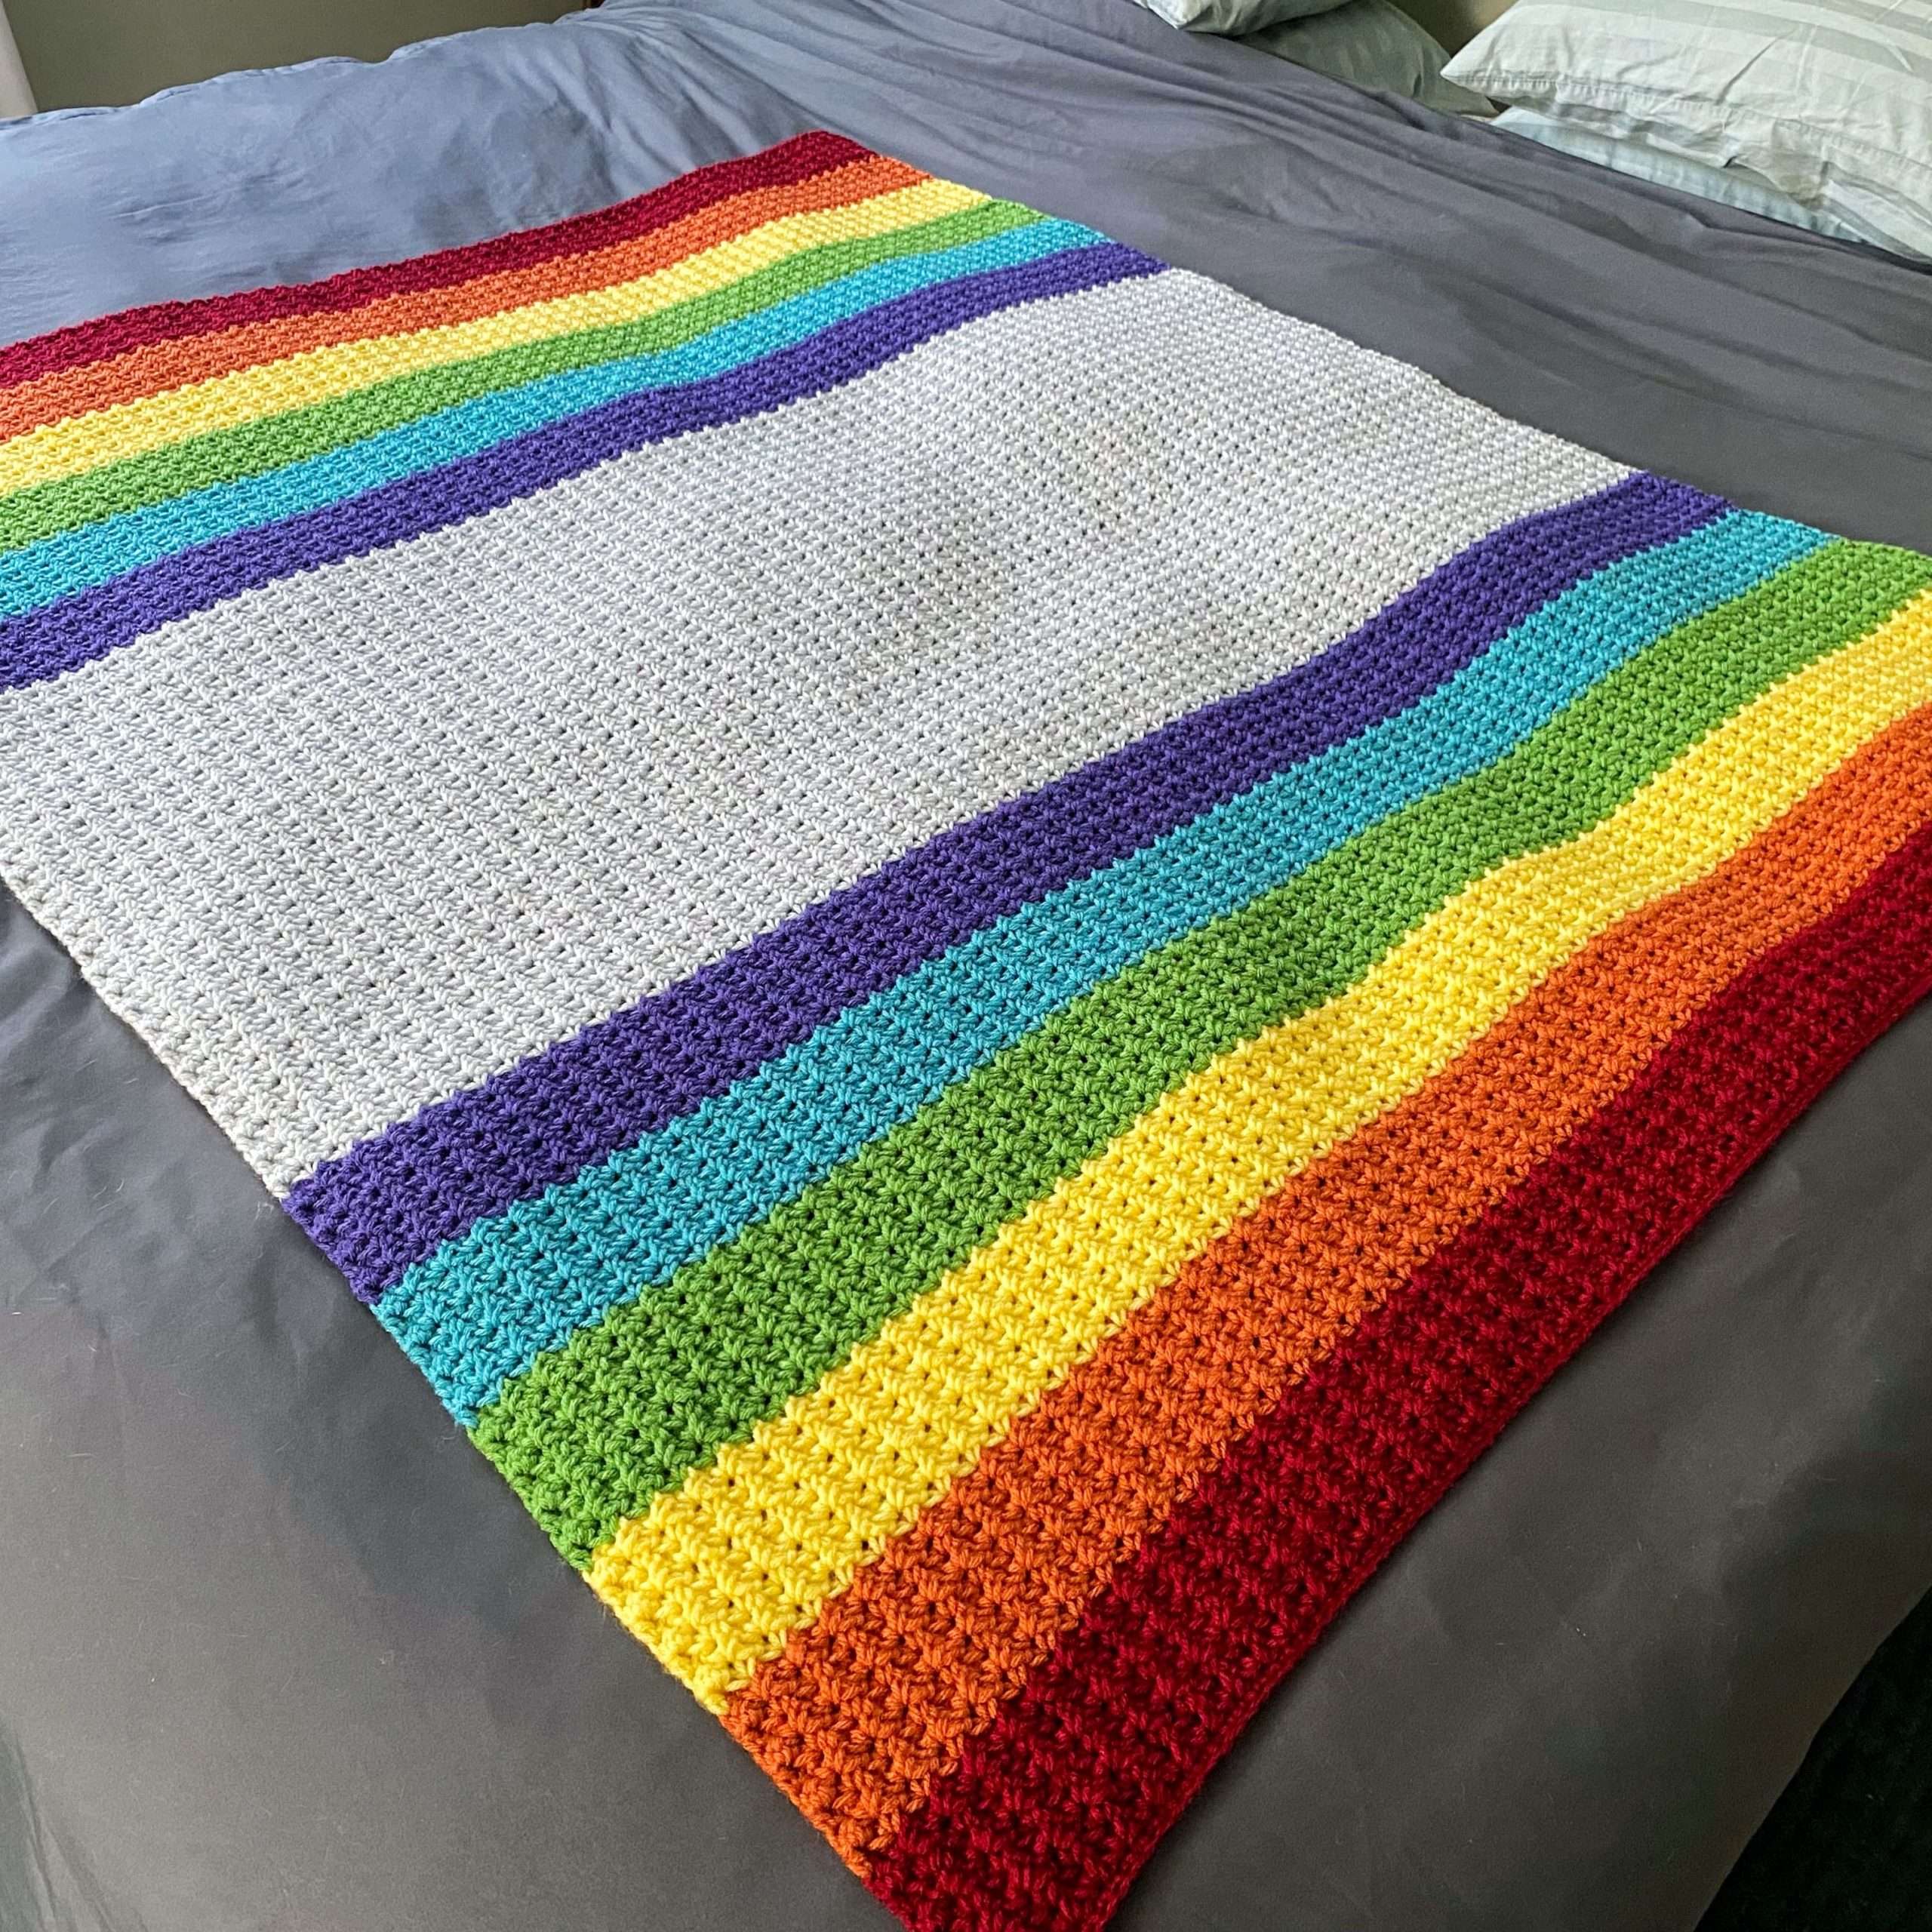
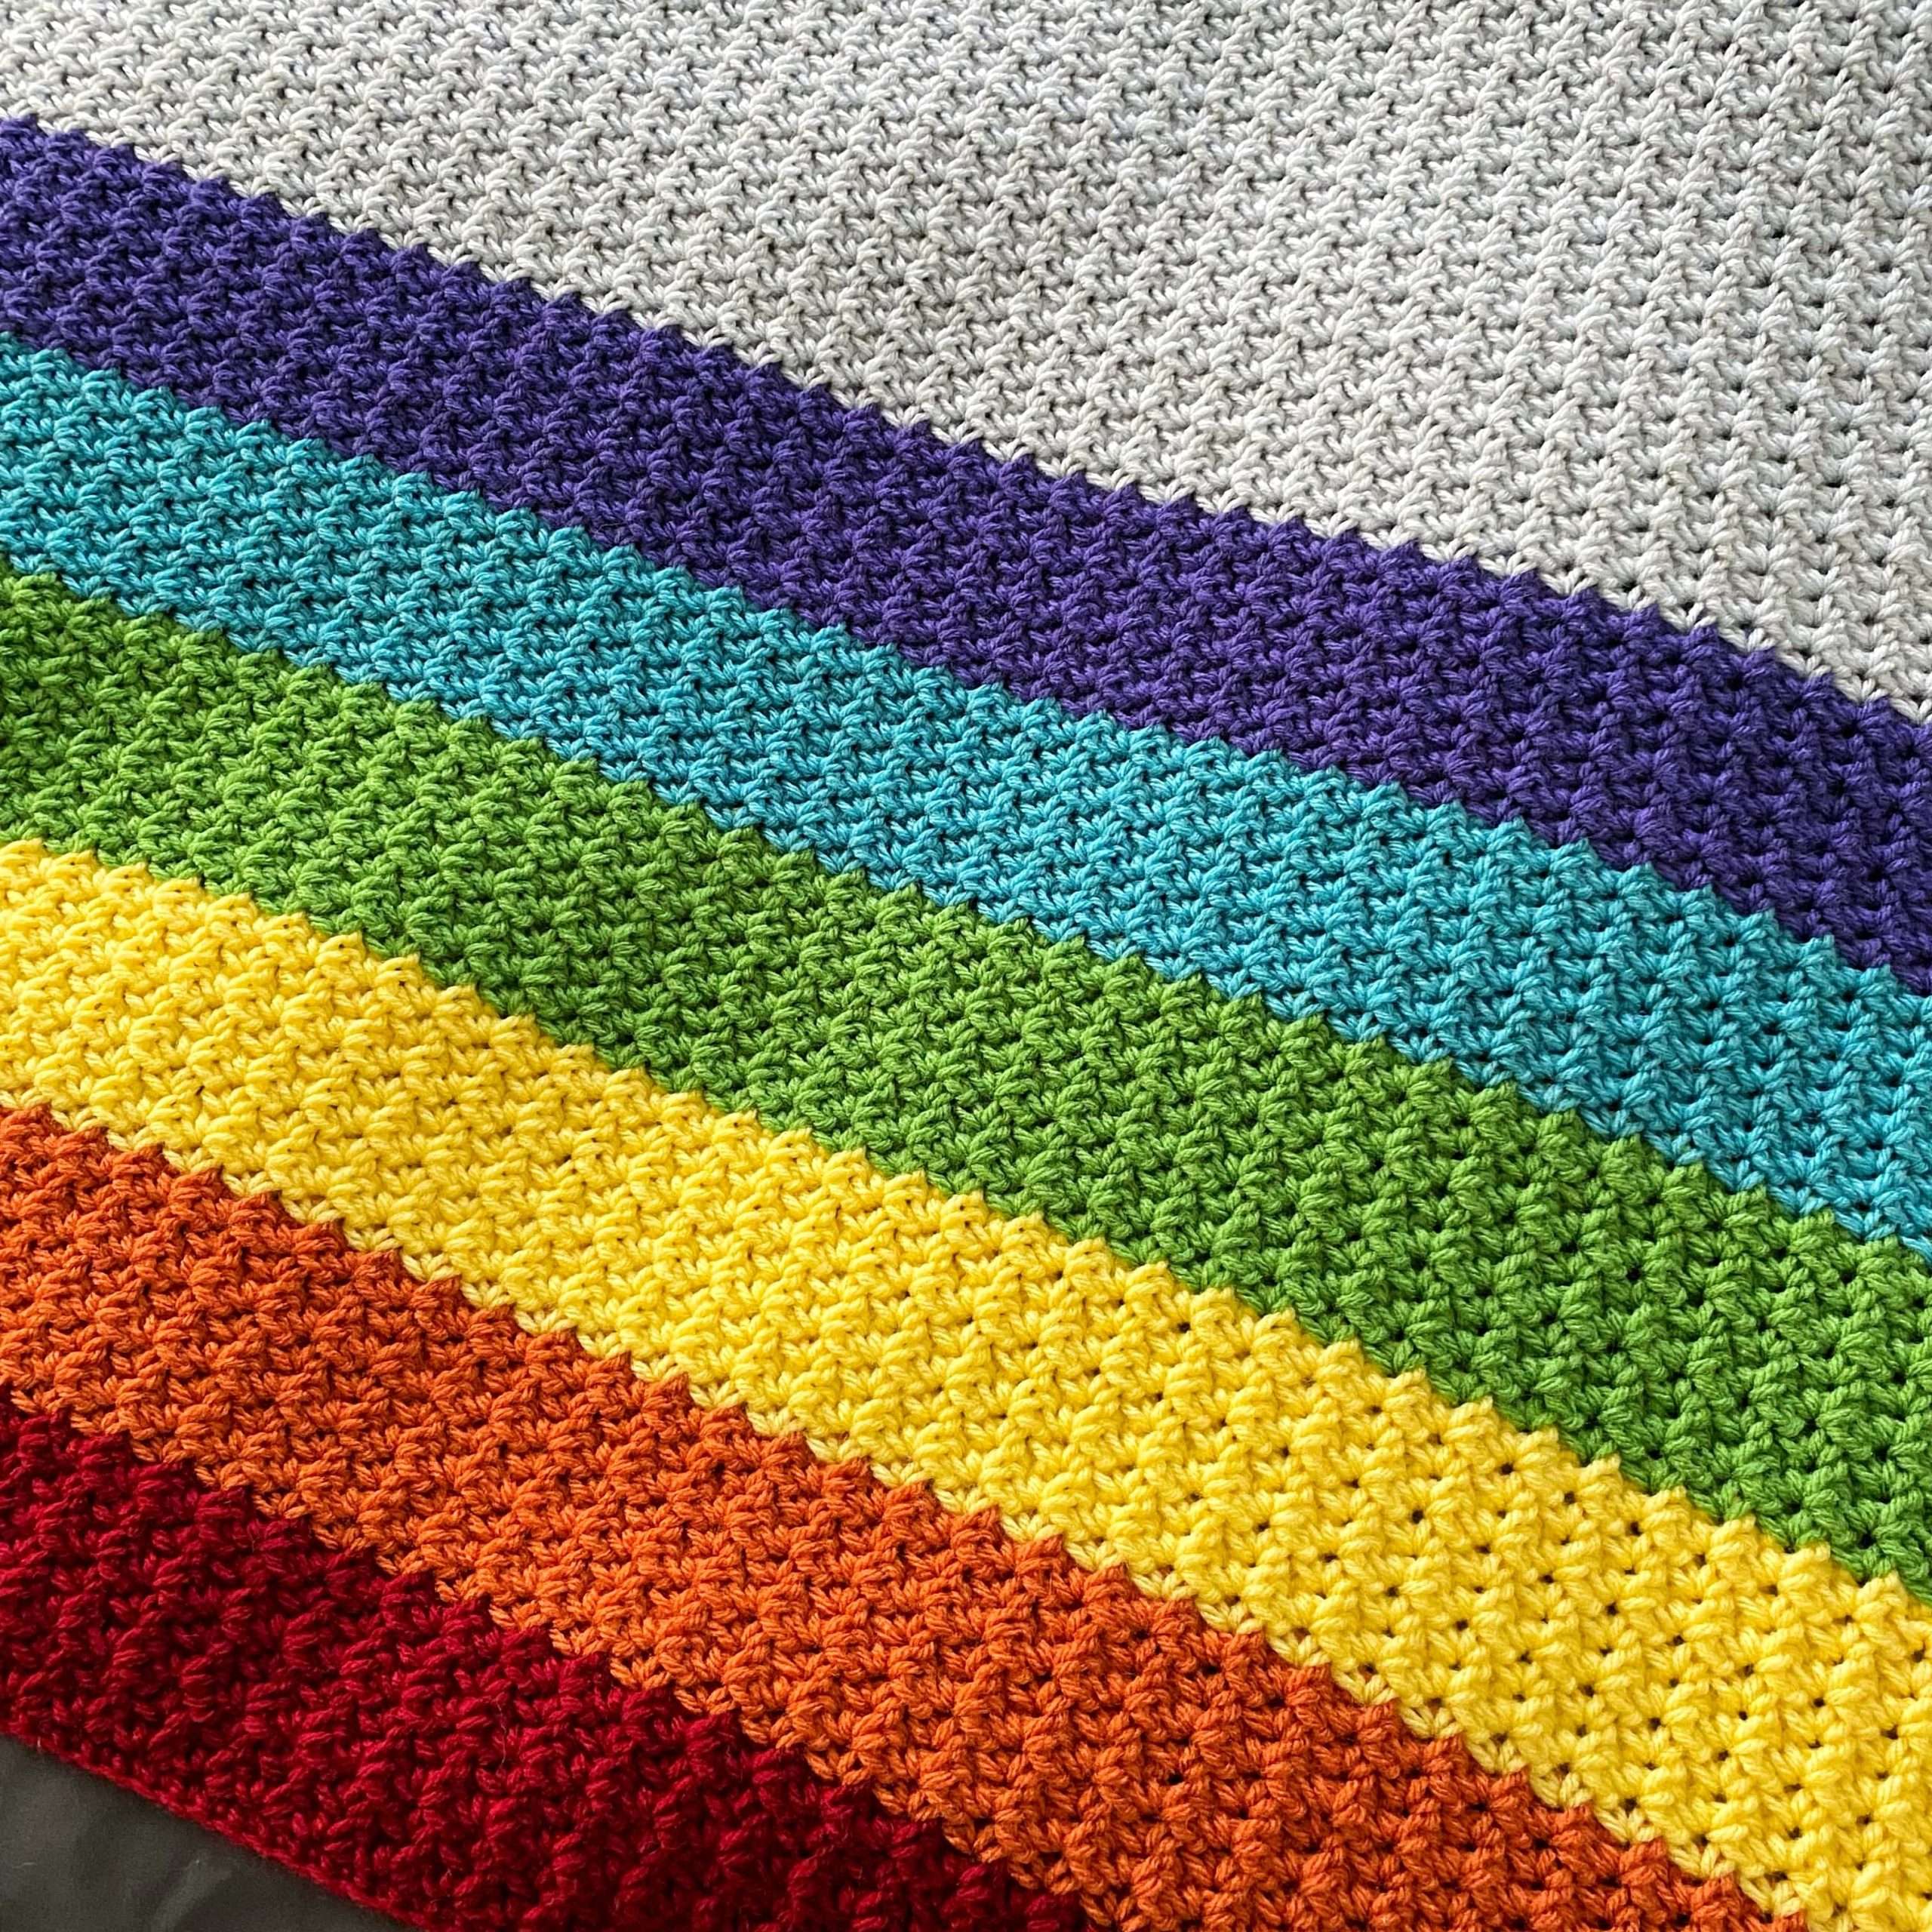
Hi guys! I have been a ball of stress lately, so I was craving something relaxing and easy to make. I found that with the Colour your World Blanket – an easy rainbow striped spider stitch blanket.
This blanket is all about finding the little joys in life and crocheting your own rainbow.
This is a one-row repeat style blanket that has a beautiful texture created with simple stitches. The colours are bold and bright, and easily customizable. Crochet with the colours of the rainbow to lift your spirits or get creative with your own colour palette.
You can find the free pattern for a lapghan sized blanket (42″ x 55″) below. I hope you enjoy making your rainbow striped spider stitch blanket!
If you prefer to print the pattern, the ad-free printable PDF includes a step-by-step video tutorial and instructions for 7 blanket sizes (Baby, Lapghan, Small, Medium and Large Throw, Queen, and King)!
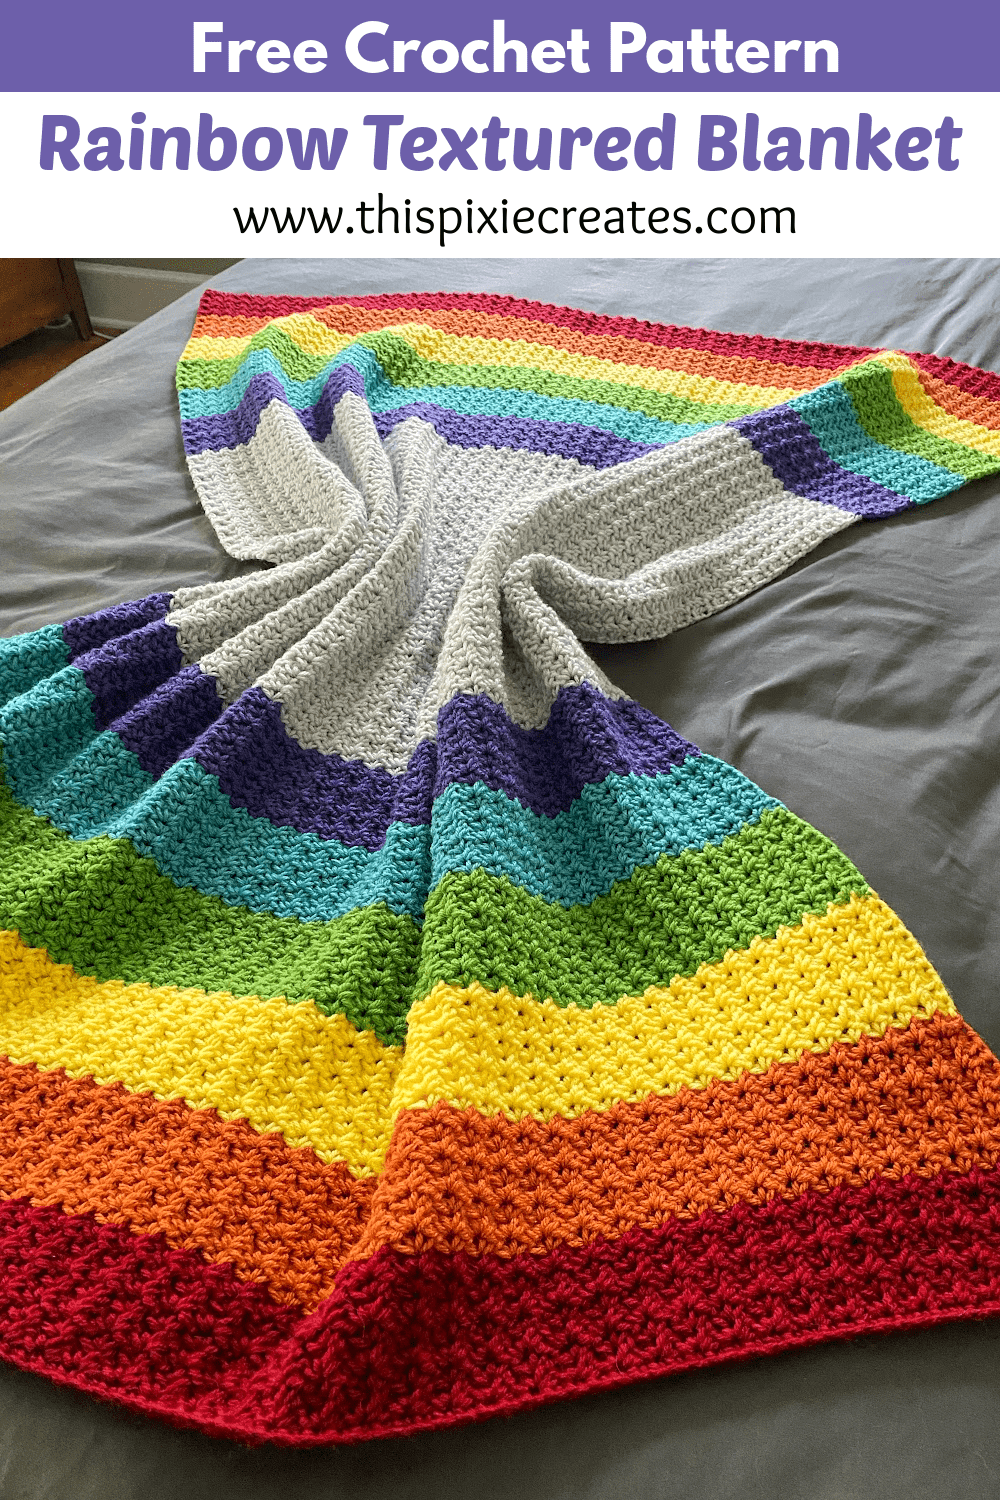
Pin this Rainbow Spider Stitch Blanket – HERE!
Pinning this pattern really makes a difference because it gets the pattern circulating, so other crocheters can see it. Thank you for taking the time to pin this Colour your World Blanket pattern!
The materials and yarn section, along with the Etsy PDF button, contains affiliate links that support the content on ThisPixieCreates. If you make a purchase through one of my affiliate links, I may receive a small commission, at no cost to you. Thank you so much for your support! Find more information about affiliate links, as well as my Privacy & Disclosures Policy here.
Crochet Skill Level: Easy
This spider stitch rainbow blanket is considered an “easy” level crochet pattern that is perfect for beginners and intermediate crocheters alike.
If you know how to crochet the chain stitch, single crochet and half double crochet stitch, then you’ll be able to make this blanket.
This blanket follows a one-row repeat, so once you get the hang of the first few rows, it’s a fun, mindless project with colour changes to keep things interesting!
Materials:
Optional Materials:
- Steamer or Spray Bottle
- Straight Pins or Blocking Pins
- Blocking Mat or Foam Board
Yarn:
- Yarn Note: You can use ANY medium 4 (worsted/aran) weight yarn as a substitute as long as it meets the gauge. The colours can be from the same or different brands.
- Loops and Threads Impeccable Yarn, Weight 4 Medium Worsted Yarn (100% Acrylic, 285 yd / 260 m, 4.5 oz / 127.5 g)
- Colours:
- Claret (A)
- Pumpkin (B)
- Lemon (C)
- Guacamole (D)
- Aqua (E)
- Eggplant (F)
- Classic Gray (G)
- Colours:
Yardage:
- Colours A, B, C, D, E, F: 250 yds / 229 m – 1 skein of each colour
- Colour G: 720 yds / 658 m – 3 skeins
- Total: 2220 yds / 2030 m

Abbreviations:
- Ch – chain
- St – stitch
- Sp – space
- Sk – skip
- Sc – single crochet
- Hdc – half double crochet
- YO – yarn over
- RS – right side
- WS – wrong side
Gauge: Approximately 6 spider sts x 10.5 rows = 4” x 4”
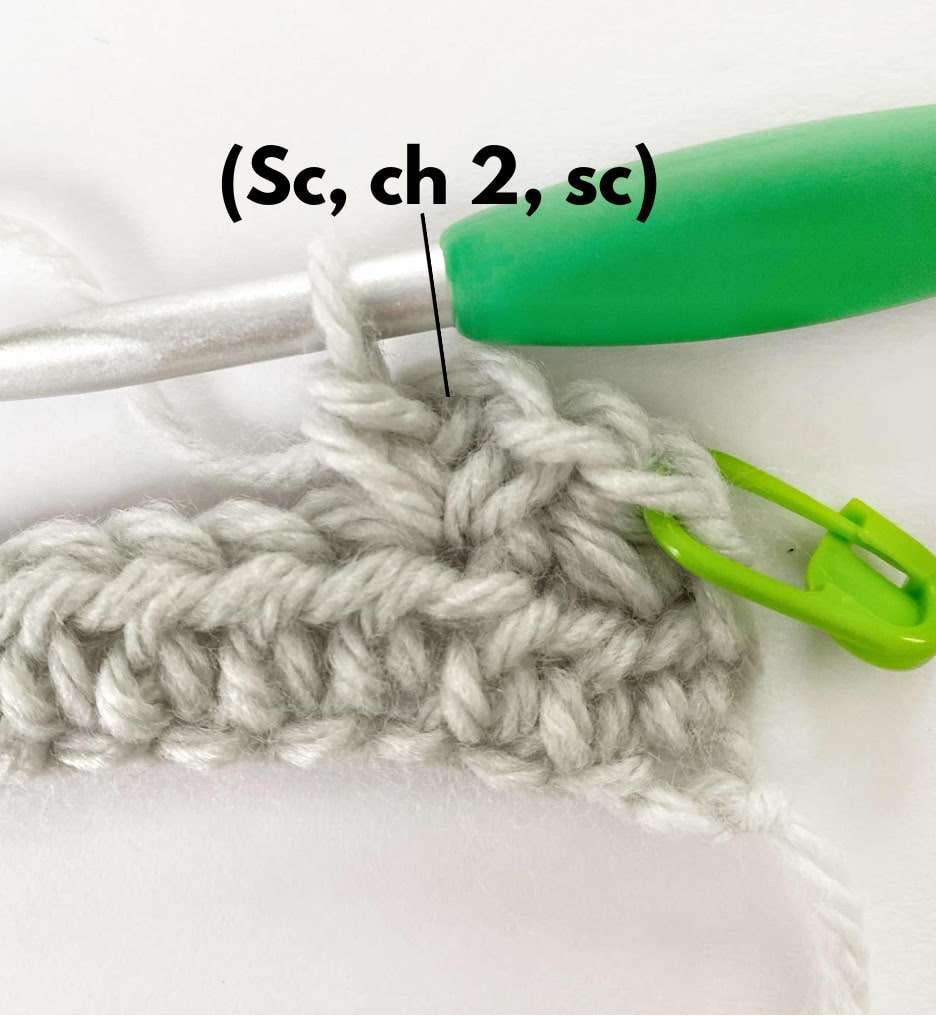
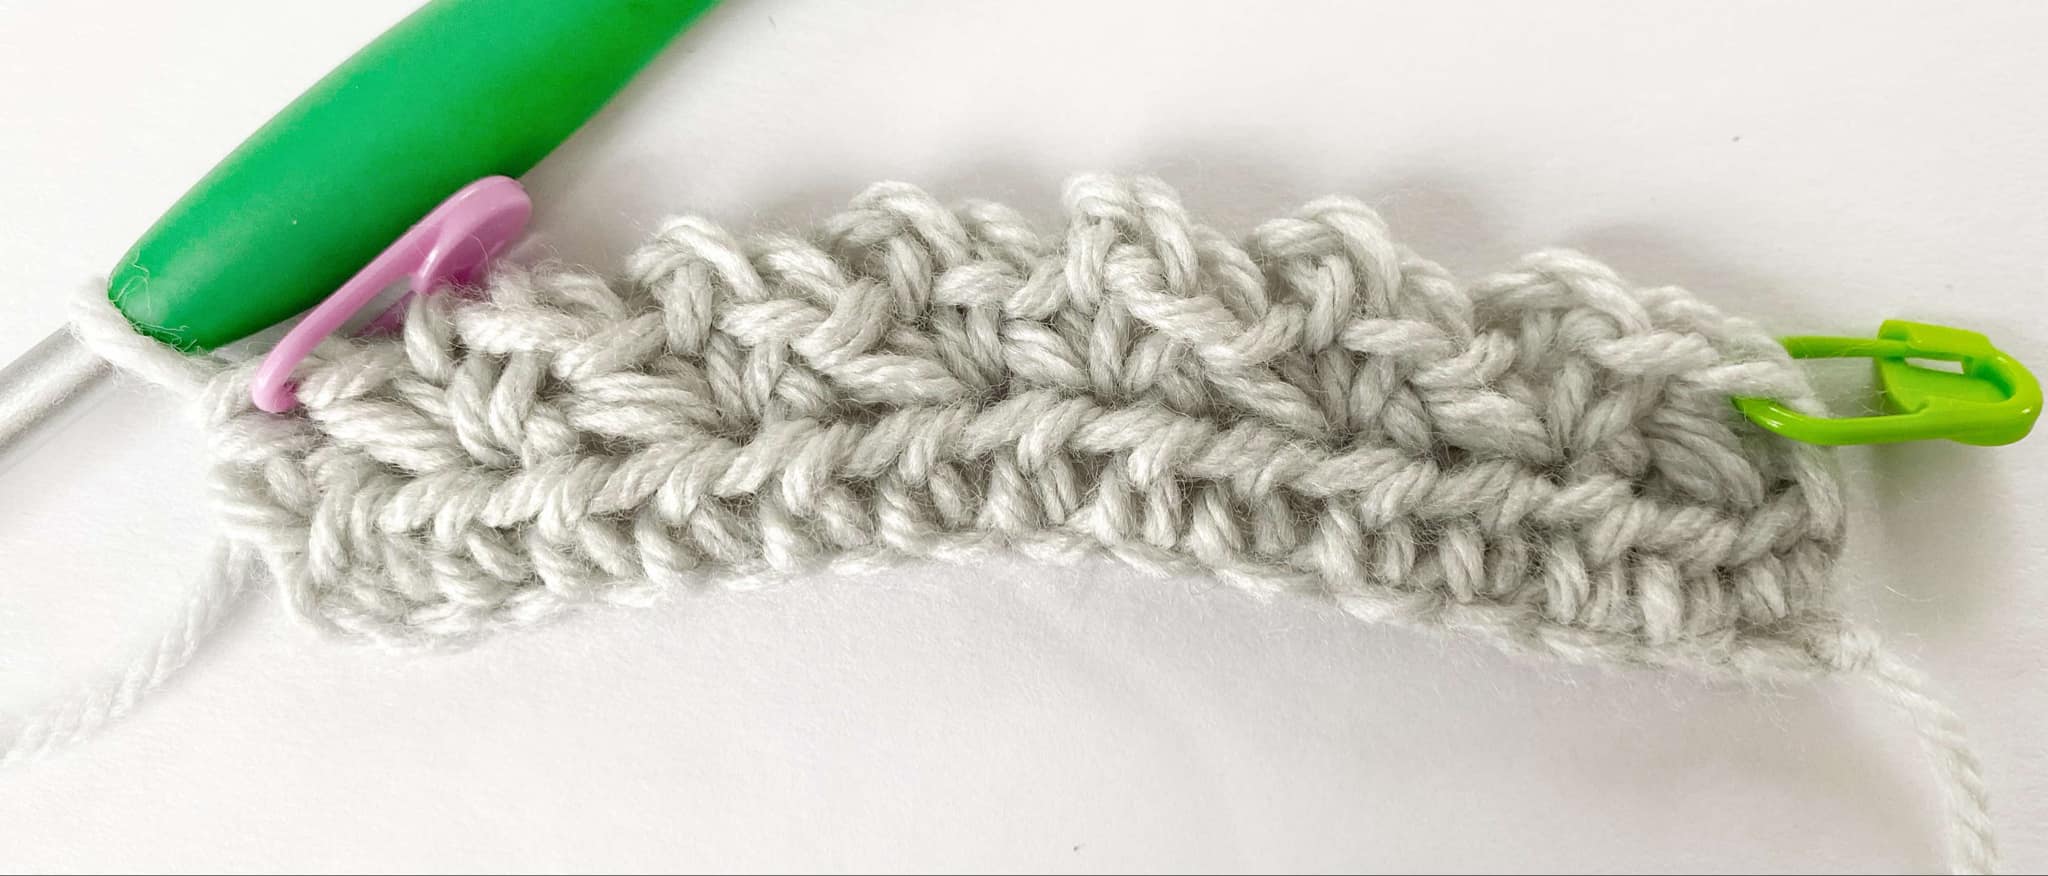
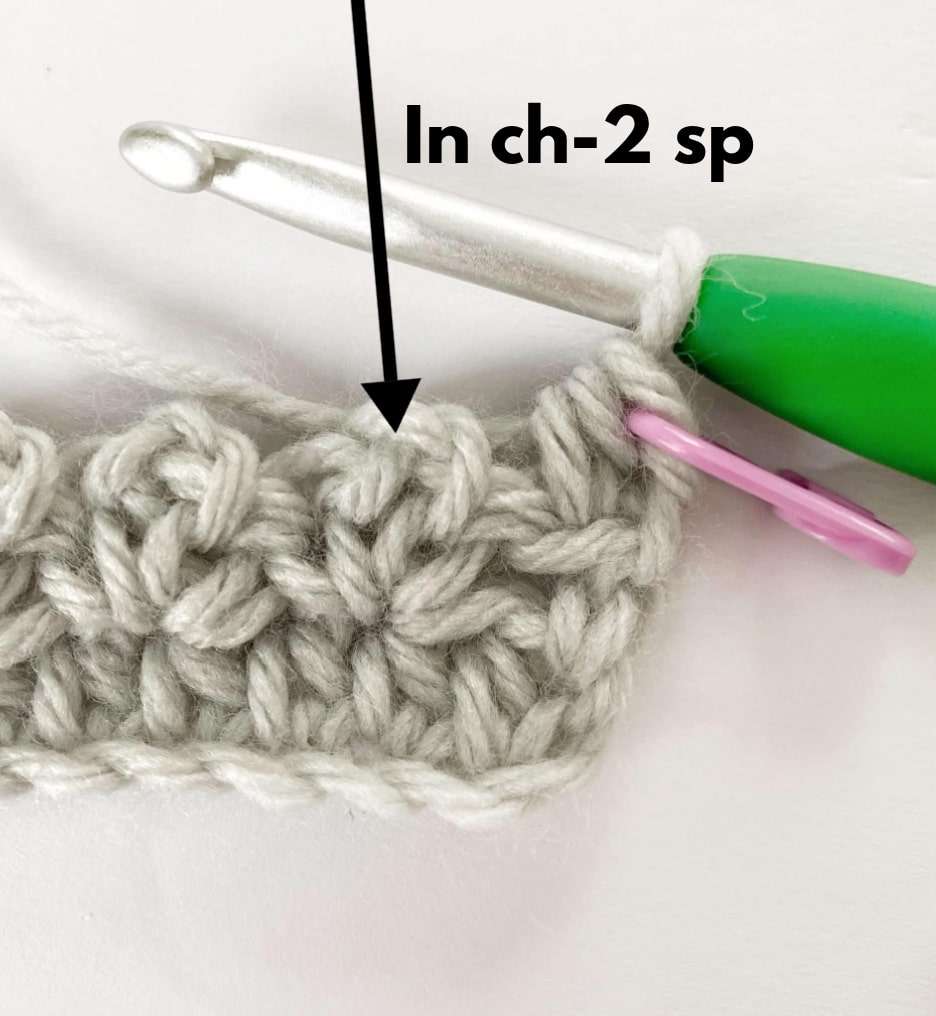
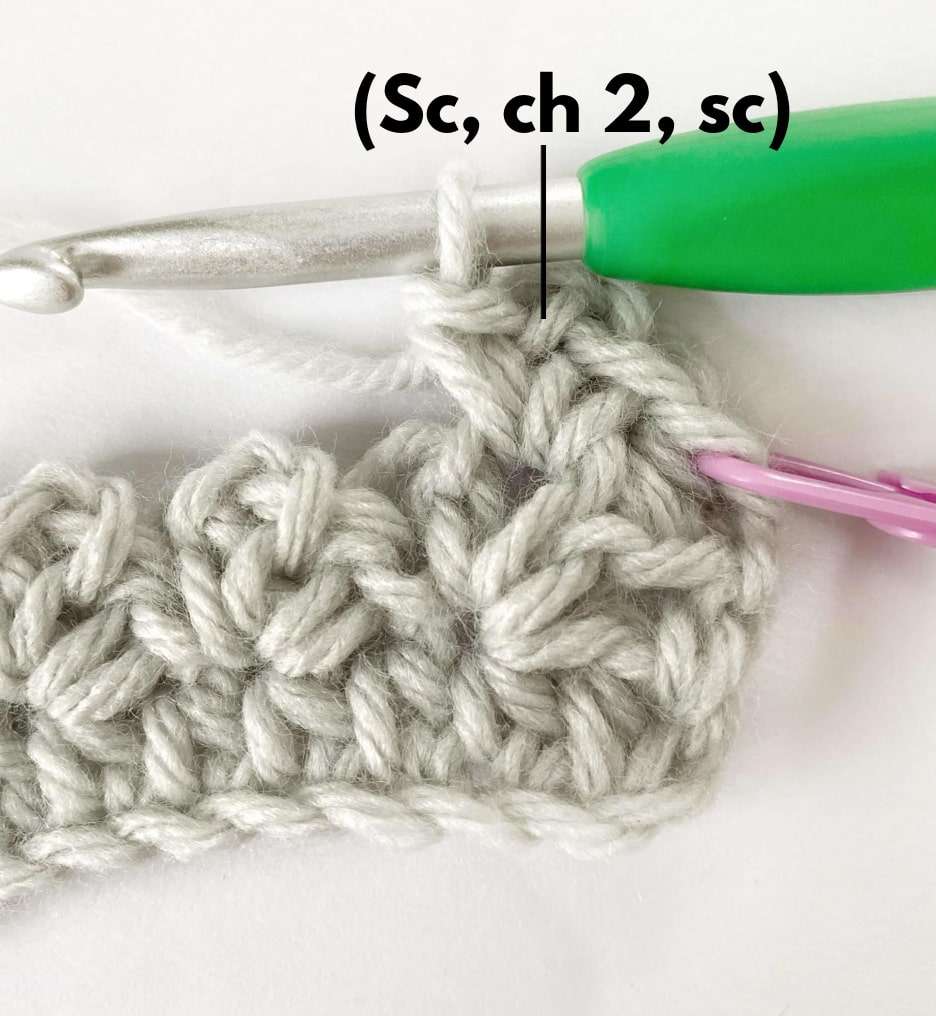
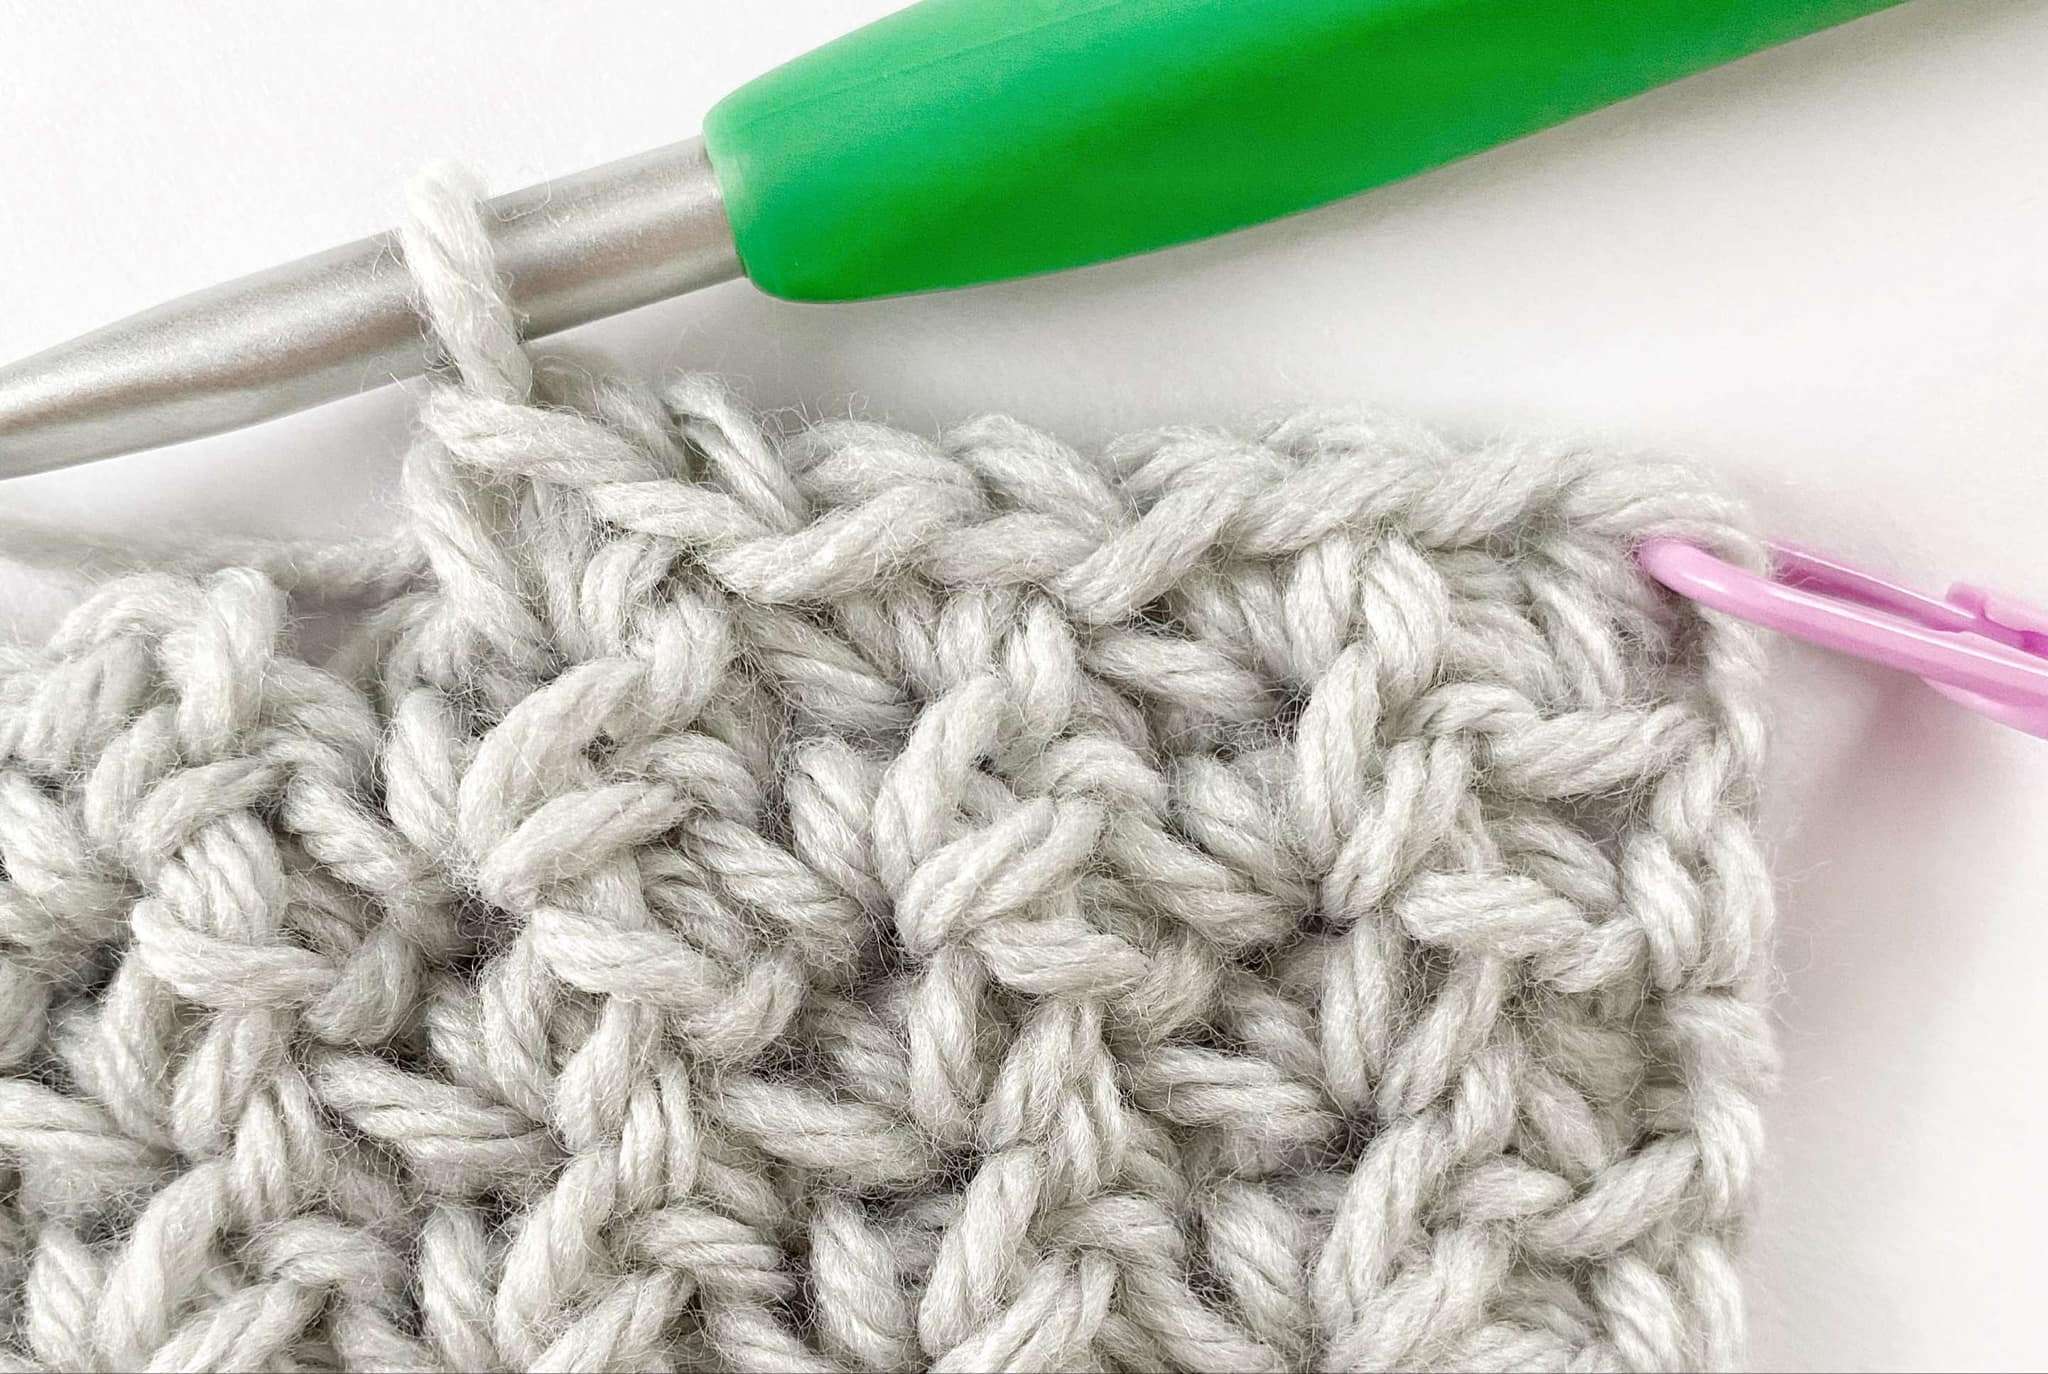
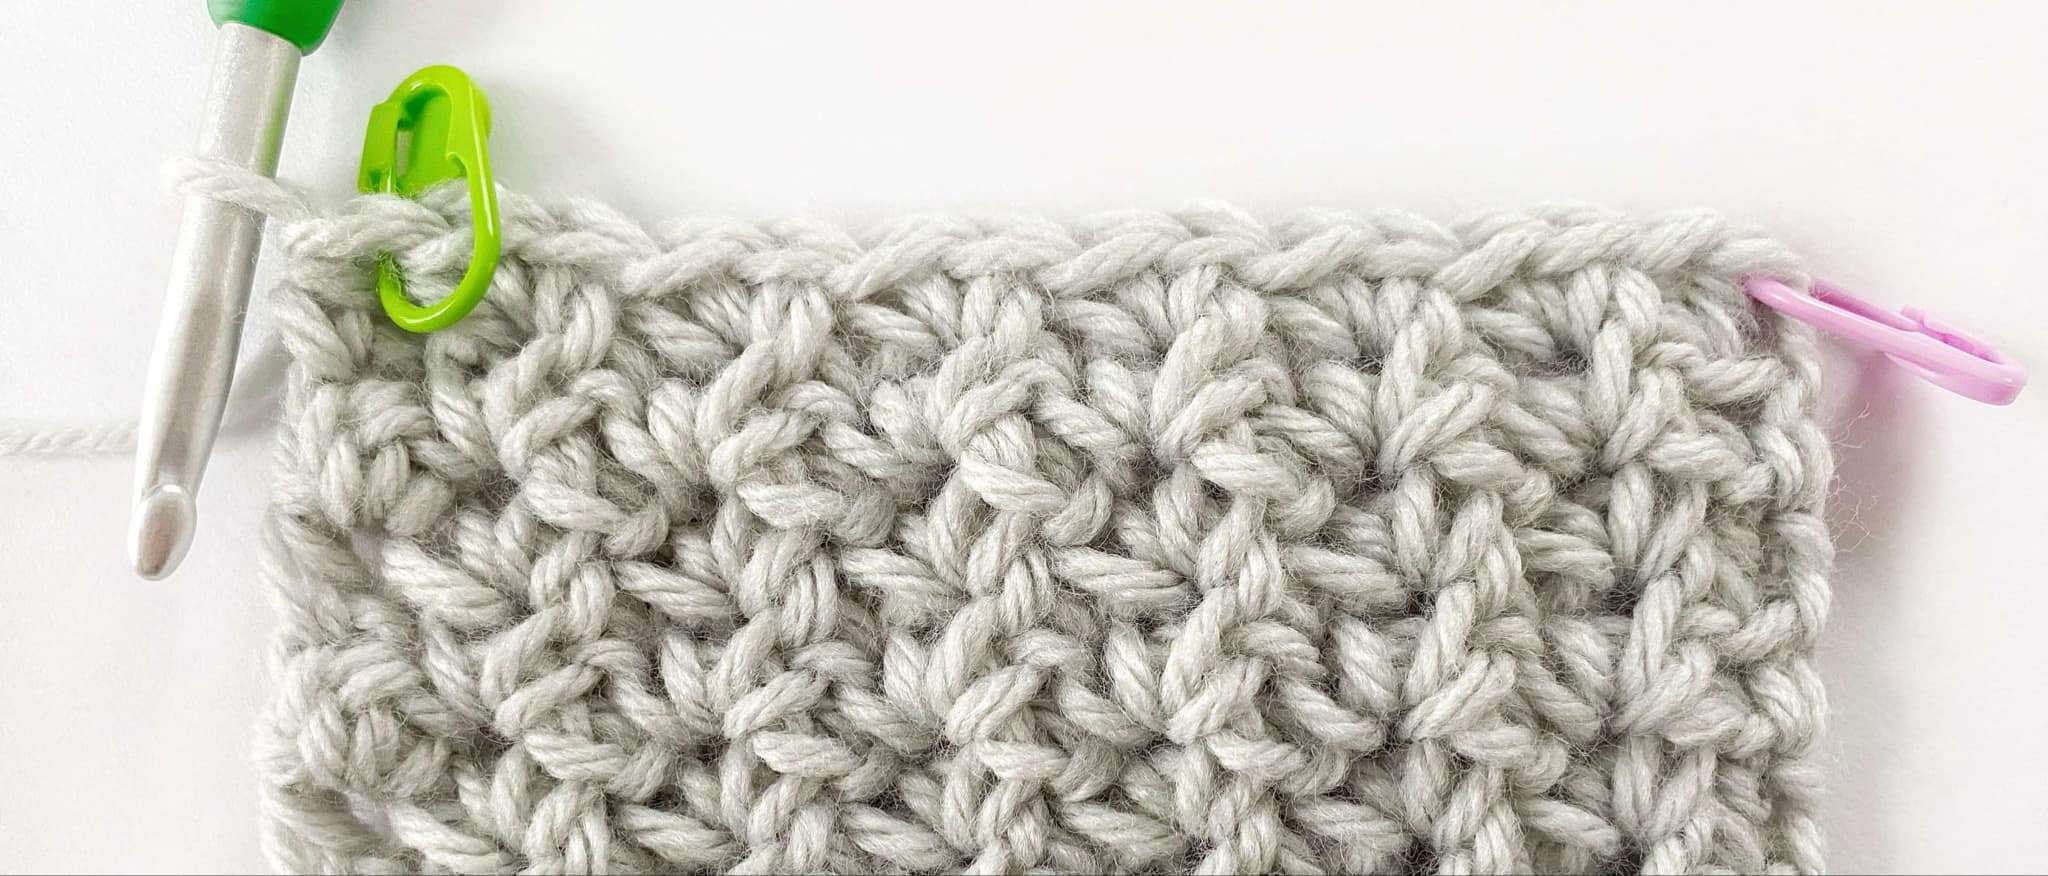
A spider stitch is considered a (sc, ch 2, sc).
Trouble with Gauge?
- If your gauge is too small (4” = more than 6 spider sts or 10.5 rows), try using a thicker weight 4 yarn or a larger crochet hook.
- If your gauge is too big (4” = less than 6 spider sts or 10.5 rows), try using a thinner weight 4 yarn or a smaller crochet hook. You can also try adjusting your tension.
Pattern Measurement:
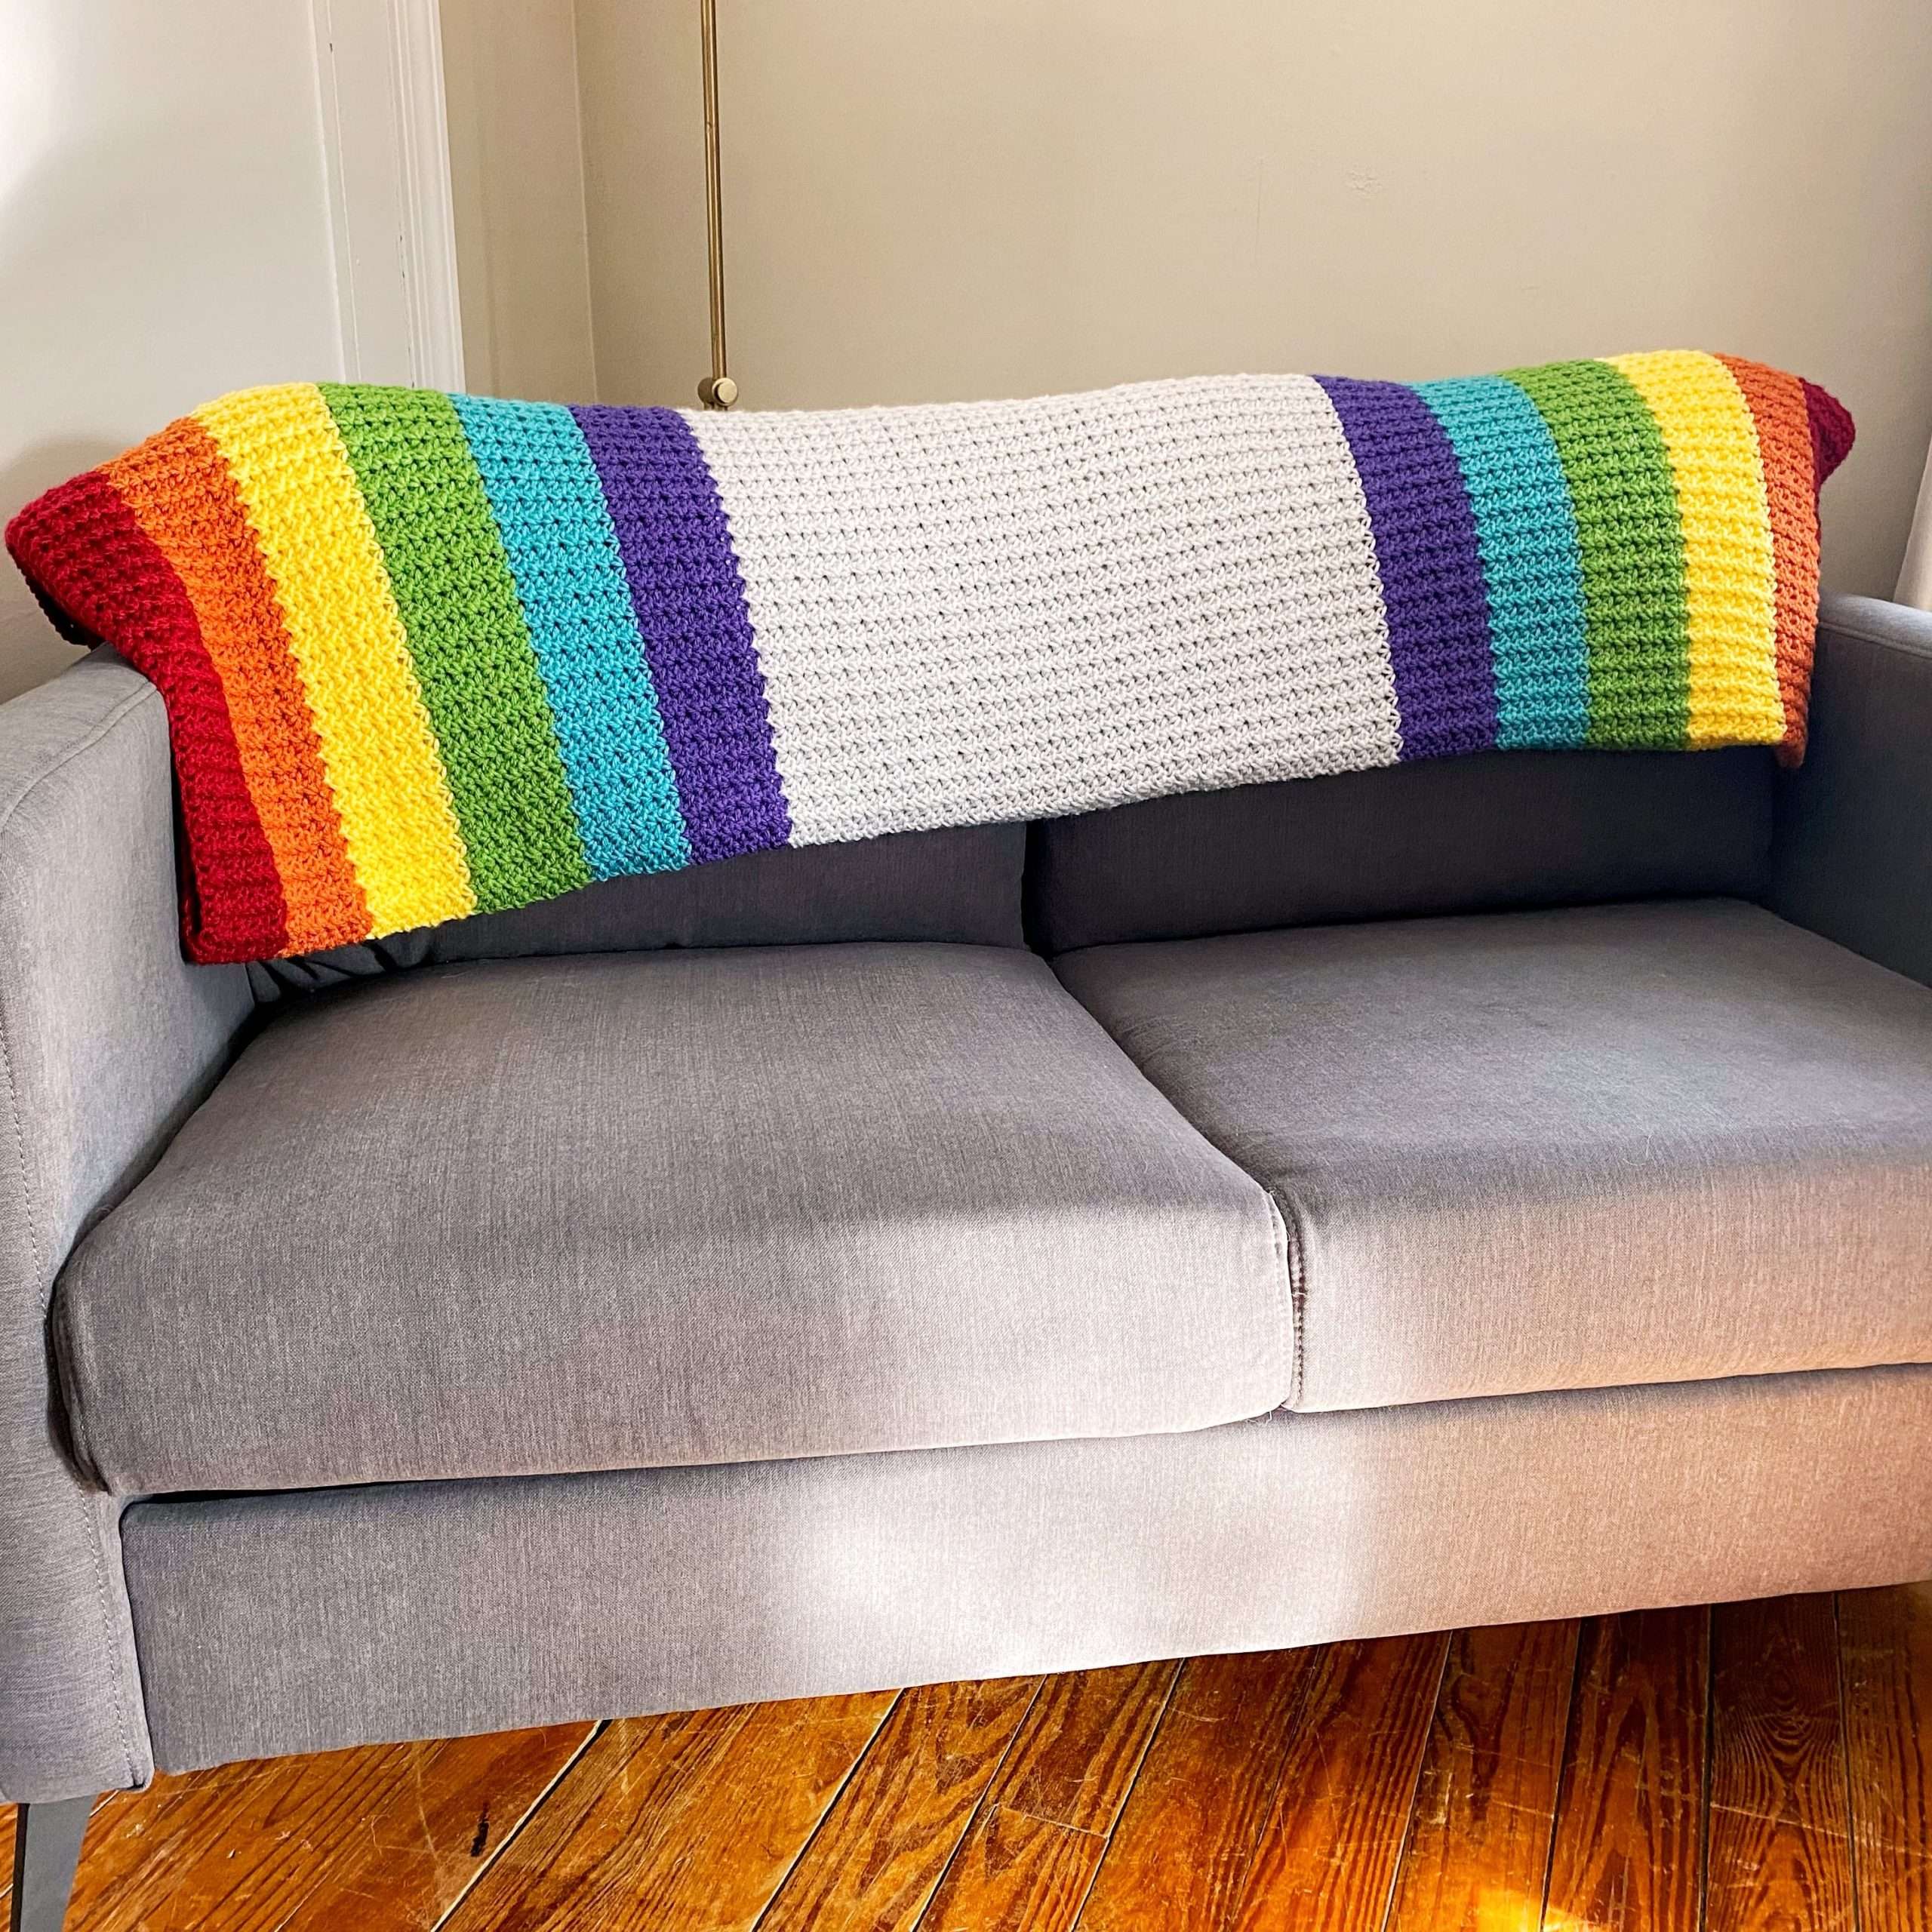
The Colour your World Blanket is a lapghan size that measures approximately 42″ wide x 55″ long. This blanket does not have a border, but you can add one if you’d like. A few border suggestions are given at the end of the pattern.
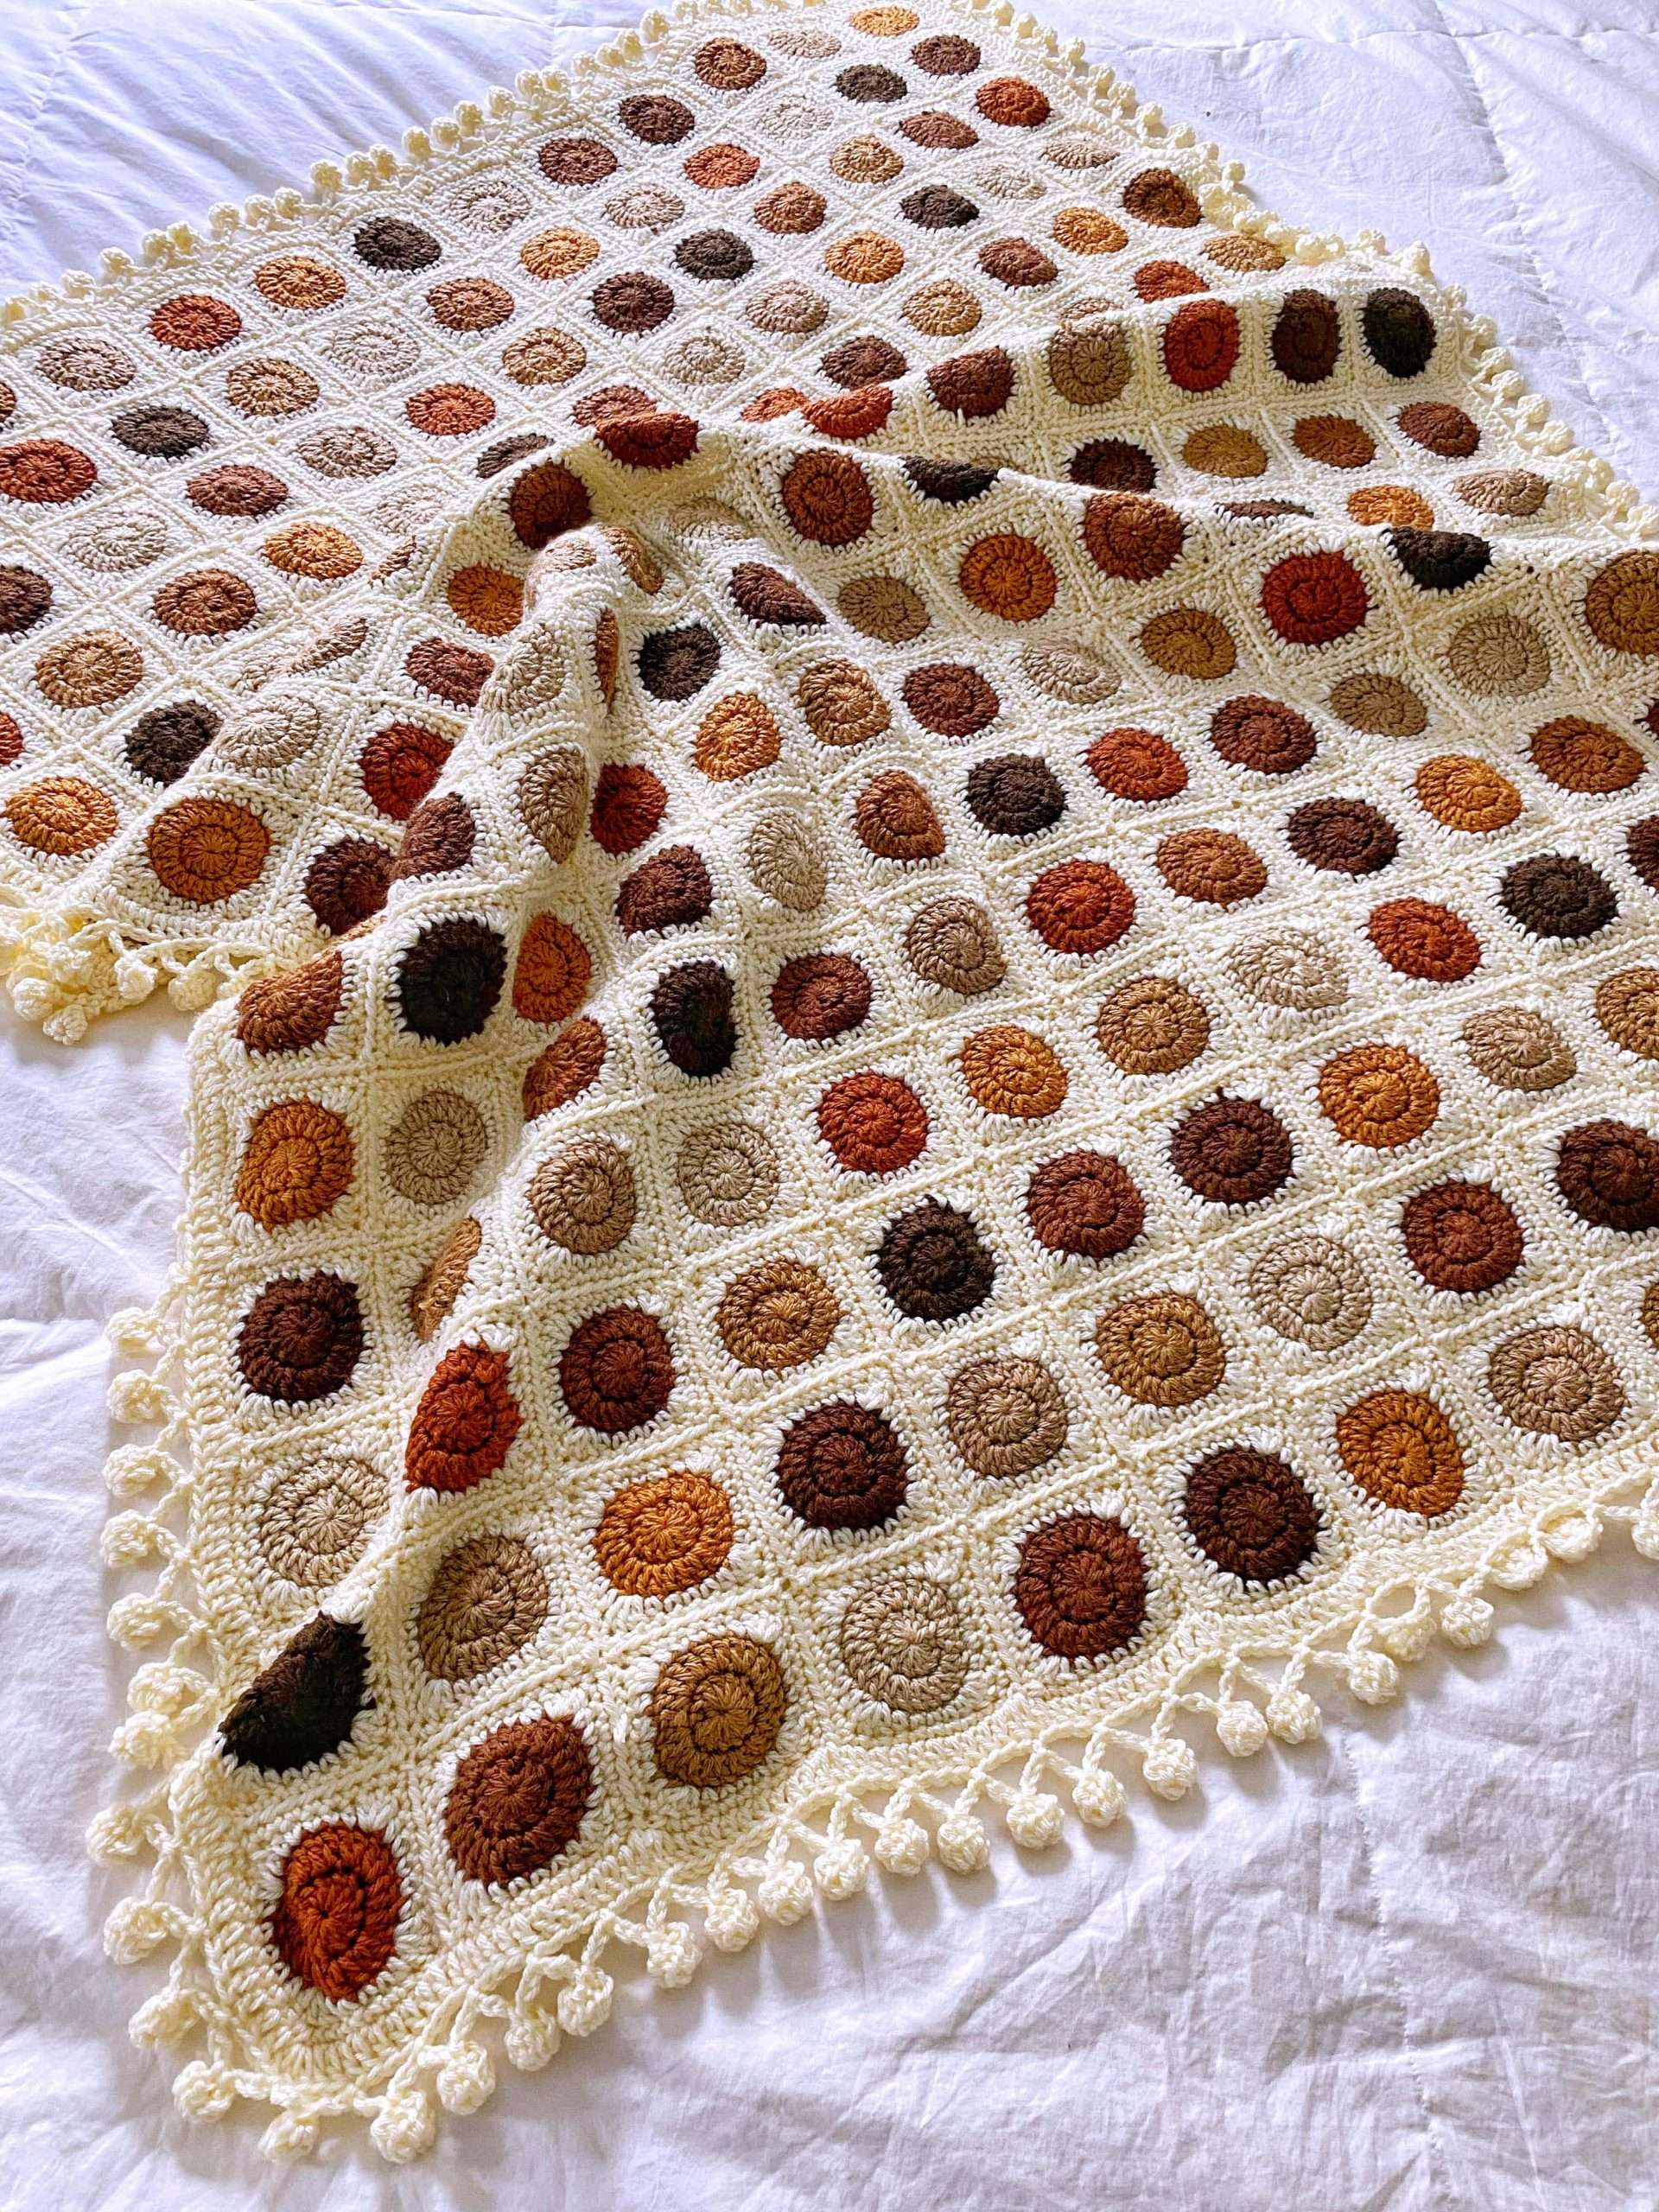
Other Colourful Crochet Blankets You’ll Love!



Customize the Size of Your Blanket:
To make the blanket smaller or larger, follow the instructions below:
- Width: Chain an even number until satisfied with the width of the blanket.
- Length: Repeat Row 3, until satisfied with the length of the blanket, then square off the blanket with the “Last Row”.
This blanket has been added to the 20+ Crochet Blanket Bundle on Etsy and Ravelry. If you purchased the bundle through Ravelry, then you should receive an email with a link to download your pattern; if you purchased through Etsy, check the Google Drive bundle to download your pattern.
Changing Colour Tutorial:
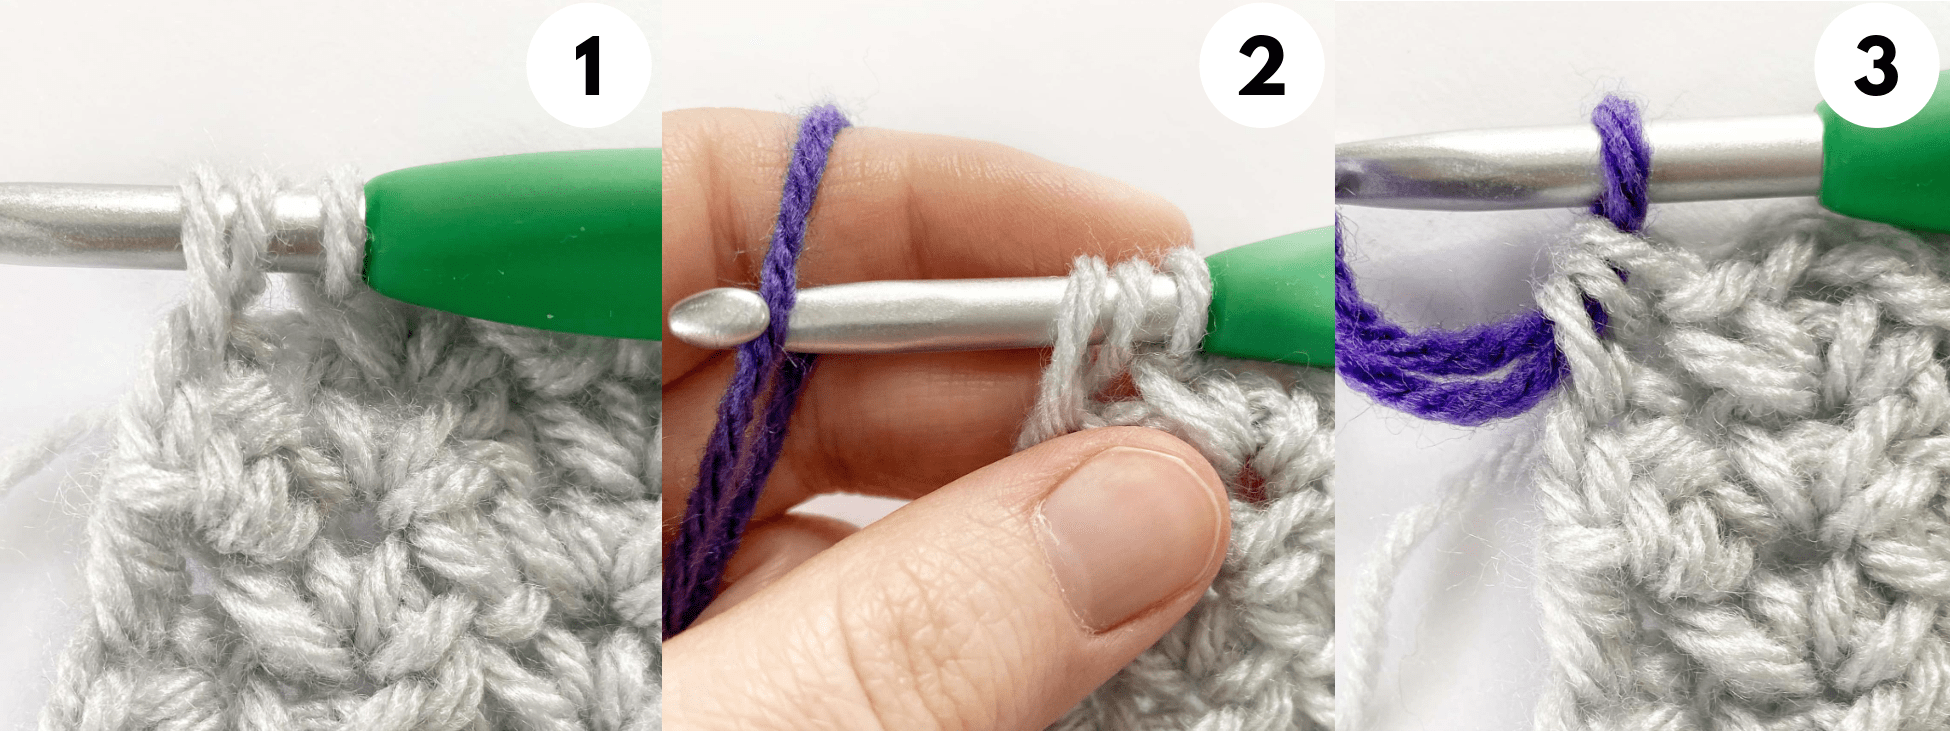
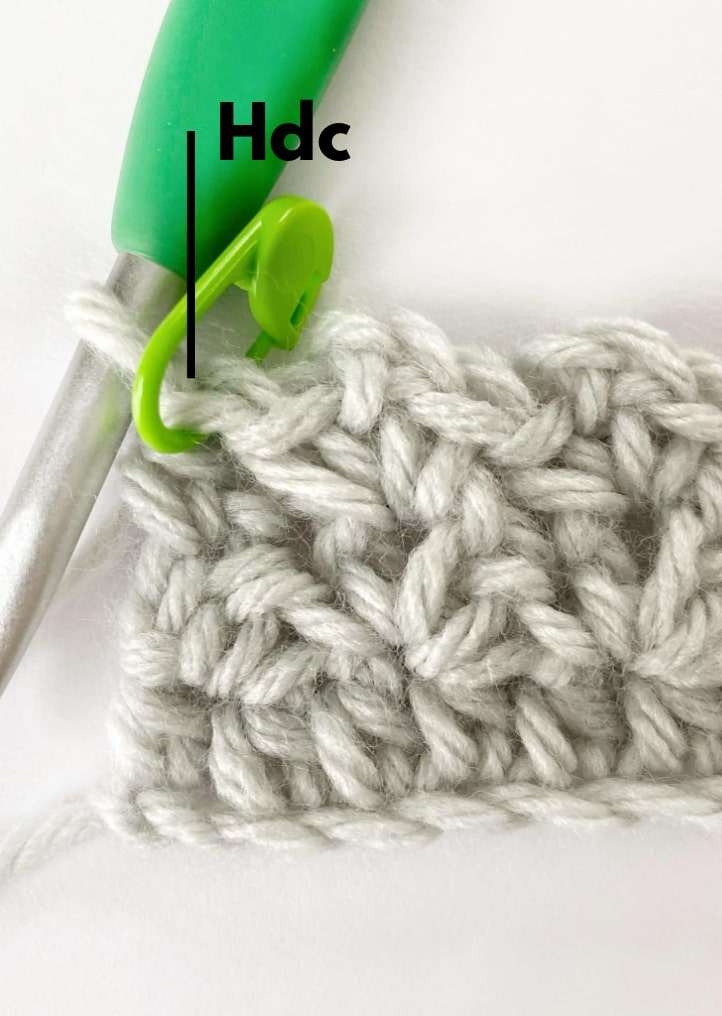
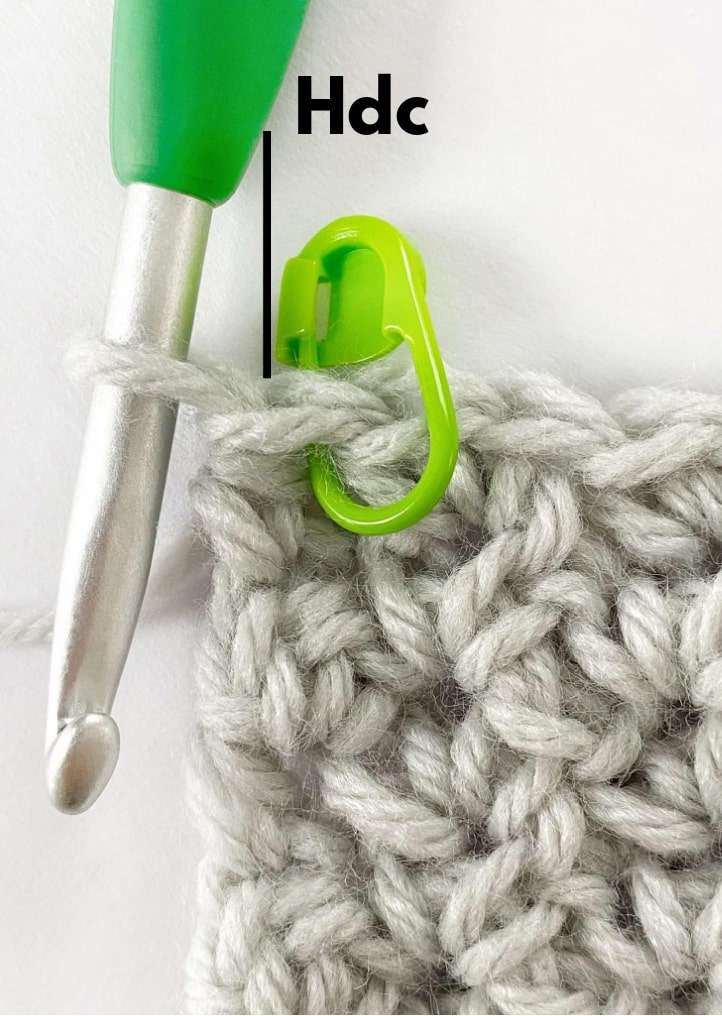
The colour changes happen in the last st (hdc) of the row.
- With the current colour (gray), YO and insert hook into the last st. YO and draw up a loop – there should be 3 loops on the hook. (Picture 1)
- Drop the current colour. Pick up the new colour with your hook (purple). (Picture 2)
- Pull the new colour through the 3 loops on the hook to complete the hdc st. (Picture 3)
- Leave a long tail for weaving in ends later, and trim the unused colour (gray).
Pattern:
Notes:
- The beginning ch 1 of each row does not count as a st.
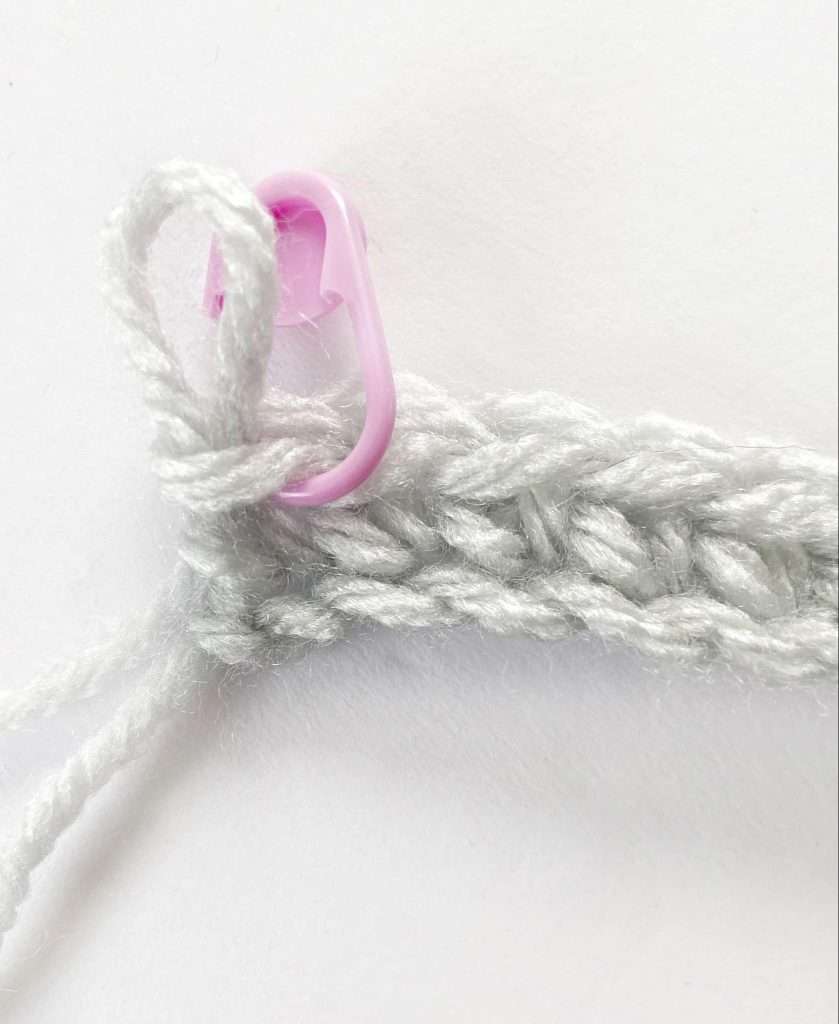
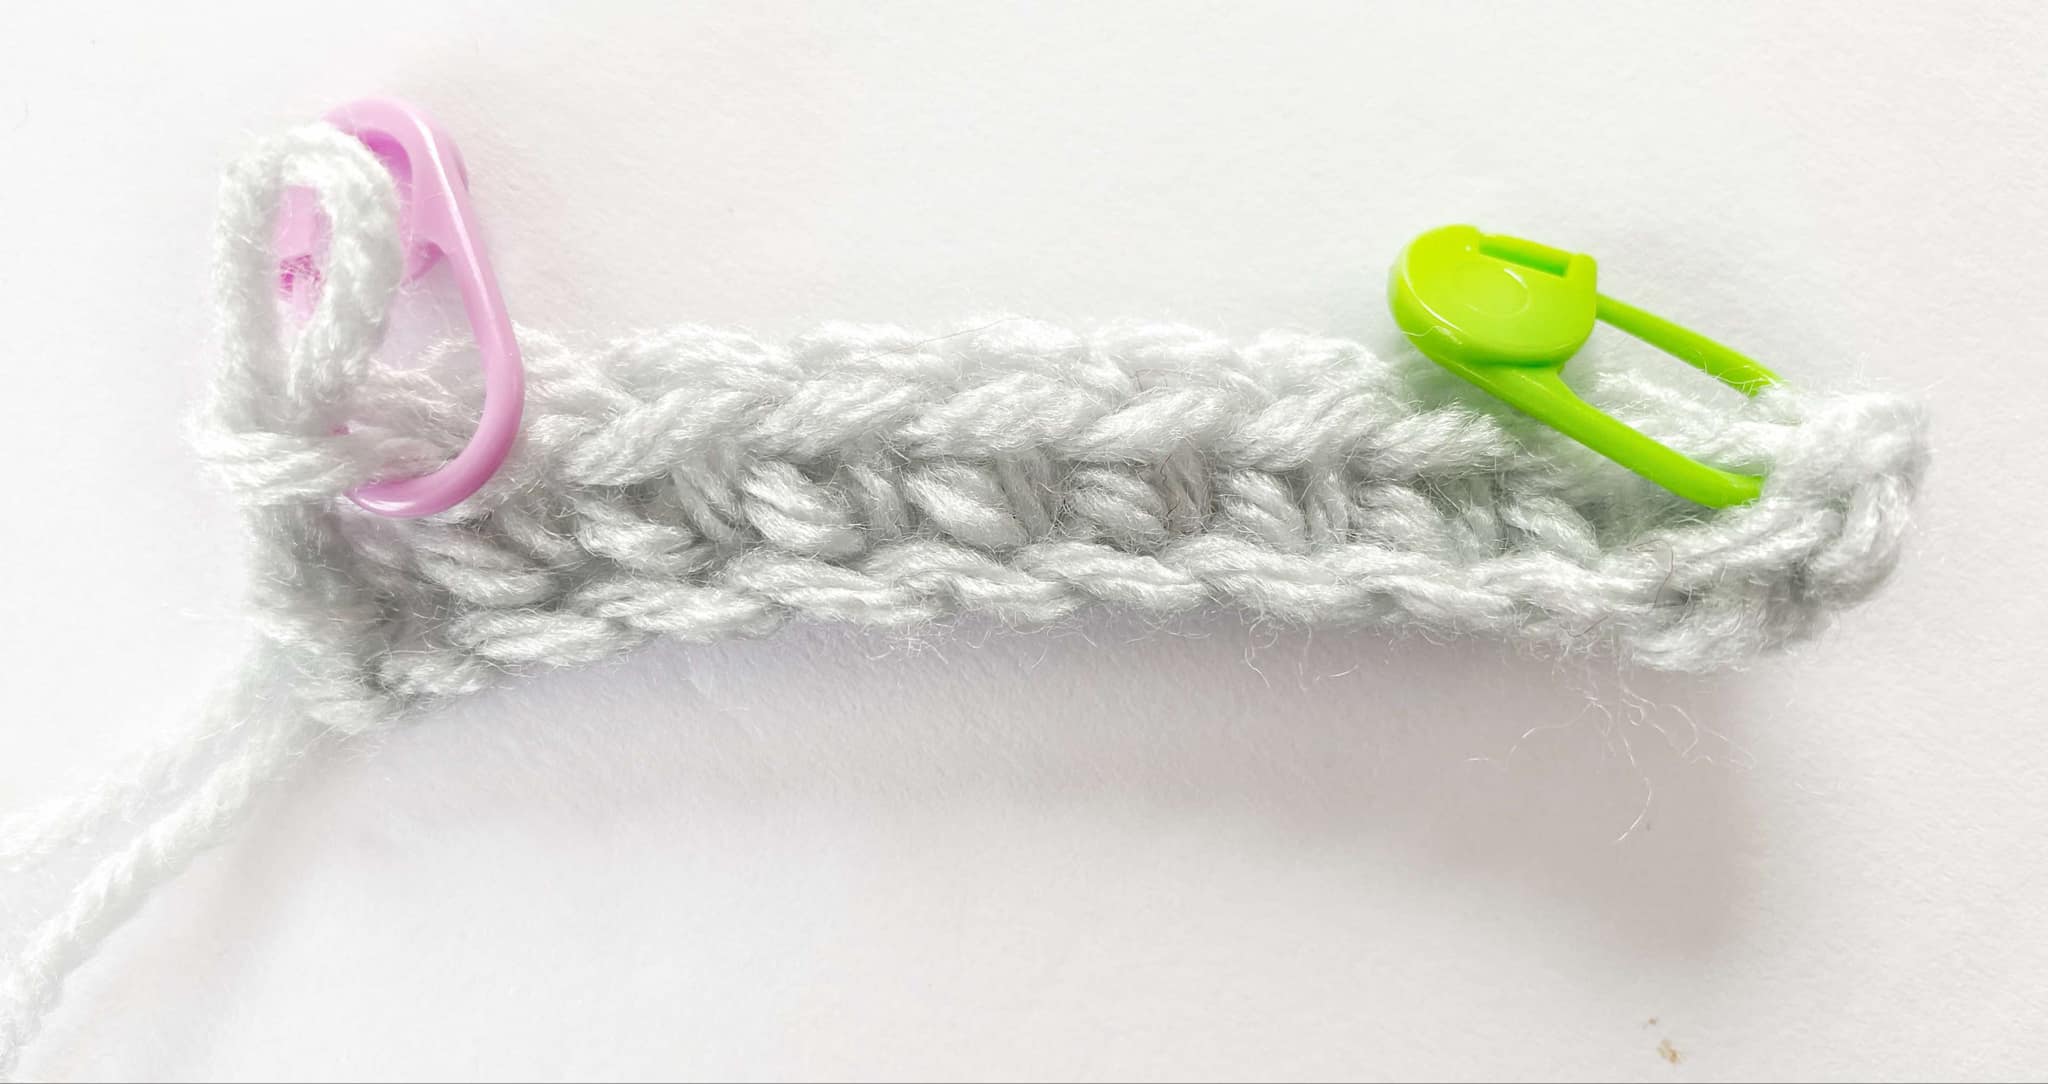
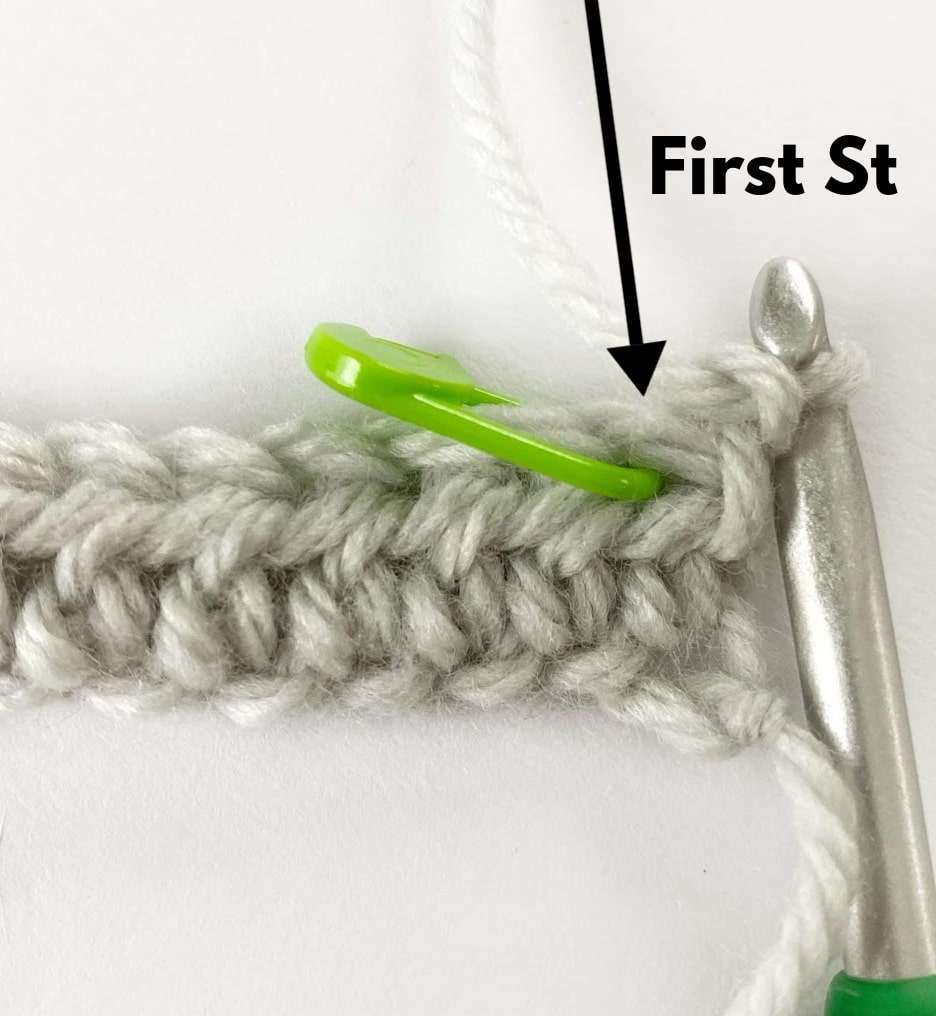
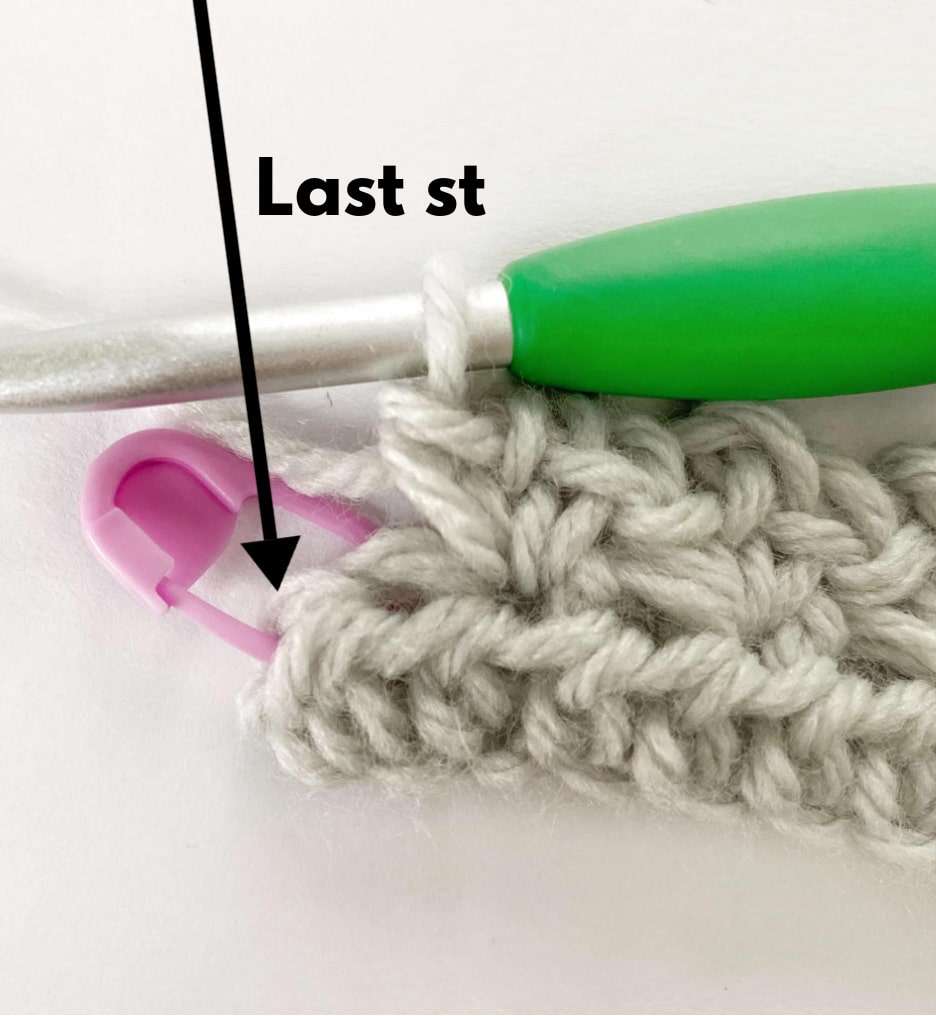
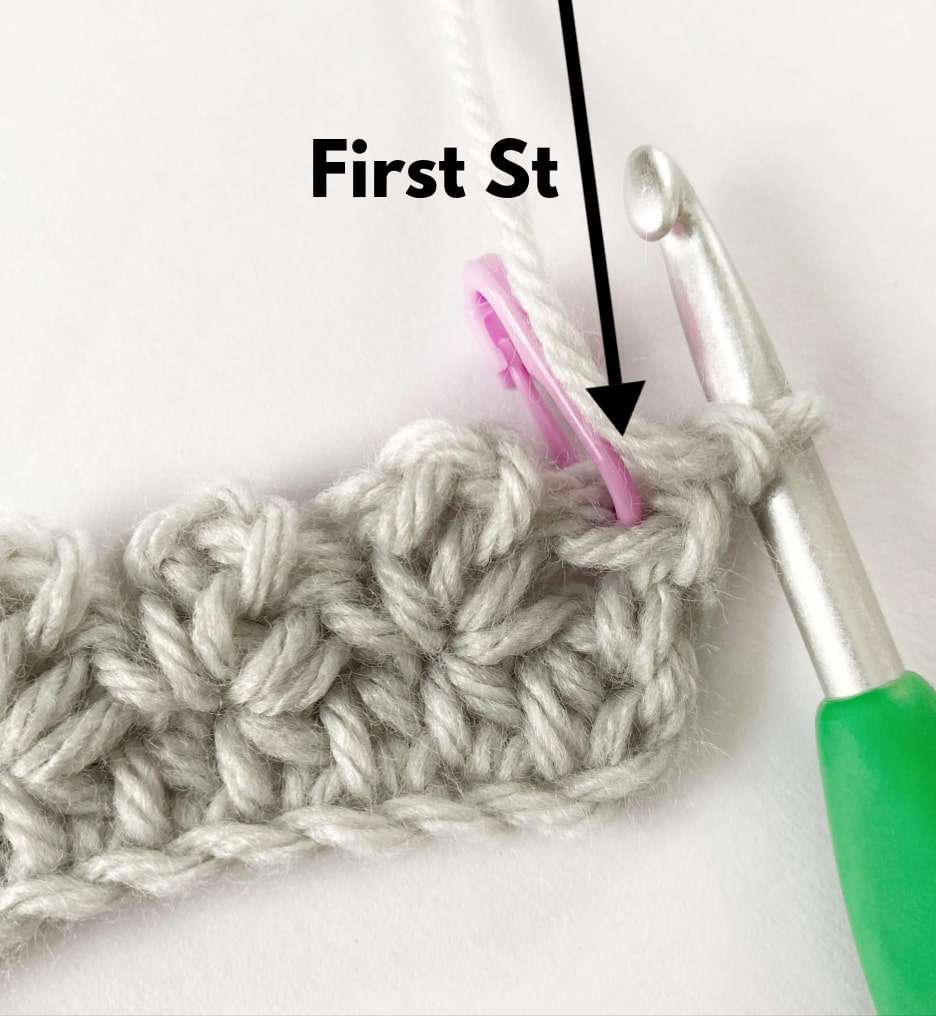
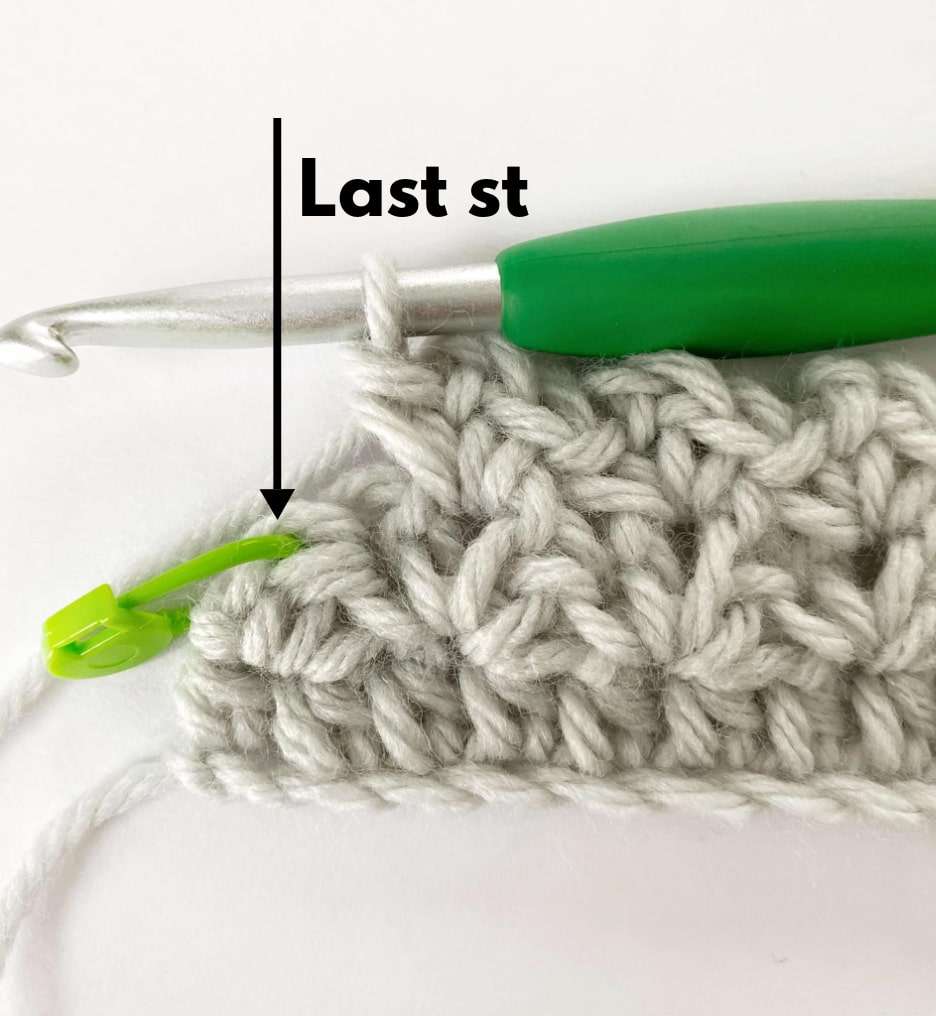
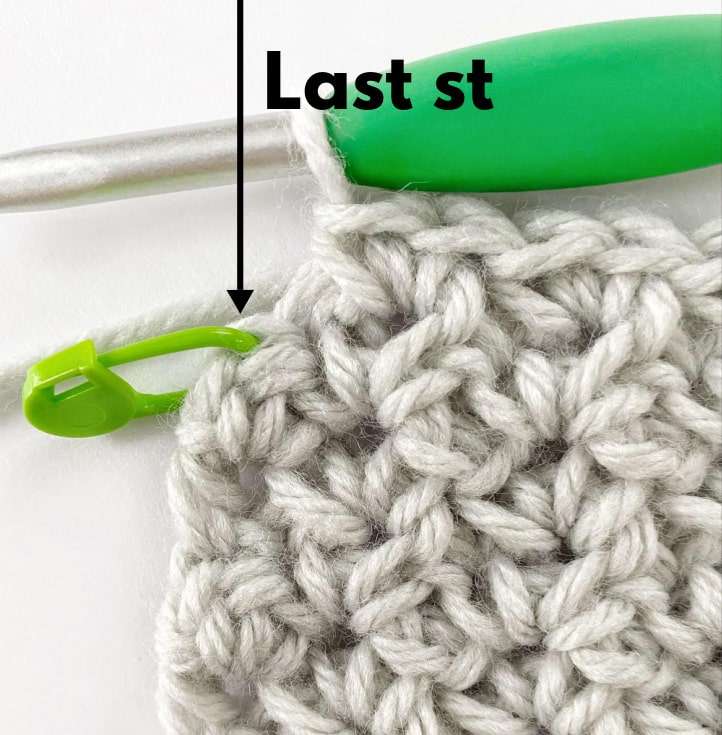
- Tip: To help you maintain your stitch count, mark the first and last st of each row with a stitch marker.
- Stitch counts are given at the end of each row.
- Colour changes happen in the last hdc of the row before the final YO (see tutorial above).
- The blanket is reversible, which means it looks the same on both sides. However, odd numbered rows are considered the RS, and even numbered rows are considered the WS.
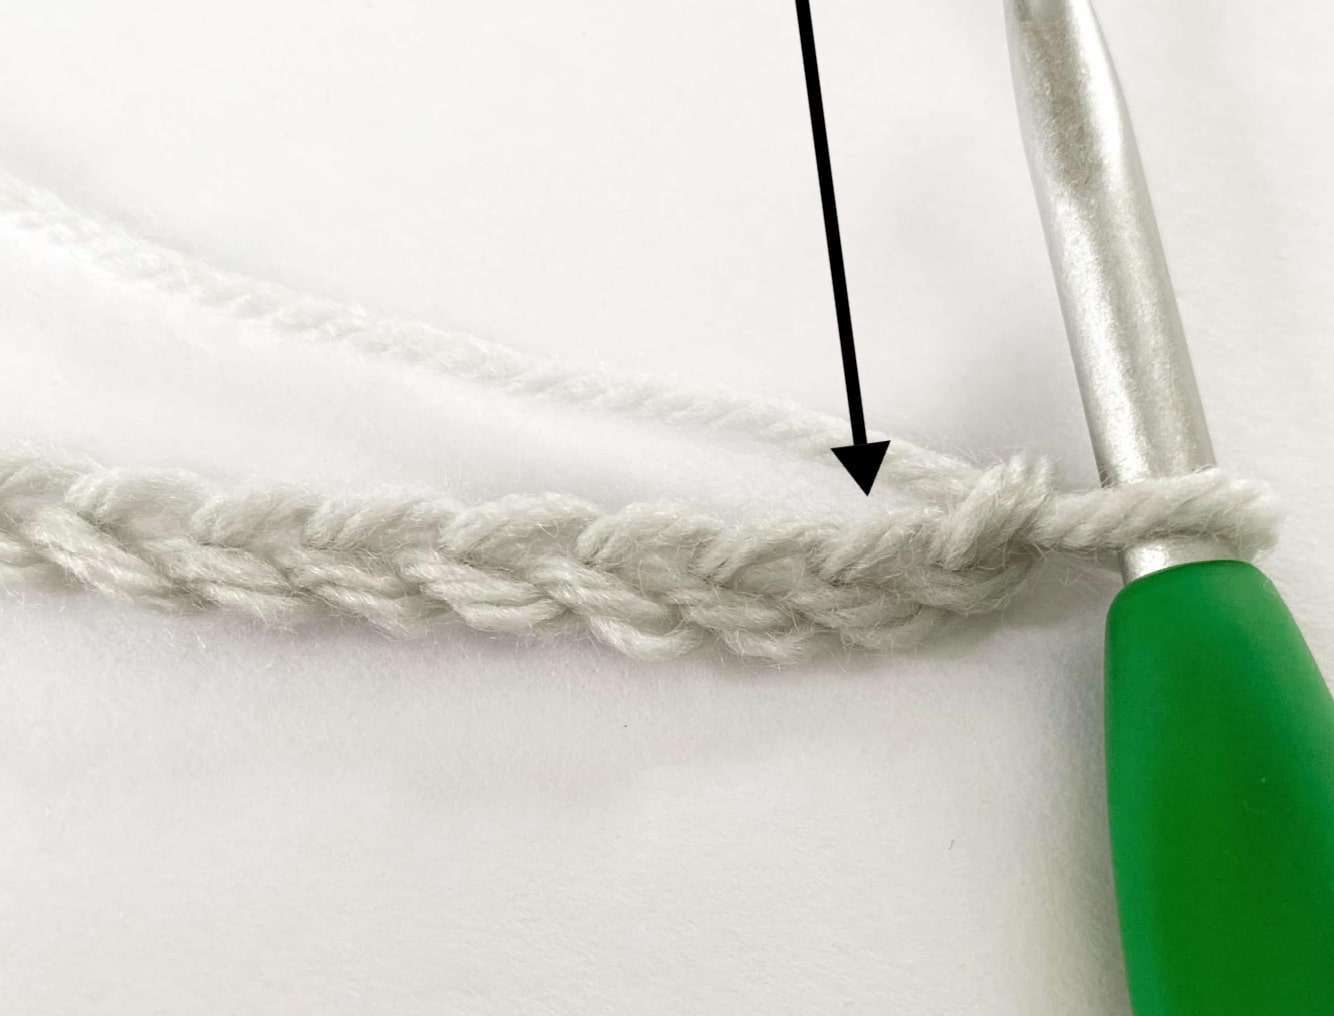
With Colour A, ch 128.
Row 1 (RS):
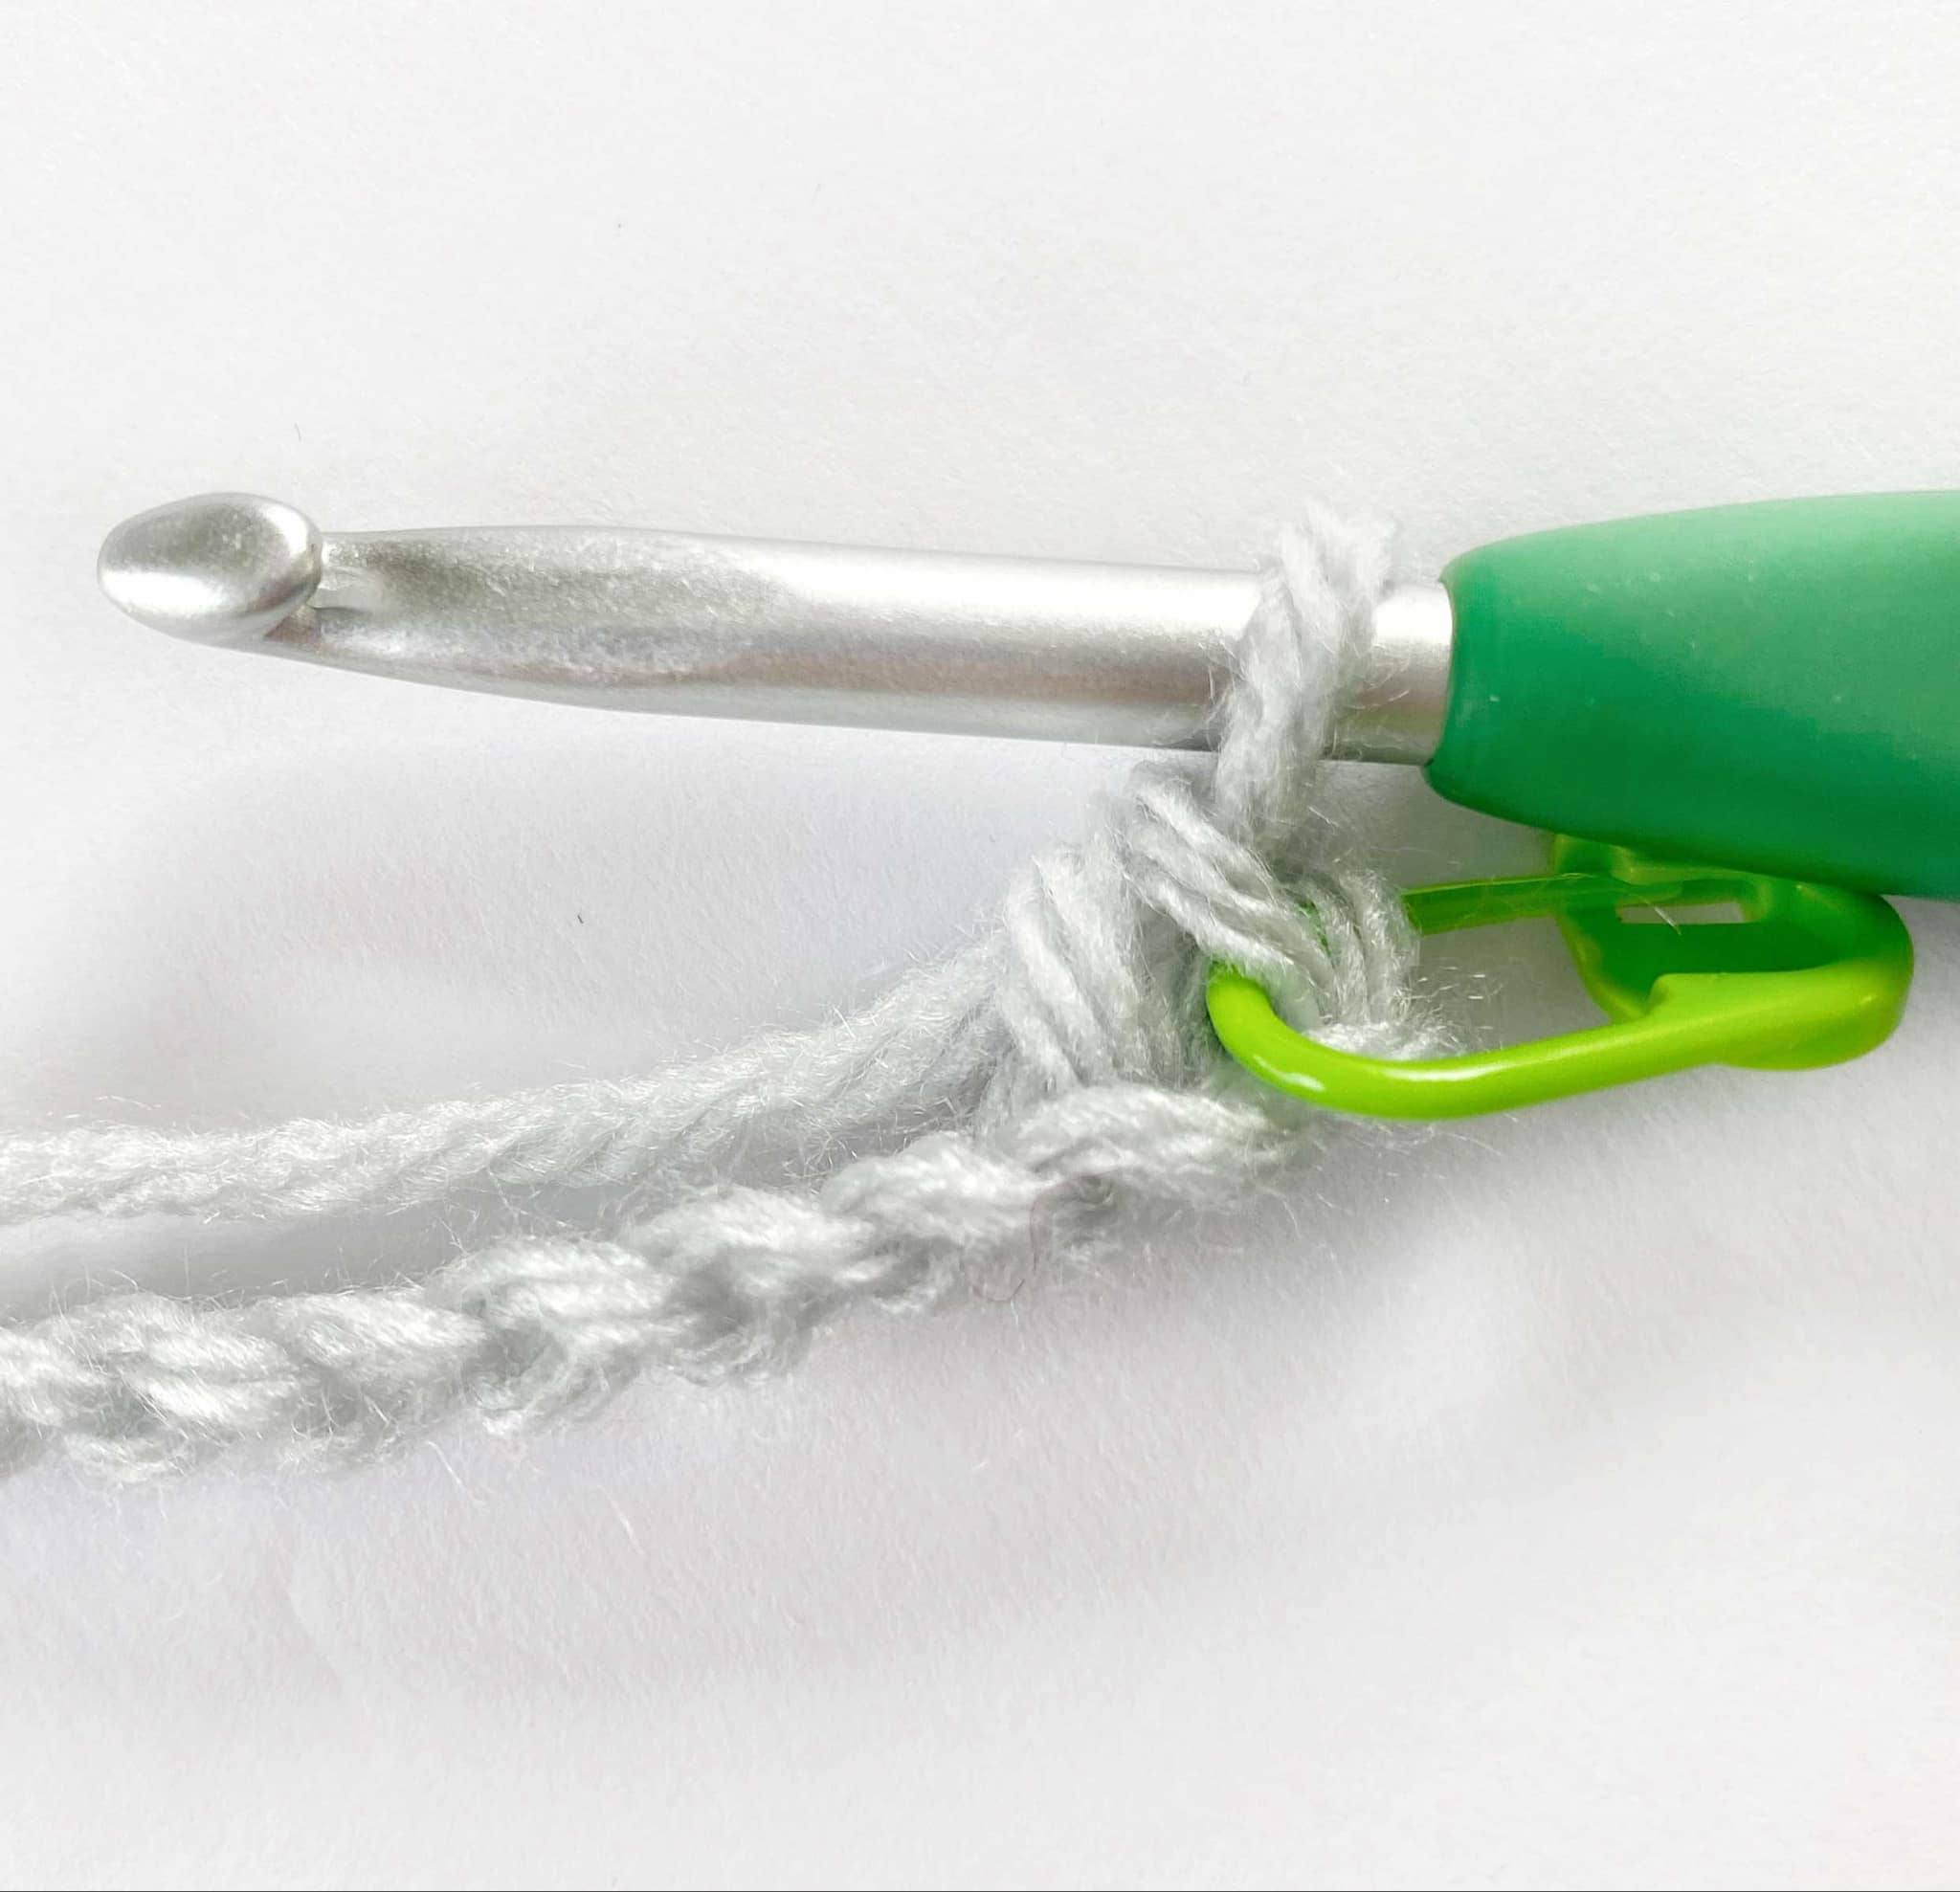
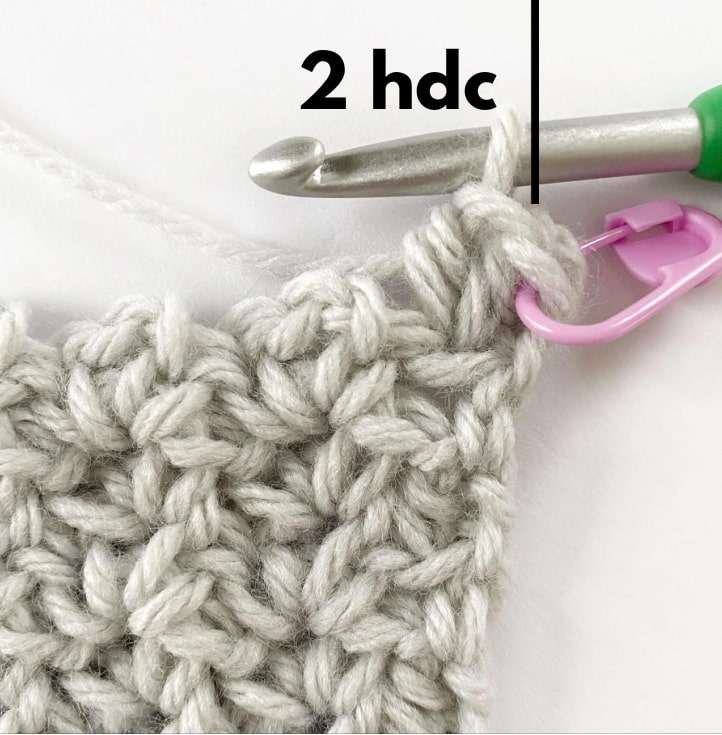
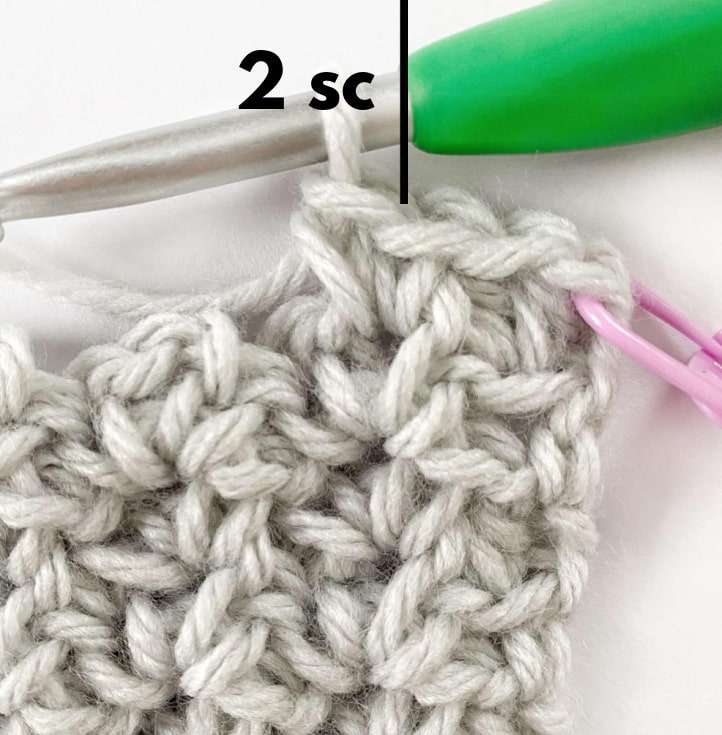
Sc in second ch from hook and in each ch across. Mark the first and last sc with a stitch marker. Turn.
- Stitch Count: 127 sc
Row 2 (WS):
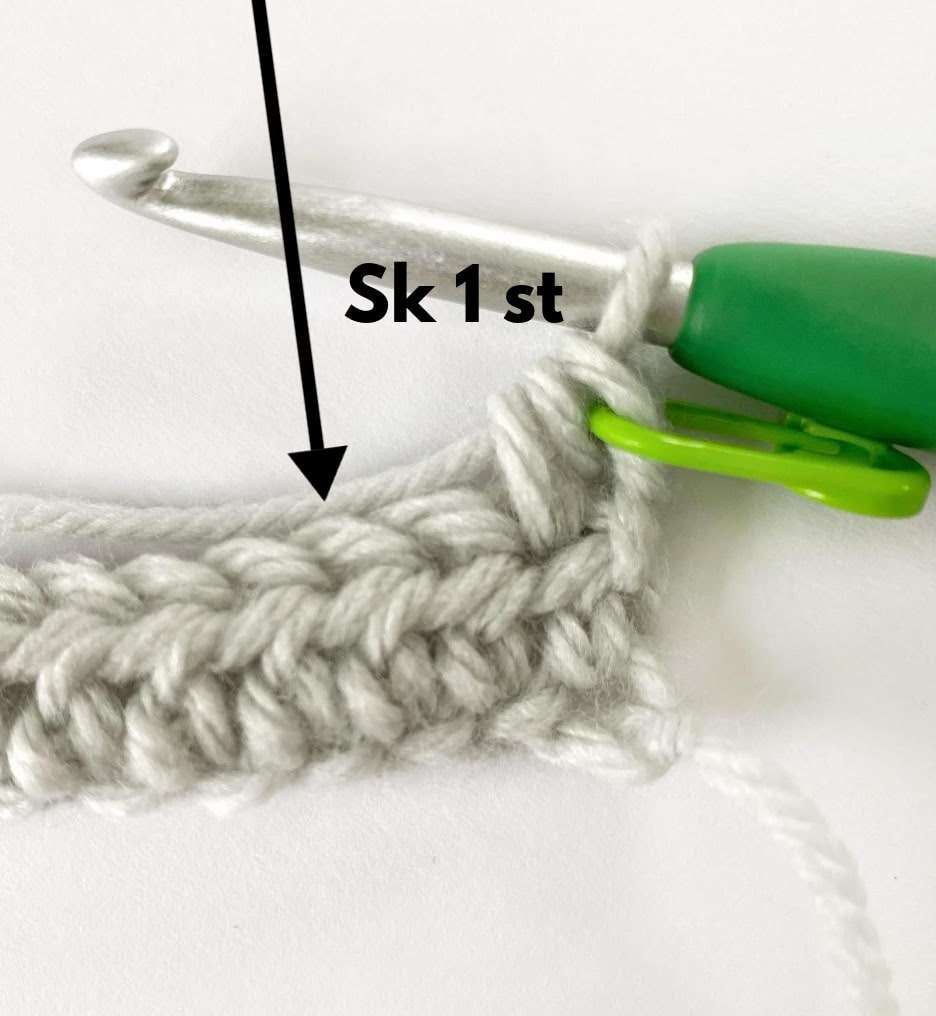
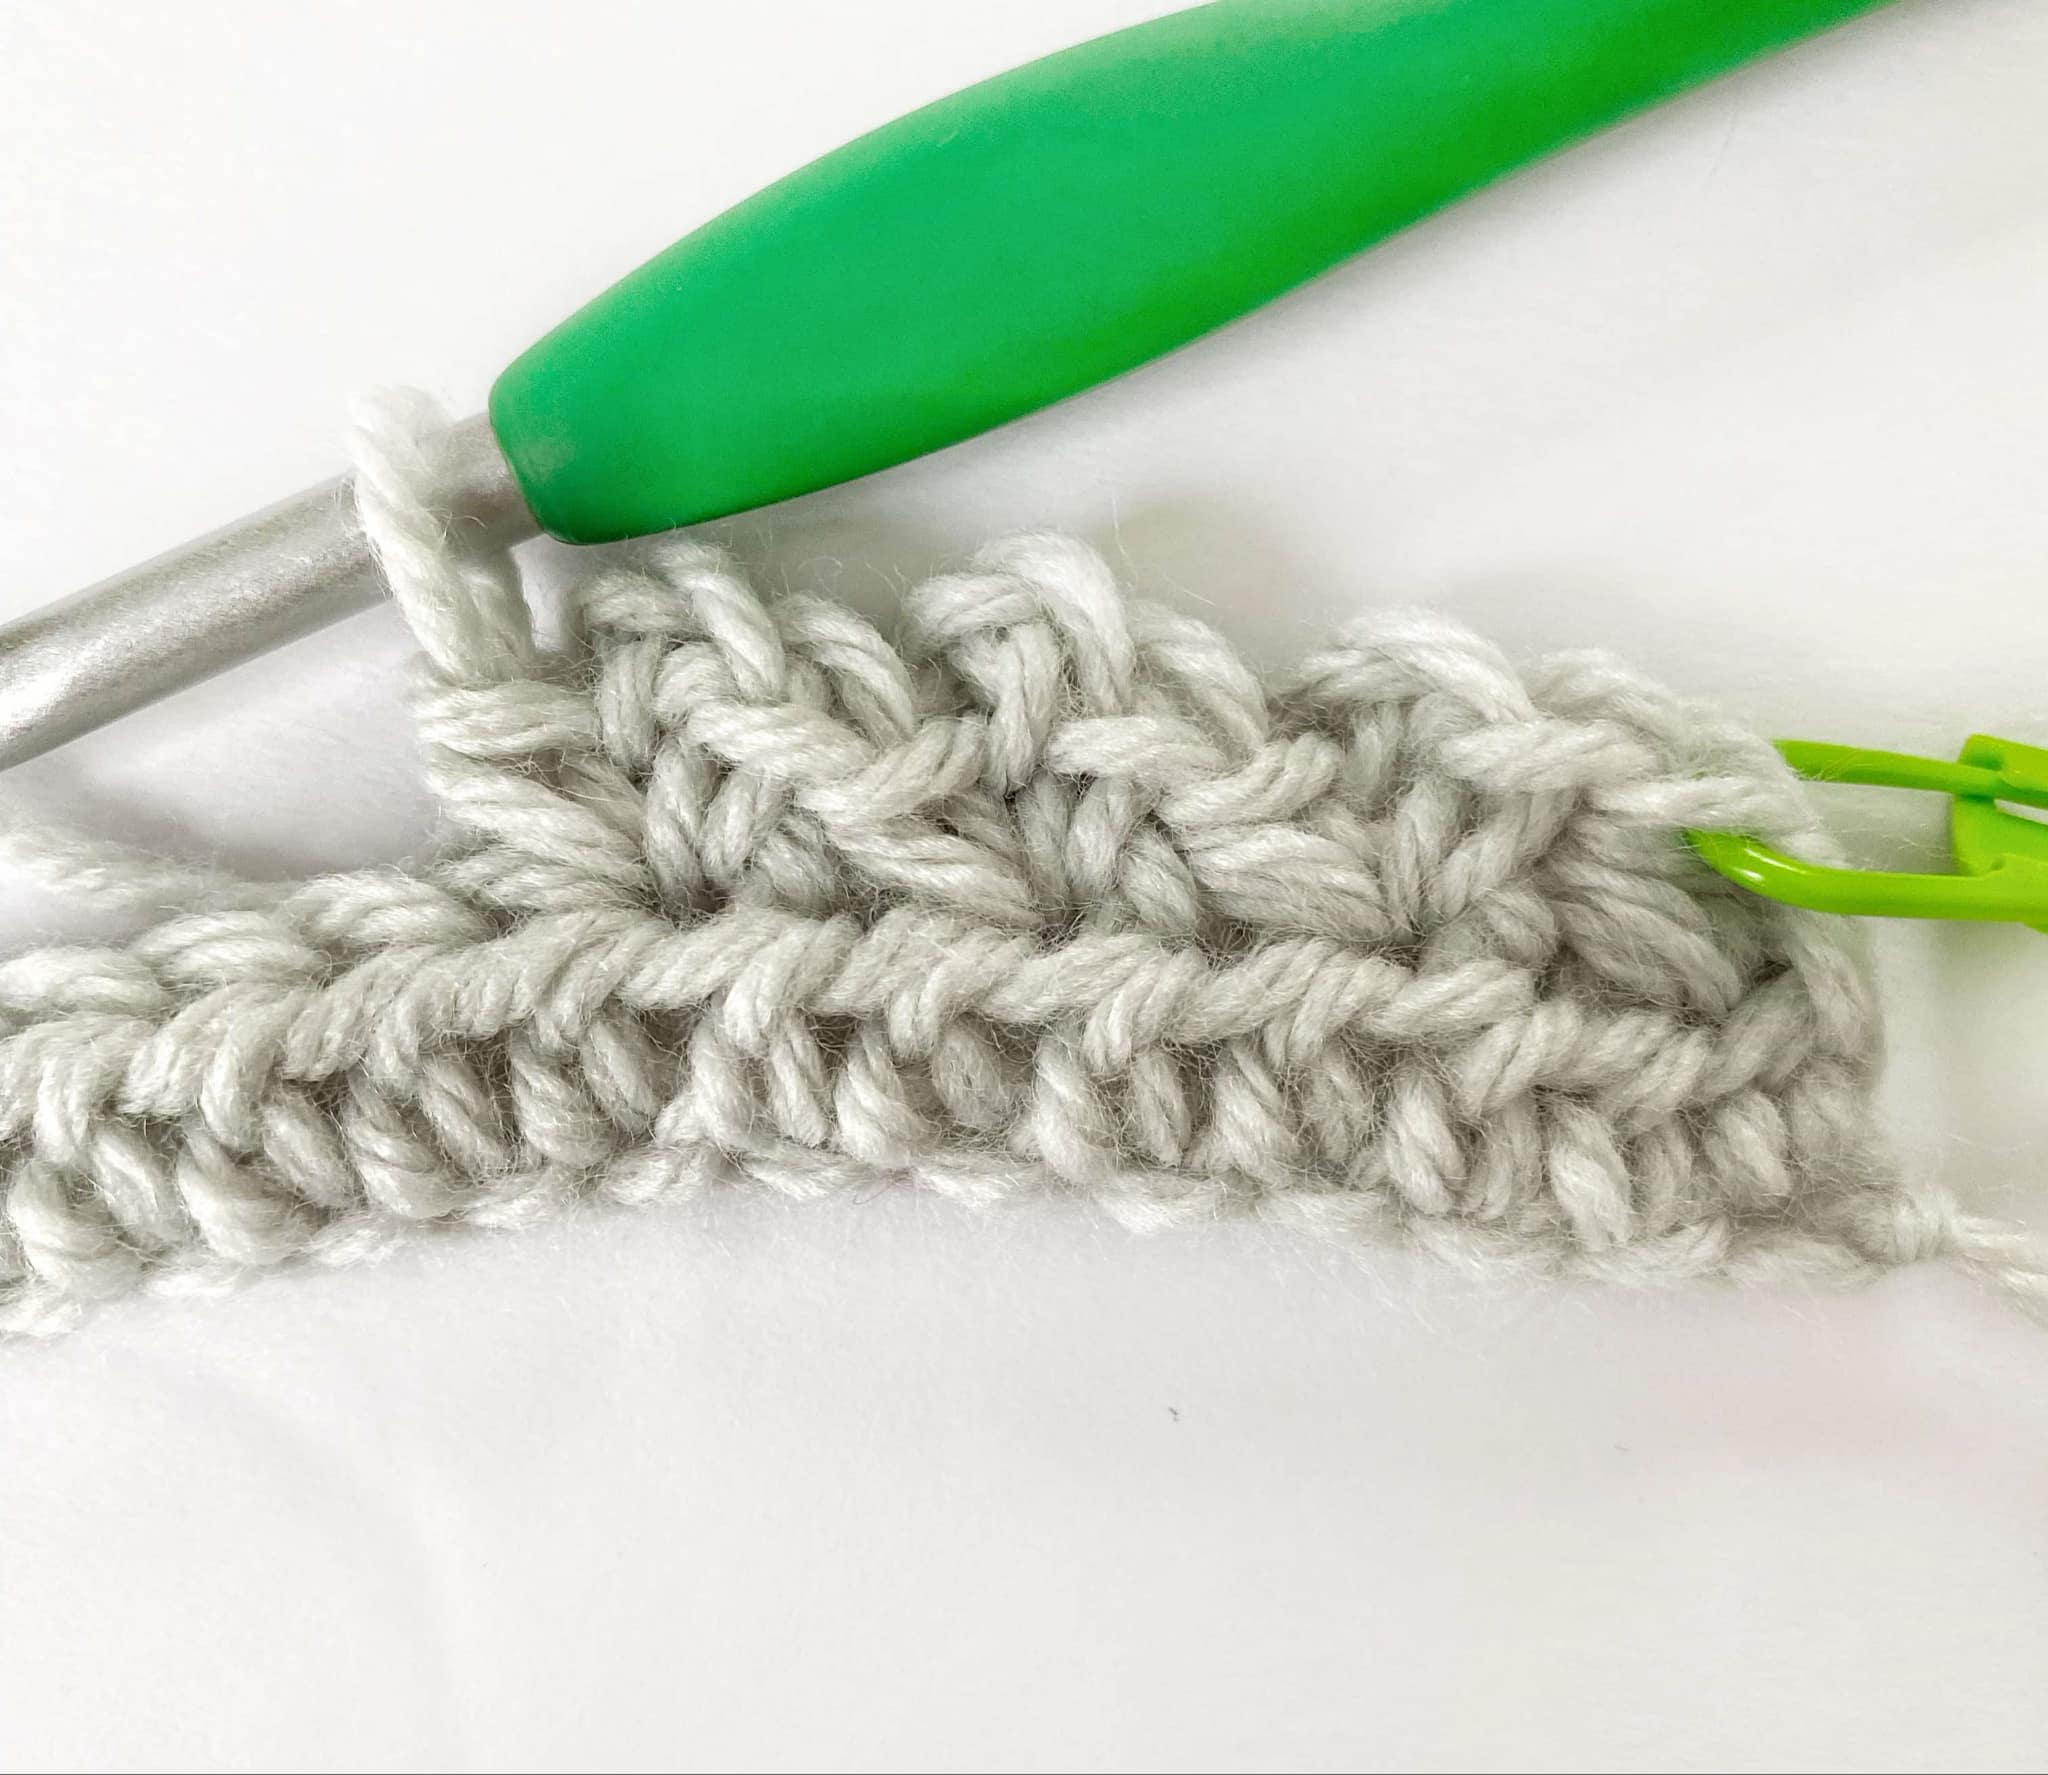
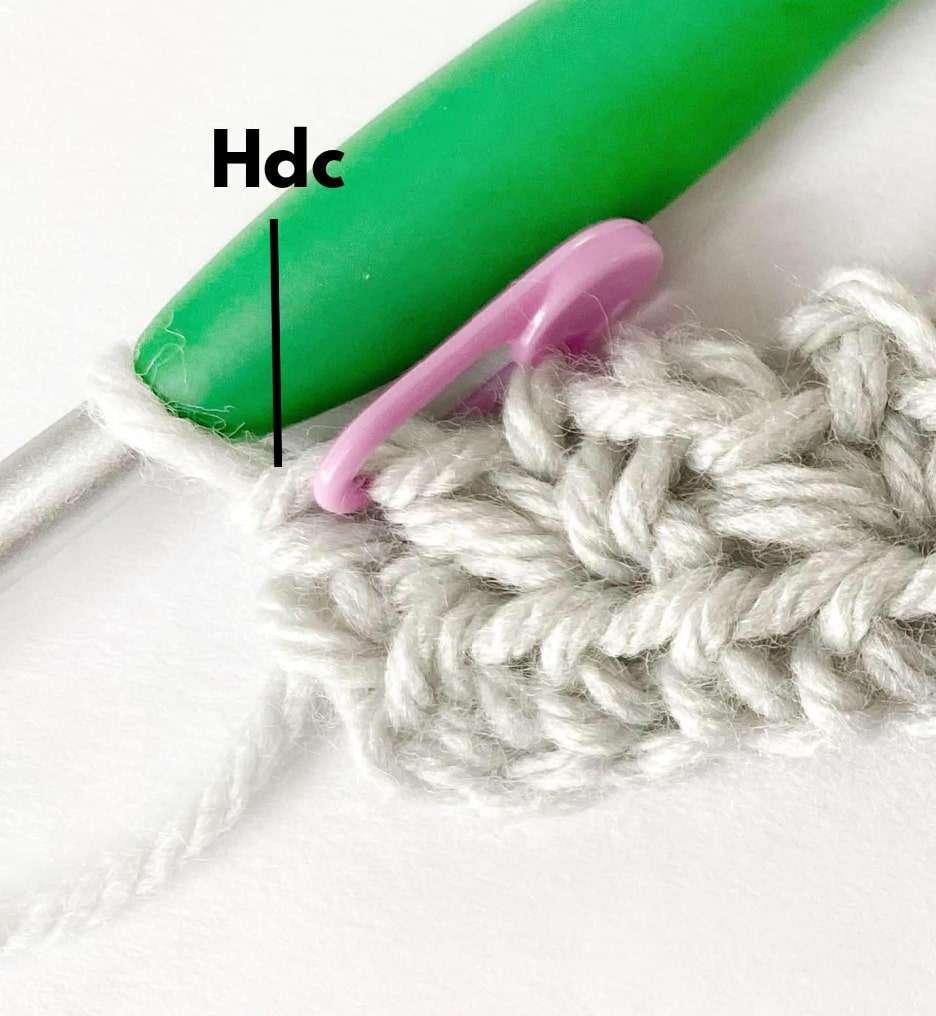
Ch 1, hdc in first st – mark with a stitch marker, [sk 1 st, (sc, ch 2, sc) in next st] until 2 sts remain, sk 1 st, hdc in last st – mark with a stitch marker. Turn.
- Stitch Count: 2 hdc, 124 sc, 62 ch-2 sp
Row 3 (RS):
Ch 1, hdc in first st – mark with a stitch marker, (sc, ch 2, sc) in each ch-2 sp across, hdc in last st – mark with a stitch marker. Turn.
- Stitch Count: 2 hdc, 124 sc, 62 ch-2 sp
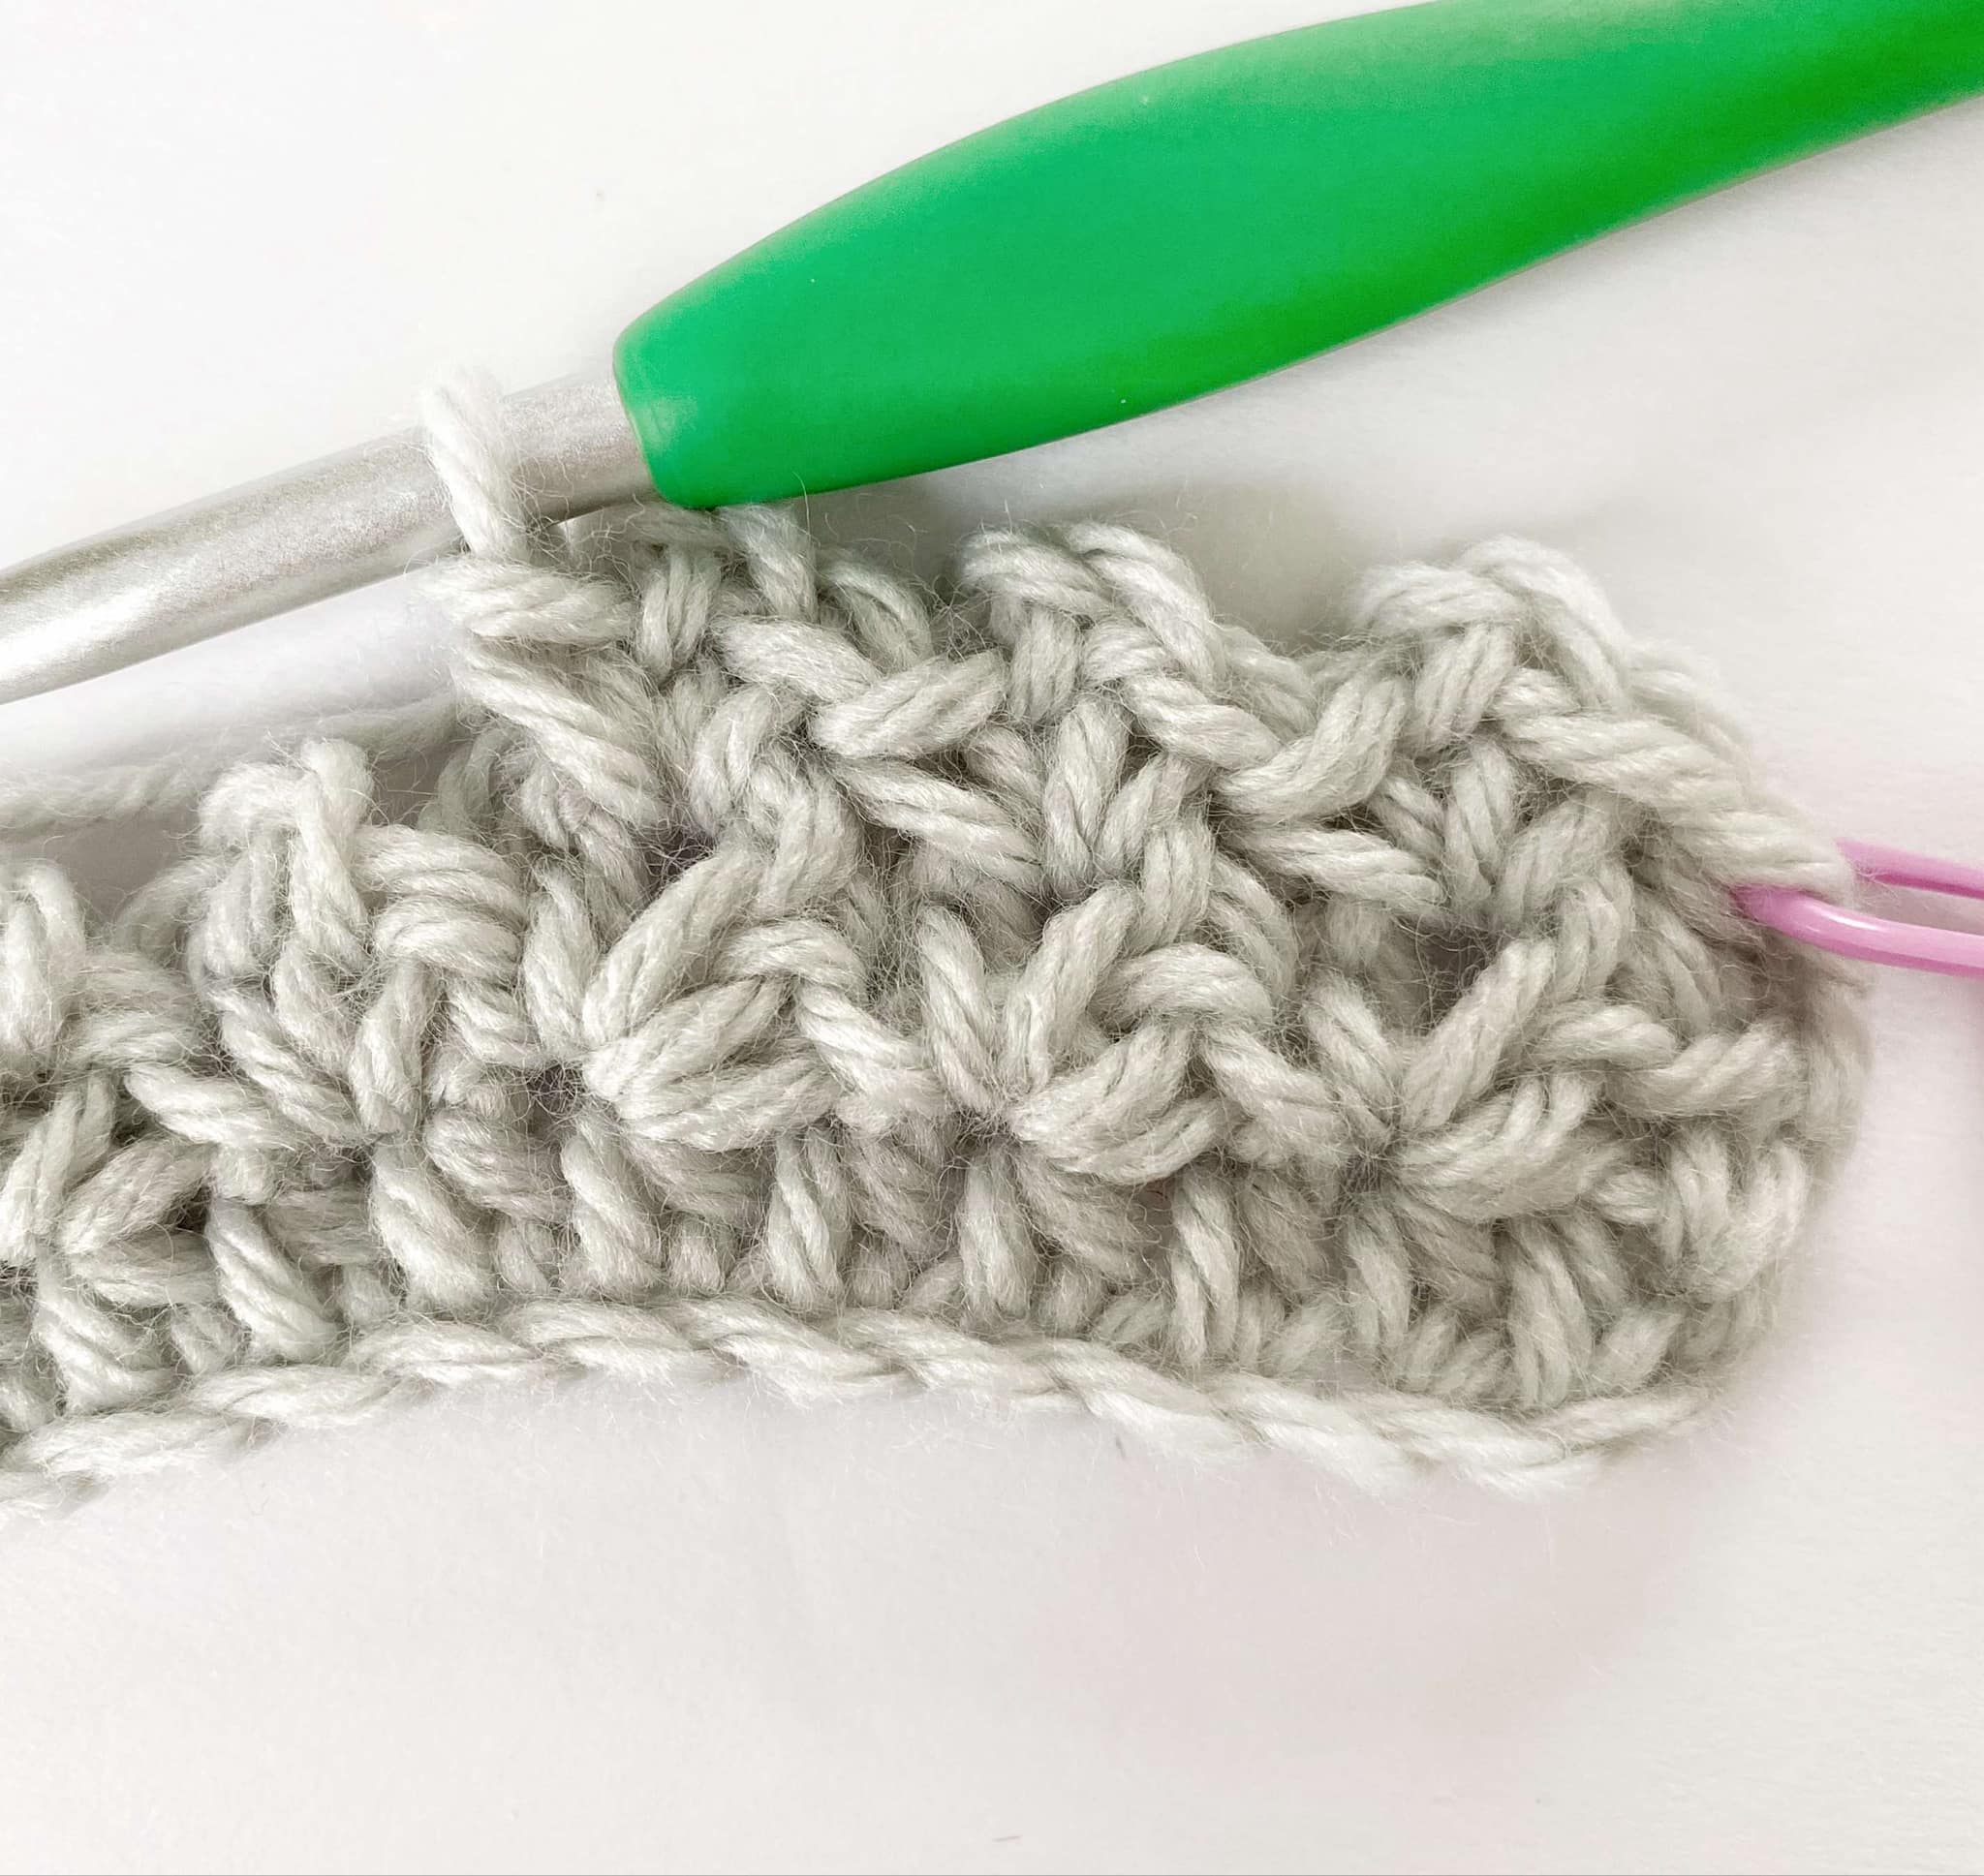
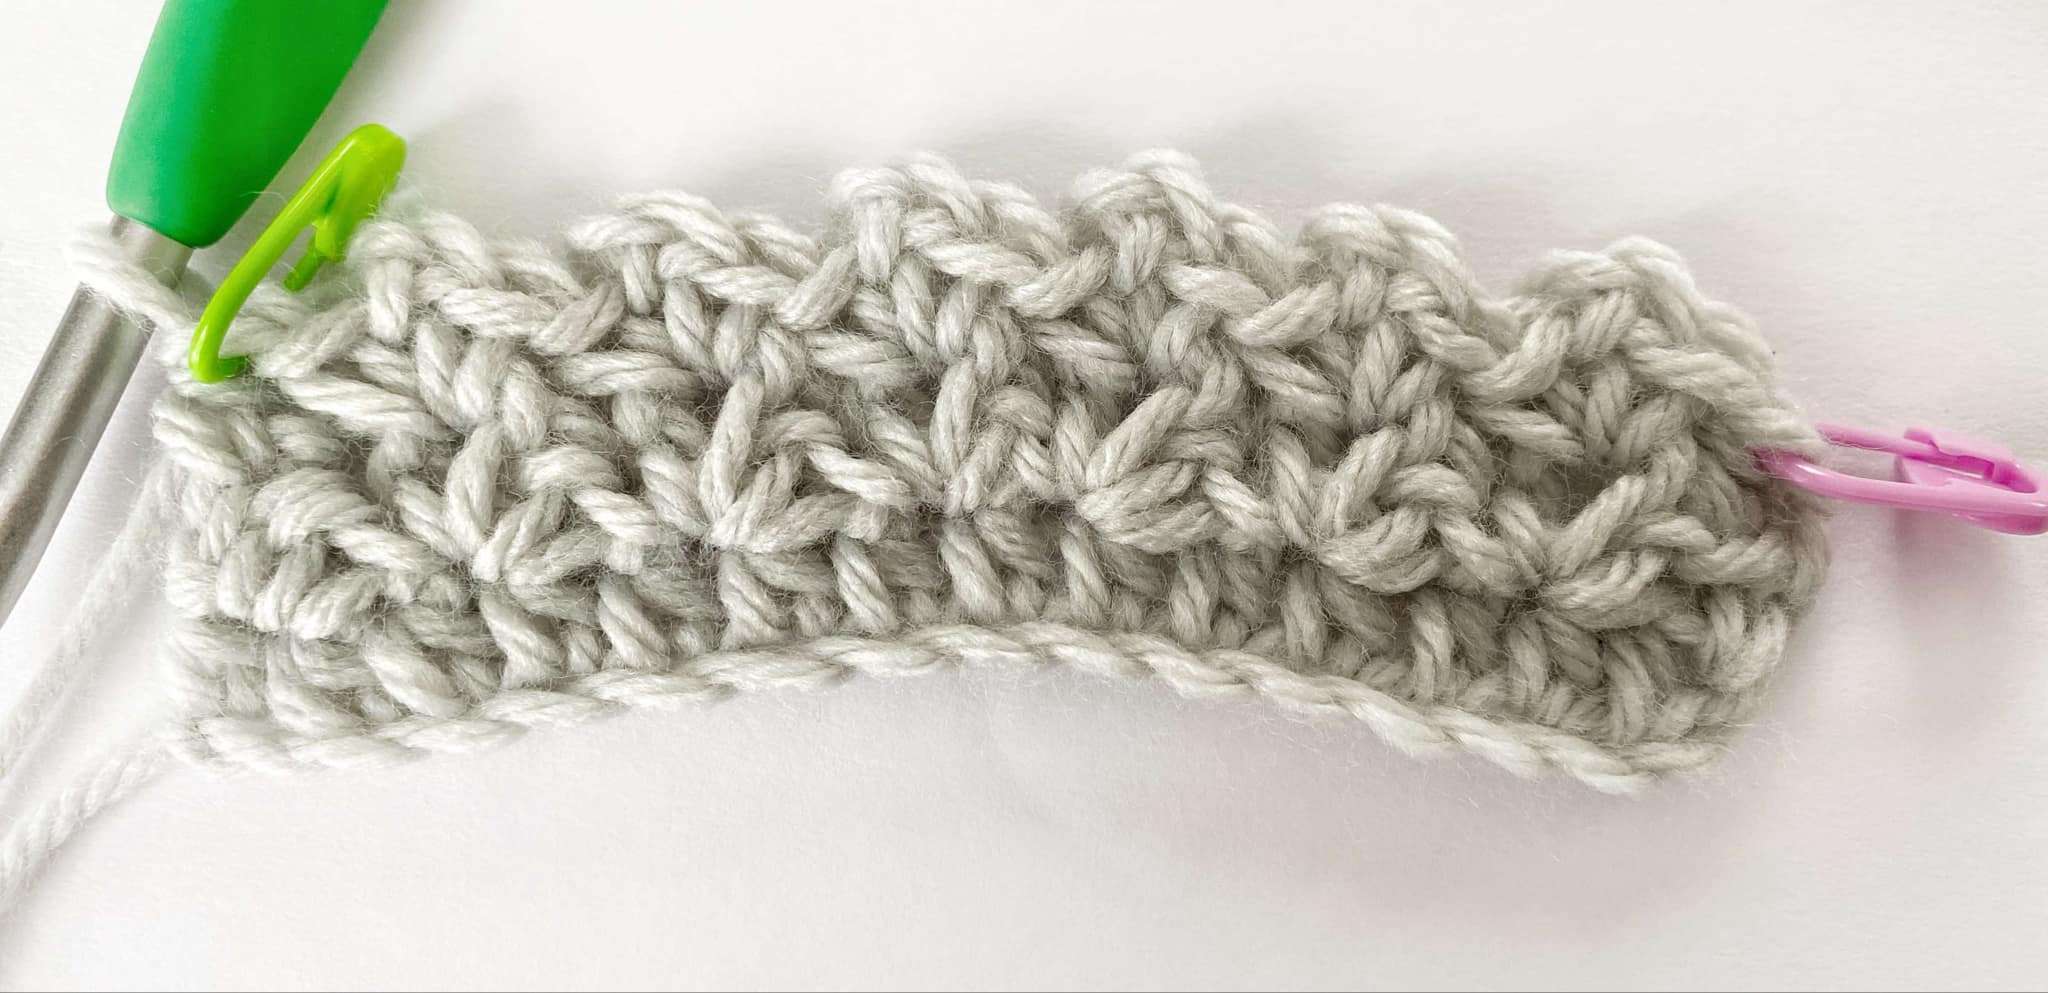
Rows 4 – 143:
Repeat Row 3, while following the colour changes below.
- Rows 1 – 8: A
- Rows 9 – 16: B
- Rows 17 – 24: C
- Rows 25 – 32: D
- Rows 33 – 40: E
- Rows 41 – 48: F
- Rows 49 – 96: G
- Rows 97 – 104: F
- Rows 105 – 112: E
- Rows 113 – 120: D
- Rows 121 – 128: C
- Rows 129 – 136: B
- Rows 137 – 144: A
Last Row (Row 144):
With Colour A, ch 1, 2 hdc in first st, 2 sc in each ch-2 sp across, hdc in last st. Fasten off and weave in all ends.
- Stitch Count: 3 hdc, 124 sc
Border:
This blanket does not have a border, but you can add one if you’d like to clean up the edges of your blanket or prefer the look of a border. Here are a few suggestions to get you thinking:
- Ribbed Border – Video Tutorial by B.Hooked
- Camel Stitch Border – Video Tutorial by Winding Road Crochet
- Single Crochet Border – Video Tutorial by Tiffany Hansen
- Pom-Pom Border – Video Tutorial by This Pixie Creates
- Braided Border – Video Tutorial by Naztazia
- Crab Stitch Border – Video Tutorial by Raffamusa Designs
Blocking the Blanket:
Blocking is the process of wetting a piece of crochet to make the ends and rows straight. To block this blanket, you will need a steamer or spray bottle, straight pins or blocking pins, and a blocking mat or foam.
Block your work by stretching out the blanket (vertically and horizontally) and placing pins along each side to hold it in place. Spray the blanket with water, or use a steamer, making sure to stay at least 2 inches away from the blanket. Gently press the water or steam into the blanket with your hands. Let the blanket dry completely before unpinning it.
Questions?
If you have any questions about the Colour your World Rainbow Spider Stitch Blanket, please send me an email through my contact page. I am happy to help!
End Notes:
Yay! You just made your first Colour your World Blanket. I hope you enjoy making and using your blanket! If you’d like to make more crochet blankets, explore some crochet patterns by clicking on the button below.
Disclaimer: You are welcome to sell items that you’ve made from this pattern; however, you are not allowed to use my pictures or sell my pattern as your own (Copyright @ ThisPixieCreates).
I hope you have a wonderful day!
Love, Dayna