

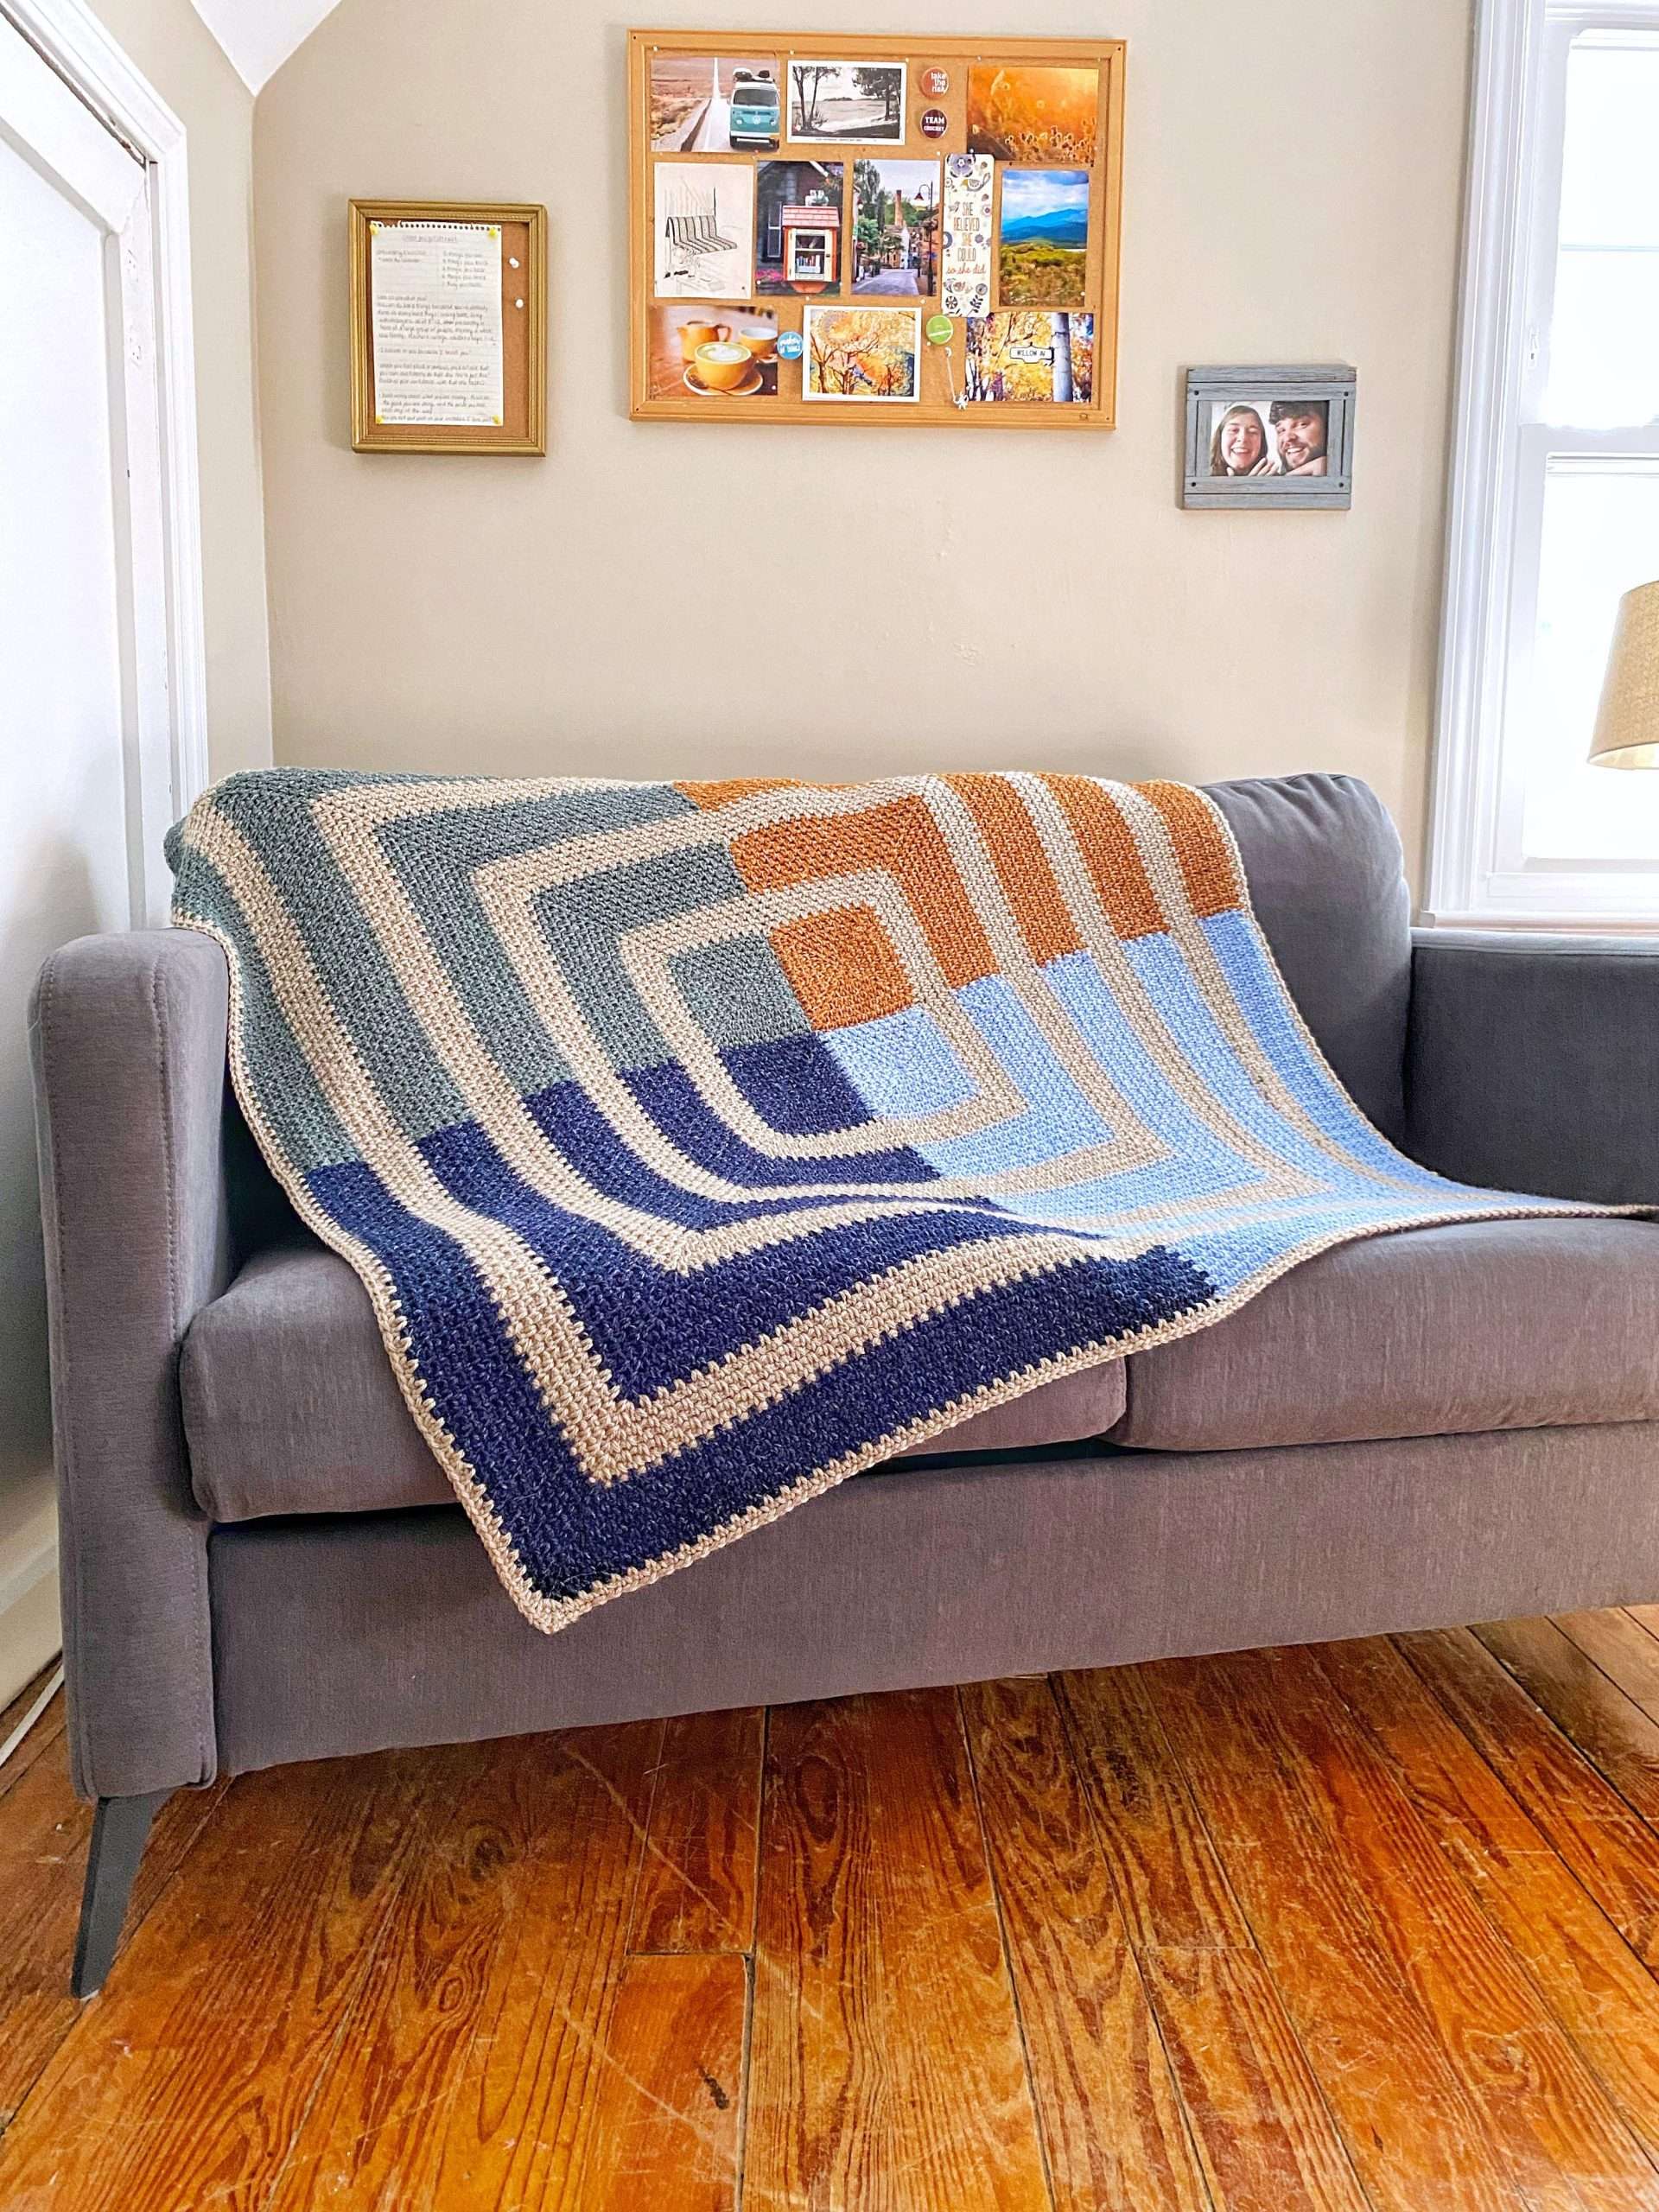
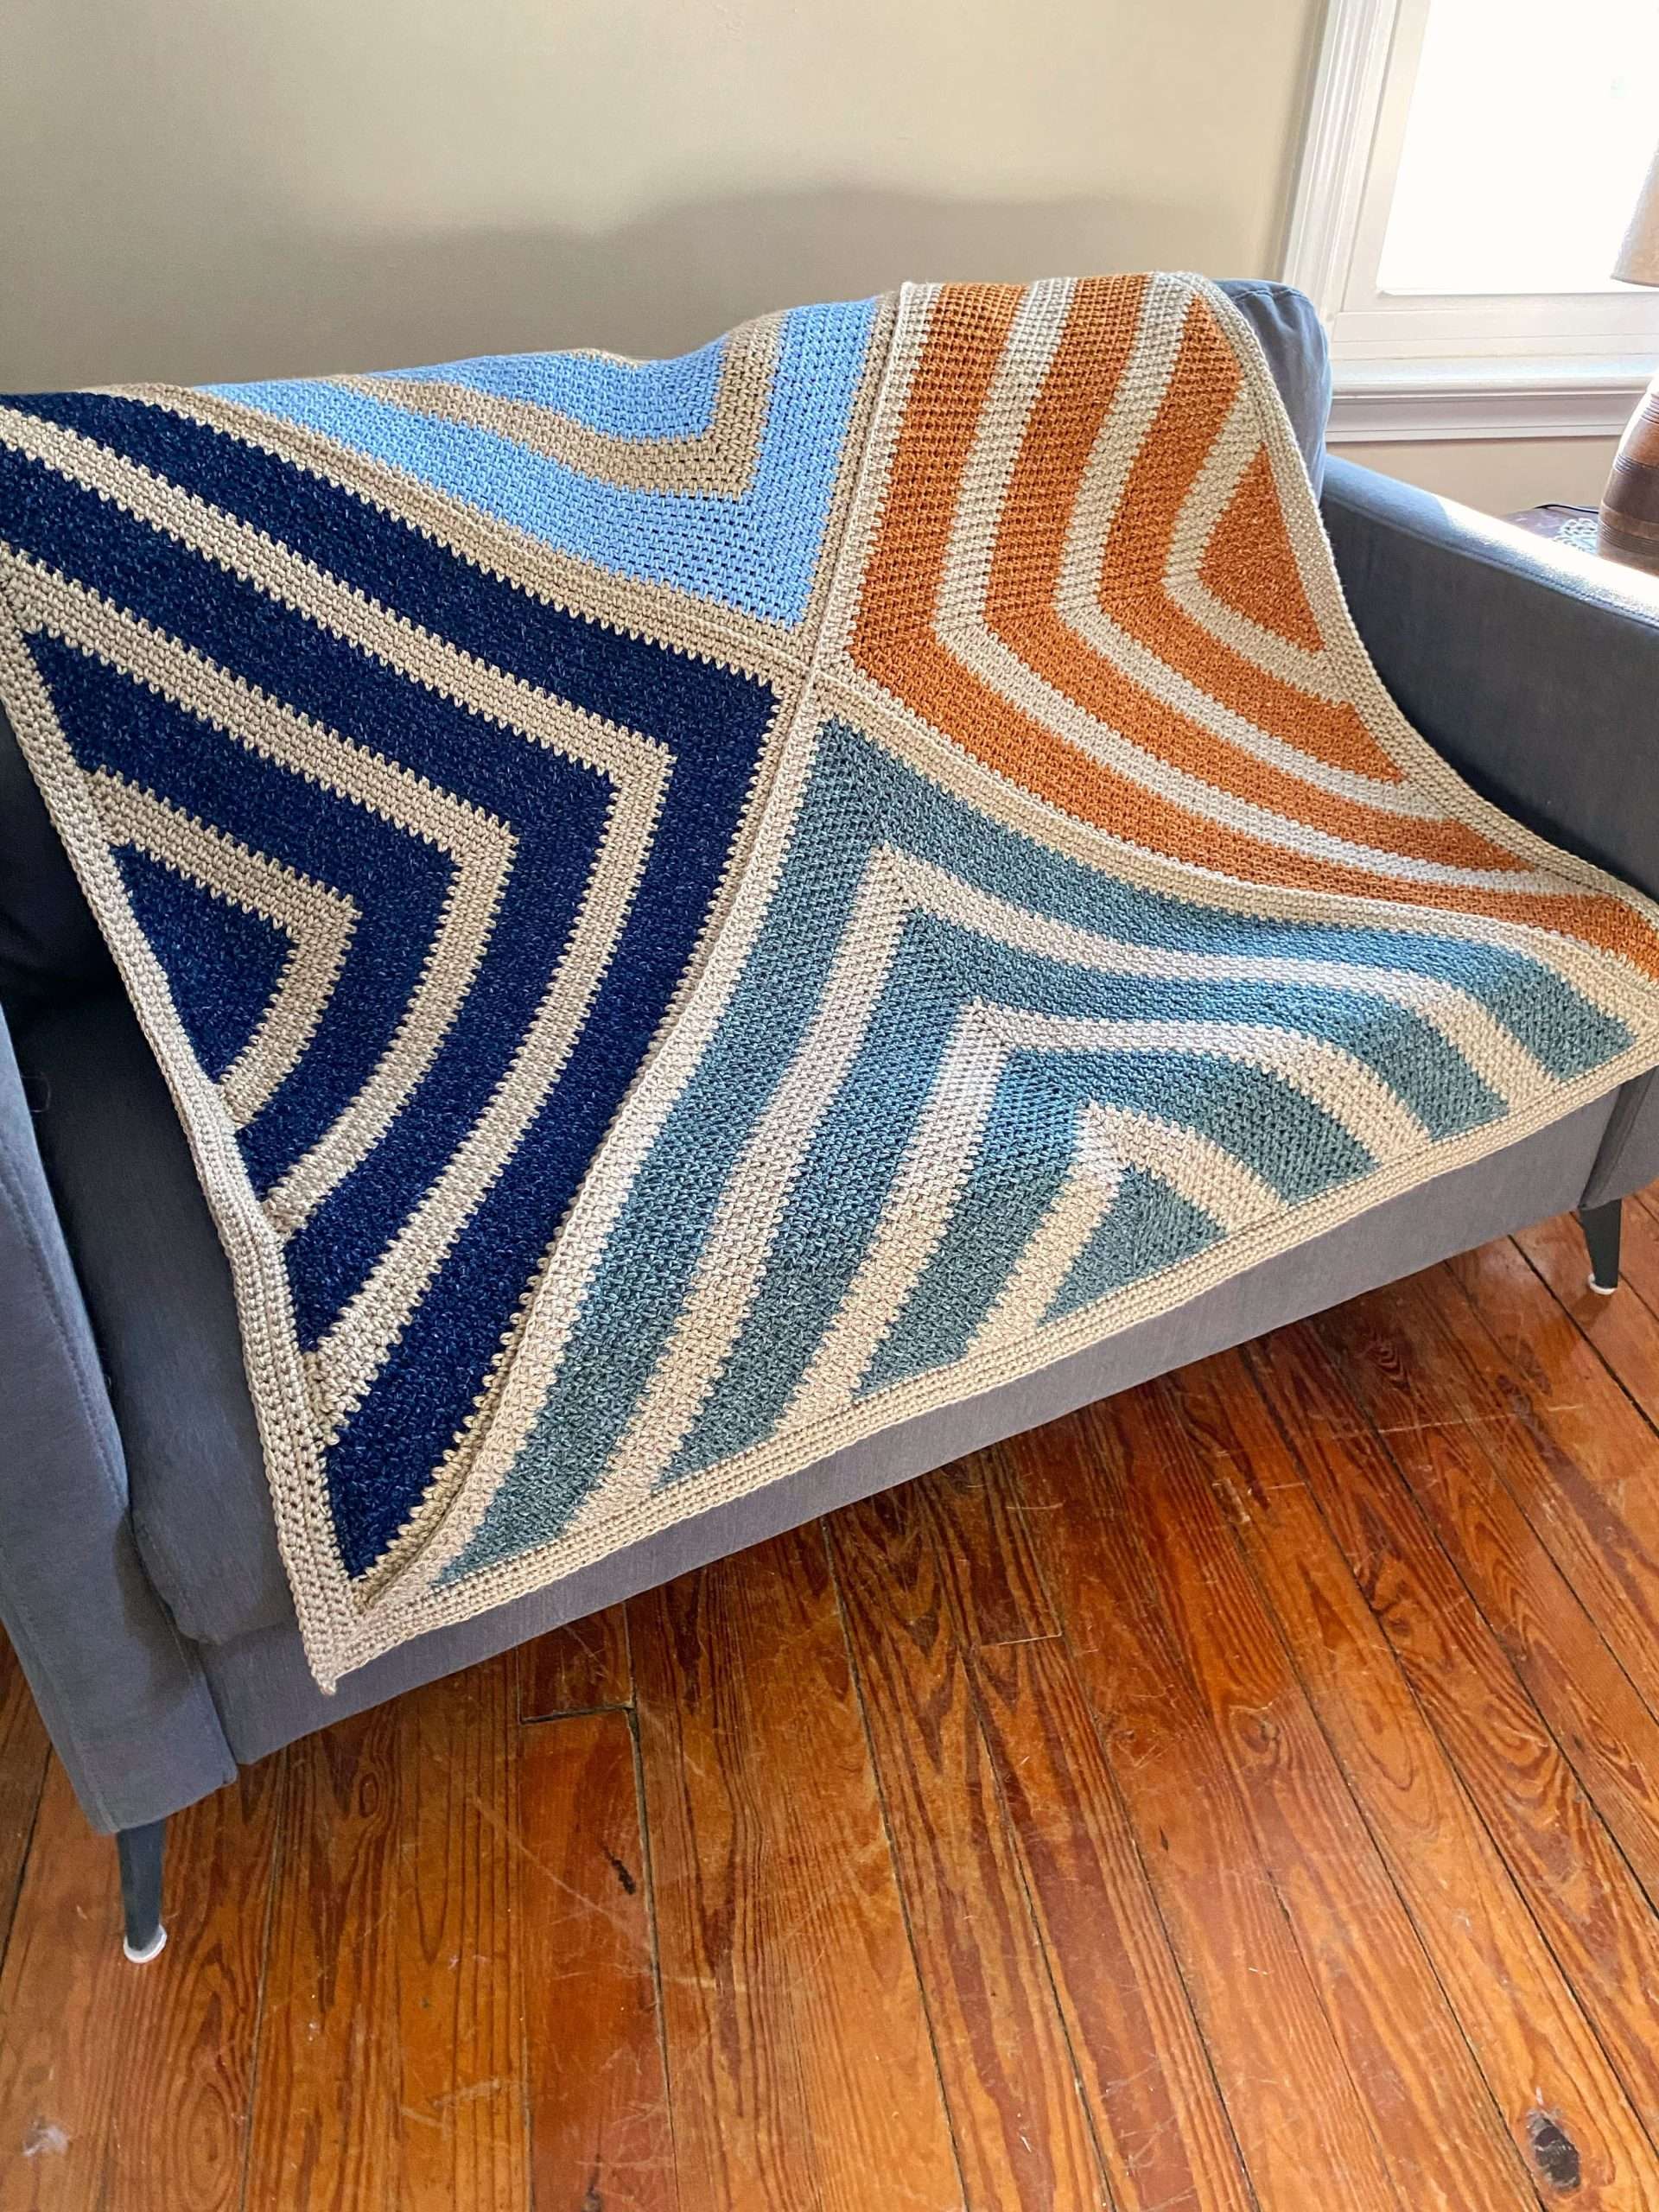
Hi guys! Last year, I shared the 4 Square Blanket – a moss stitch blanket made up of 4 center squares. Today I’m excited to share its mate – a similar blanket with its own spin on the moss stitch: the Four Triangles Blanket. This blanket is made up of – you guessed it – 4 moss stitch triangles.
If you’re looking for a modern striped blanket that you can easily customize to suit your needs, then this is the perfect project for you. Whether you make this blanket in 2 colours (1 main colour and 1 contrasting colour) or 5 (like I did), the result will be gorgeous.
The free crochet pattern below, shows you how to crochet a lapghan size blanket (46.5″ x 46.5″), but instructions are provided to make a custom size; and includes step-by-step pictures to help you.
I hope you enjoy making your blanket!
If you prefer to print the pattern, the ad-free printable PDF includes step-by-step video tutorials and instructions for 7 blanket sizes (Small Baby to King)!
Pin this Moss Stitch Triangle Blanket – HERE!
Pinning this pattern really makes a difference because it gets the pattern circulating, so other crocheters can see it. Thank you for taking the time to pin this pattern!

The materials and yarn section, along with the Etsy PDF button, contains affiliate links that support the content on ThisPixieCreates. If you make a purchase through one of my affiliate links, I may receive a small commission, at no cost to you. Thank you so much for your support! Find more information about affiliate links, as well as my Privacy & Disclosures Policy here.
Crochet Skill Level: Advanced Beginner
This moss stitch triangle blanket is geared towards advanced beginners who know how to make a single crochet and chain stitch and have made one or two crochet projects before.
Each triangle follows a one-row repeat, so once you get the hang of the first few rows, it is a fun, mindless project!
Materials:
Optional Materials:
- Steamer or Spray Bottle
- Straight Pins or Blocking Pins
- Blocking Mat or Foam Board
Yarn:
- Yarn Note: You can use ANY medium 4 (worsted/aran) weight yarn as a substitute.
- Lion Brand Jeans, Weight 4 Medium (100% Acrylic, 246 yd / 225 m, 100 g / 3.5 oz)
- Vintage (CC1)
- Top Stitch (CC2)
- Brand New (CC3)
- Faded (CC4)
- Lion Brand Heartland, Weight 4 Medium (100% Acrylic, 251 yd / 230 m, 142 g / 5 oz)
- Grand Canyon (Main Colour – MC)
Yardage:
- Main Colour (MC): 895 yds / 645 m – 4 skeins
- Colours A – D: 305 yds / 270 m – 2 skeins of each colour
- Total: 2115 yds / 1724 m
Abbreviations:
- Ch – chain
- St(s) – stitch(es)
- Sp(s) – space(s)
- Sk – skip
- MR – magic ring
- Sl st – slip stitch
- Sc – single crochet
- YO – yarn over
- RS – right side
- WS – wrong side
- [ ] – repeat instructions inside brackets
- MC – main colour
- CC – contrasting colour (1, 2, 3, or 4)
Gauge: Approximately 17 sts x 15 rows of moss stitch pattern = 4” x 4”
- Stitches include ch-1 sps and sc, so 17 sts could mean 9 sc & 8 ch-1 sps, or 8 sc & 9 ch-1 sps.
- Moss Stitch Pattern can be found here if you’d like to make a gauge swatch:
- Ch 22
- Row 1: Sc in fourth ch from hook (3 skipped chs count as a sc and ch 1), [ch 1, sk 1 ch, sc in next ch] to end of row. Turn. <11 sc, 10 ch-1 sp>
- Rows 2 – 17: Ch 3 (counts as a sc and ch 1), sc in first ch-1 sp, [ch 1, sc in next ch-1 sp] to end of row. The last sc should be in the beginning ch-2 of the previous row. Turn. <11 sc, 10 ch-1 sp>
- We crocheted a few more stitches and rows, so that our gauge is more accurate. If your gauge is too small (more than 17 sts or 15 rows), try using a thicker weight 4 yarn or a larger crochet hook. If your gauge is too big (less than 17 sts or 15 rows), try using a thinner weight 4 yarn or a smaller crochet hook. You can also try adjusting your tension.
Pattern Measurement:
The Four Triangles Blanket is a lapghan size that measures approximately 46.5″ wide x 46.5″ long, including the border. The border is crocheted at the end of the blanket, and it adds approximately 2.5″ to the length and width of the blanket.
Other Crochet Blankets You’ll Love!


Customize the Size of Your Blanket:
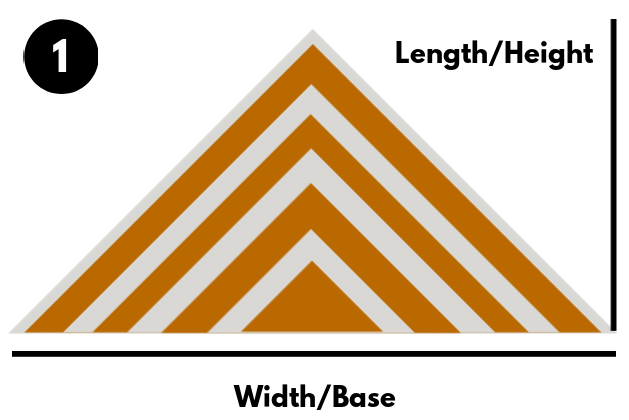
This blanket is a square, which means that the length and width will be the same.
- The width (base) of the triangle determines the size of the blanket.
- To make your blanket smaller or larger, repeat Row 4 until satisfied with the width of the first triangle – this triangle sets the tone for the rest of the blanket. The final 3 rows of the triangle should be done in the MC.
- Keep track of the number of rows worked because you need to repeat this process for the other 3 triangles. Then finish the blanket with the border!
Moss Stitch Triangle Blanket Construction:
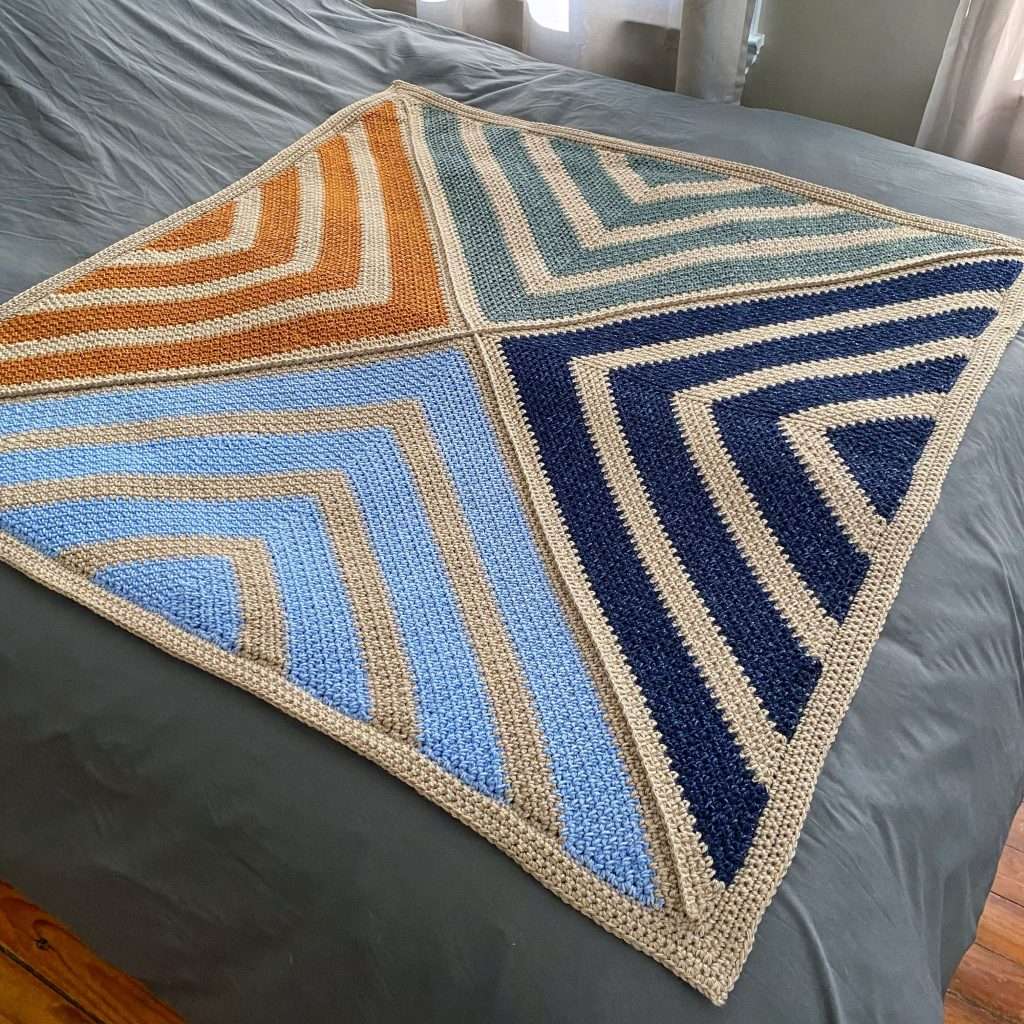
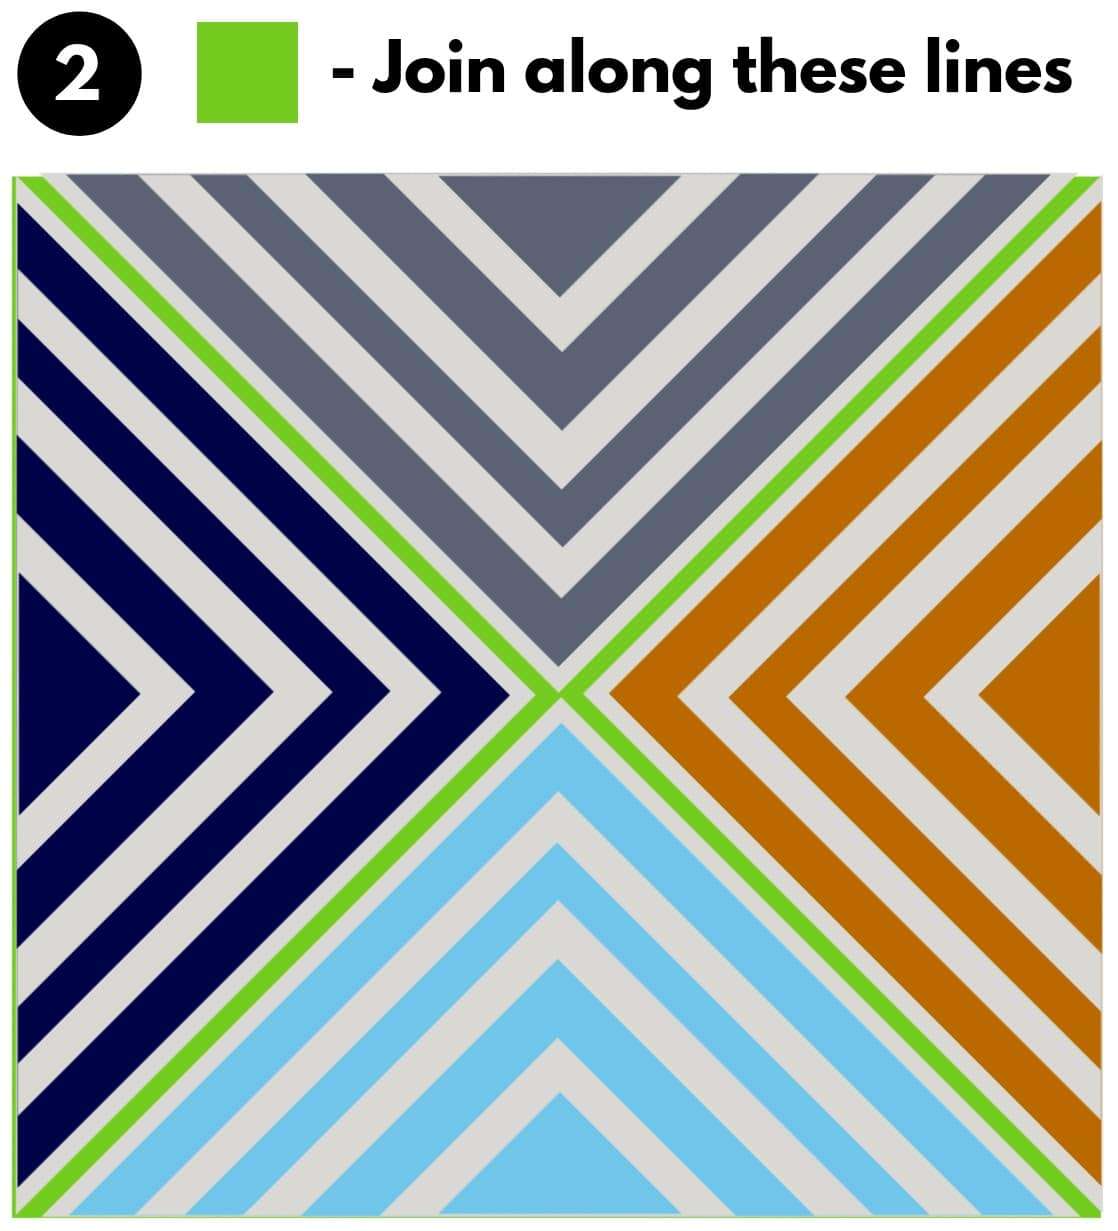
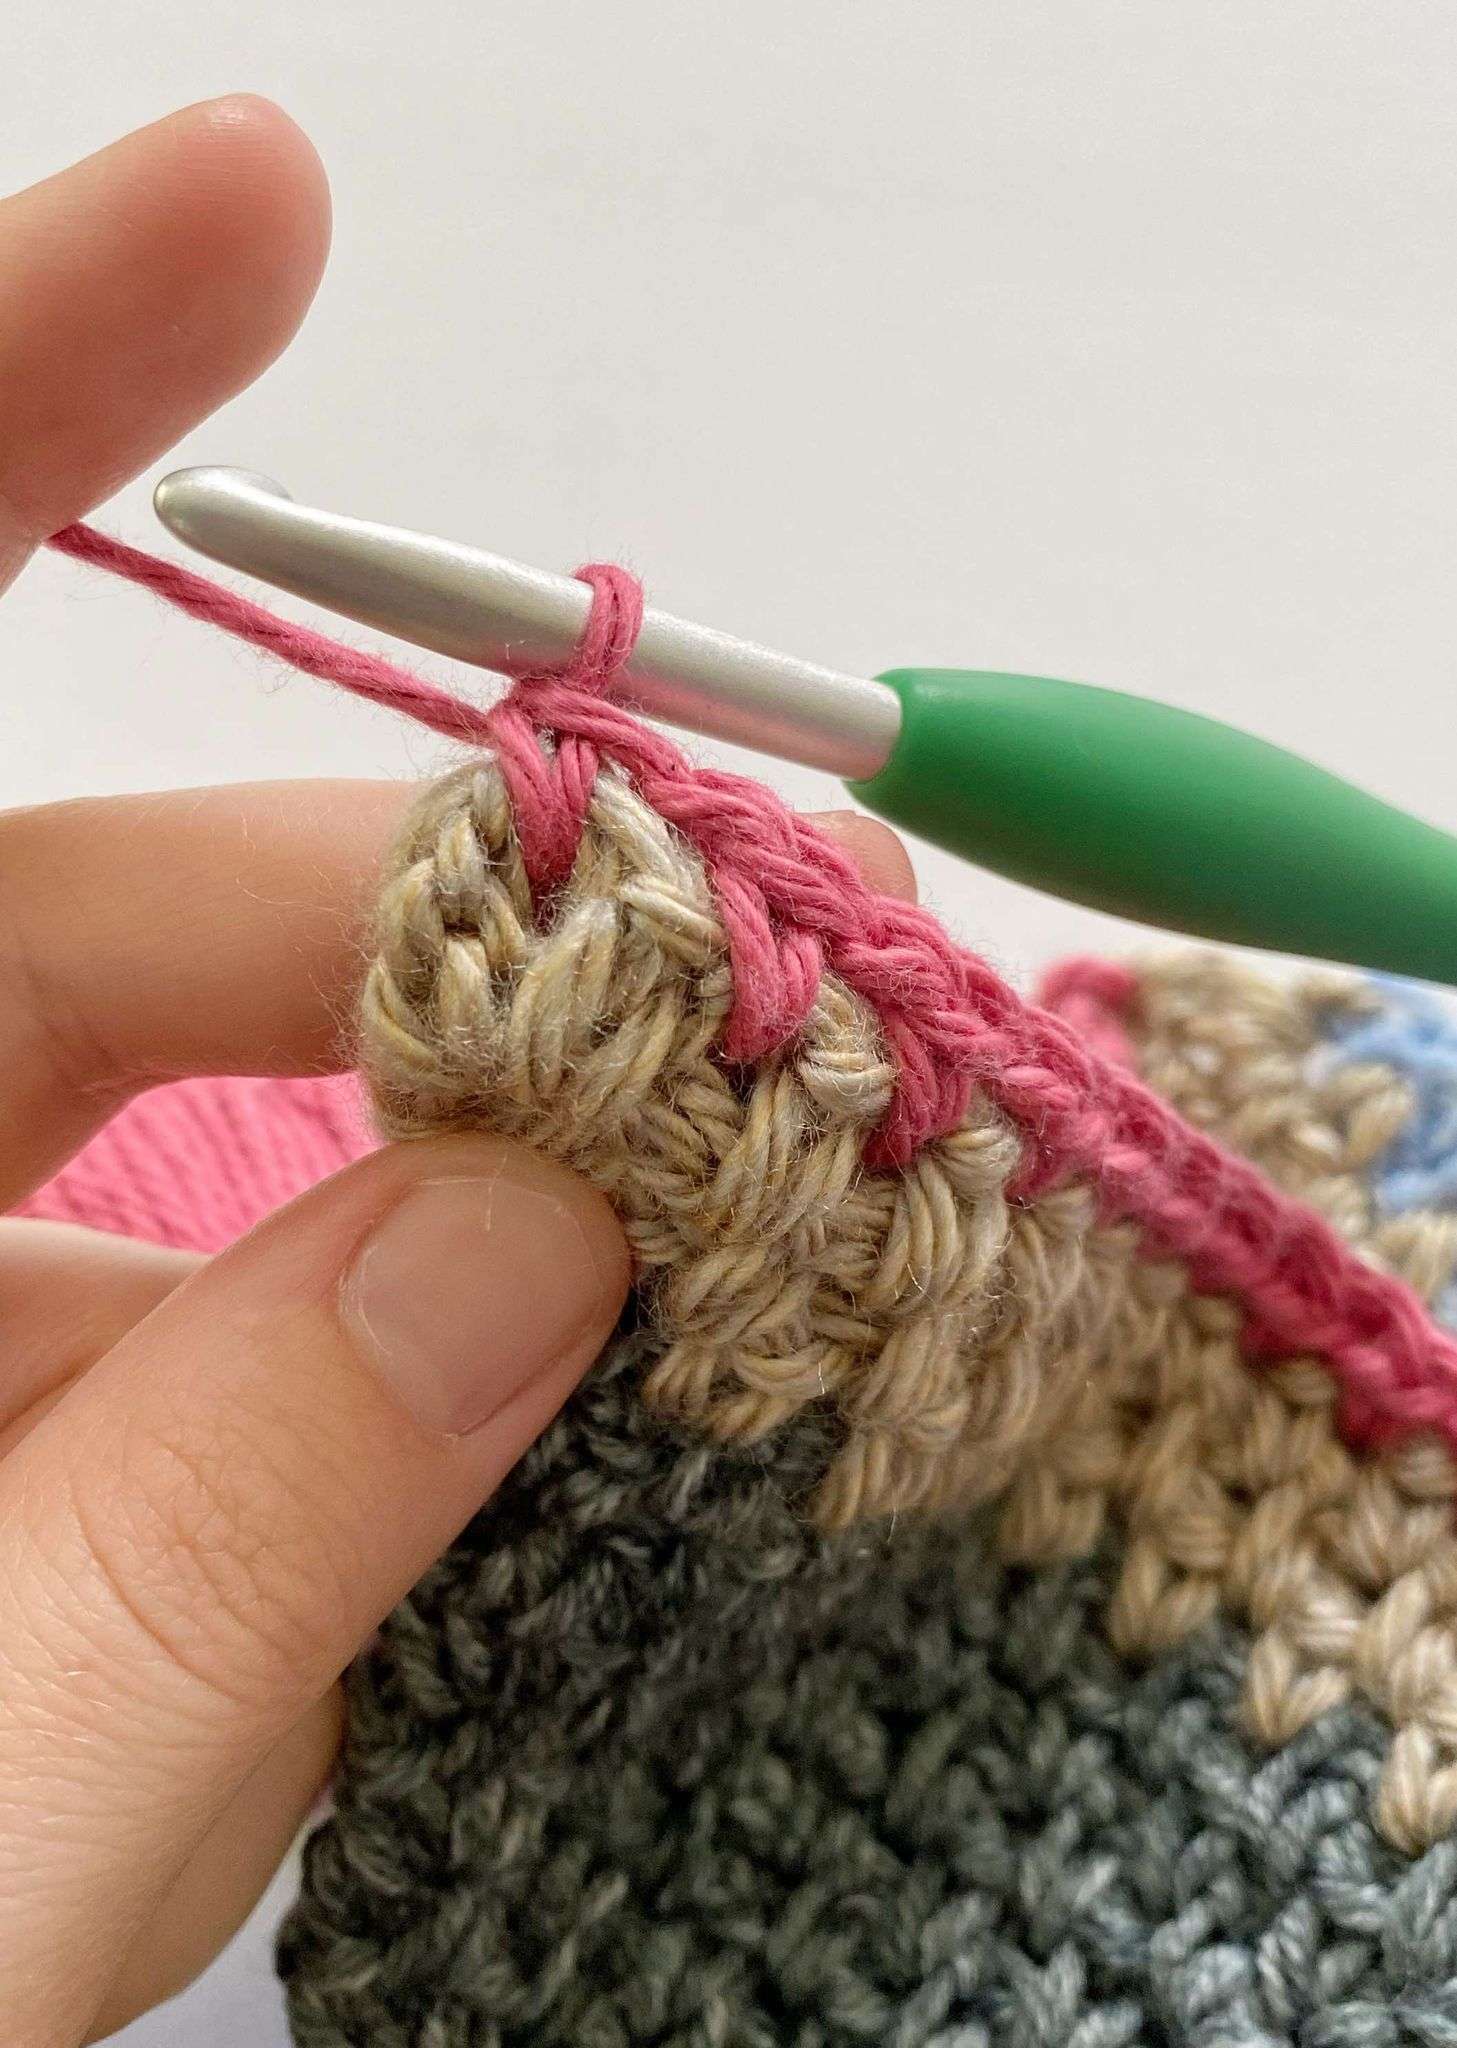
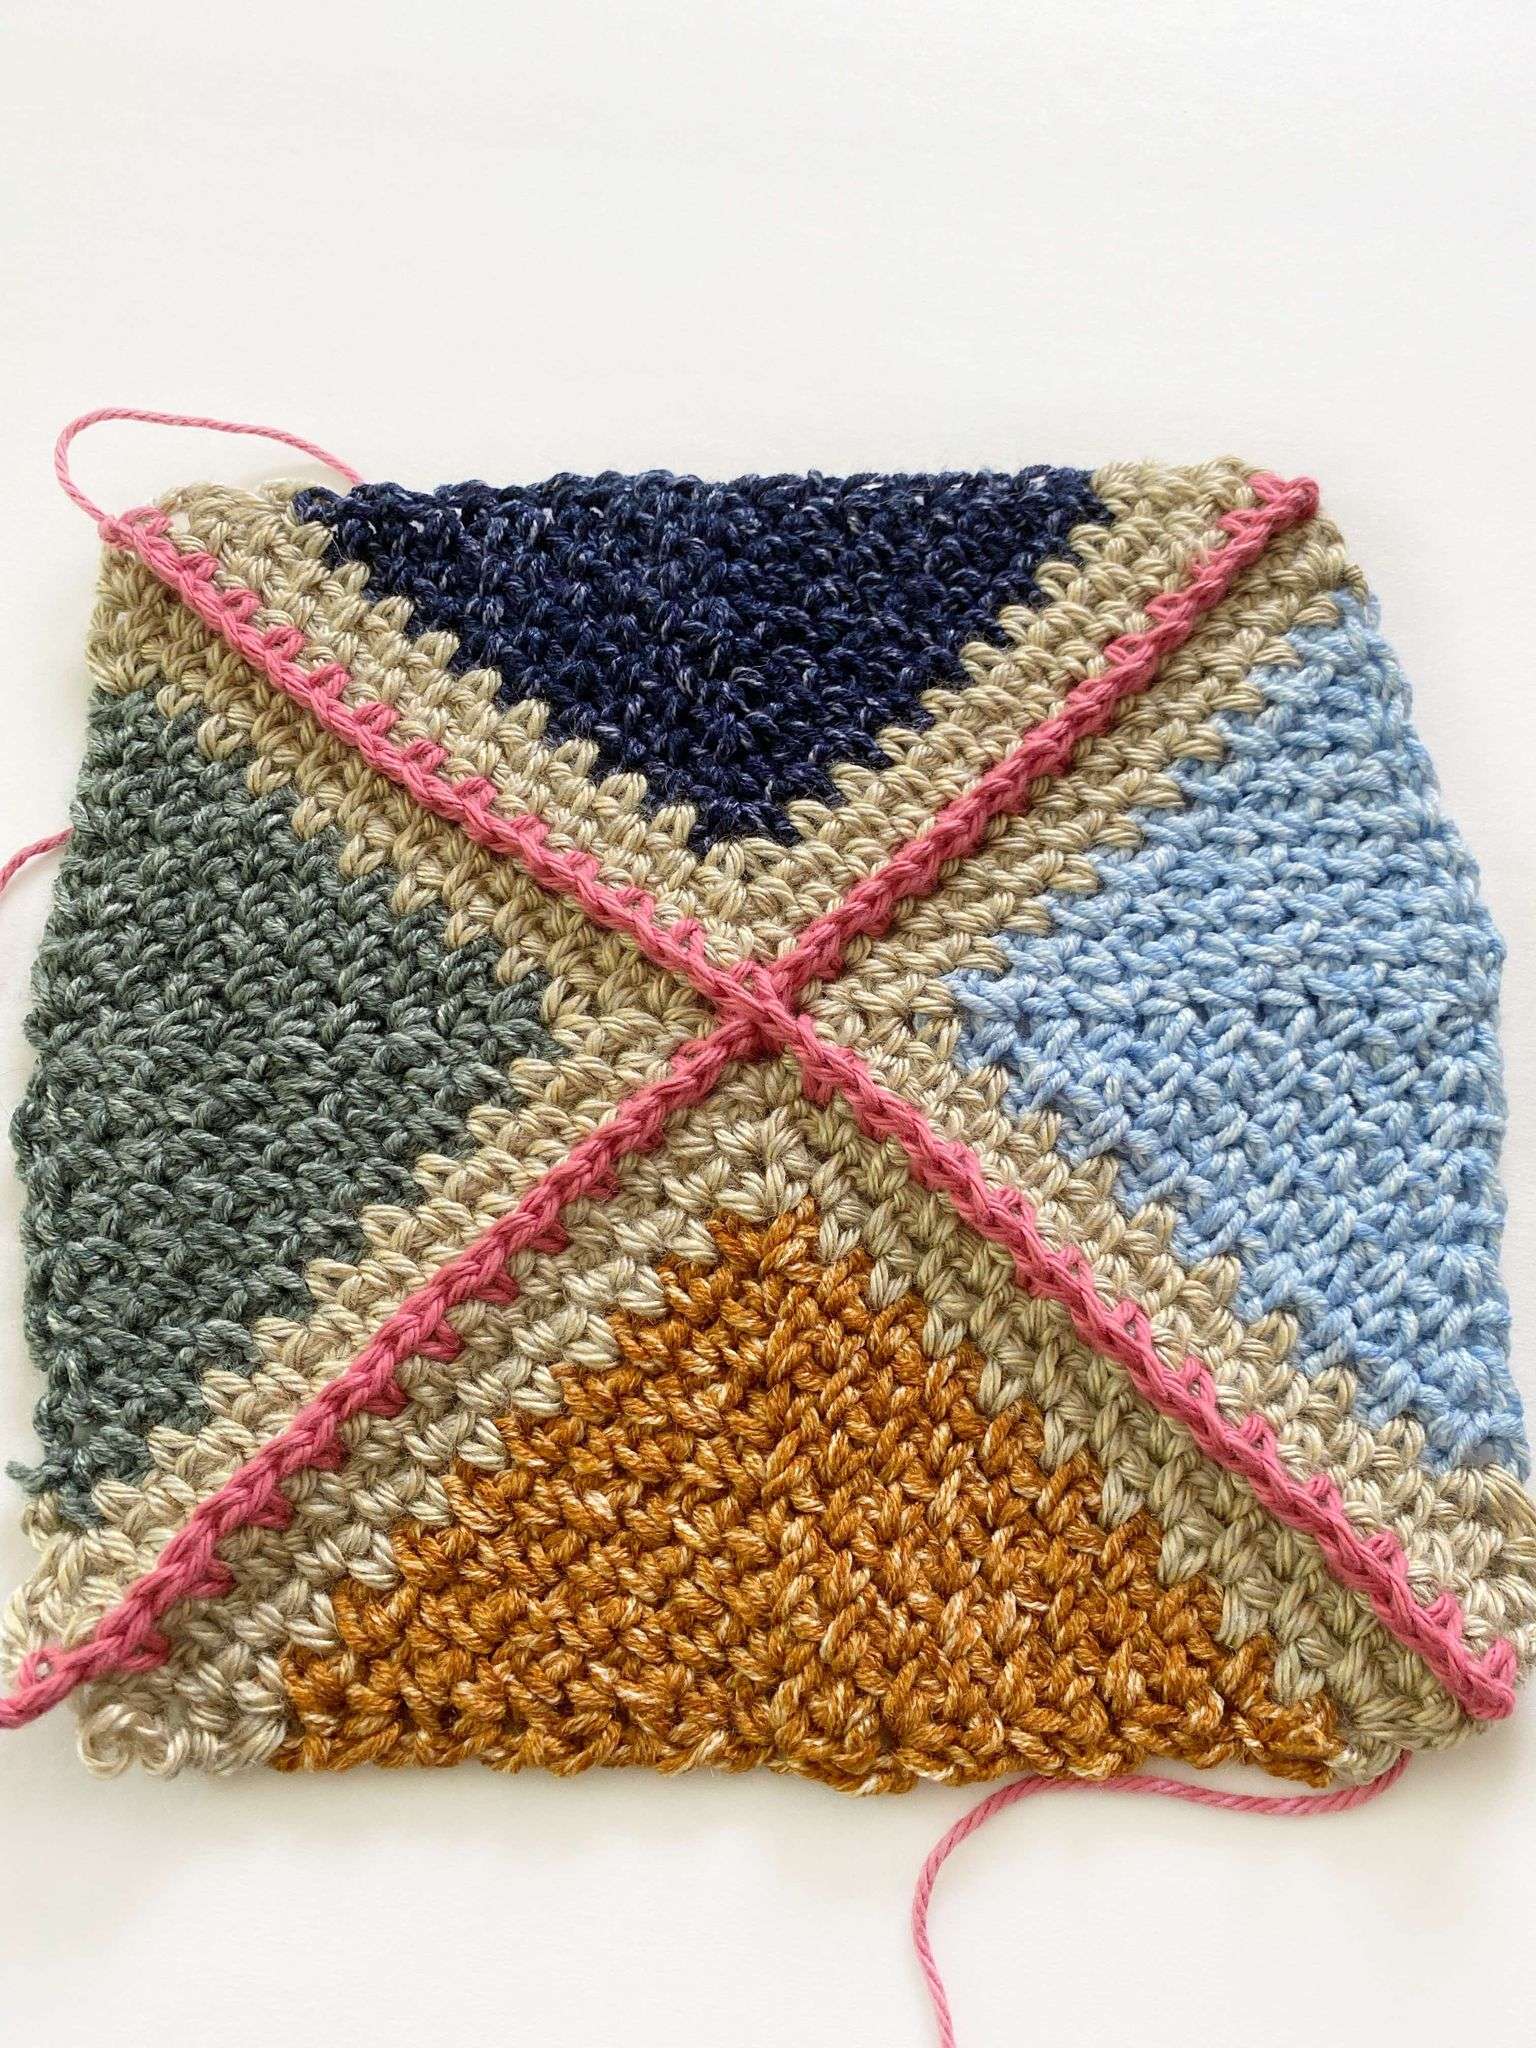
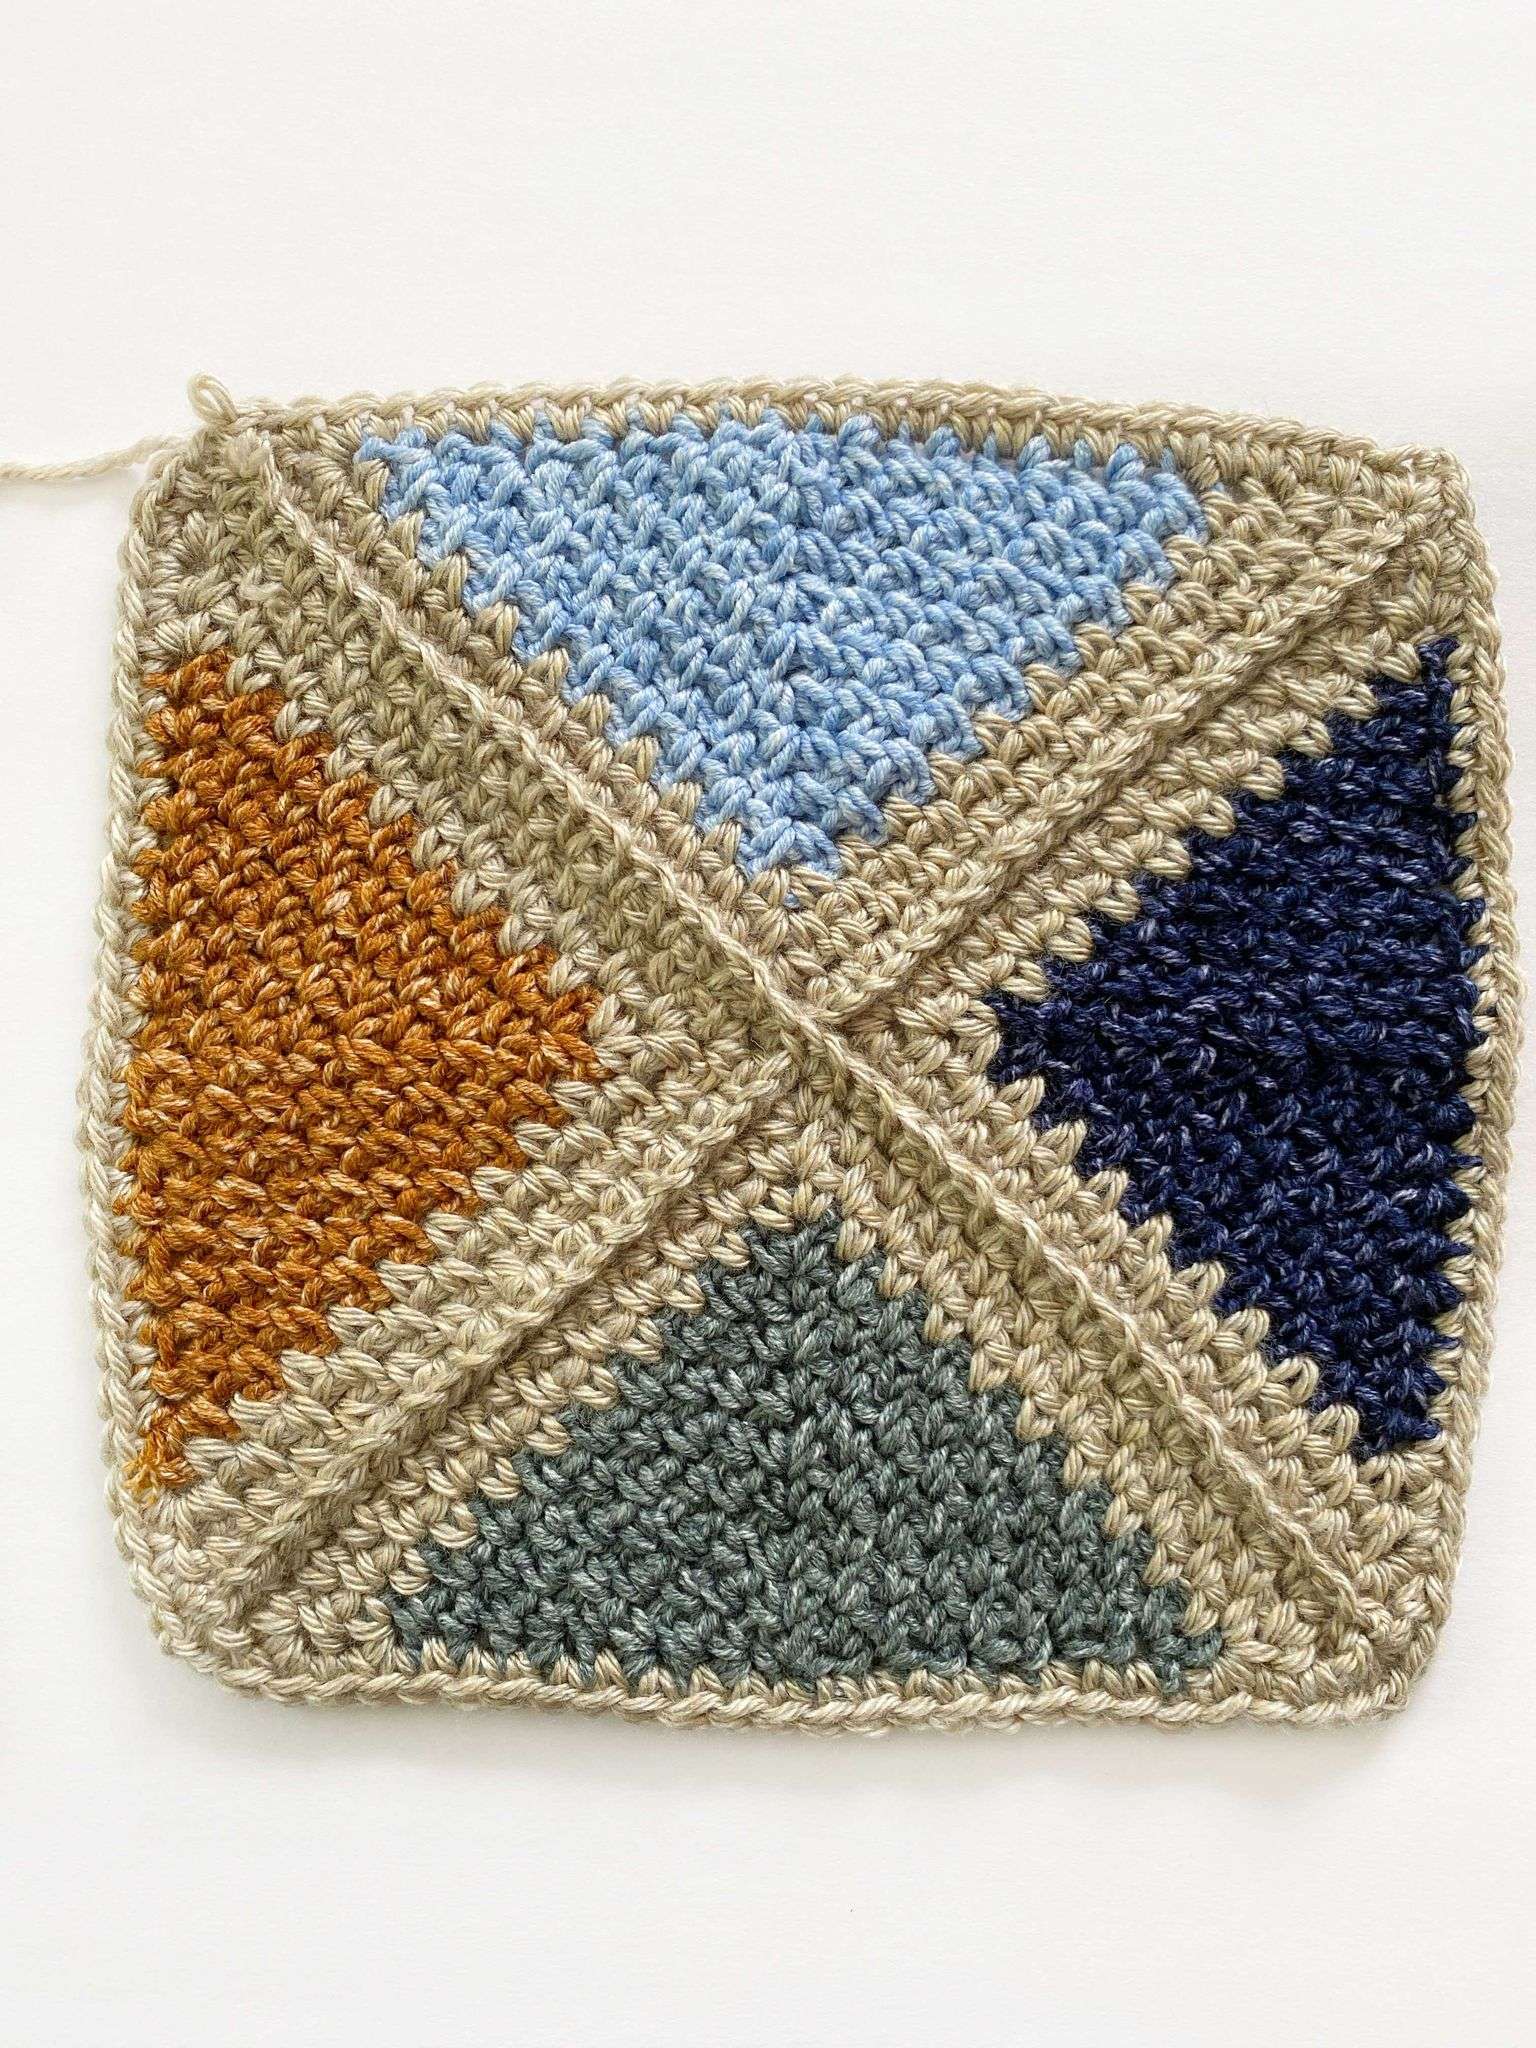
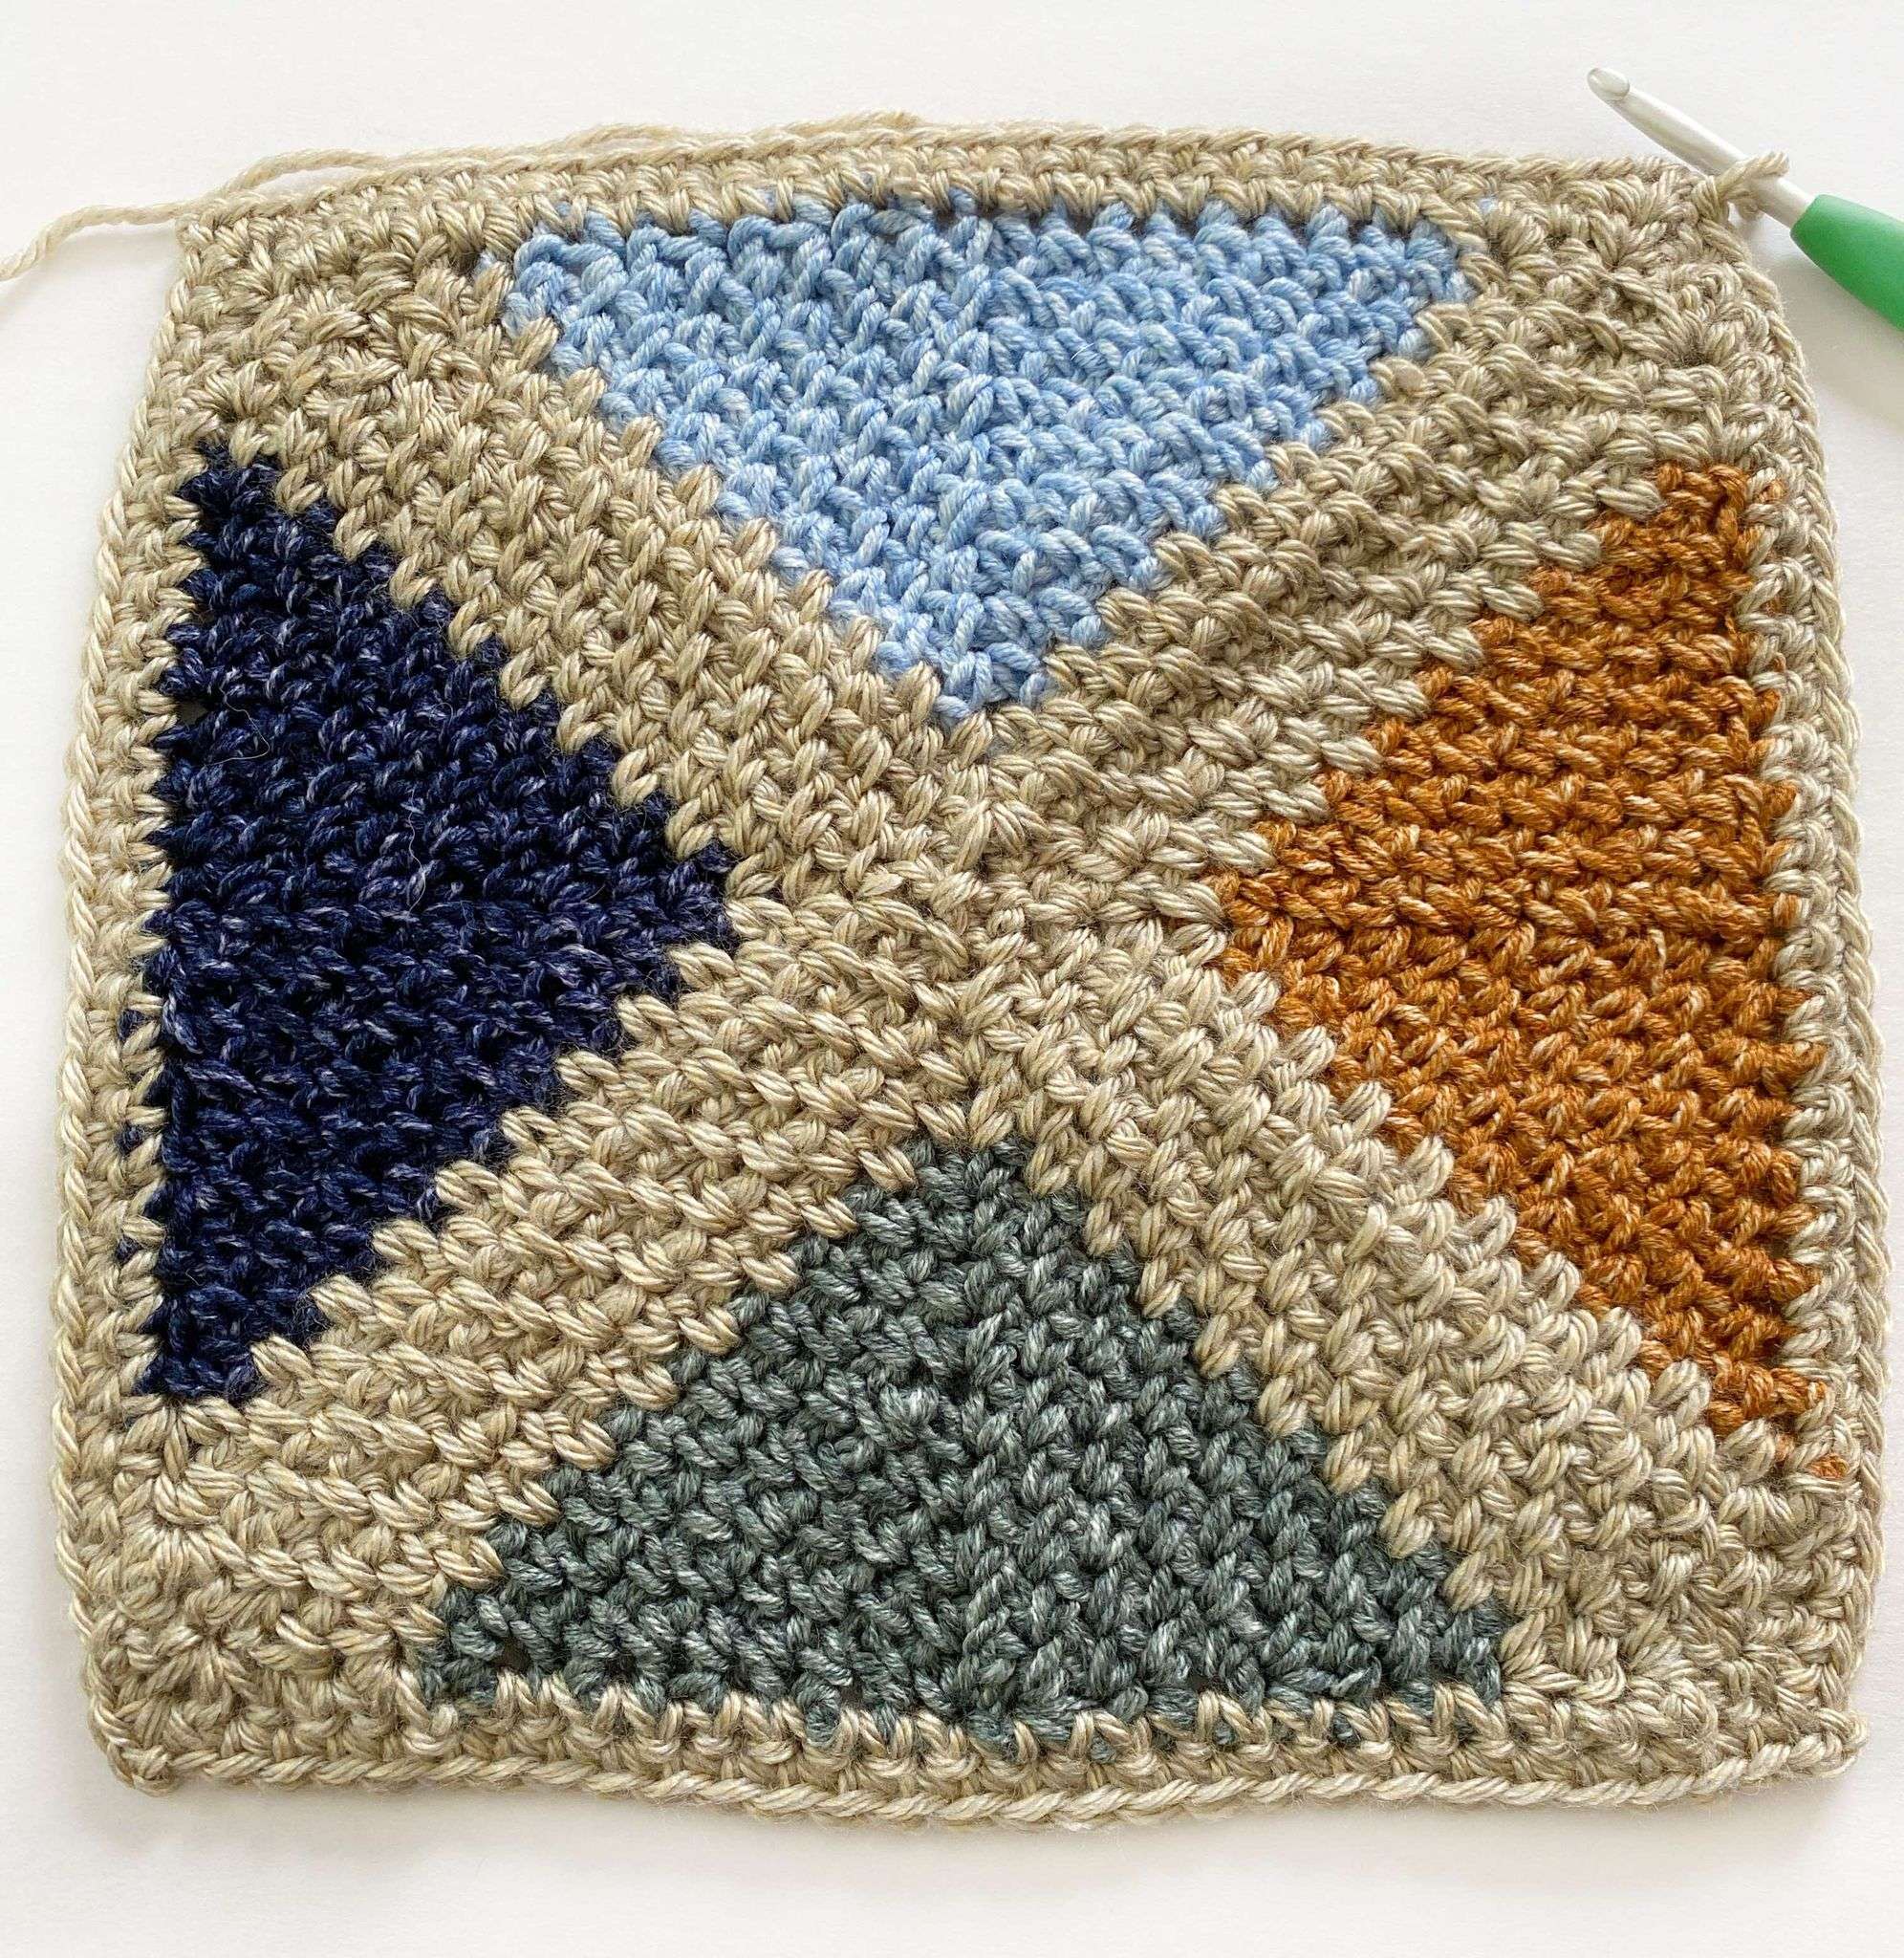
- The blanket is made up of 4 identical triangles. Each triangle is crocheted separately in 1 of the 4 contrasting colours (CC1, CC2, CC3, CC4), before they are joined together using a moss stitch crochet join (Picture 2).
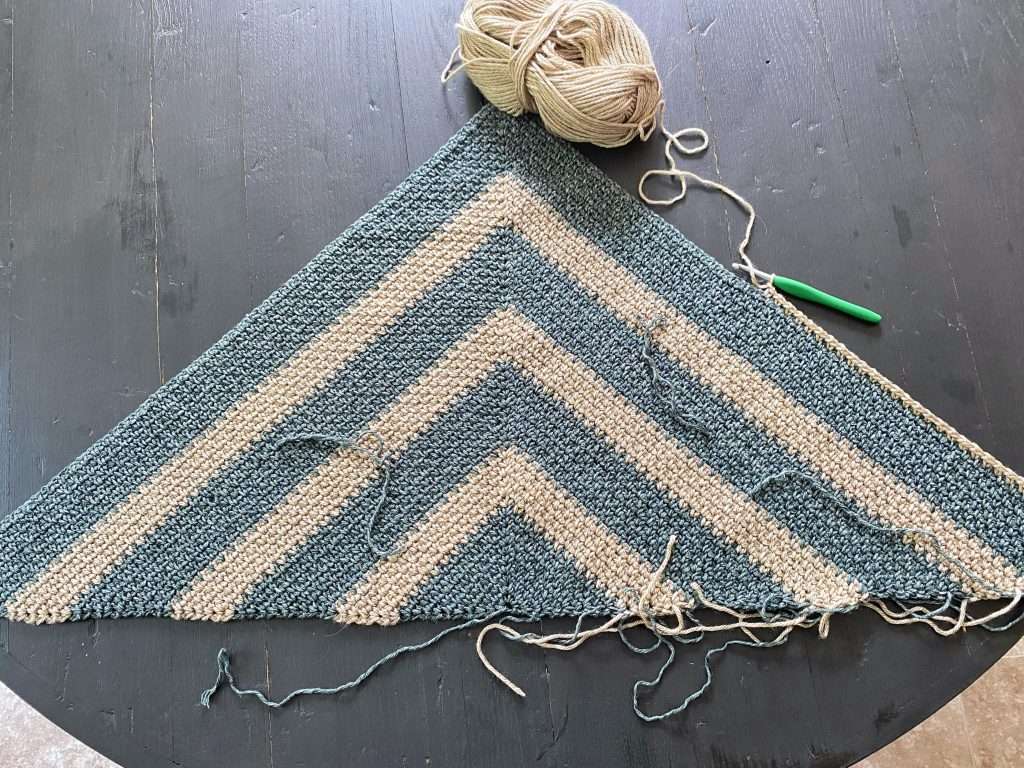
- Each triangle alternates between two colour blocks: a Main Colour Block made of 6 rows, and a Contrasting Colour Block made of 10 rows. Each triangle ends on a MC block of 3 rows.
*The Ad-free Printable PDF has sizing instructions for 7 blanket sizes (Baby, Lapghan, Small Throw, Medium Throw, Large Throw, Queen, and King), along with step-by-step video tutorials.
Changing Colour Tutorial:
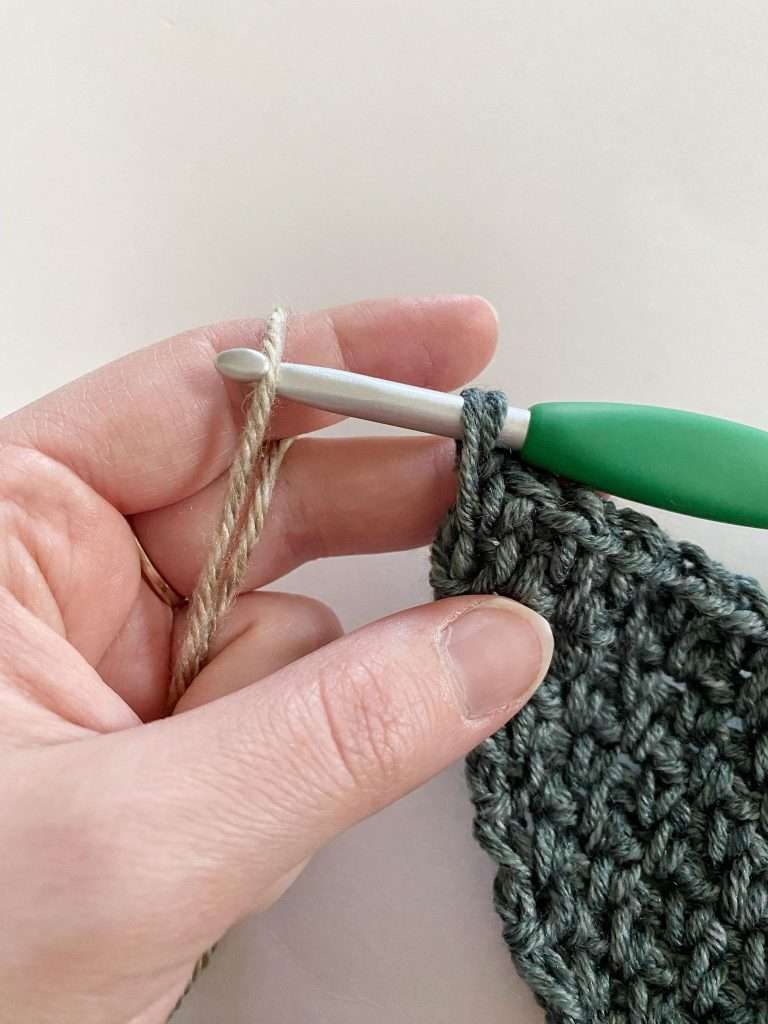
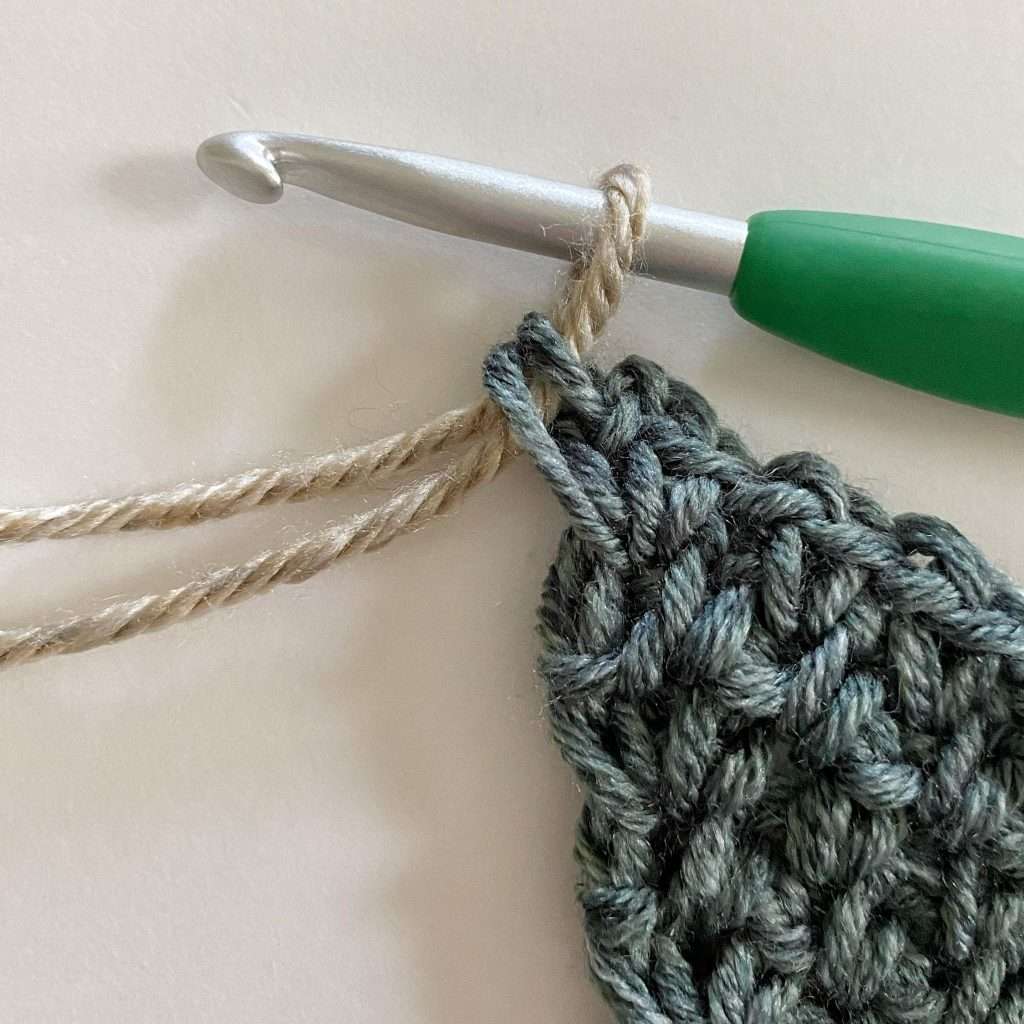
Colour changes always happen in the final YO of the last sc of a row.
- Before completing the final sc, drop the current colour, and pick up the new colour – there should be 2 loops remaining on the hook. (Picture 1)
- Pull the new colour through the remaining 2 loops on the hook to complete the sc and change colour. (Picture 2)
Fastening on:
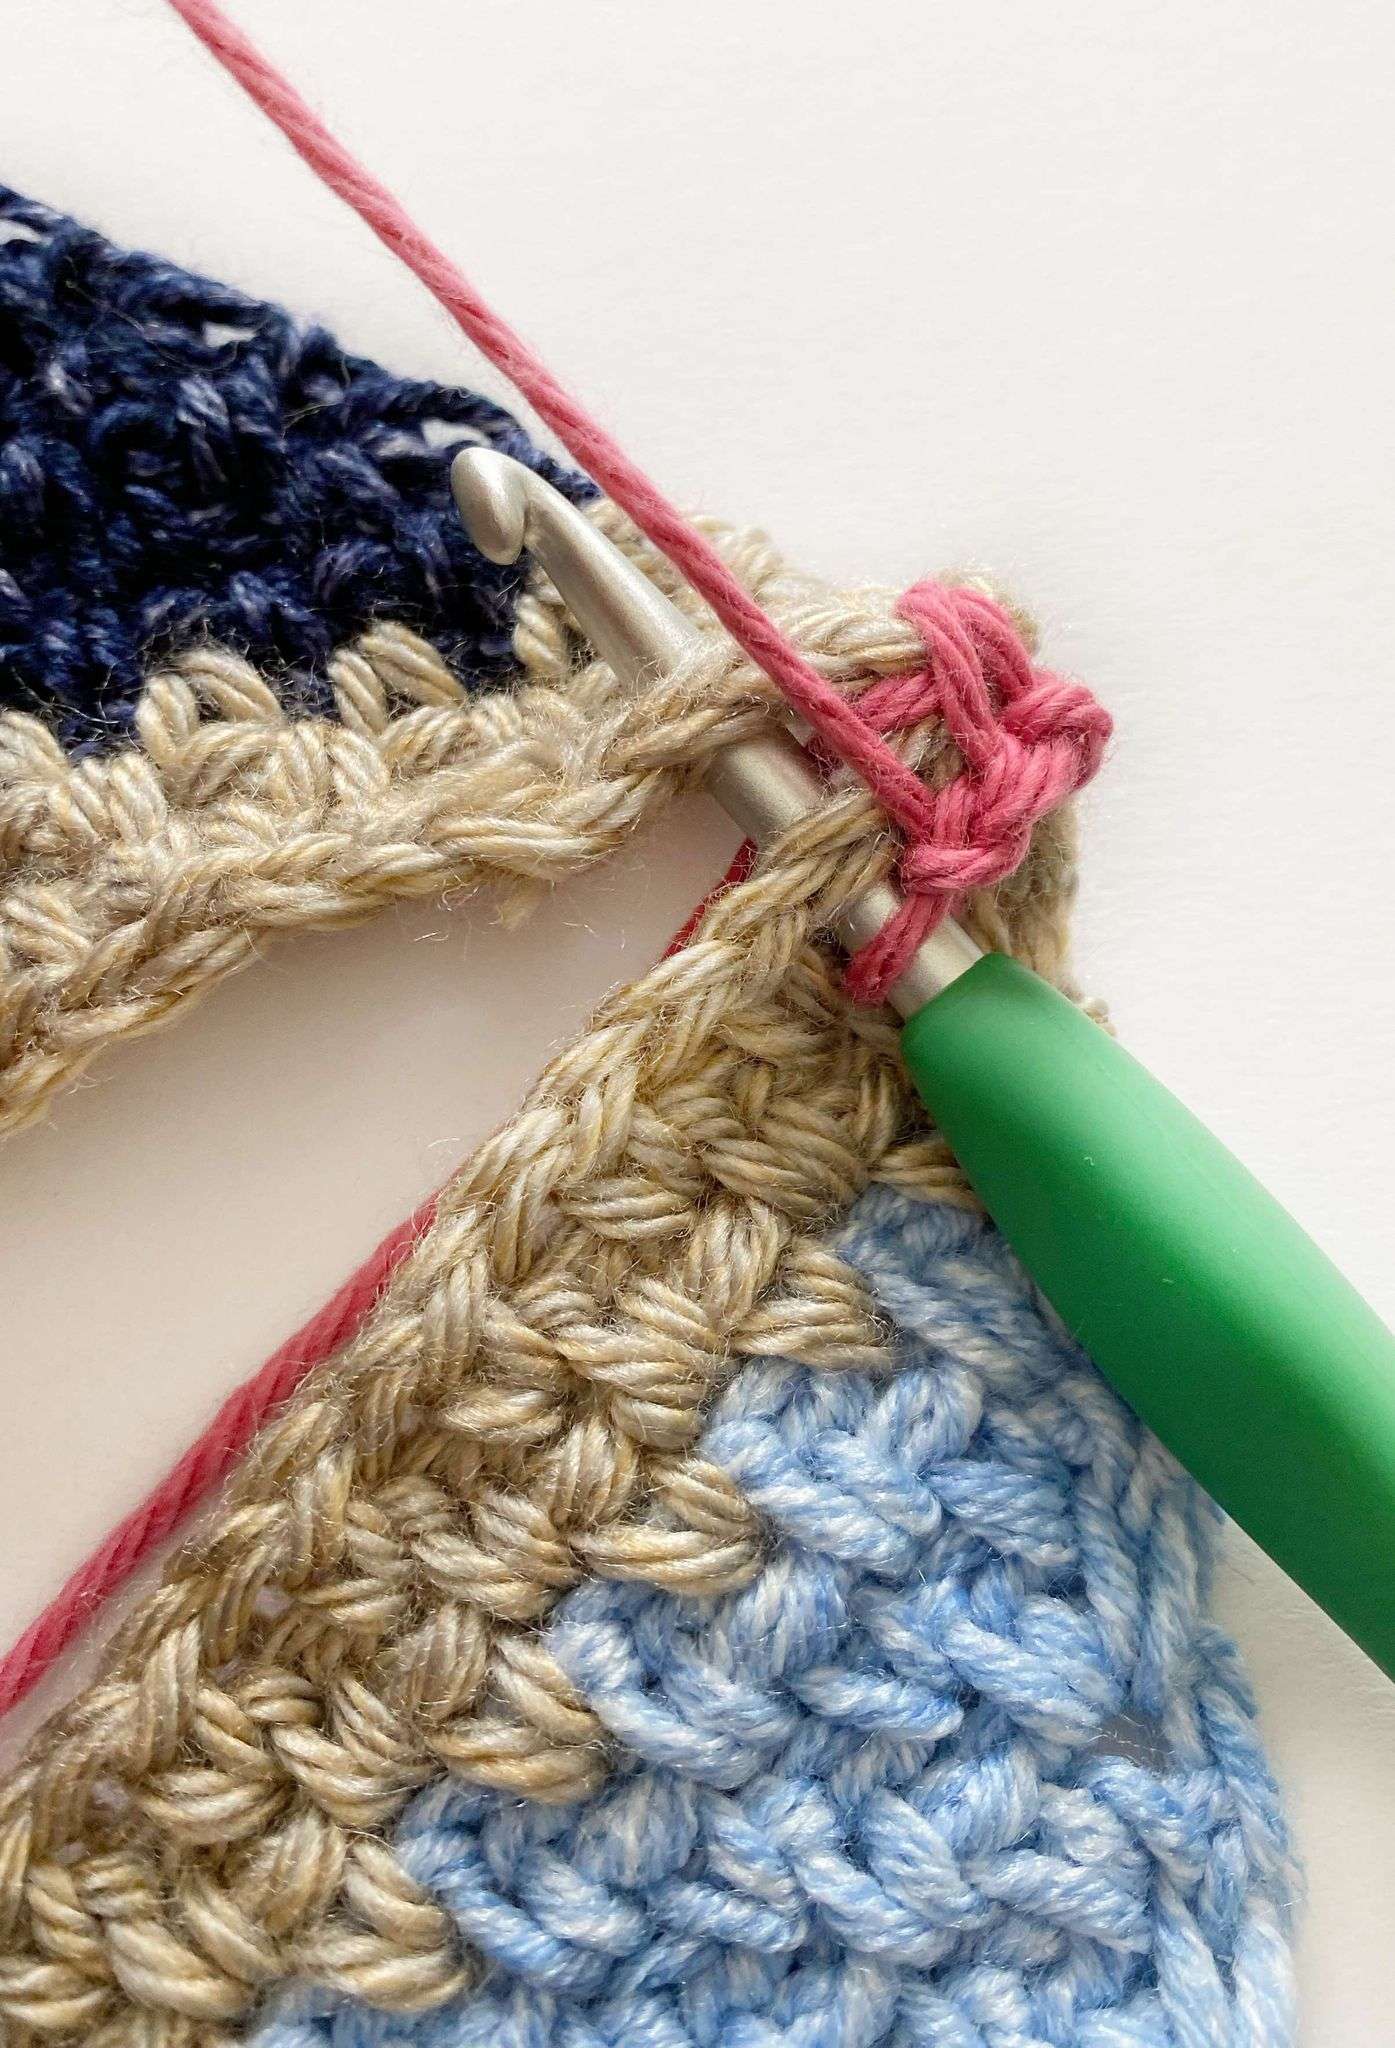
- Insert hook into indicated st/sp. (Picture 1)
- YO with indicated colour and pull through the st/sp. (Picture 2 & 3)


Fasten off:
YO, and pull through the loop on the hook to make a long tail. Cut the strand and pull it tight to close the knot that this creates.
Pattern:
Notes:
- The beginning ch-3 of each row counts as 1 sc and 1 ch-2 sp.
- Odd numbered rows are considered the RS, while even numbered rows are considered the WS.
- Yarn is not carried throughout this pattern. After joining the new colour, drop the old colour, leave a tail, and cut the strand.
- Use stitch markers (or safety pins) to mark the first, center, and last ch-2 sp of each row – these ch-2 sps are where the increases occur.
- Each contrasting colour (CC) block is 10 rows, and each main colour (MC) block is 6 rows. The triangle will end with a MC block of 3 rows.
- Each triangle will have a different CC. Triangle #1 uses CC1; Triangle #2 uses CC2; Triangle #3 uses CC3; and Triangle #4 uses CC4.
- You can substitute a ch-4 circle in place of a magic ring (MR).
Triangle (Make 4):
Make one triangle in each of the 4 contrasting colours (CC1, CC2, CC3, CC4), for a total of 4 triangles.
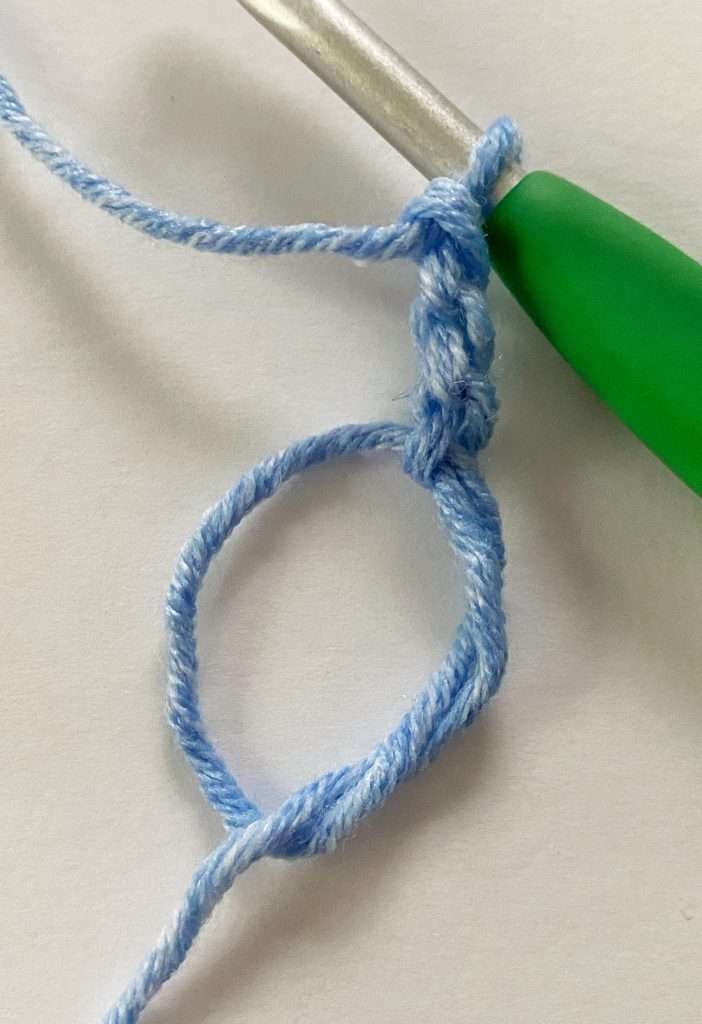
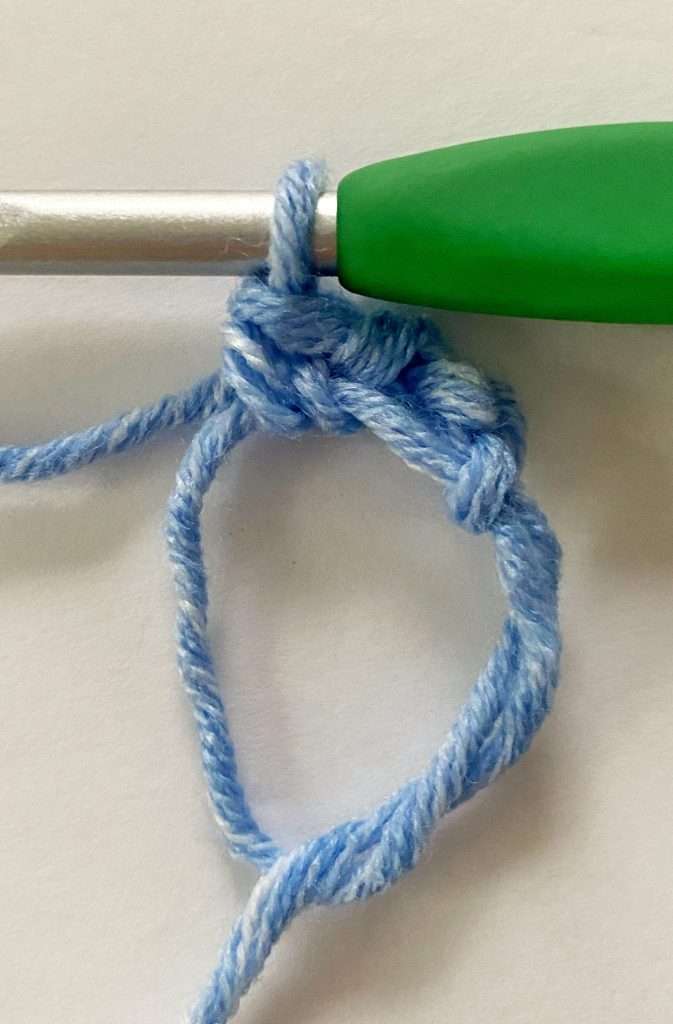
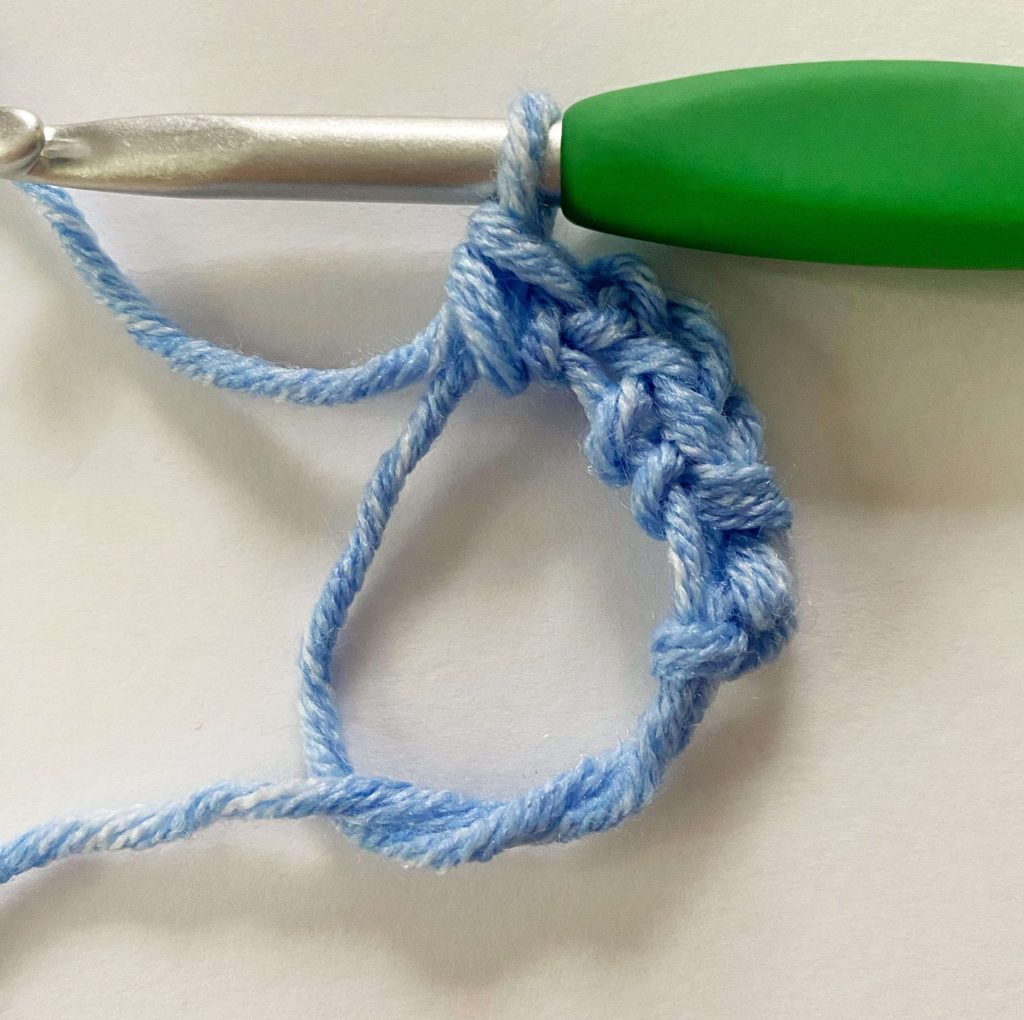
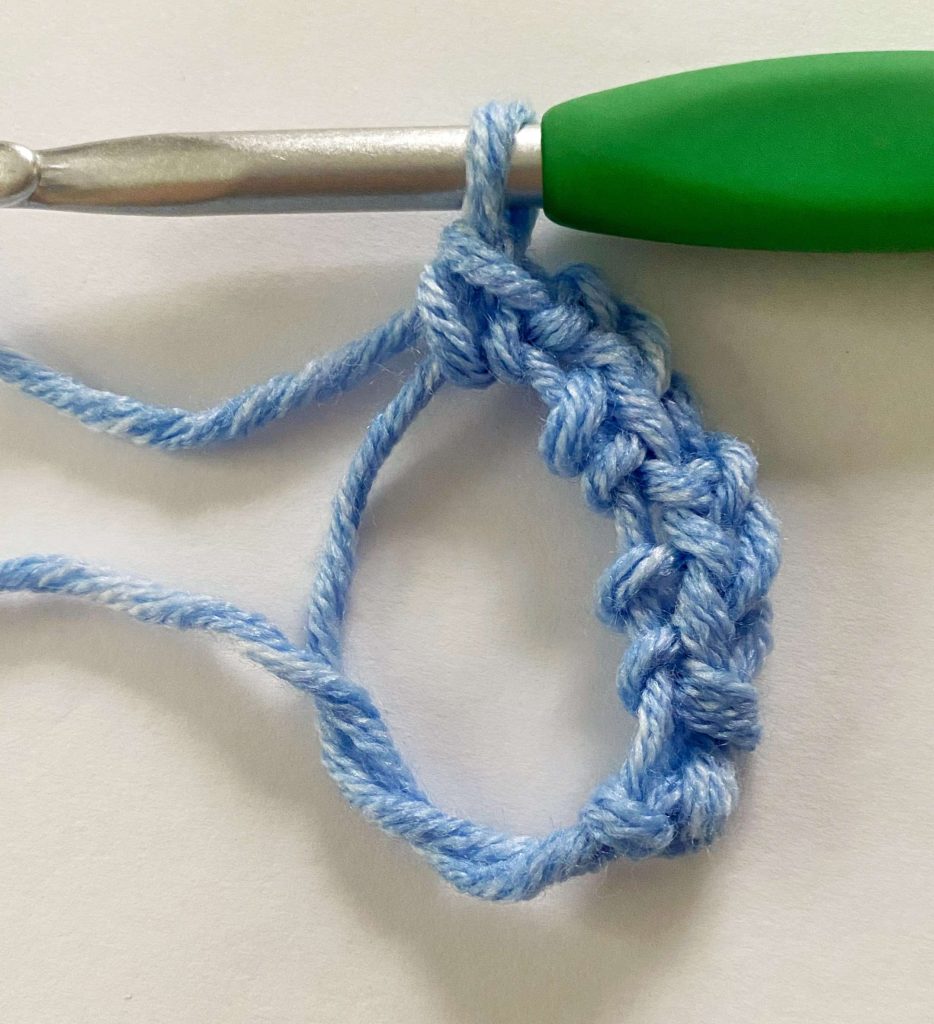
With CC1, make a MR.
Row 1 (RS):
- Ch 3 (counts as 1 sc and 1 ch-2 sp here and throughout)
- Sc in MR.
- [ch 2, sc] 2 times in MR. Turn.
Stitch Count: 4 sc, 3 ch-2 sp
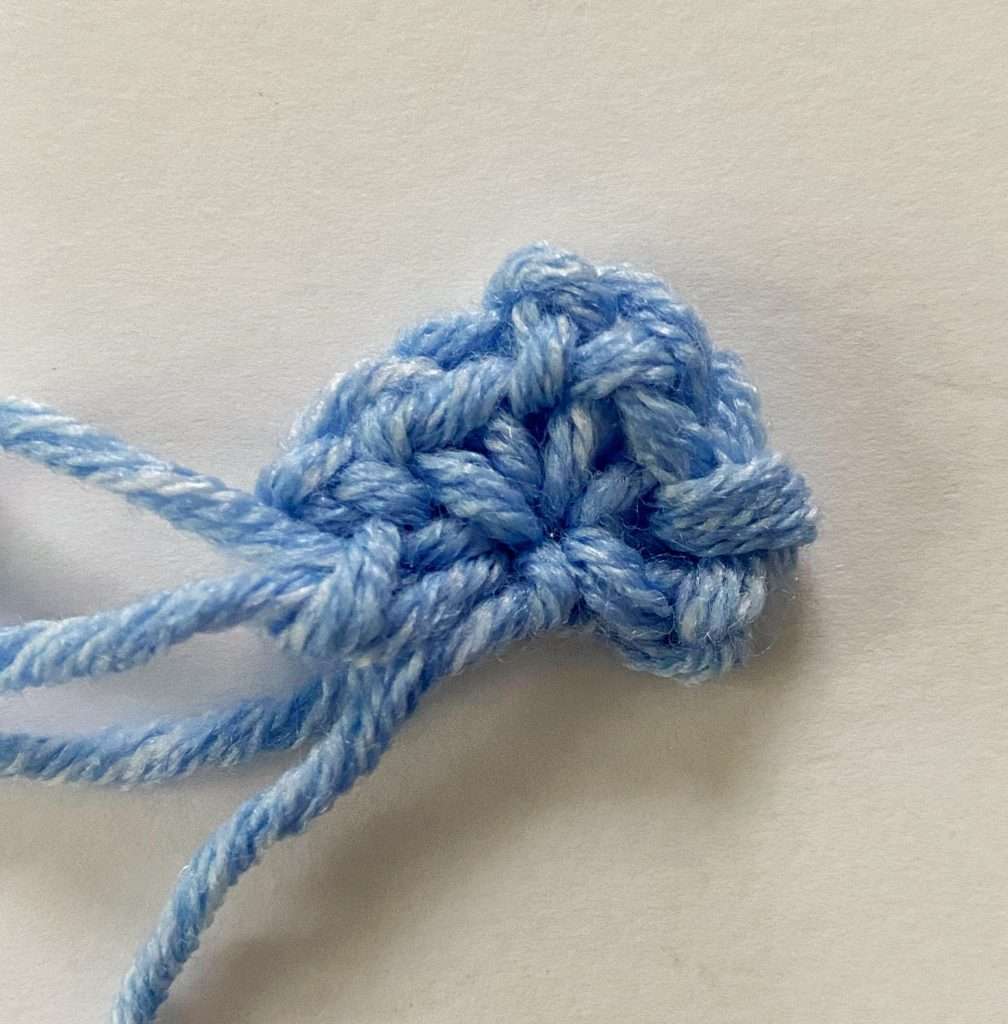
Row 2 (WS):
- Ch 3, (sc, ch 1) in first ch-2 sp
- (Sc, ch 2, sc, ch 1) in center ch-2 sp
- (Sc, ch 2, sc) in last ch-2 sp. Turn.
Stitch Count: 3 sc, 1 ch-2 sp, 1 ch-1 sp, on each side of the center ch-2 sp
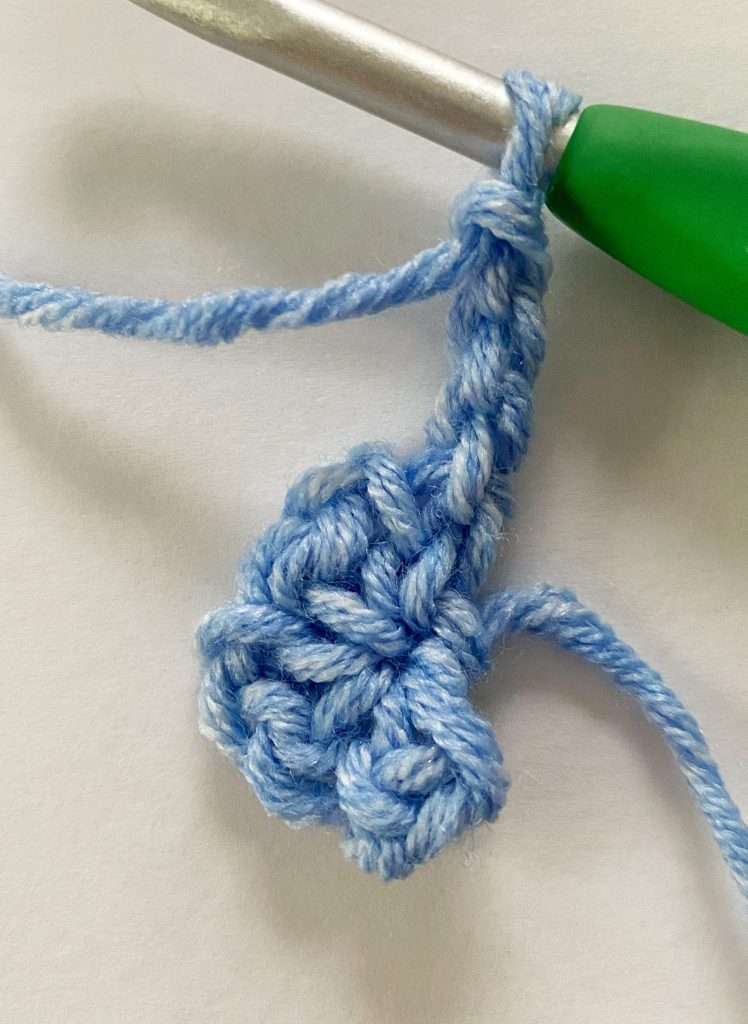
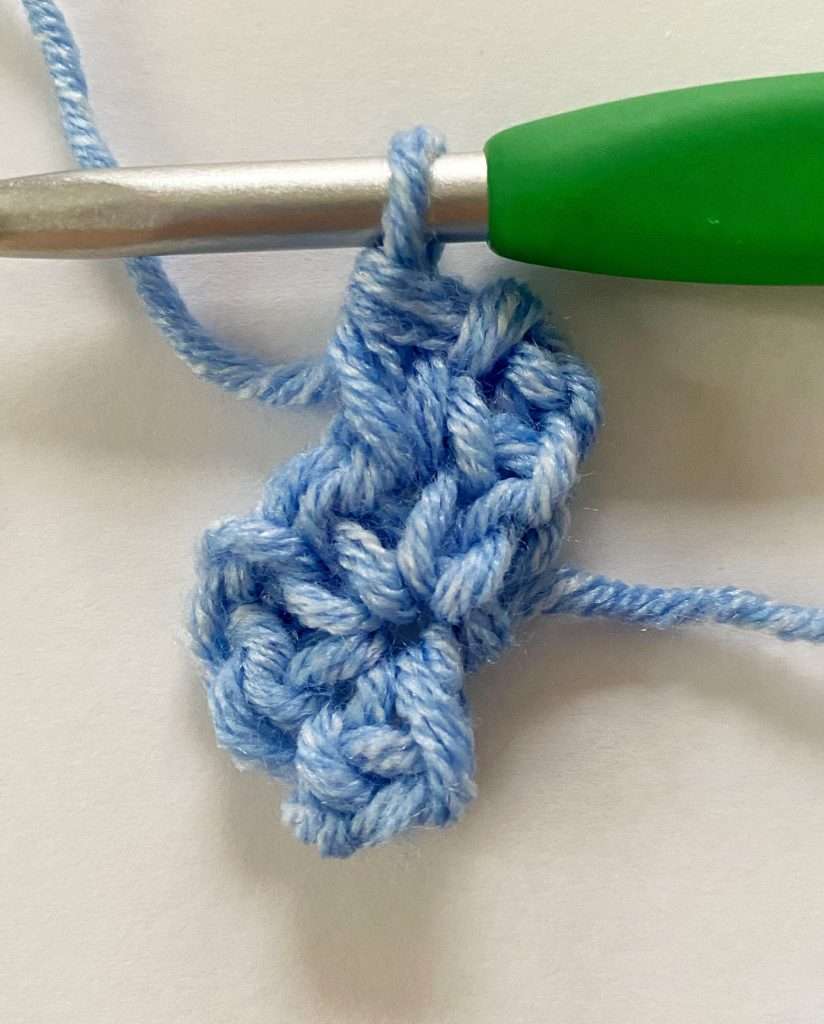
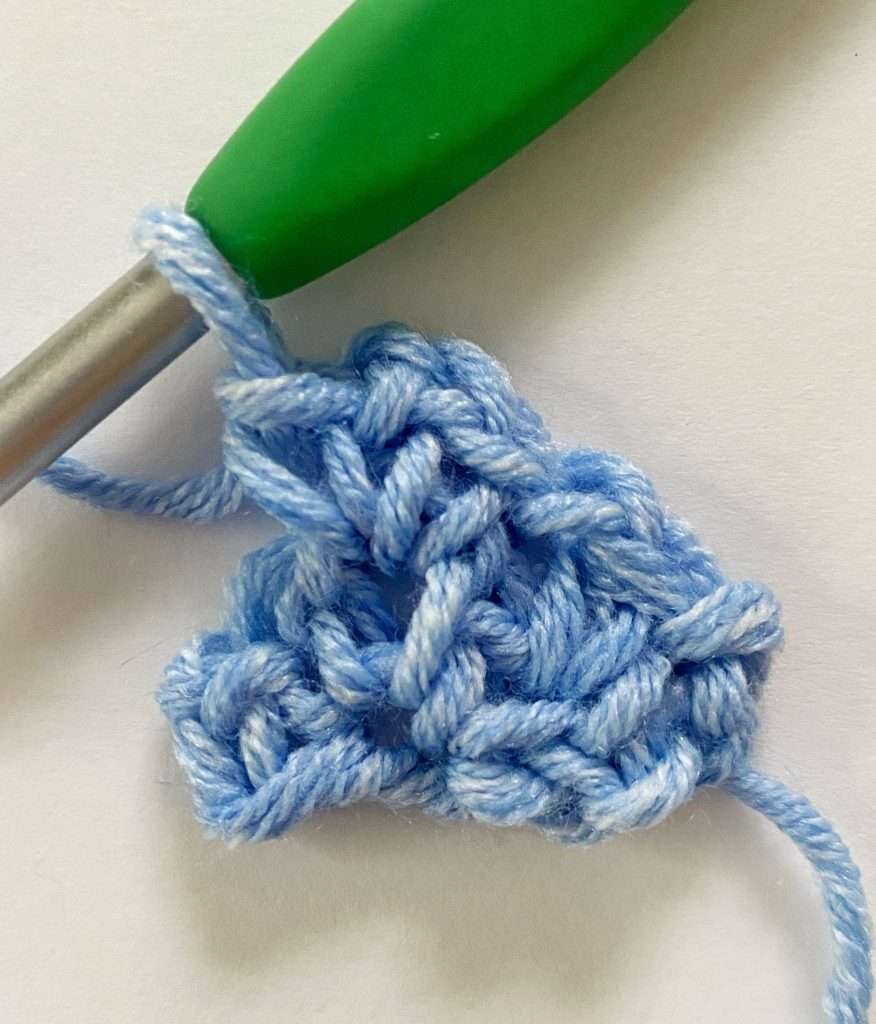
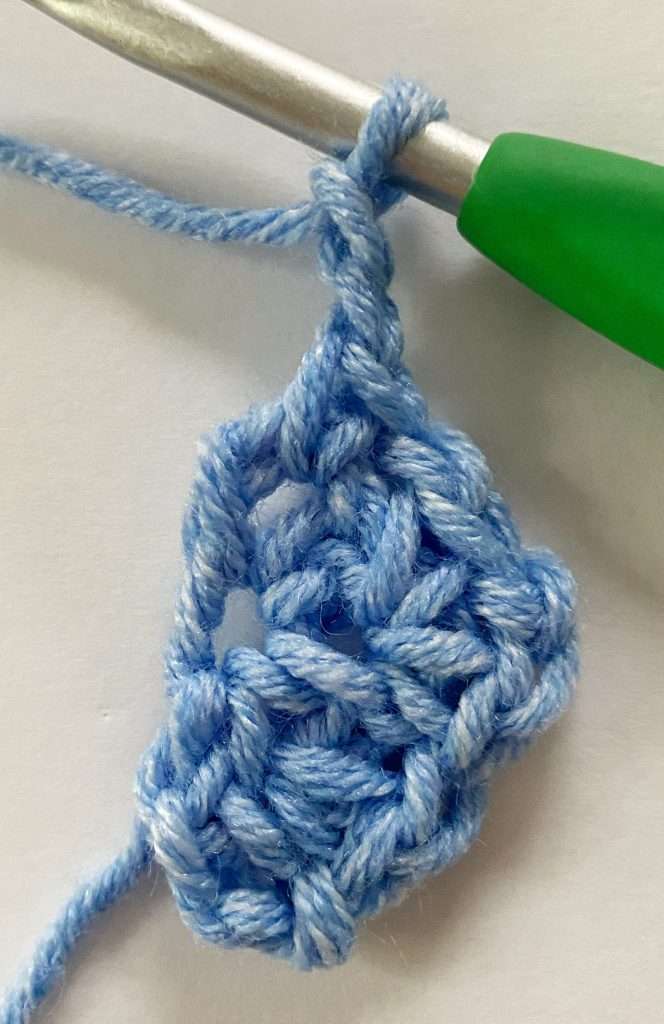
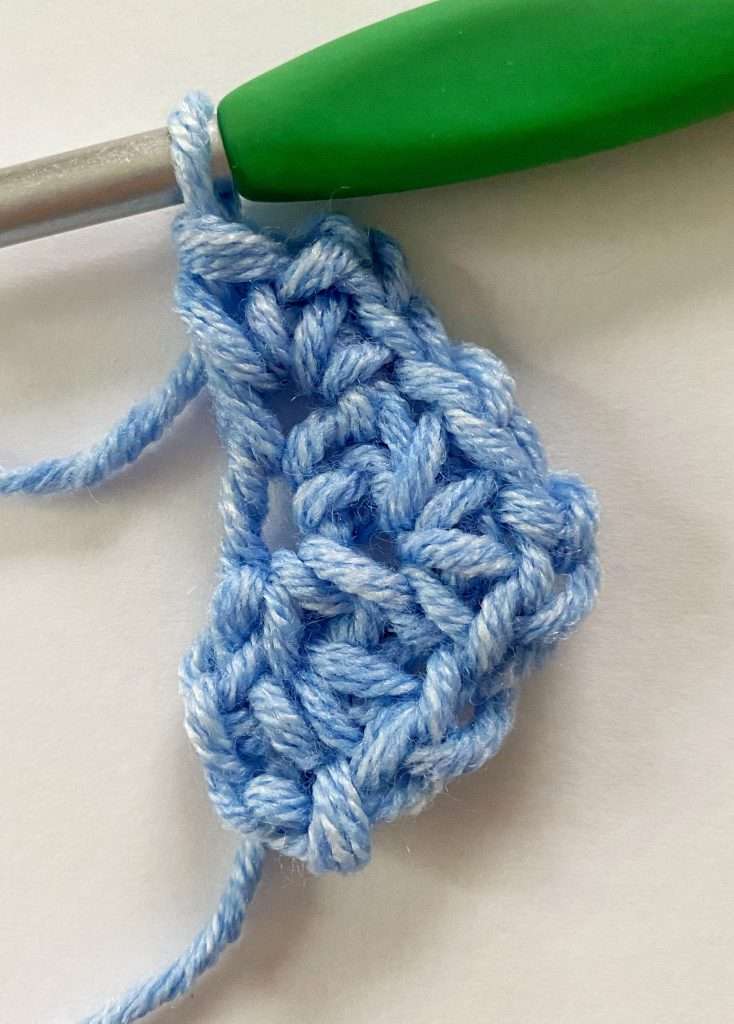
Row 3 (RS):
- Ch 3, (sc, ch 1) in first ch-2 sp
- (Sc, ch 1) in next ch-1 sp
- (Sc, ch 2, sc, ch 1) in center ch-2 sp
- (Sc, ch 1) in next ch-1 sp
- (Sc, ch 2, sc) in last ch-2 sp. Turn.
Stitch Count: 4 sc, 1 ch-2 sp, 2 ch-1 sp, on each side of the center ch-2 sp
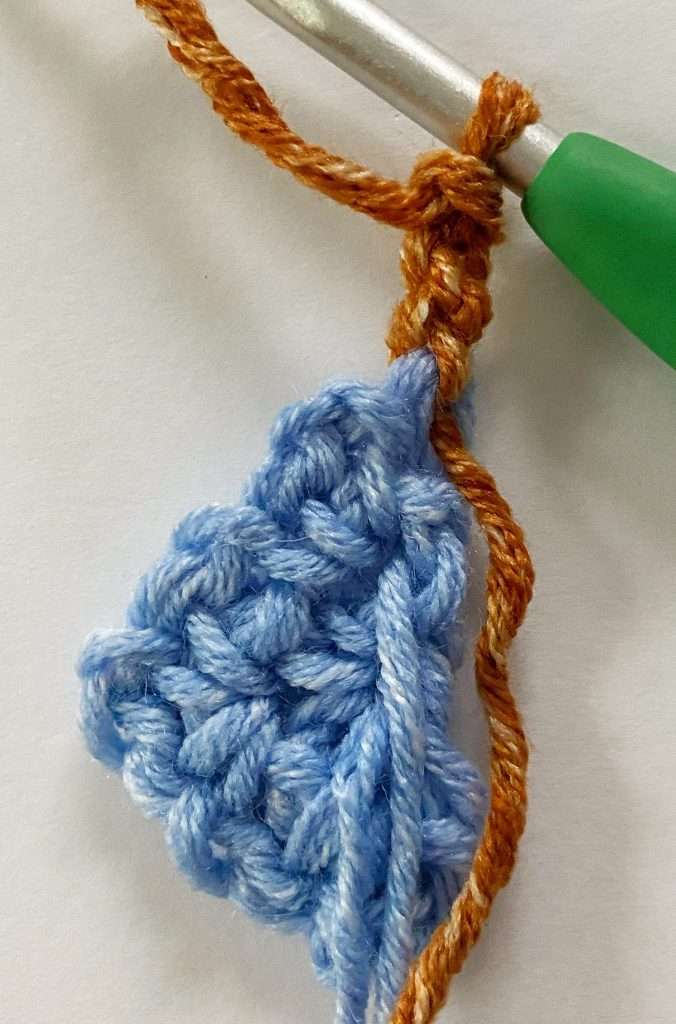
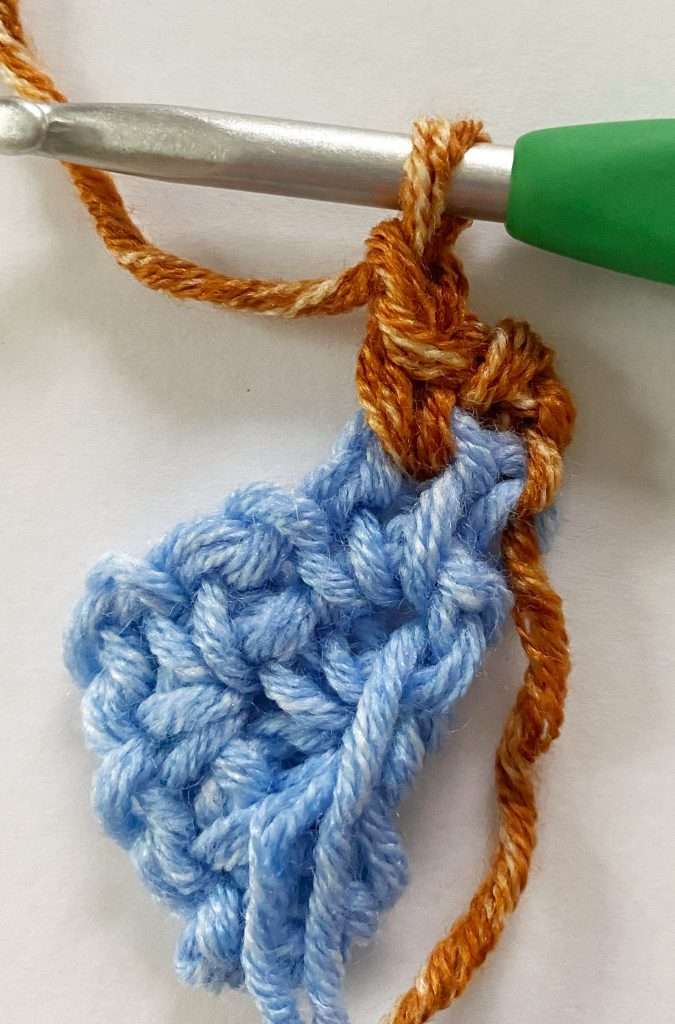
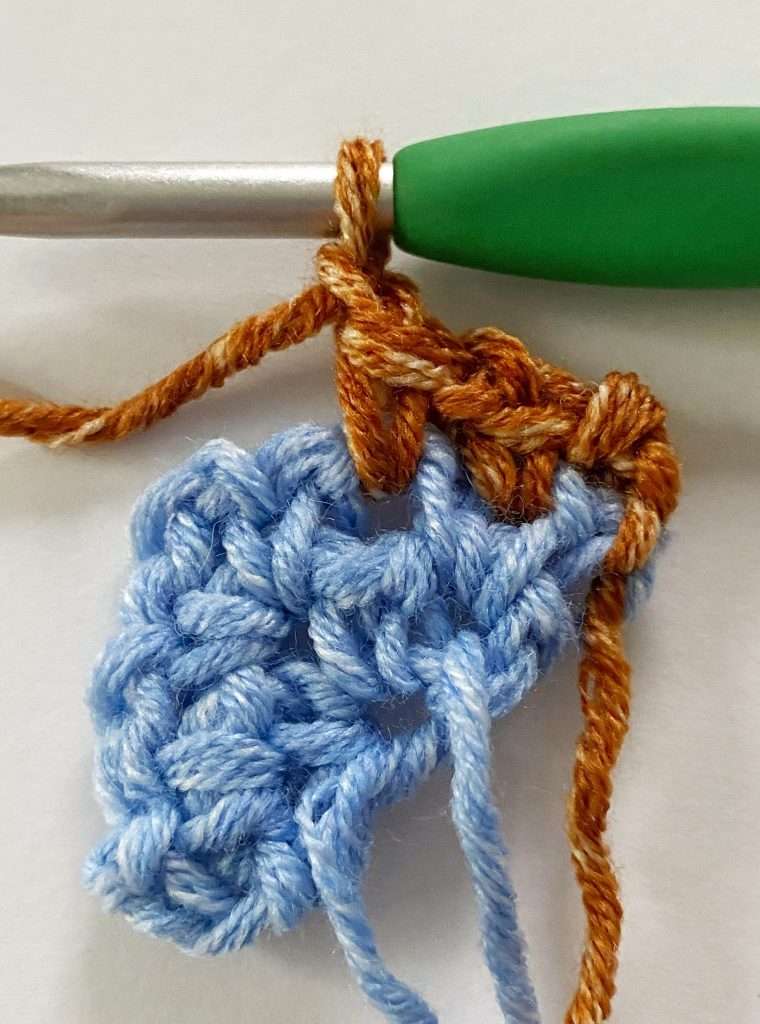
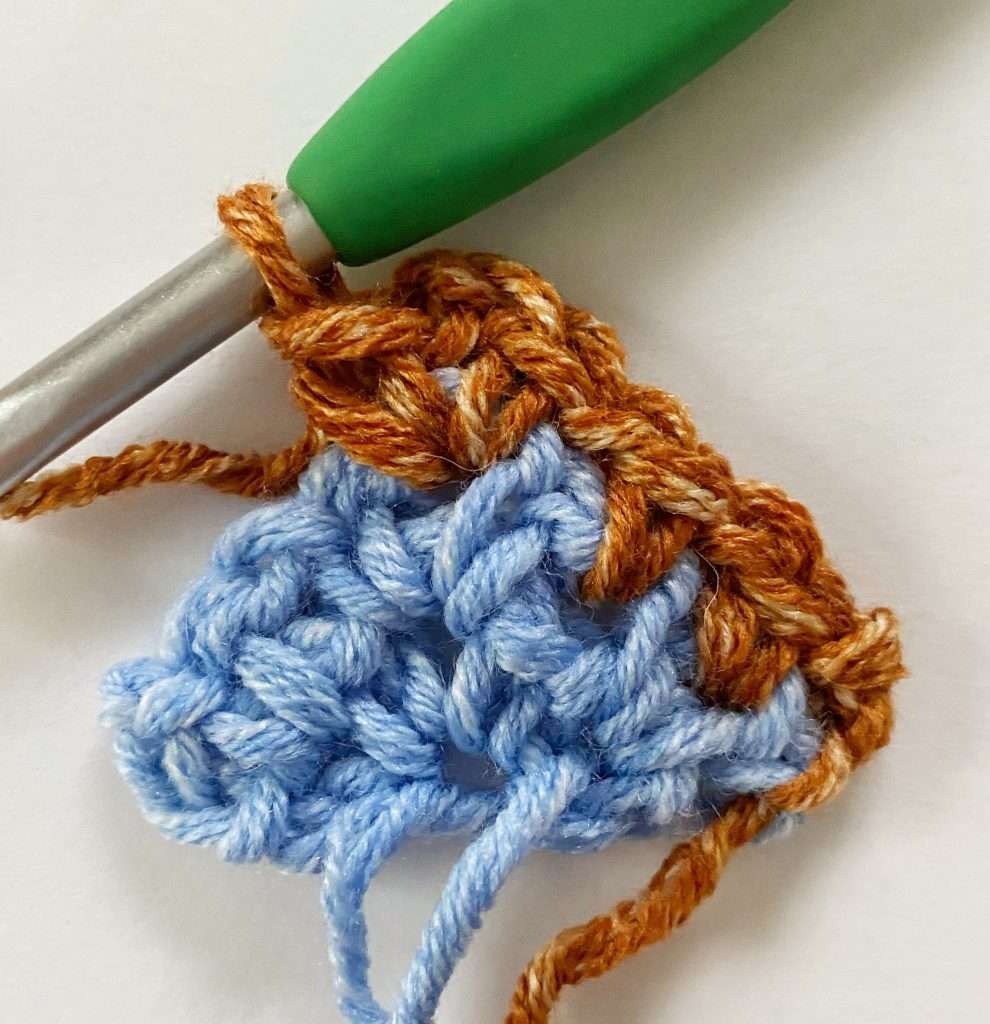
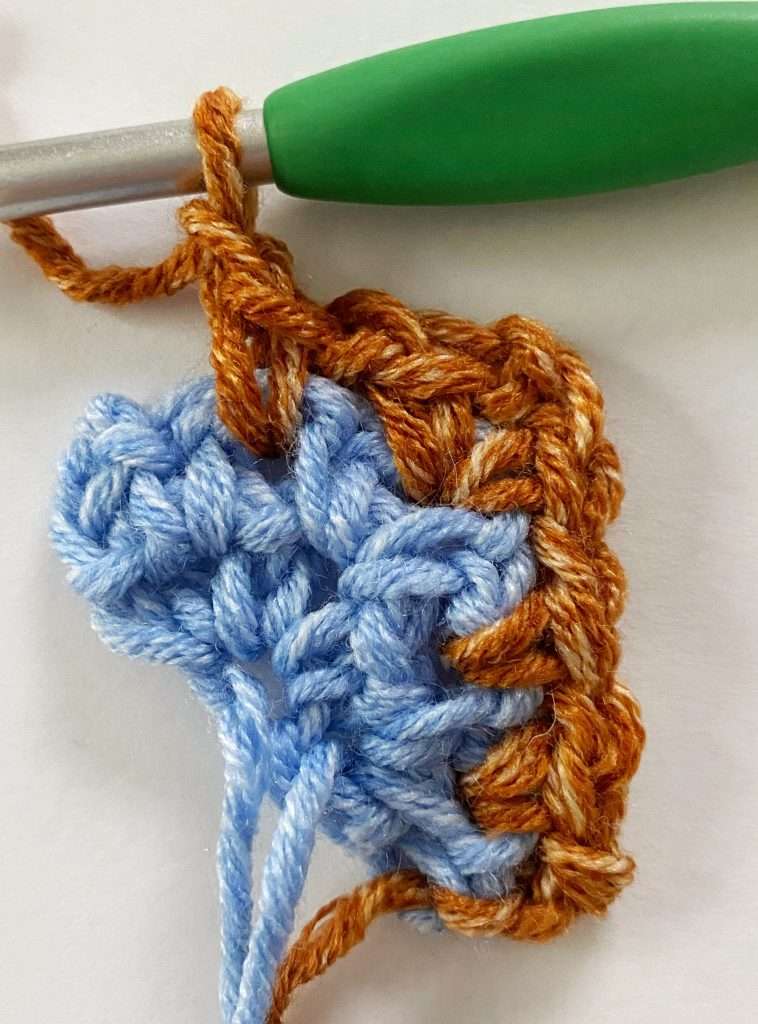
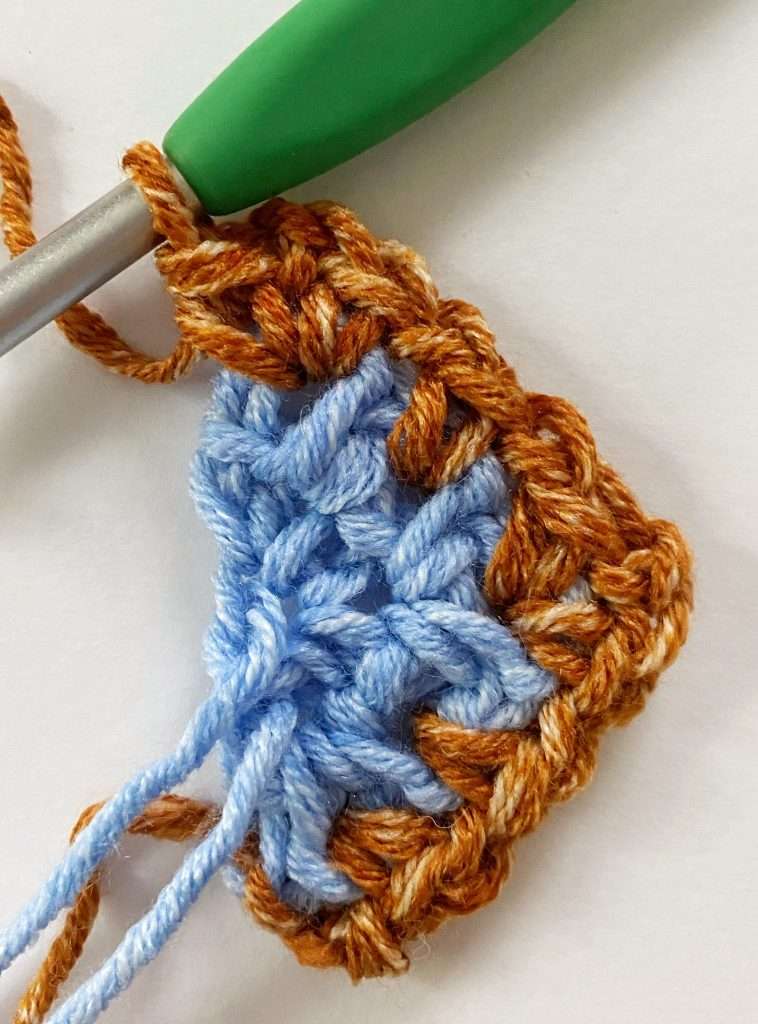
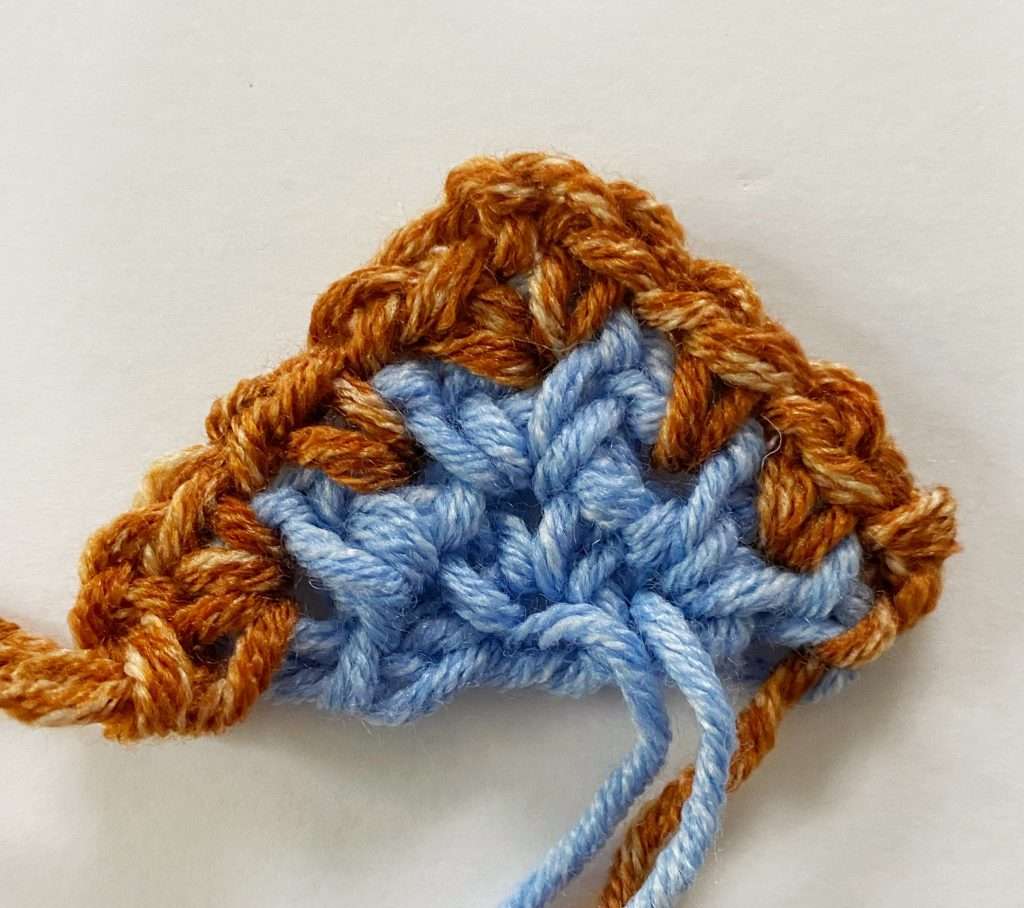
Row 4 (WS):
- Ch 3, (sc, ch 1) in first ch-2 sp
- (Sc, ch 1) in each ch-1 sp until center ch-2 sp
- (Sc, ch 2, sc, ch 1) in center ch-2 sp
- (Sc, ch 1) in each ch-1 sp until last ch-2 sp
- (Sc, ch 2, sc) in last ch-2 sp. Turn.
Stitch Count: 5 sc, 1 ch-2 sp, 3 ch-1 sp, on each side of the center ch-2 sp
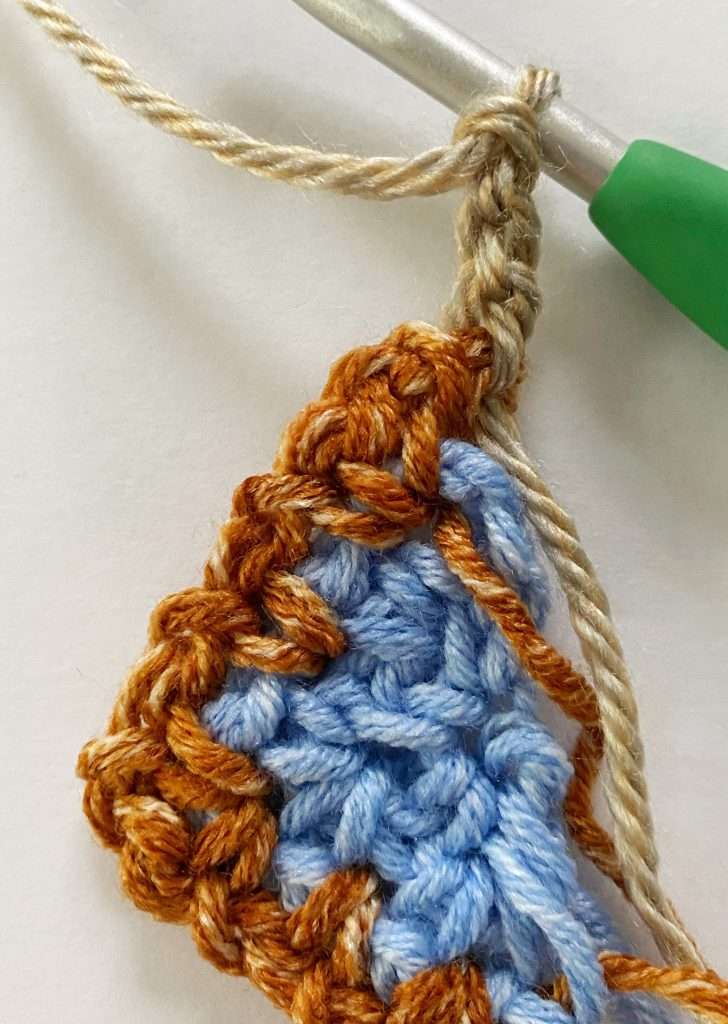
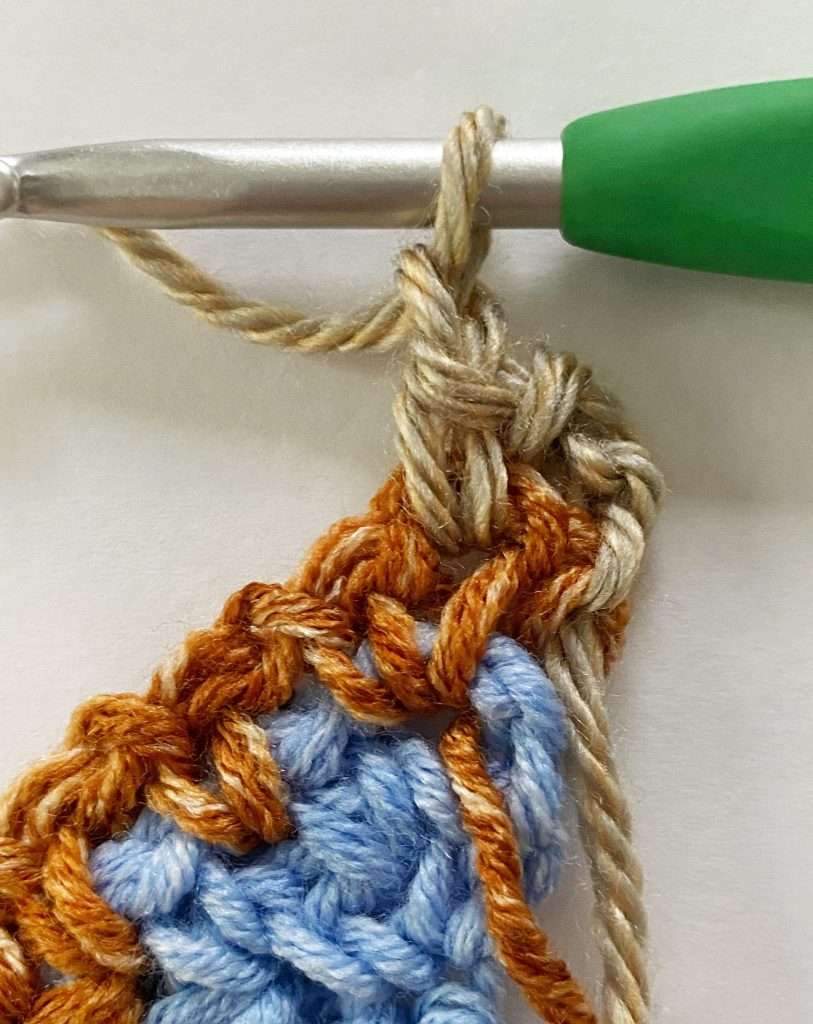
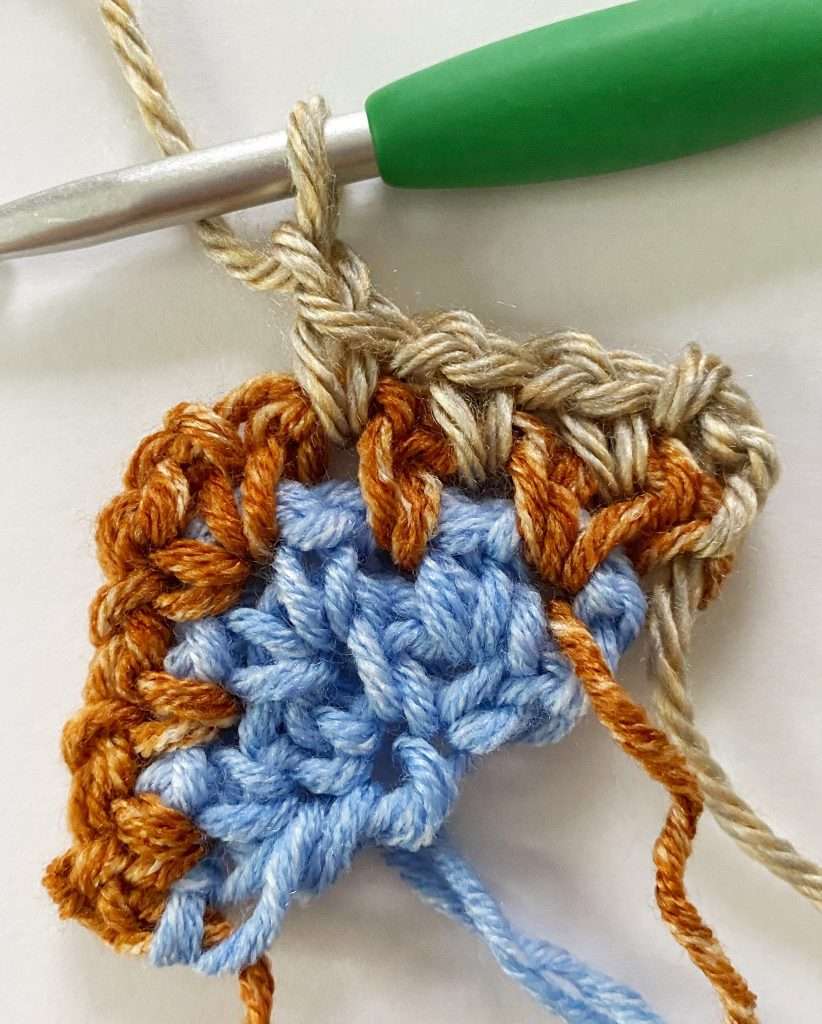
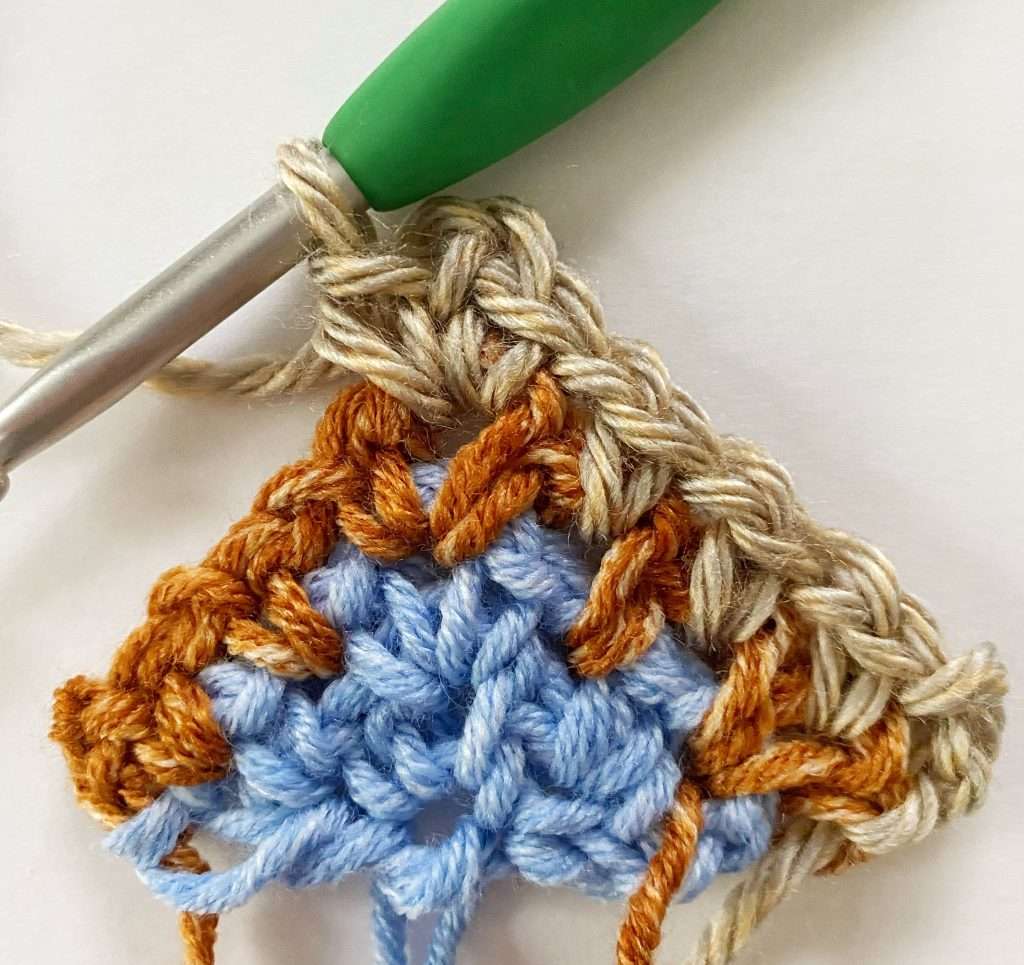
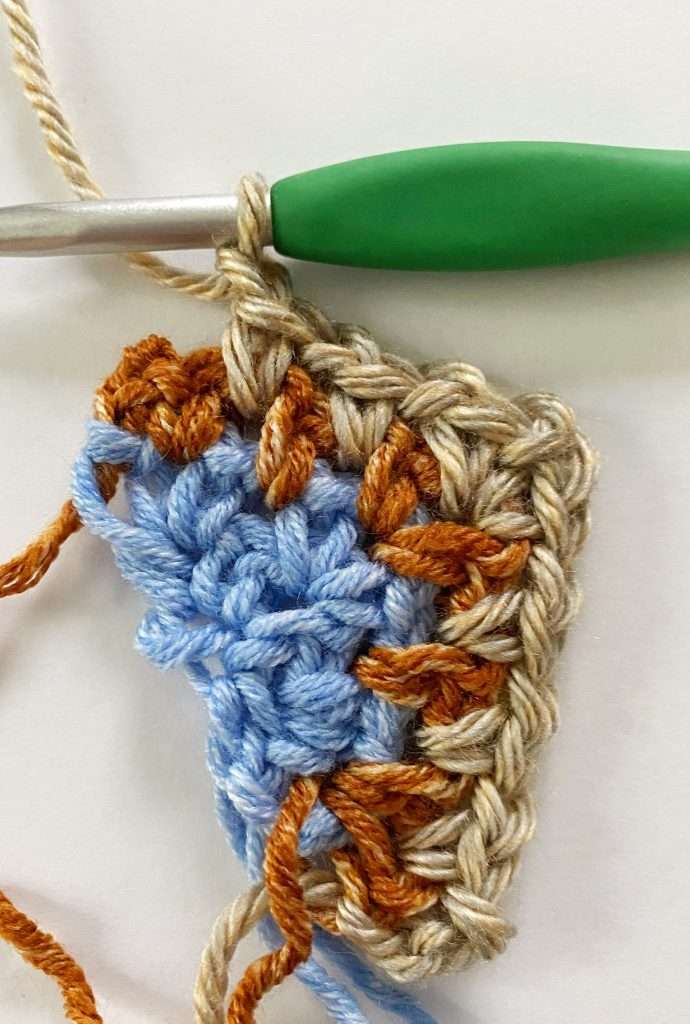
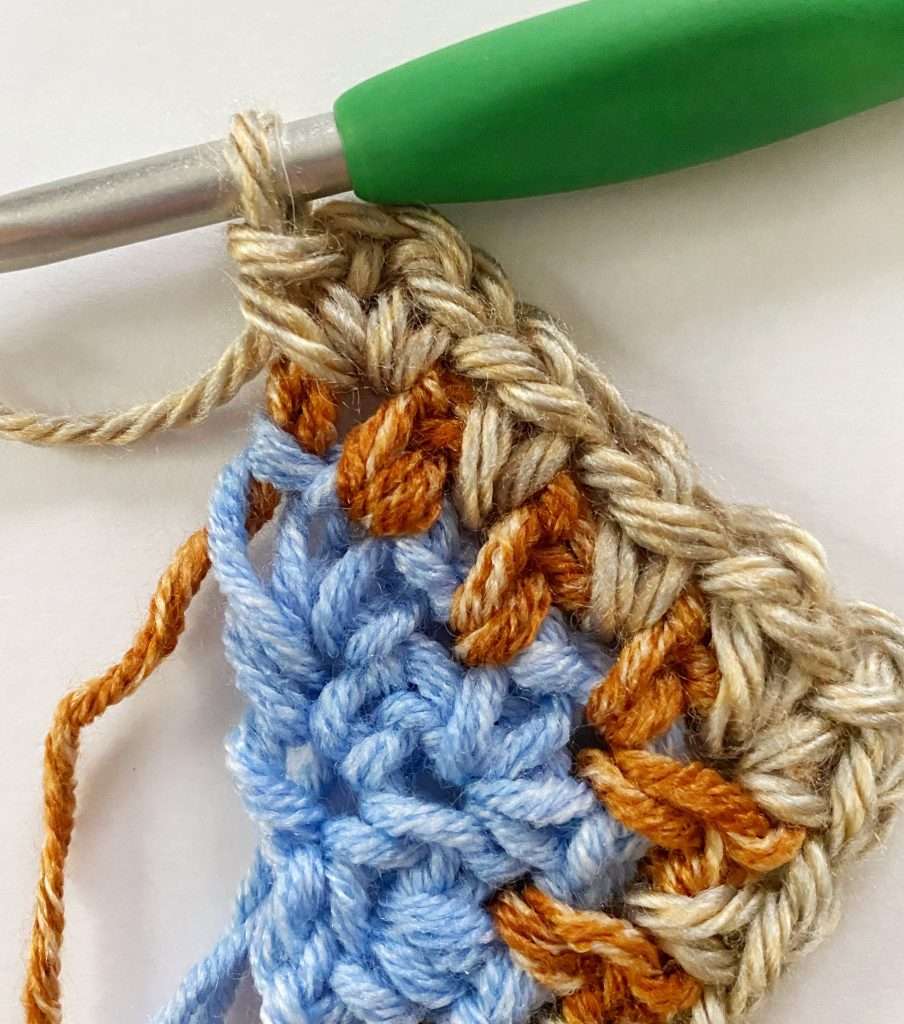
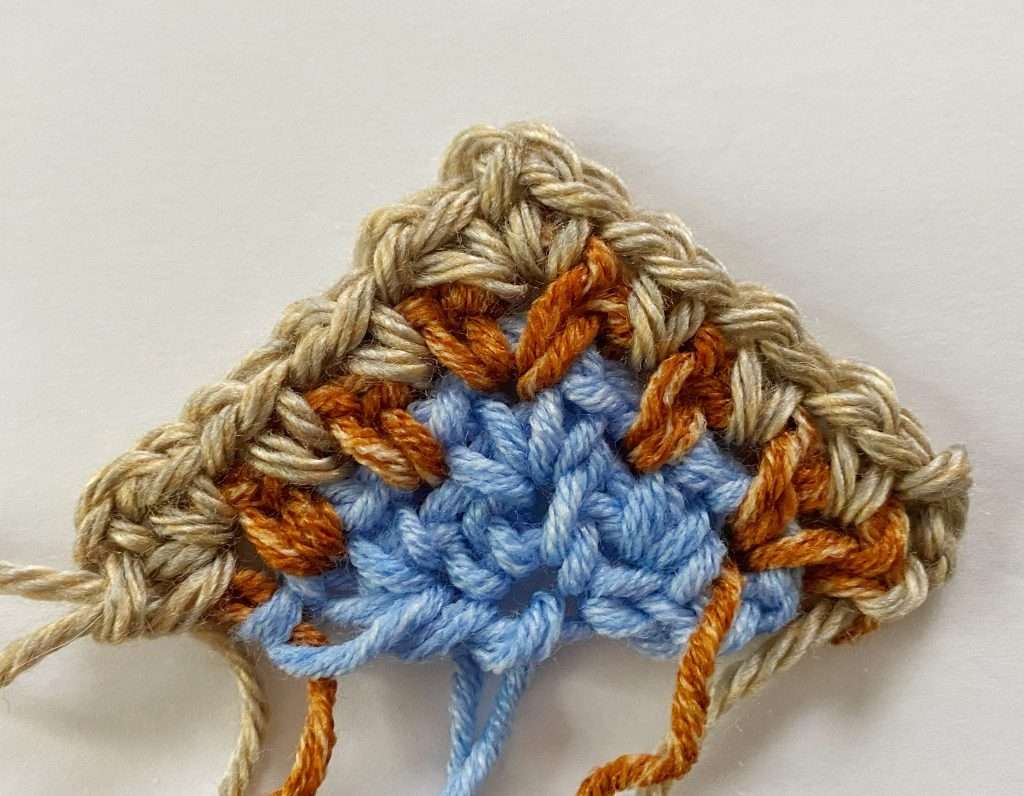
Note: Each row increases by 1 sc and 1 ch-1 sp on each side of the center ch-2 sp.
Rows 5 – 61: Repeat Row 4, while following the colour changes below. Always change colour in the final YO of the last sc of the row.
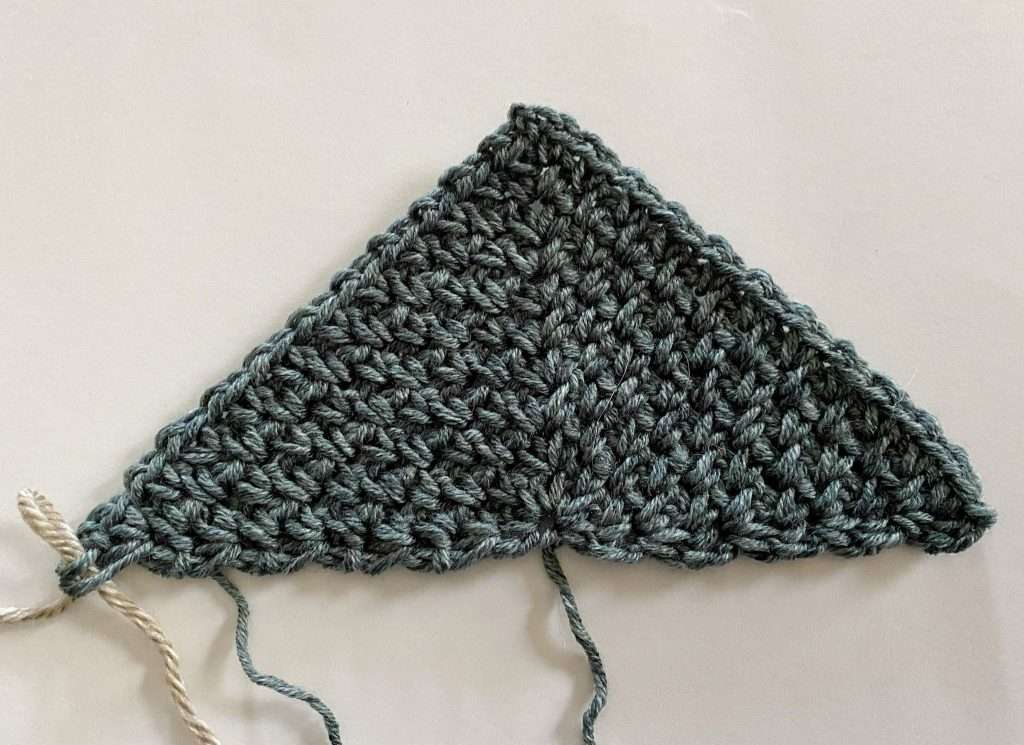
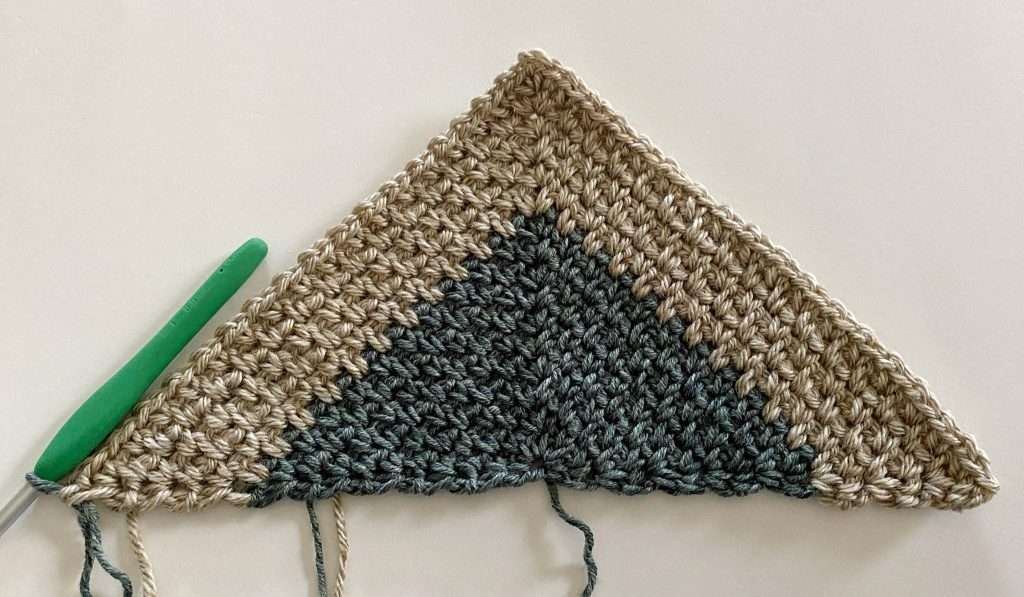

Colour Chart:
Rows 1 – 10: CC
Row 11 – 16: MC
Rows 17 – 26: CC
Rows 27 – 32: MC
Rows 33 – 42: CC
Row 43 – 48: MC
Rows 49 – 58: CC
Rows 59 – 61: MC
Fasten off and weave in ends. Repeat this process 3 more times, using CC2, CC3, and CC4, to make a total of 4 triangles.
Join the Triangles Together:
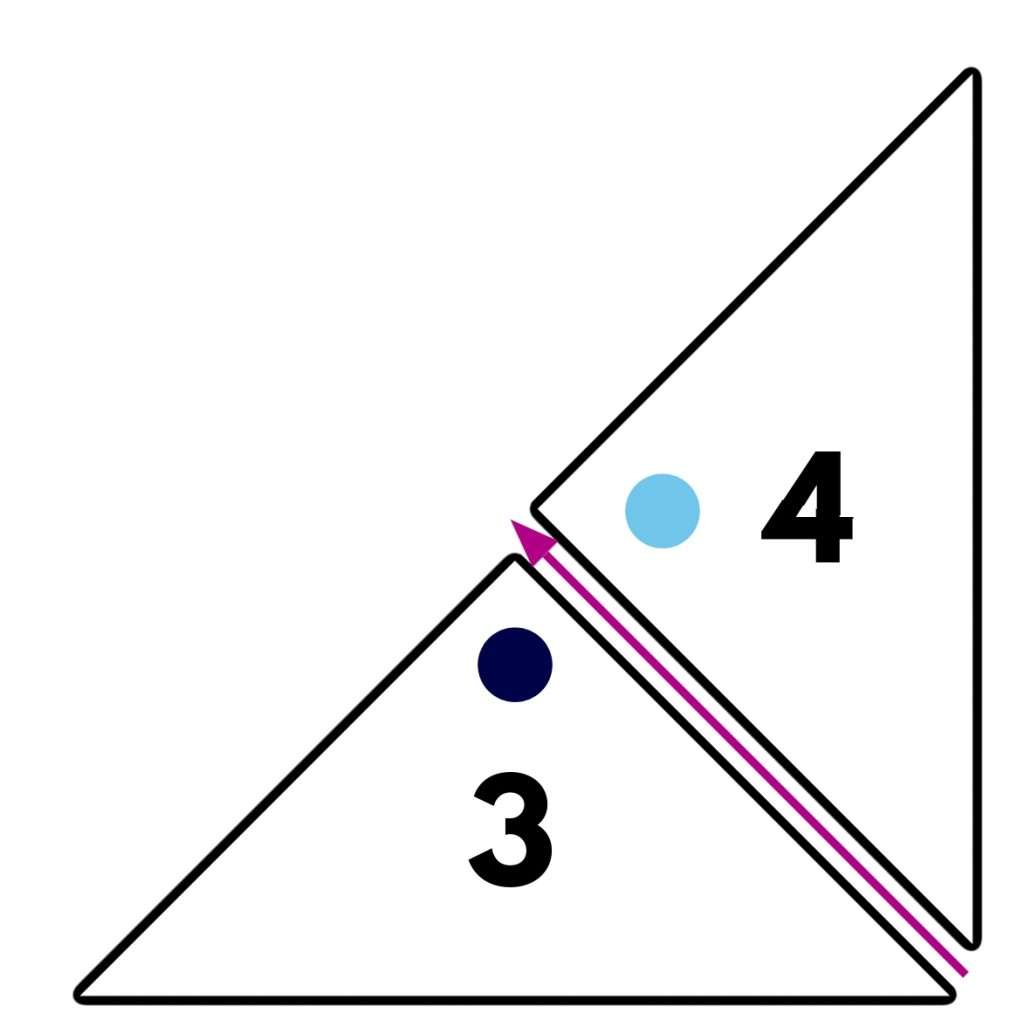
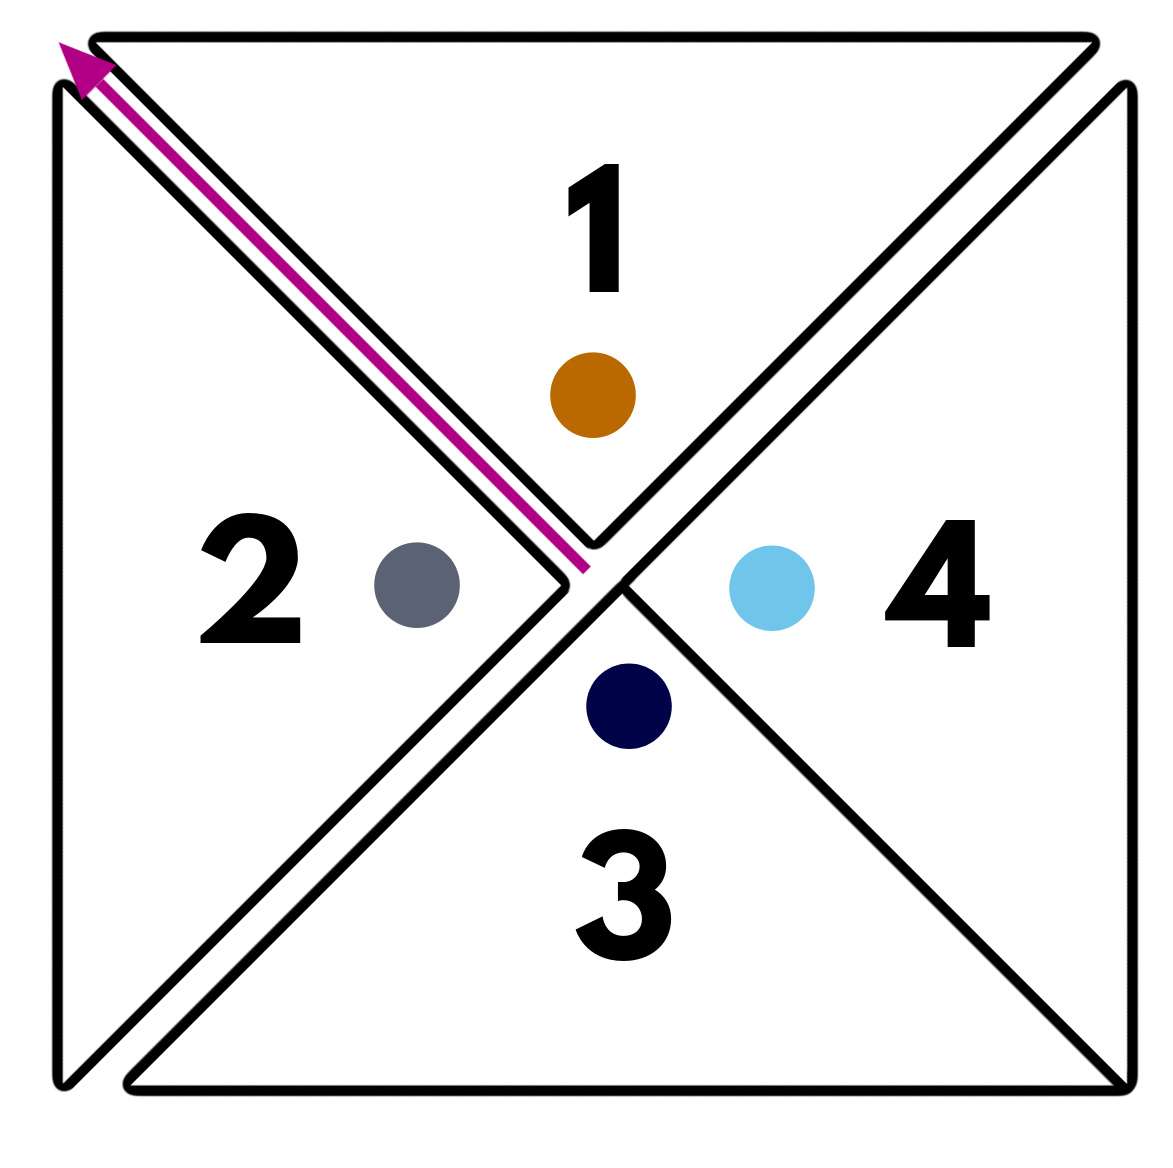
- Line up the 4 triangles according to the diagram, making sure that the RS of each triangle is facing you.
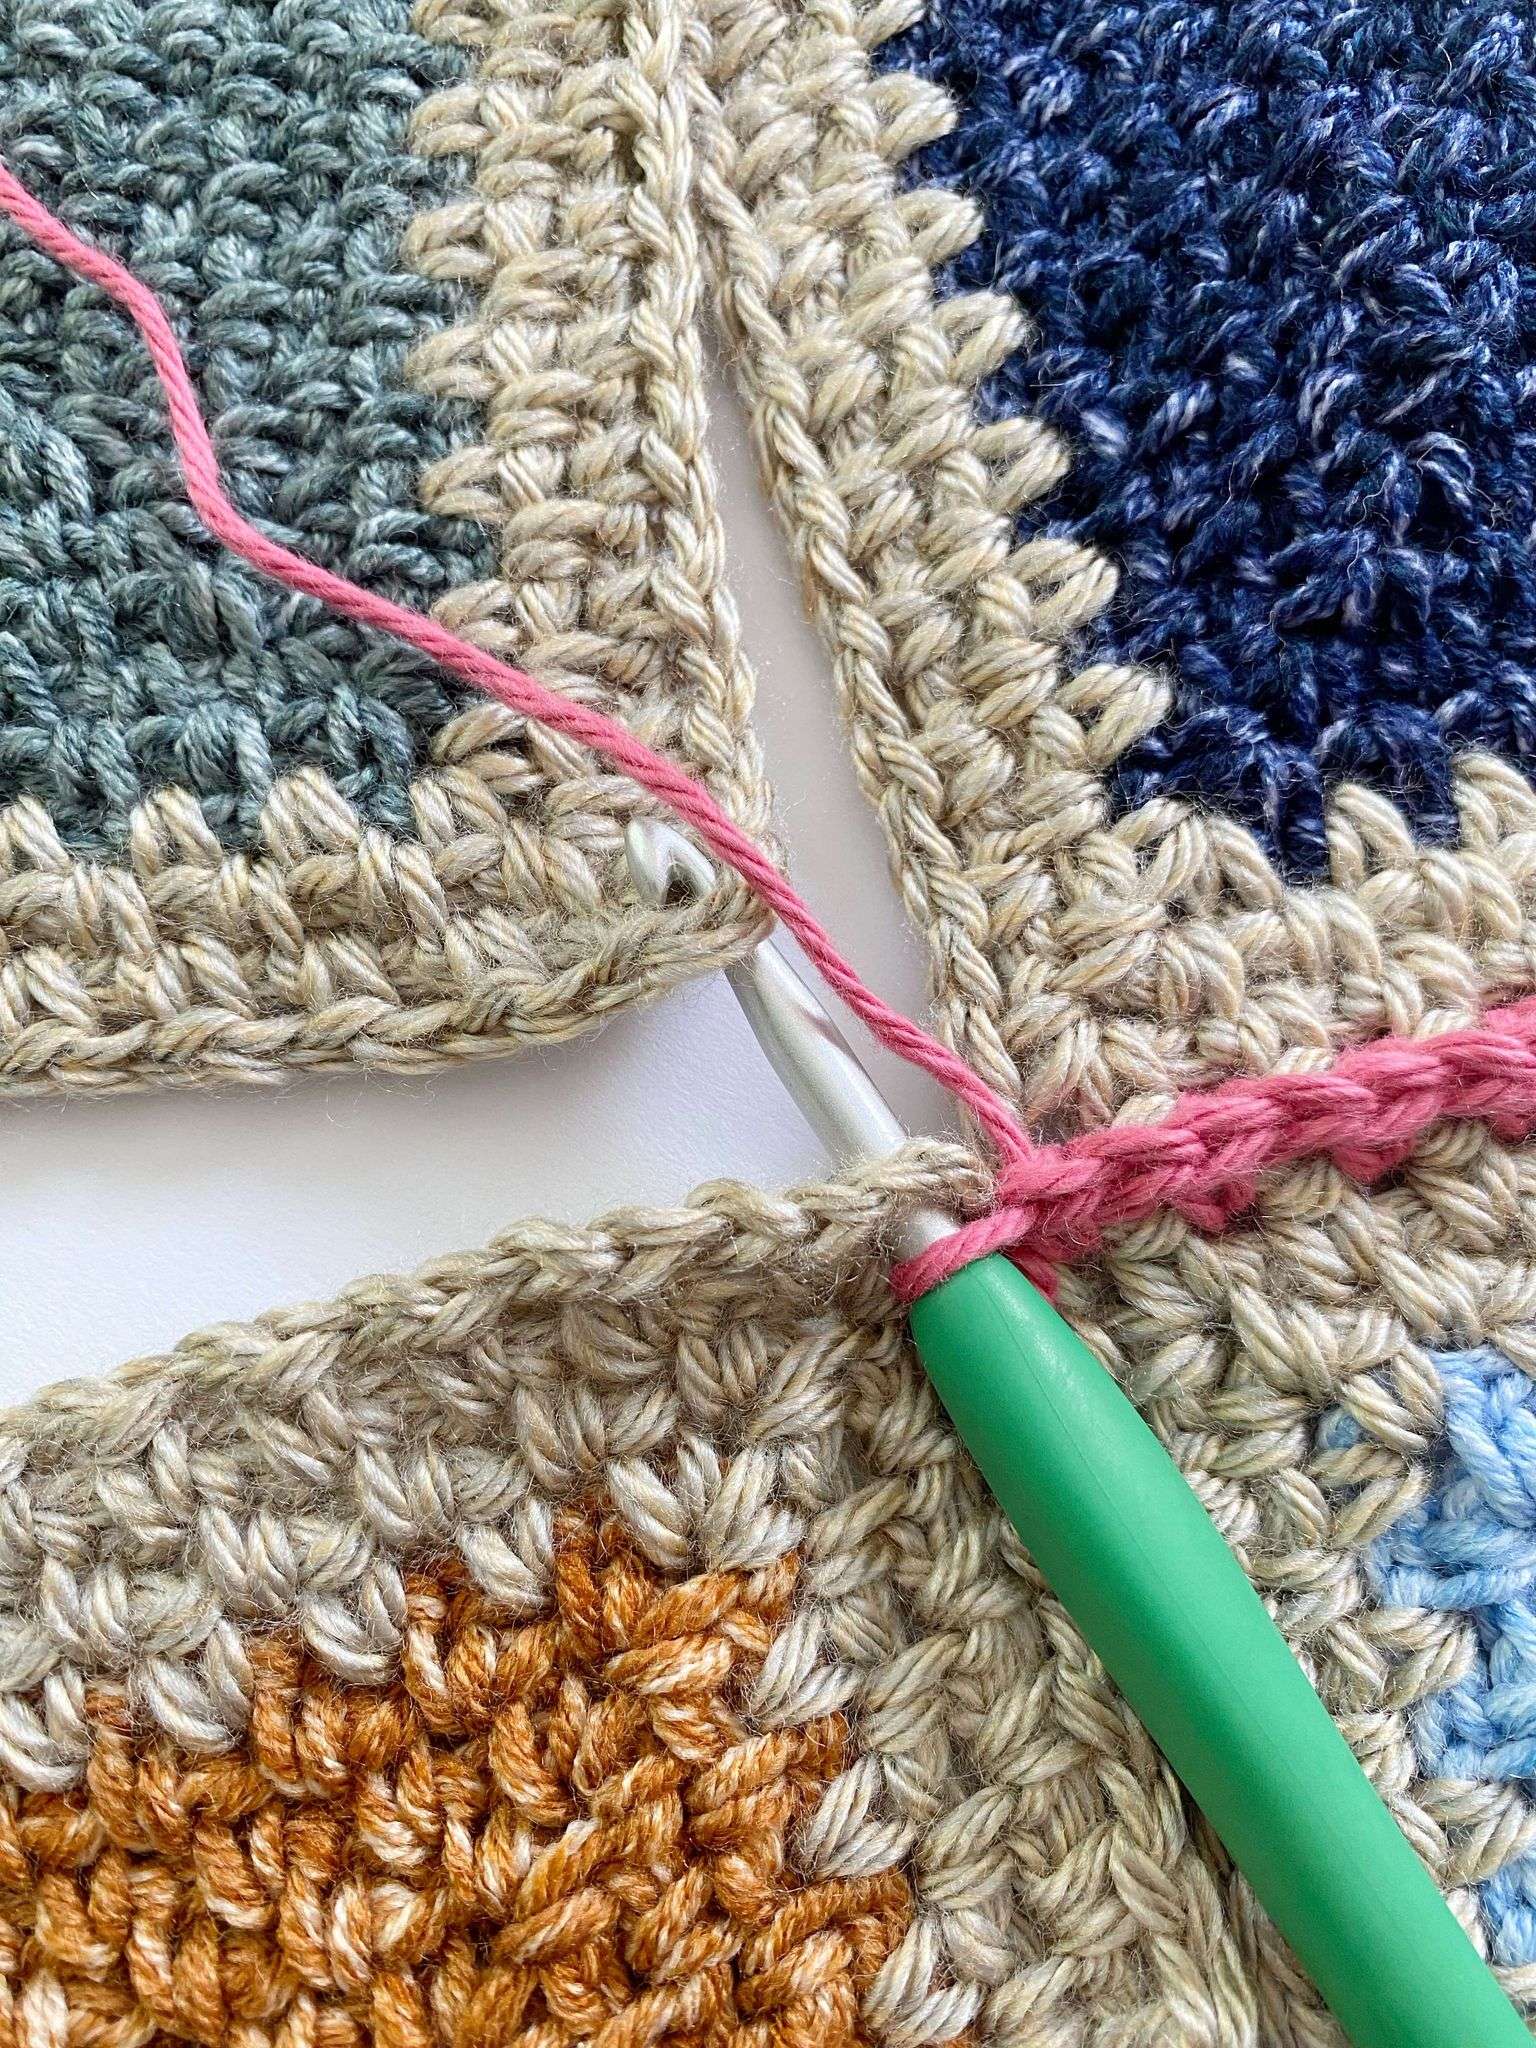
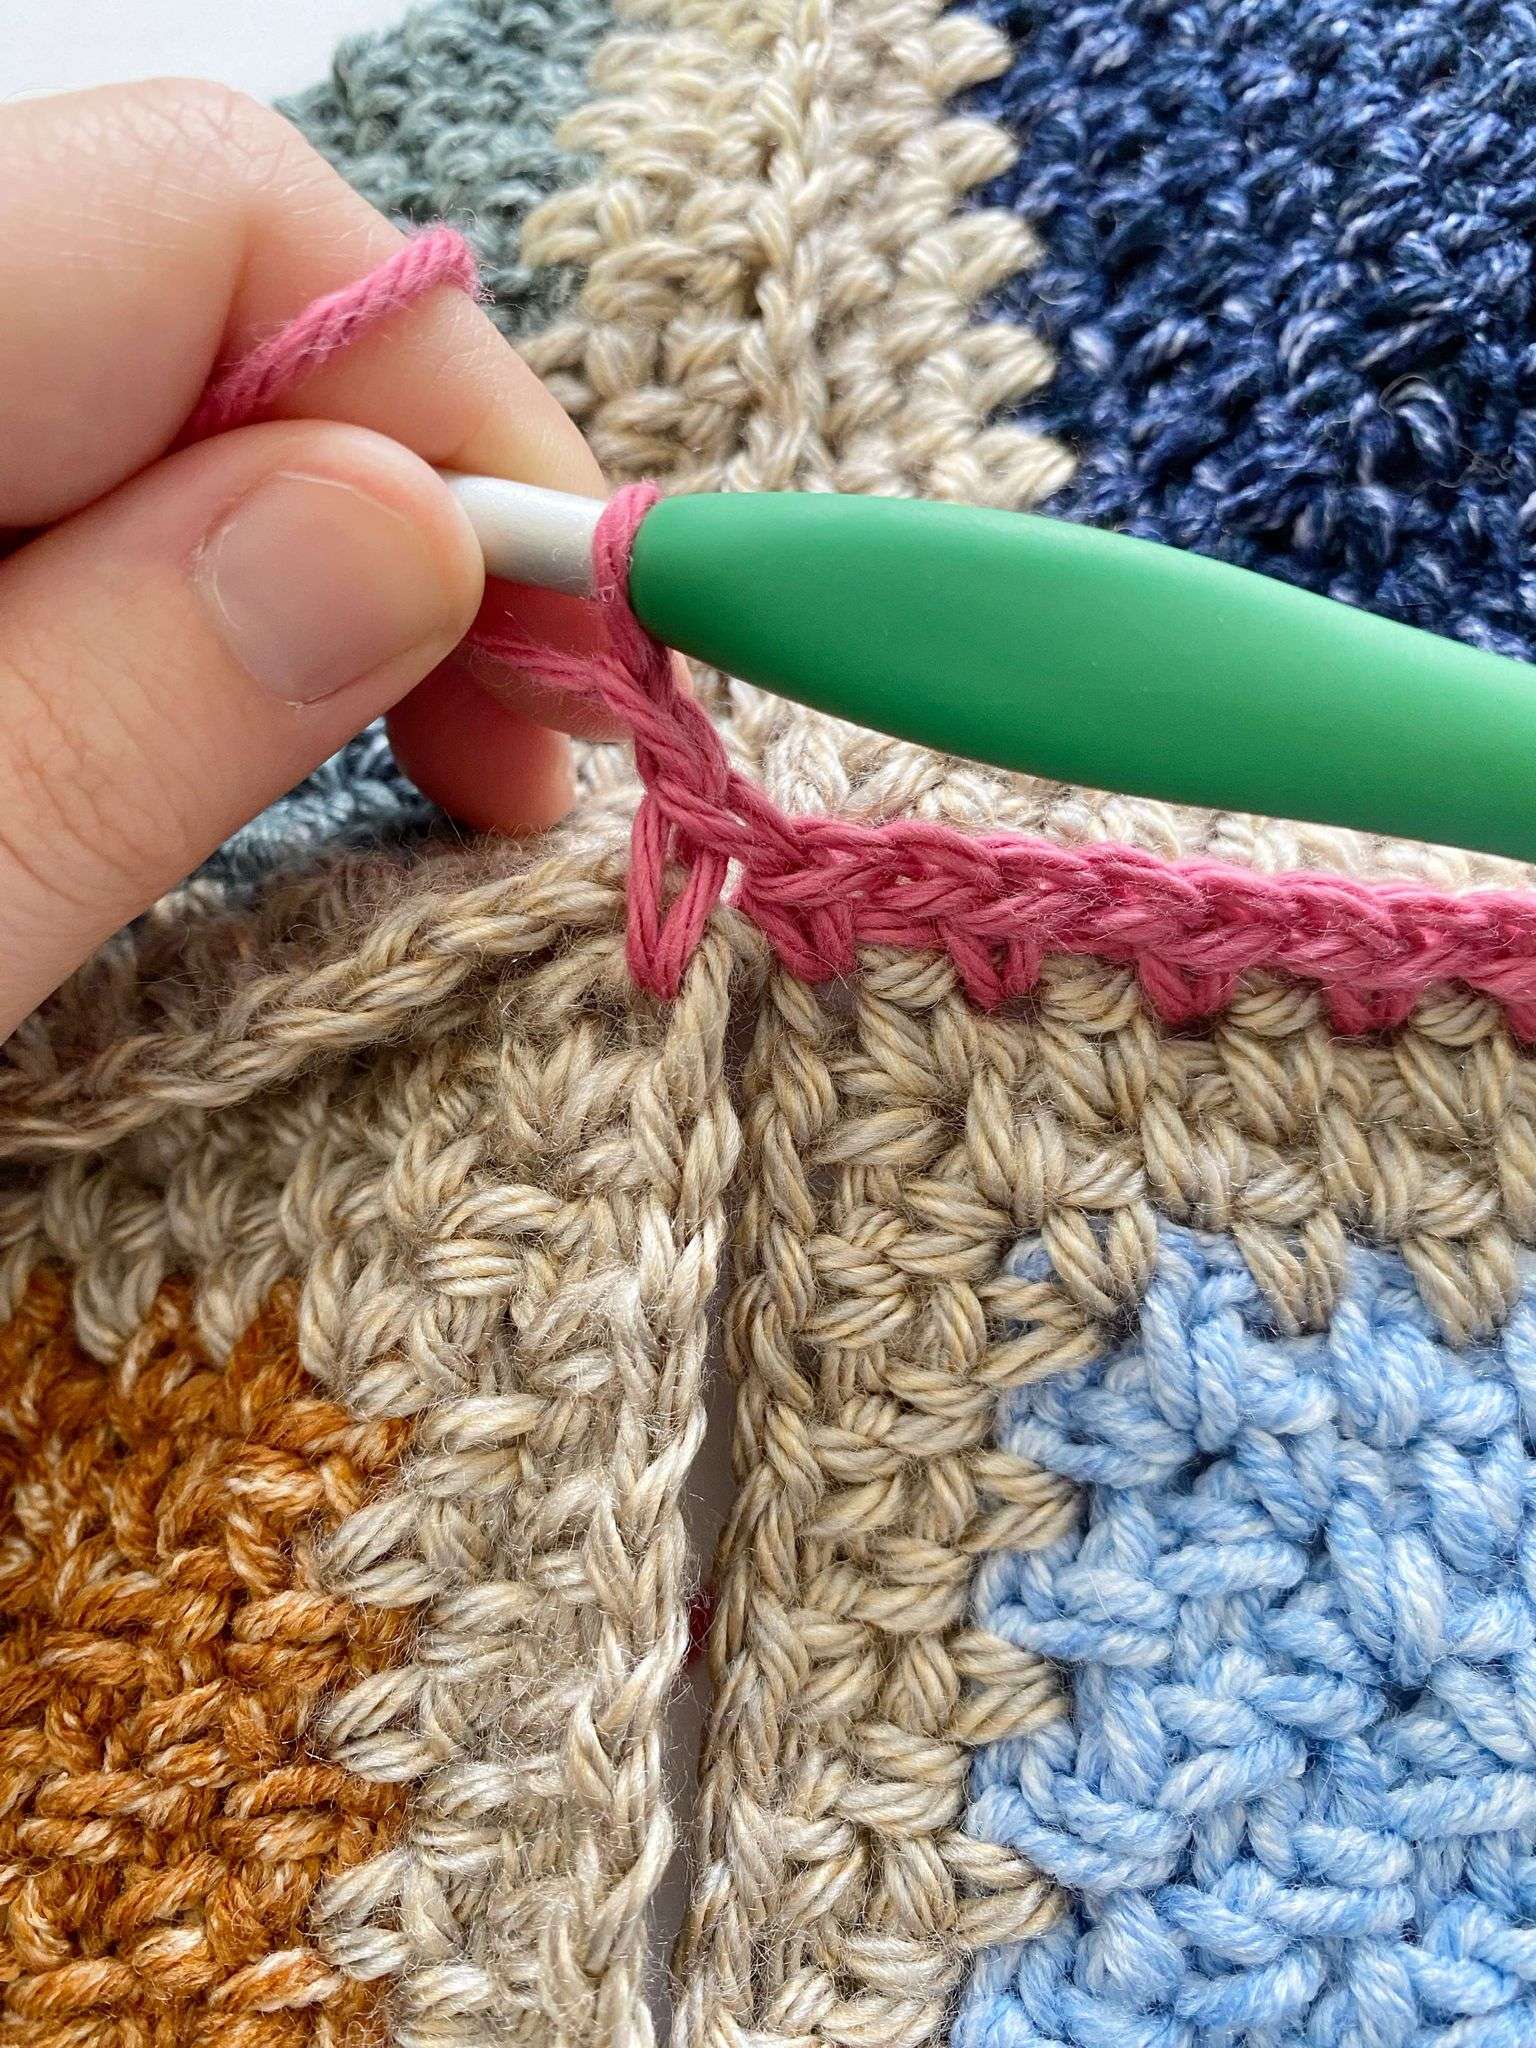
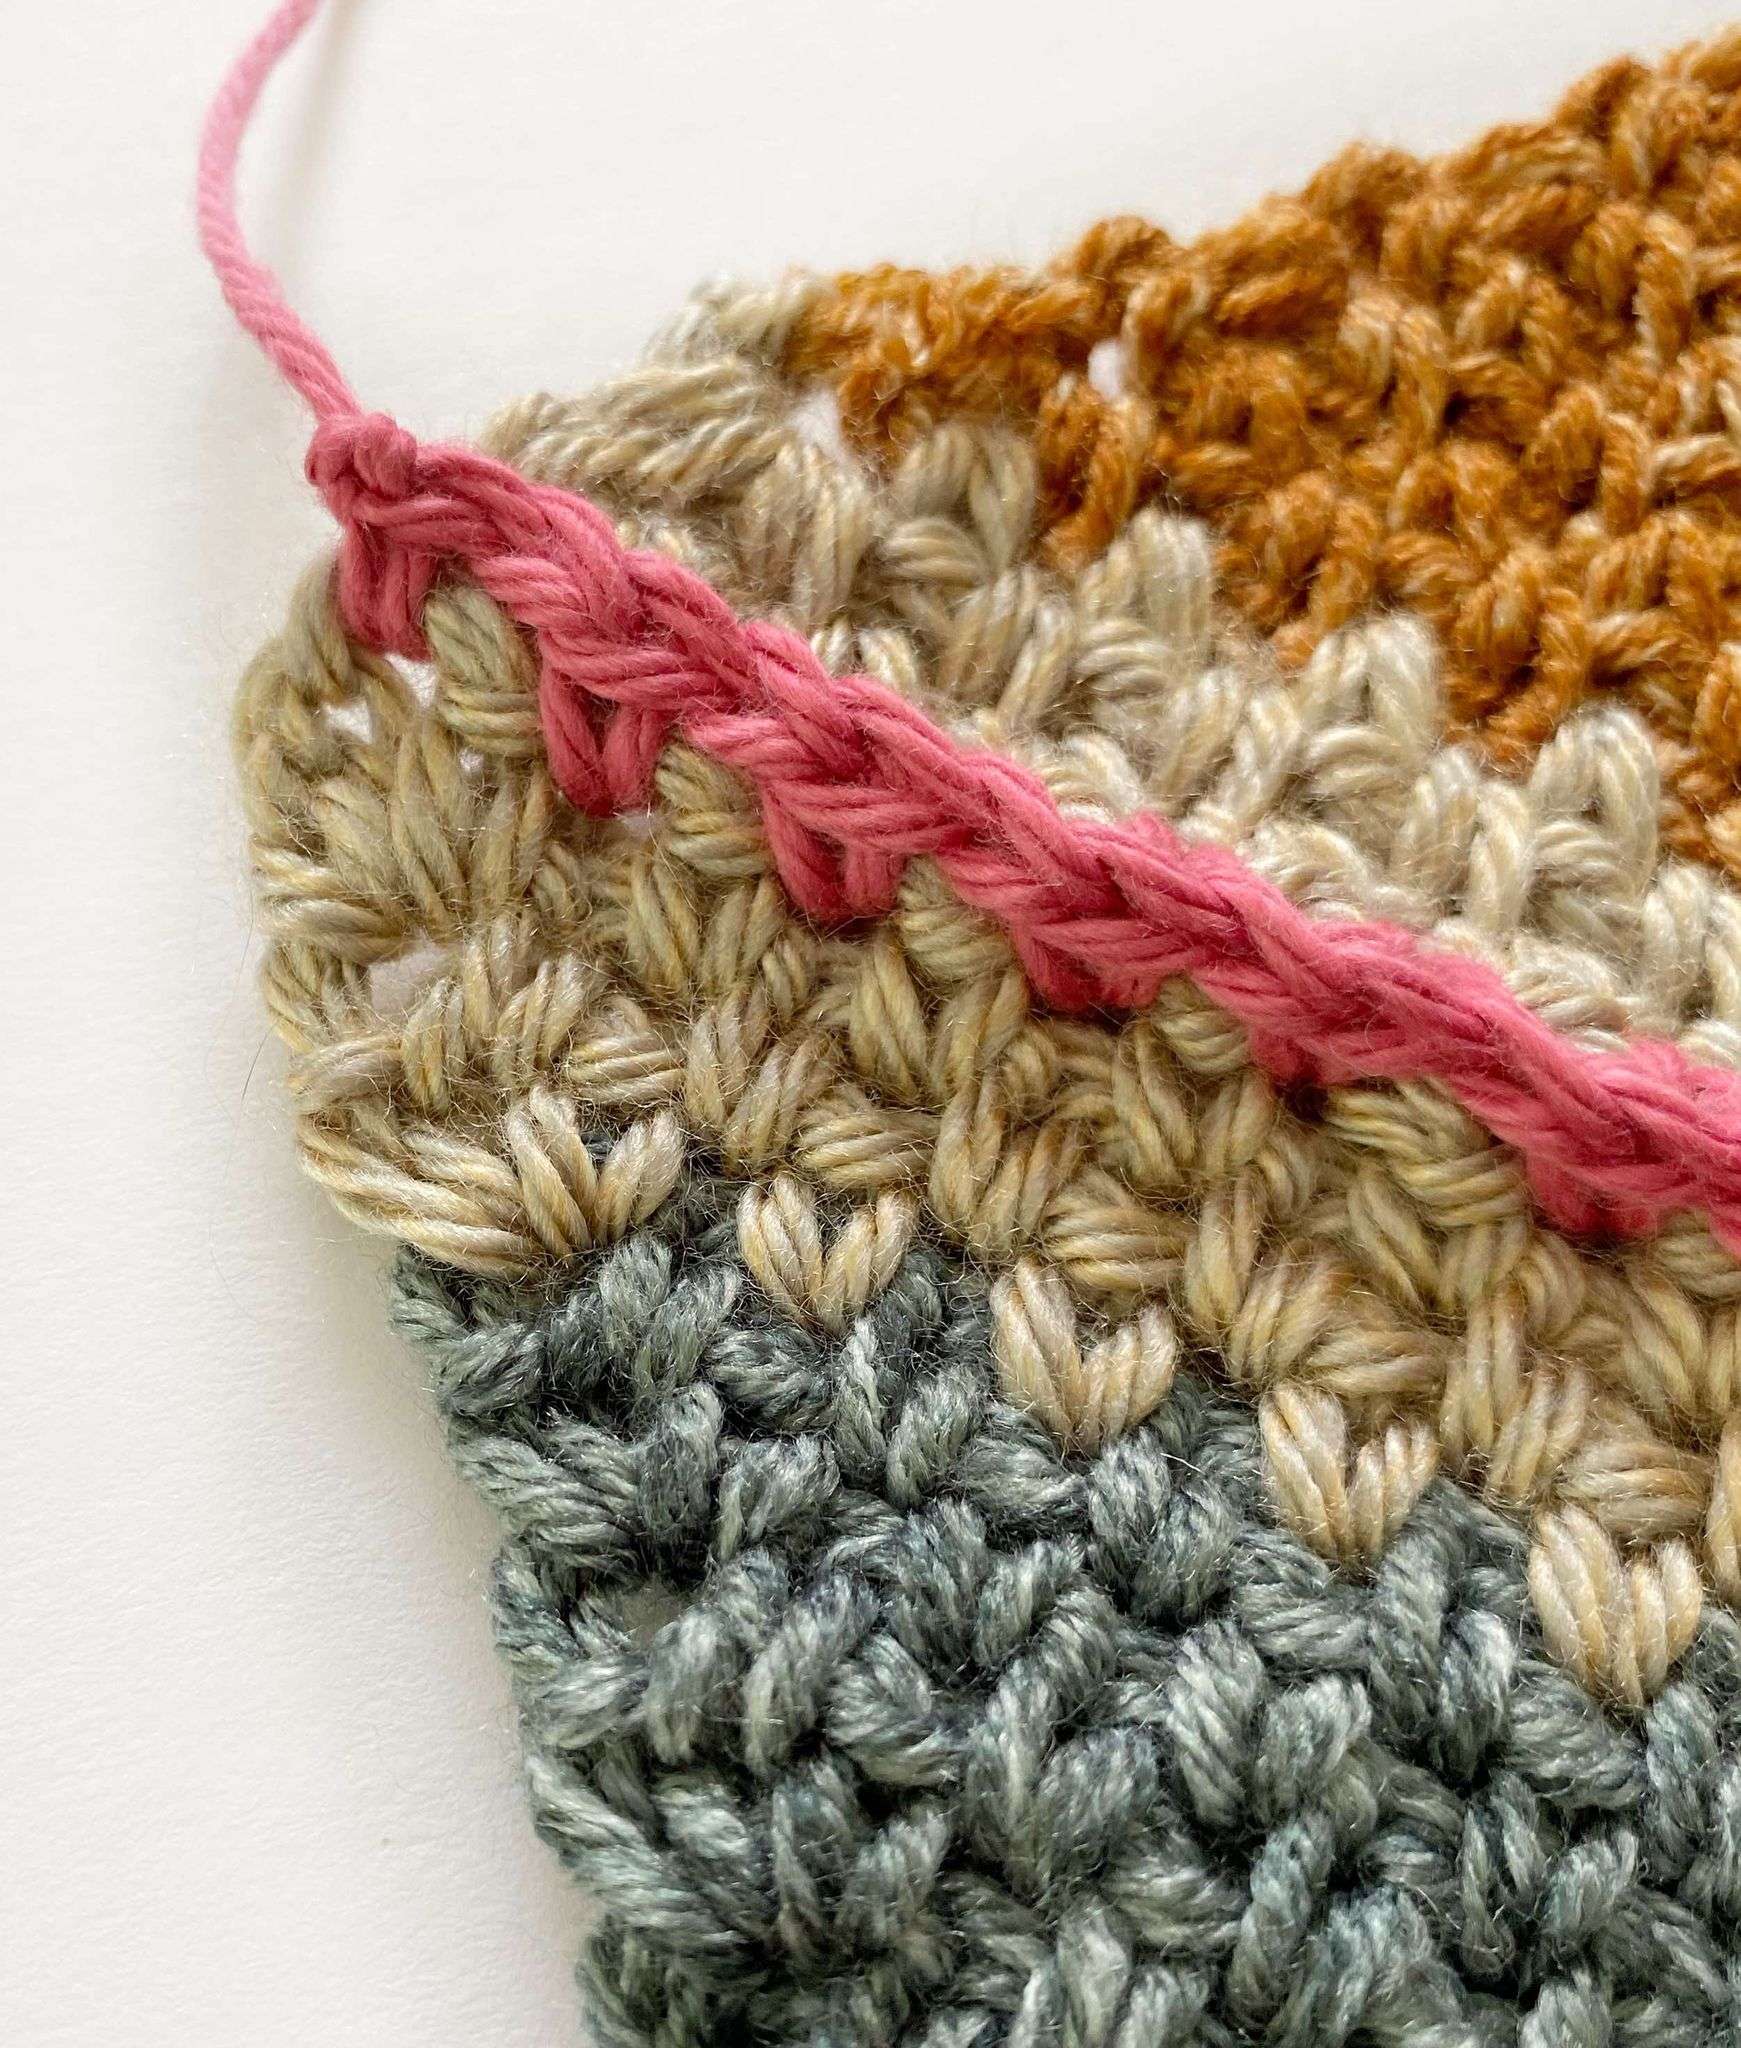
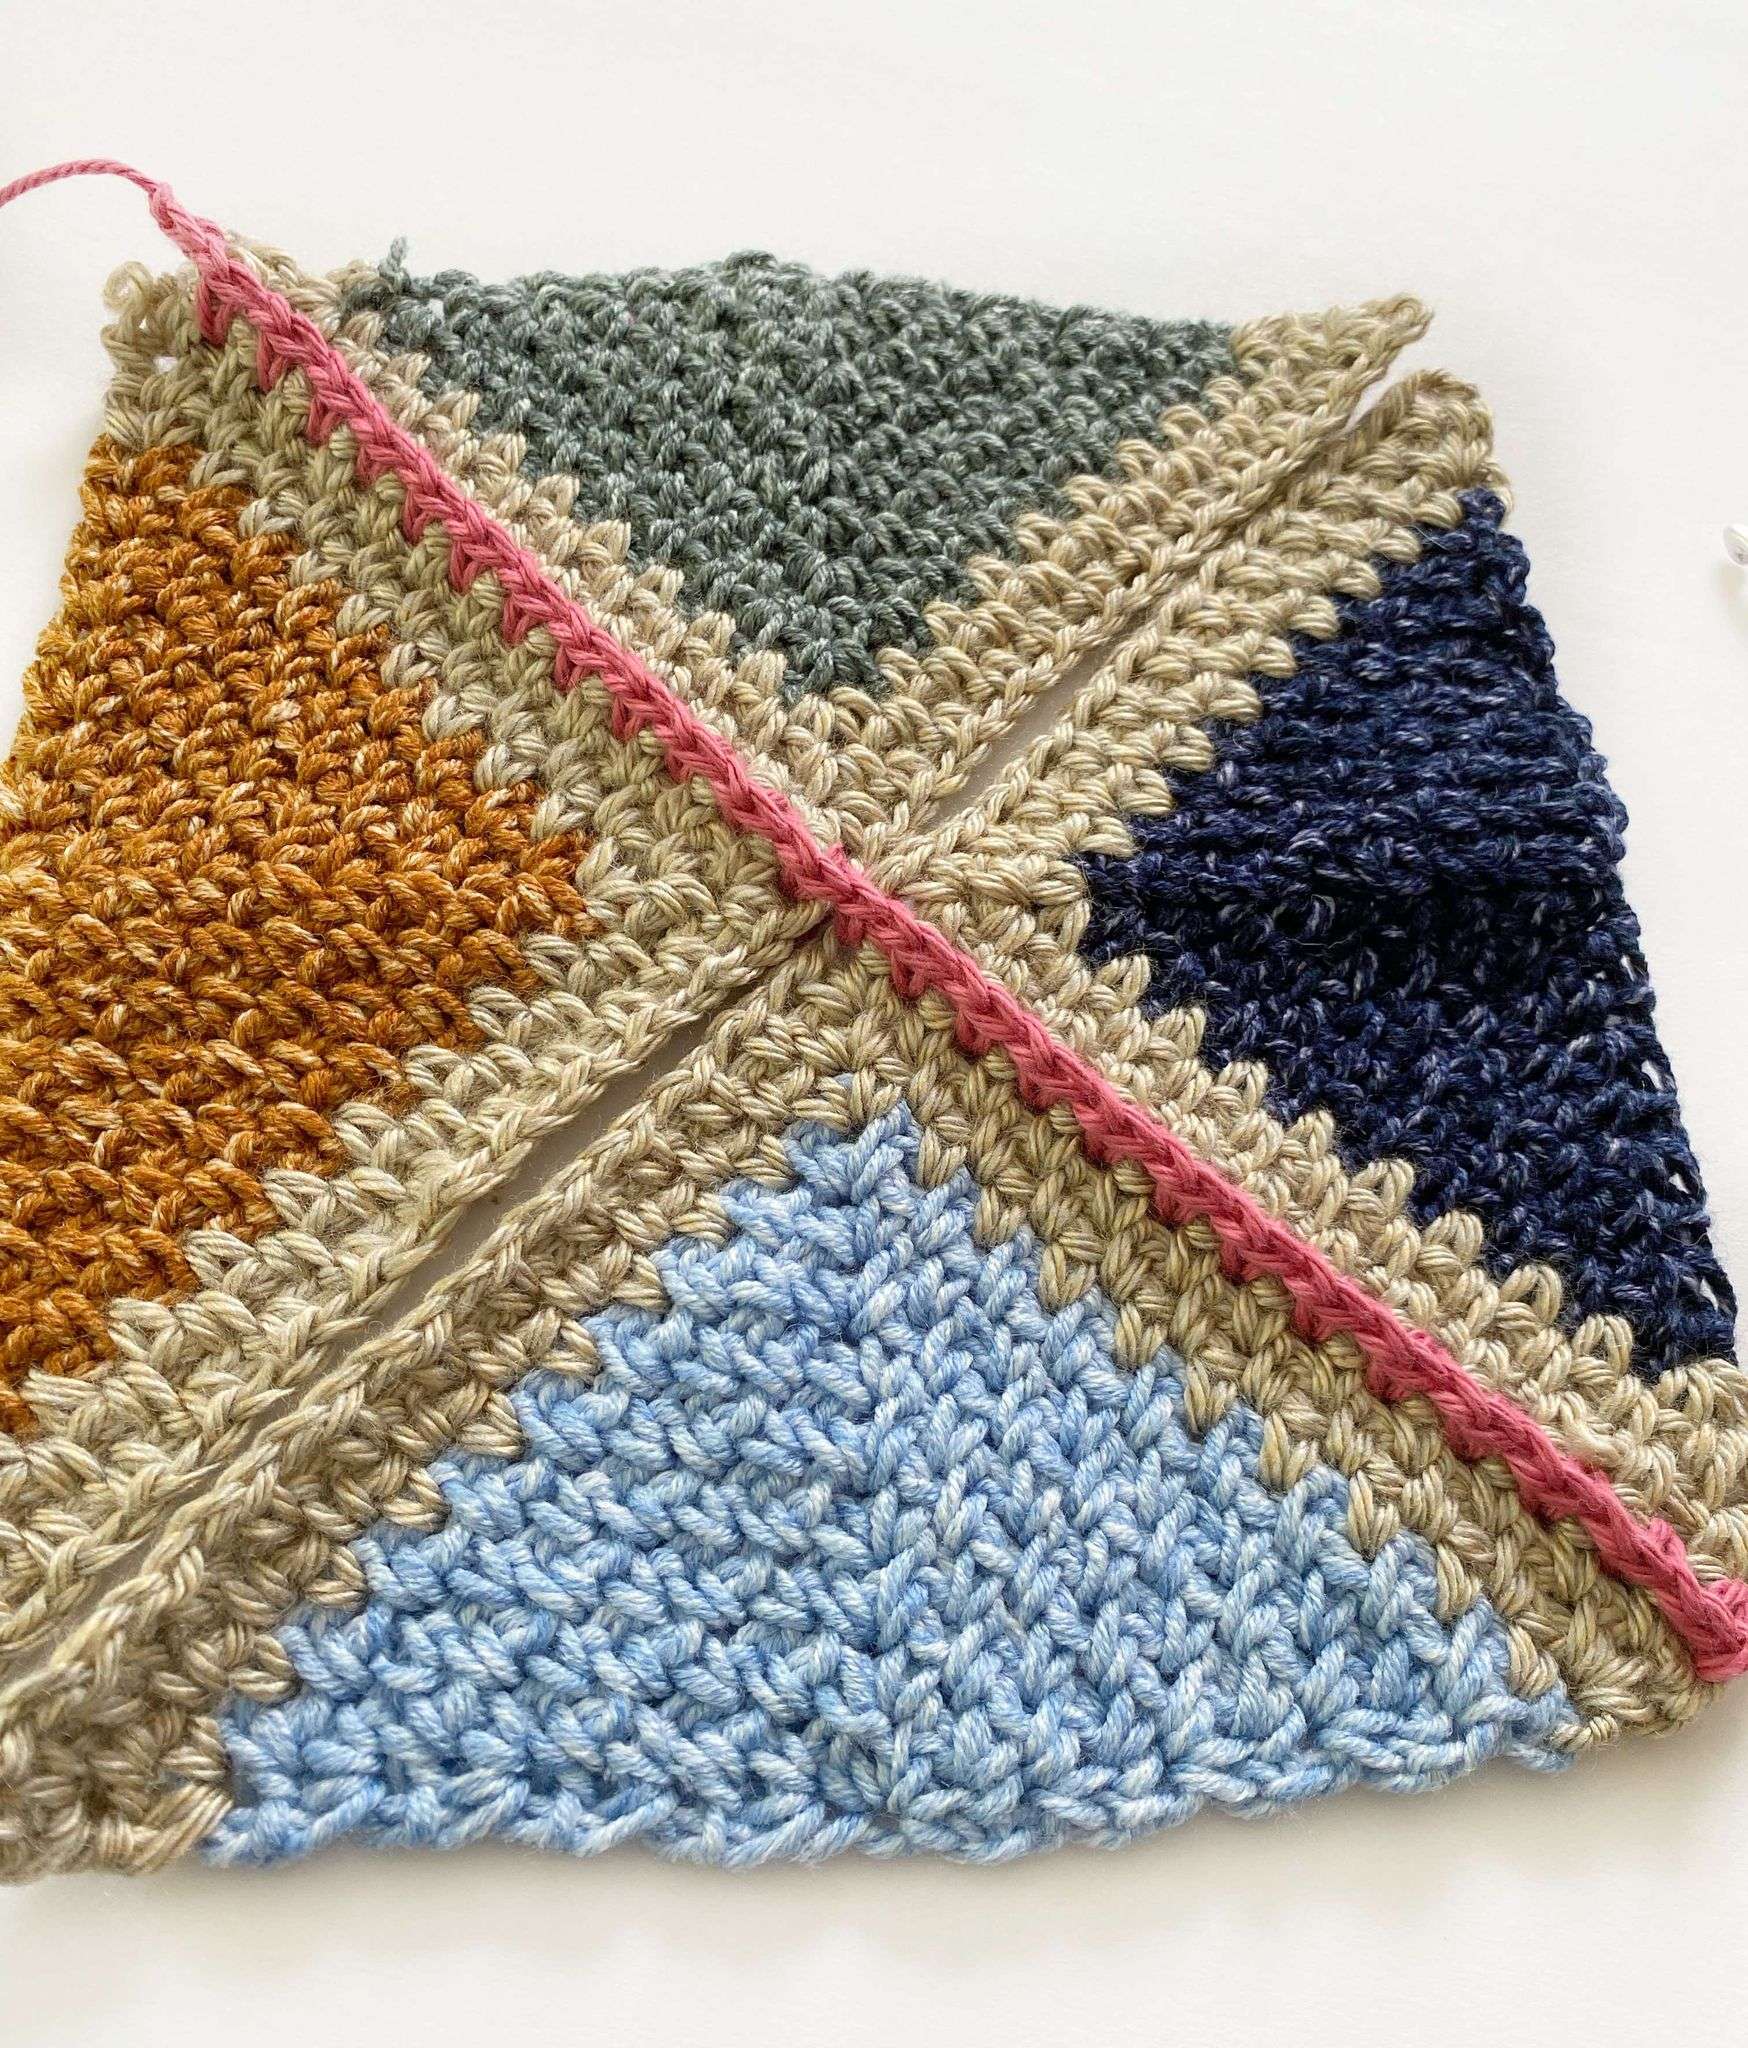
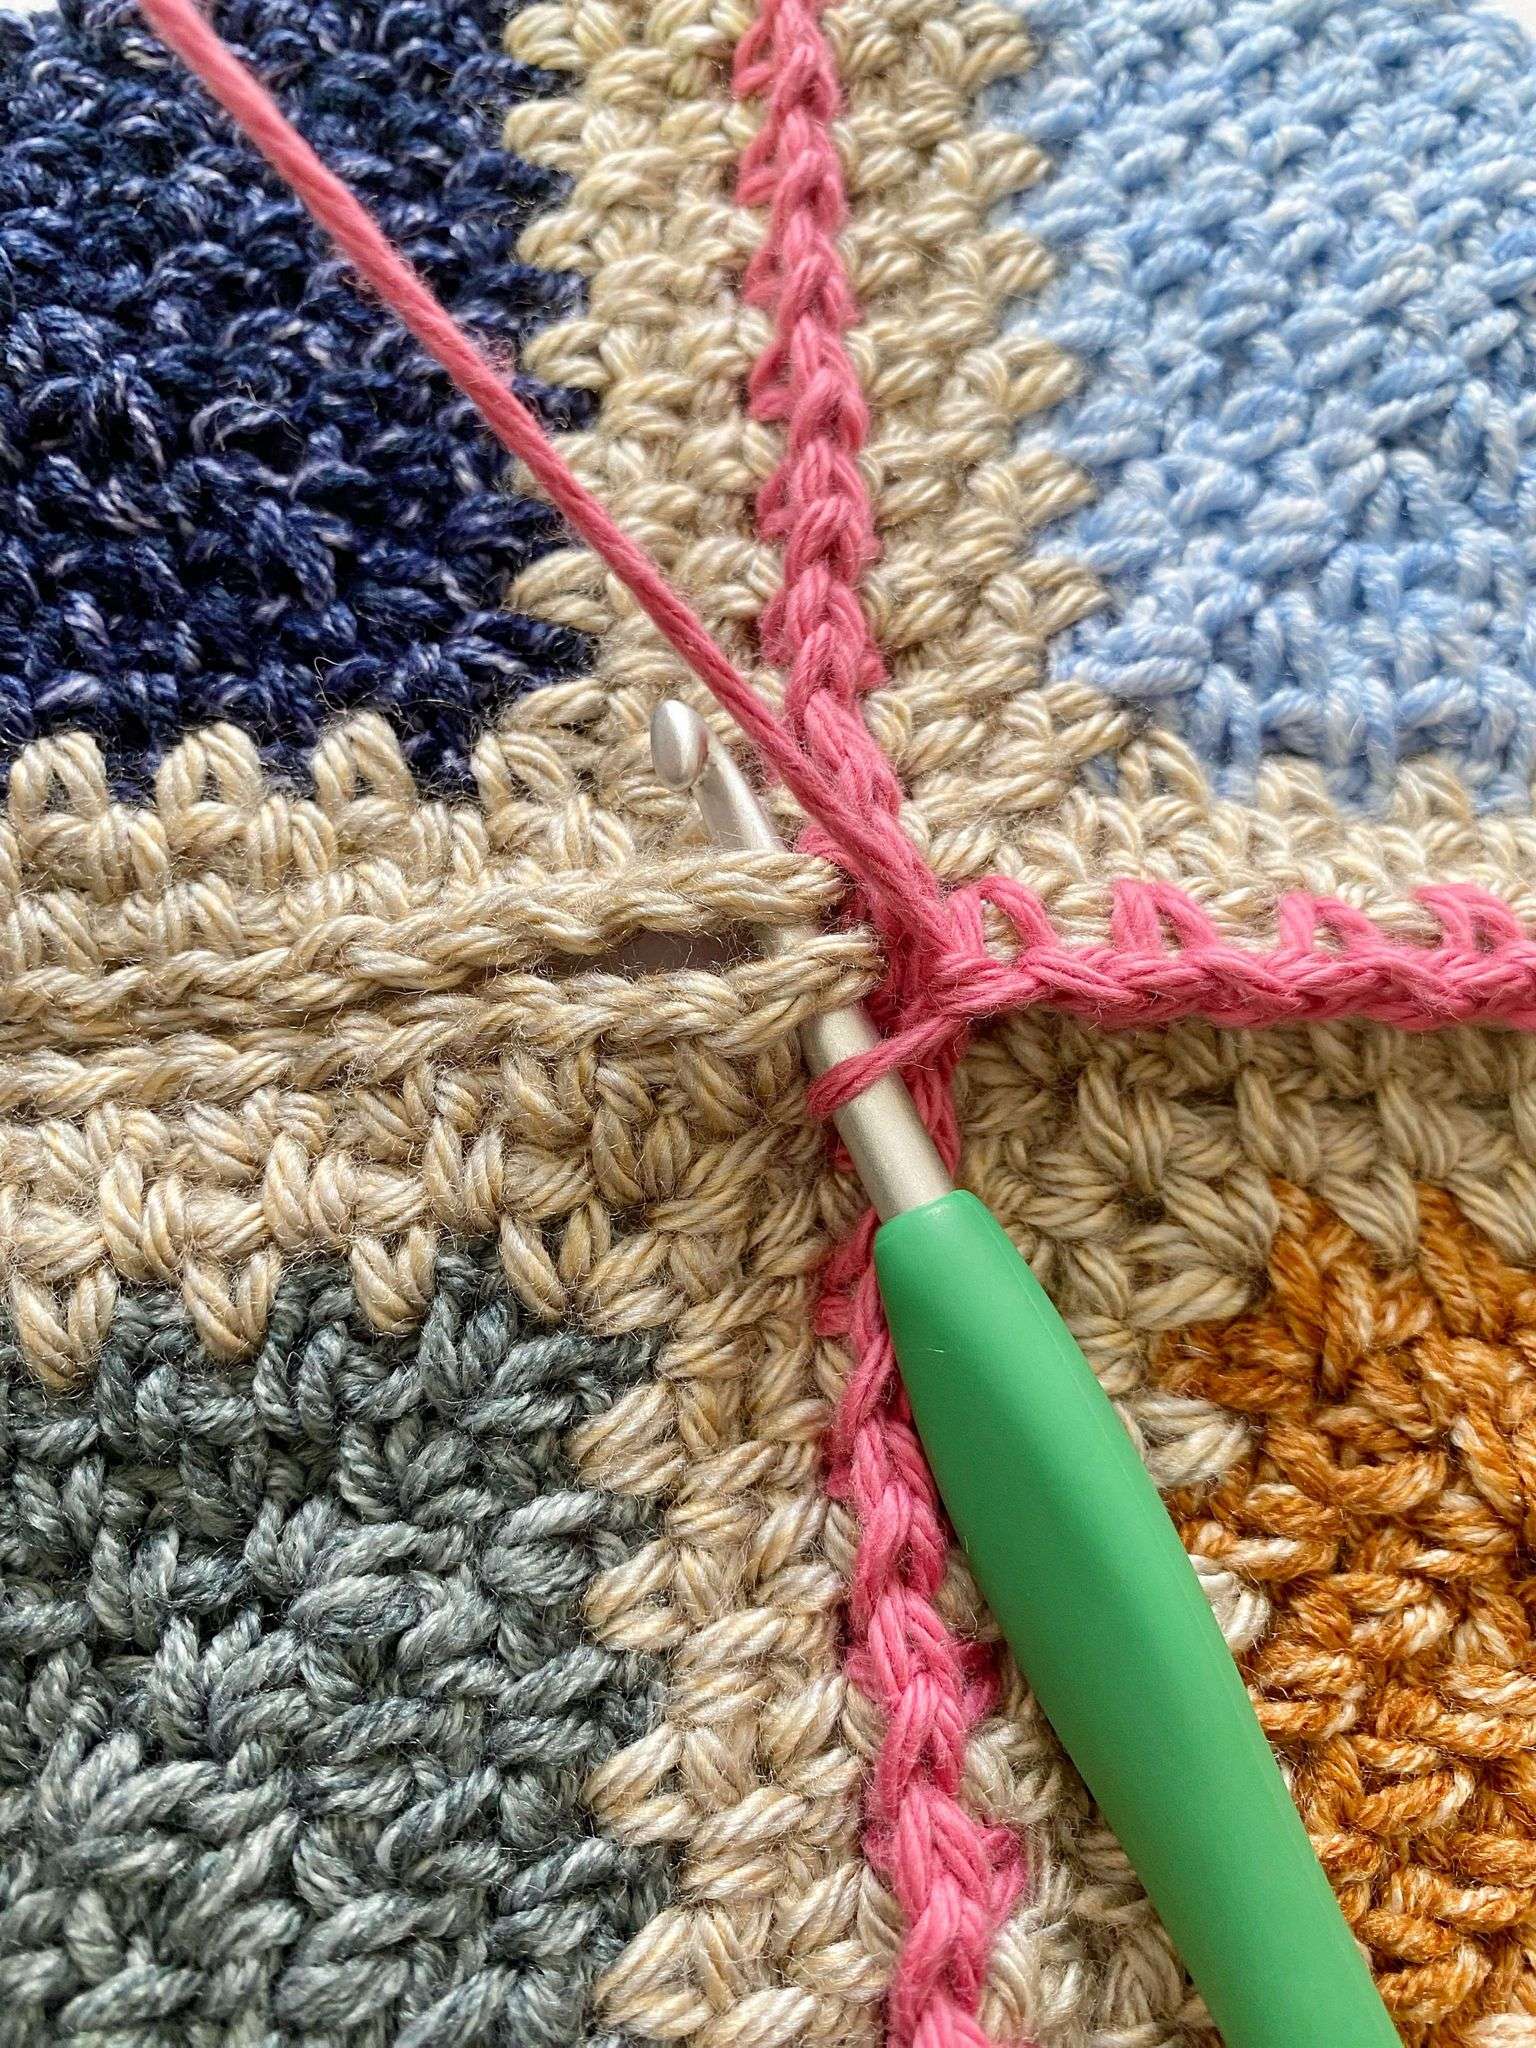
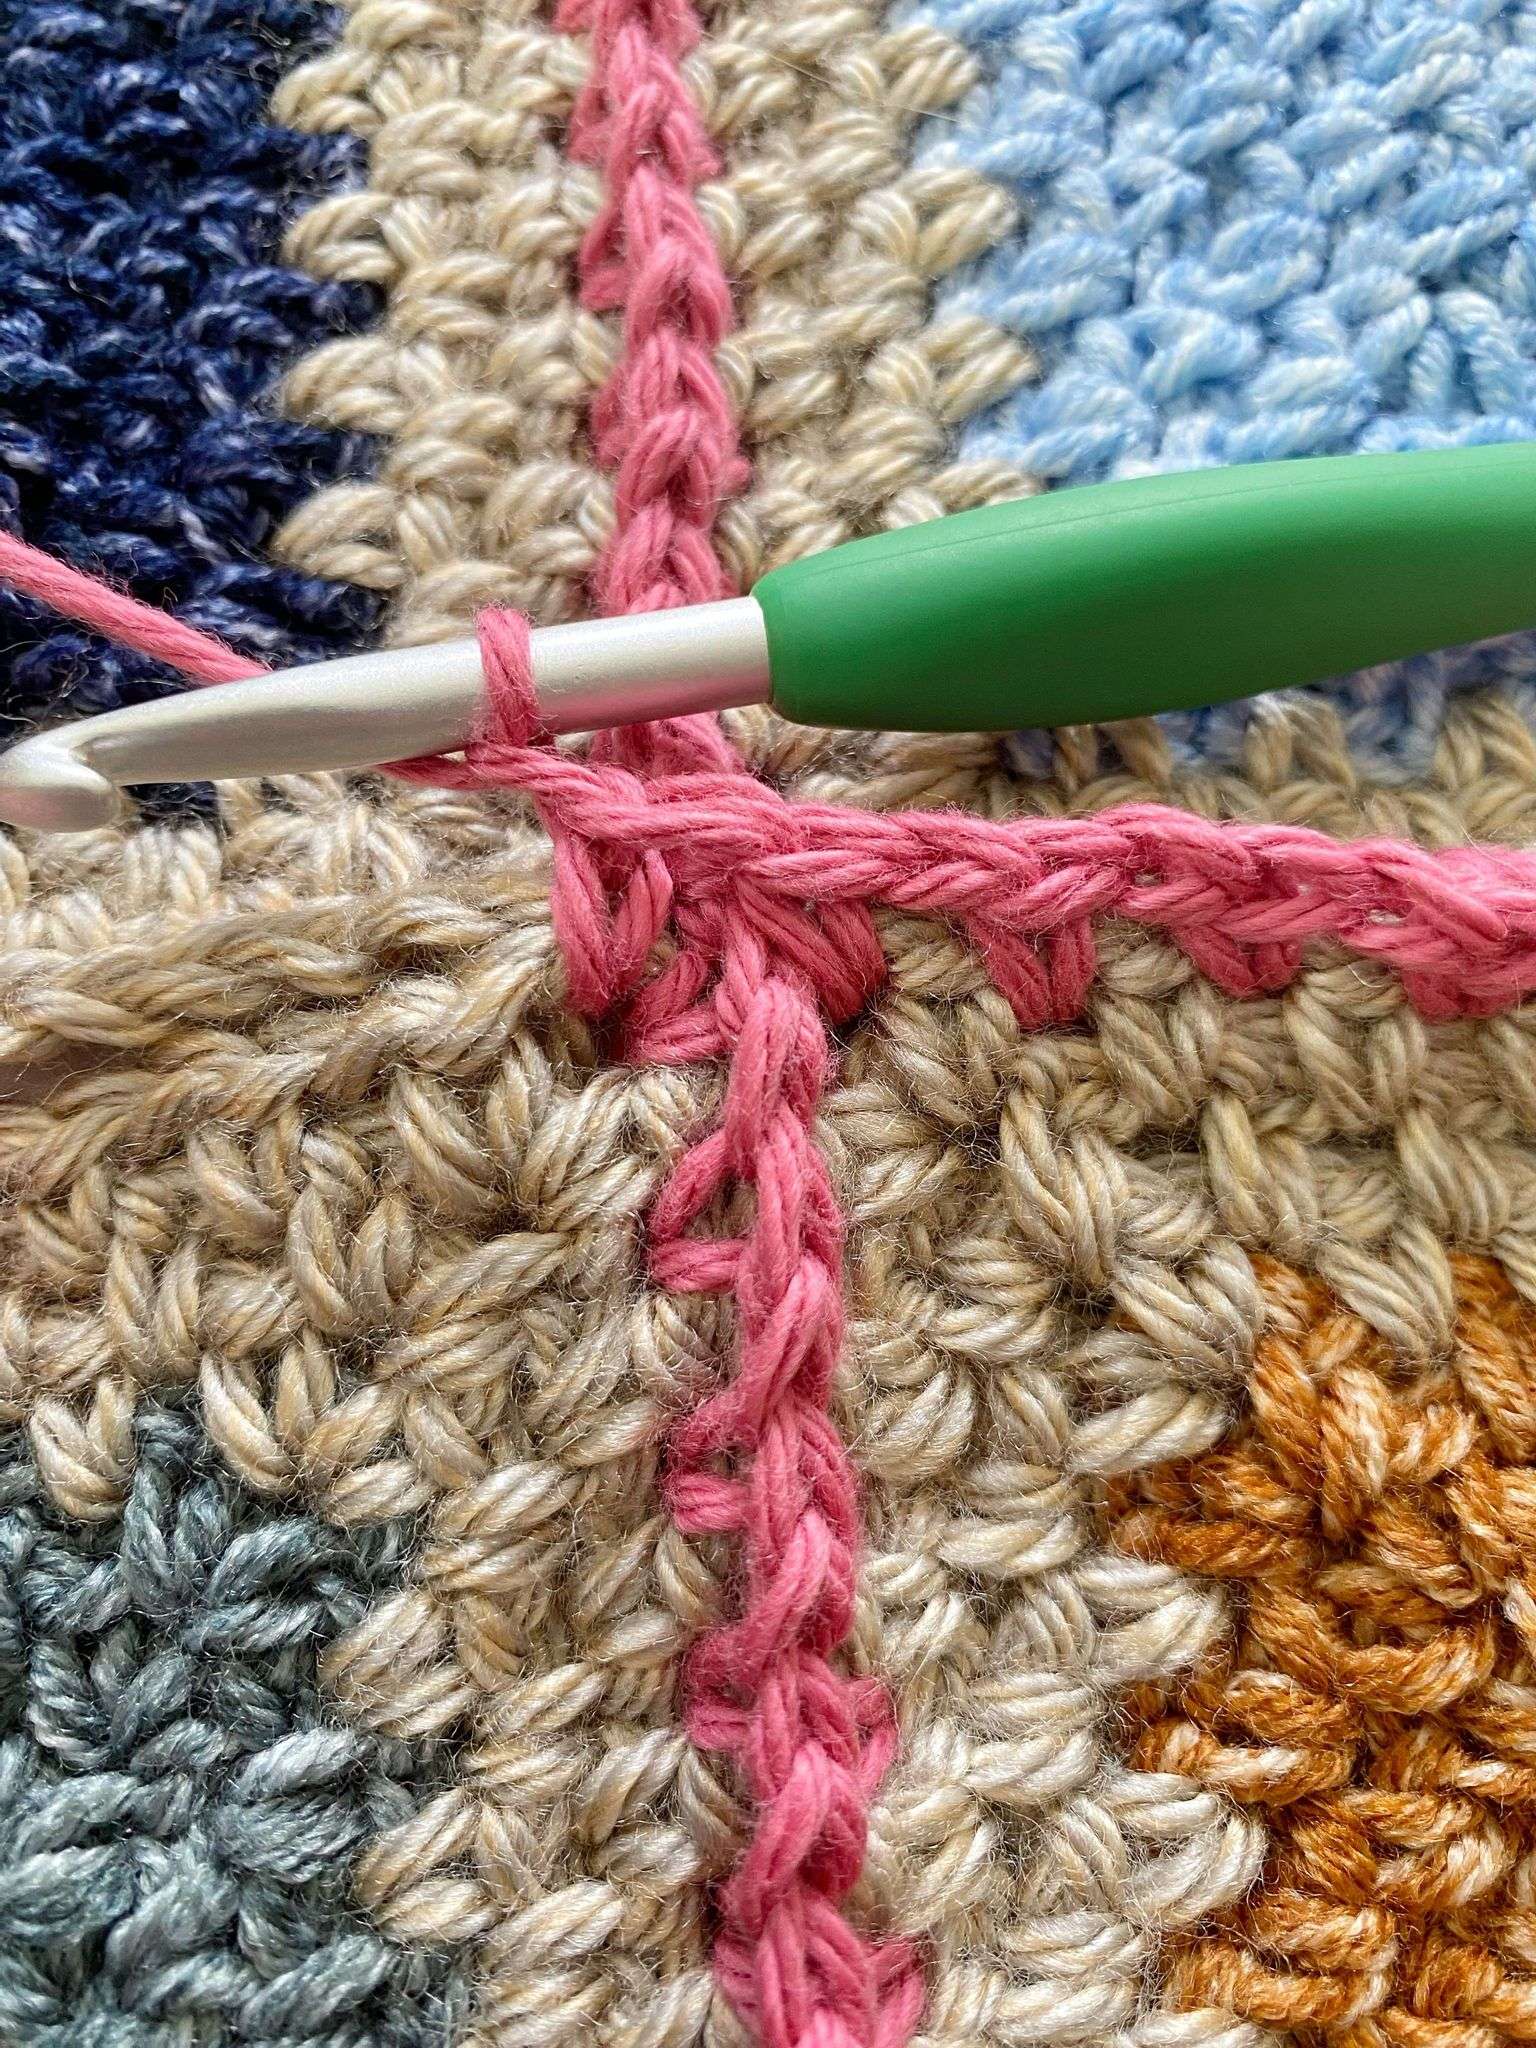
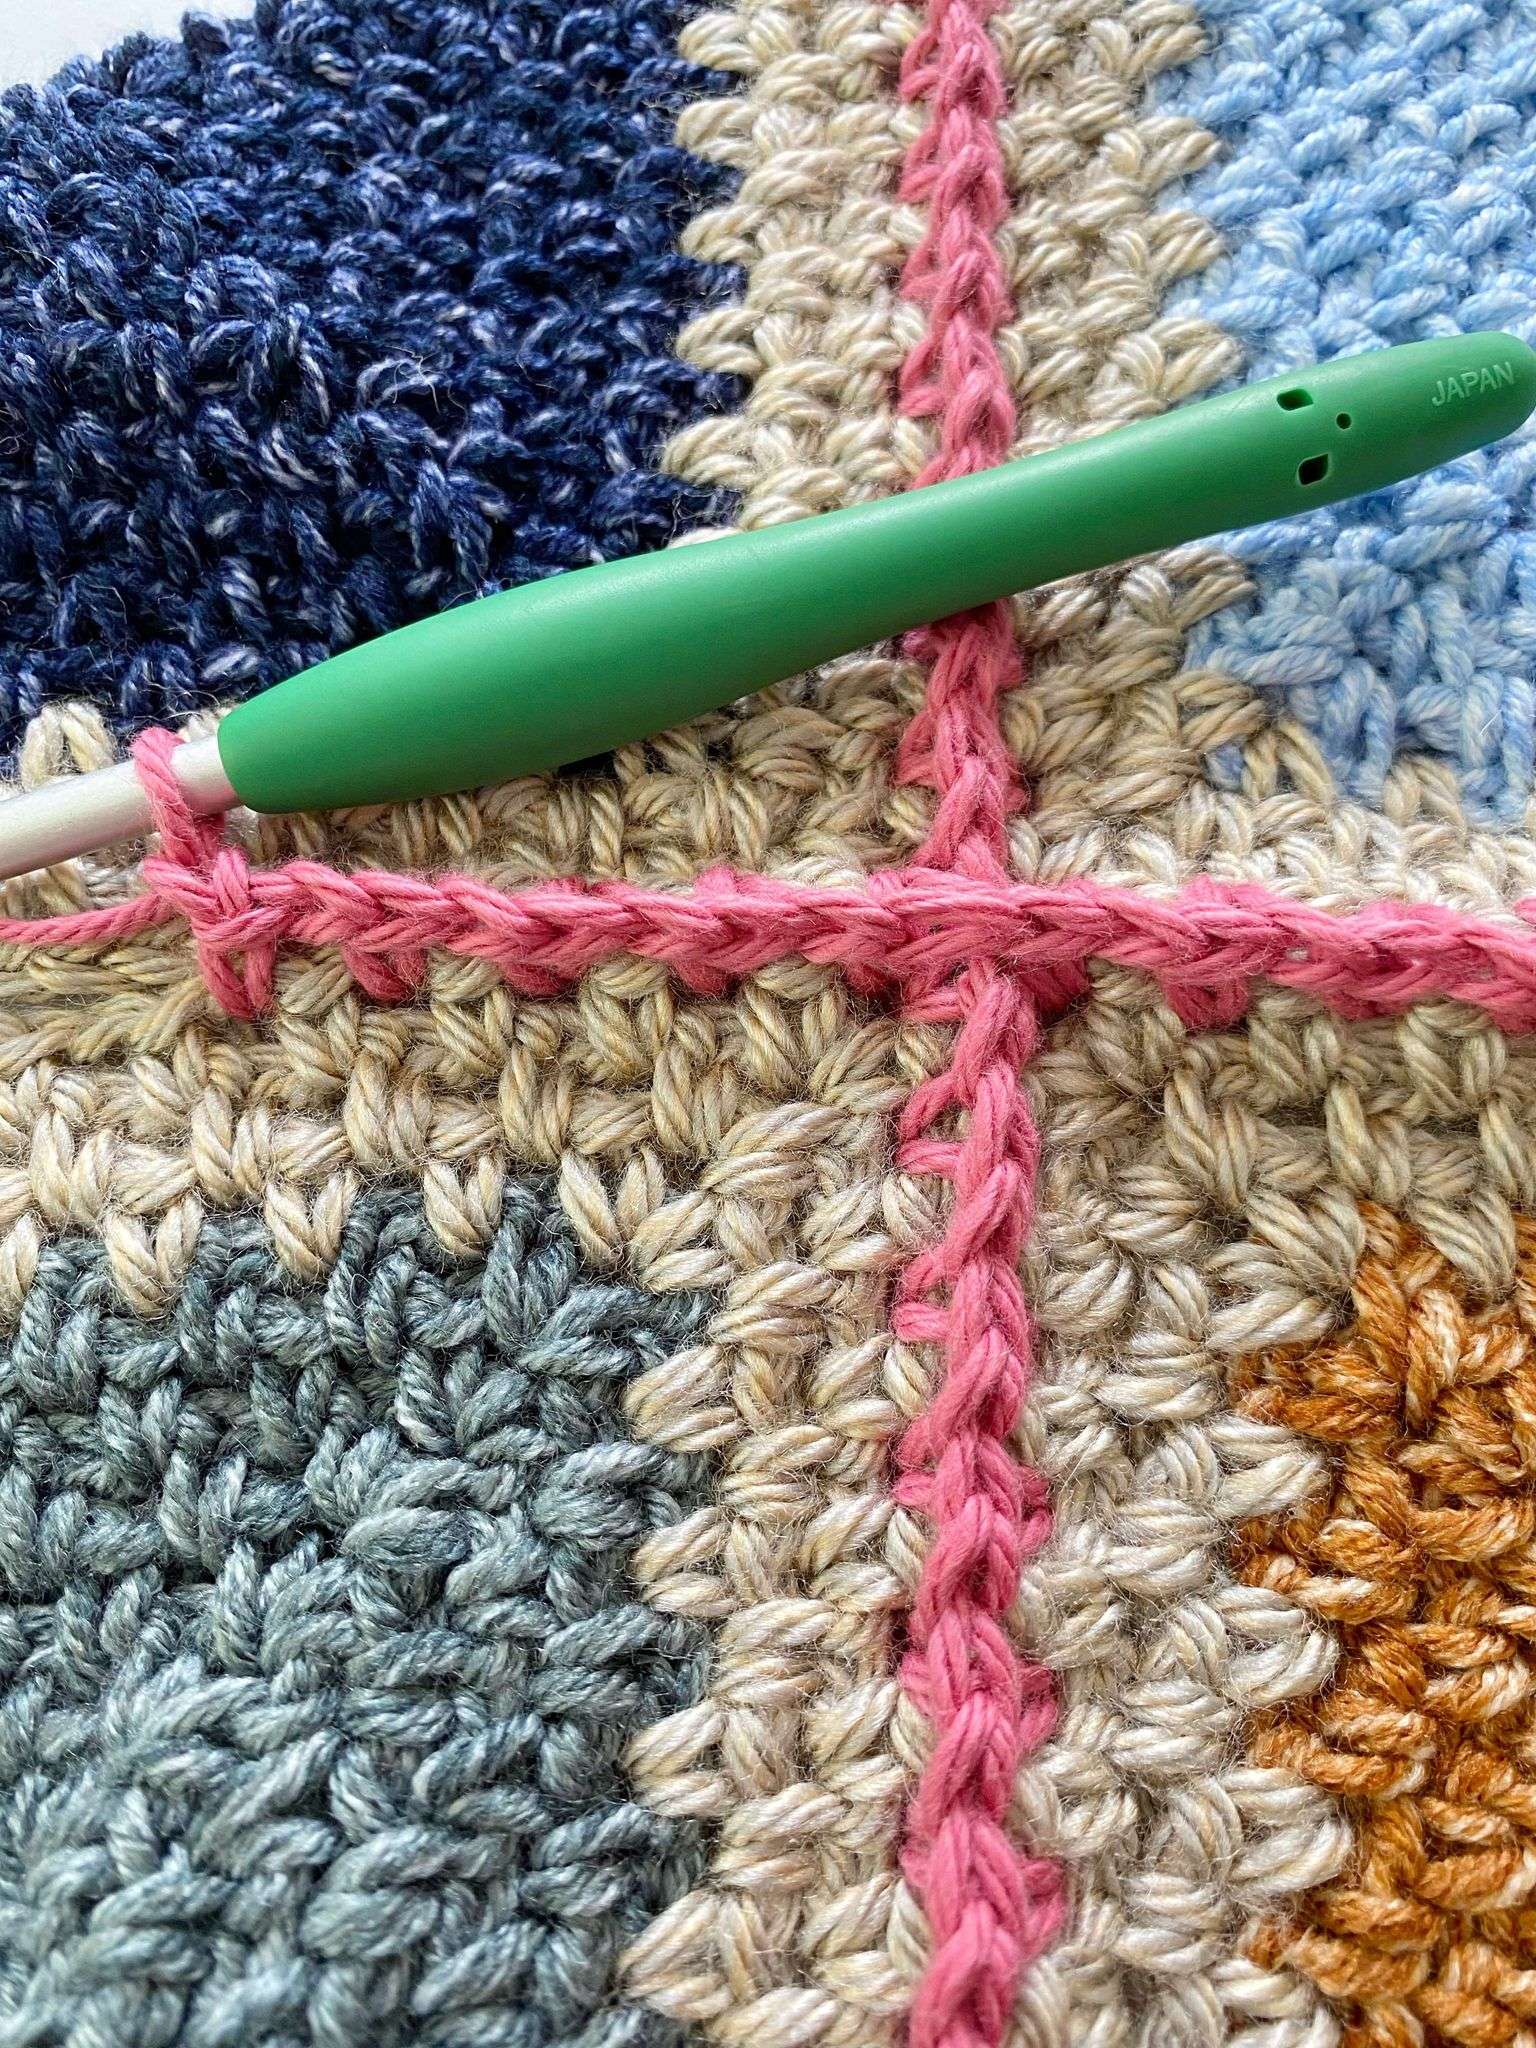
- To join the triangles, we are going to crochet along the diagonal and make two passes – a first join and a second join – to ensure that all the sides are joined.
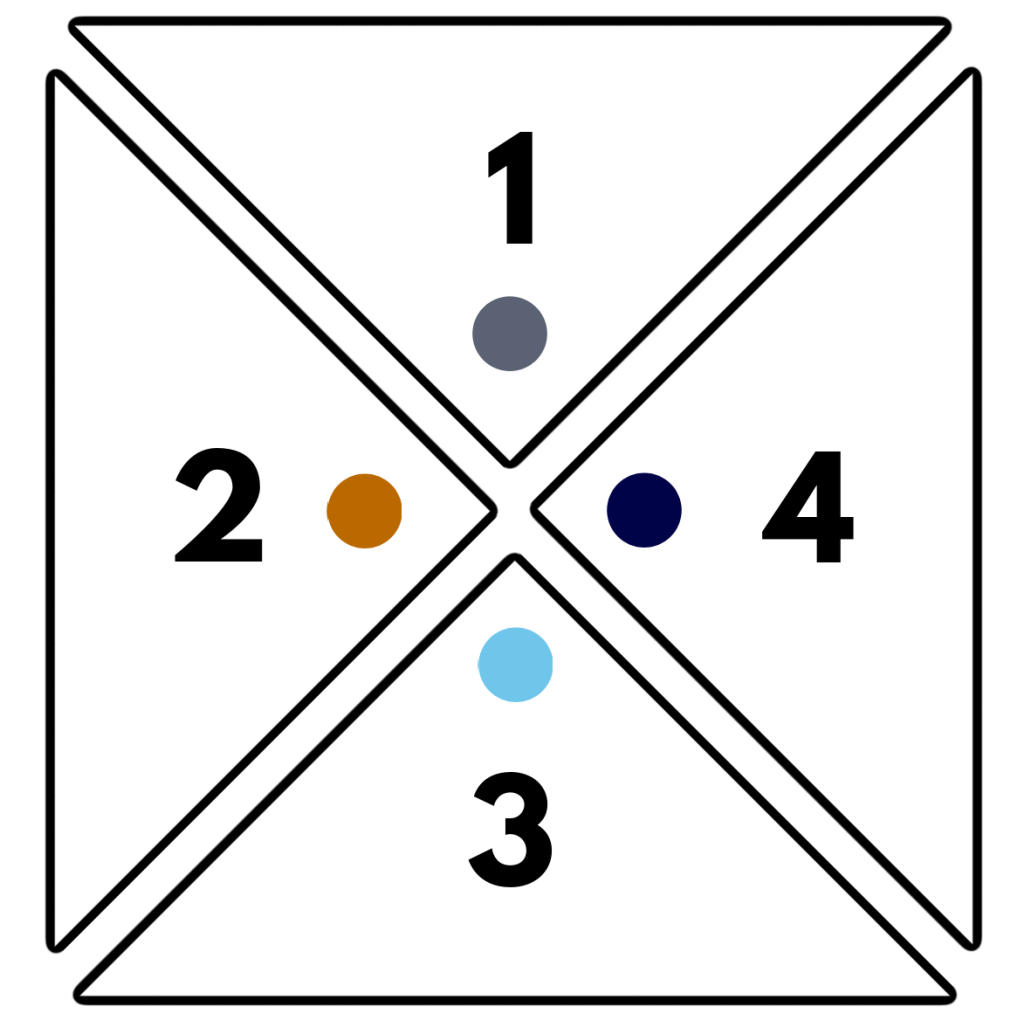
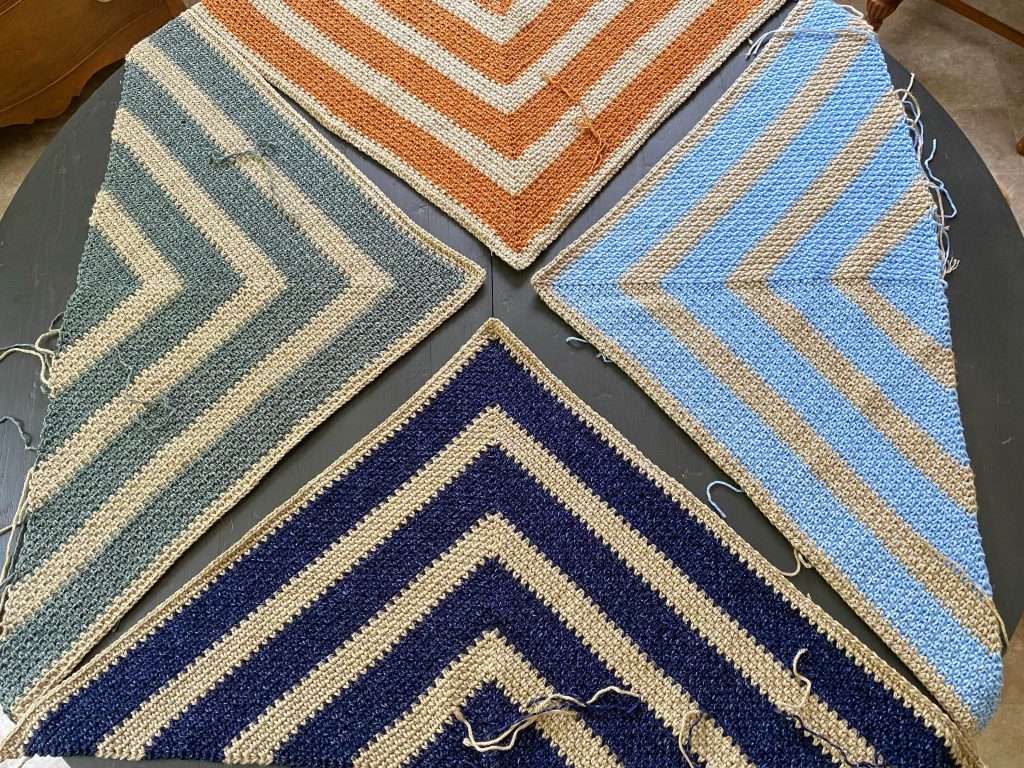
First Join:
Fasten on with MC in the bottom right corner ch-2 sp of Triangle 3. To join the triangles, insert hook into the matching ch-sps of the two triangles before making a sc.
Join Triangle 3 to 4: Ch 1, (sc, ch 1) in first ch-2 sp – going through matching ch-2 sps of Triangle 3 and 4; (sc, ch 1) in each matching ch-1 sp across until center ch-2 sp, sc in center ch-2 sp, and do not ch-1. You’ve joined Triangle 3 to 4!
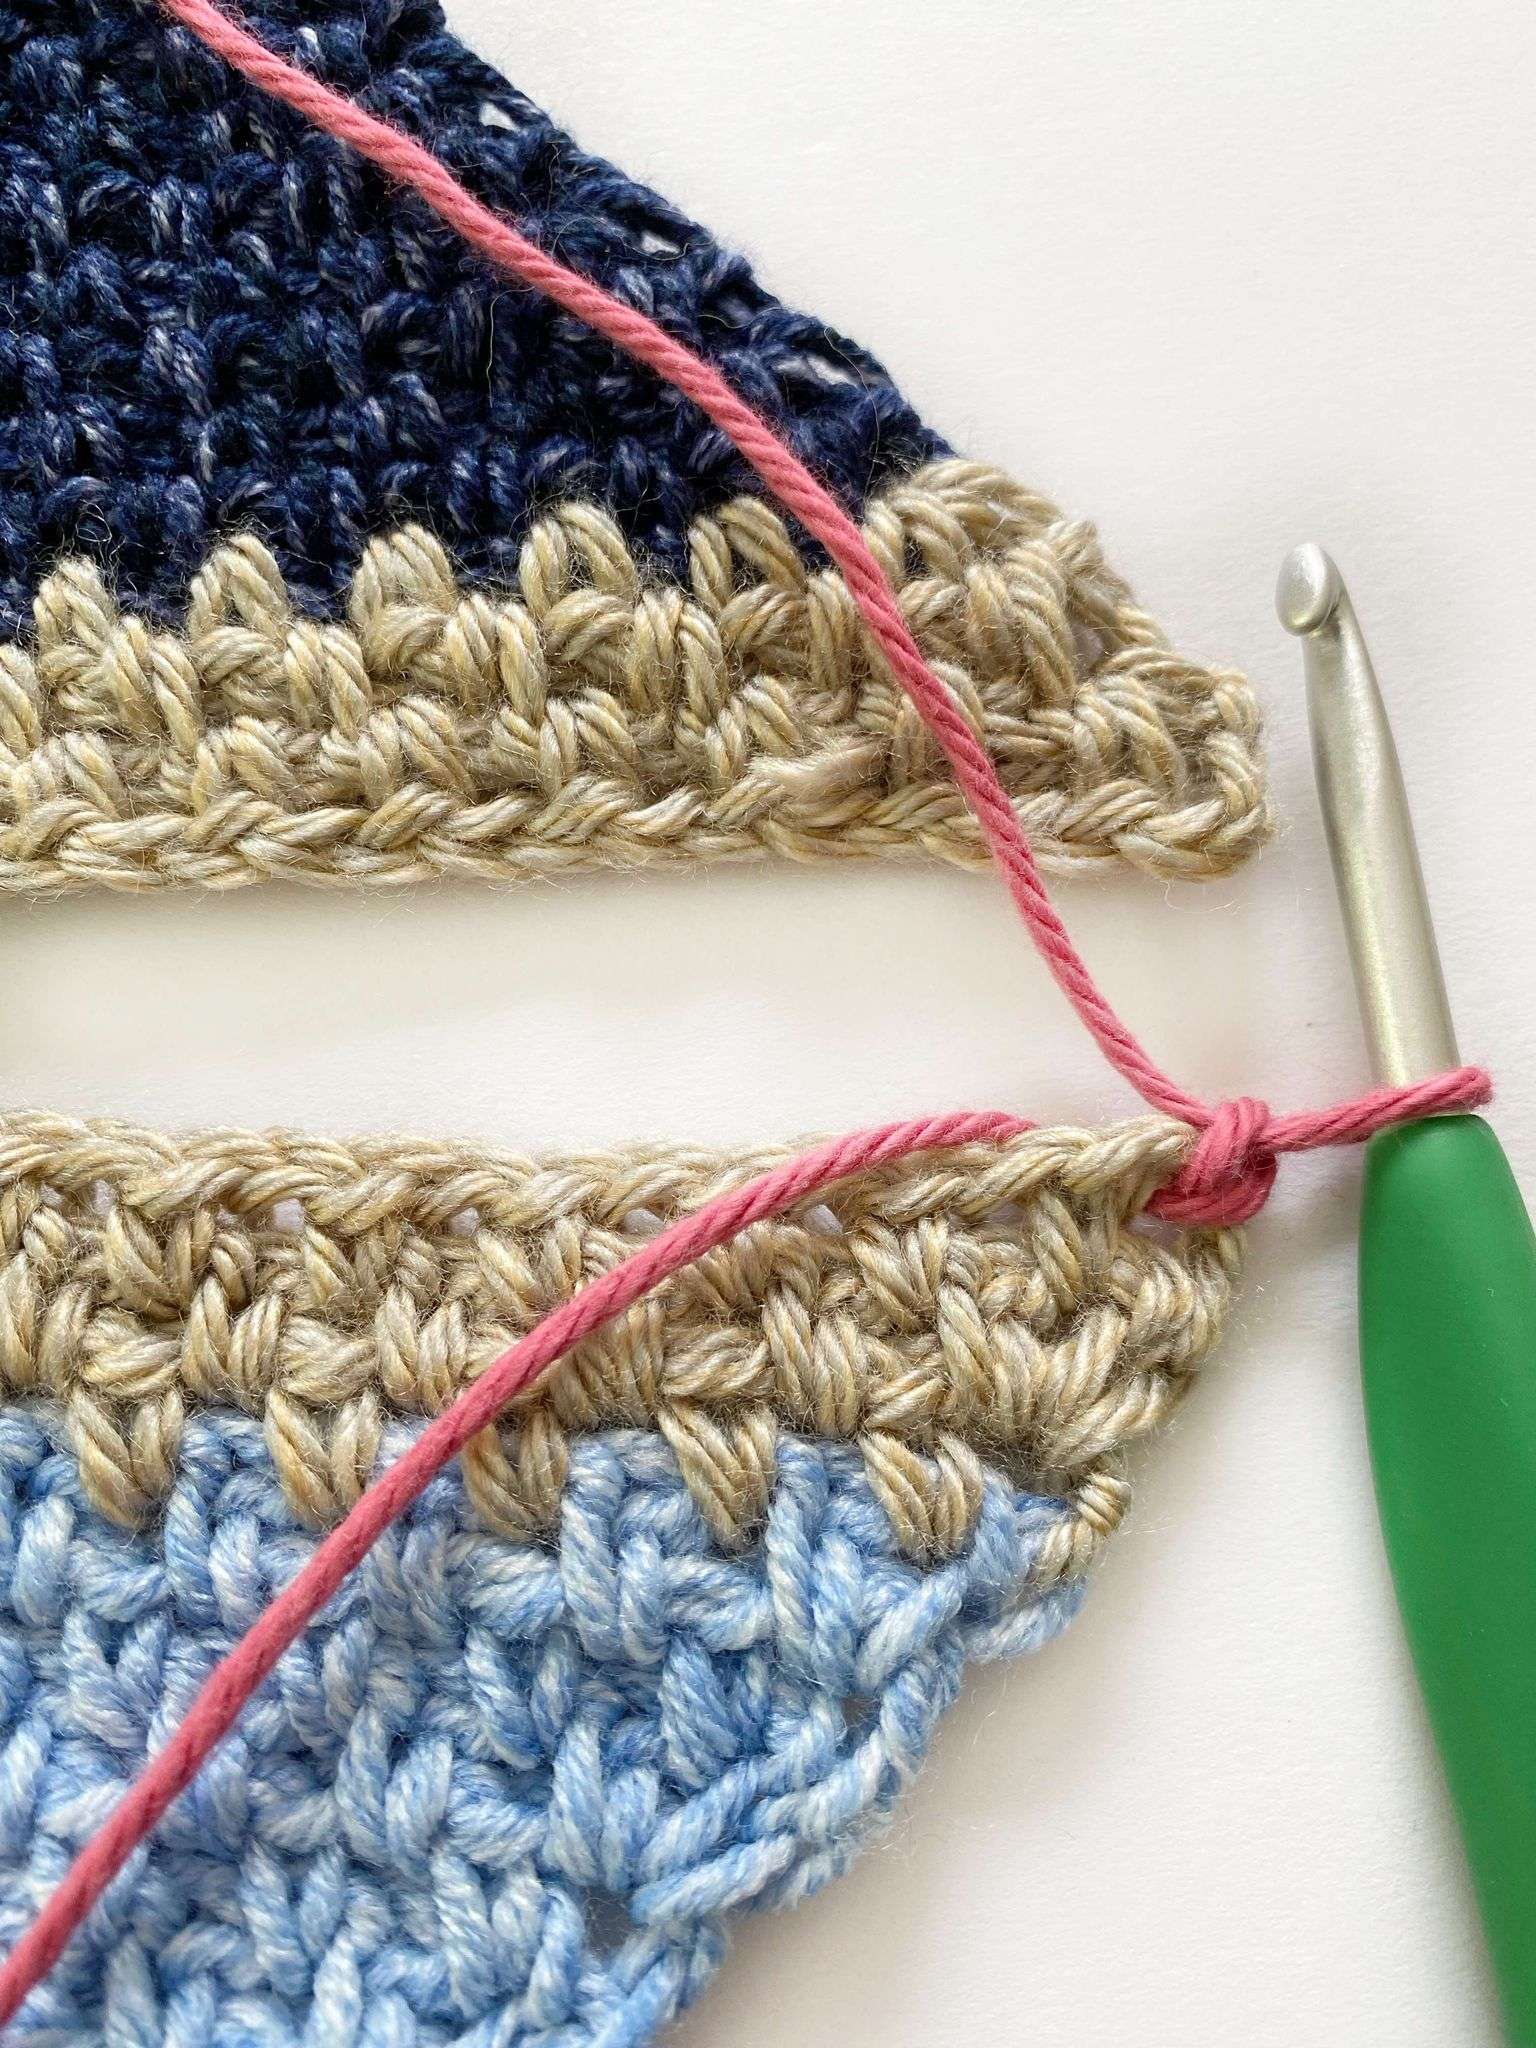
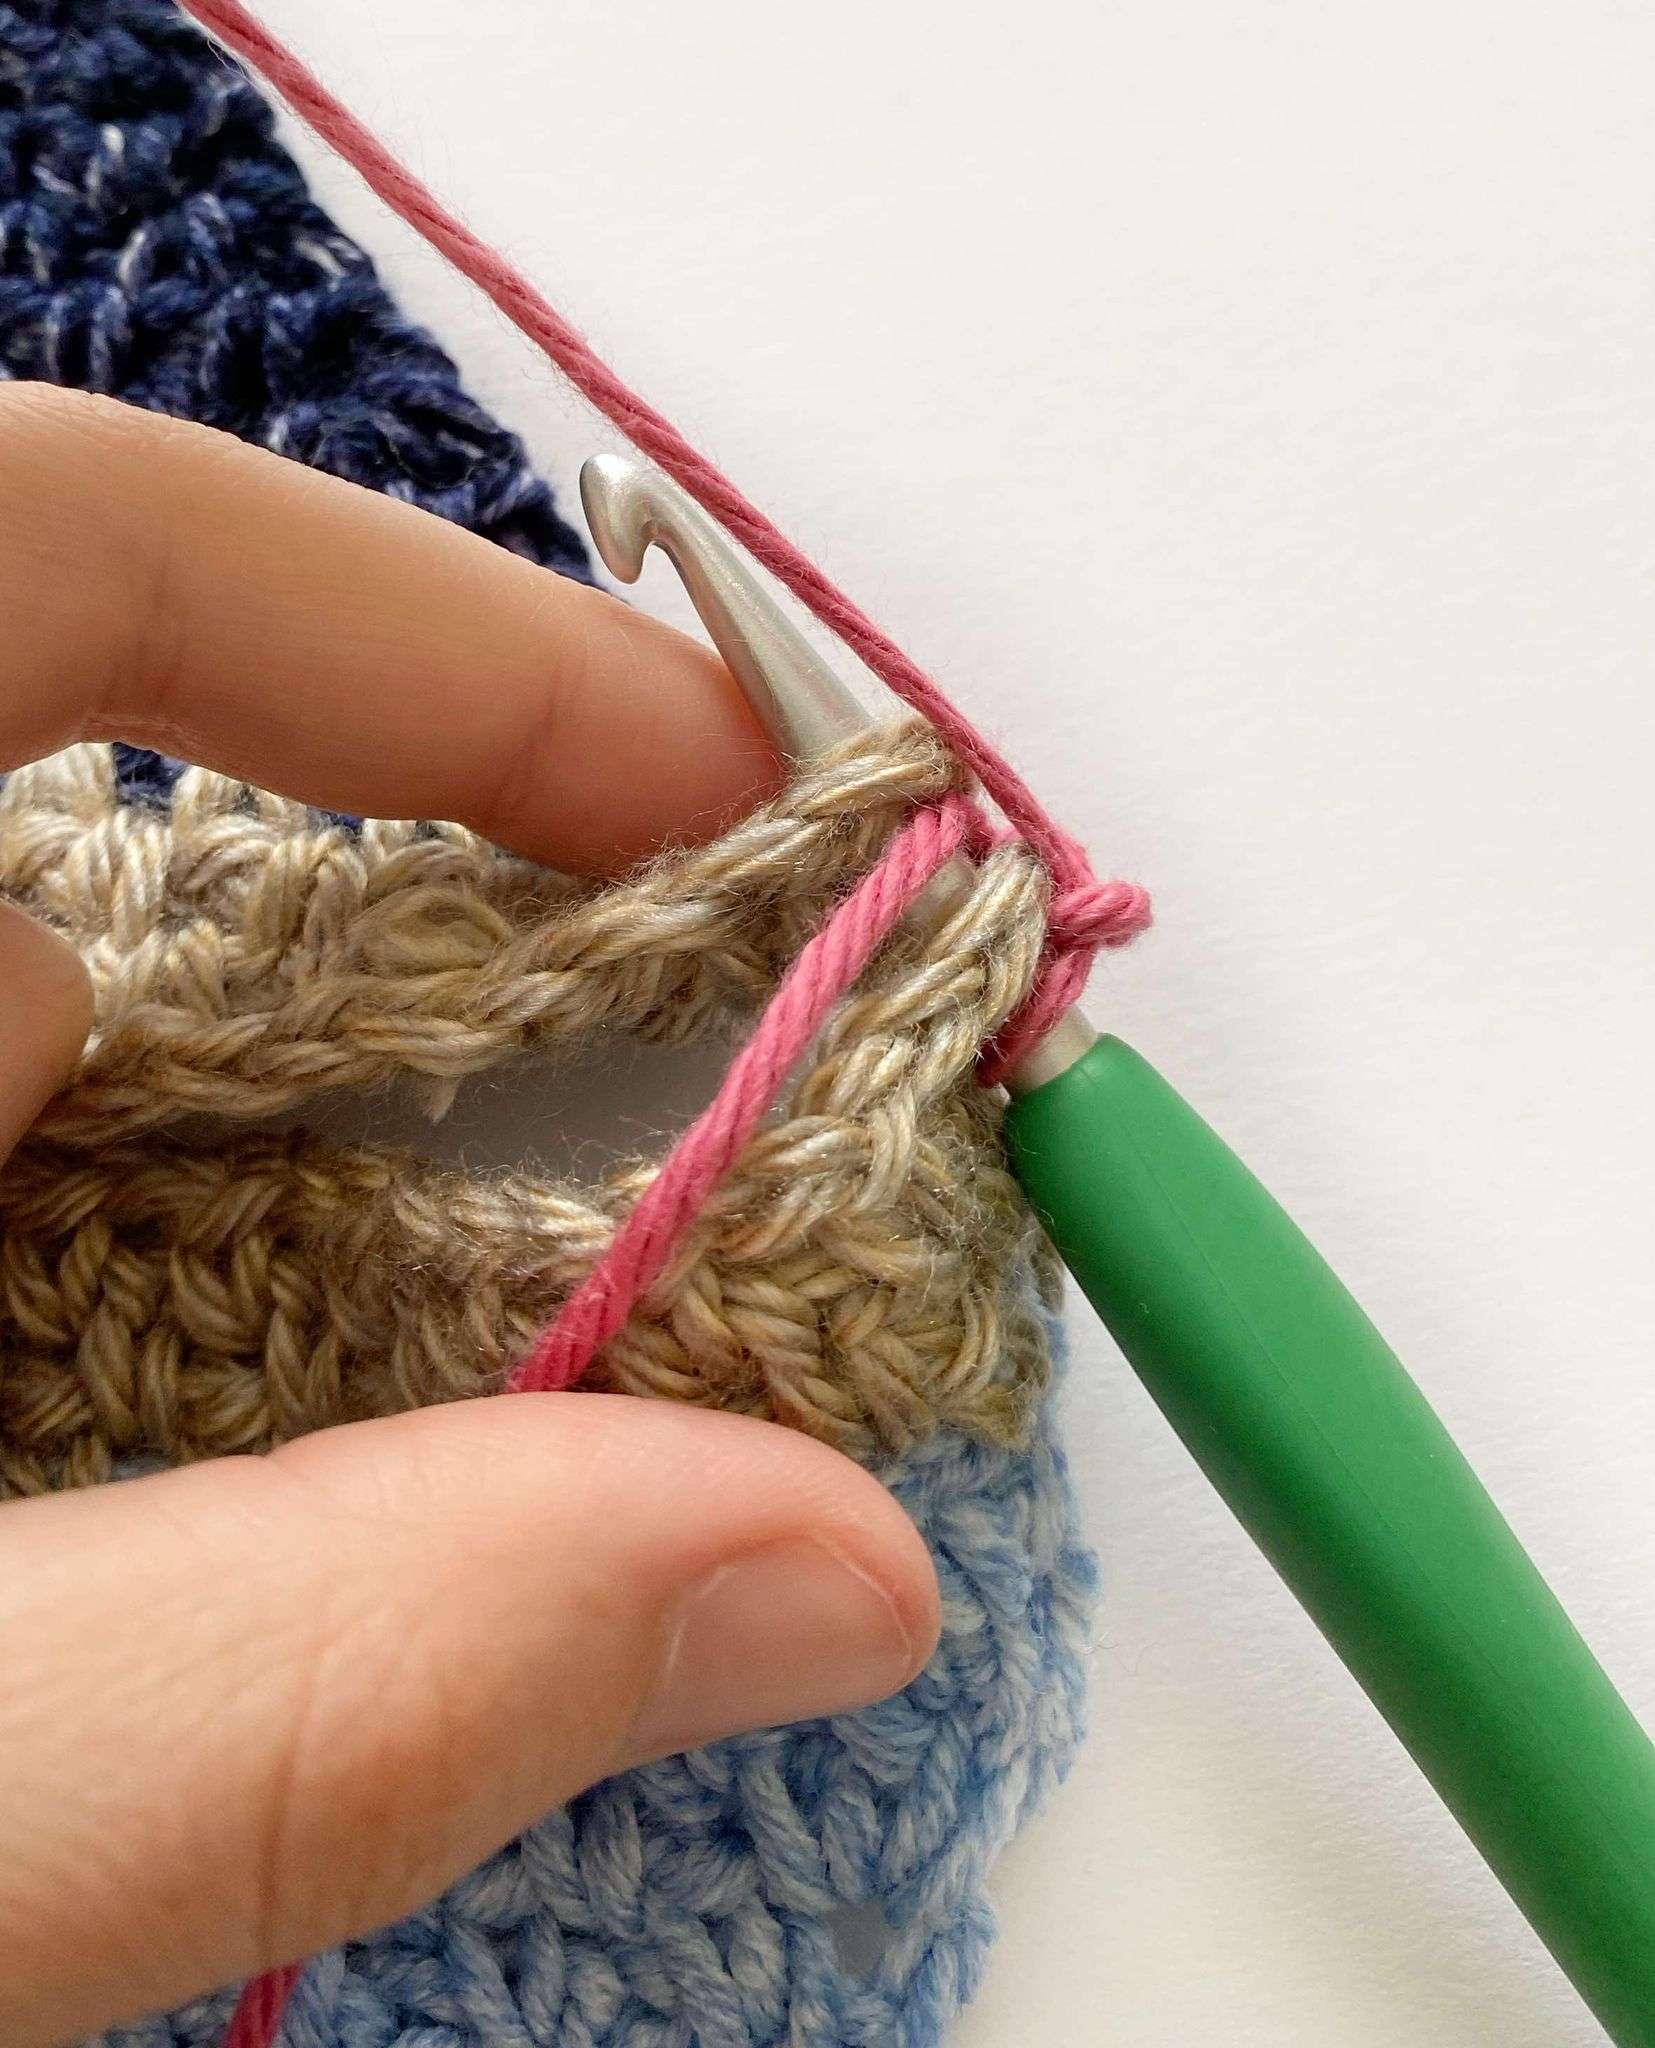
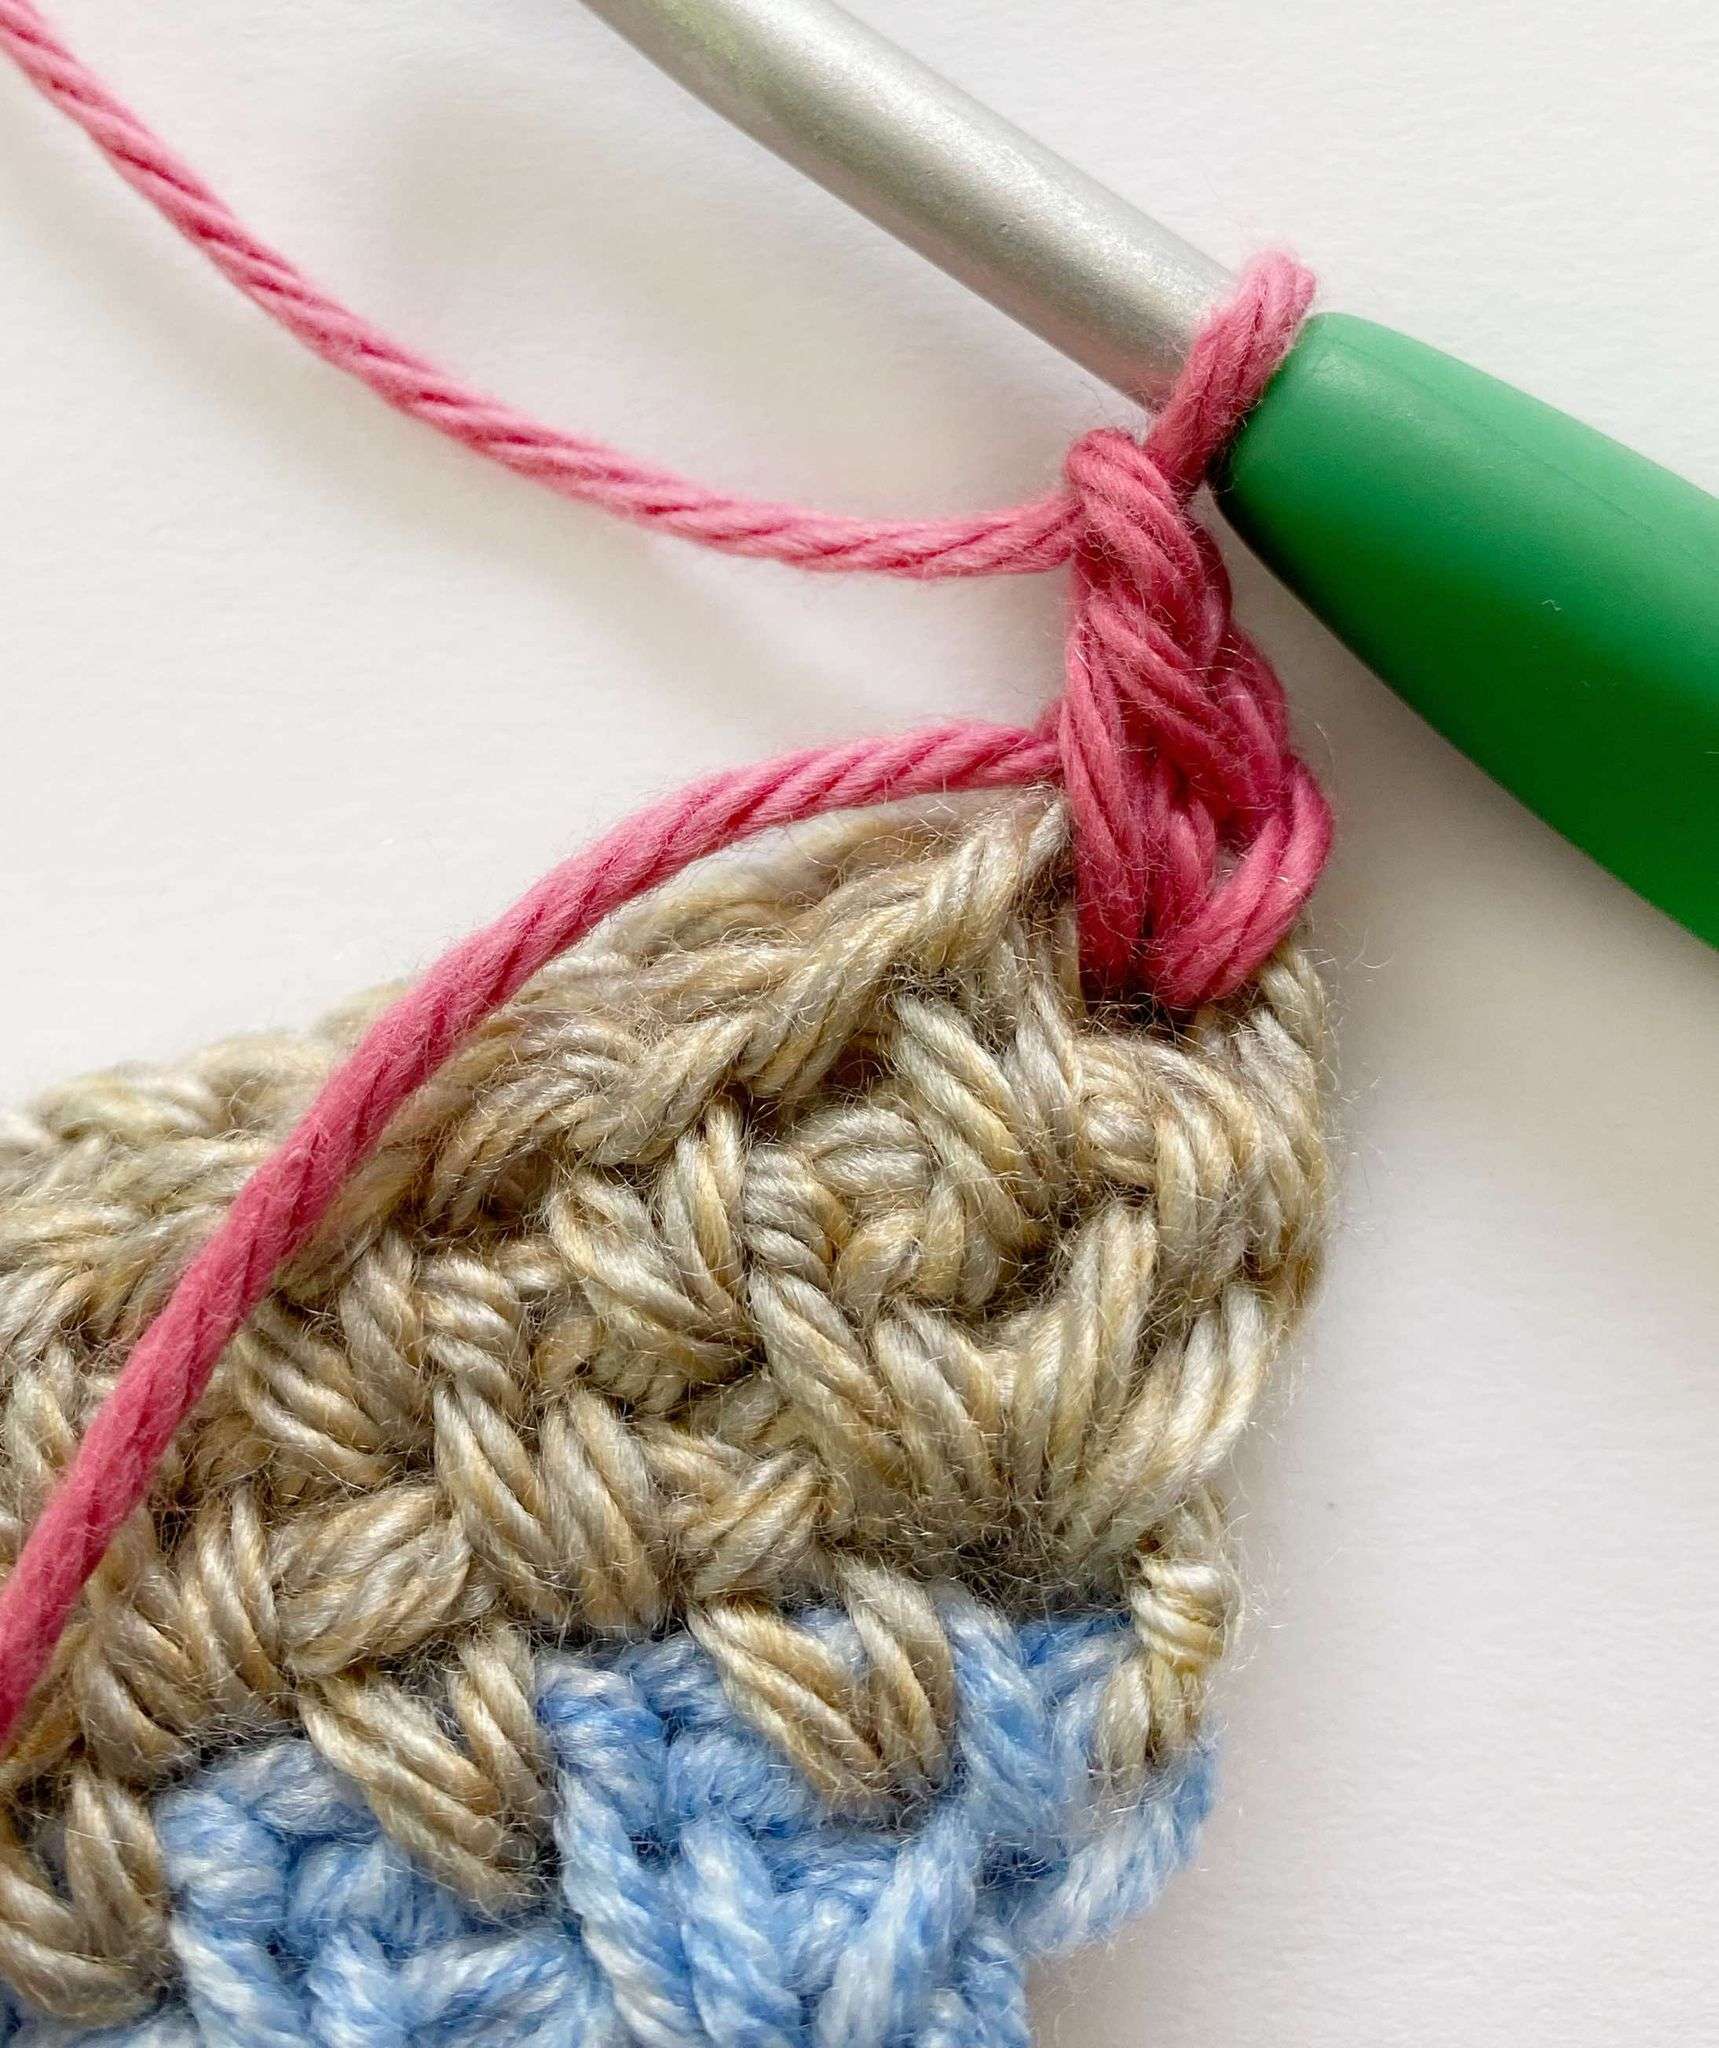
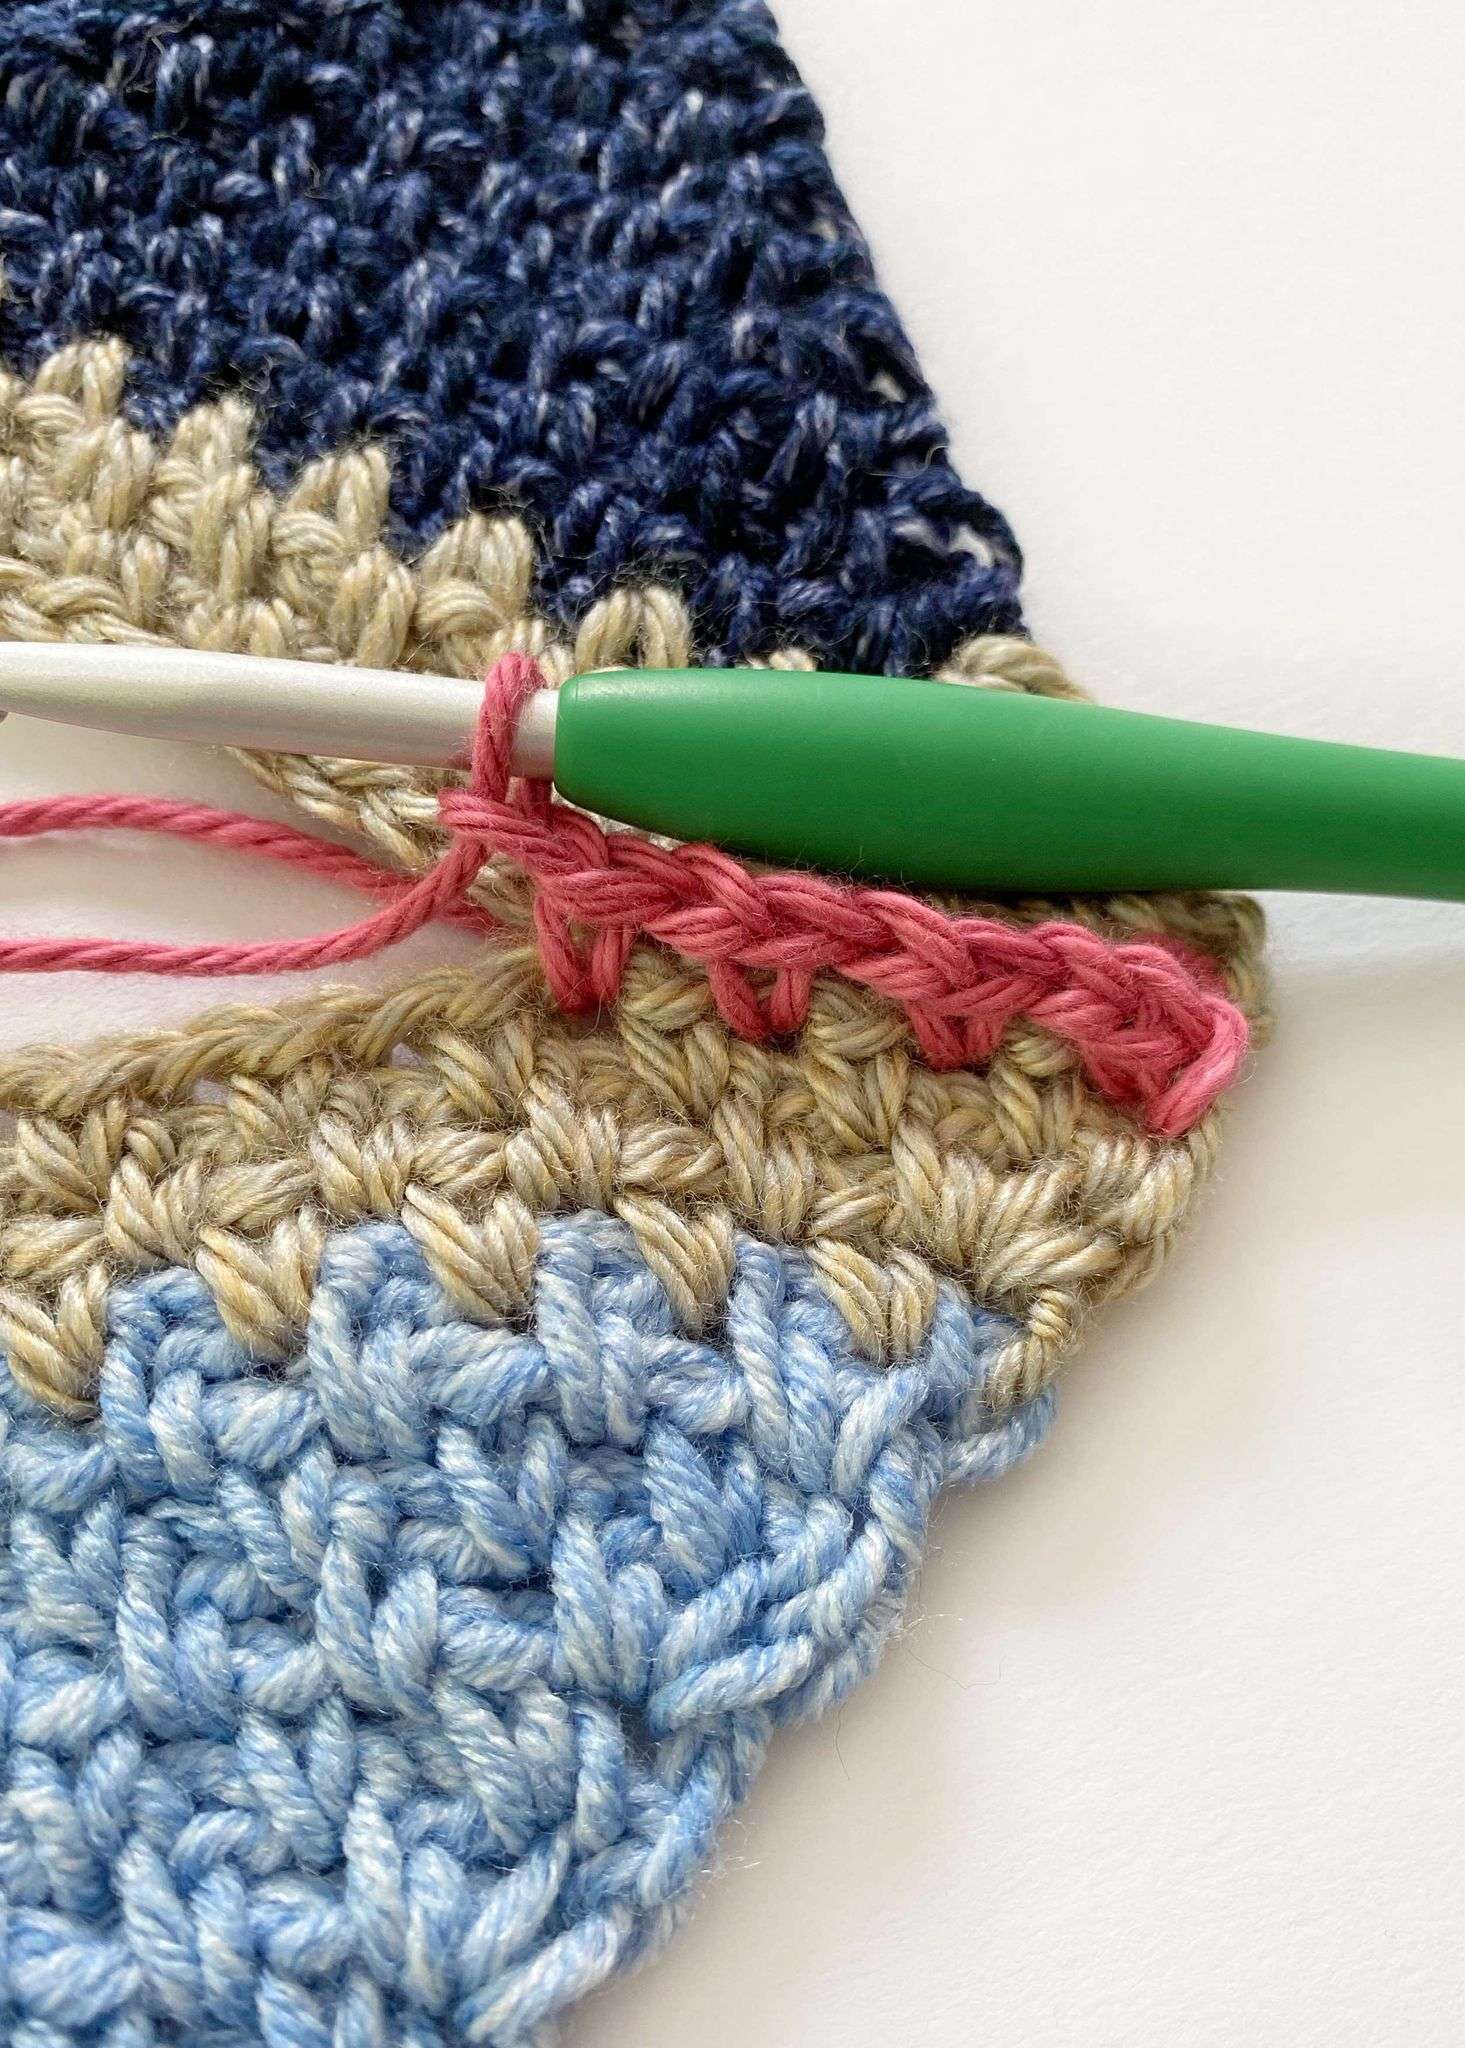
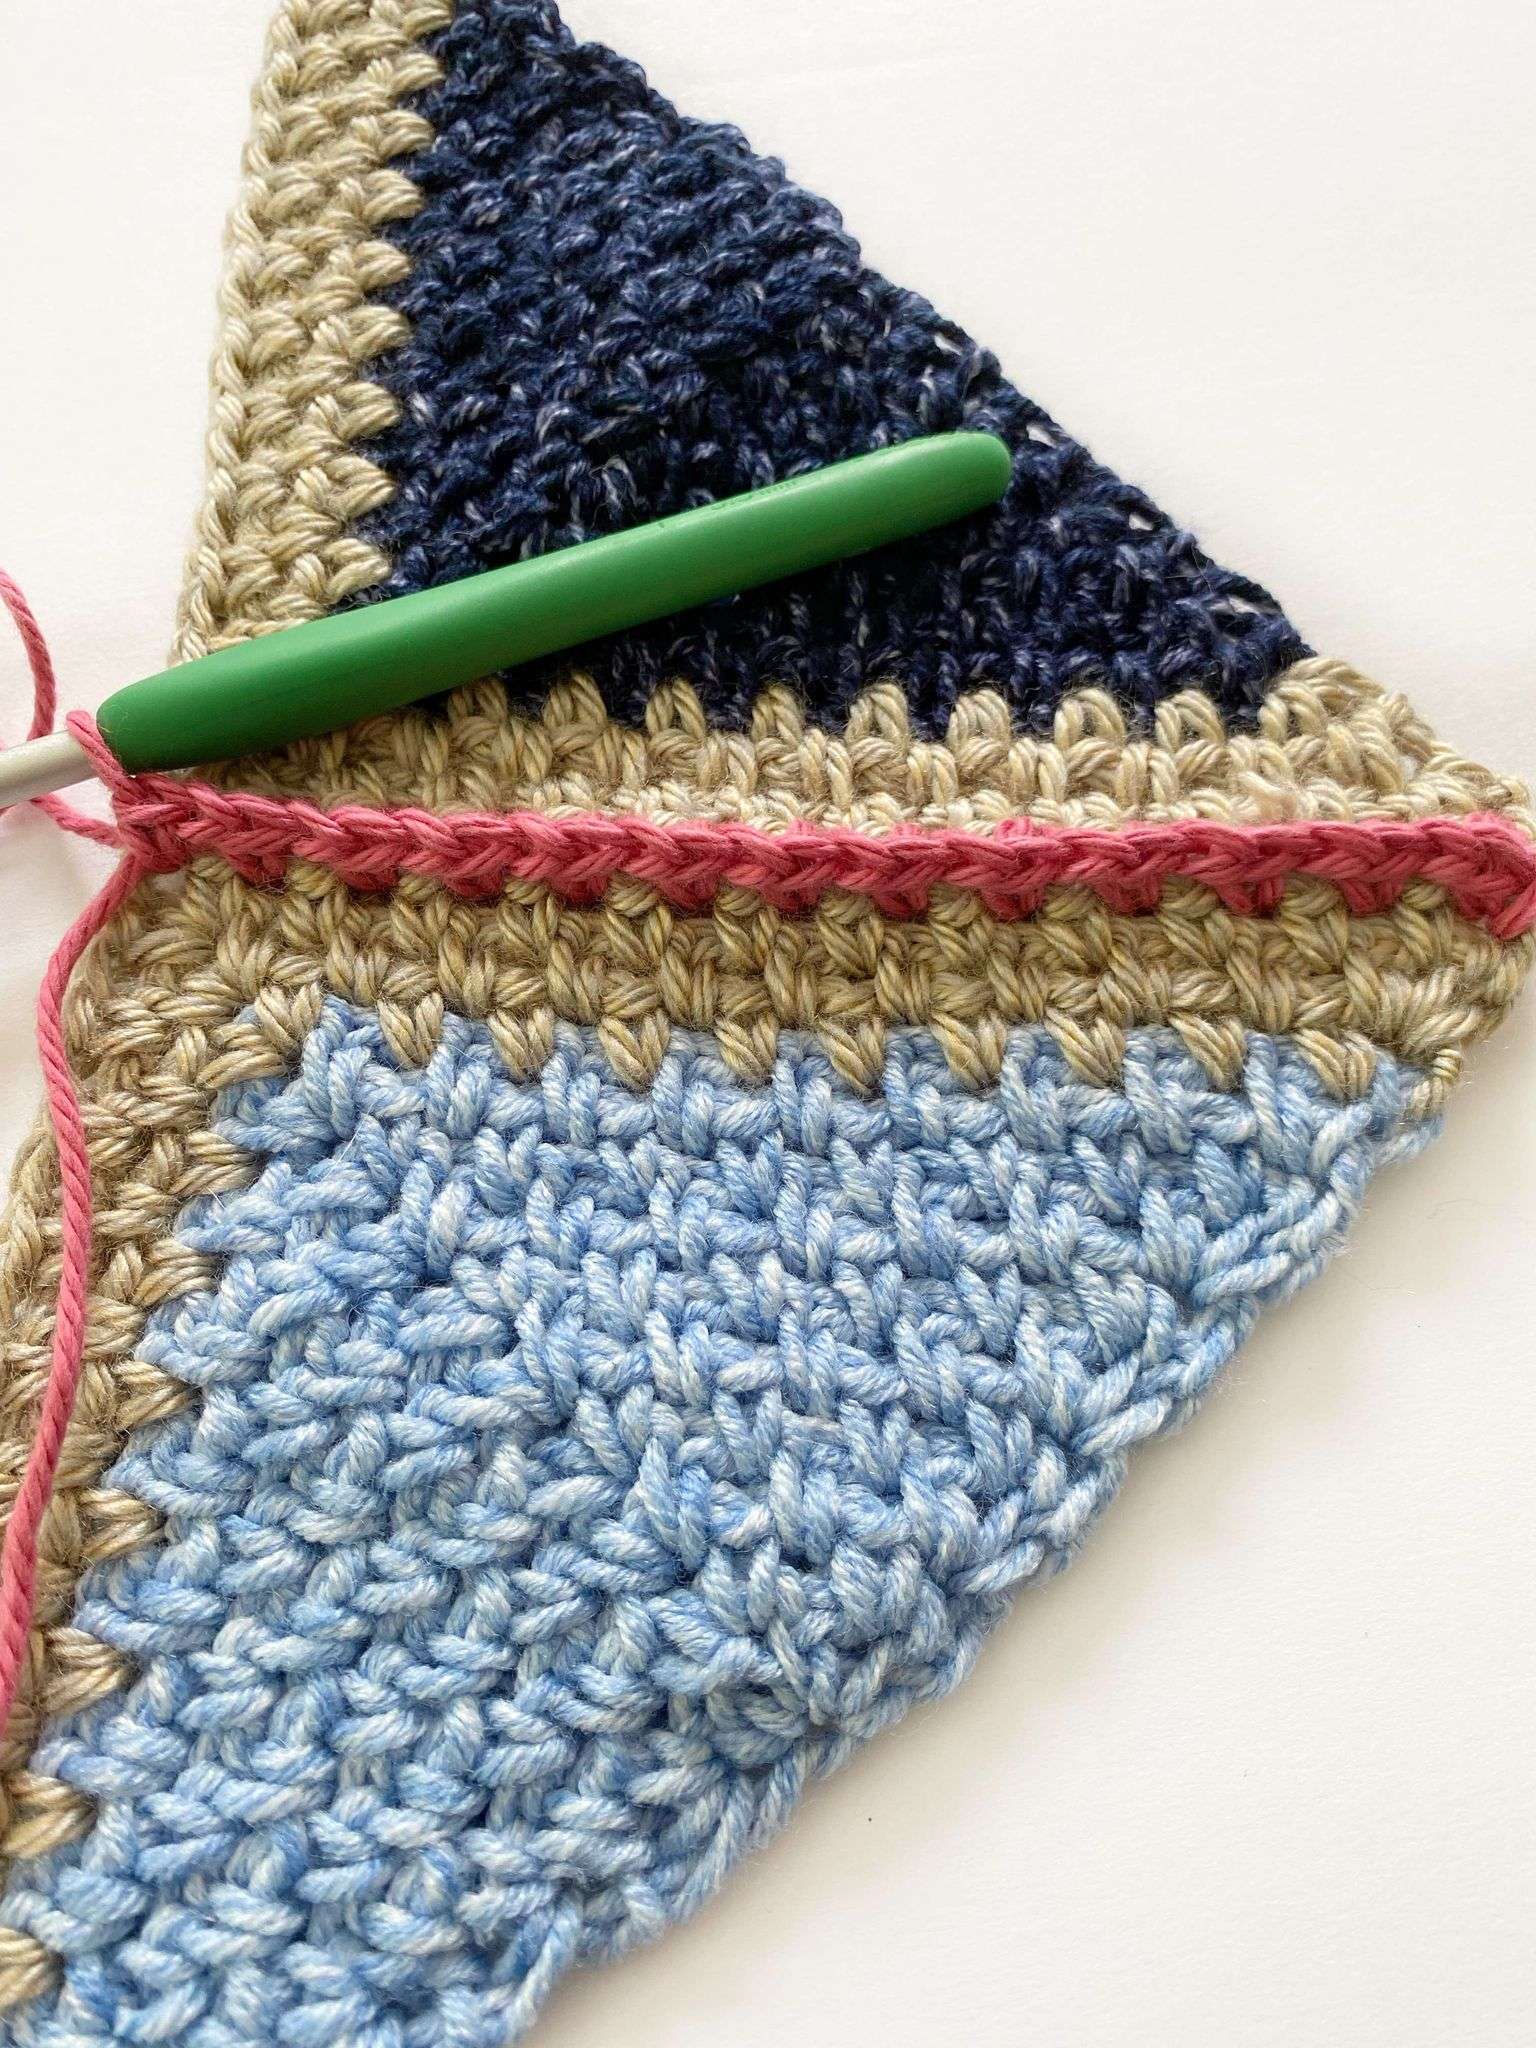
Join Triangle 2 to 1: Starting in the center ch-2 sp, (sc, ch 1) in each ch-sp across until corner ch-2 sp; sc in corner ch-2 sp, and do not ch-1. Fasten off and weave in ends.
Second Join:
Fasten on with MC in the top right corner ch-2 sp of Triangle 4. To join the triangles, insert hook into the matching ch-sps of the two triangles before making a sc.
Join Triangle 4 to 1: Ch 1, (sc, ch 1) in first ch-2 sp – going through matching ch-2 sps of Triangle 4 and 1, (sc, ch 1) in each matching ch-1 sp across until center ch-2 sp, sc in center ch-2 sp, and do not ch-1.
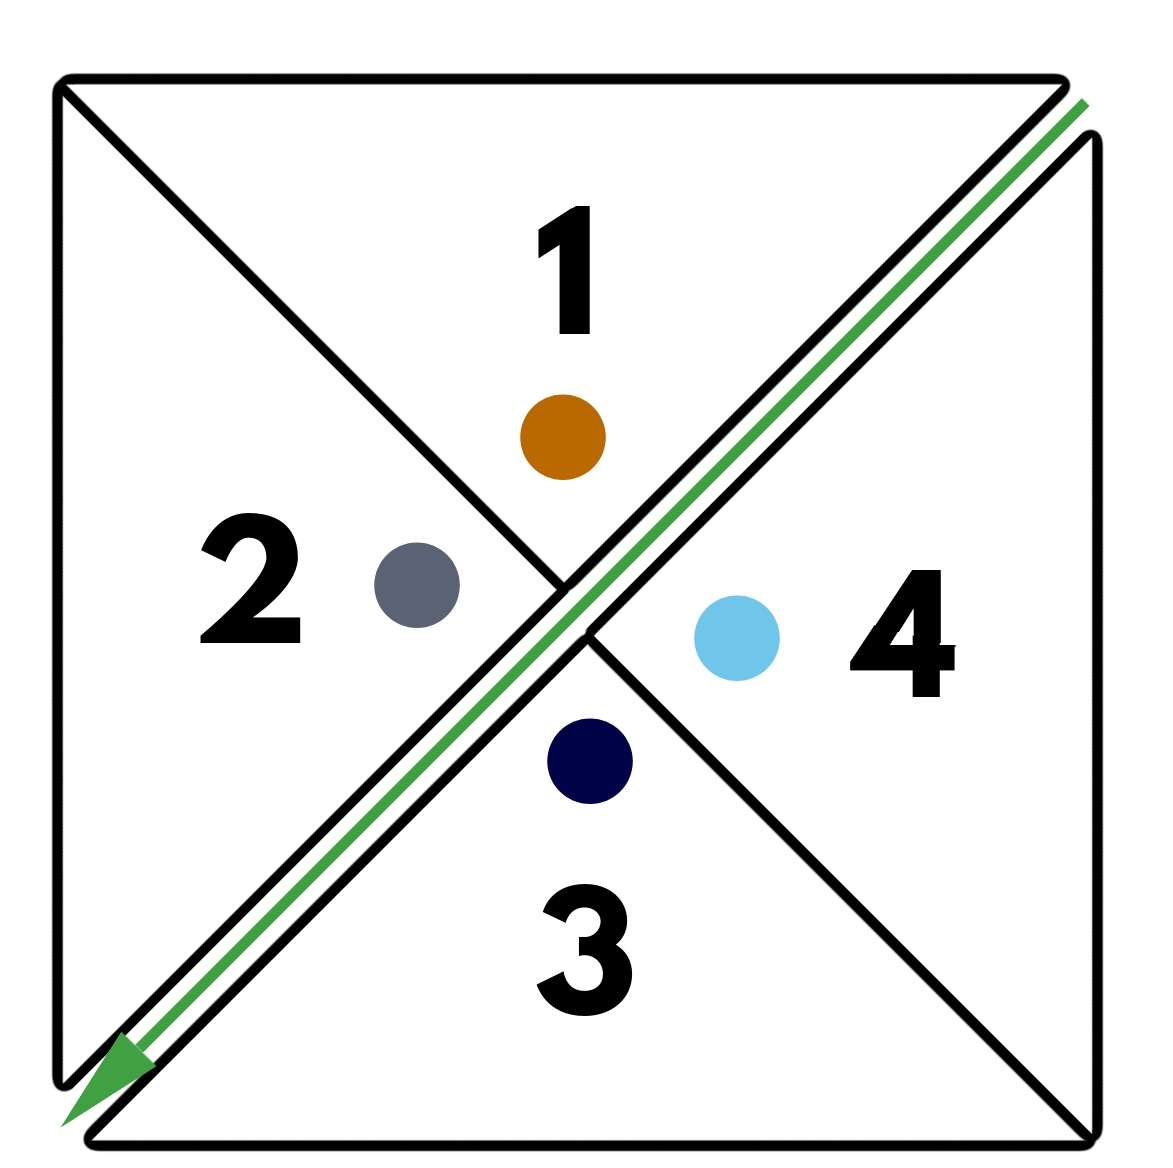
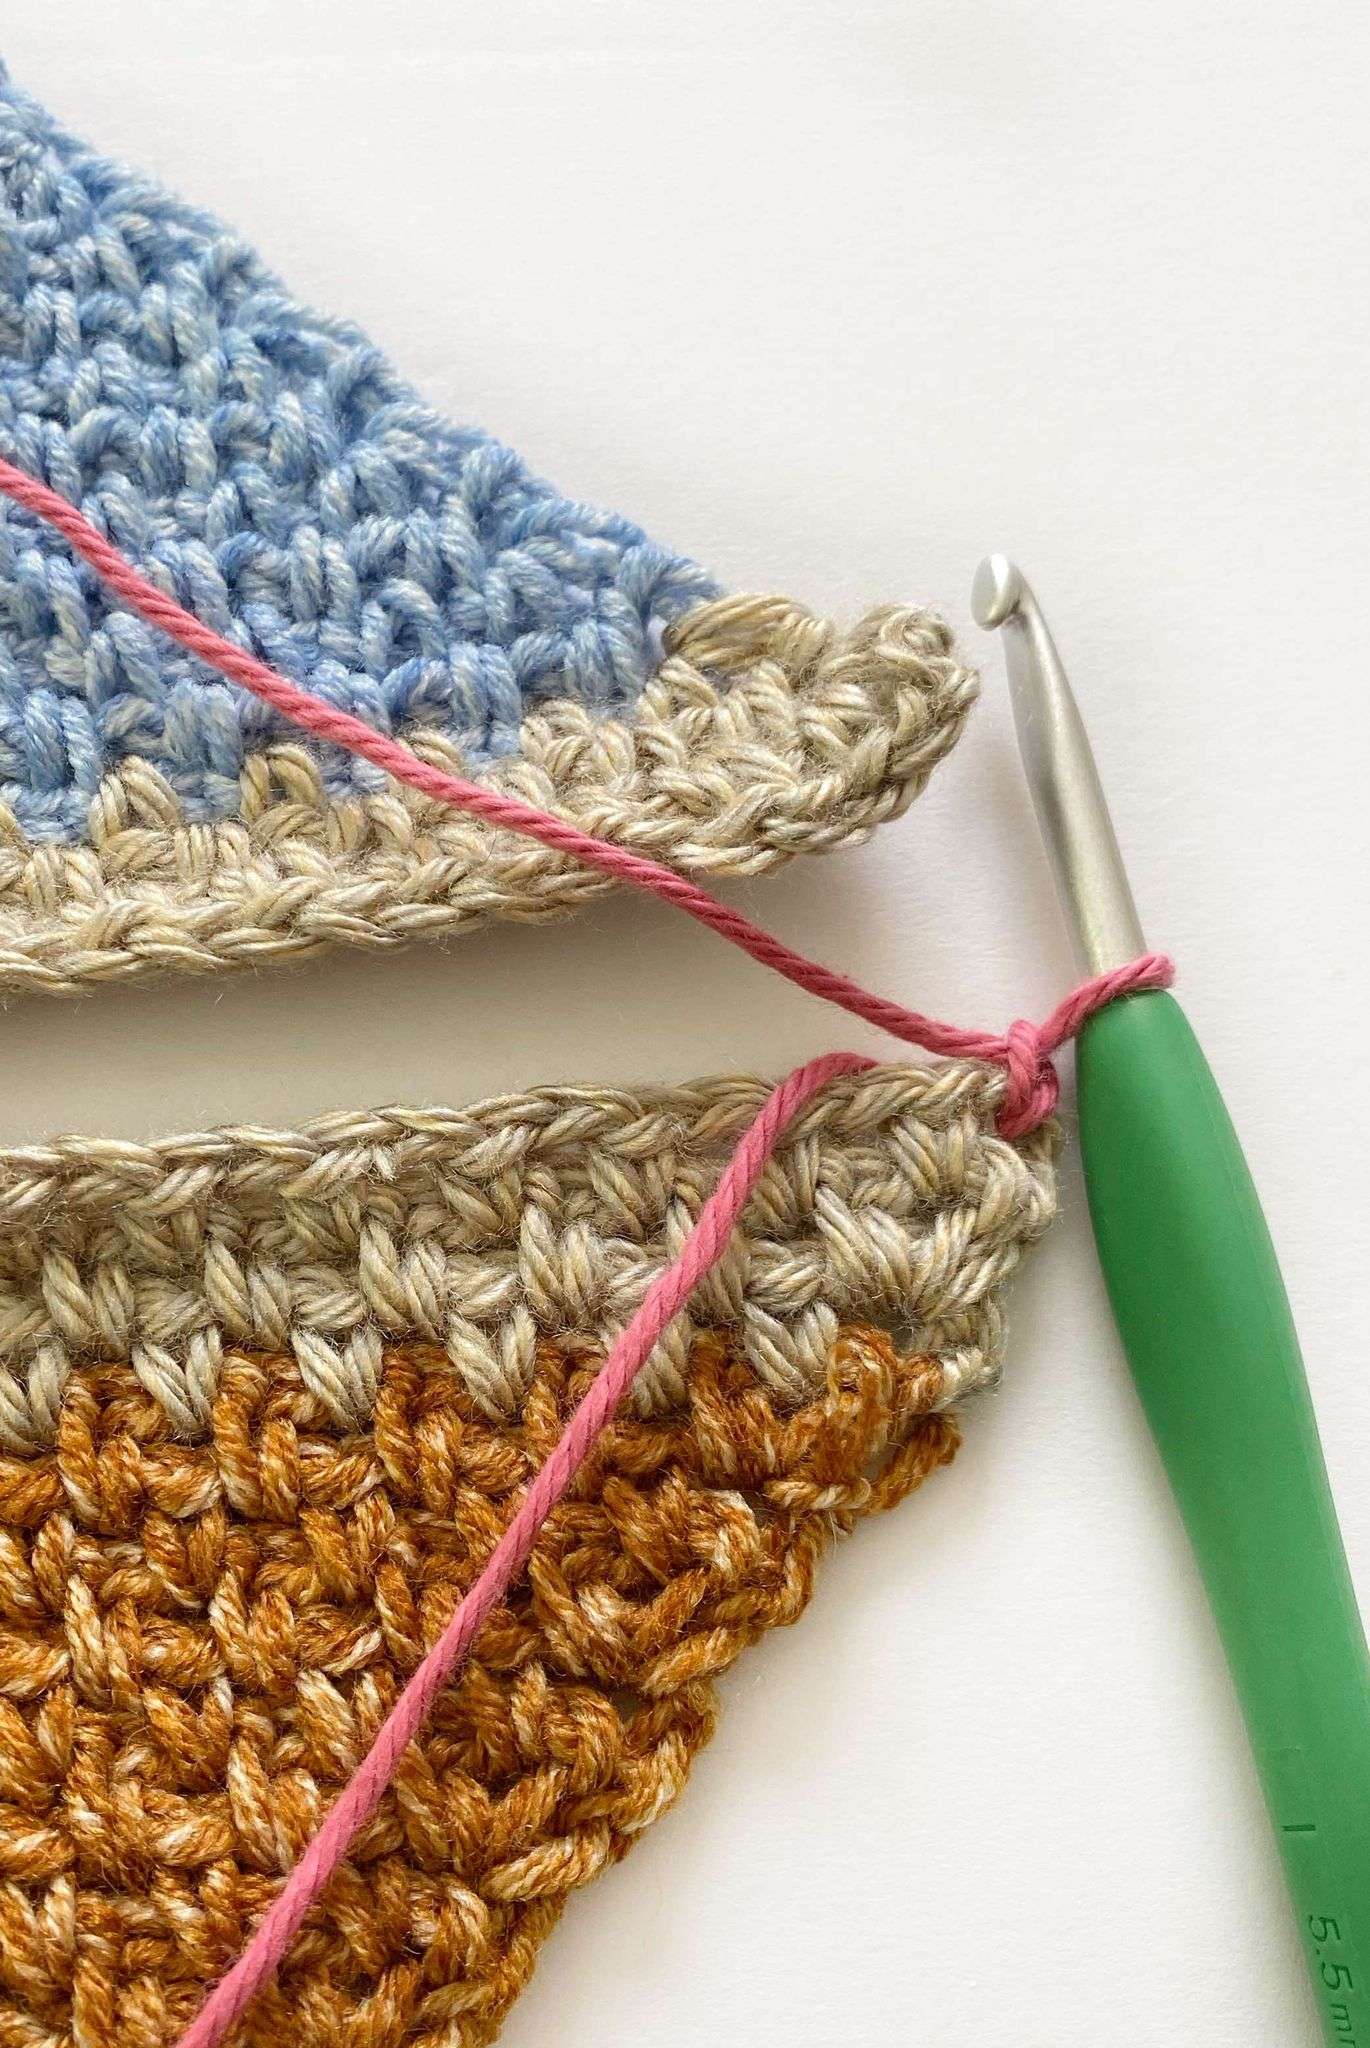
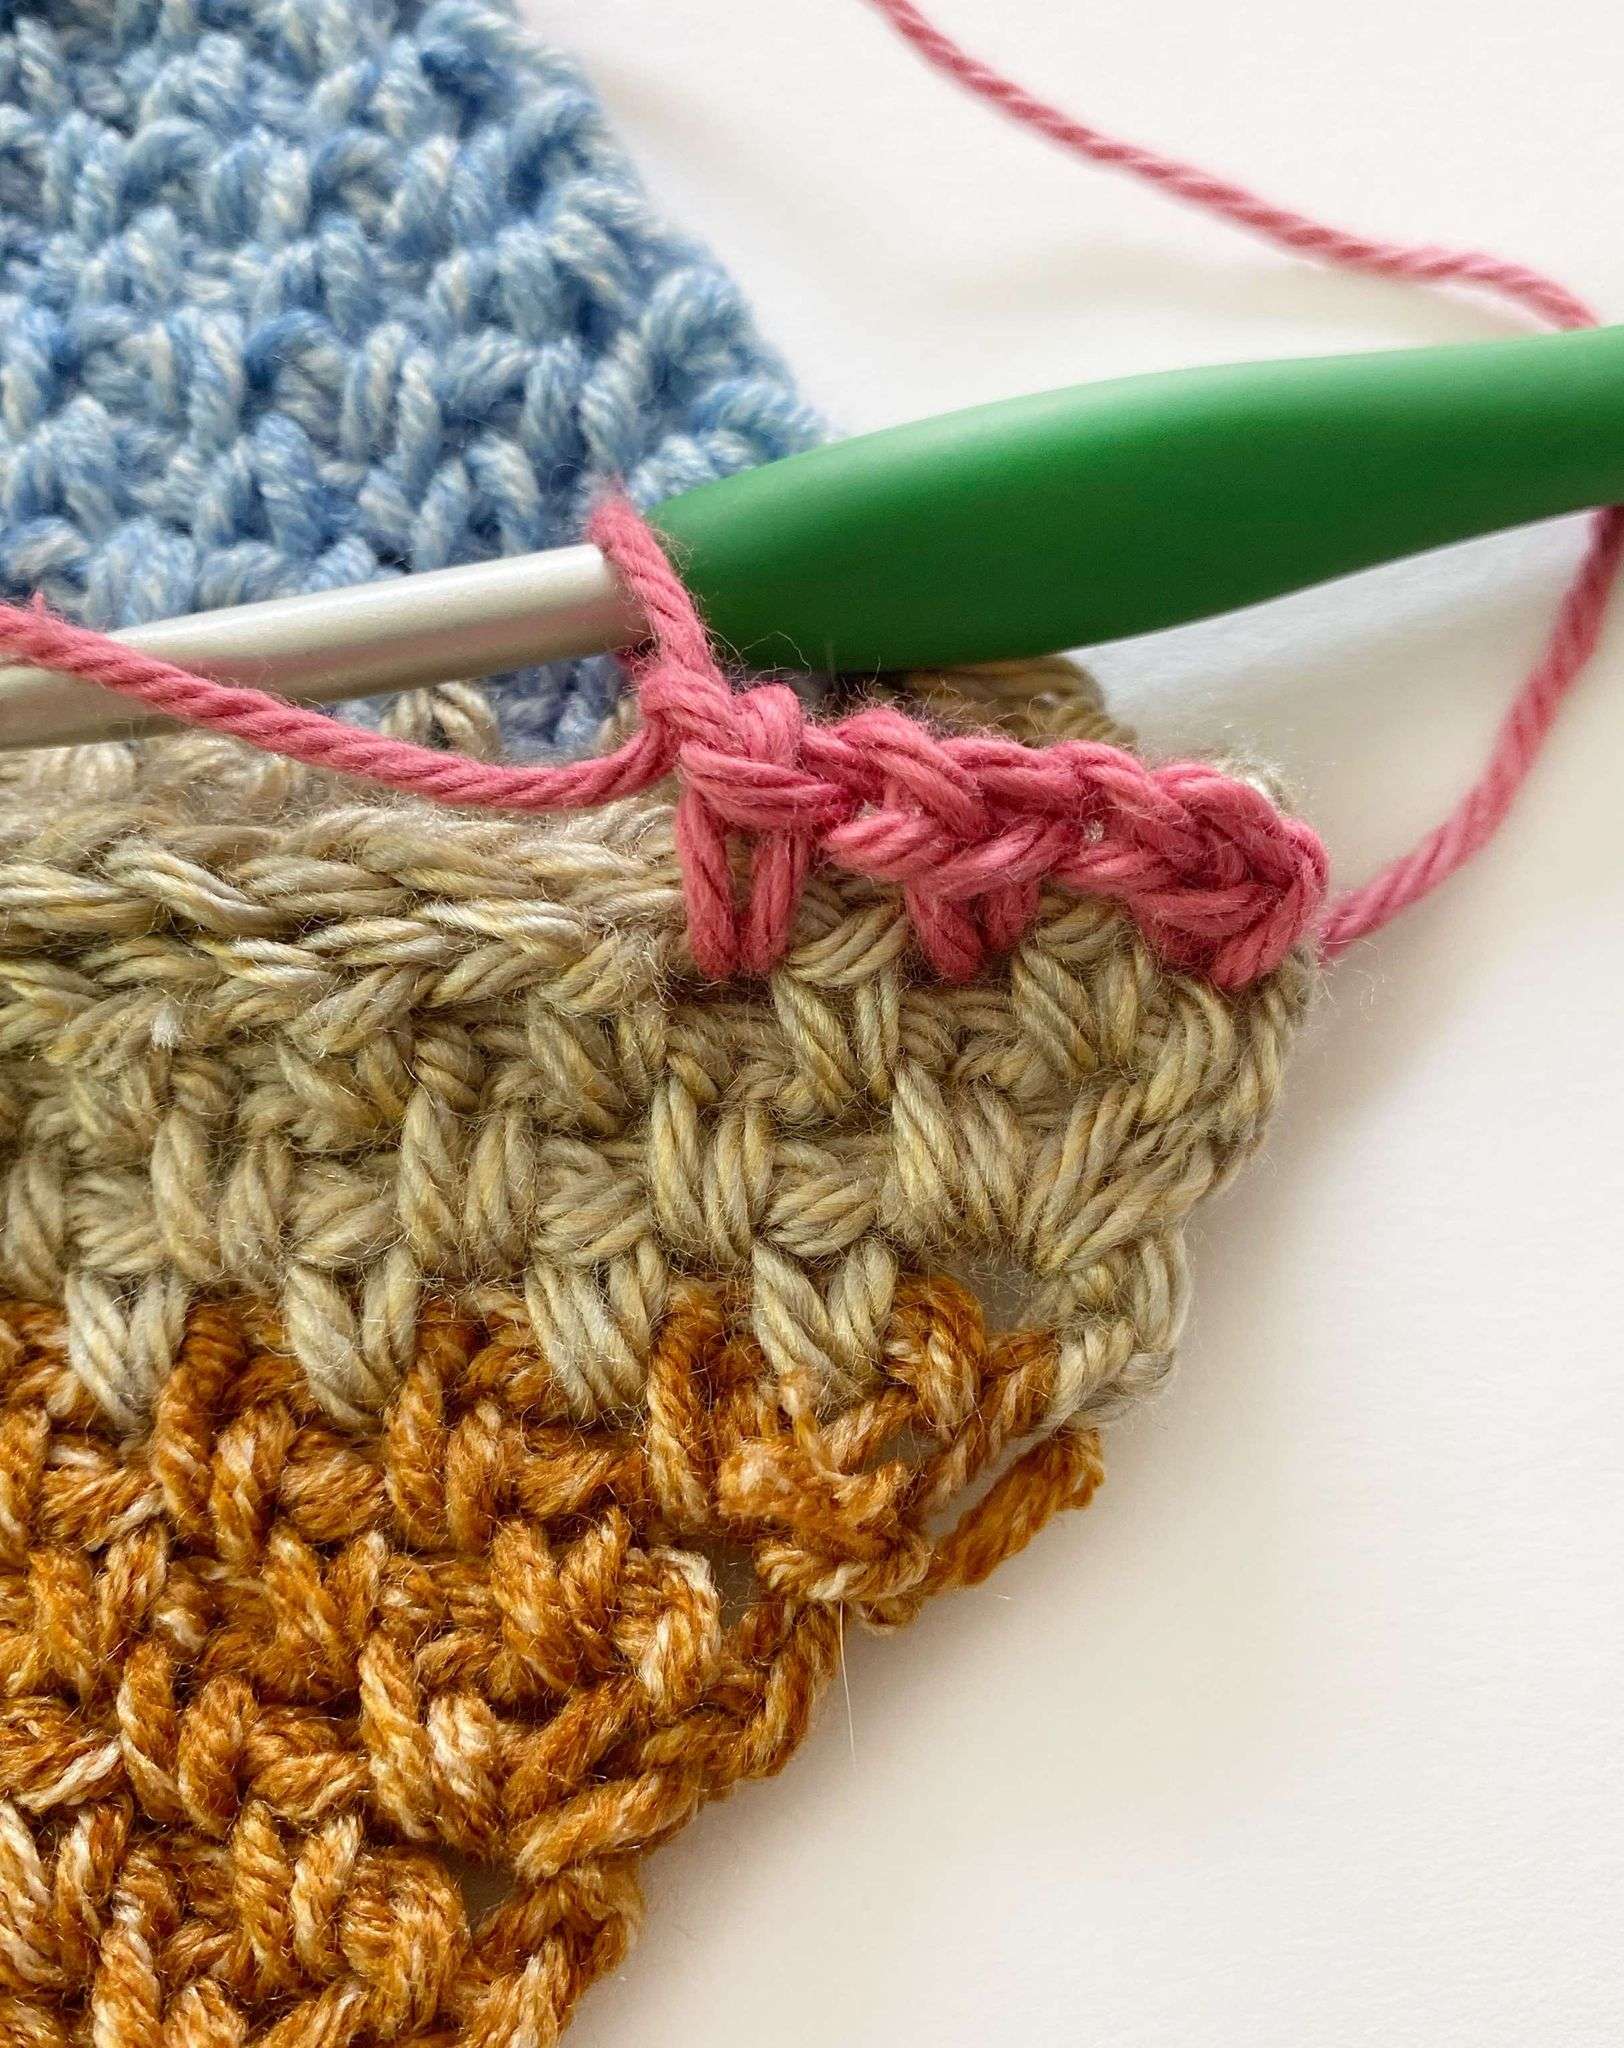
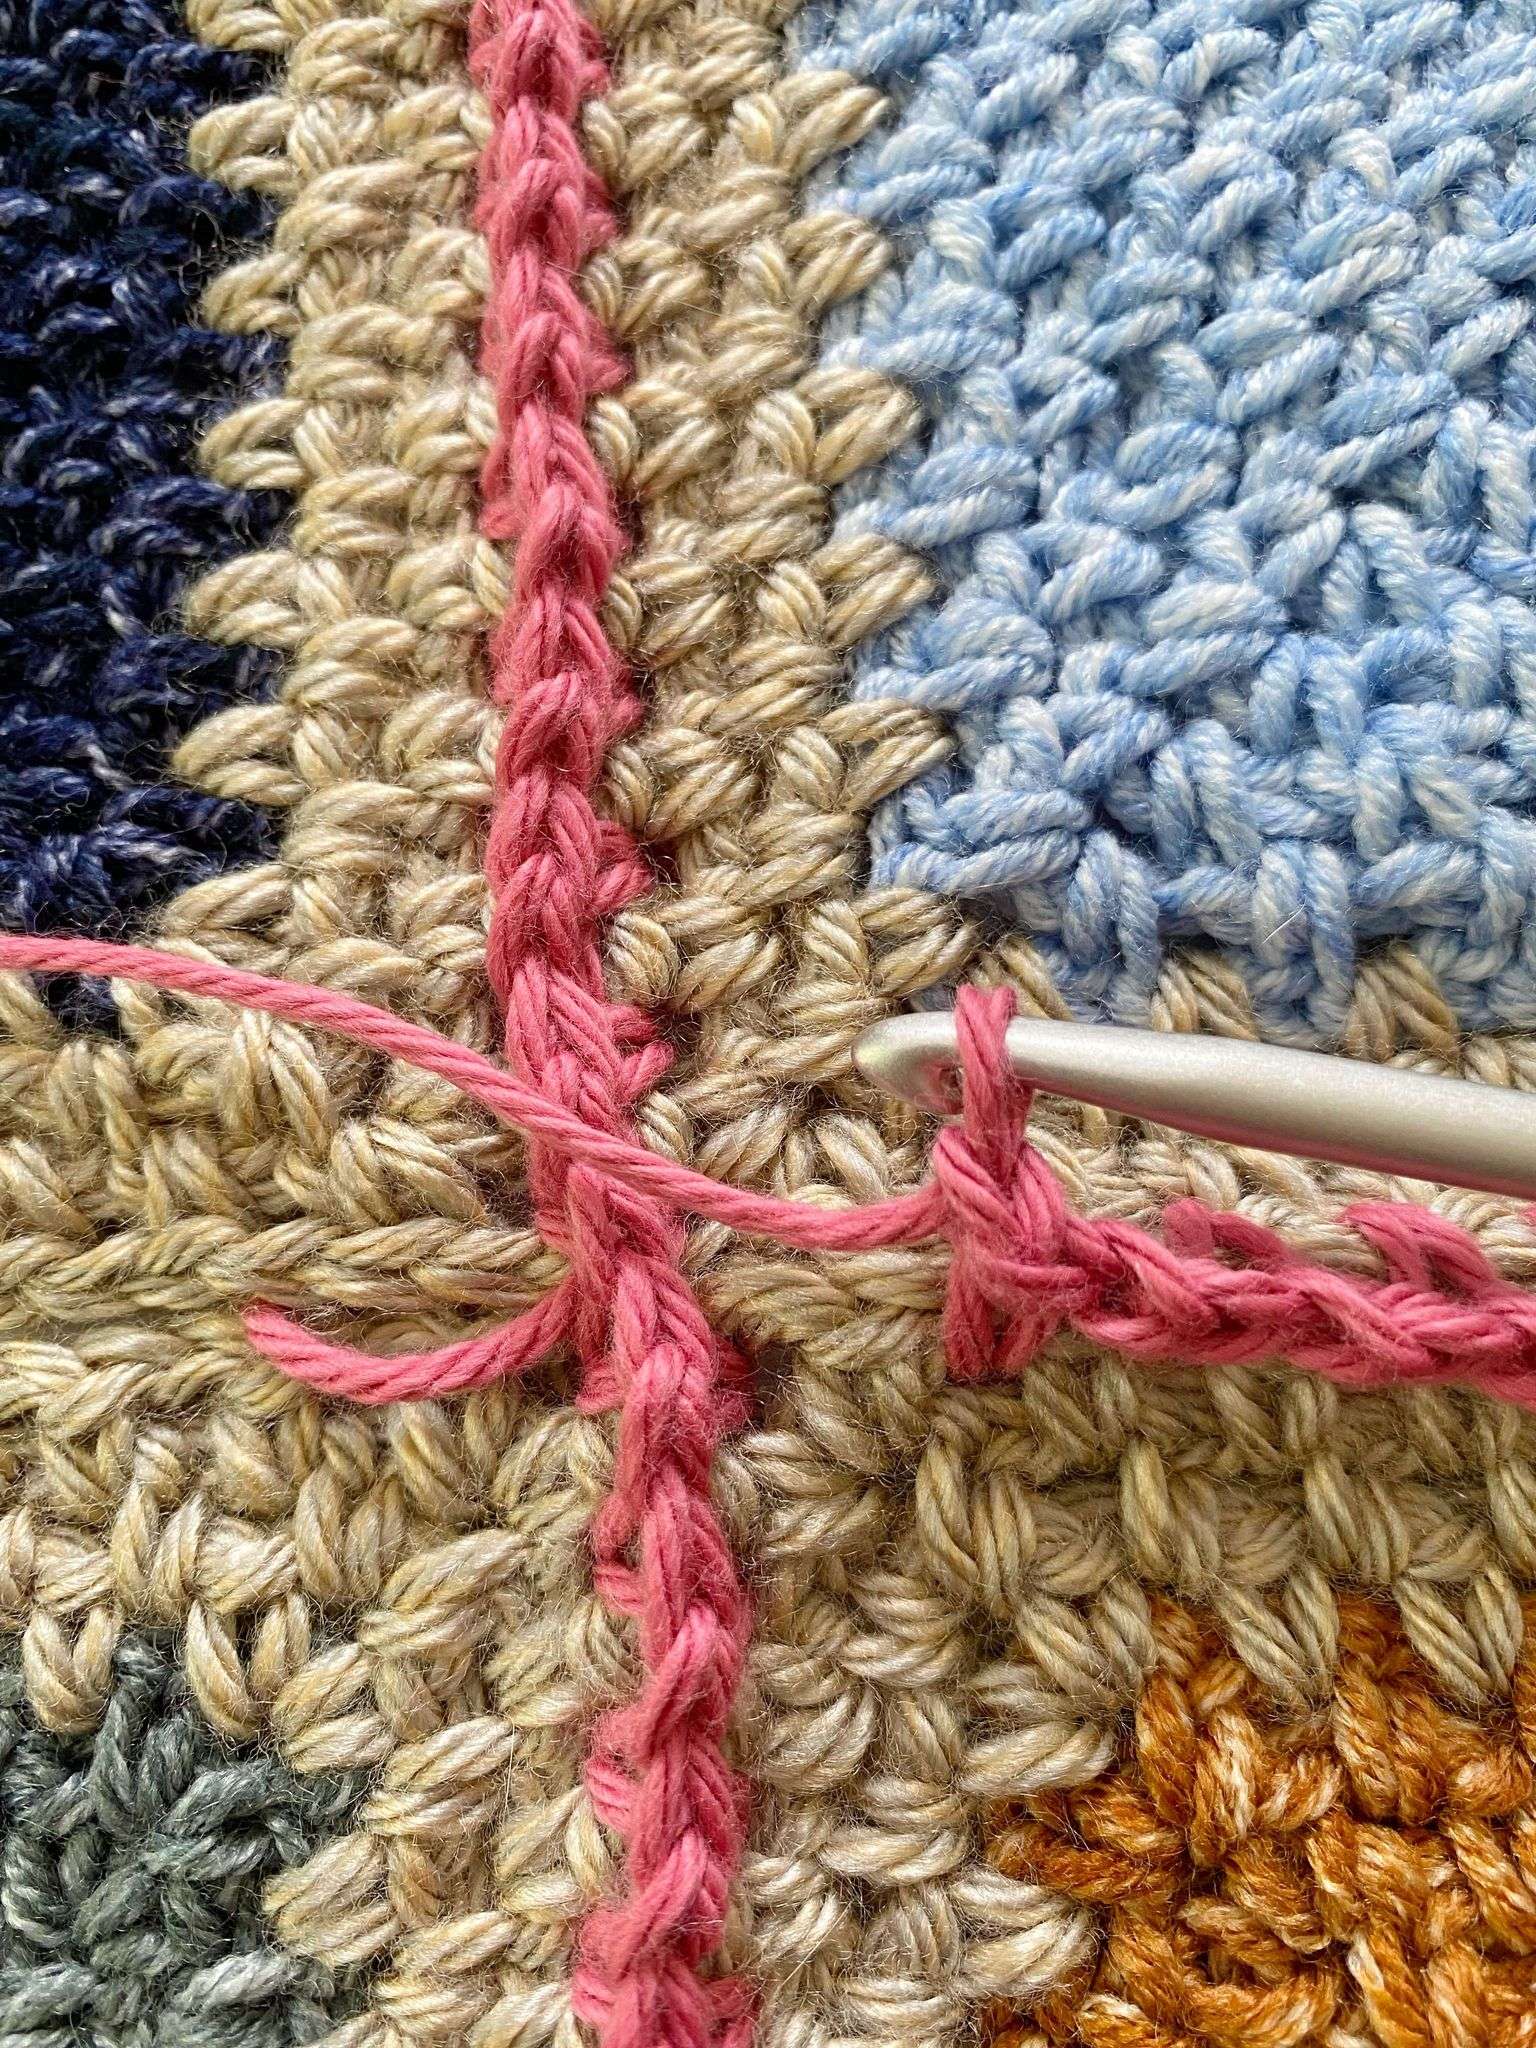
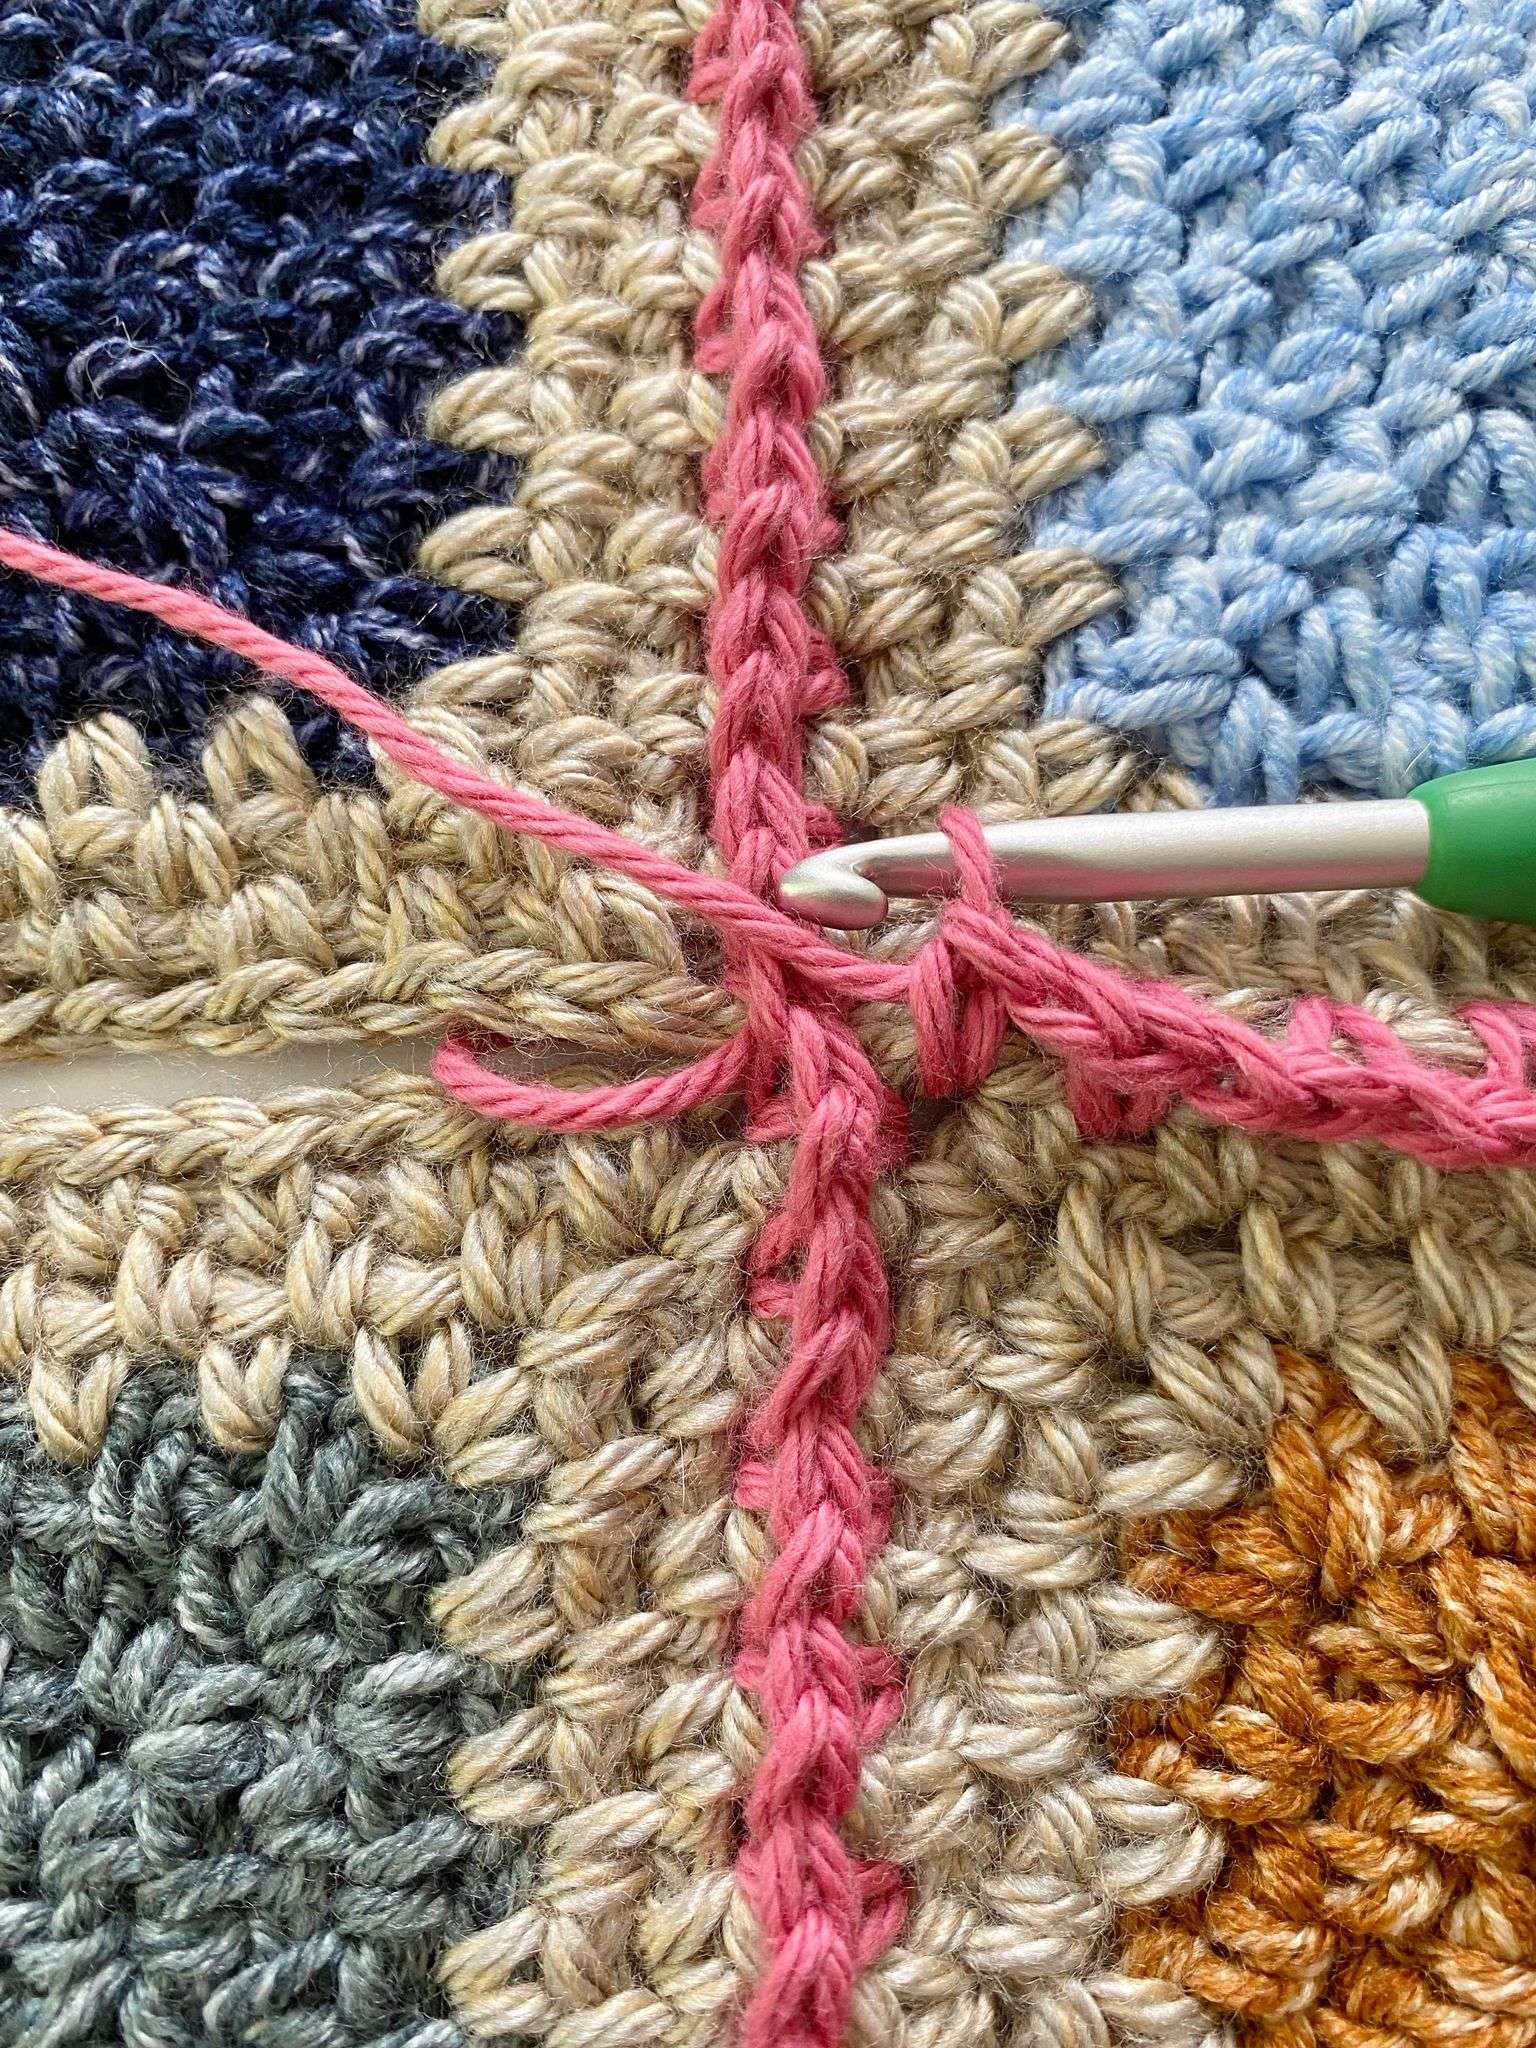
Join Triangle 3 to 2: Starting in the center ch-2 sp, (sc, ch 1) in each ch-sp across until corner ch-2 sp; sc in corner ch-2 sp, and do not ch-1. Fasten off and weave in ends.

Border:
- The border adds approximately 2.5″ to the length and width of the moss stitch triangle blanket.
- Do not block your work before starting the border. The blocking process will happen after the border.
Make sure that the RS is facing you. With MC, fasten on in the top-right corner of the blanket.
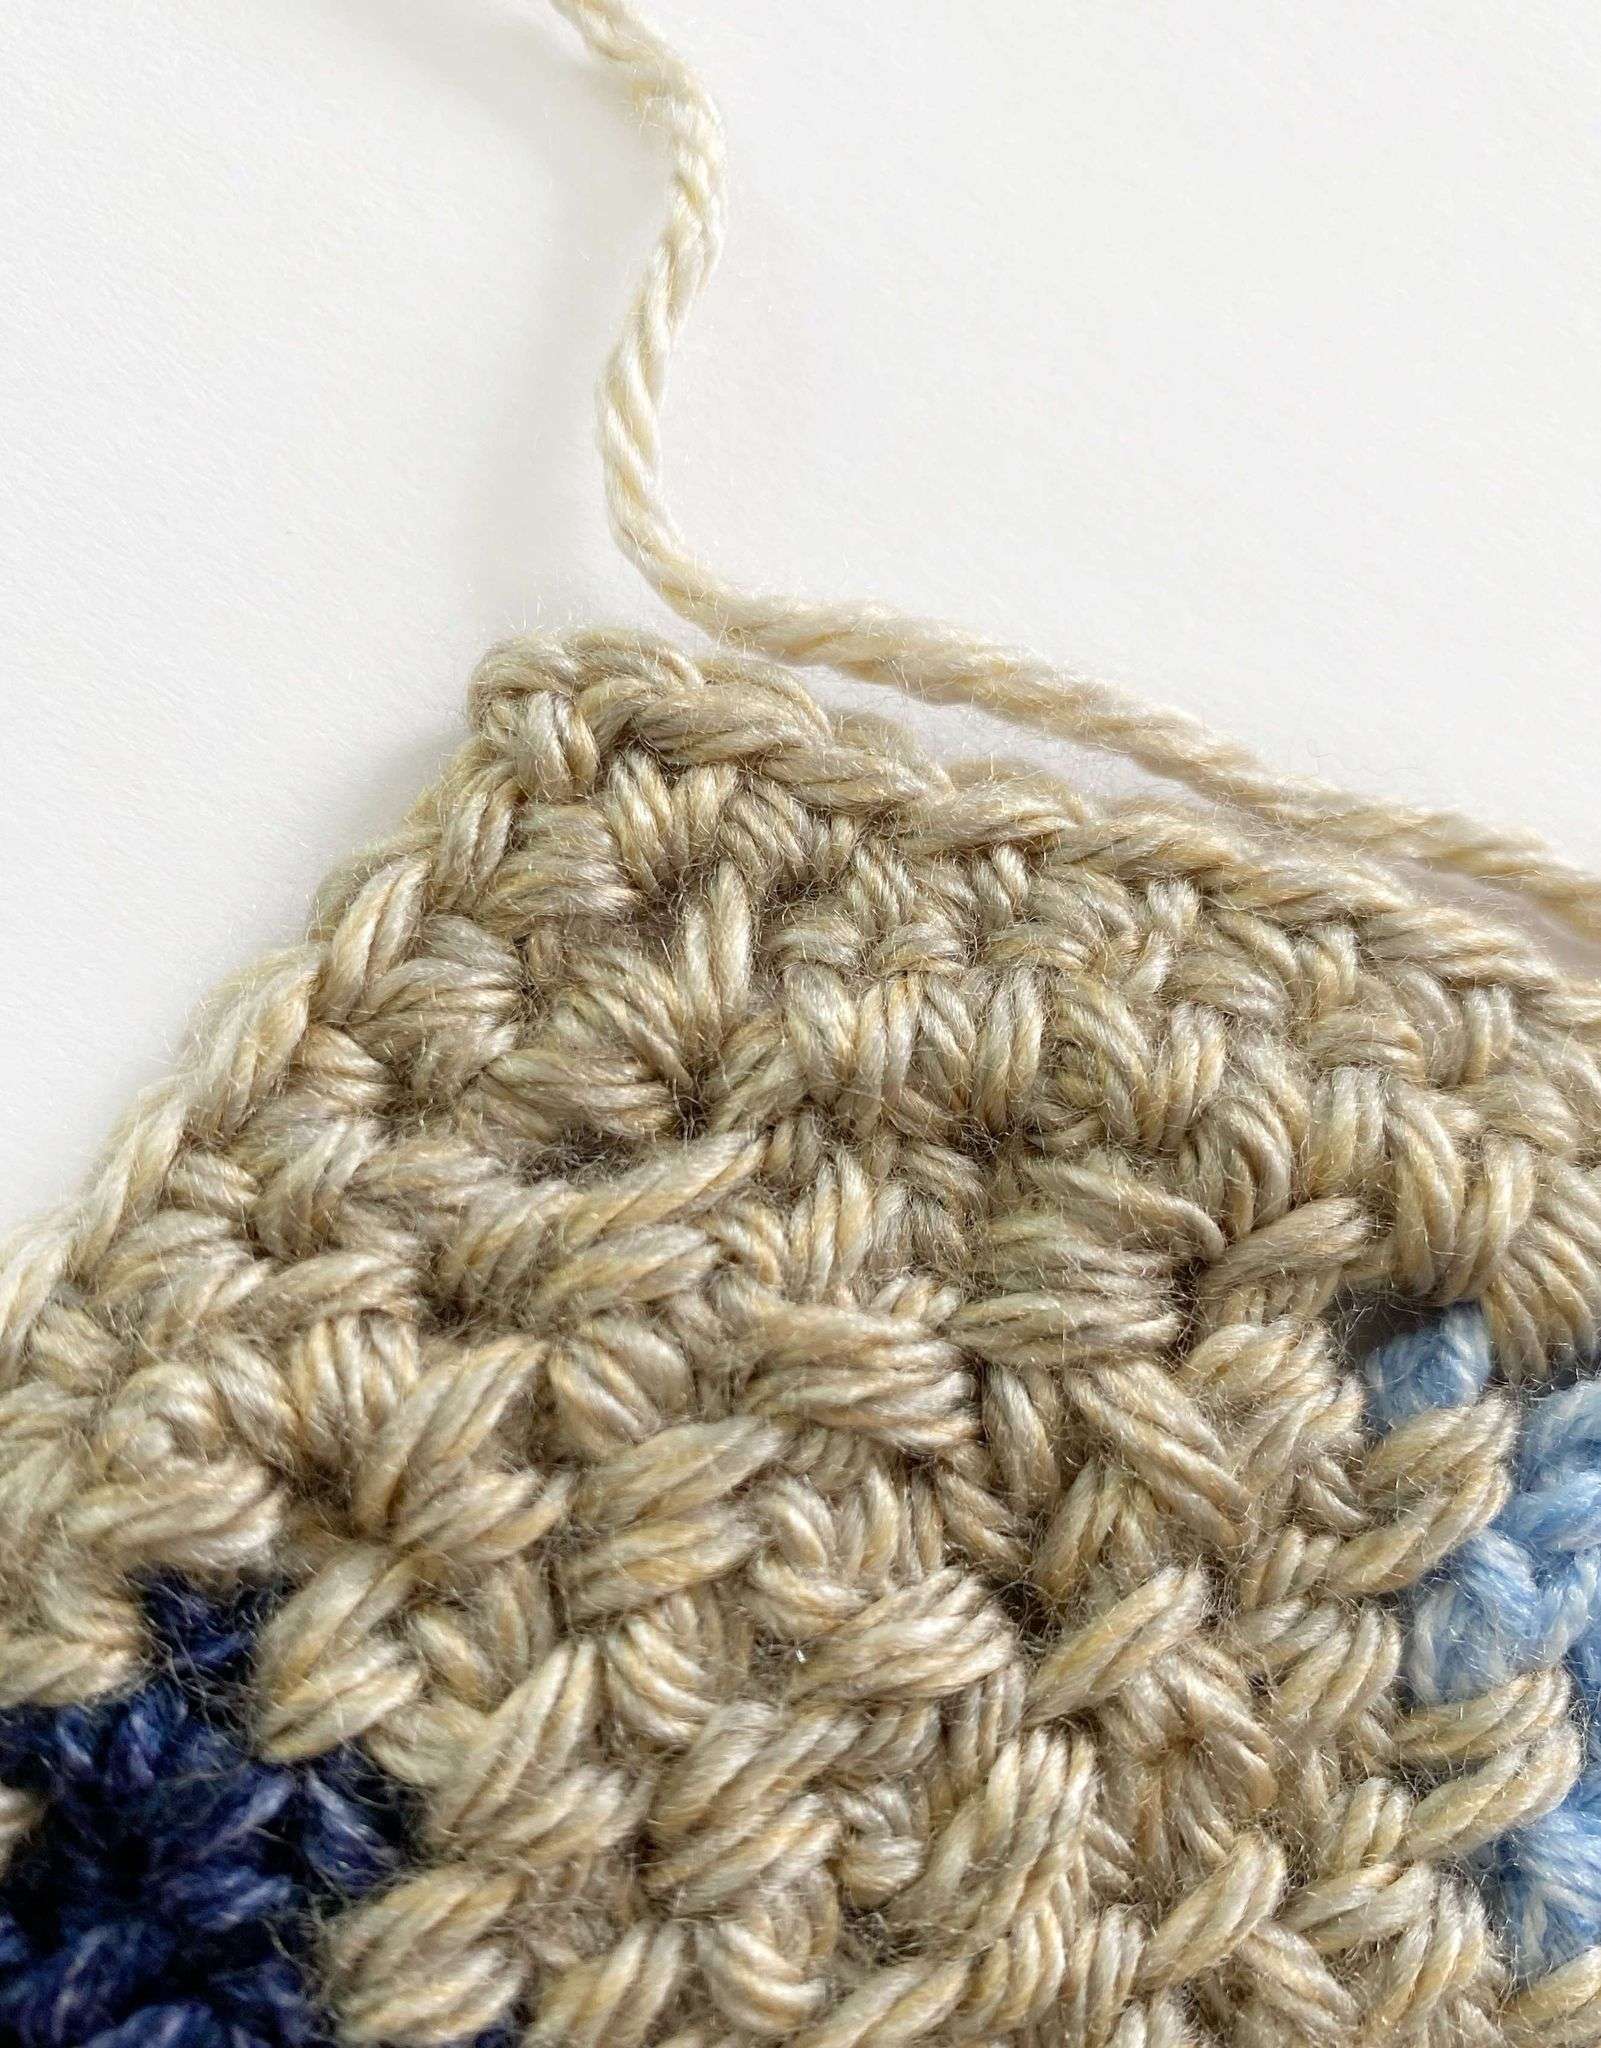
Rnd 1 (RS): With MC, ch 1, [(Sc, ch 2, sc) in corner, sc into side of each row across until corner] 4 times. Sl st in the first sc of the rnd to join, and then sl st in the corner ch-2 sp. Turn.
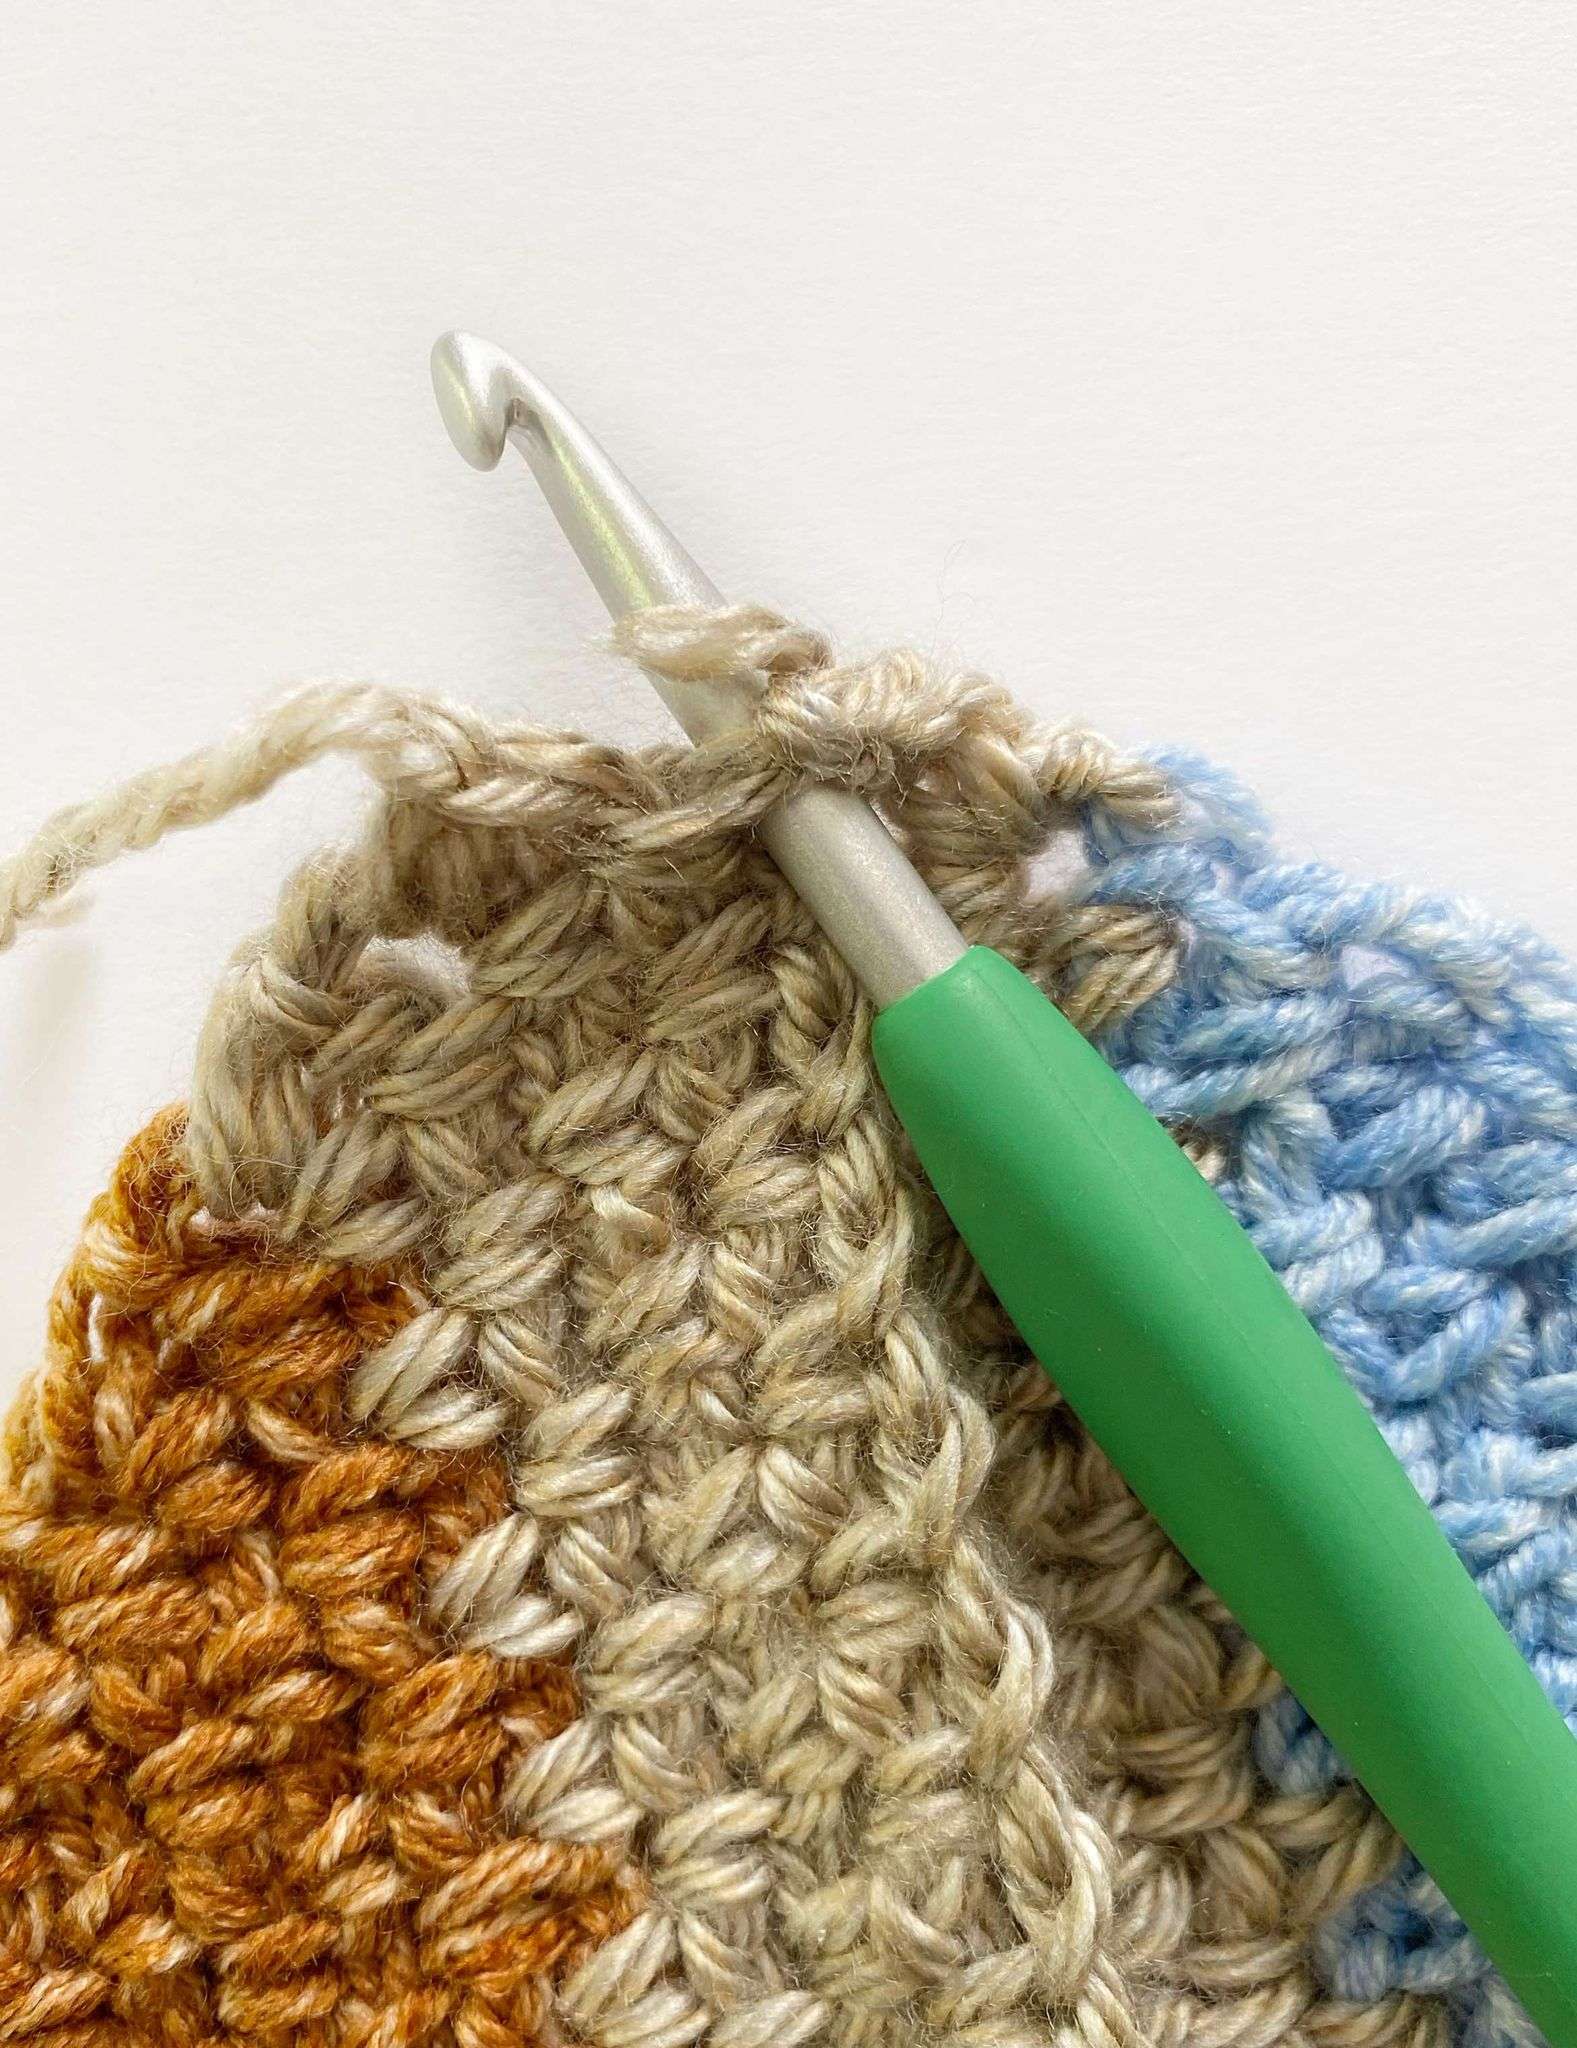
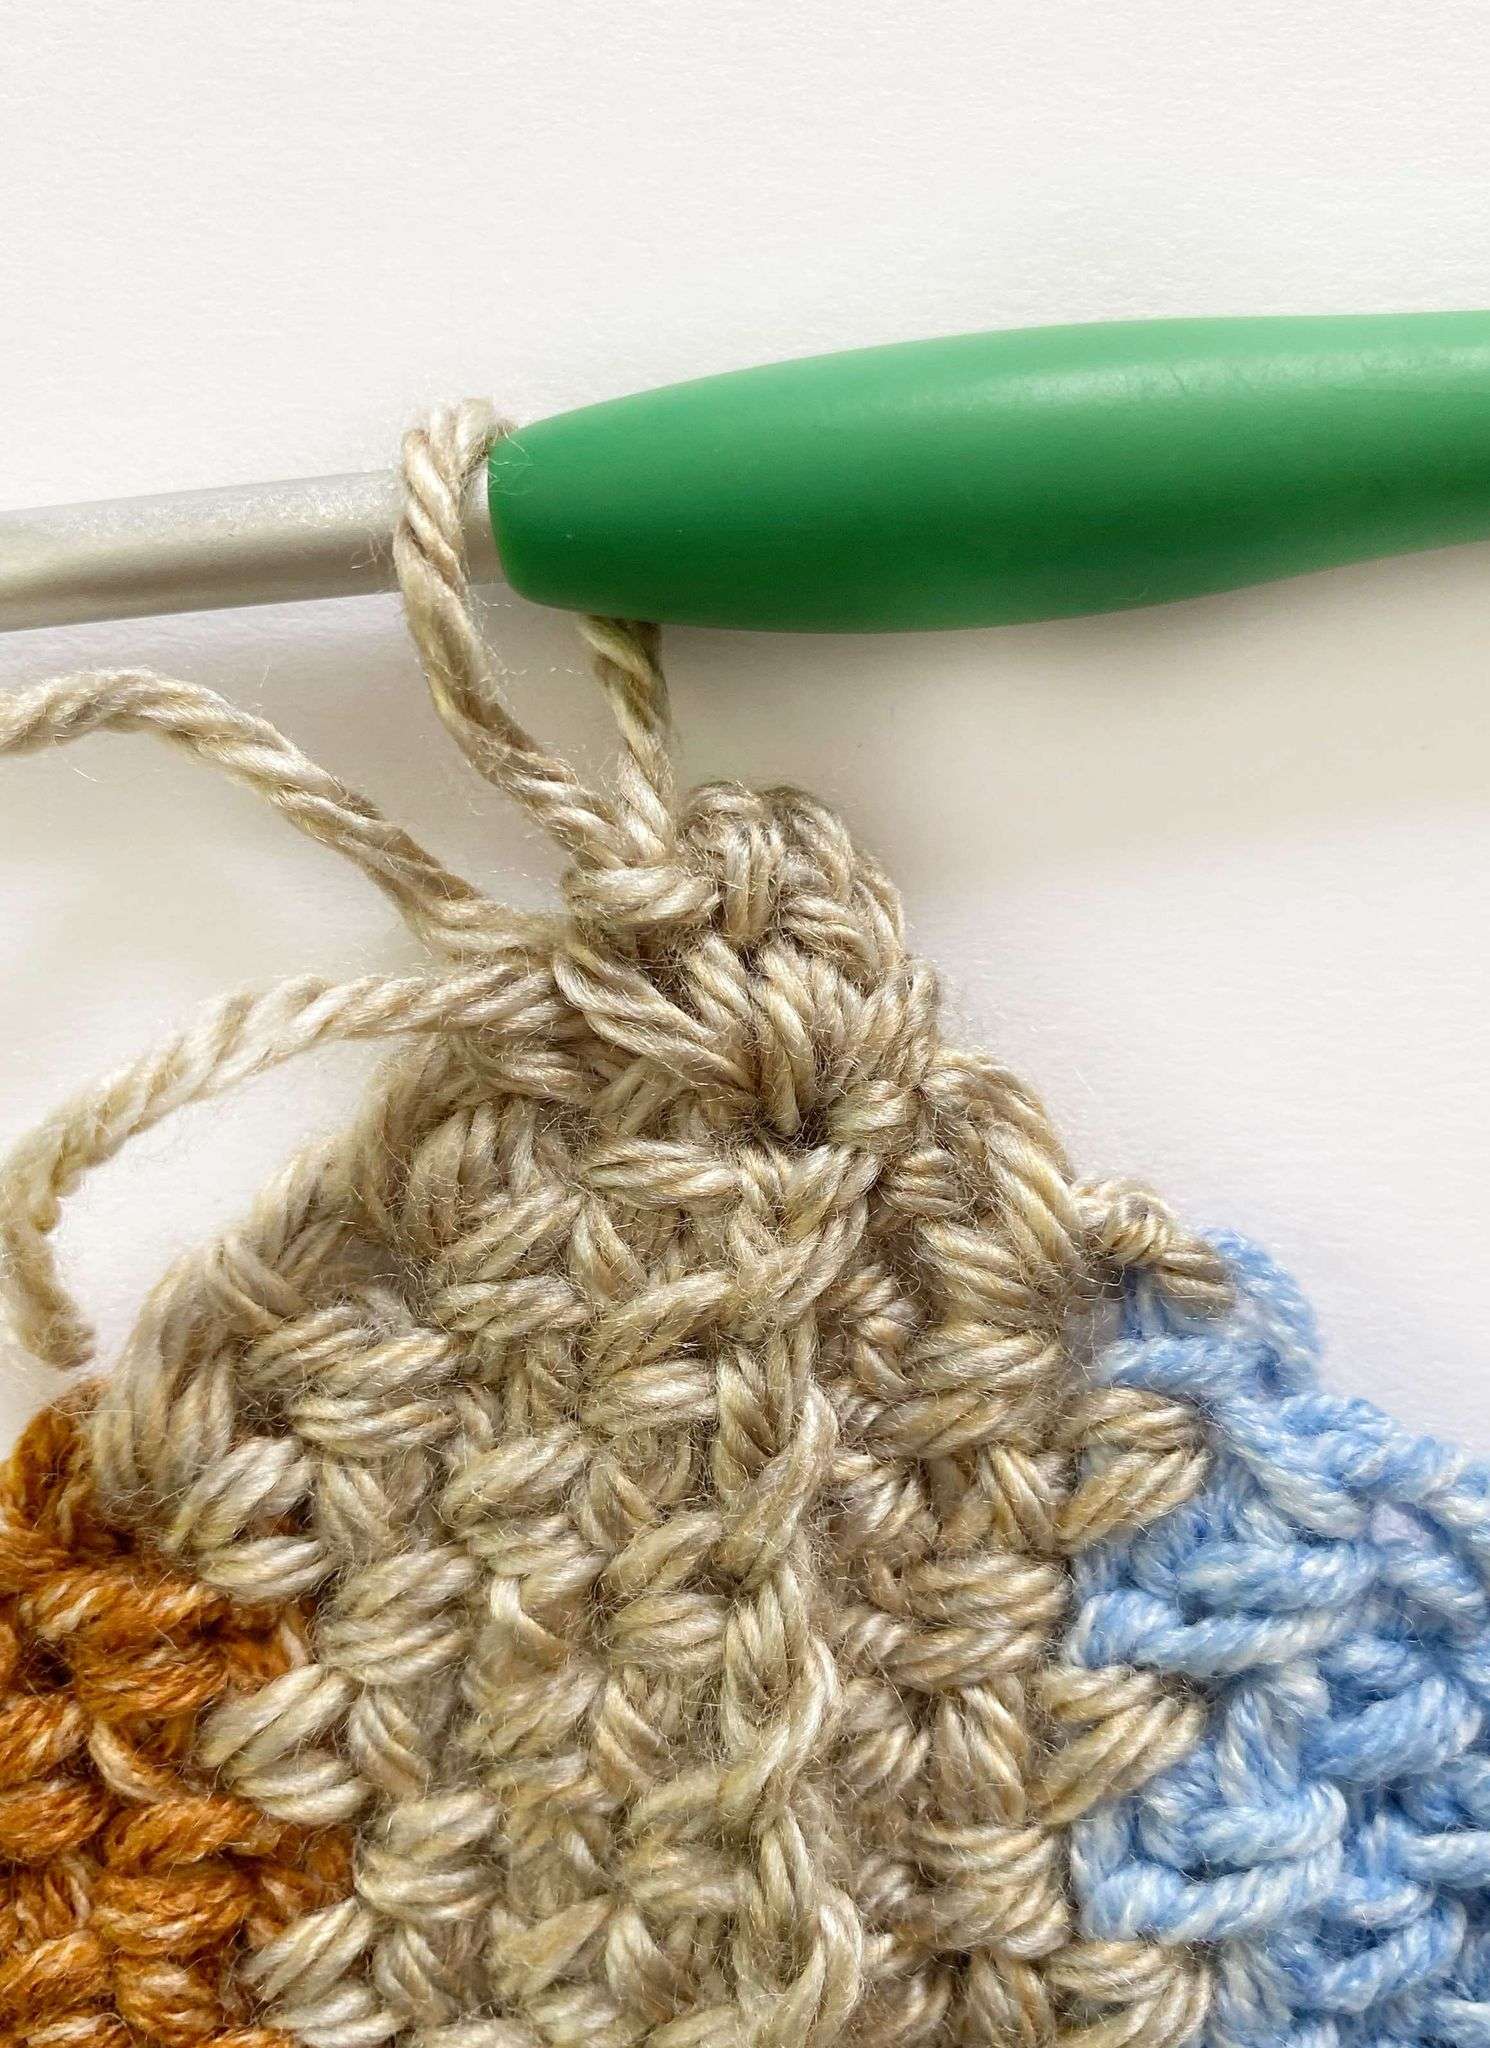
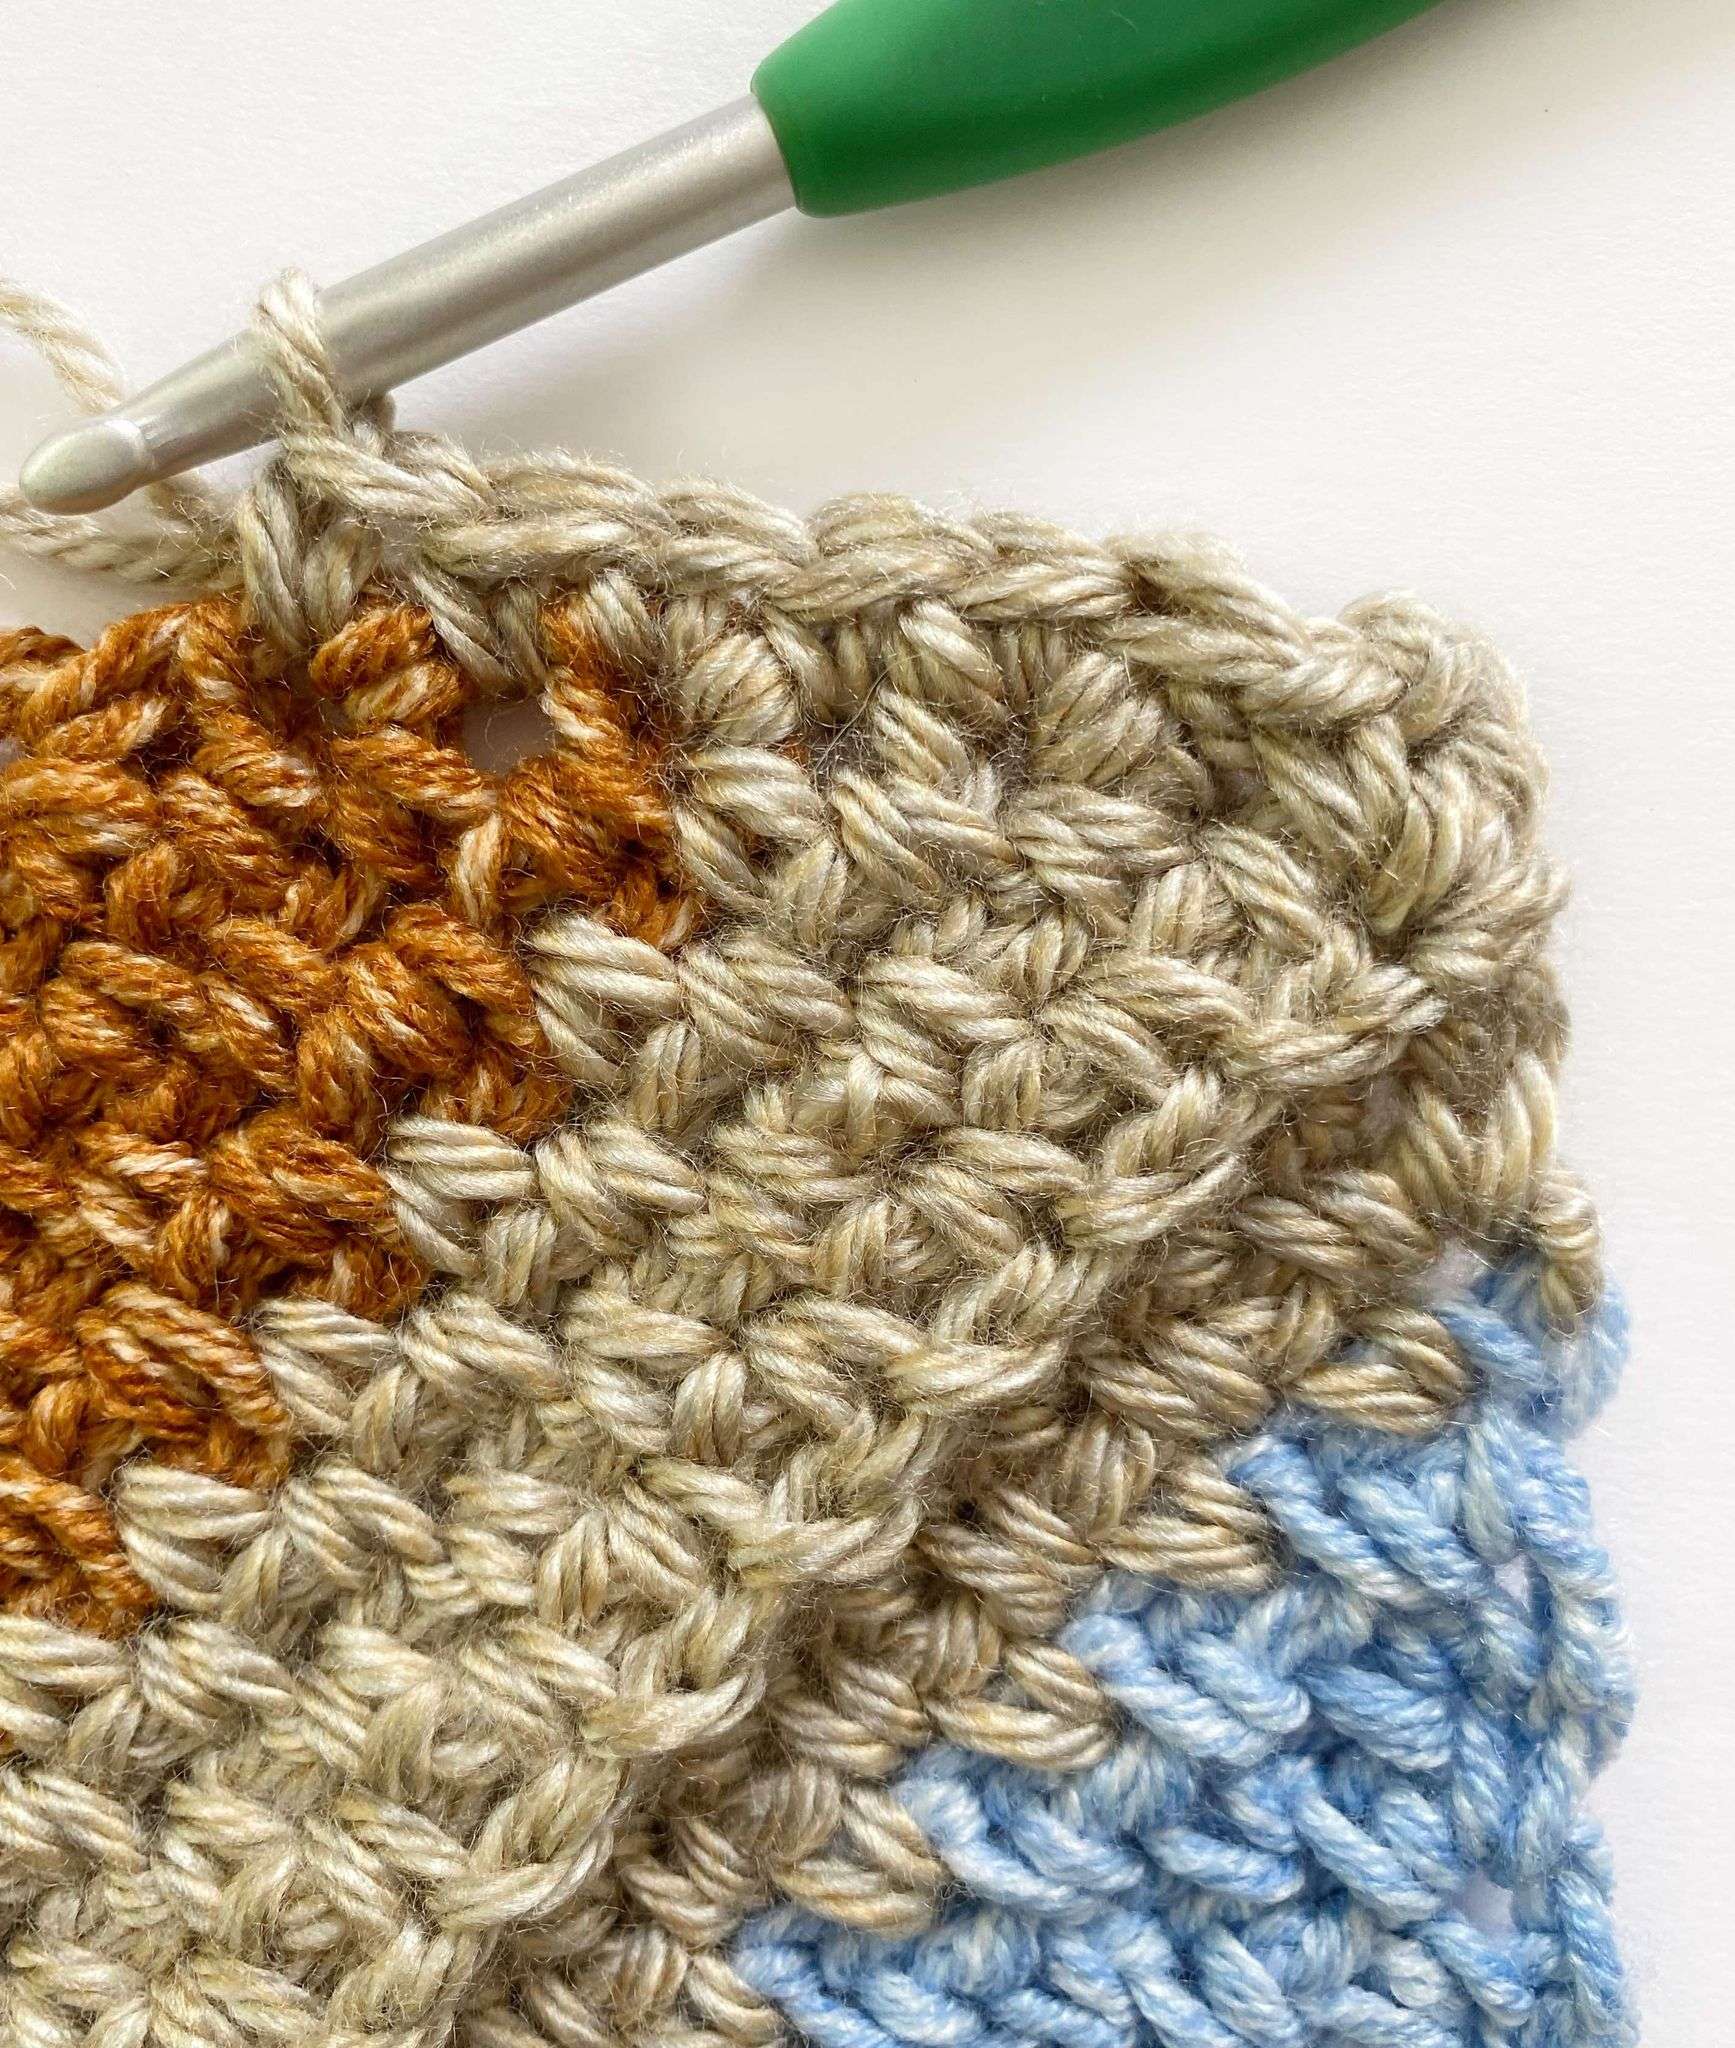
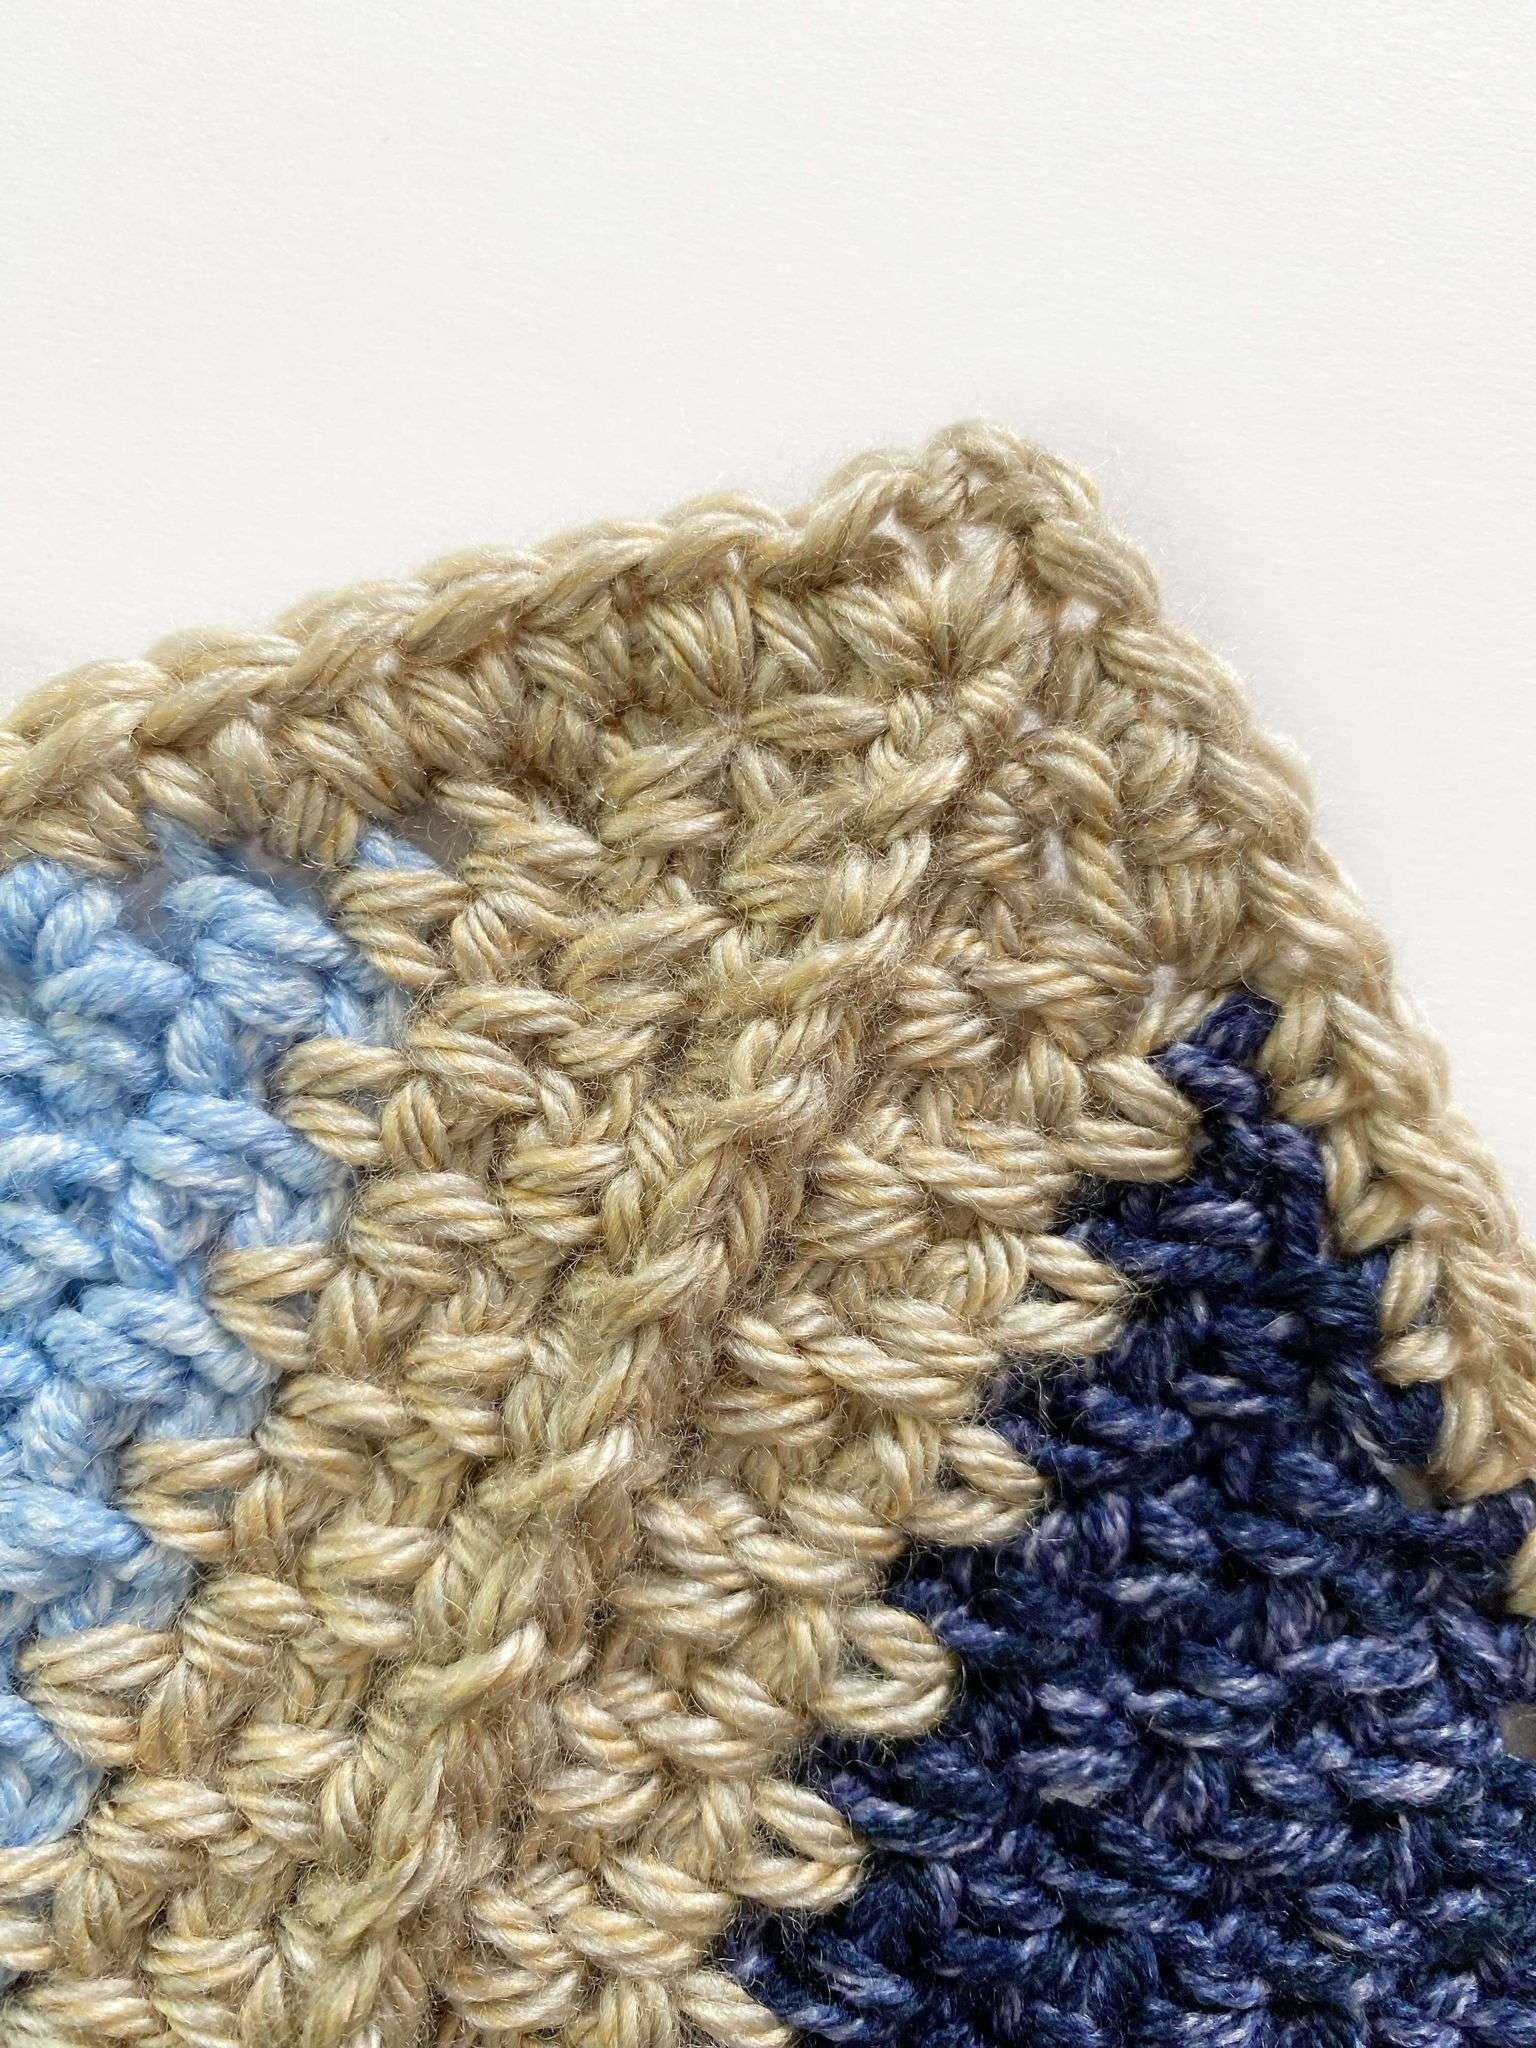
Rnds 2 – 5: Ch 1, [(Sc, ch 2, sc) in corner ch-2 sp, sc in each st across until ch-2 sp] 4 times. Sl st in the first sc of the rnd to join, and then sl st in the corner ch-2 sp. Turn.
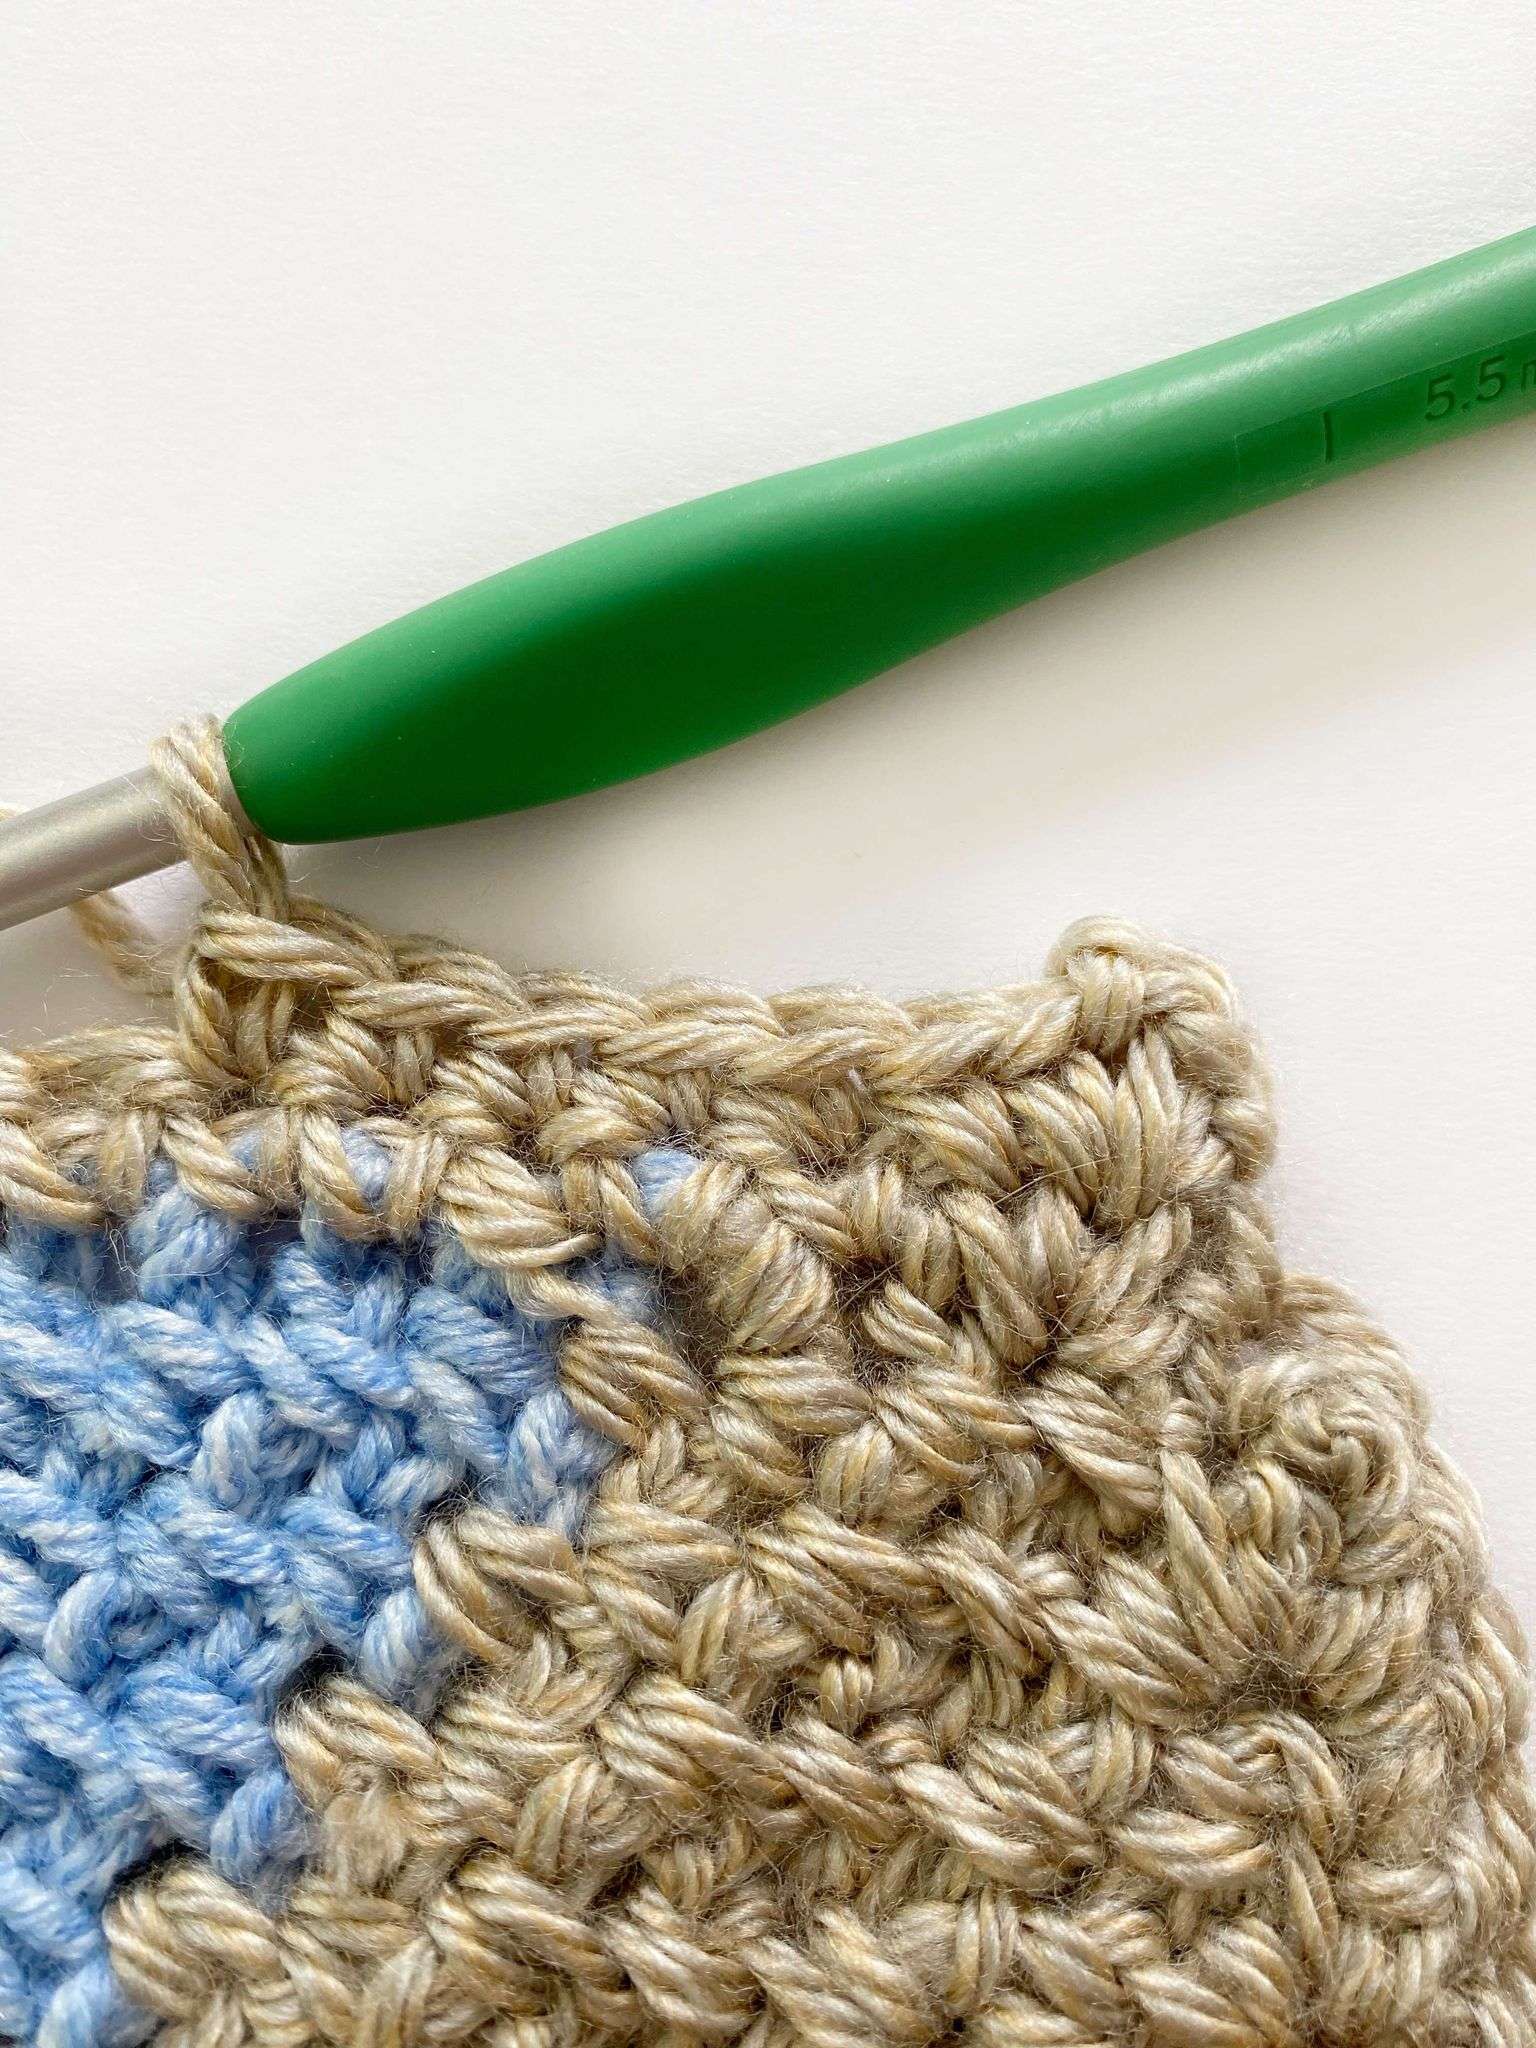

Blocking the Blanket:
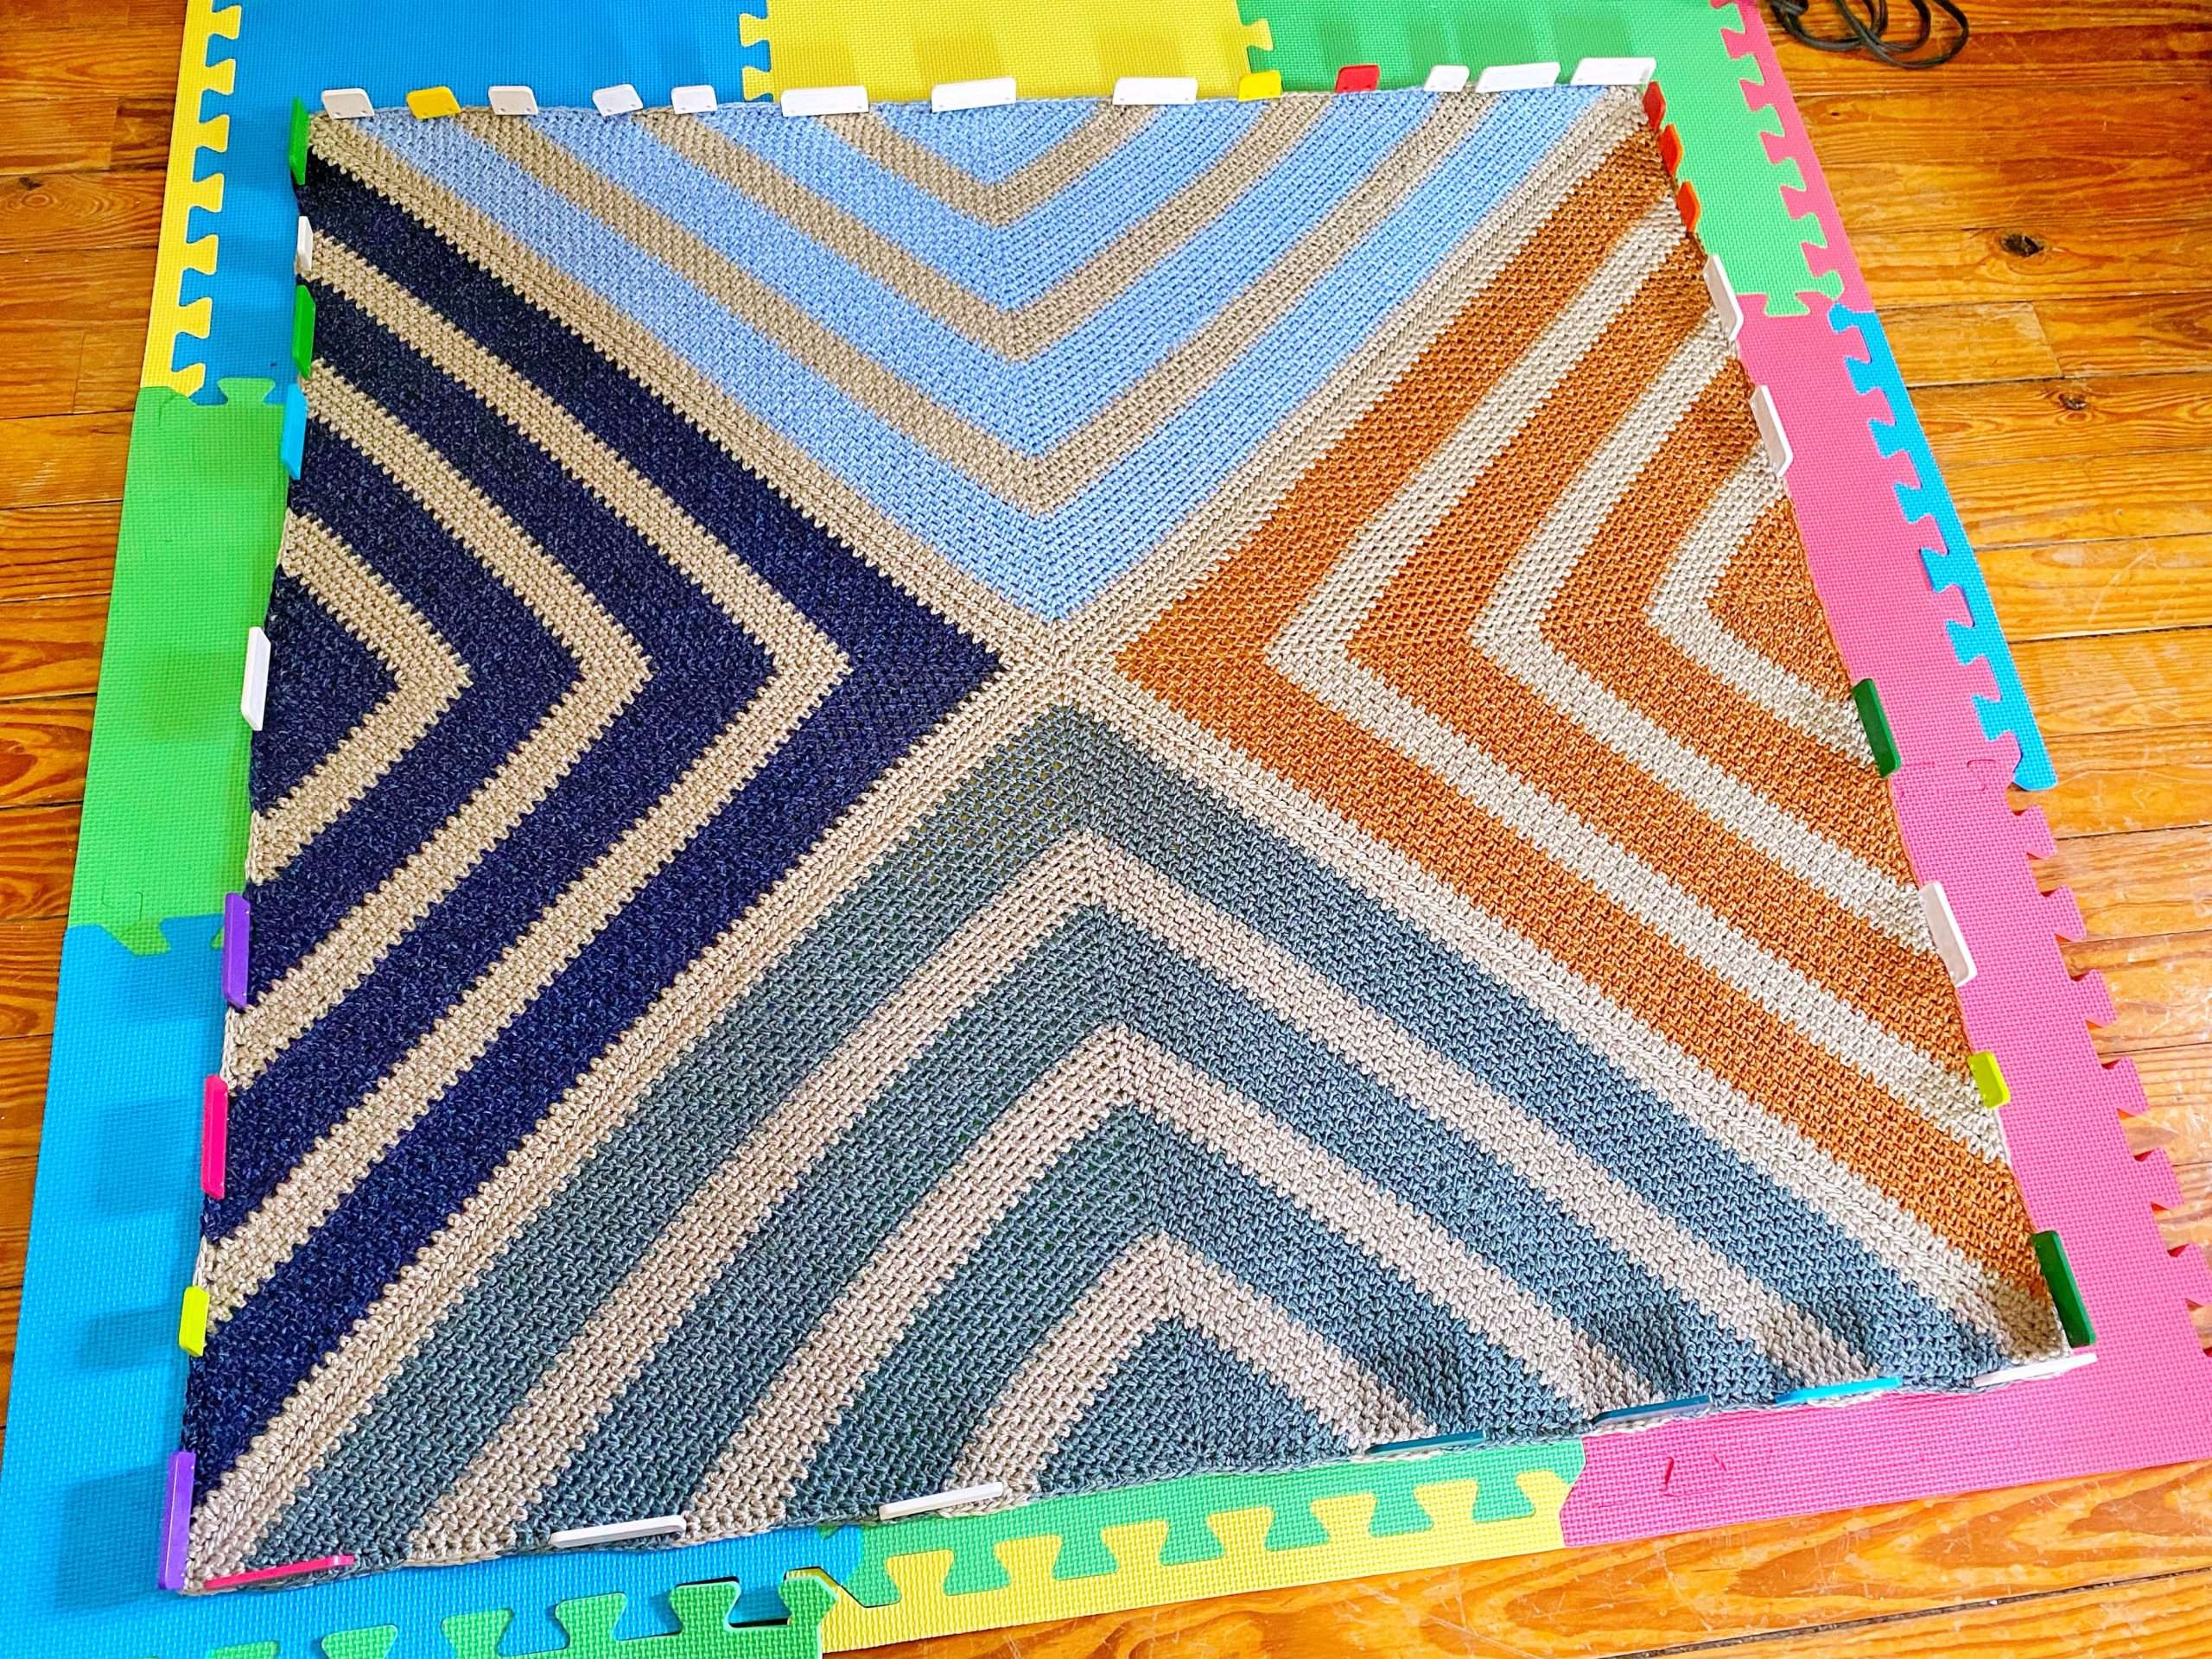
Blocking is the process of wetting a piece of crochet to make the ends and rows straight. To block this blanket, you will need a steamer or spray bottle, straight pins or blocking pins, and a blocking mat or foam.
Block your work by stretching out the blanket (vertically and horizontally) and placing pins along each side to hold it in place. Spray the blanket with water, or use a steamer, making sure to stay at least 2 inches away from the blanket. Gently press the water or steam into the blanket with your hands. Let the blanket dry completely before unpinning it.
Questions?
If you have any questions about the Four Triangles Blanket, please send me an email through my contact page. I am happy to help!
End Notes:
Yay! You just made your first Four Triangles Blanket. I hope you enjoy making and using your blanket! If you’d like to make more crochet blankets, or other crochet home decor items, explore some crochet patterns by clicking on the button below.
Disclaimer: You are welcome to sell items that you’ve made from this pattern; however, you are not allowed to use my pictures or sell my pattern as your own (Copyright @ ThisPixieCreates).
I hope you have an amazing day!
Love, Dayna
I bought the triangle blanket PDF and just read through it. It is the best written pattern I have seen in my 55+ years of crochet. Taking each row and breaking it down into bullet points is awesome. I do this with patterns all the time because it makes them easier to follow. I put then into excel and break down each row. It is so great to see a pattern writer do it for a paid pdf pattern. I love it!!!
Hi Betty,
I’m so happy to hear that you like the Four Triangles Blanket Pattern. I really hope you’ll enjoy making it, and please feel free to share a picture when you’re finished – I’d love to see how your blanket turns out. 🙂