
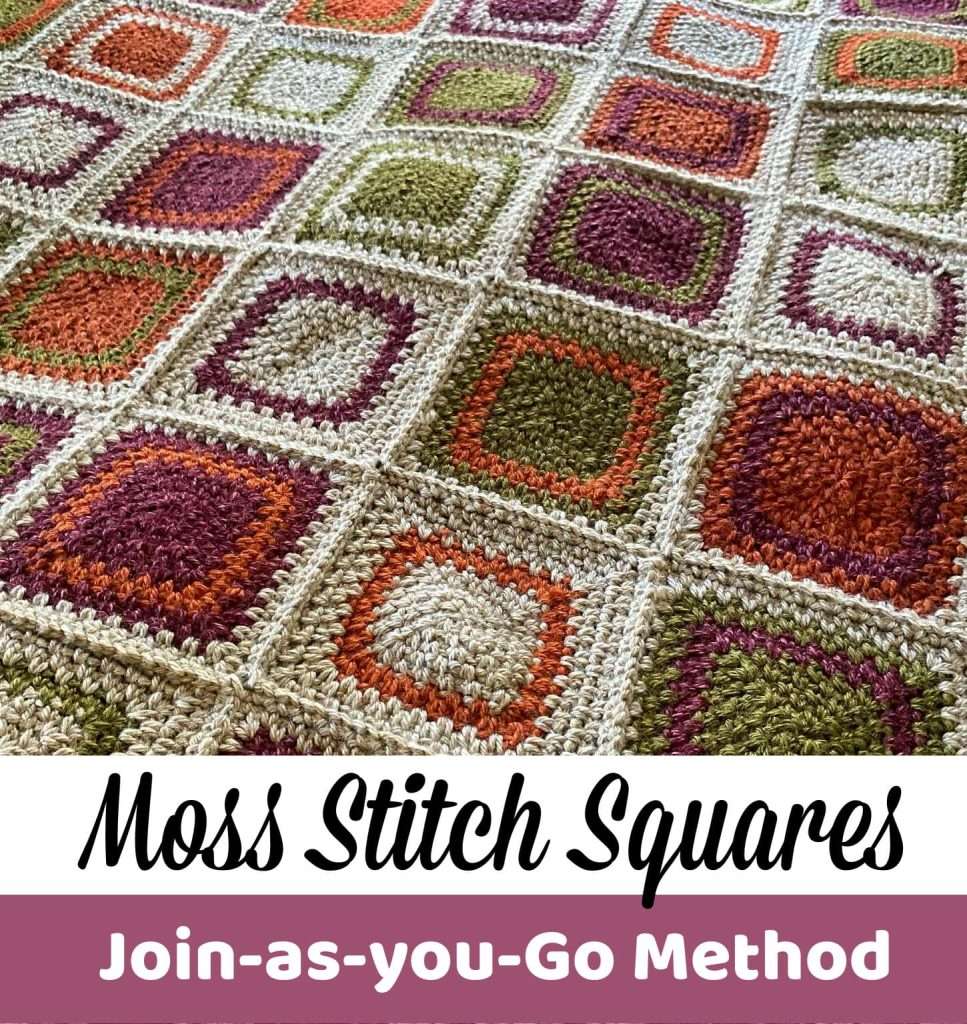
Hi guys! Today, I am sharing a step-by-step tutorial for joining moss stitch squares together using a crochet join-as-you-go method. I’d rather crochet my squares together than sew them, so if you’re like me, then you’ll love this method.
You can use this JAYGO method to make wall hangings, bags, scarves, blankets and more! I used this method in both the Disco Queen Blanket and Cotton Candy Parade Blanket.
For this tutorial, I am using this moss stitch square pattern, and a 5.5mm crochet hook. However, you can use any yarn and hook size of your choice!
Let’s dive in!
More Moss Stitch Tutorials You’ll Love!
- Perfect Moss Stitch Square
- Moss Stitch in Rows
- Moss Stitch in a Triangle
- Moss Stitch Granny Square Blanket
Pin this Moss Stitch Square Join – HERE!
If you don’t have time to try this method, simply pin it for later, so you can find it when you’re ready to start joining your squares!
Abbreviations Used:
- Ch – chain
- St – stitch
- Sp – space
- Sc – single crochet
- YO – yarn over
Join the Moss Stitch Squares Together:
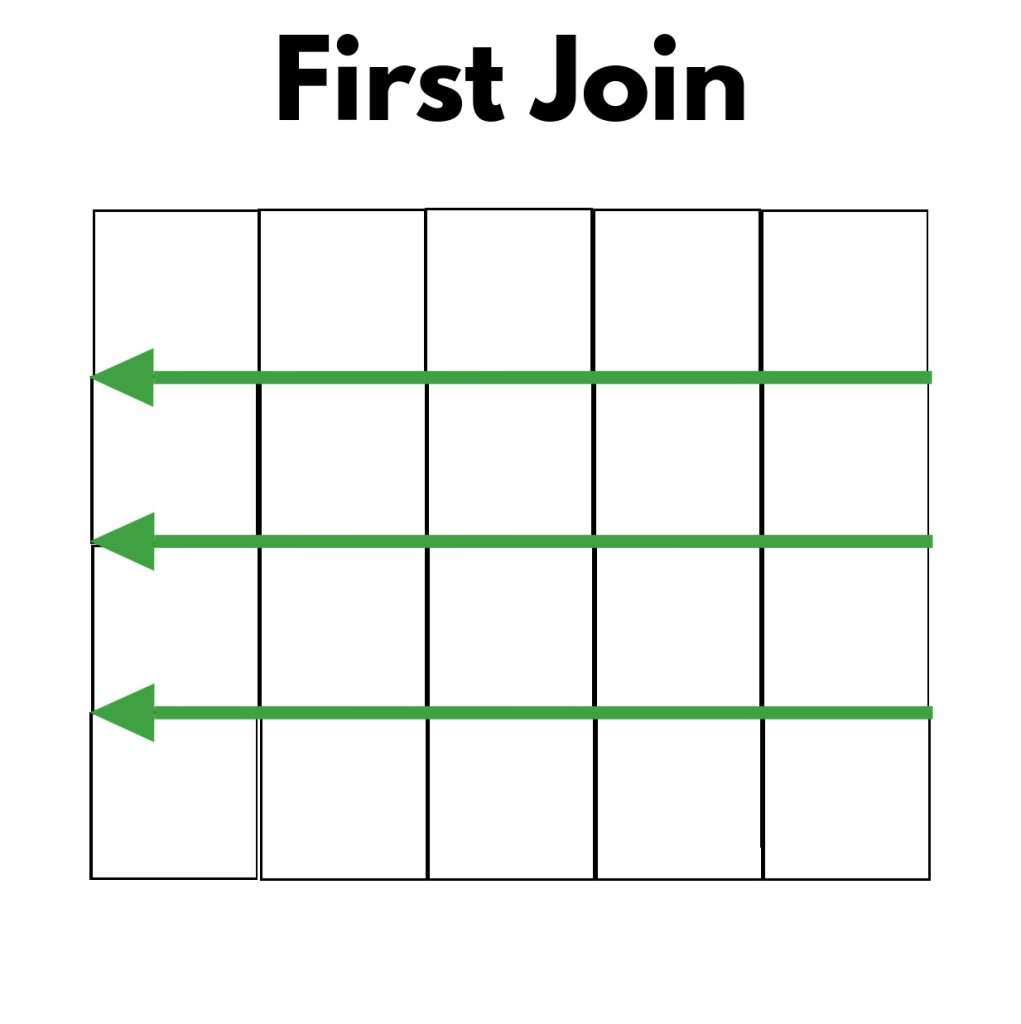
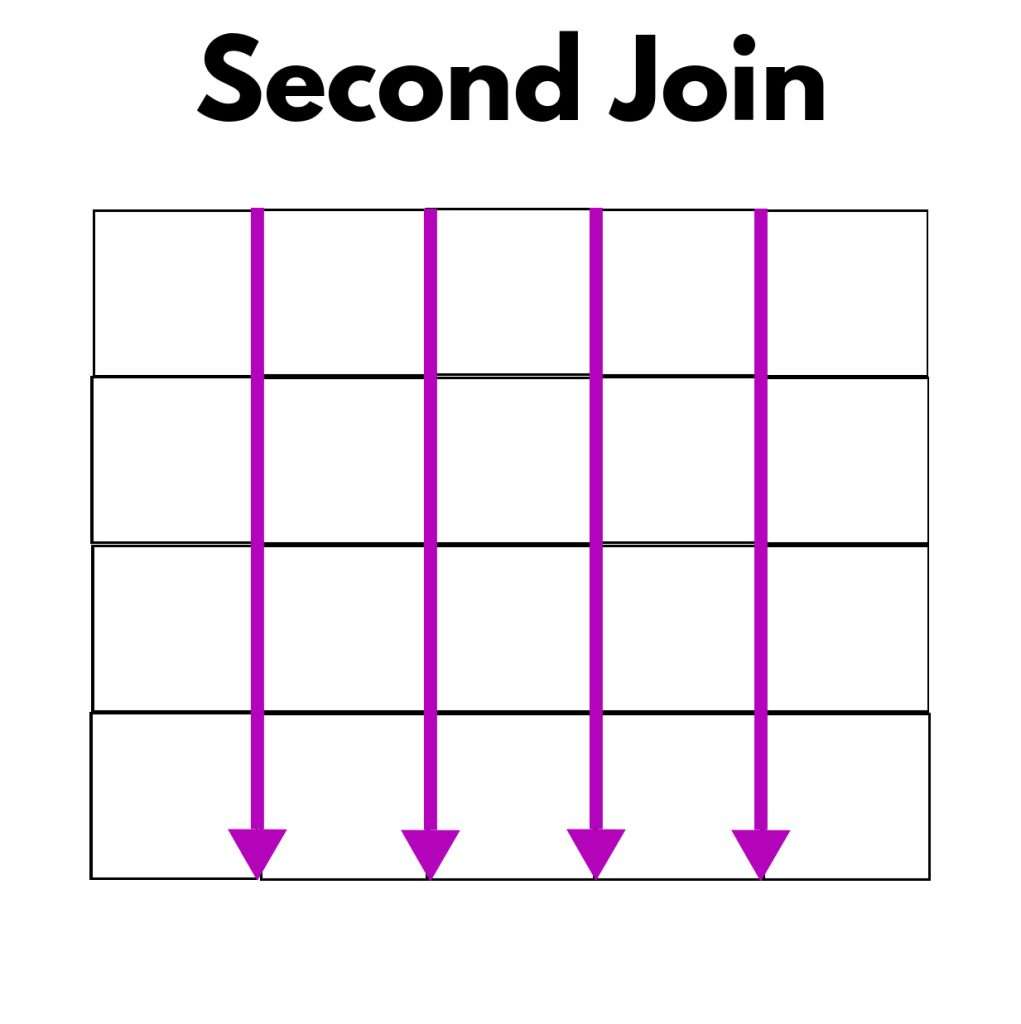
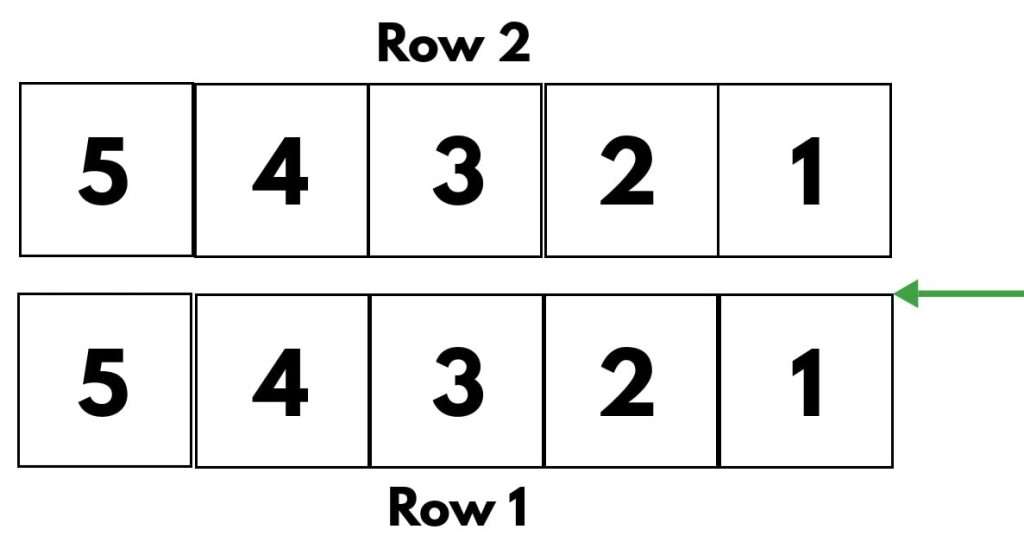
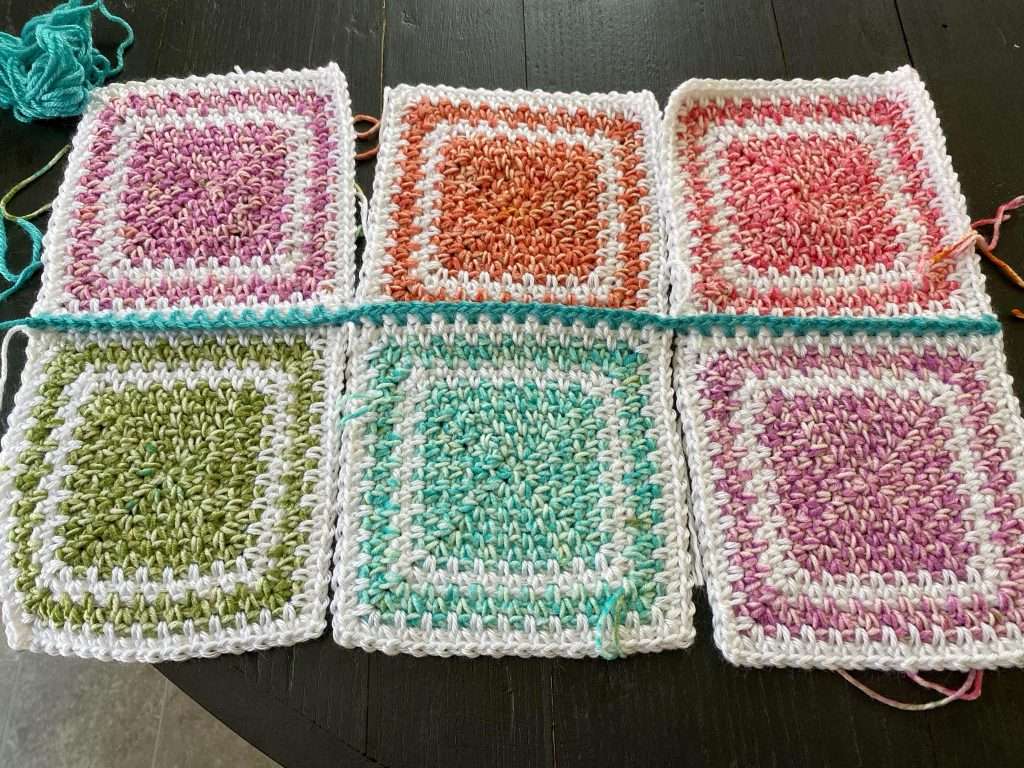
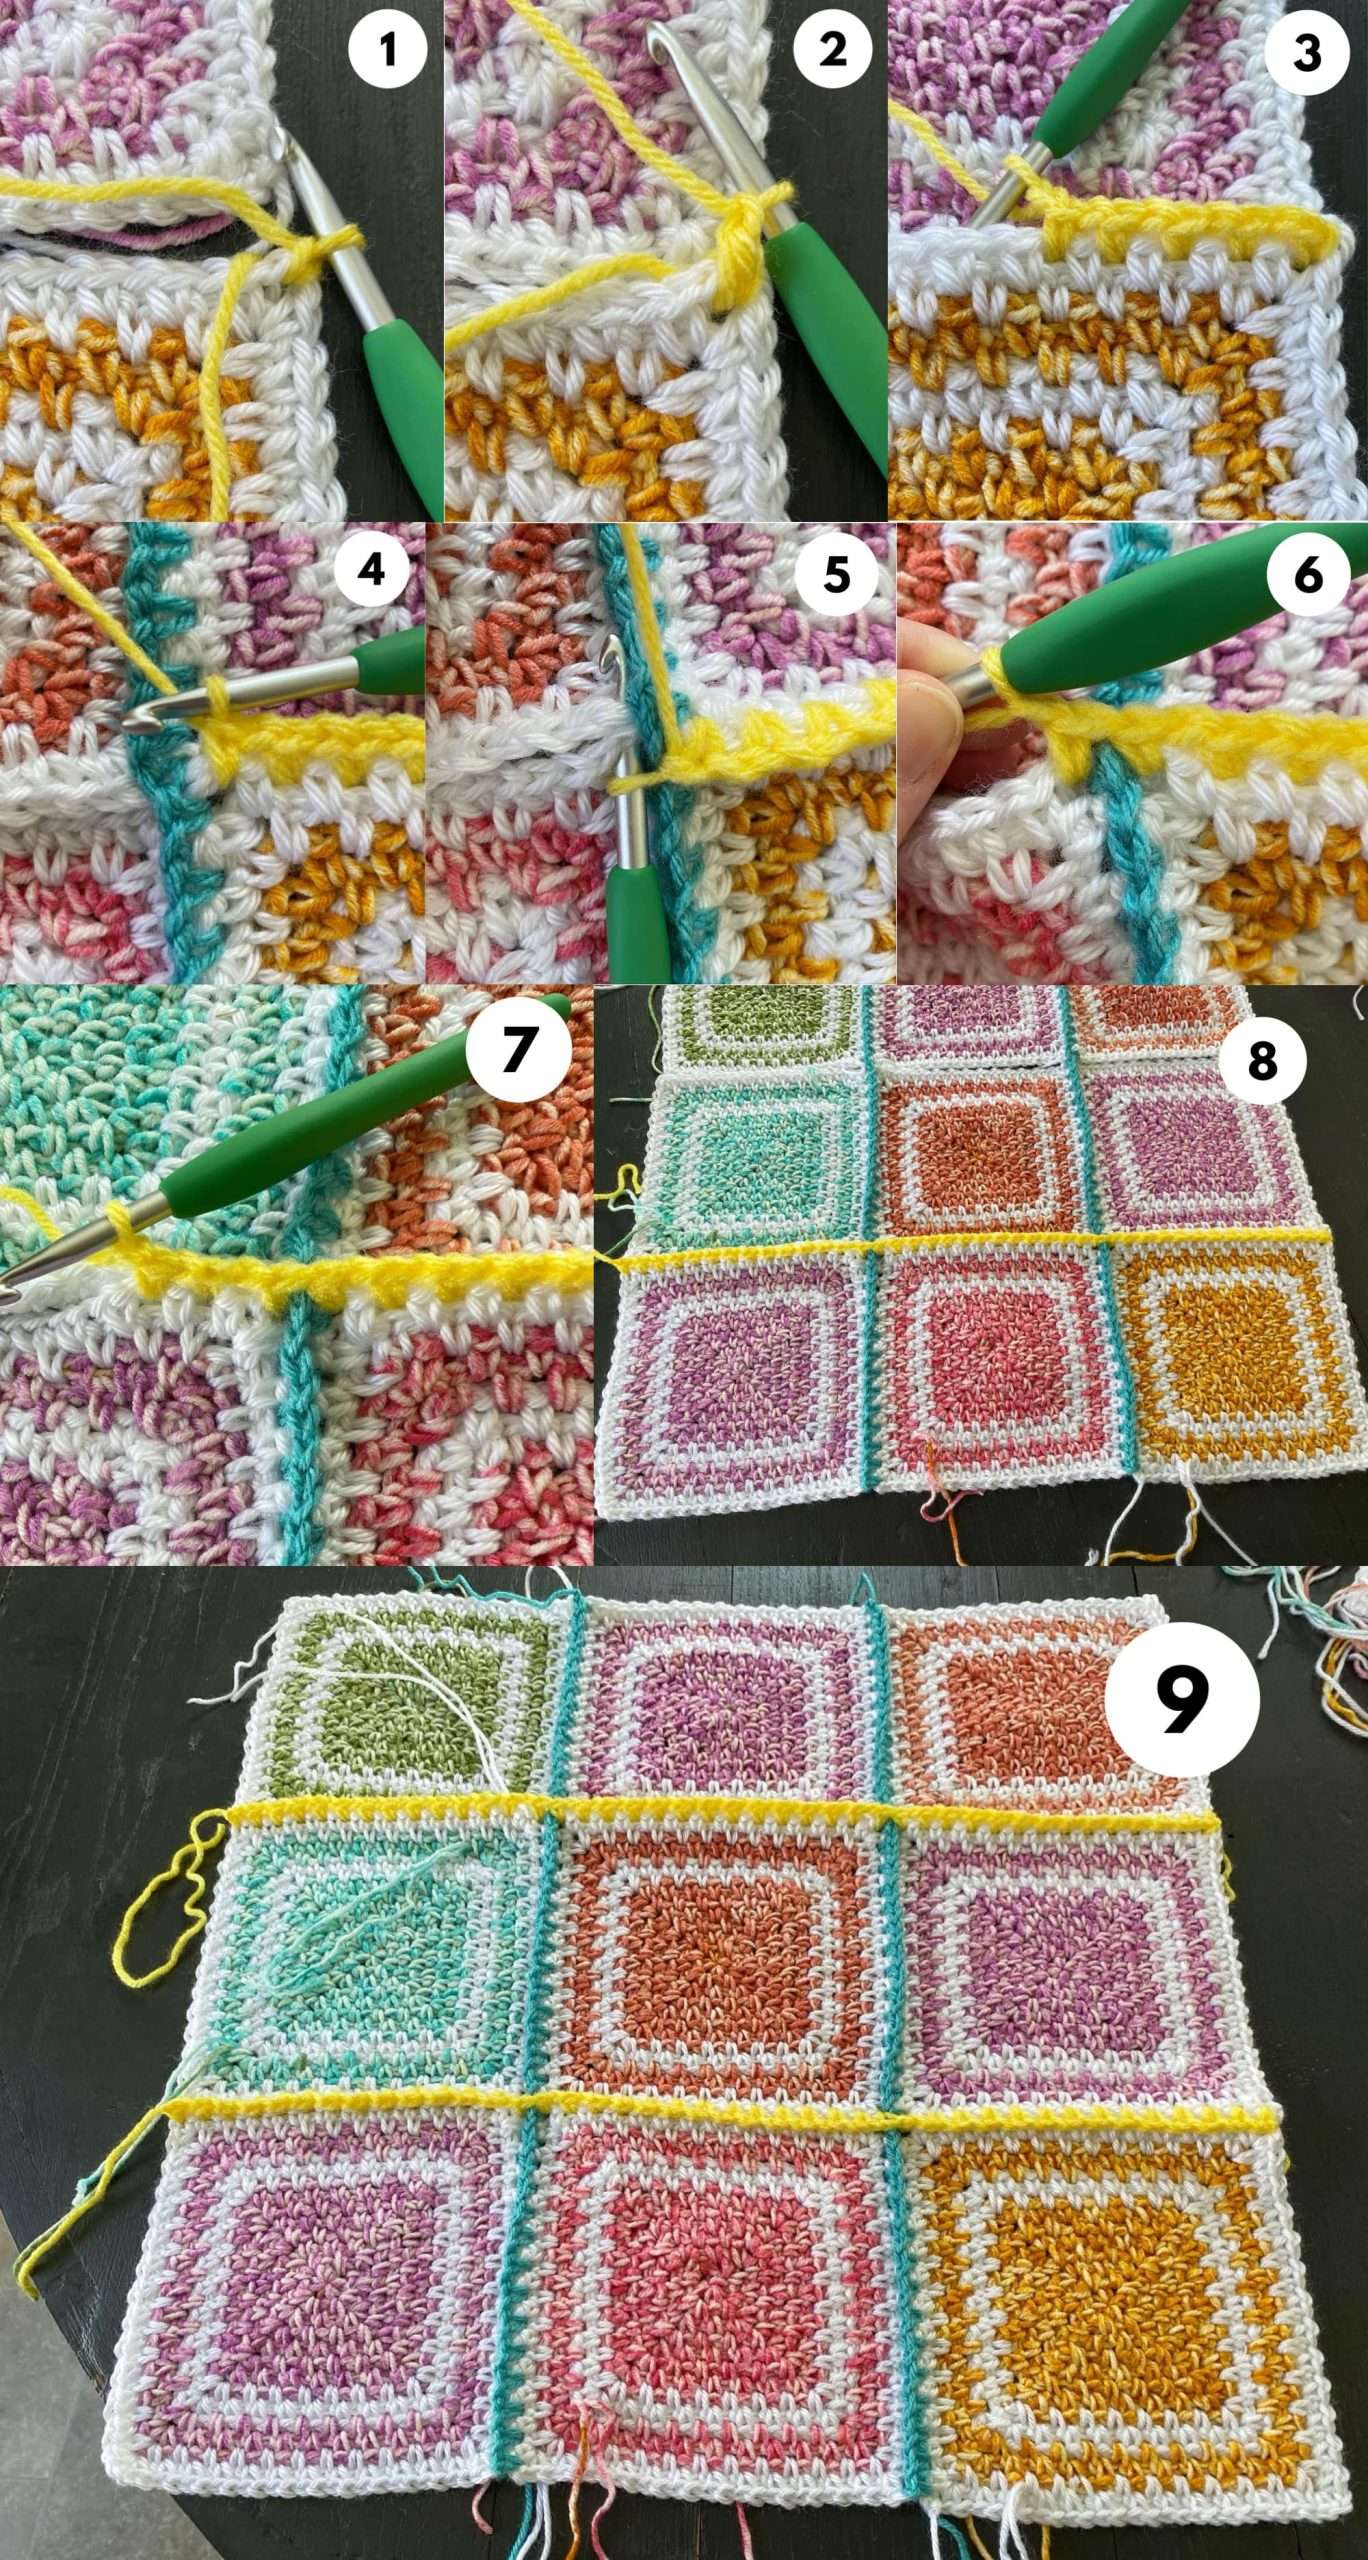
To join moss stitch squares, we are going to make two passes – a first join (horizontal, to join the rows) and a second join (vertical, to join the columns) – to ensure that all the sides are joined.
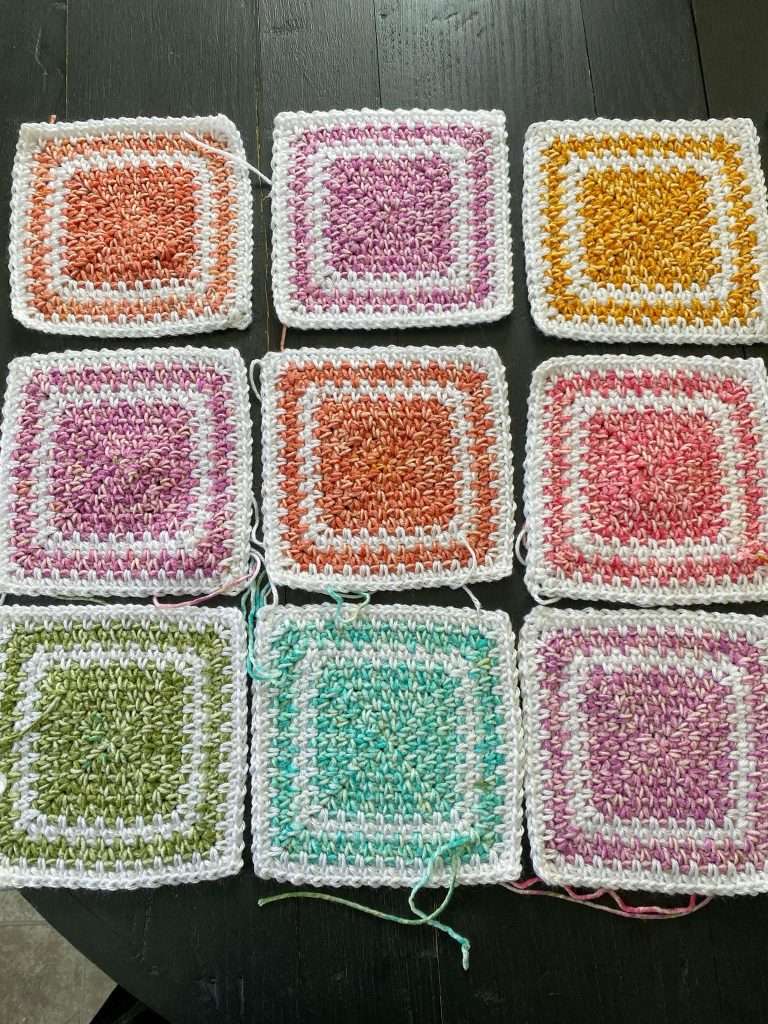
Step 1: Layout your squares.
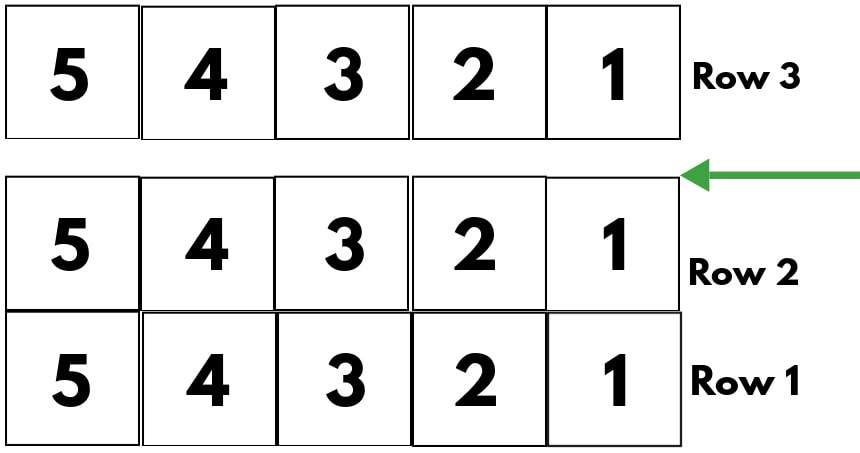
Step 2 (First Join – Rows): Each row is joined to the row above it. Starting with Row 1, join each square across the row to the matching square of Row 2.
- Insert hook into the top-right corner ch-2 sp of Square 1 of Row 1. Pick up the yarn with your hook and pull it through the ch-2 sp to fasten on. Ch 1.
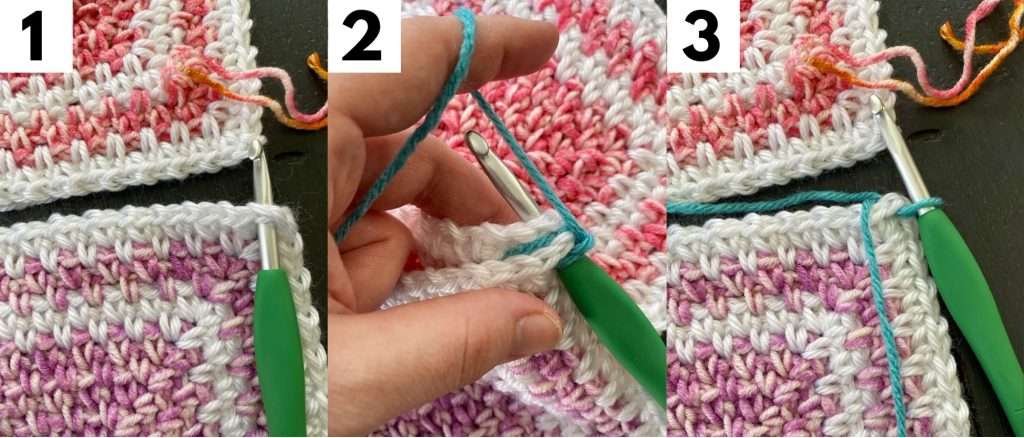
- { Insert hook into the first corner ch-2 sp of Square 1 Row 1, and the matching corner ch-2 sp of Square 1 Row 2, and make a (sc, ch 1) to join.
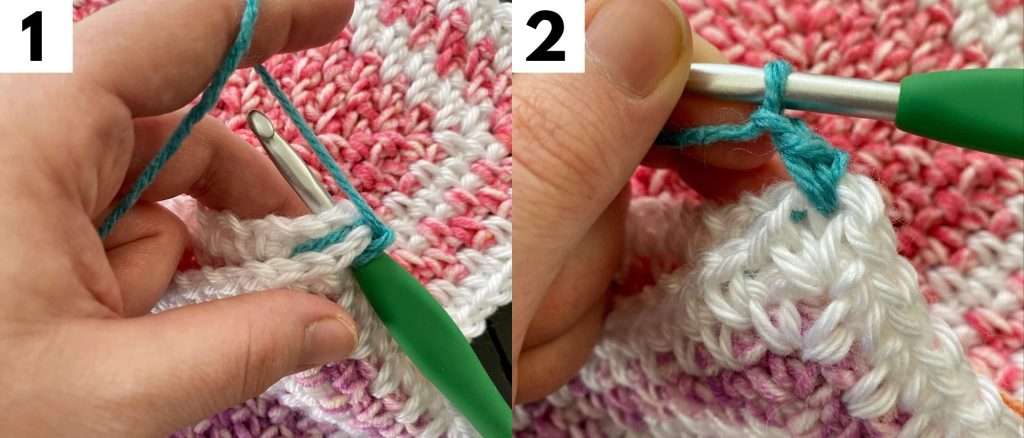
- (Sc, ch 1) in every ch-1 sp of the two squares across.
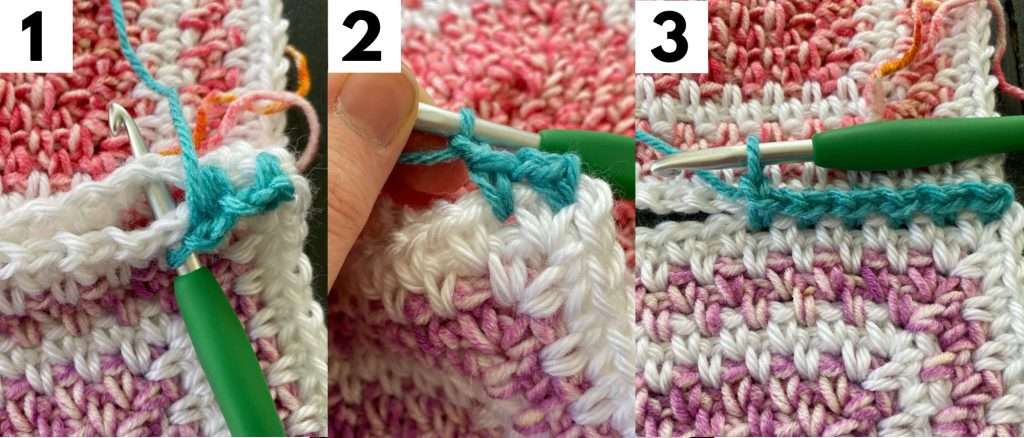
- Sc in the last corner ch-2 sp of the two squares. Do not ch 1.}
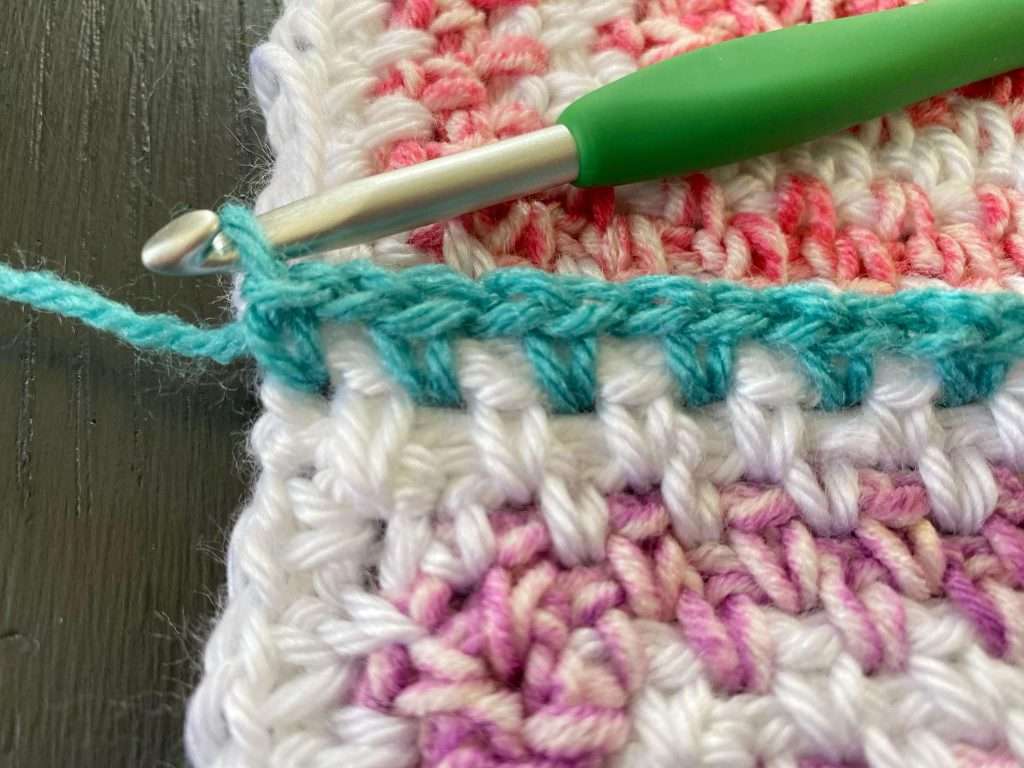
Repeat this process from { to } to join each square across the row. To fasten off, YO and pull through the loop on the hook to make a long tail, then trim it. Pull tight to make the knot secure.
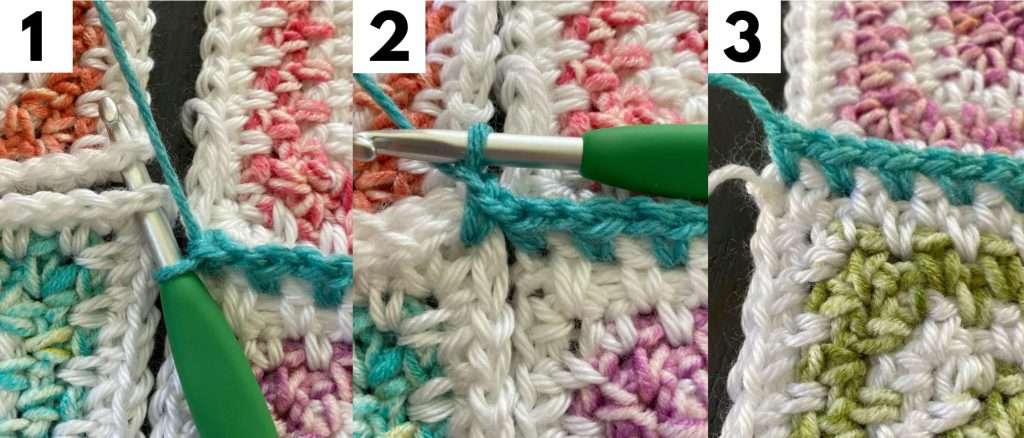
- To join the next two rows (ie. Row 2 and 3), insert hook into the top-right corner ch-2 sp of Square 1 Row 2. Pick up the yarn with your hook and pull it through the ch-2 sp to fasten on. Ch 1.
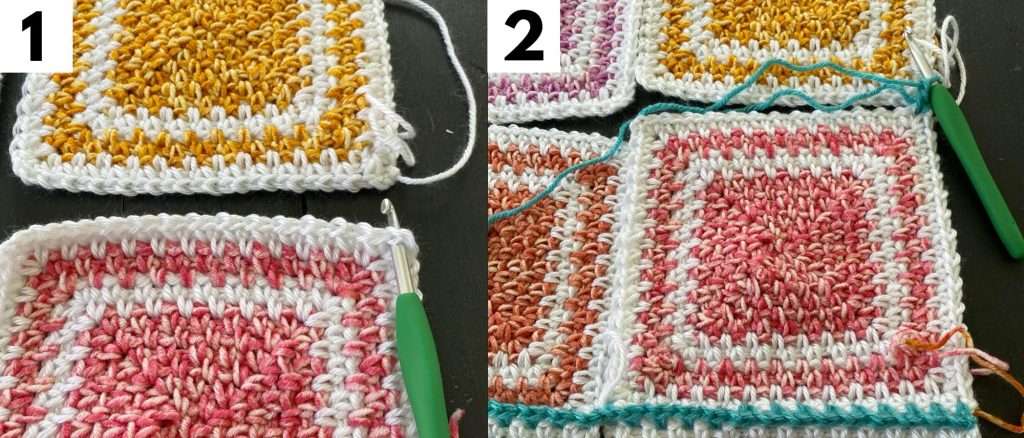
- Repeat the process from { to } to join each square across the two rows.
- Continue to repeat Step 2 until all rows of the blanket are joined.
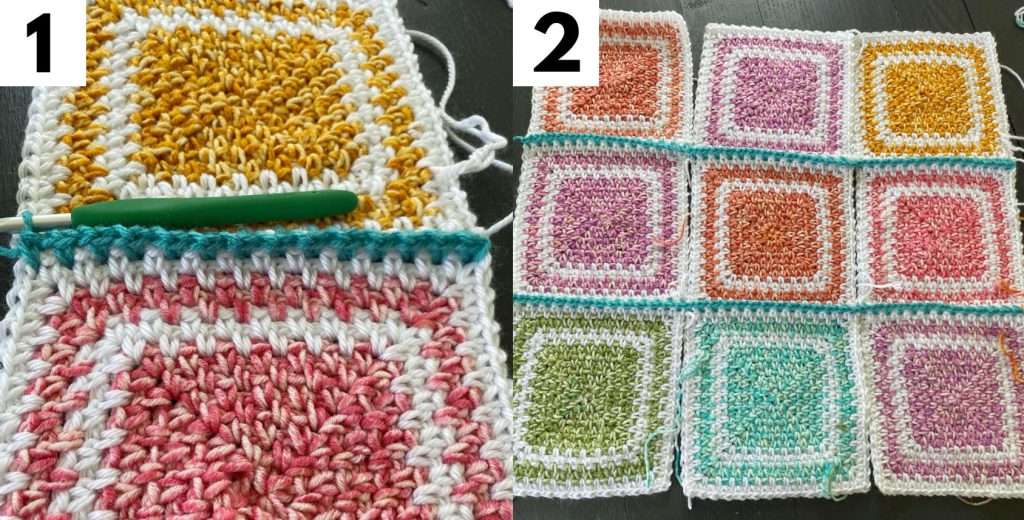
Step 3 (Second Join – Columns): Each column is joined to the one beside it.
- Rotate the blanket 90 degrees, so you can crochet each column join like a row join (right-to-left across the horizontal).
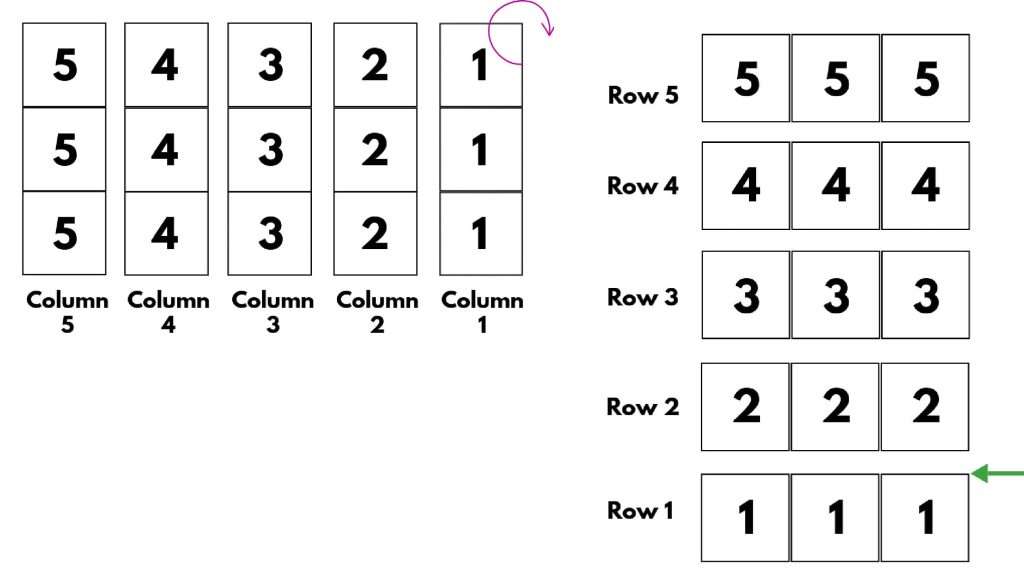
- Repeat Step 2 to join each column to the one beside it. When you reach a row join, crochet over top of it, so that it falls between the column join (Picture 5 & 6).
And you’re done!
I hope you enjoyed this tutorial for joining moss stitch squares together. For me, using a crochet join beats sewing my squares together any day!
Please let me know in the comments if you have any questions and what you are making with your squares.
Sincerely, Dayna