


You can find the free pattern and video tutorial linked below.
If you prefer to print the pattern, you can find the ad-free printable PDF here. I can’t wait to see your potholder(s)!
Important Links / Schedule:
Pin this Knit-Like Crochet Potholder – HERE!
Don’t have time to make the Sweater Weather Potholder just yet? Pin it for later, so you can easily find it when you’re ready to start crocheting!

Materials:
Yarn:
Yardage:
Front and Back of this Striped Knit-Like Crochet Potholder:

The Ad-free Printable PDF for the Sweater Weather Potholder is available as an individual PDF pattern on Etsy or Ravelry; or as a Crochet Along bundle, which includes written instructions for all 13 patterns on Ravelry or Etsy!

Abbreviations:
Gauge: Approximately 13 sts x 18 rows = 4” x 4”
Before you start your potholder, you can crochet a swatch to check your gauge.
- Ch 18
- Row 1: Sc in second ch from hook (the skipped ch does not count as a st), sc in each ch across. Turn. <17 sc>
- Rows 2 – 21: Ch 1 (doesn’t count as a st), sc in first st, Wsc in each st across until last st, sc in last st. Turn. <2 sc, 15 WSc>
Measure your swatch to see if 13 sts across = 4″, and if 18 rows = 4″. We worked a few stitches and a couple of rows more, so that the measurement is more accurate.
If your gauge is too small (more than 13 sts or 18 rows), try using a thicker weight 4 yarn or a larger crochet hook. However, if your gauge is too big (less than 13 sts or 18 rows), try using a thinner weight 4 yarn or a smaller crochet hook. You can also try adjusting your tension.
Construction & Pattern Measurements:
This striped knit-like potholder uses the waistcoat single crochet stitch to create a knit-like appearance. It’s crocheted in the round to make a pouch, then seamed closed at the top. Due to the colour changes, there is a noticeable seam on the back side of the potholder.
- When laid flat, the potholder measures approximately 8” wide x 8” long.
How to Customize the Size of Your Potholder:
To make your striped knit-like potholder smaller or larger than the original pattern, follow the instructions below:
- Width: The width of the potholder is determined by the starting chain. Chain any number until satisfied with the width.
- Length: To make your potholder shorter or longer, continue to repeat Rnds 5 – 14, until satisfied; then make 1 final rnd in Colour A, before joining and adding a ch-circle.
Single Crochet (Sc) vs. Waistcoat Single Crochet (WSc):
The difference between a single crochet and a waistcoat single crochet is where we insert the hook. To make a sc, insert the hook under both the front and back loops of the st; to make a Wsc, insert the hook between the two legs of the st – or the center of the “V”.
Single Crochet (Sc):
Insert hook into both loops (front and back) of the indicated st, YO and draw up a loop. YO, and pull through both loops.
Waistcoat Single Crochet (WSc):
It is important to crochet WSc sts with a loose/relaxed tension because if the stitches are too tight, then it will be hard to insert the hook.
Insert hook into the center of the “V”, between the two legs of the sc st.

With a loose tension, YO and draw up a loop – there should be 2 loops on the hook.
YO and pull through both loops to complete the WSc.
Changing Colour:
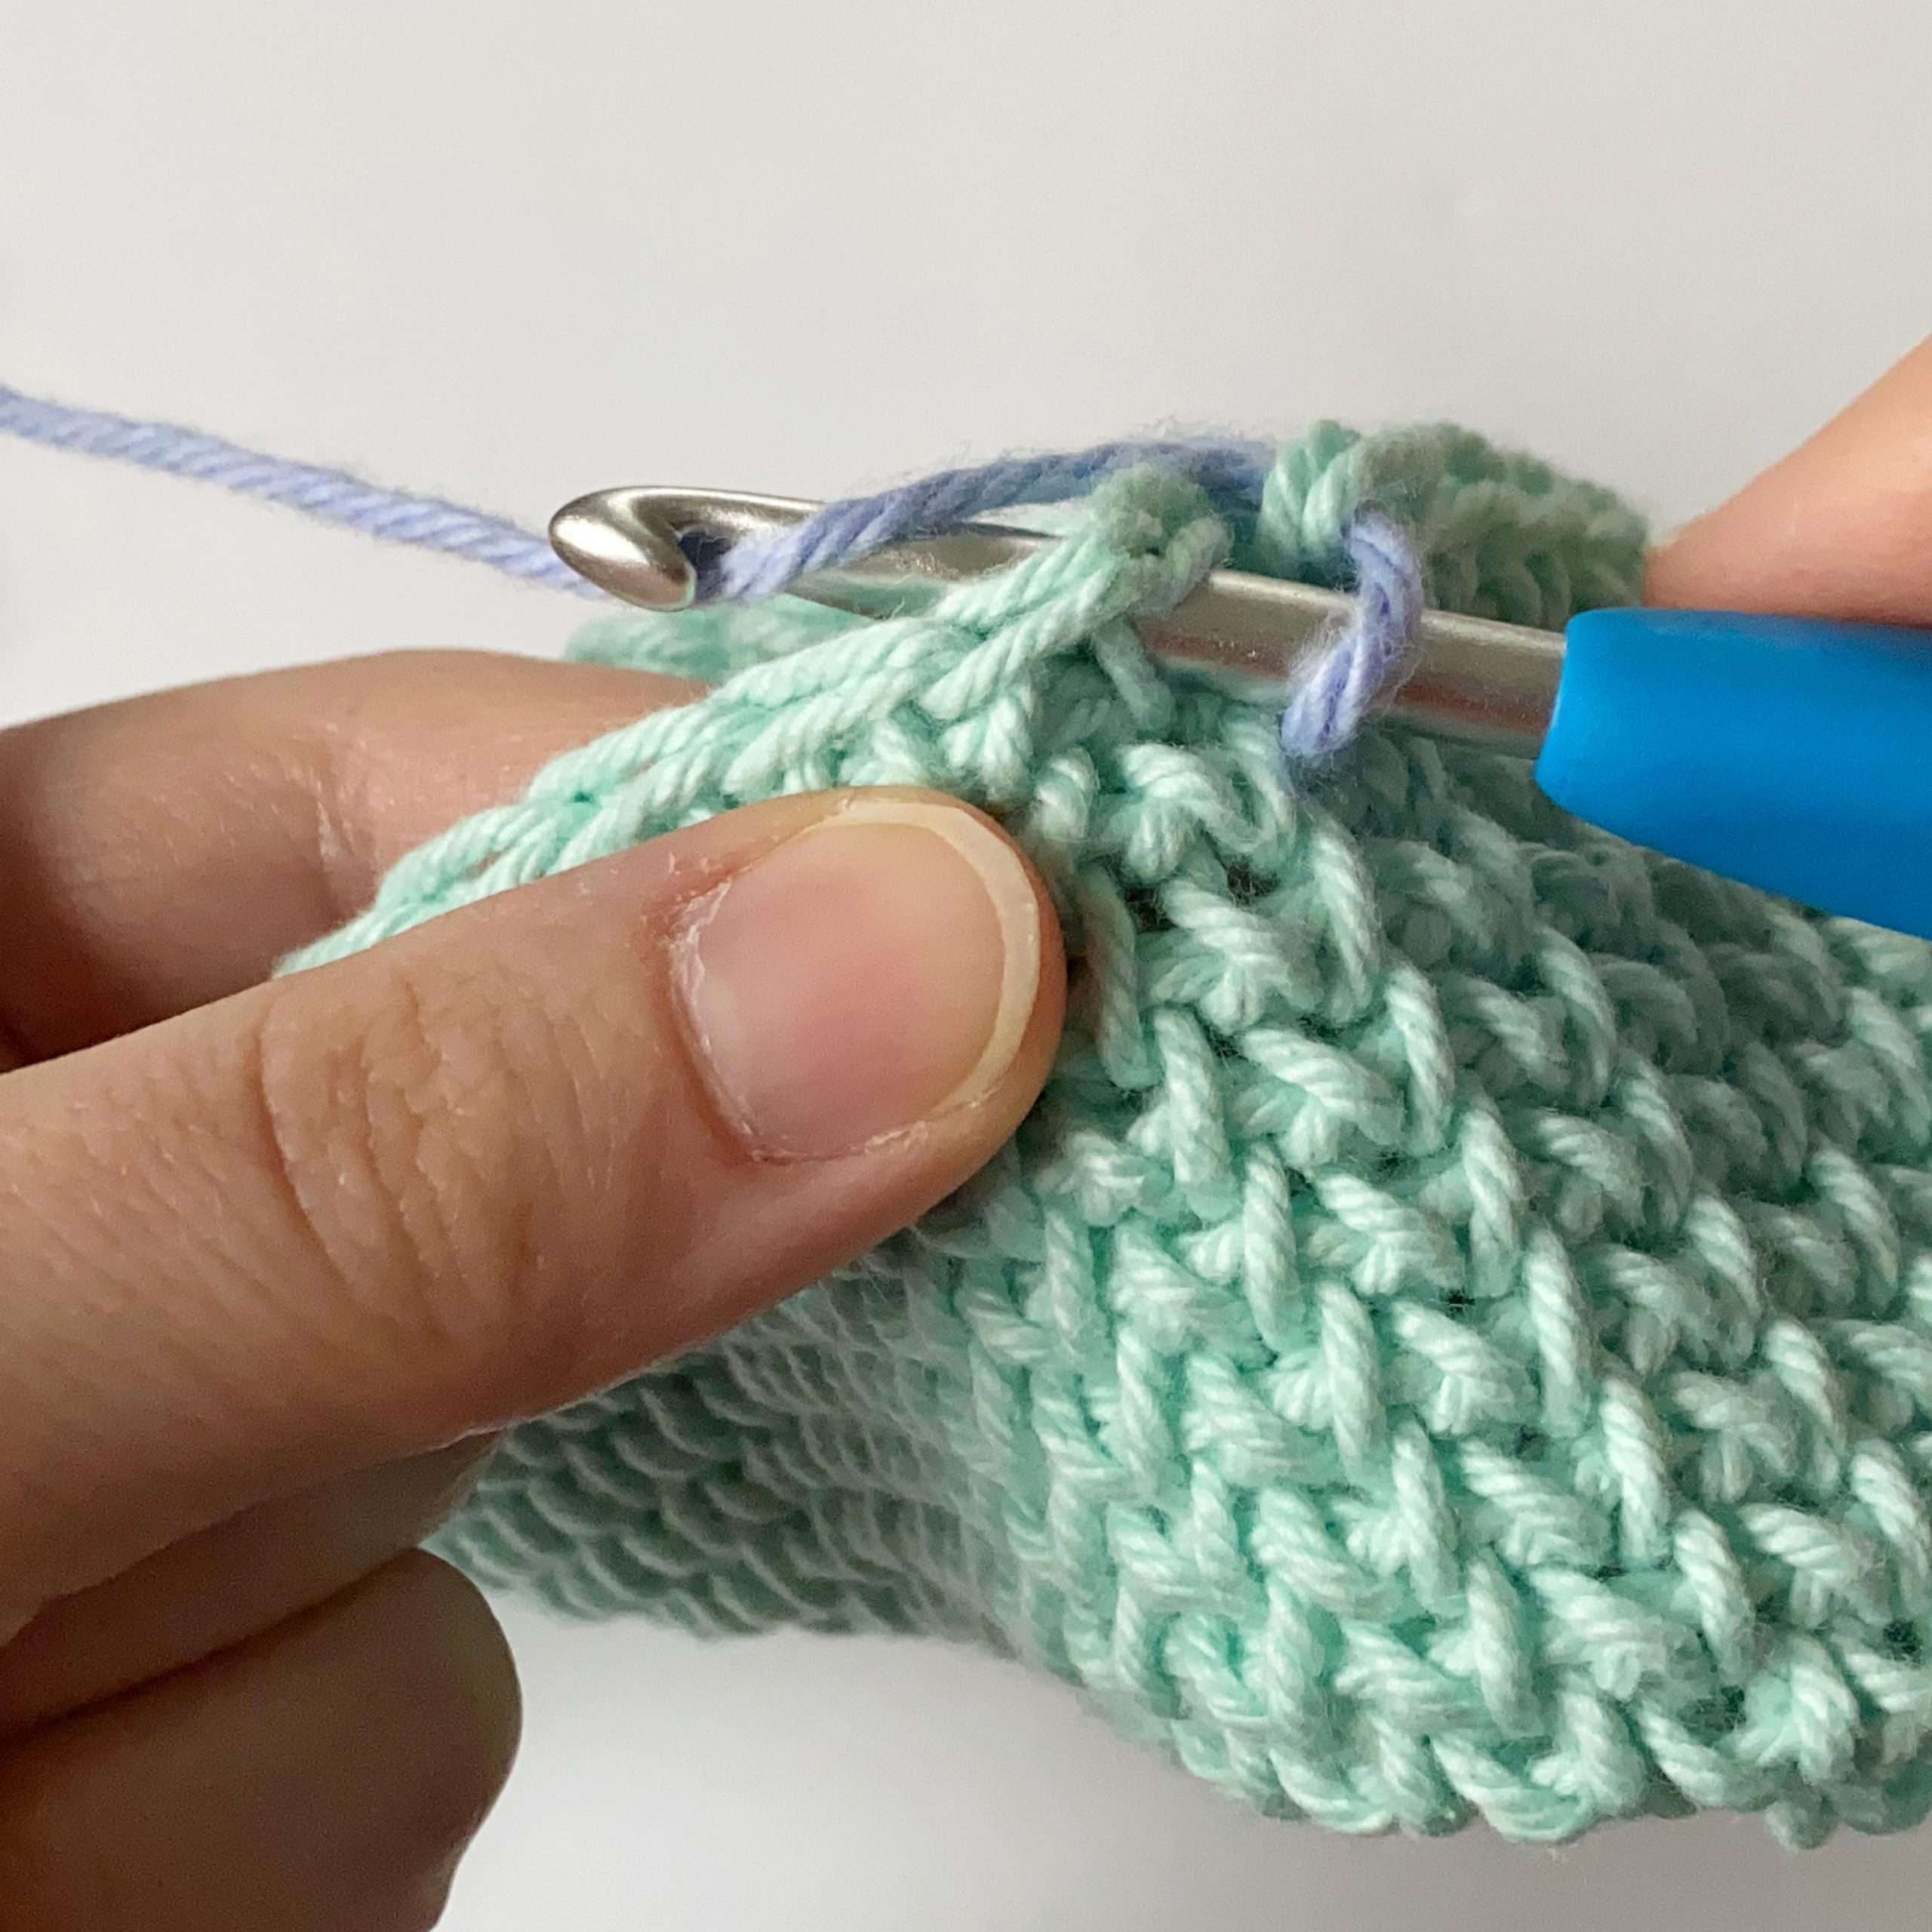
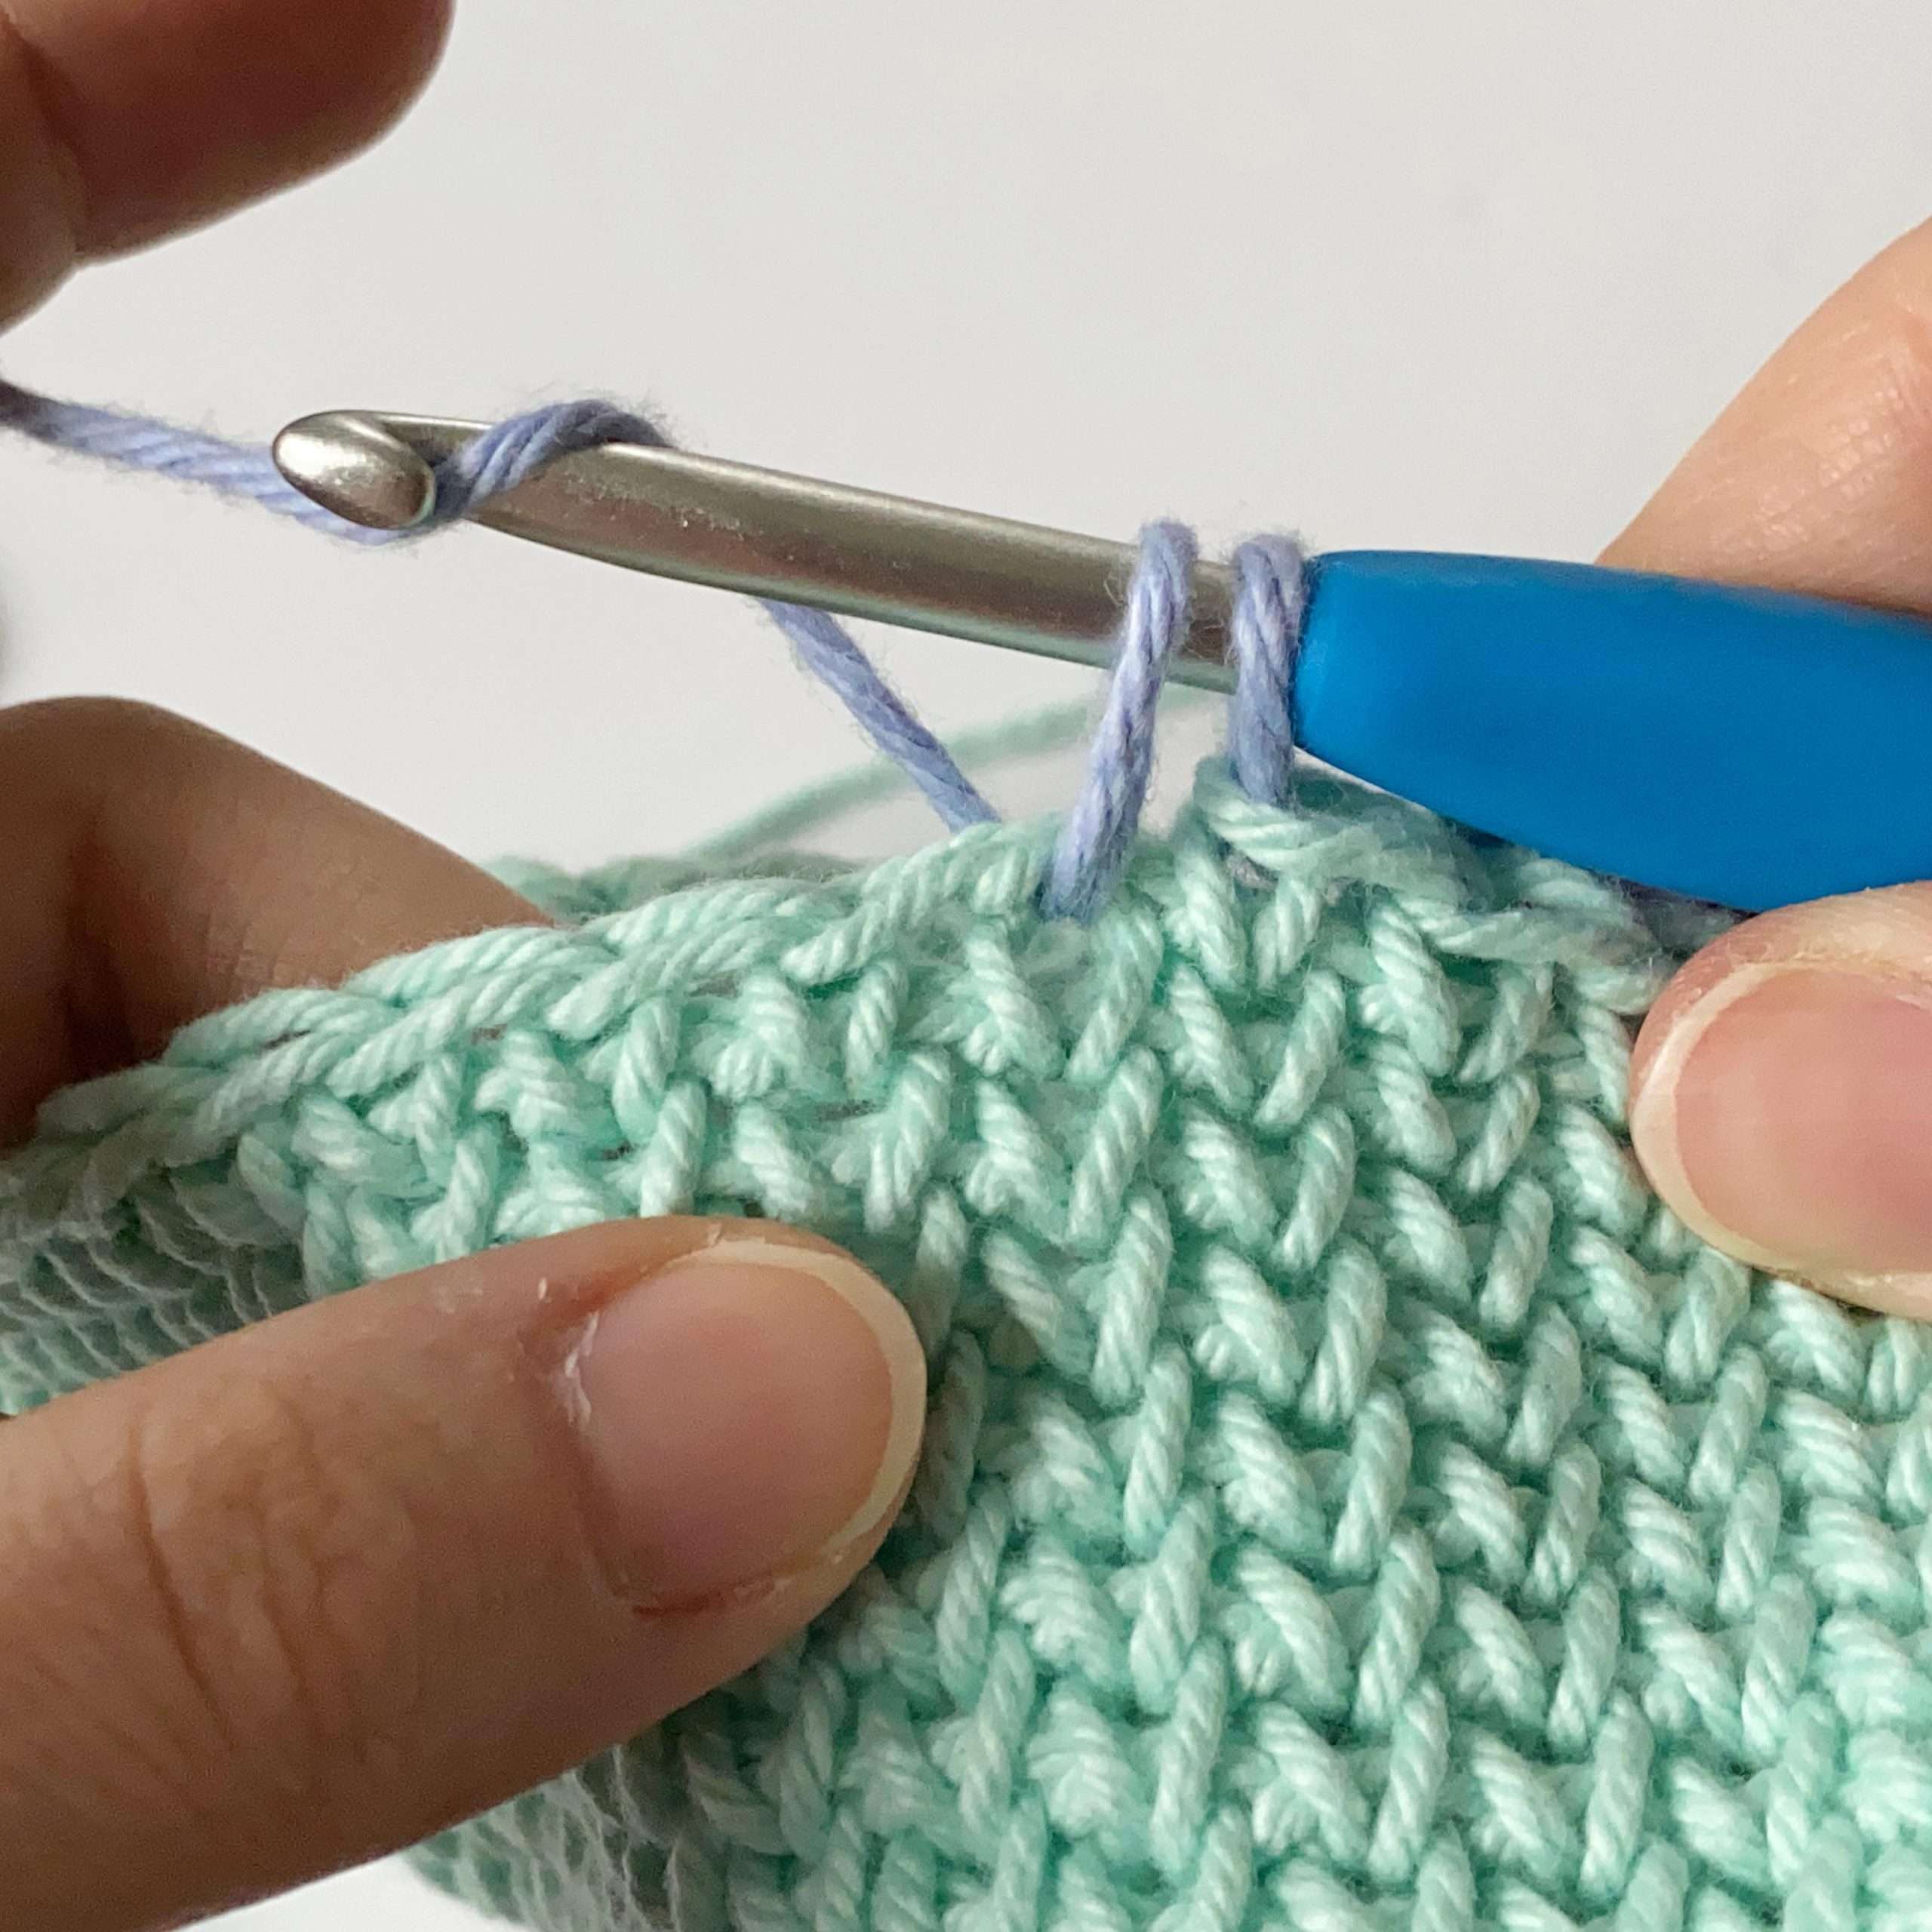
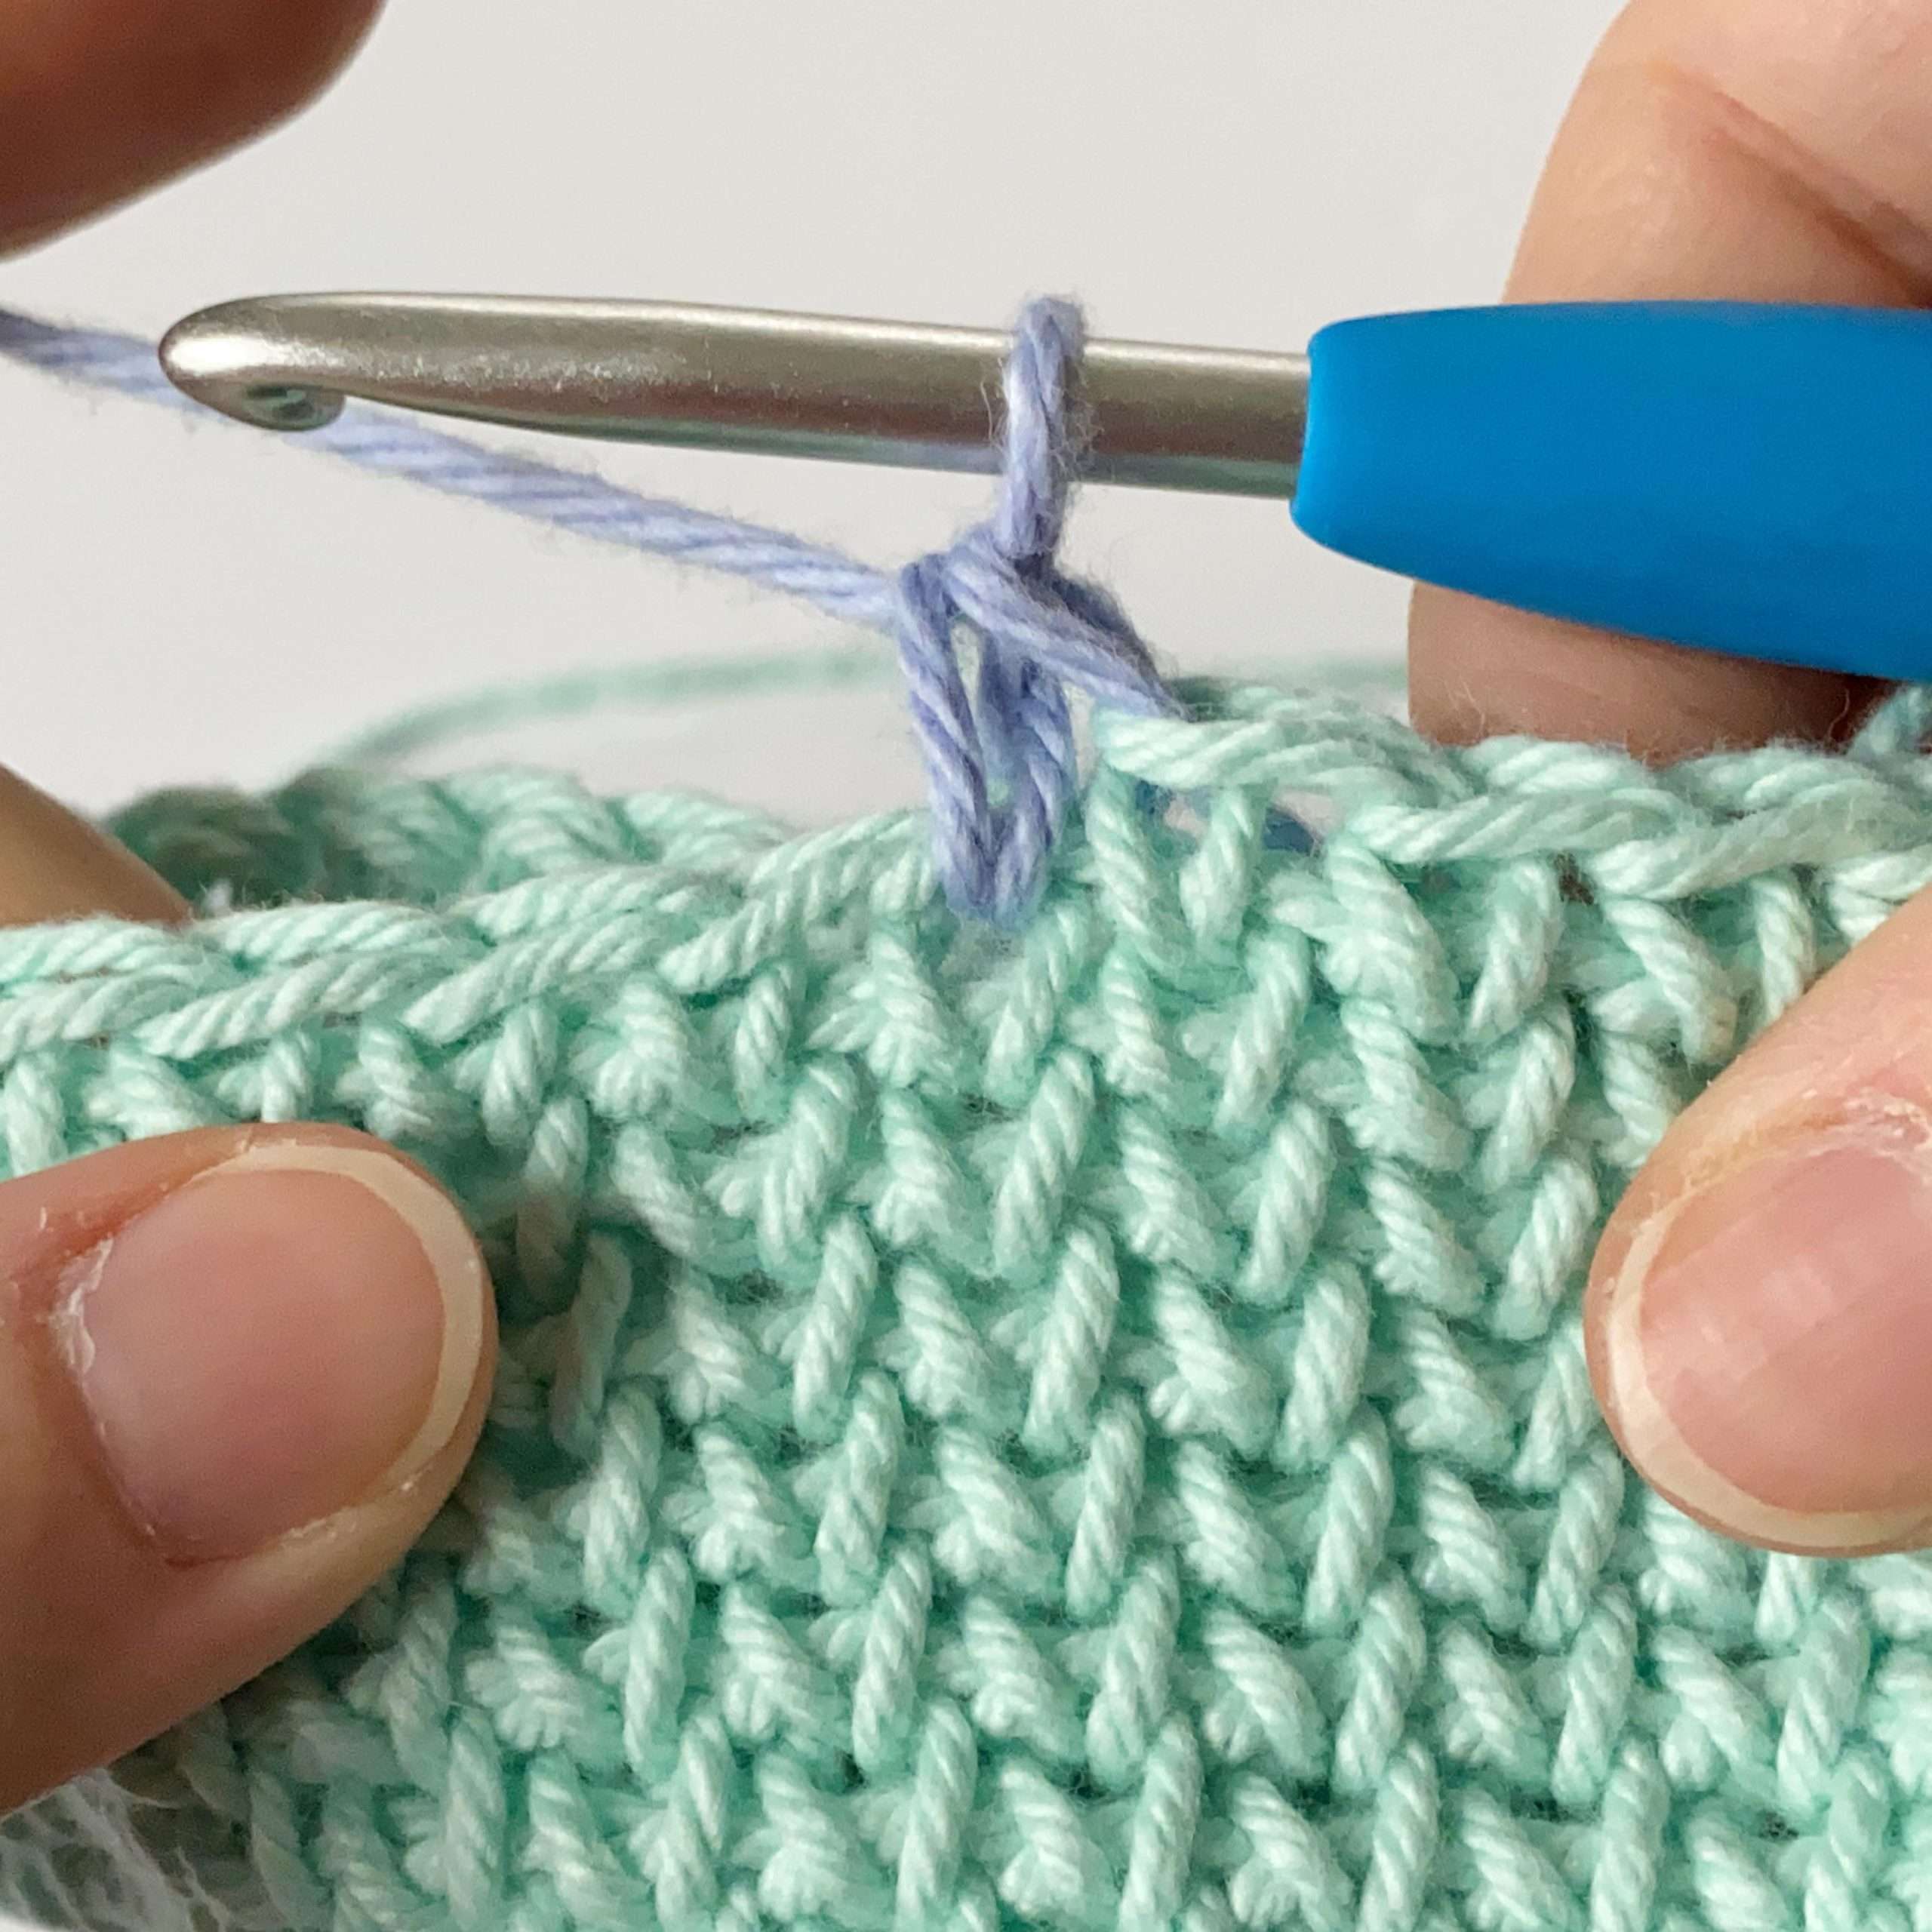
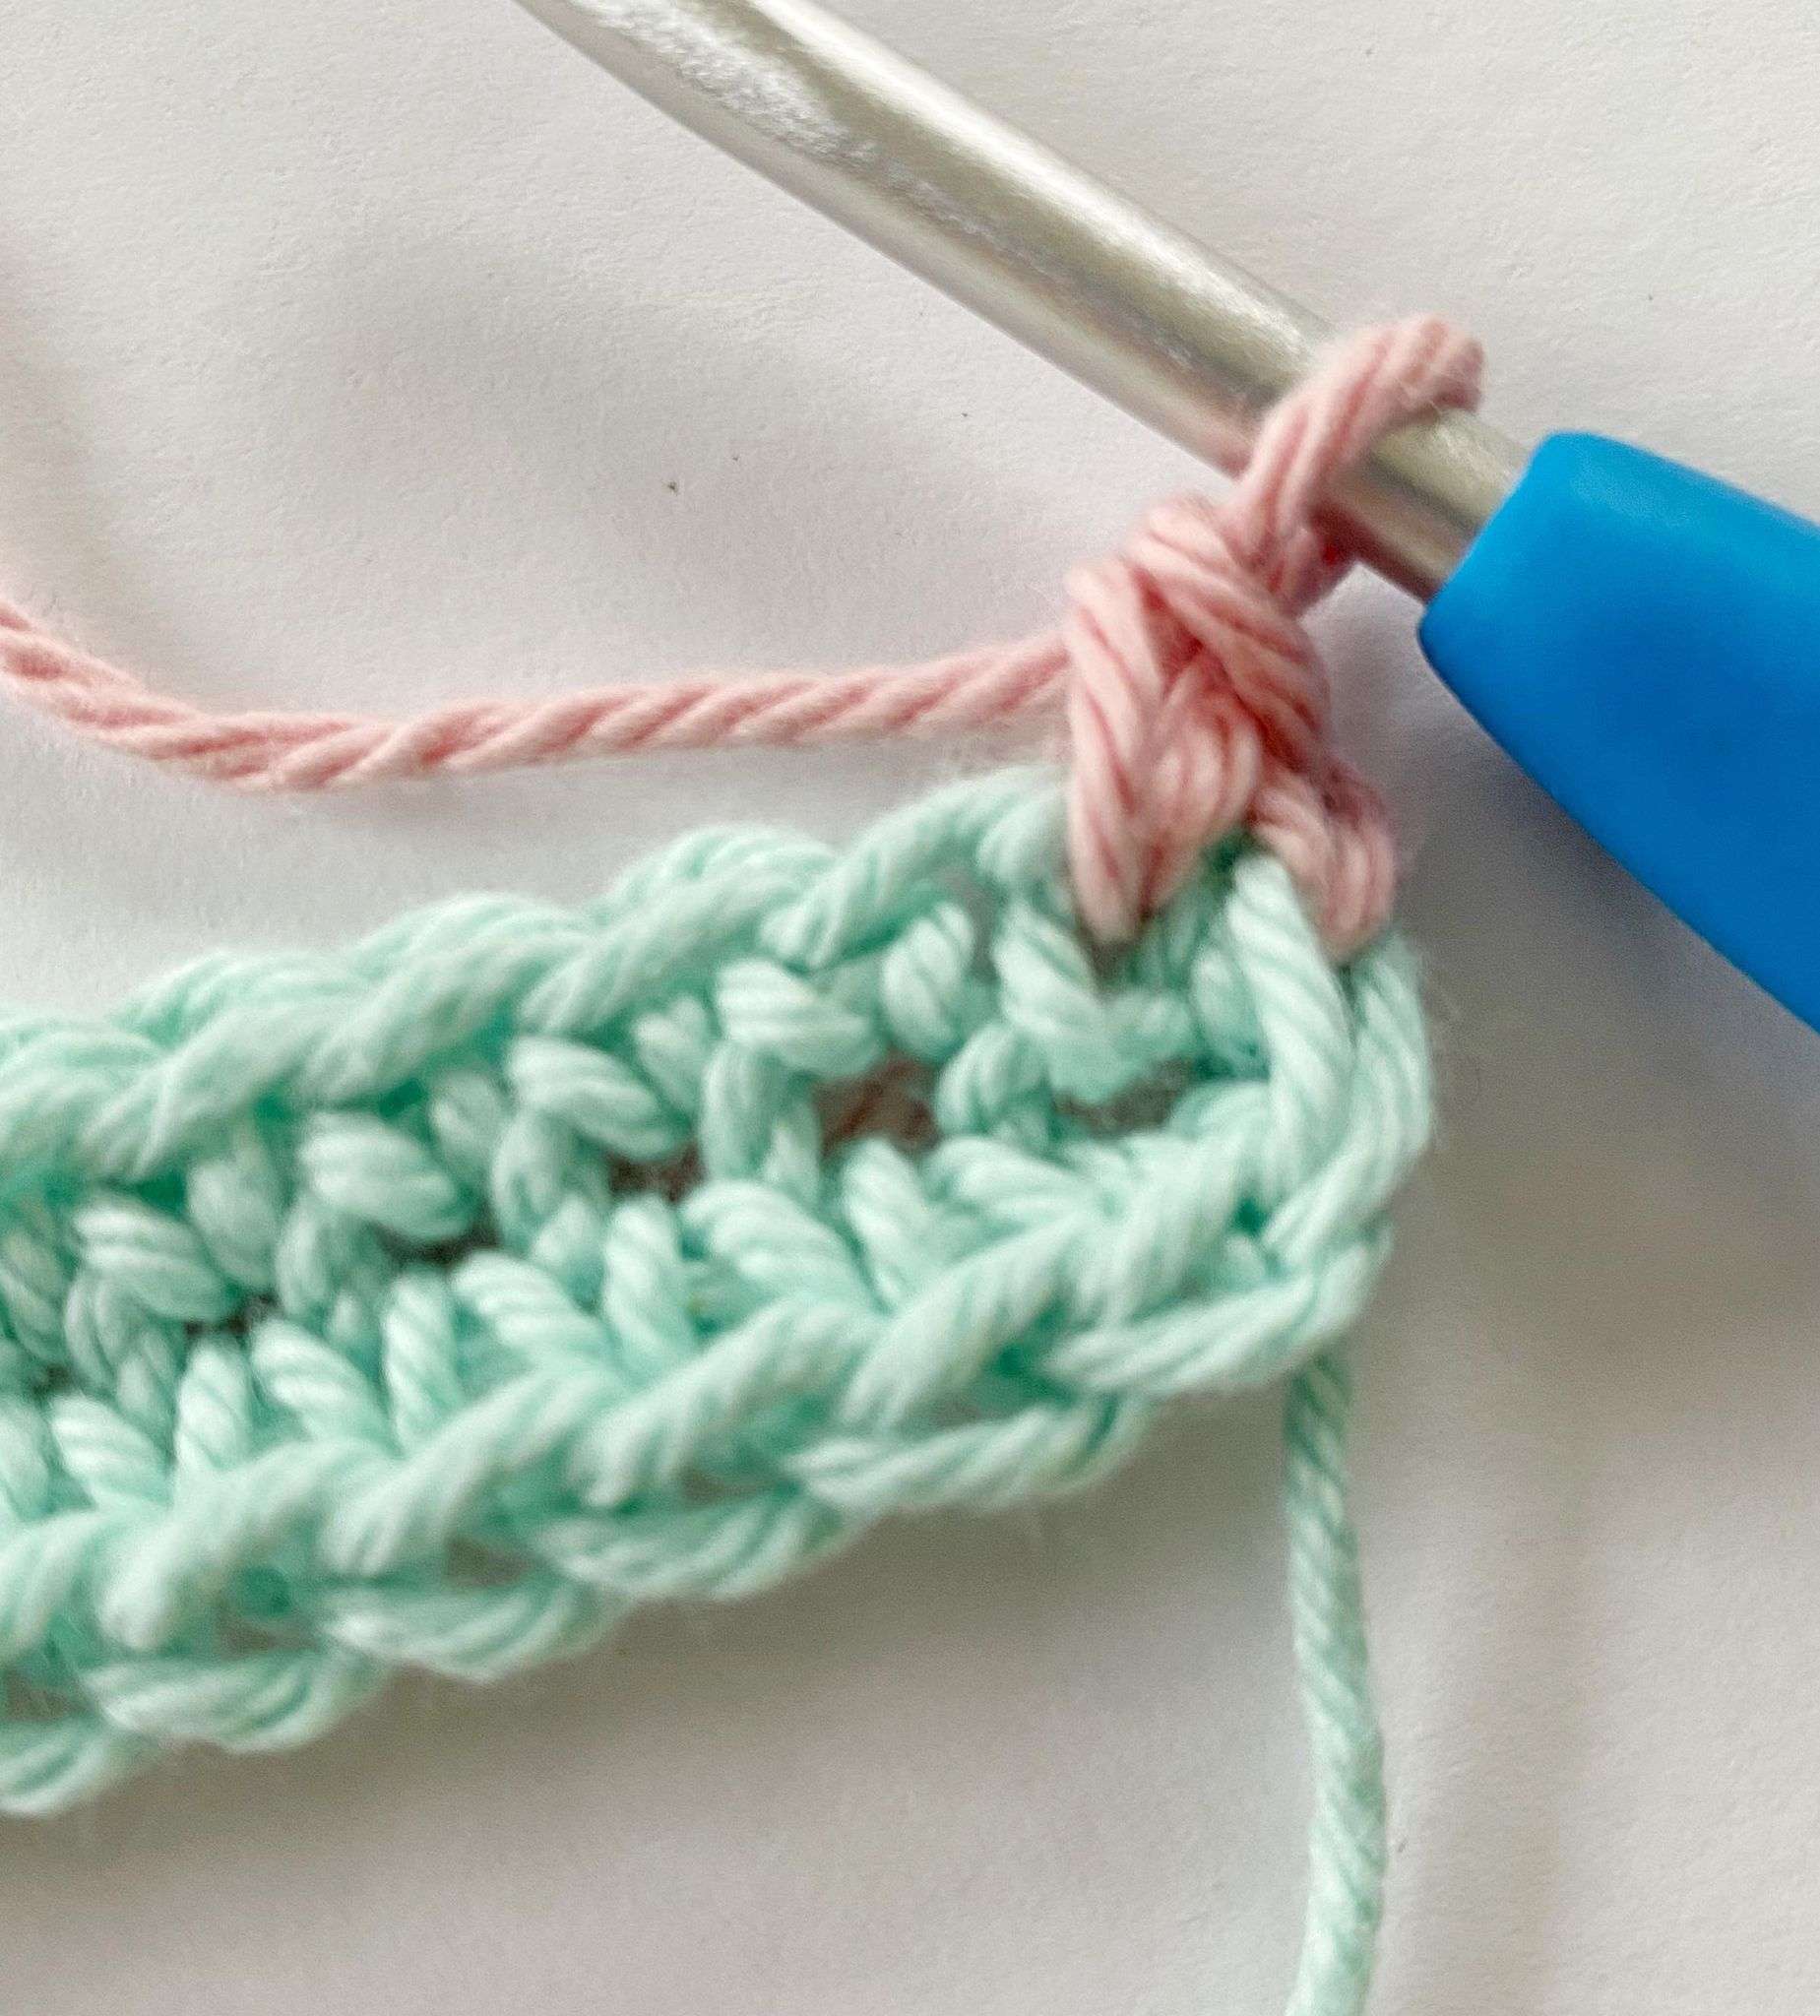
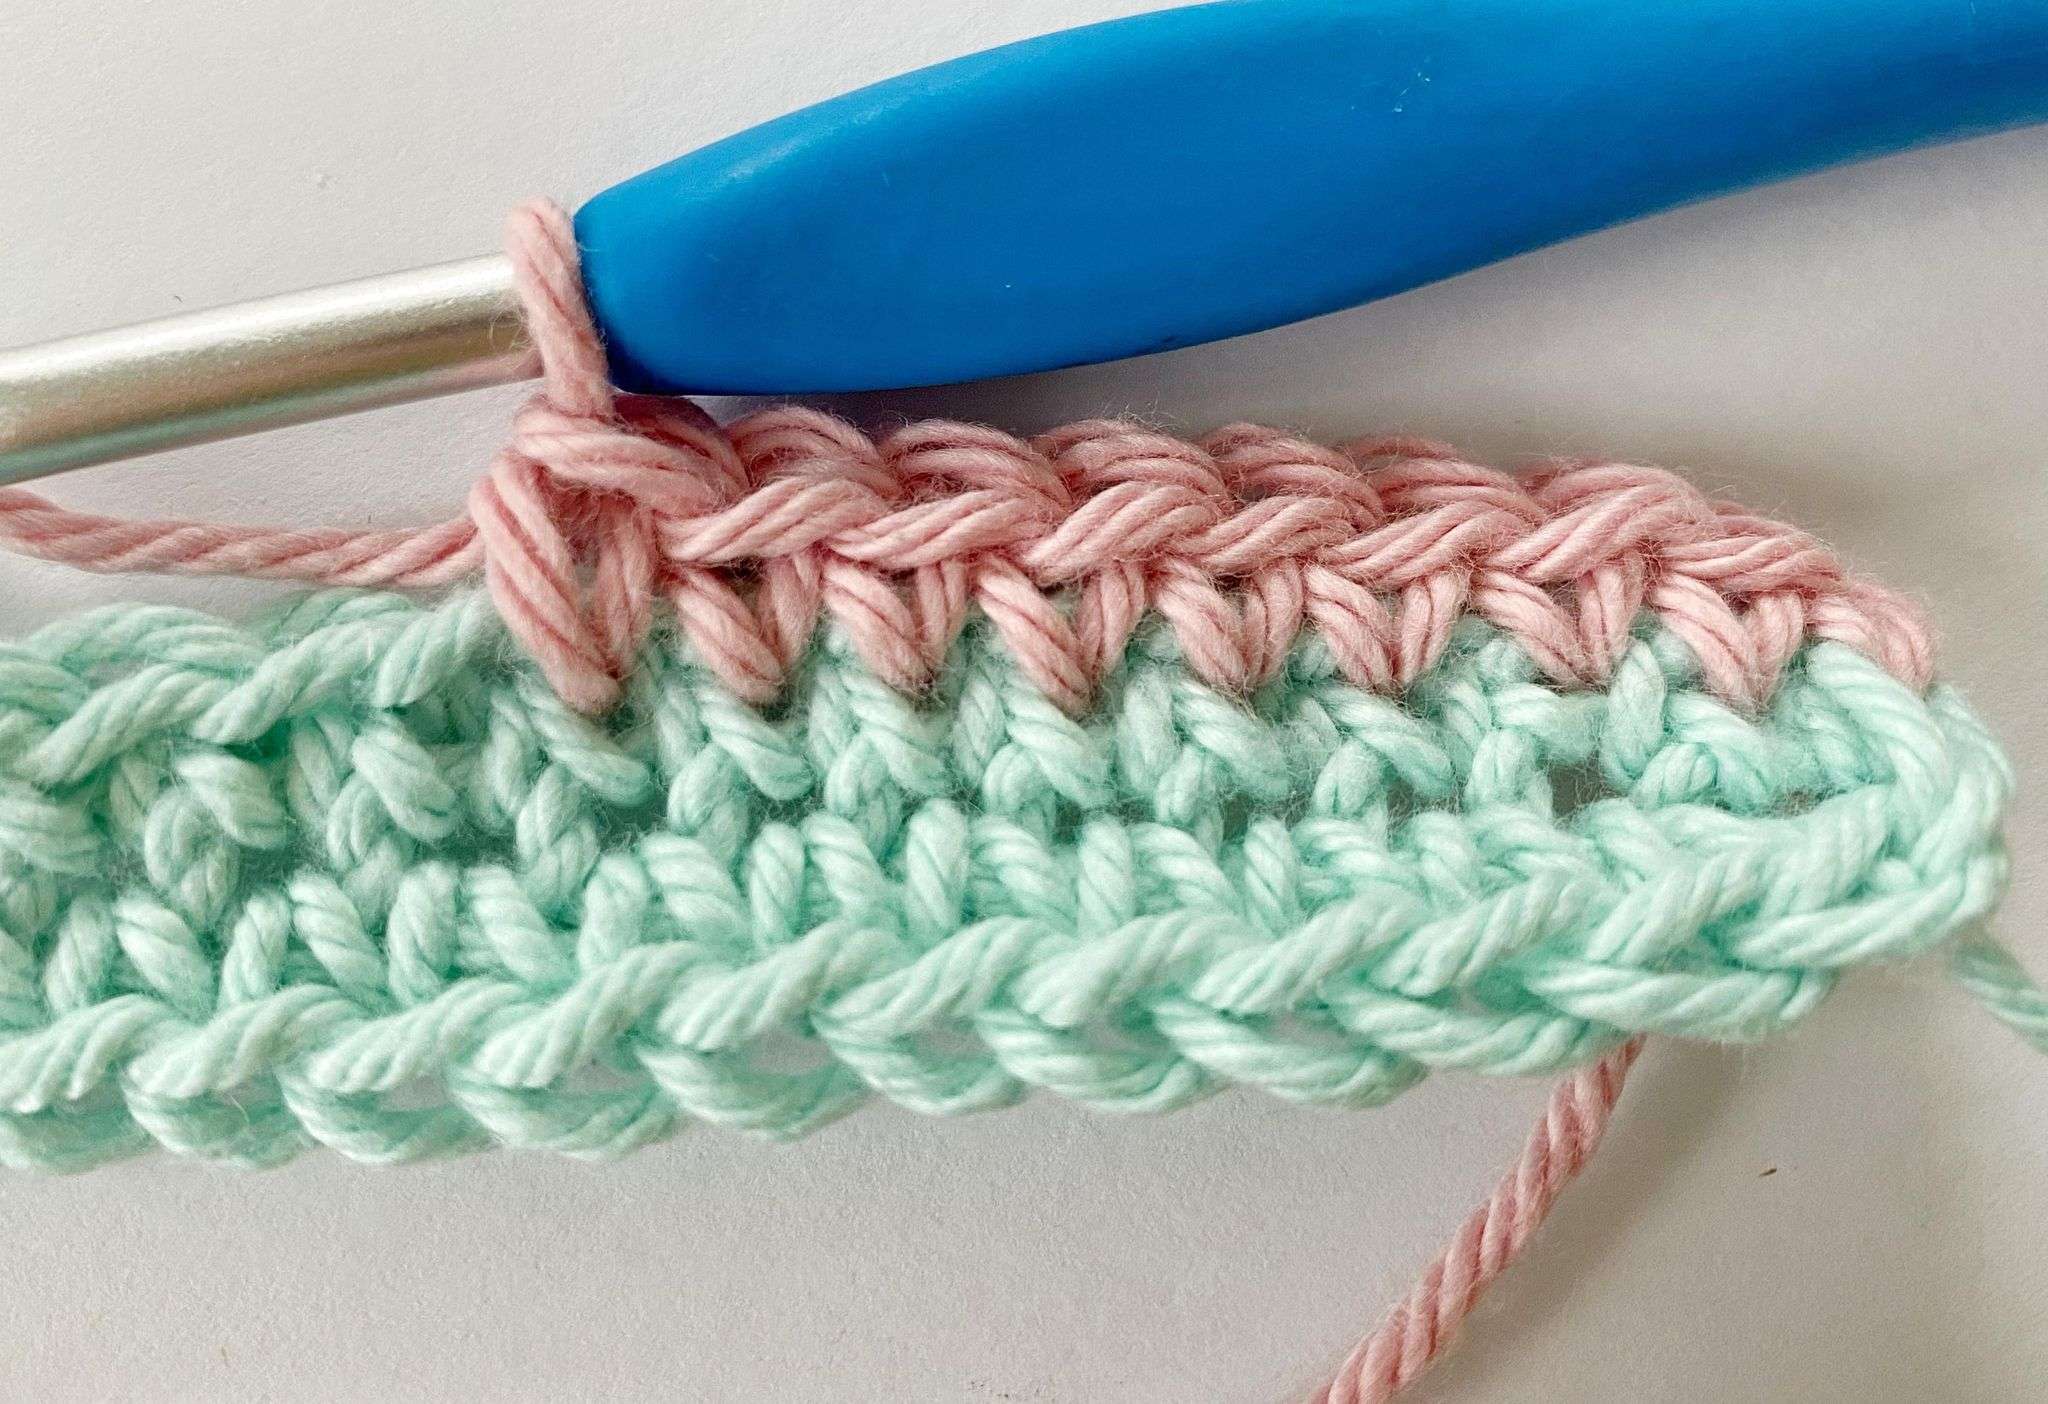
Colour changes happen at the end of the rnd.
- After working the last st of the rnd, insert hook into the first st of the rnd to join. Drop the current colour, and YO with the new colour (Picture 1).
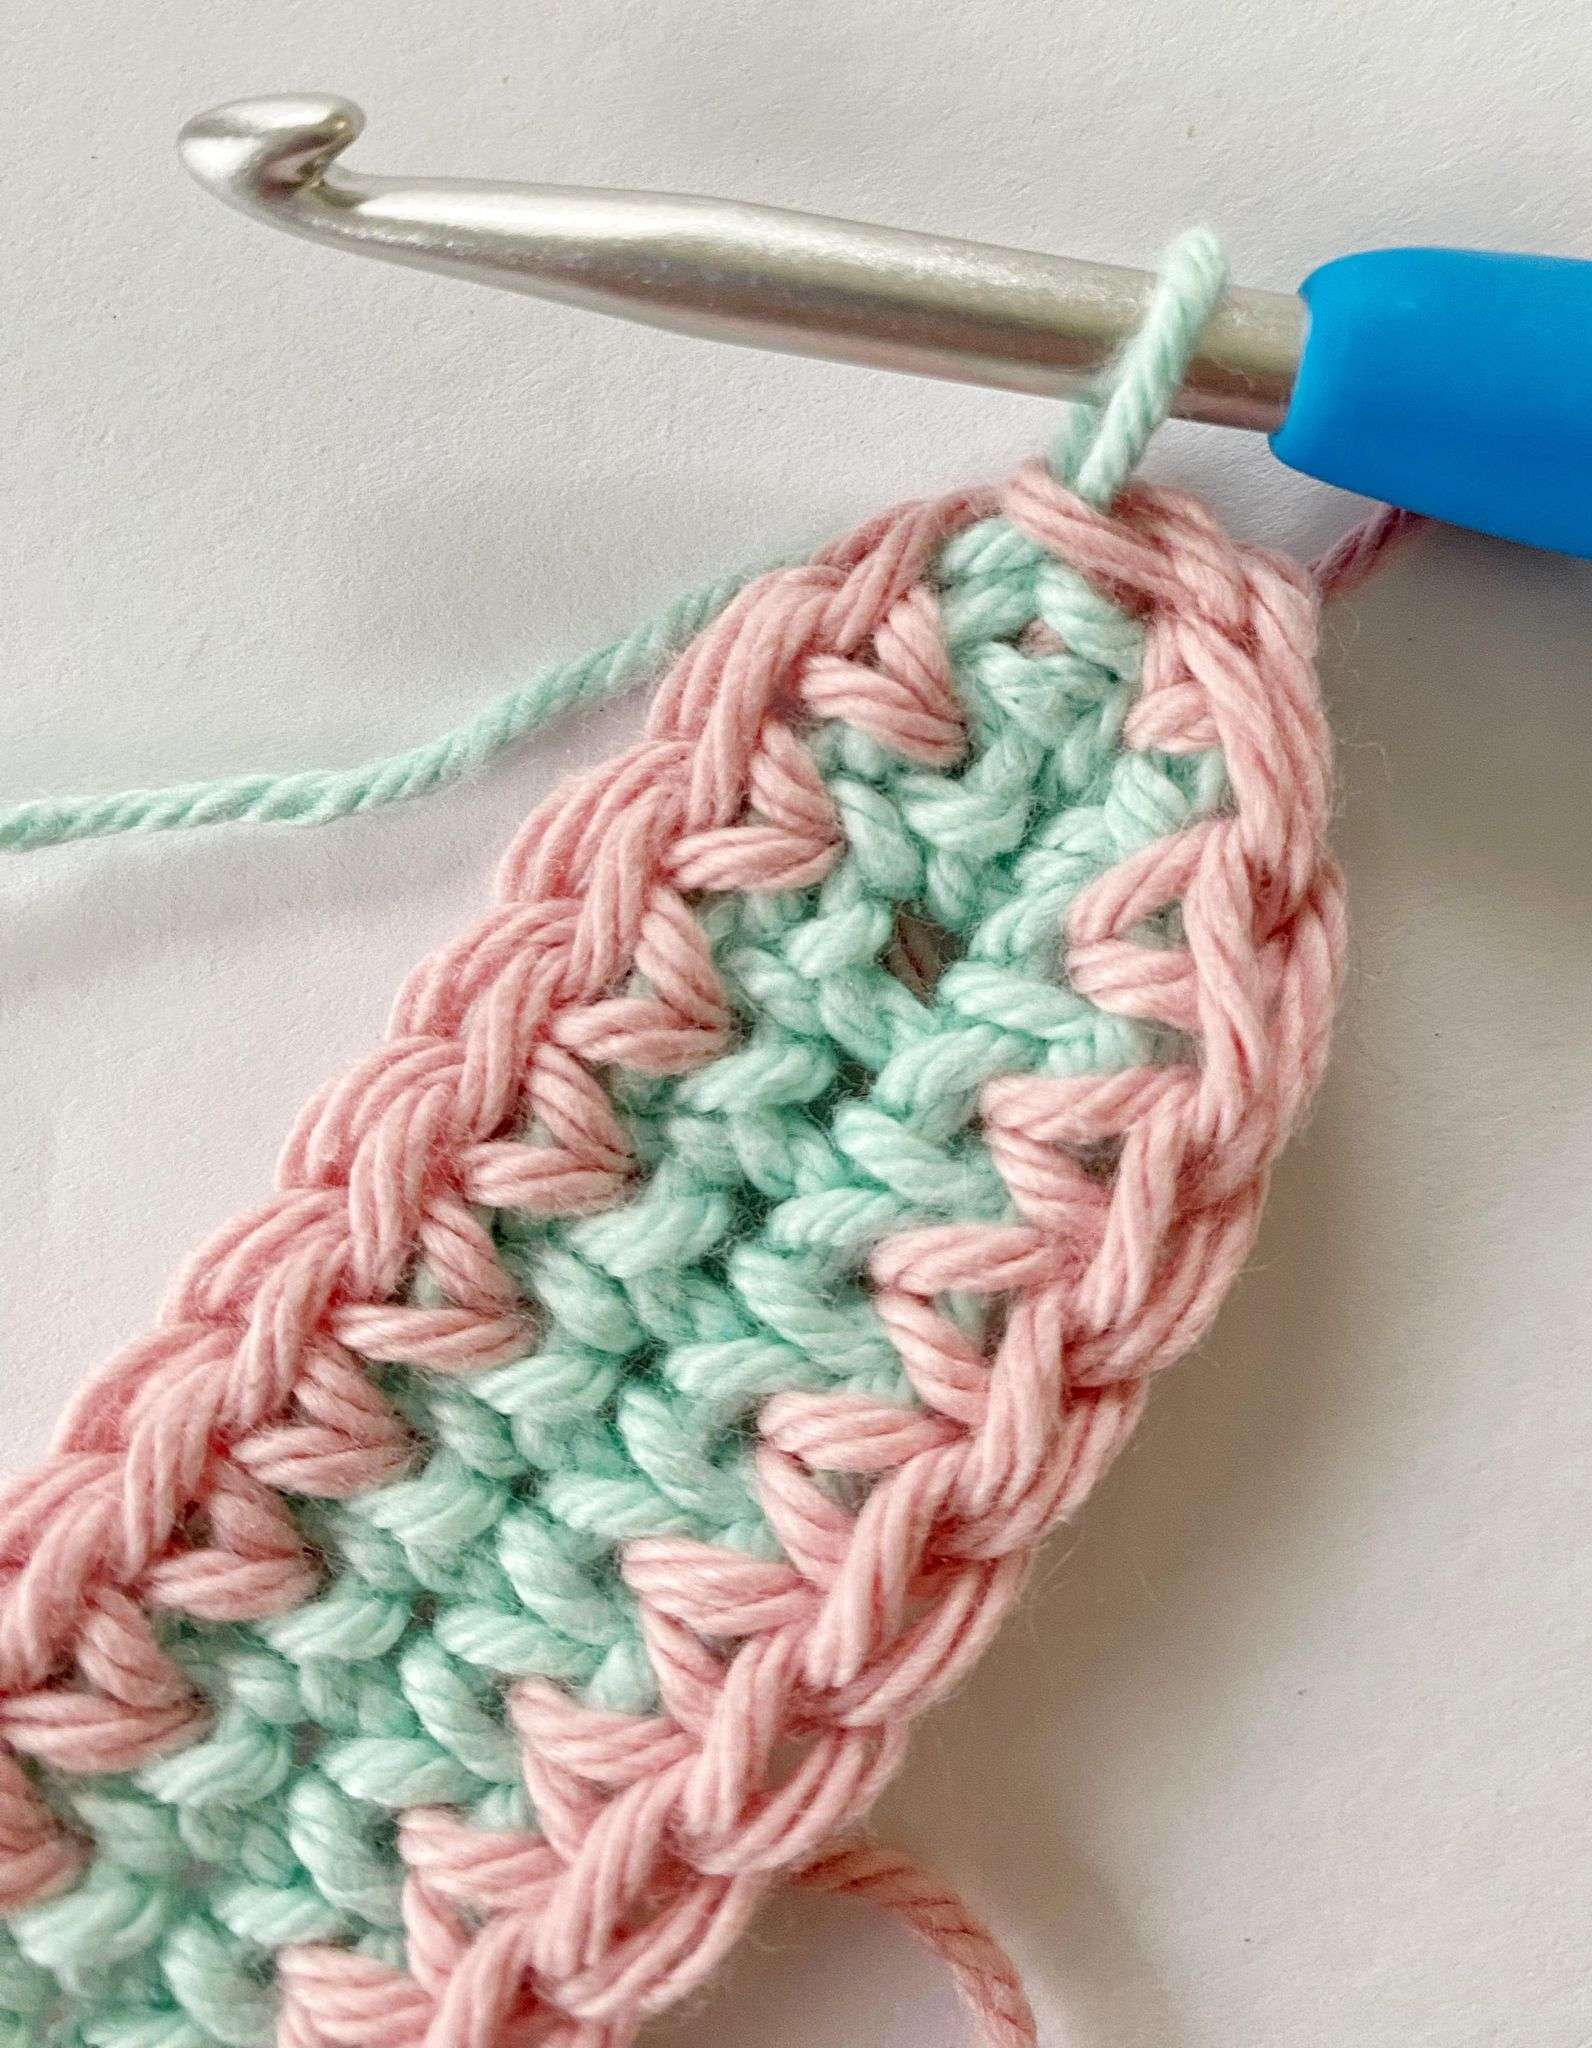
- Pull through the st and loop on the hook to complete the sl st and change colour (Picture 2 & 3).
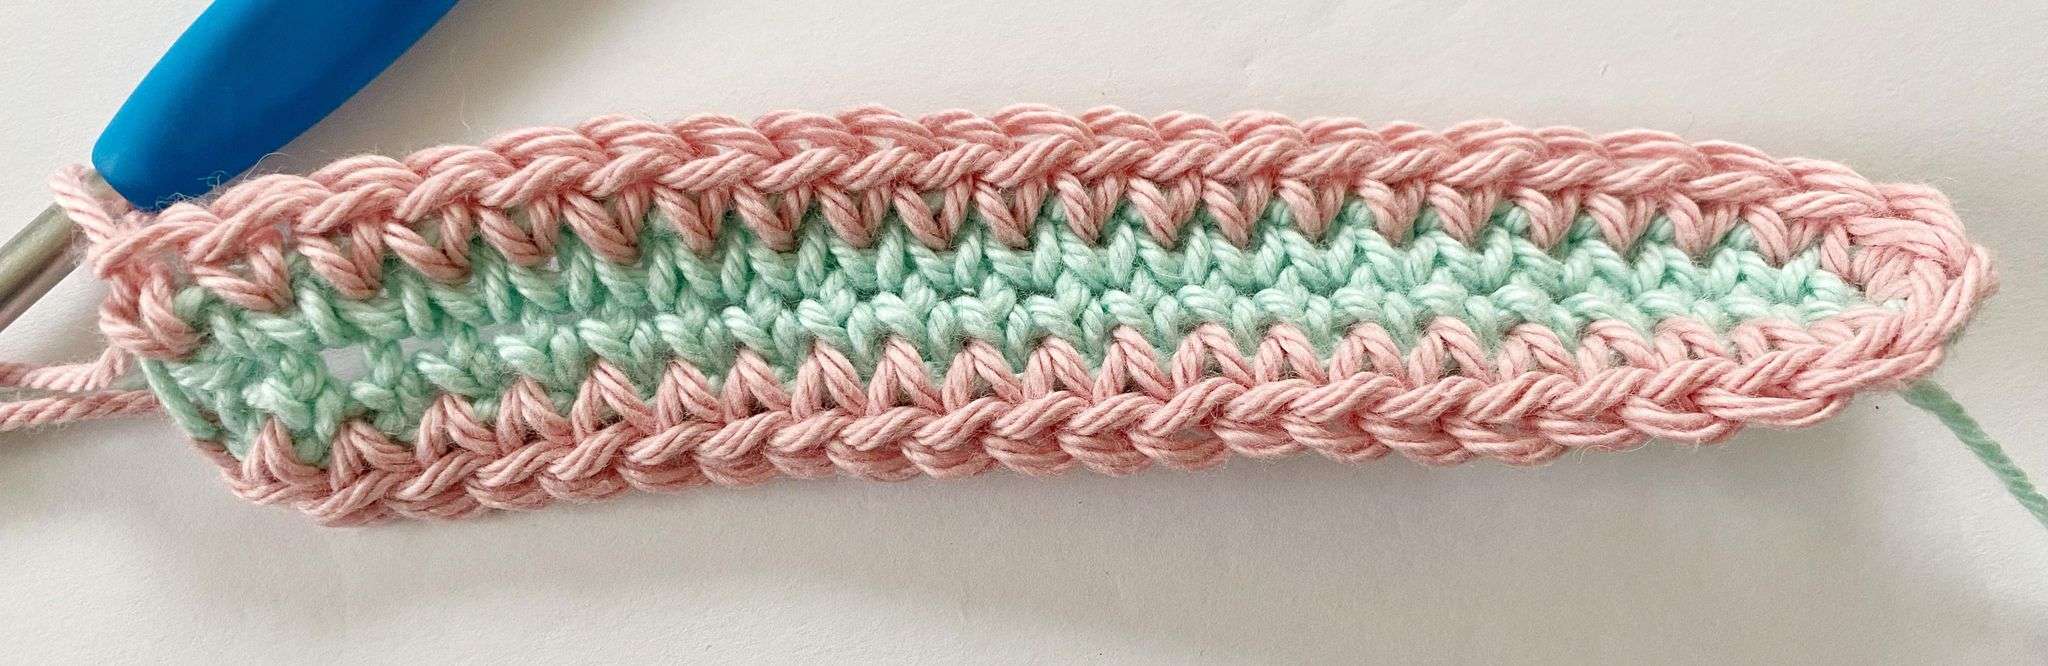
- Start the next rnd with the new colour, but make sure the unused colour (green) is hanging from the back of your work – you’ll need it for future rnds.

Video Tutorial:
- It walks you through Rnds 1 – 4, fastening off, folding and seaming the potholder closed, and adding a ch-circle.
- There are timestamps throughout the video, so you can skip around to find what you need.
Pattern:
Notes:
With Colour A, ch 26
Rnd 1: Sc in second ch from hook – mark with a stitch marker, sc in each st across; 2 sc in last ch.
- Rotate your work 180 degrees clockwise, so you are working along the bottom of the chain.
- Sc in each ch across. The last sc should be in the first ch of the rnd to complete the corner – mark with a stitch marker. Join with a sl st, completing the final YO with Colour B. <50 sc>


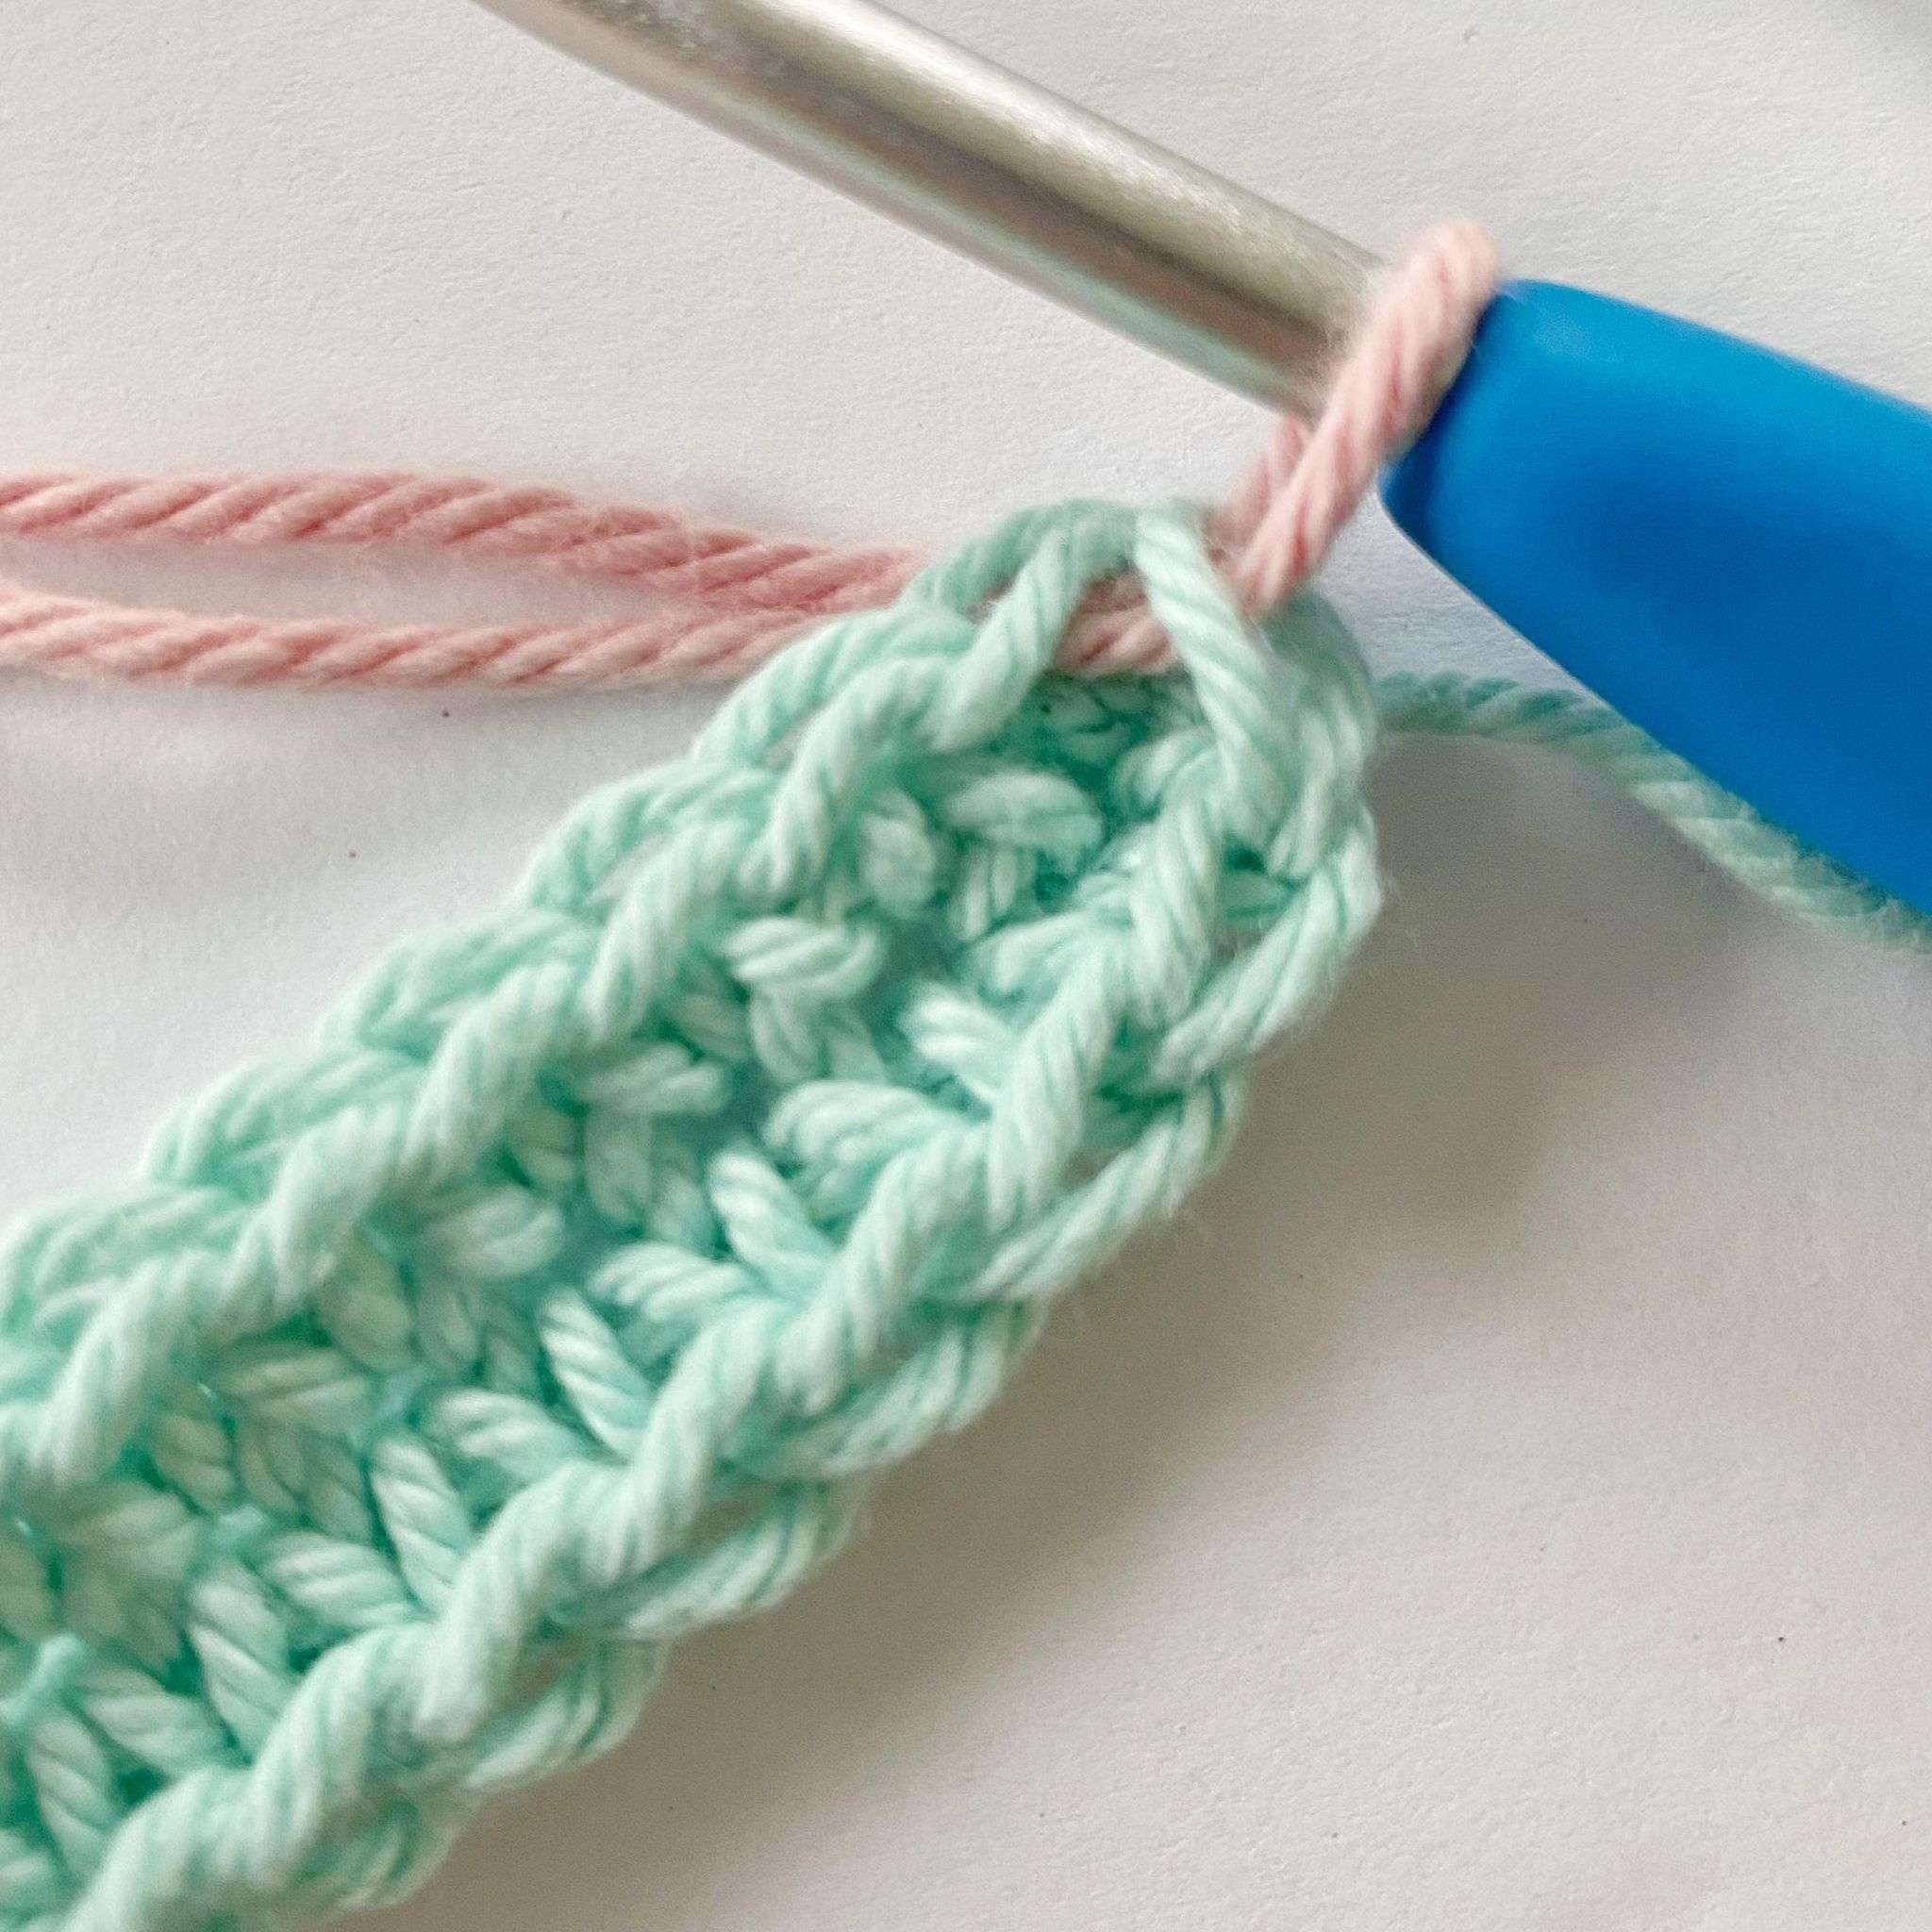
Rnd 2: With Colour B, ch 1, WSc in each st around. Join with a sl st, completing the final YO with Colour A. <50 WSc>

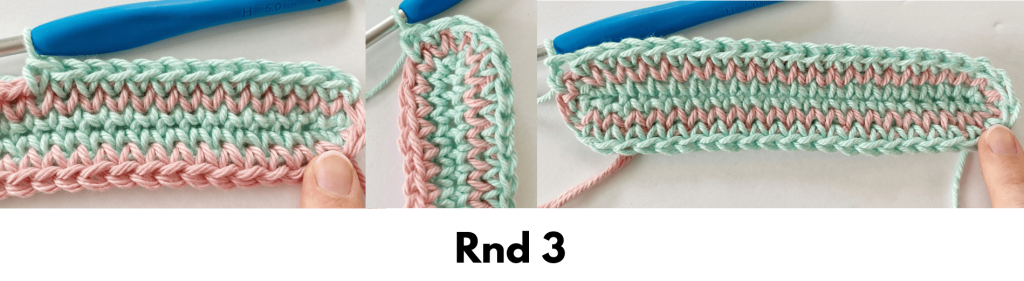
Rnds 3 – 35: Repeat Rnd 2, while following the colour changes below.
| Rnd 3: Colour A Rnd 4: Colour B Rnds 5 – 7: Colour A Rnd 8: Colour B Rnds 9 – 11: Colour A Rnd 12: Colour B Rnd 13: Colour A Rnd 14: Colour B Rnds 15 – 17: Colour A Rnd 18: Colour B Rnds 19 – 21: Colour A | Rnd 22: Colour B Rnd 23: Colour A Rnd 24: Colour B Rnds 25 – 27: Colour A Rnd 28: Colour B Rnds 29 – 31: Colour A Rnd 32: Colour B Rnd 33: Colour A Rnd 34: Colour B Rnd 35: Colour A |

Fasten off and weave in all ends.
Closing the Potholder Closed:
These pictures are from the Serendipity Potholder, but the technique is the same!
- Line up the front and back sts.
- Starting in the top right corner, insert the hook into both loops of the front and back st, YO with Colour A, and pull through both sts and the loop on the hook to fasten on. Ch 1, insert hook into both sts again and make a sl st.
- Sl st into each st across, making sure to go through both the front and back sts to join. Do not fasten off.


Adding a Ch-Circle:
These pictures are from the Serendipity Potholder, but the technique is the same!
- After making the final sl st, ch 13 (Picture 1).
- Sl st into the side of the first ch to make a ch-circle. (Picture 2)
- Fasten off, leave a tail, and weave in the last end (Picture 3, 4, 5, 6).

Questions?
Other Crochet Patterns You’ll Love!


End Notes:
The 2023 Potholders Galore Crochet-Along is complete!
Thank you so much for participating in this year’s crochet-along! I hope you had fun making your potholders and learning some new techniques along the way.