
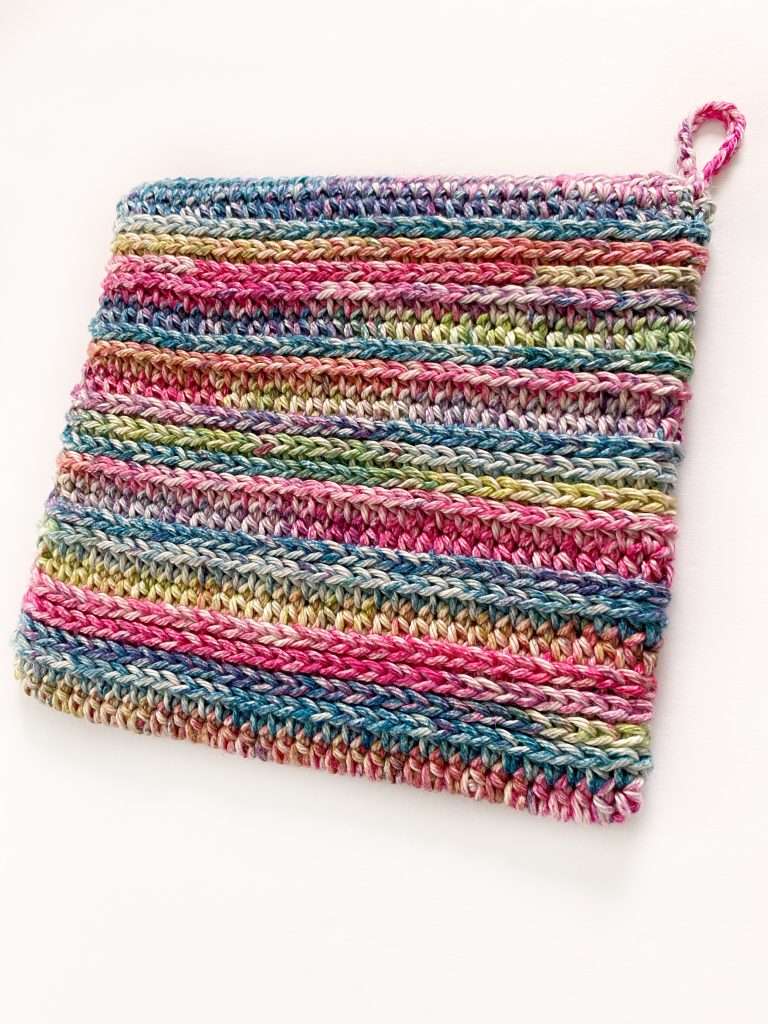
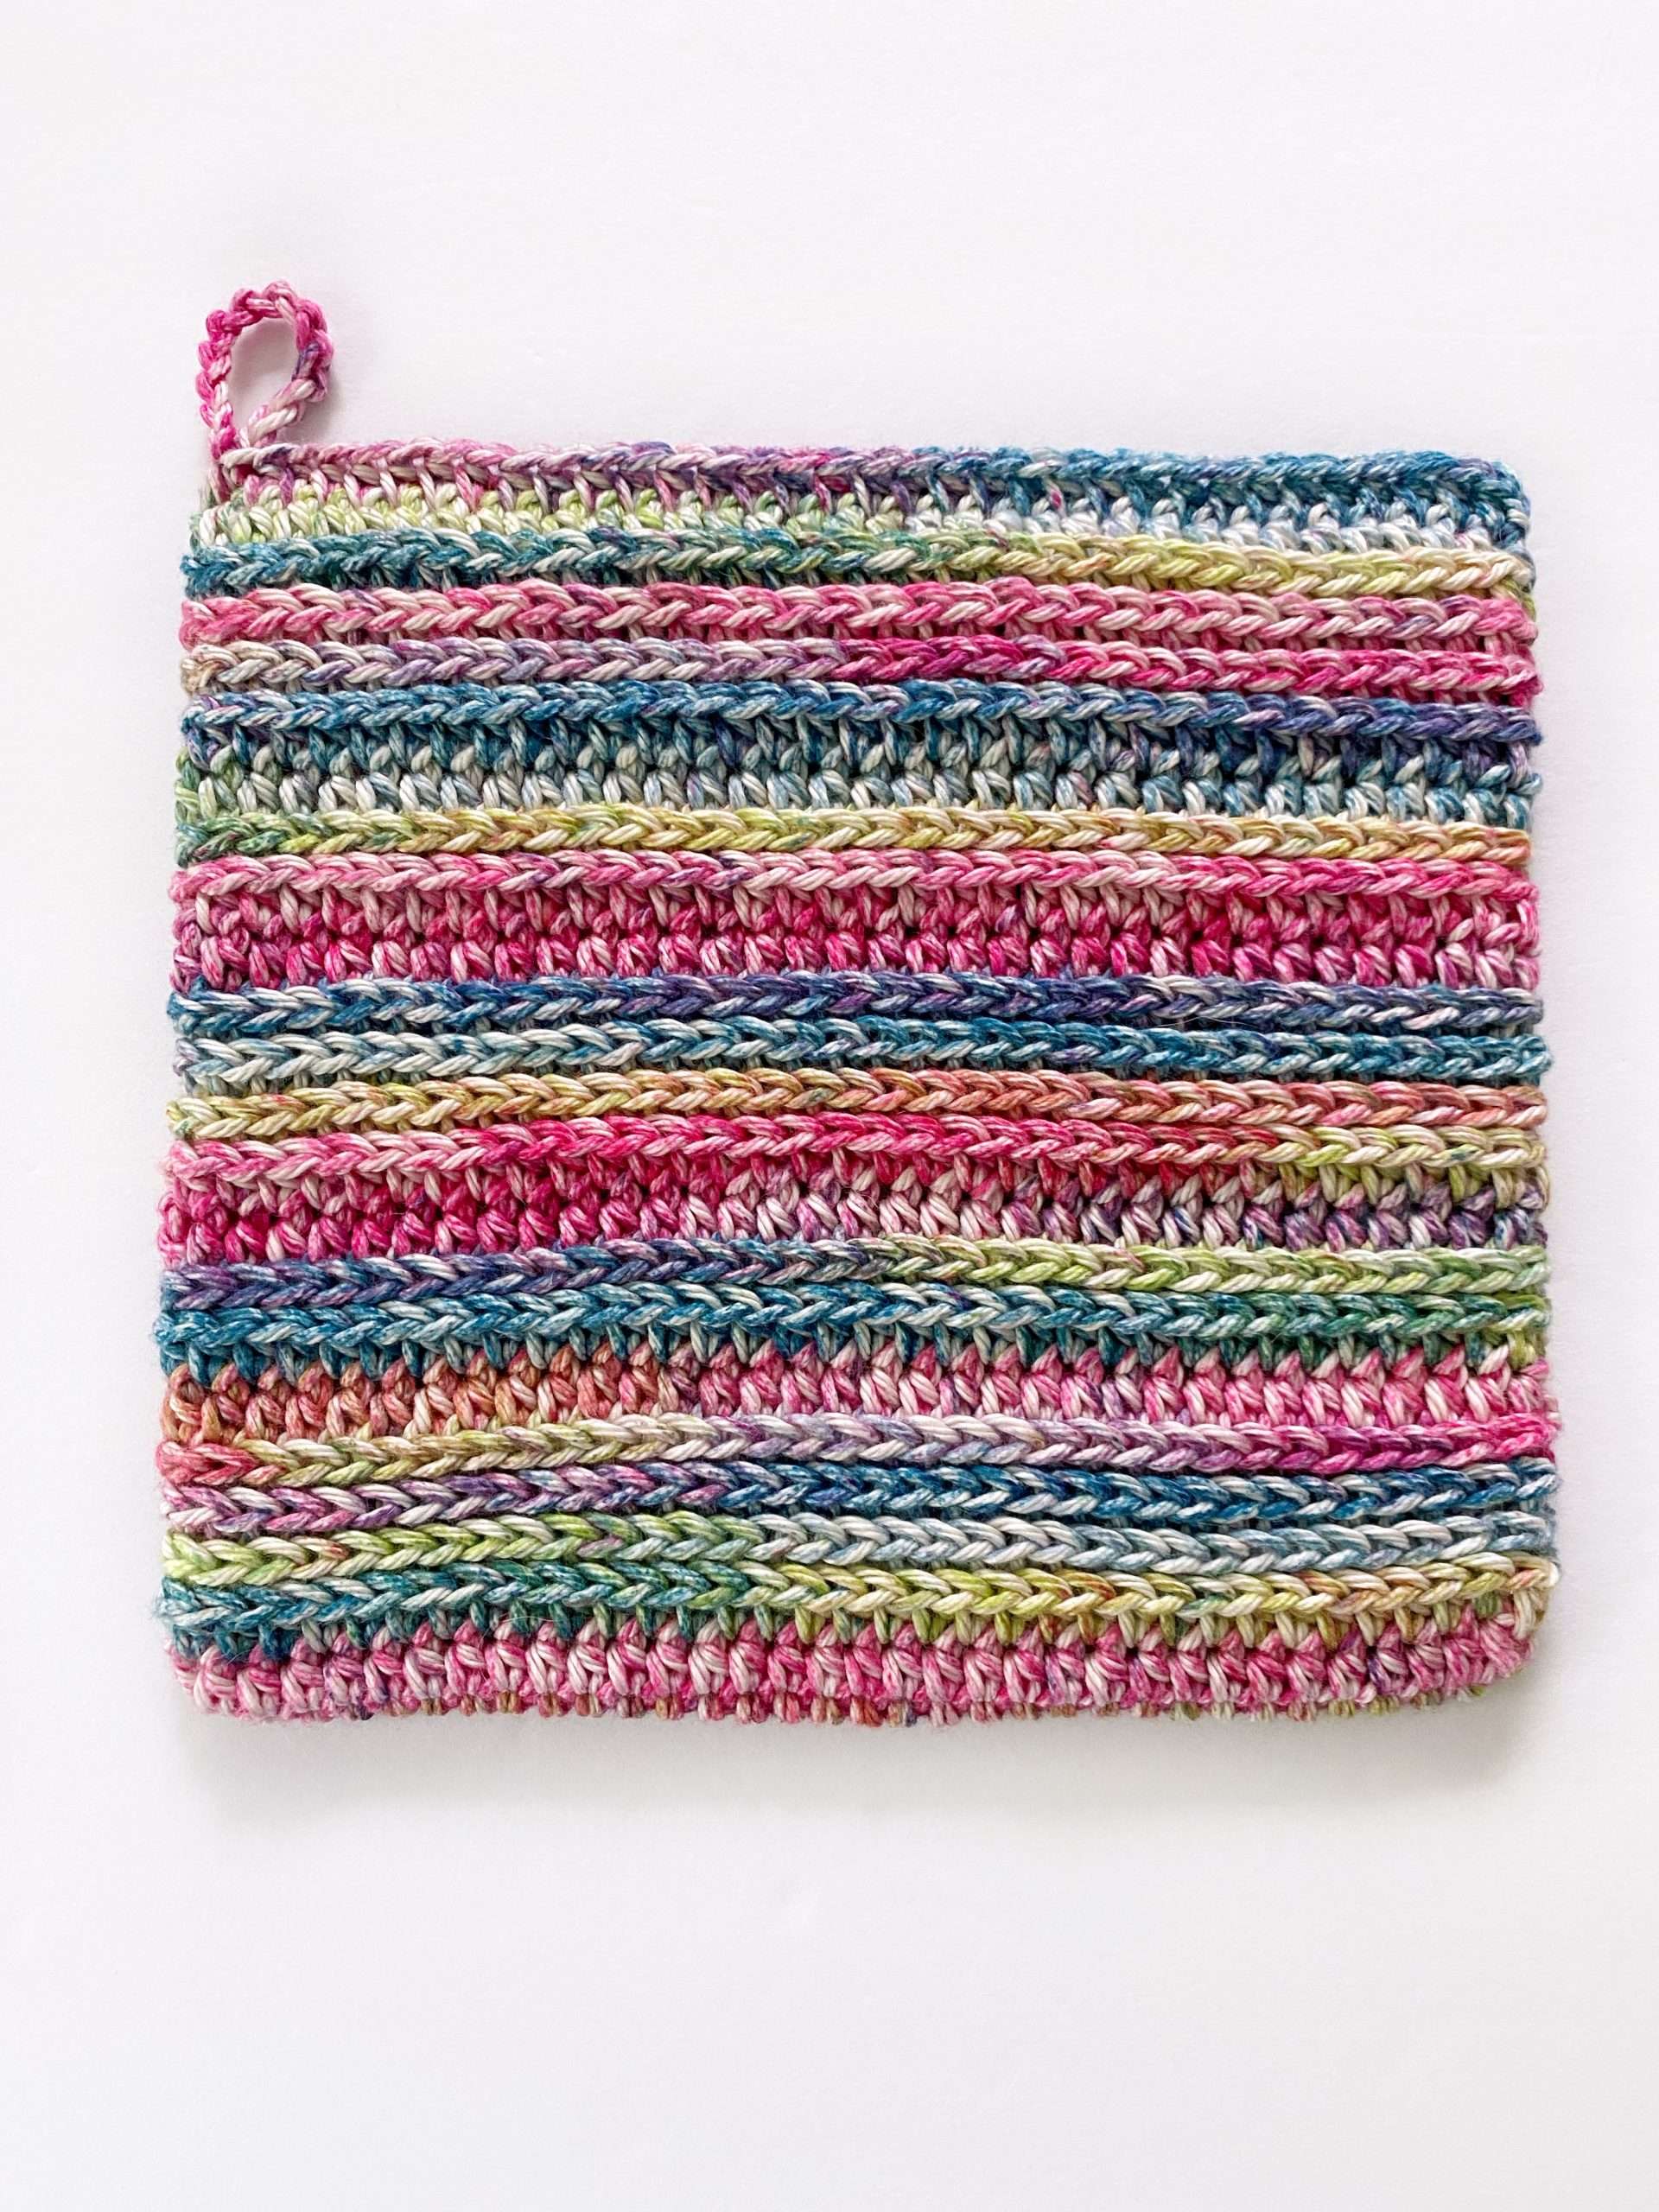
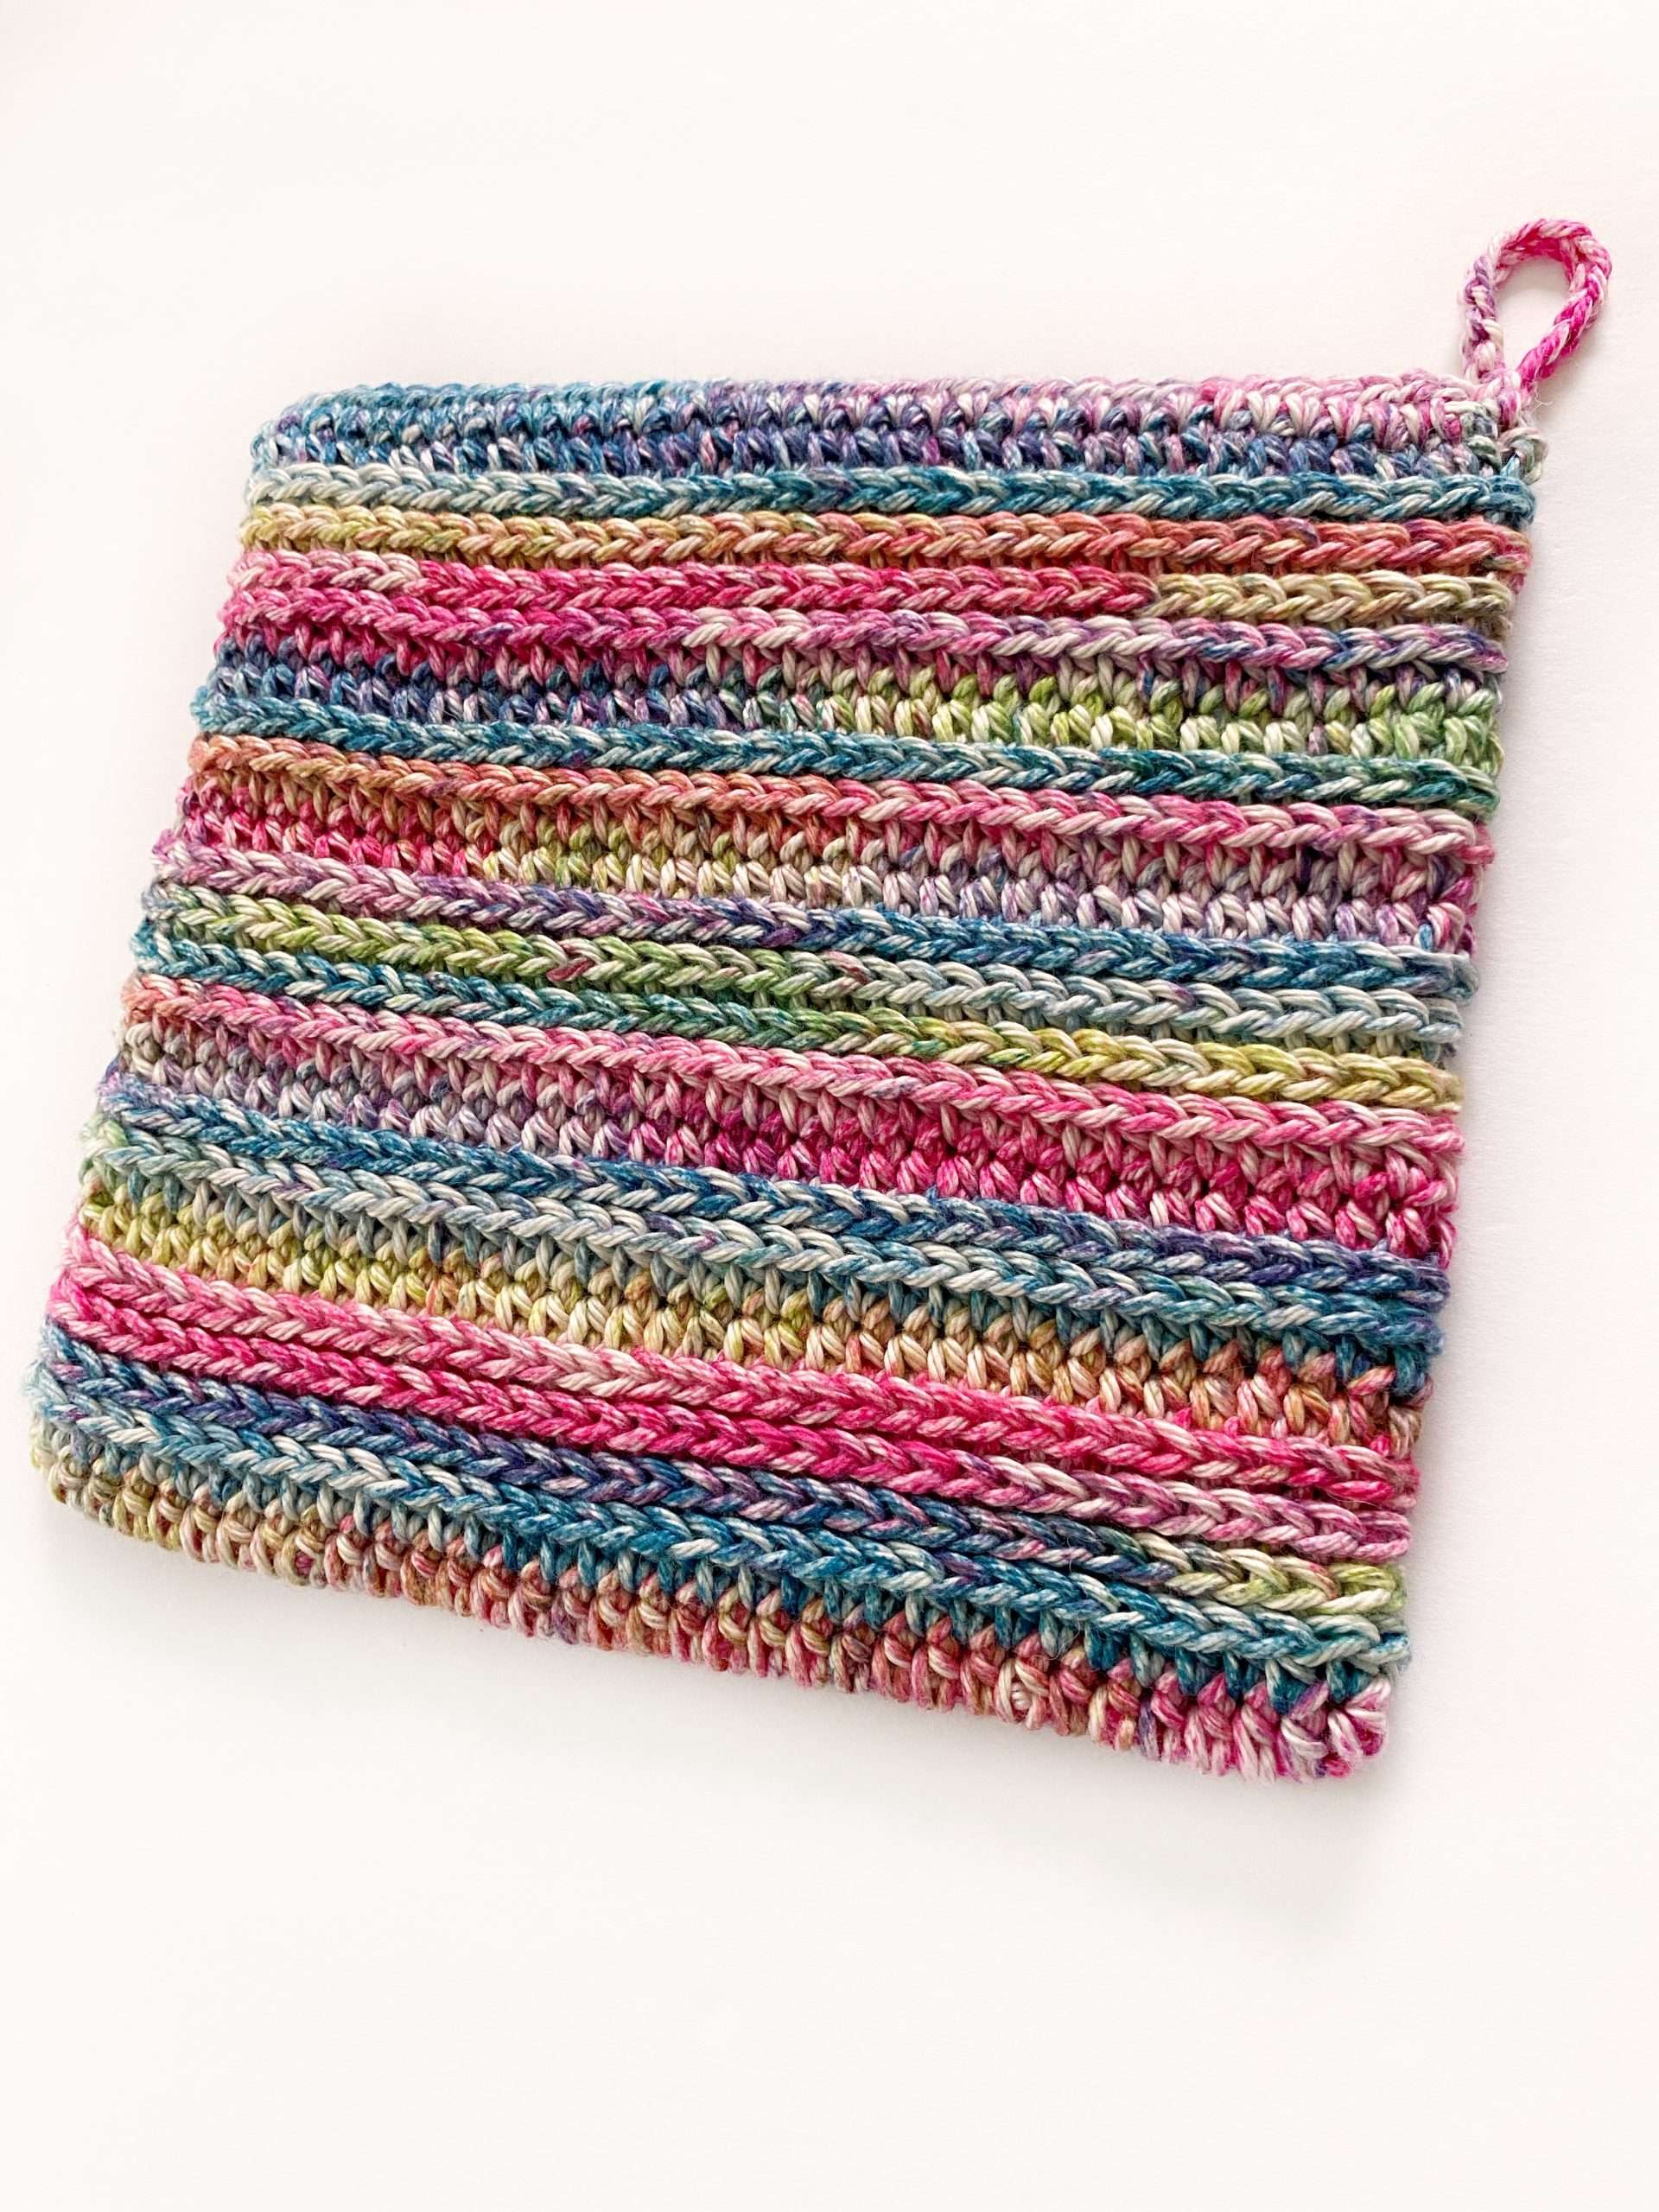
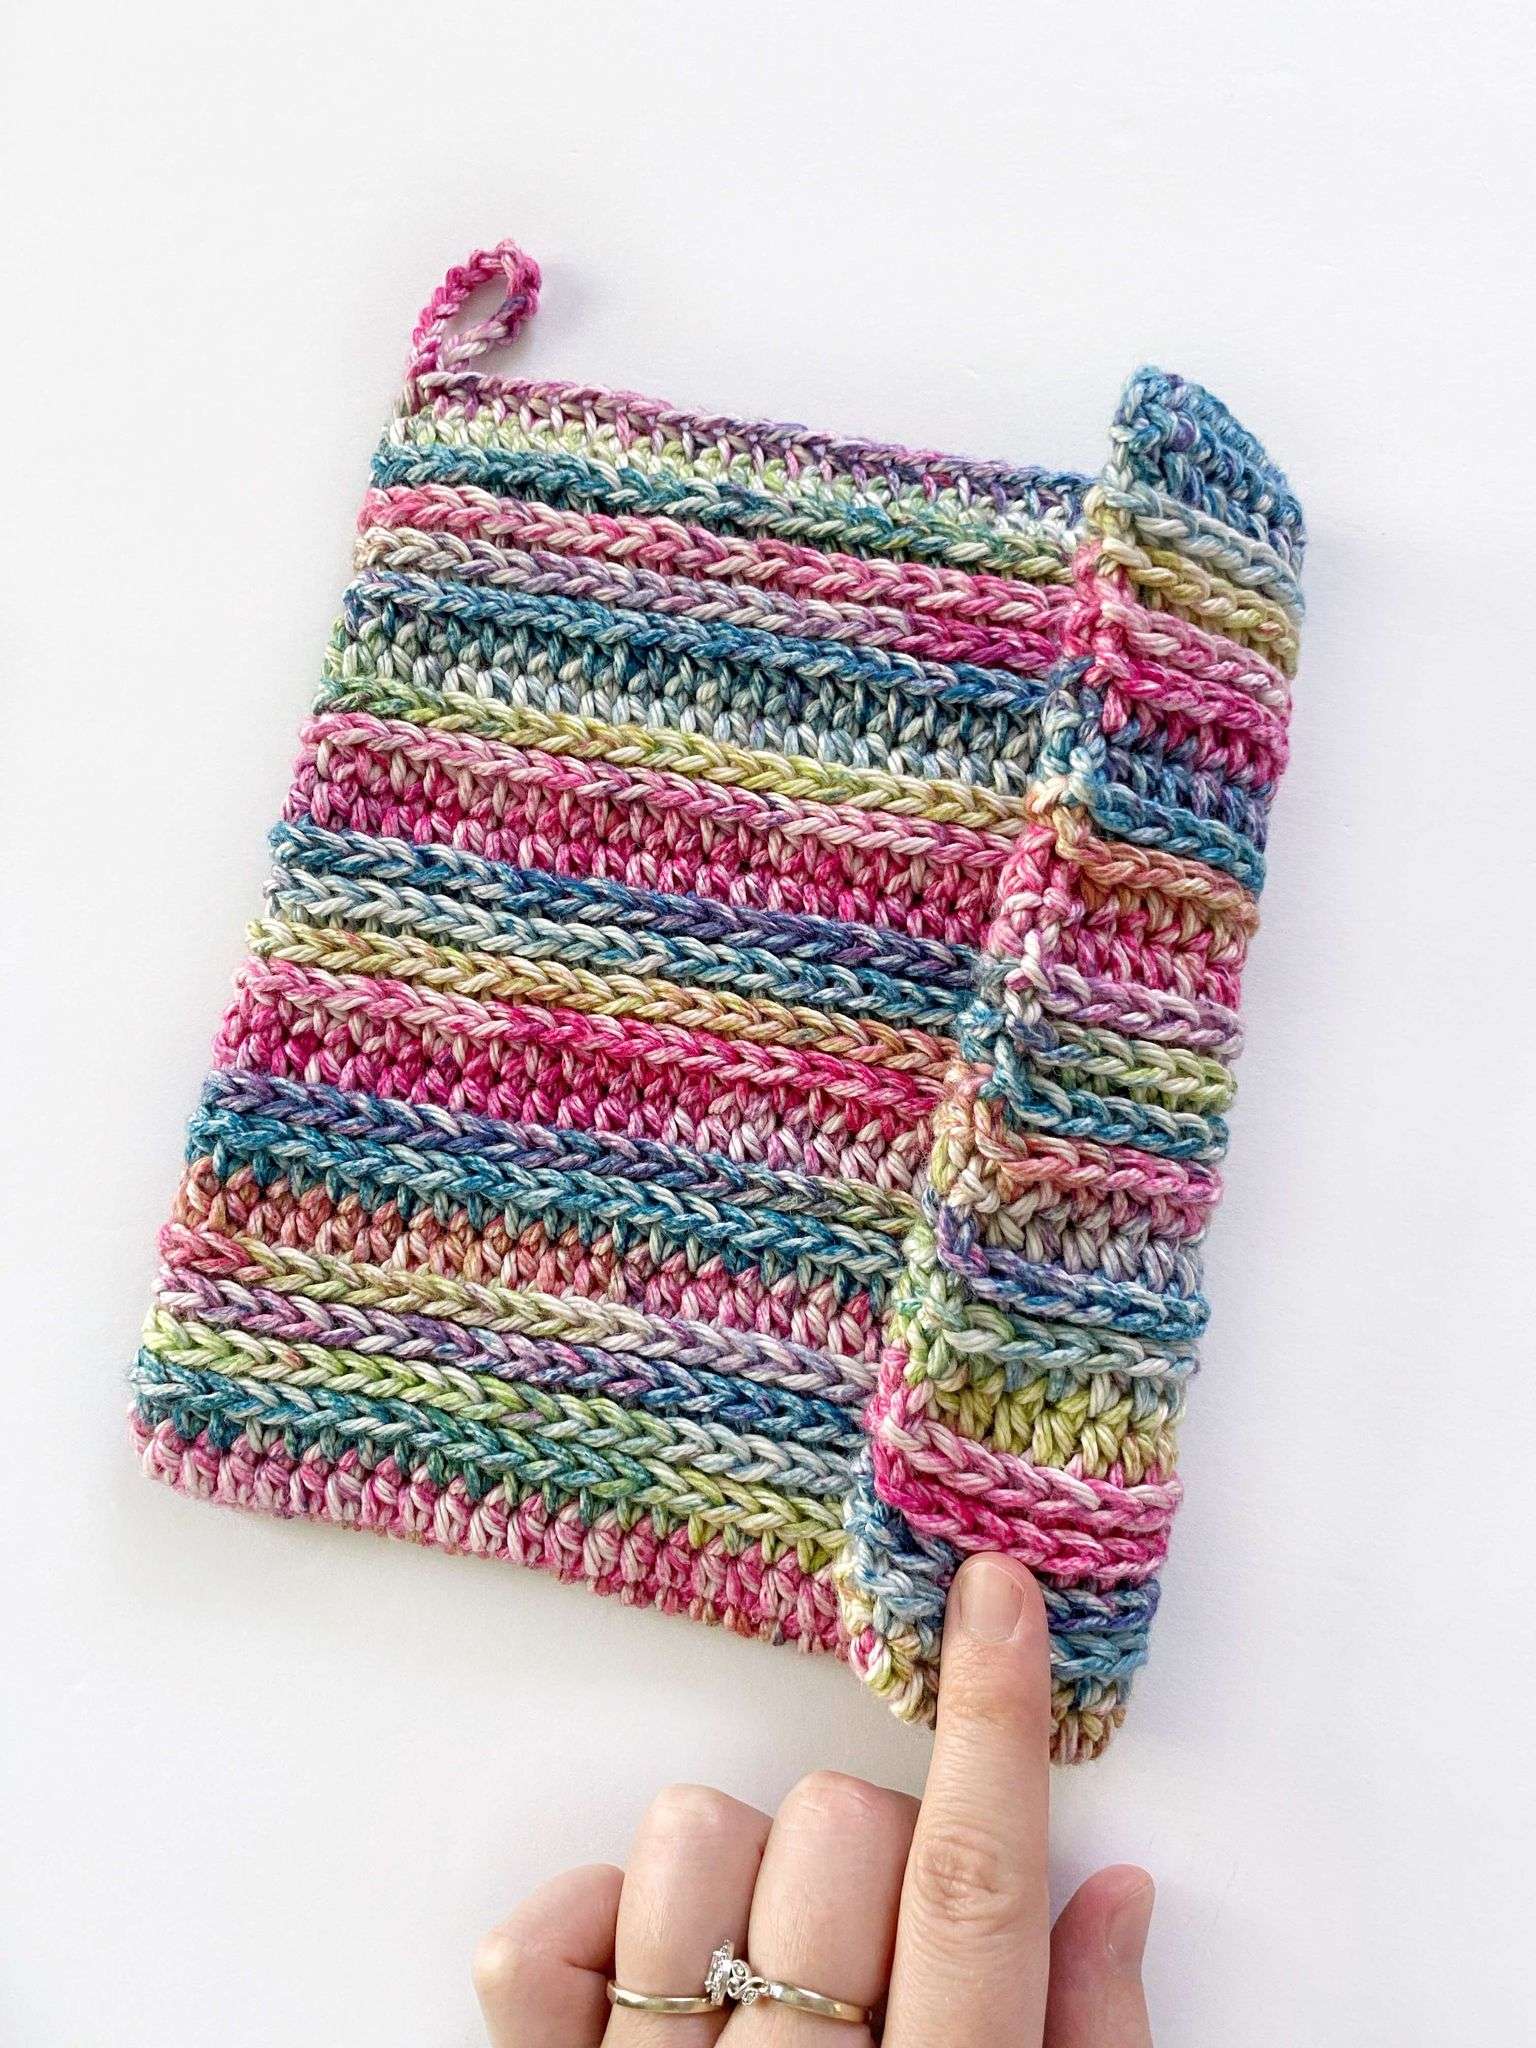
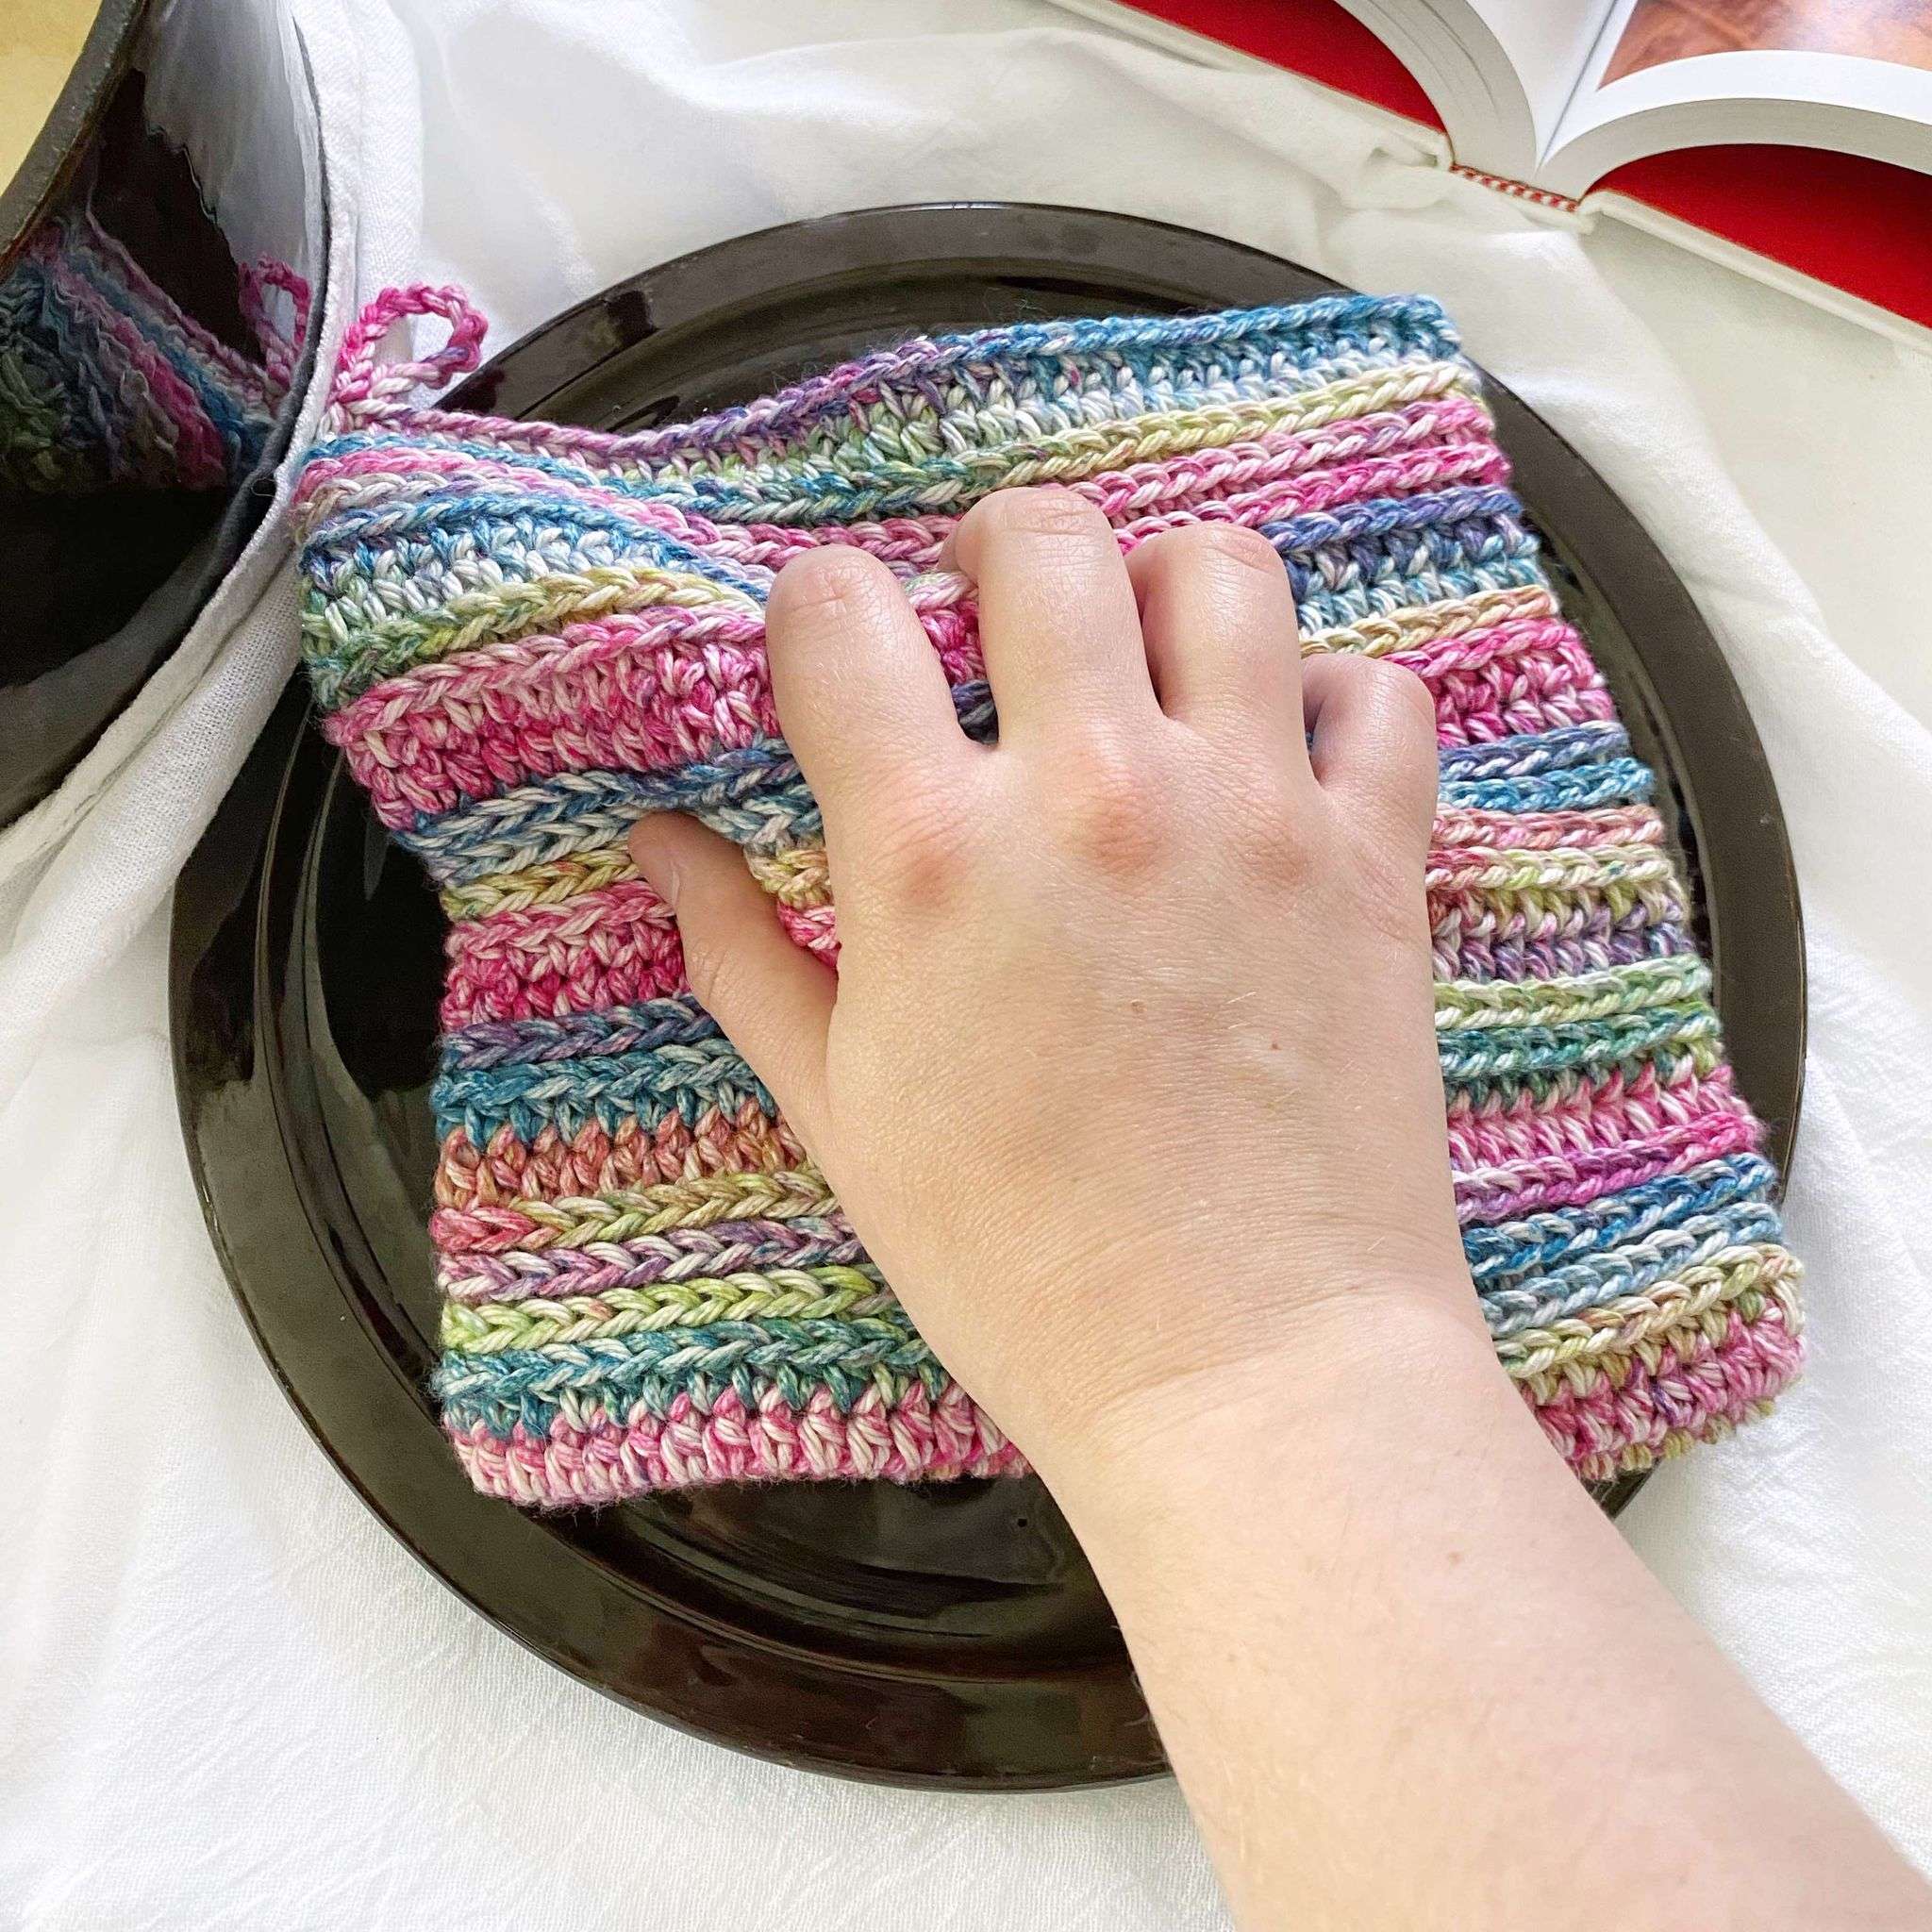
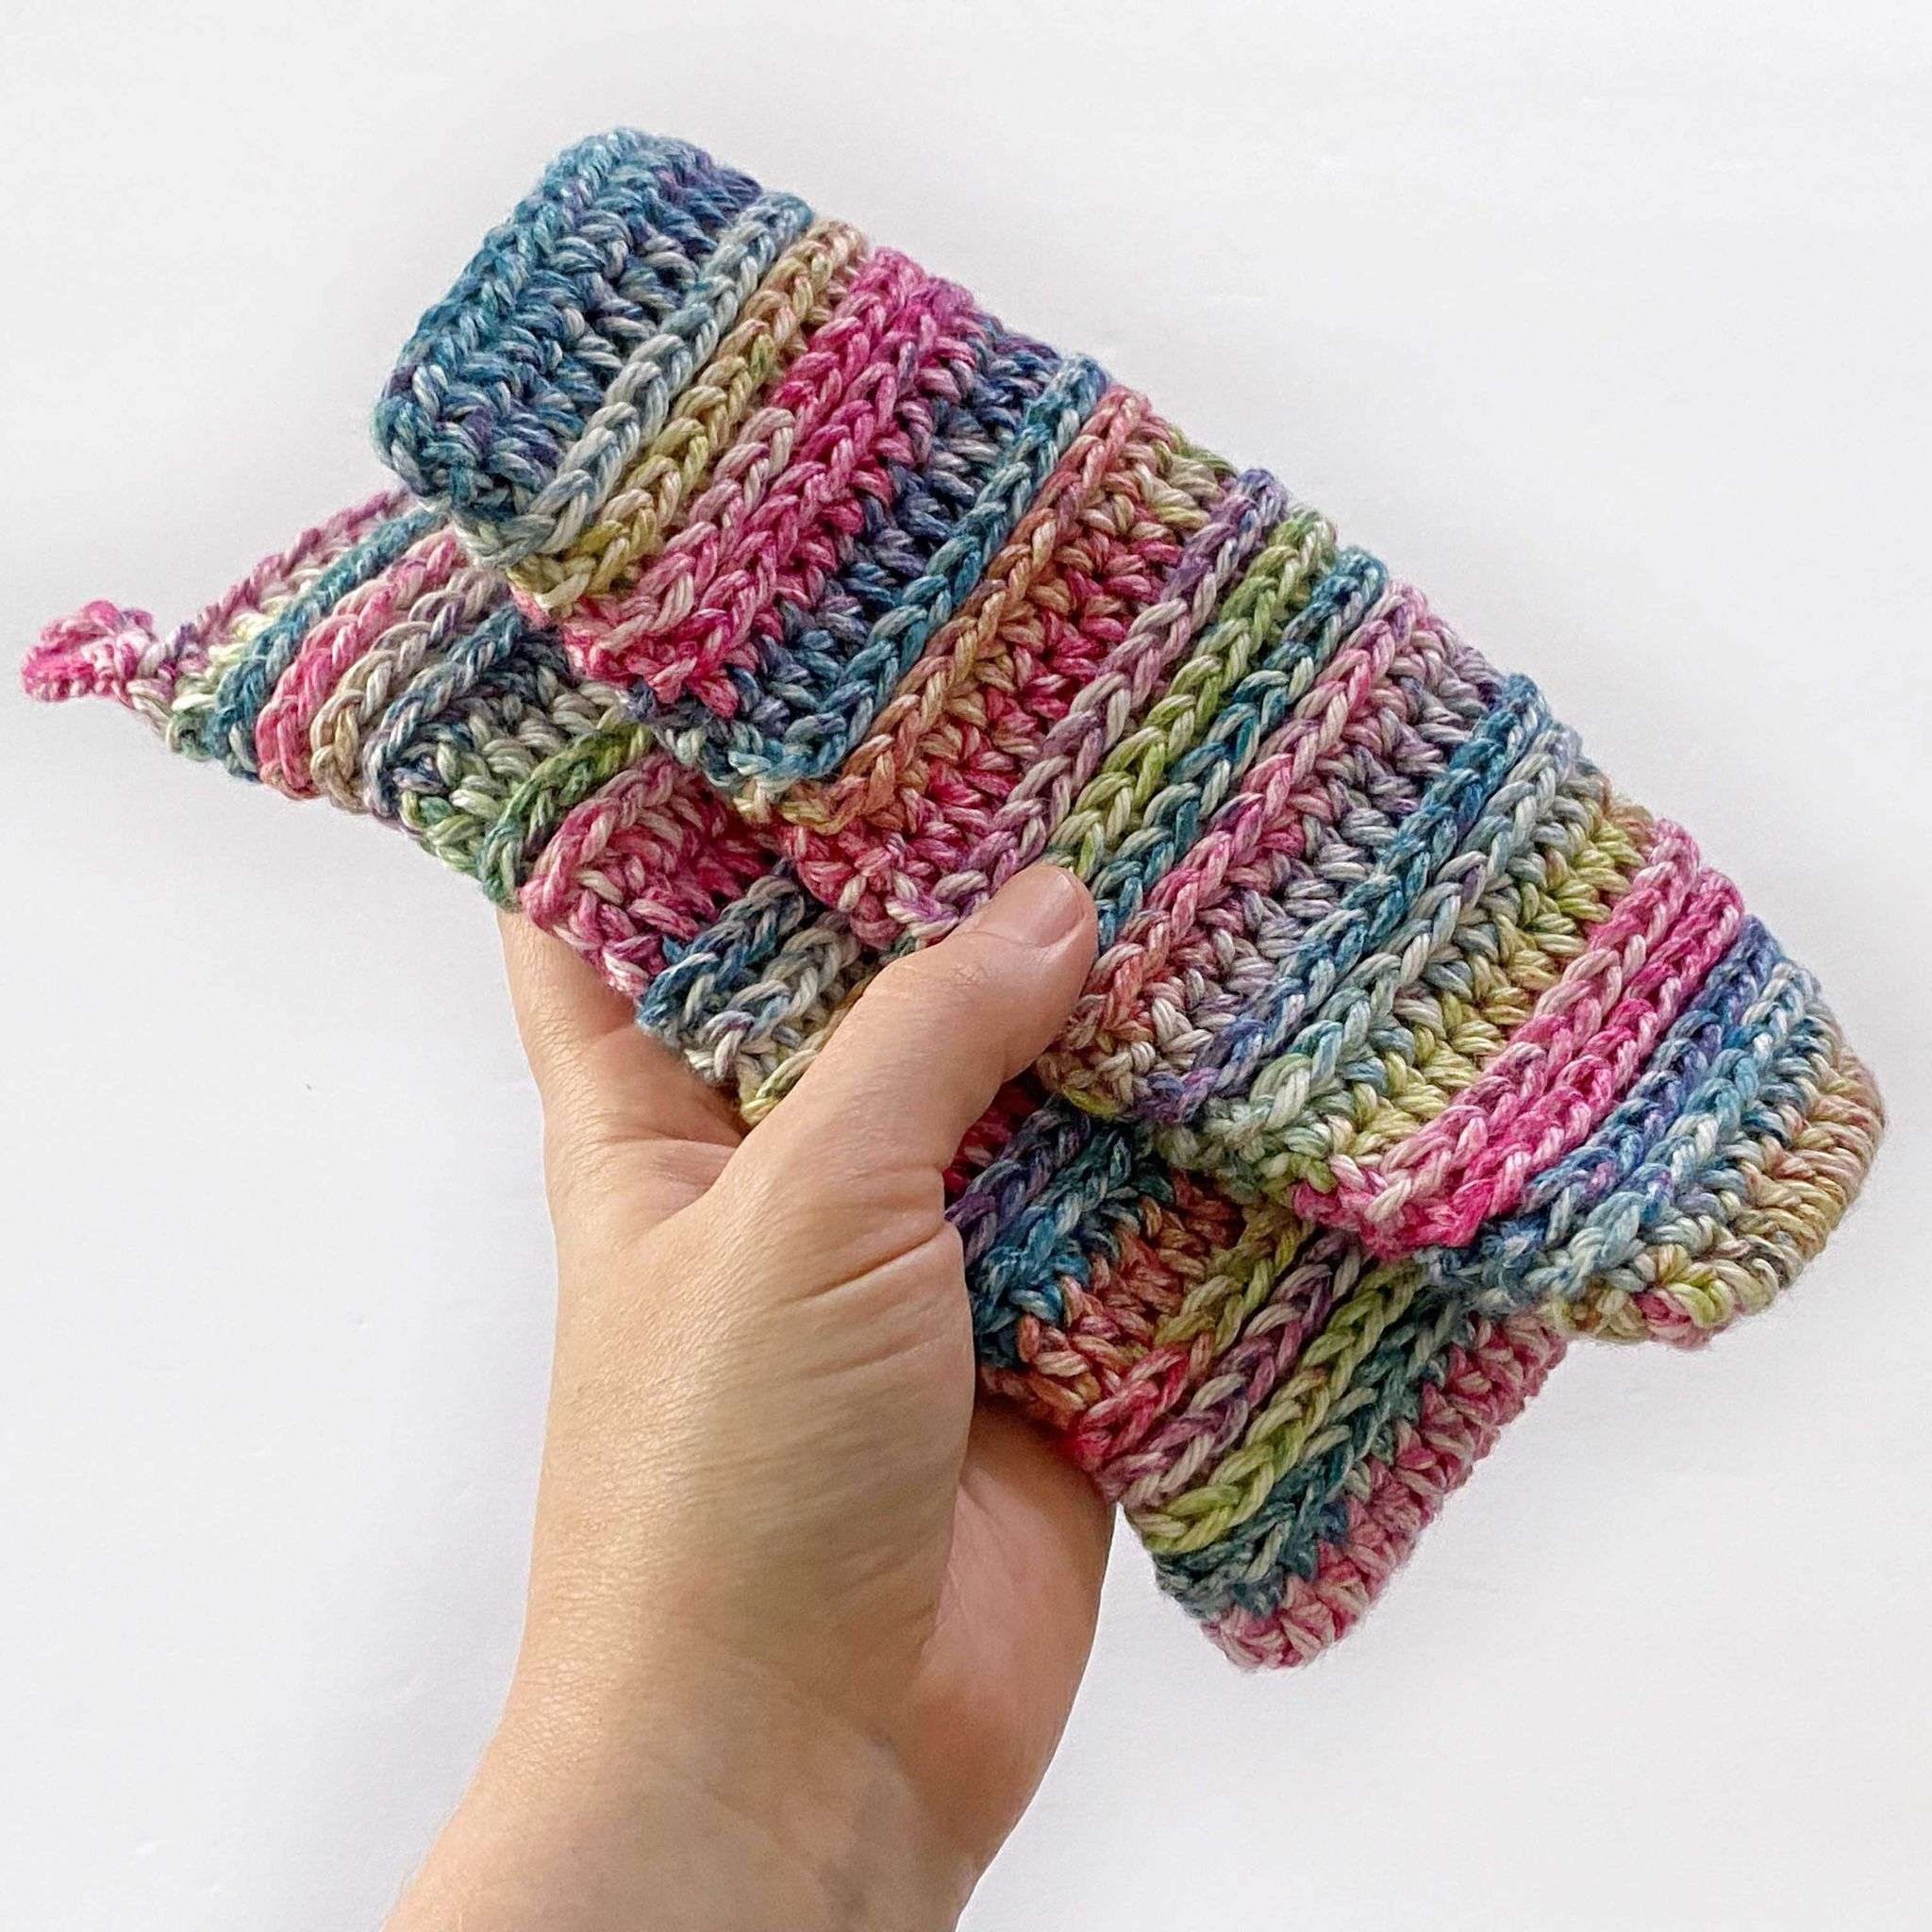
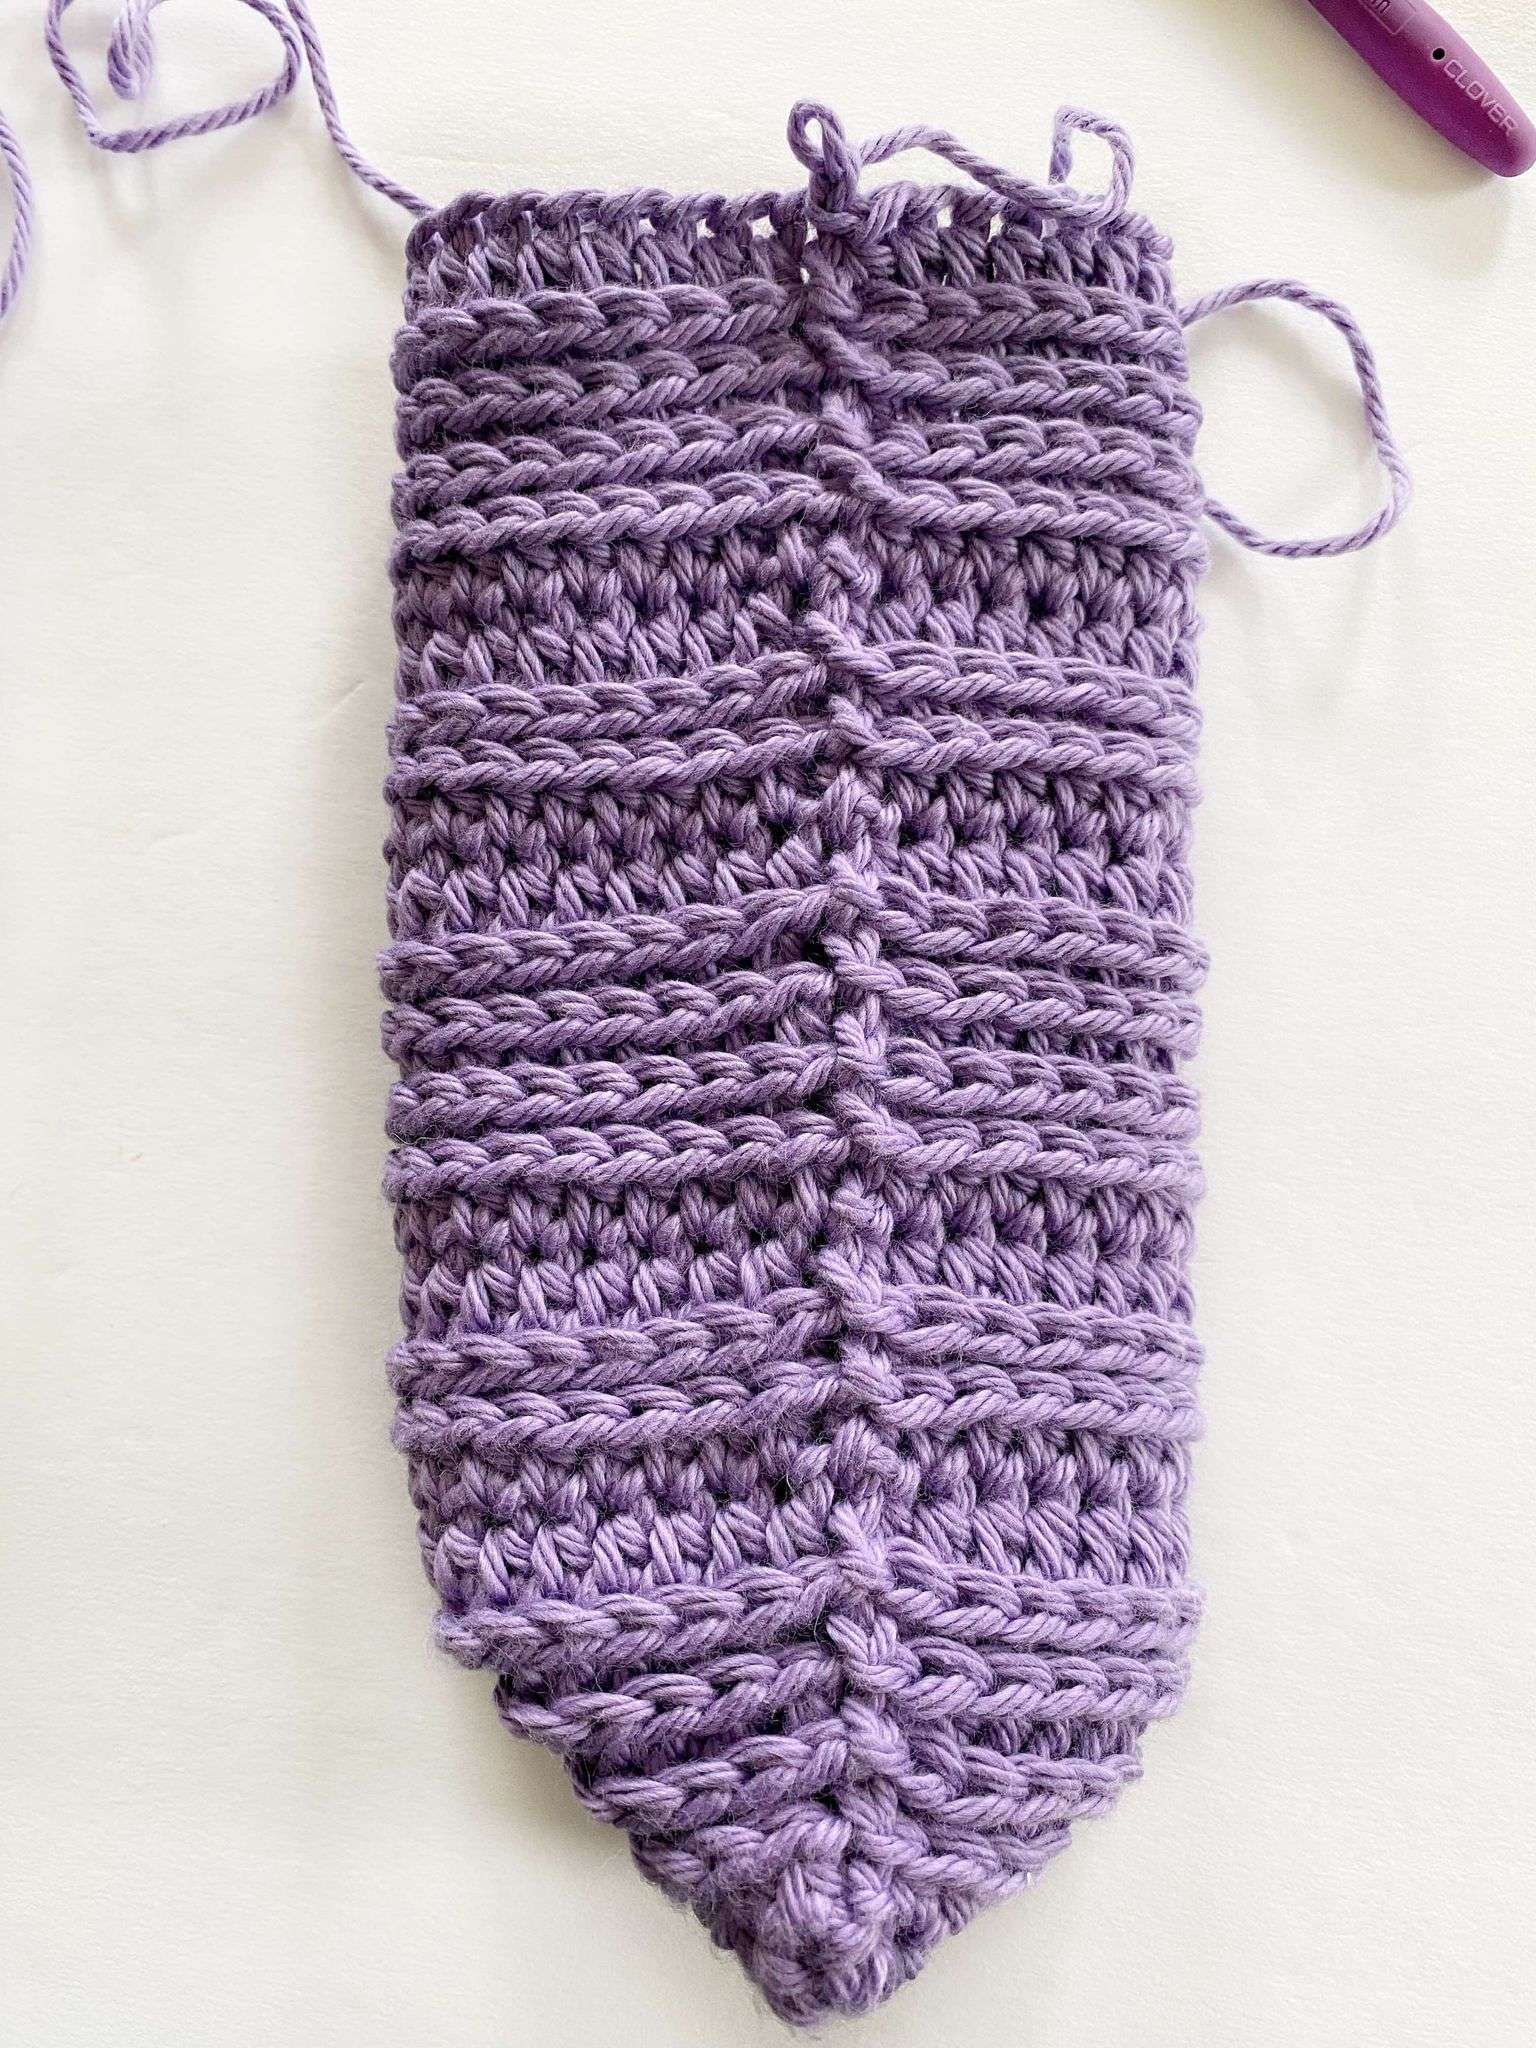
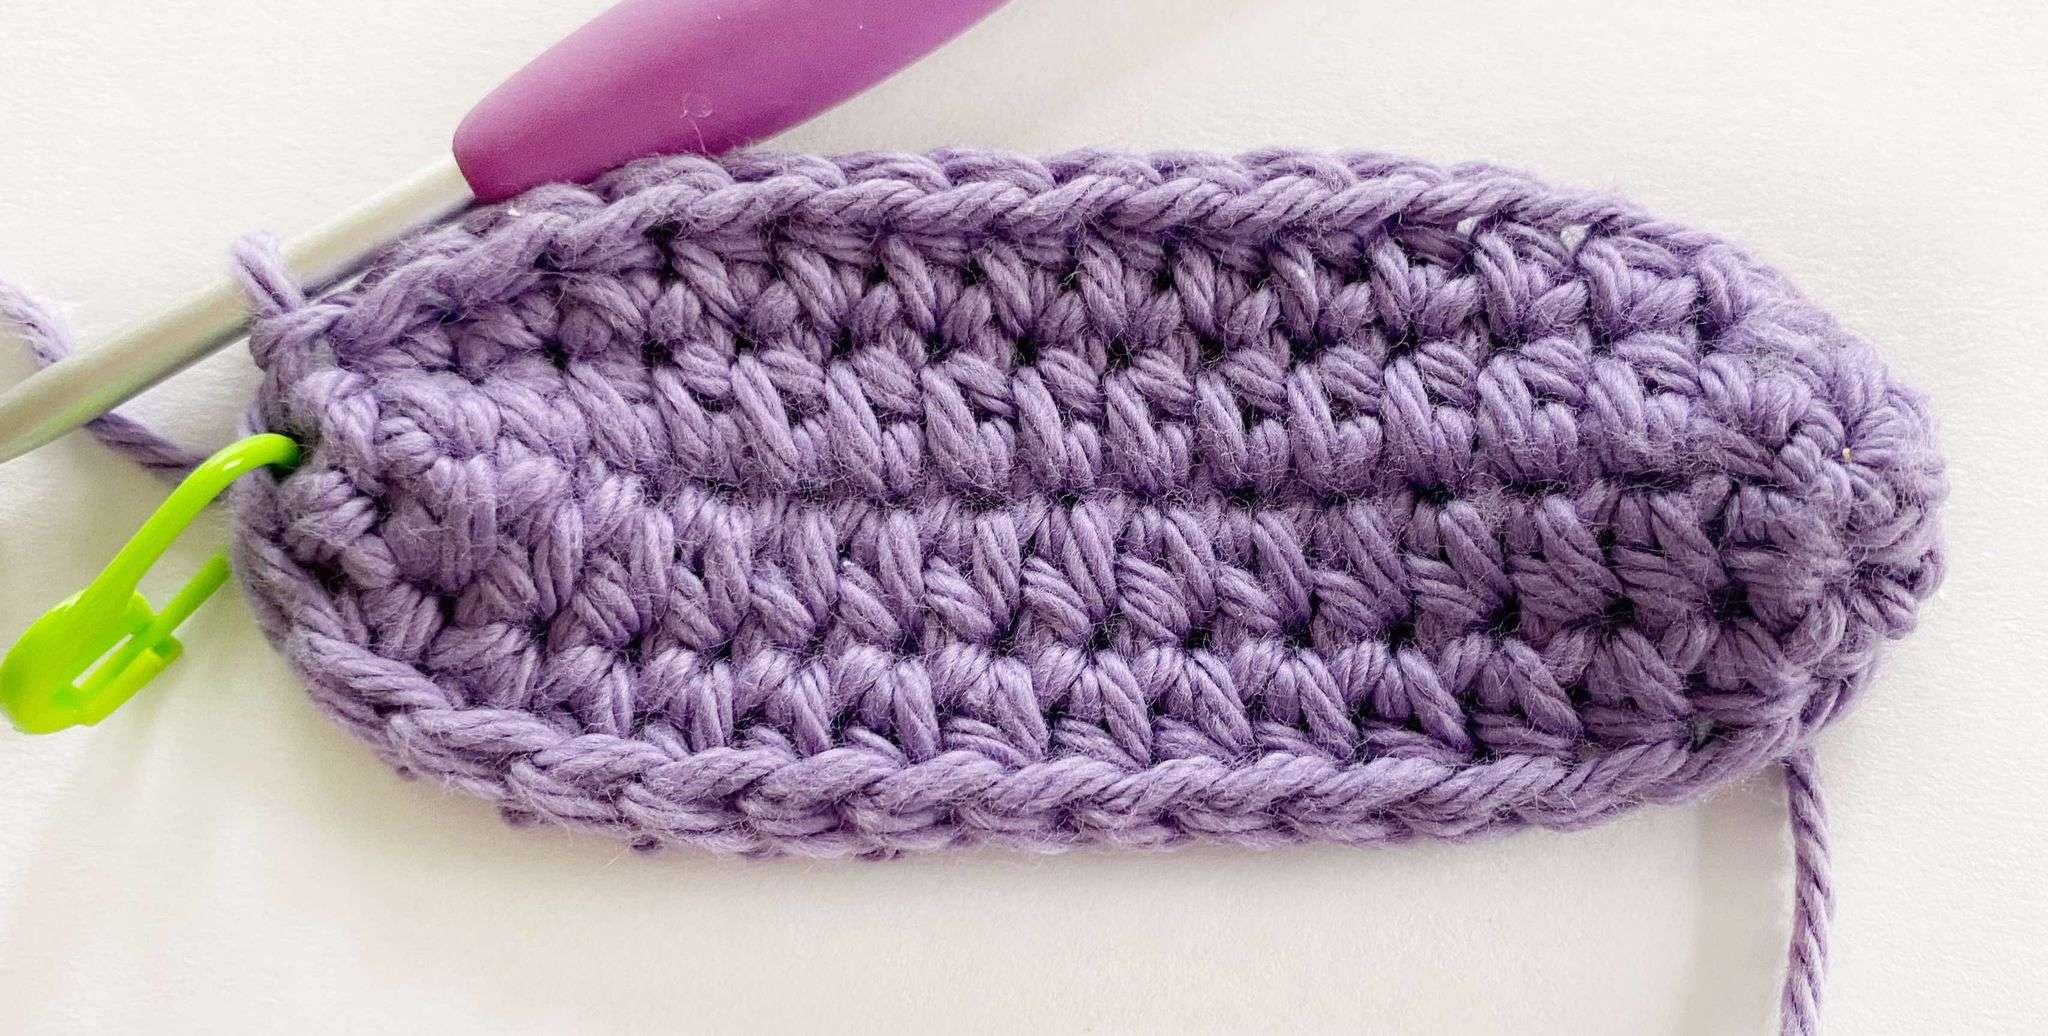
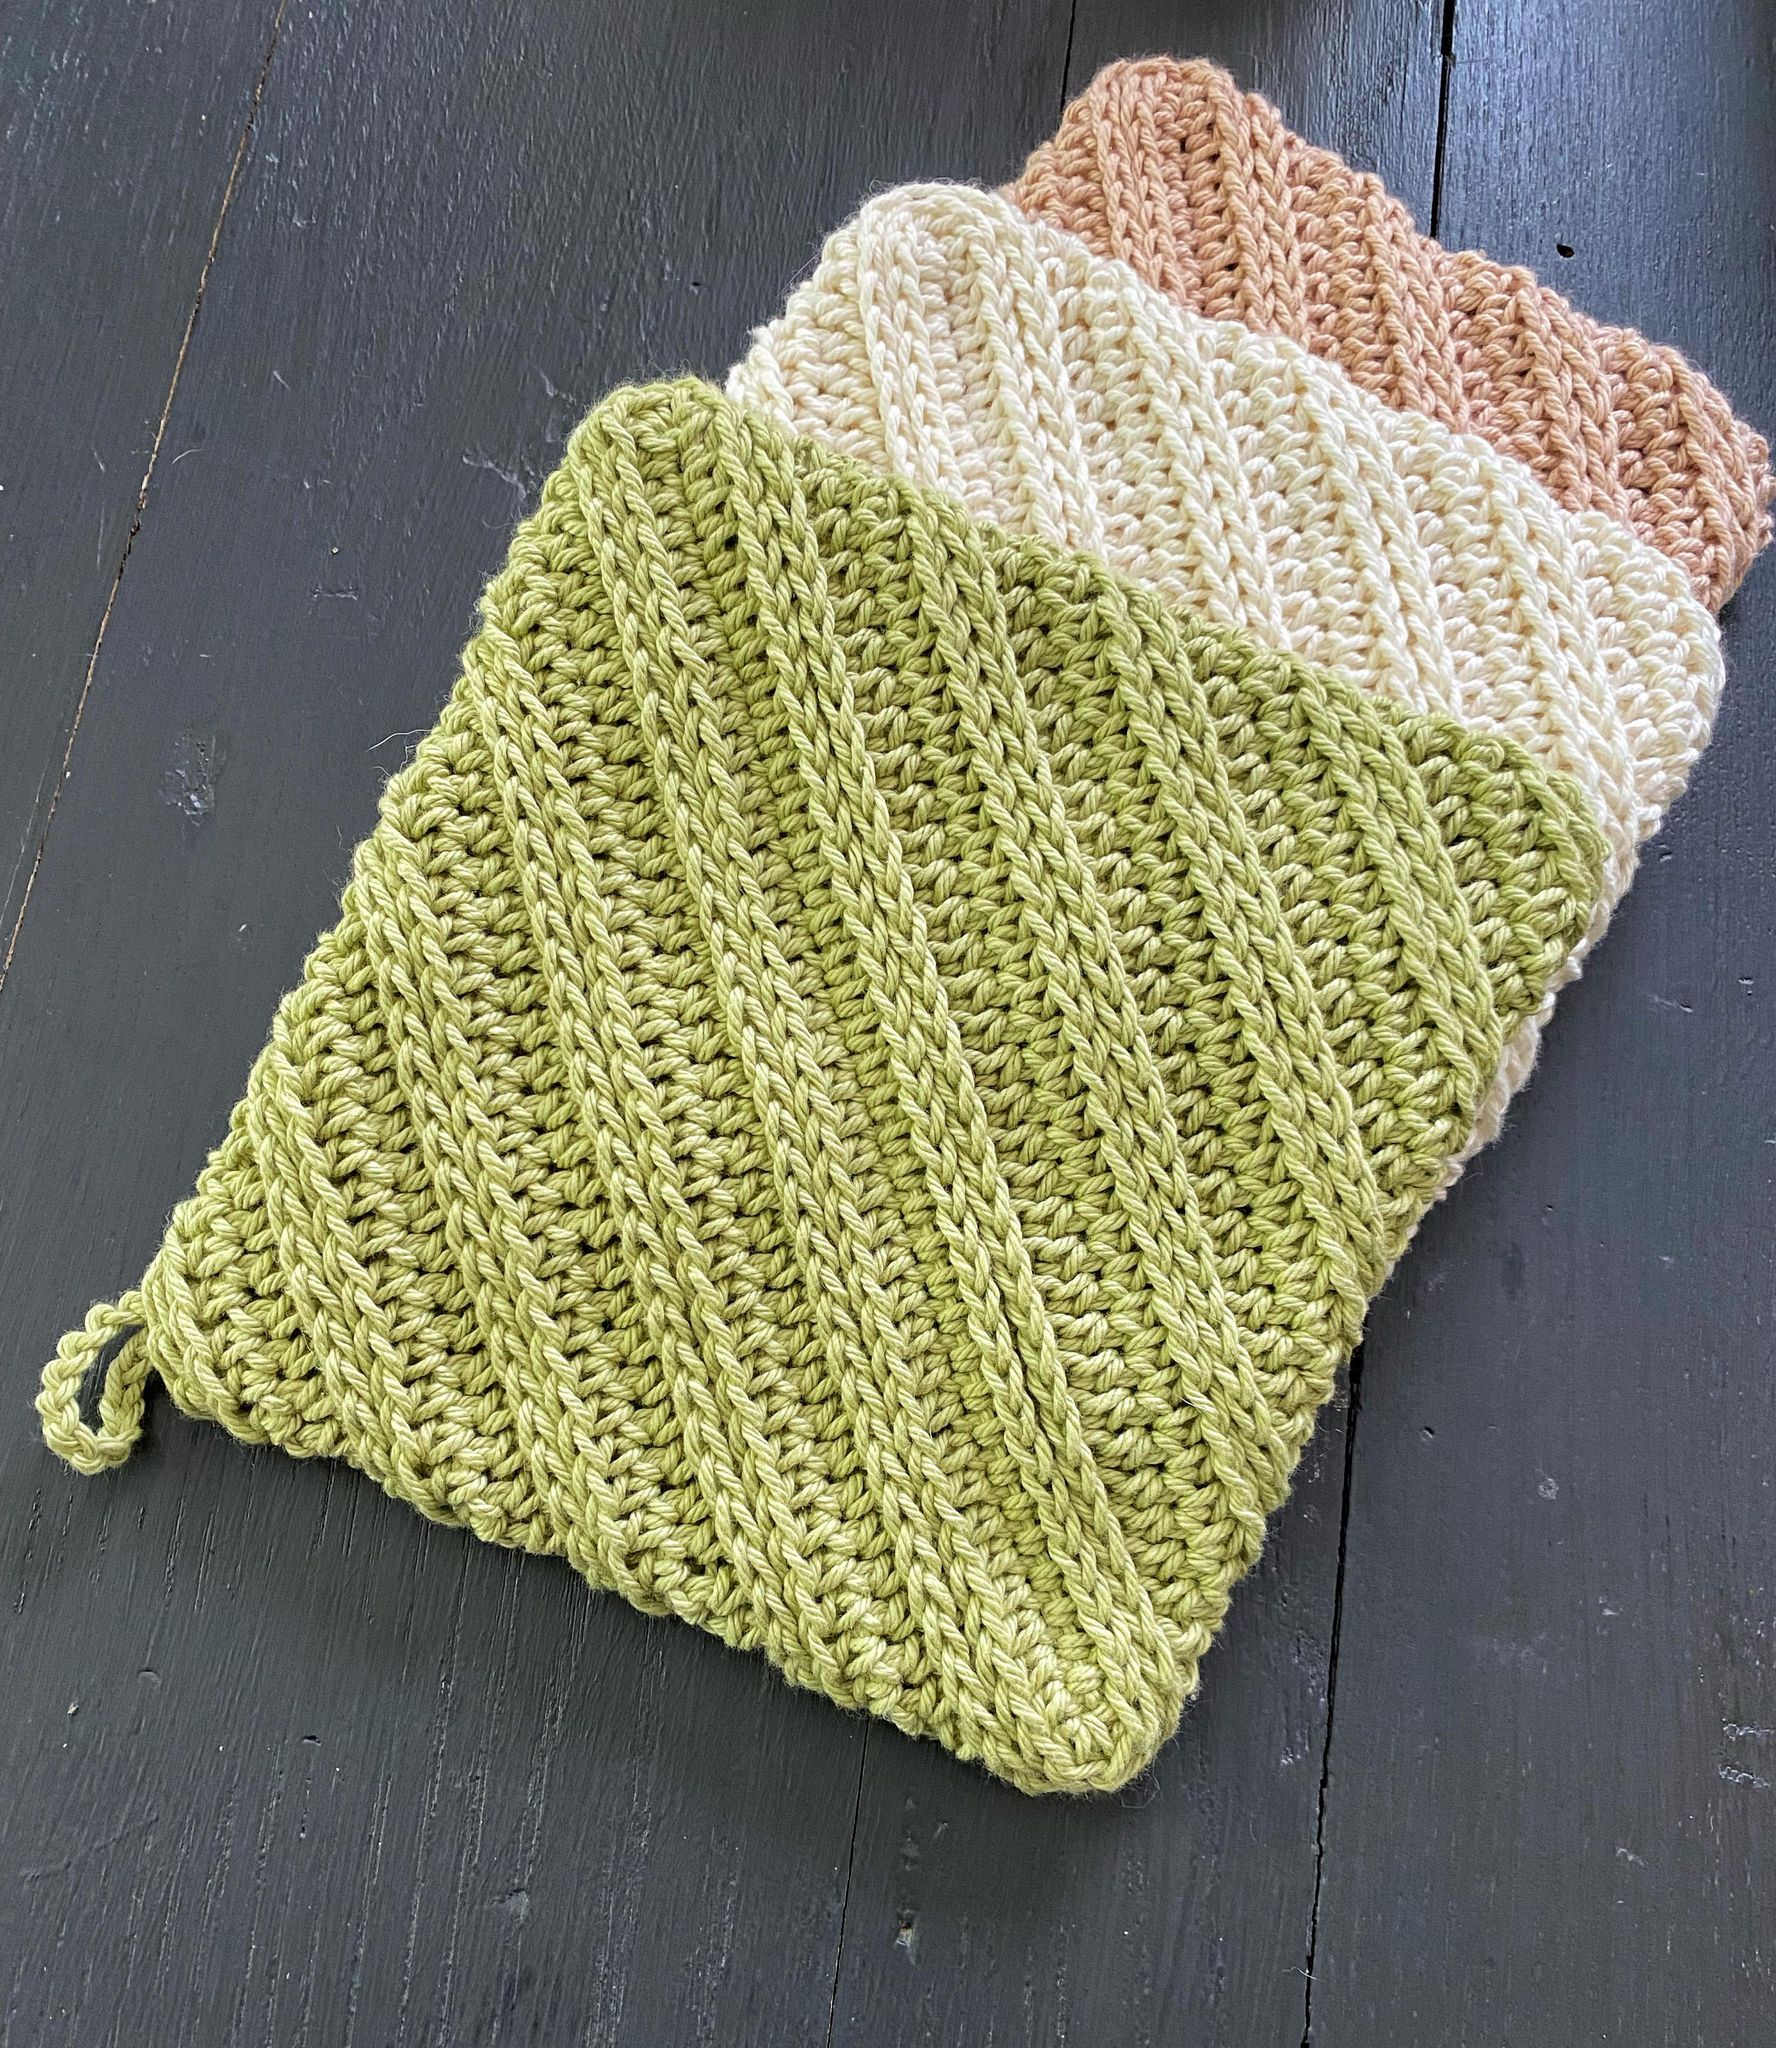
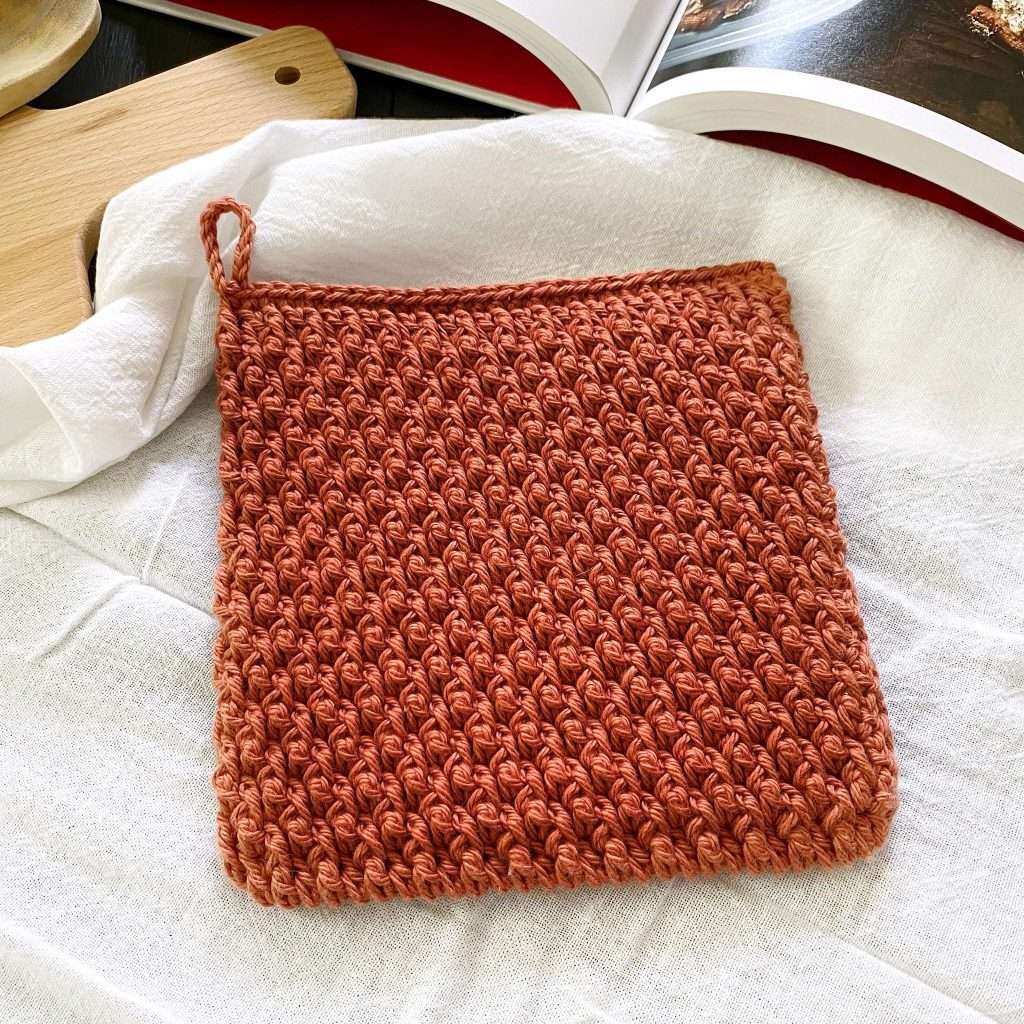
This potholder is crocheted in the round in one piece, so there is no sewing involved. This means it’s double thick, so you can use it safely in your kitchen!
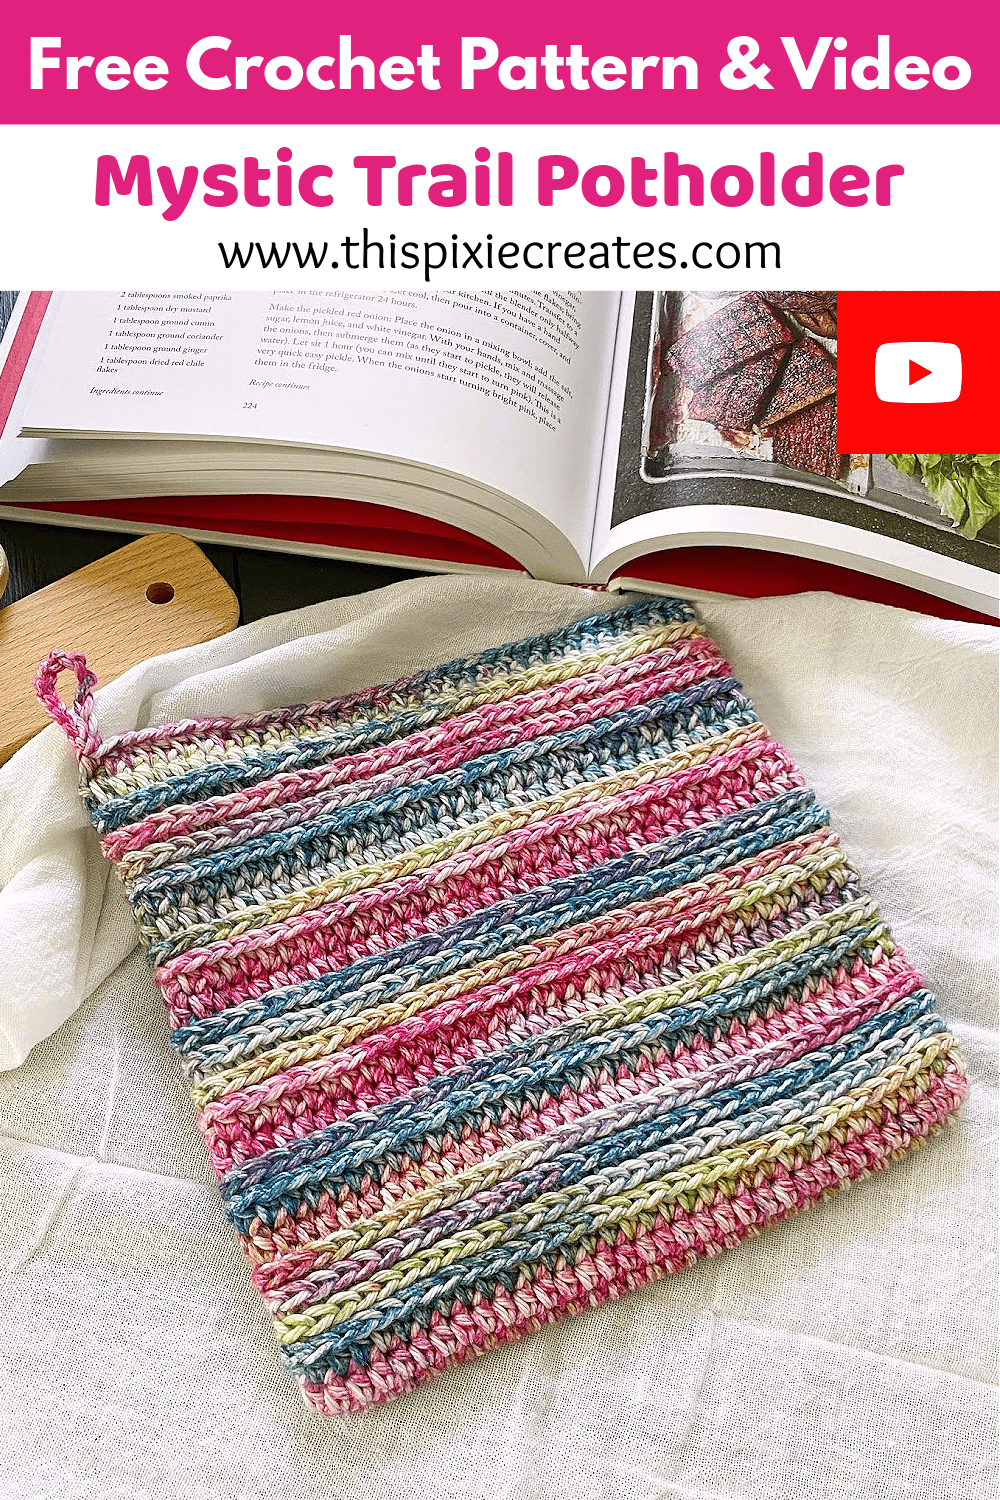
Pin this Camel Stitch Crochet Potholder – HERE!
Important Links / Schedule:
Potholder Patterns:
Materials:
Yarn:
*Yarn Note:
Yardage:
- 170 yds / 156 m
Front, Back and Seam of the Potholder:
Abbreviations:
Gauge: Approximately 17 sts x 12 rows = 4” x 4”
- If your gauge is too small (more than 17 sts or 12 rows), try using a thicker weight 4 yarn or a larger crochet hook.
- If your gauge is too big (less than 17 sts or 12 rows), try using a thinner weight 4 yarn or a smaller crochet hook. You can also try adjusting your tension.
Pattern Measurements & Construction:
Customize the Size of your Camel Stitch Crochet Potholder:
To make your potholder smaller or larger than the original pattern, follow the instructions below:
Width: The width of the potholder is determined by the starting chain. Chain any number until satisfied with the width of the potholder.
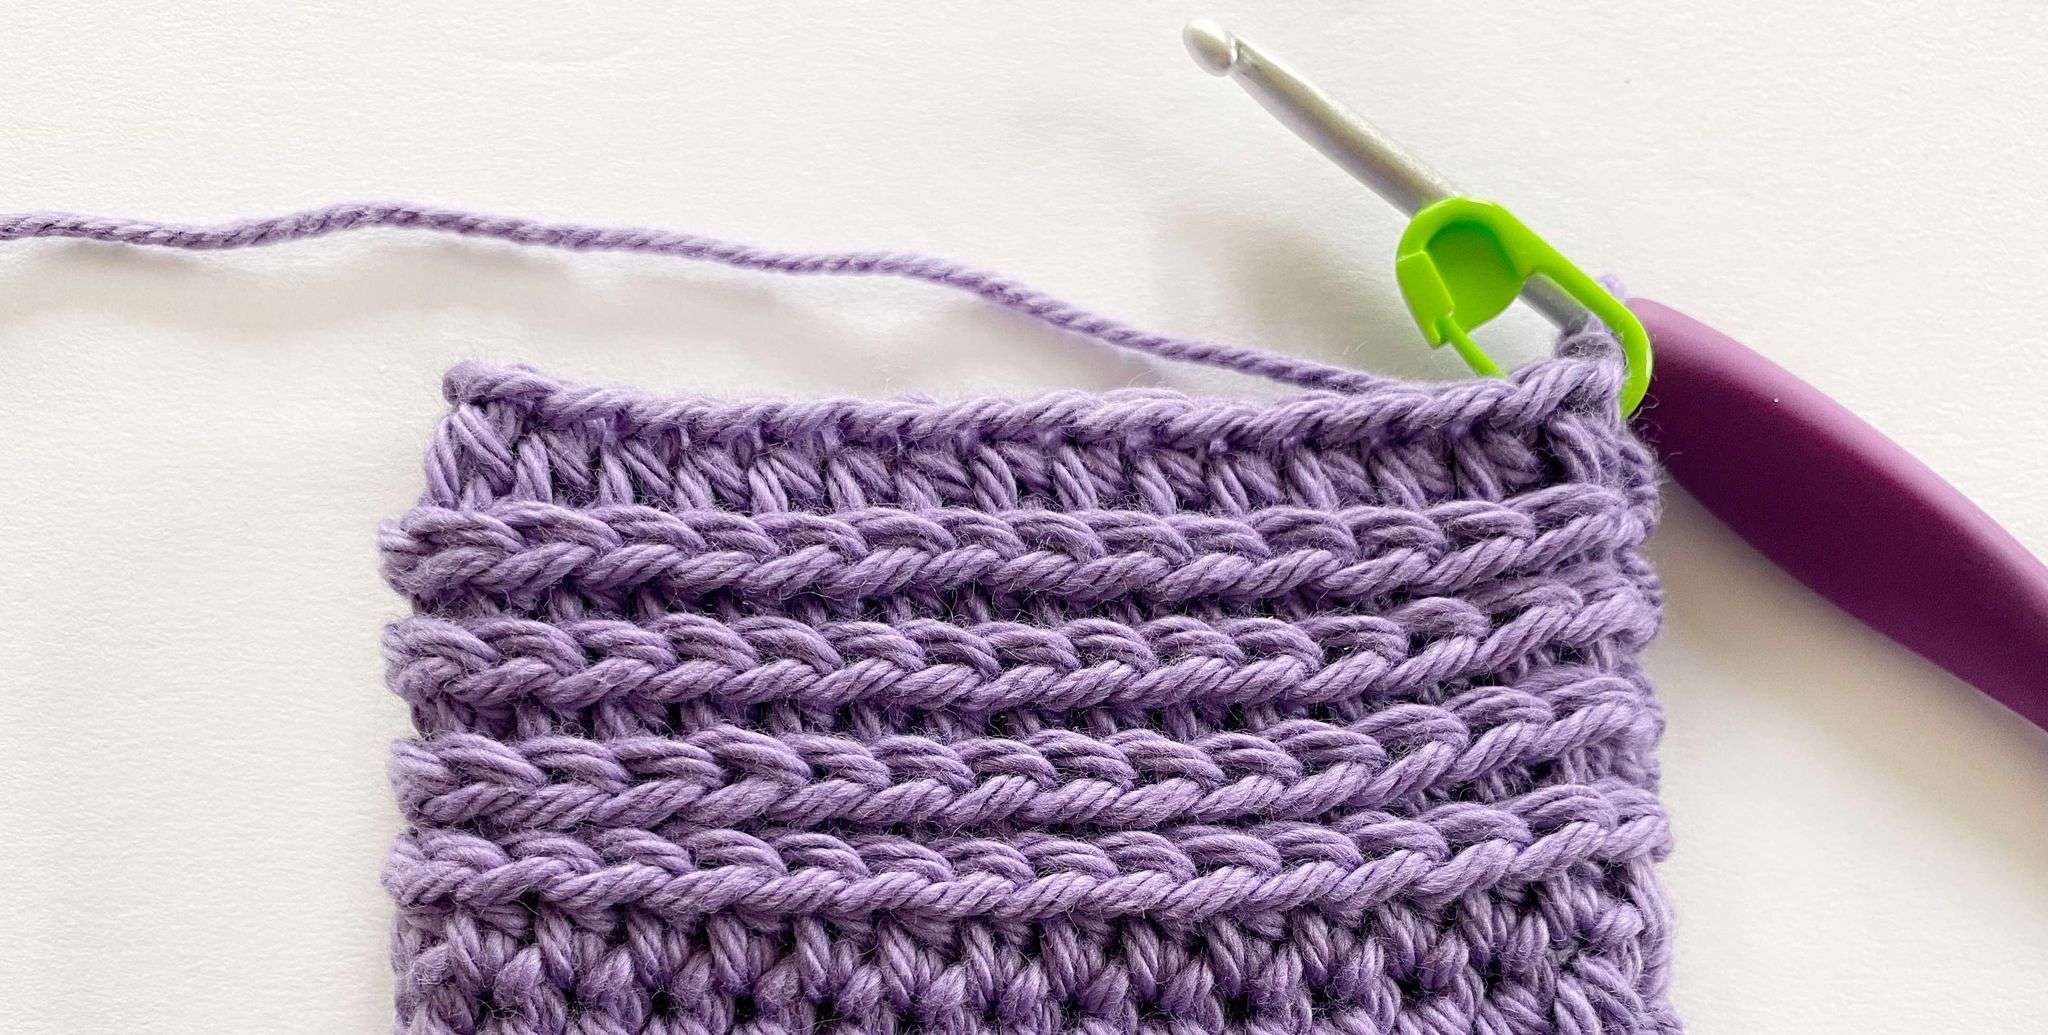
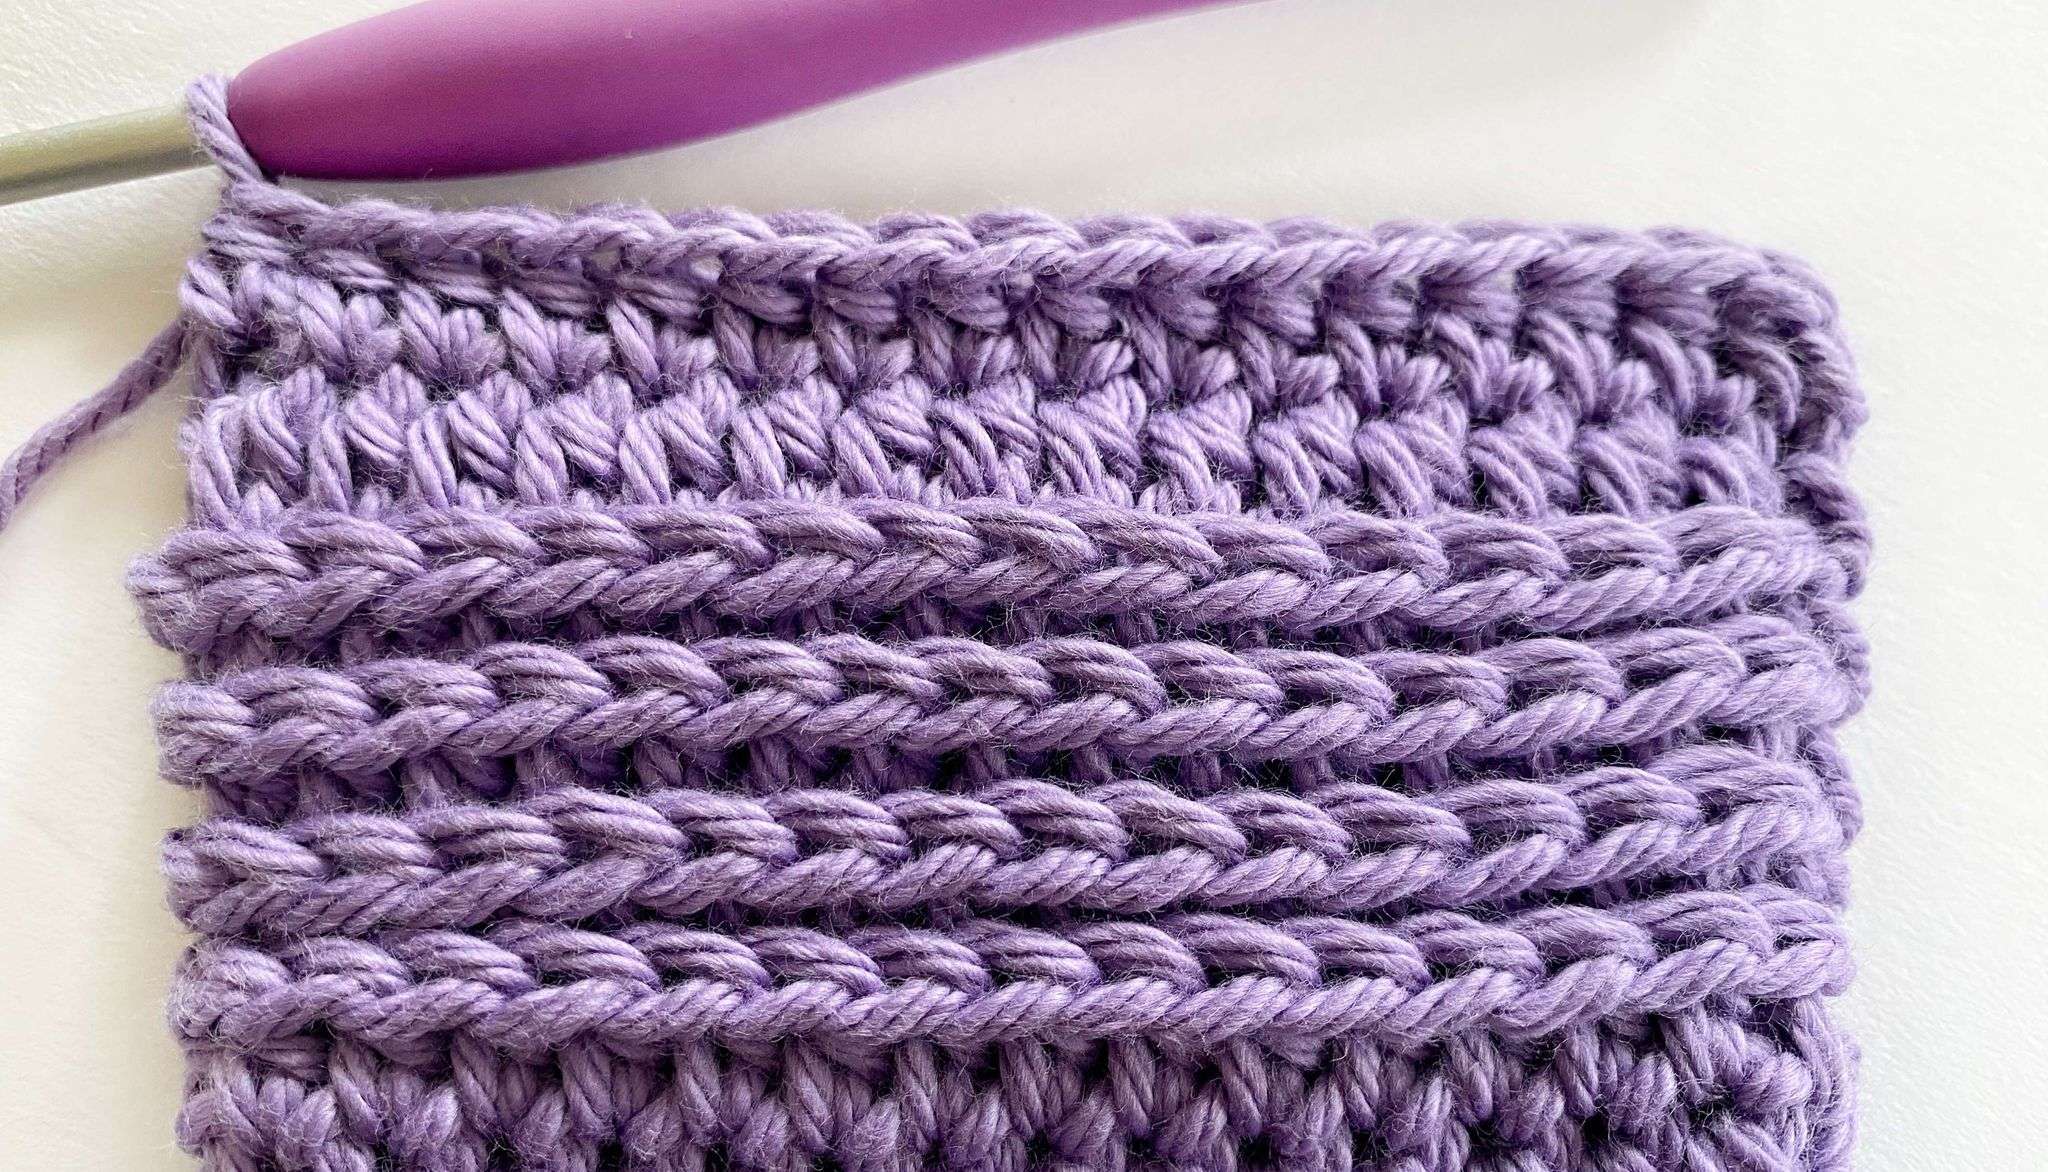
Length: The original potholder has a stripe pattern of: 4, 2, 4, 2, 4. Each stripe is made up of half double crochets in the third loop only rounds.
To make your potholder longer or shorter, play around with the size of the stripes.
- For a smaller potholder, you could try the following stripe pattern: (3, 2, 3, 2, 3) or (4, 1, 4, 1, 4).
- For a larger potholder, you could try the following stripe pattern: (4, 3, 4, 3, 4) or (5, 2, 5, 2, 5).
Remember to separate each stripe with 1 round of regular hdc. Also, after Rnd 1, continue to alternate between “normal” and “skipped” rounds to create a straight seam (see below).
The Ad-free Printable PDF for the Mystic Trail Potholder is available as an individual PDF pattern on Ravelry or Etsy; or as a Crochet Along bundle, which includes written instructions for all 13 patterns on Ravelry or Etsy!
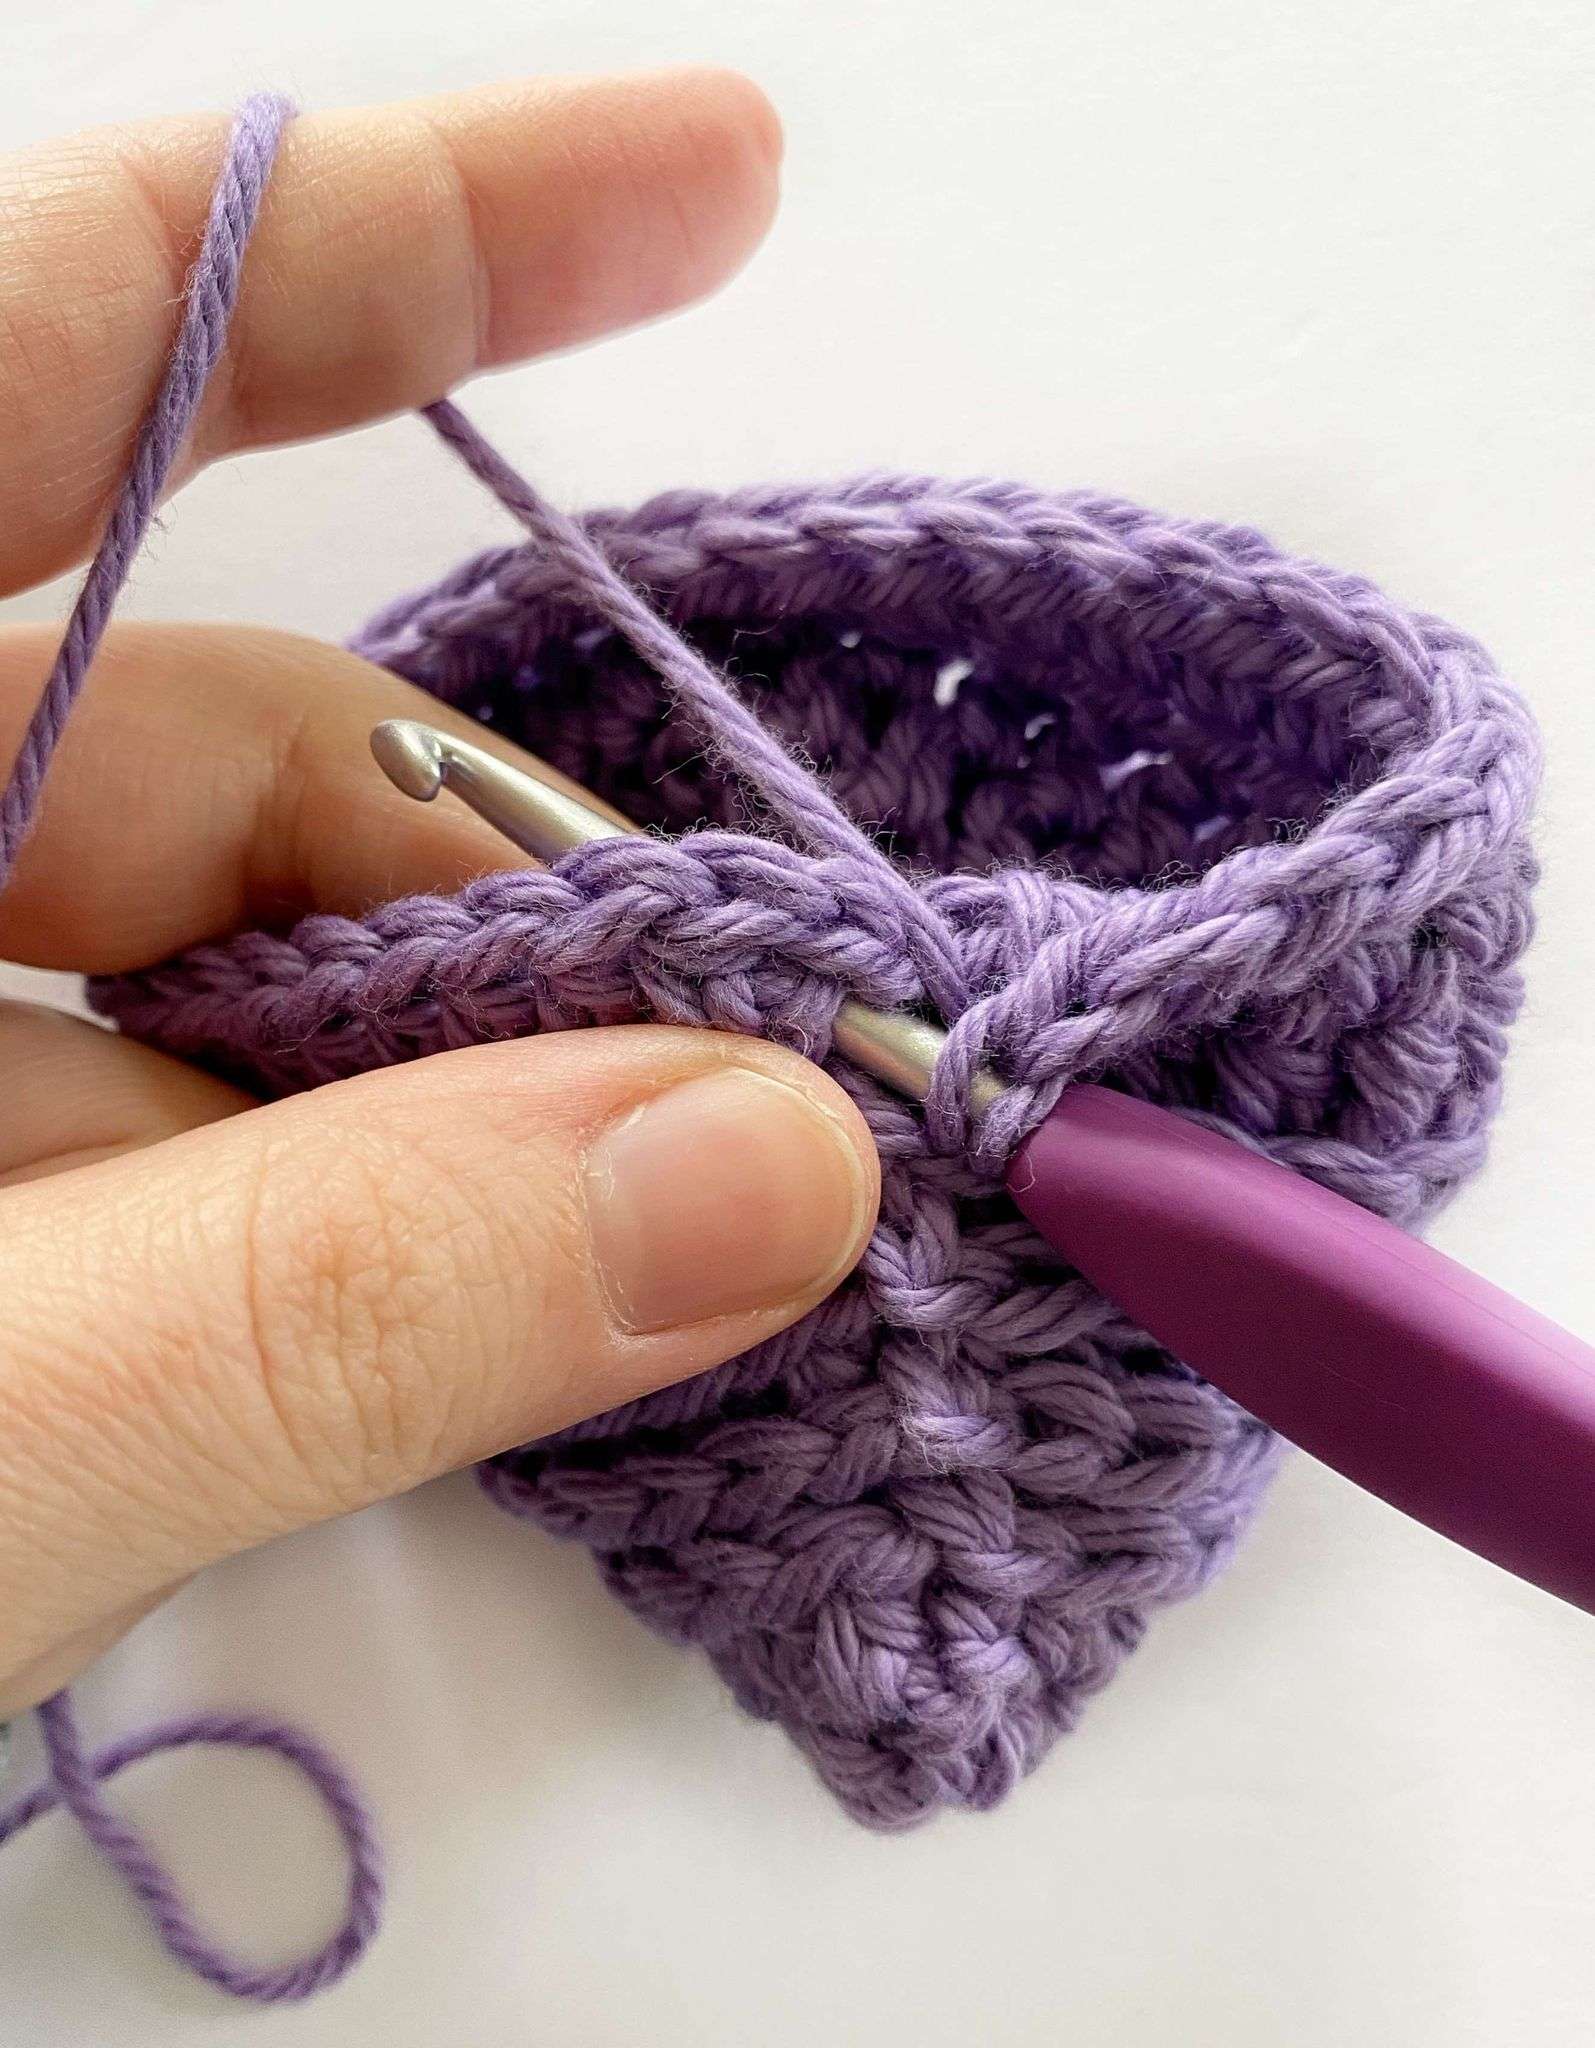
Half Double Crochet in Third Loop Only Tutorial:
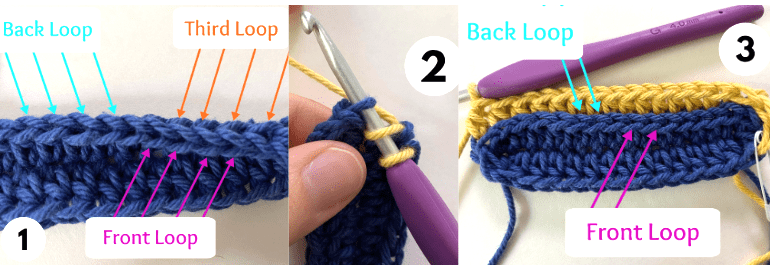
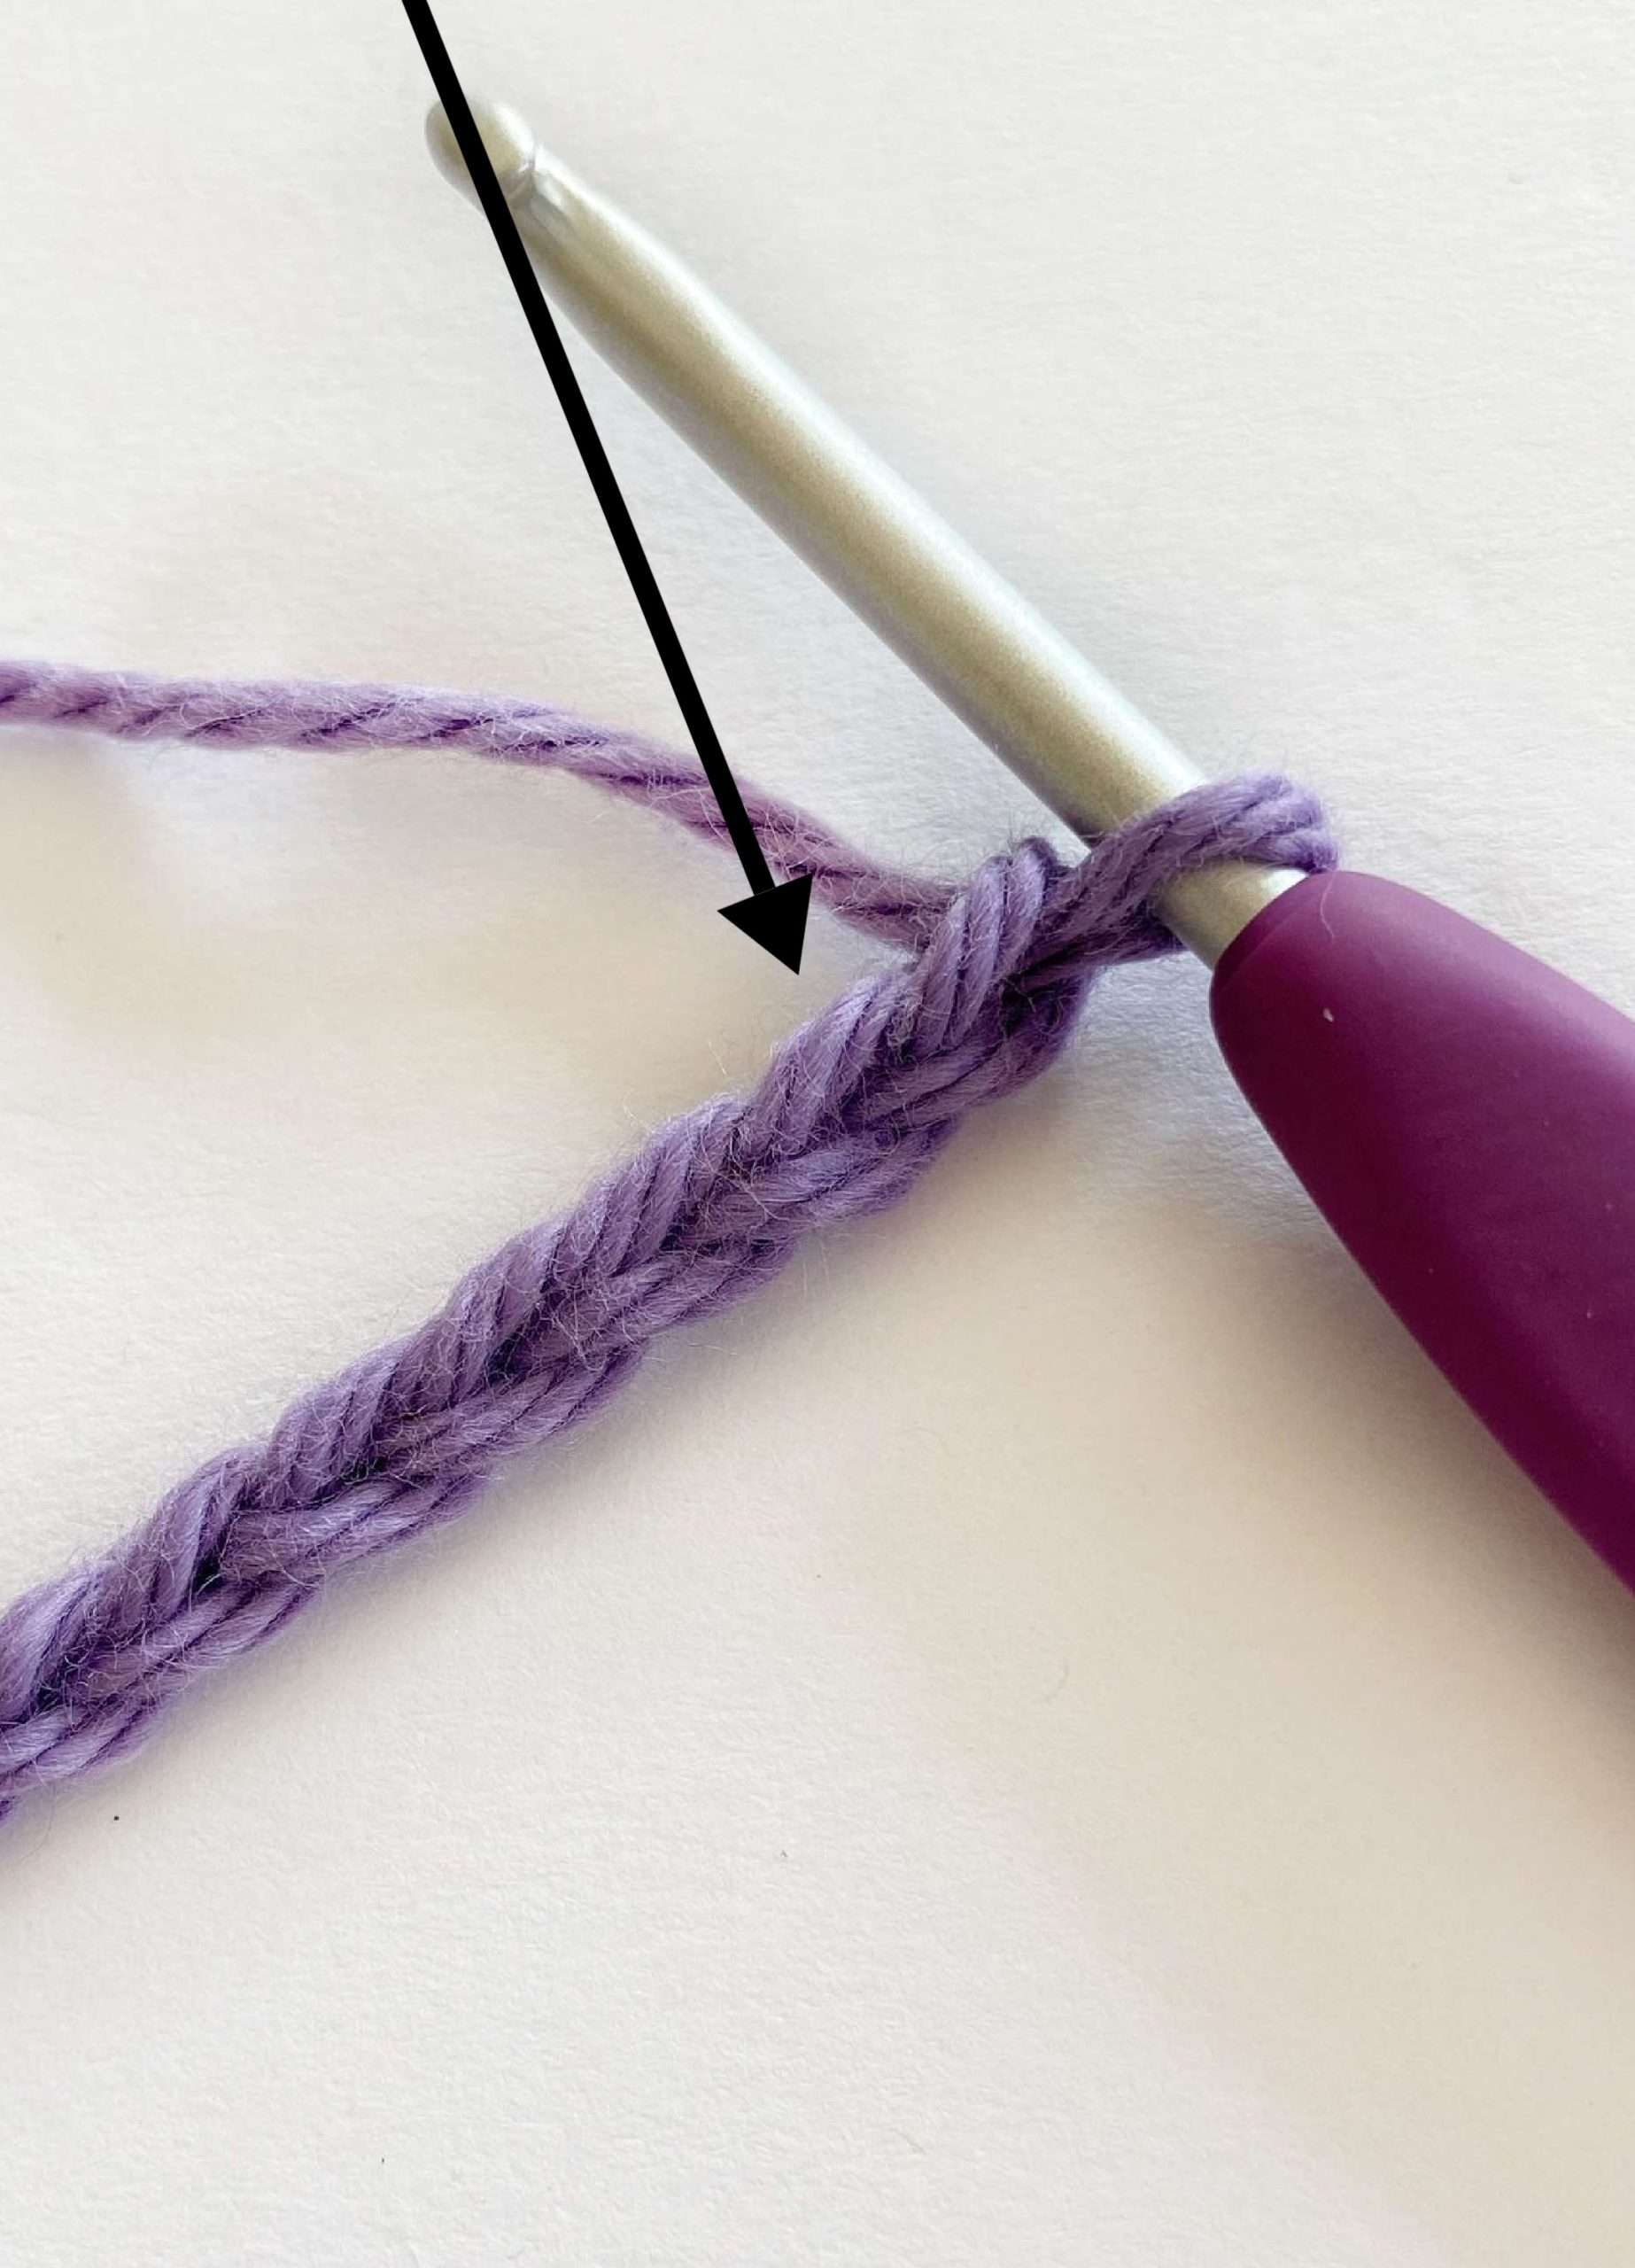
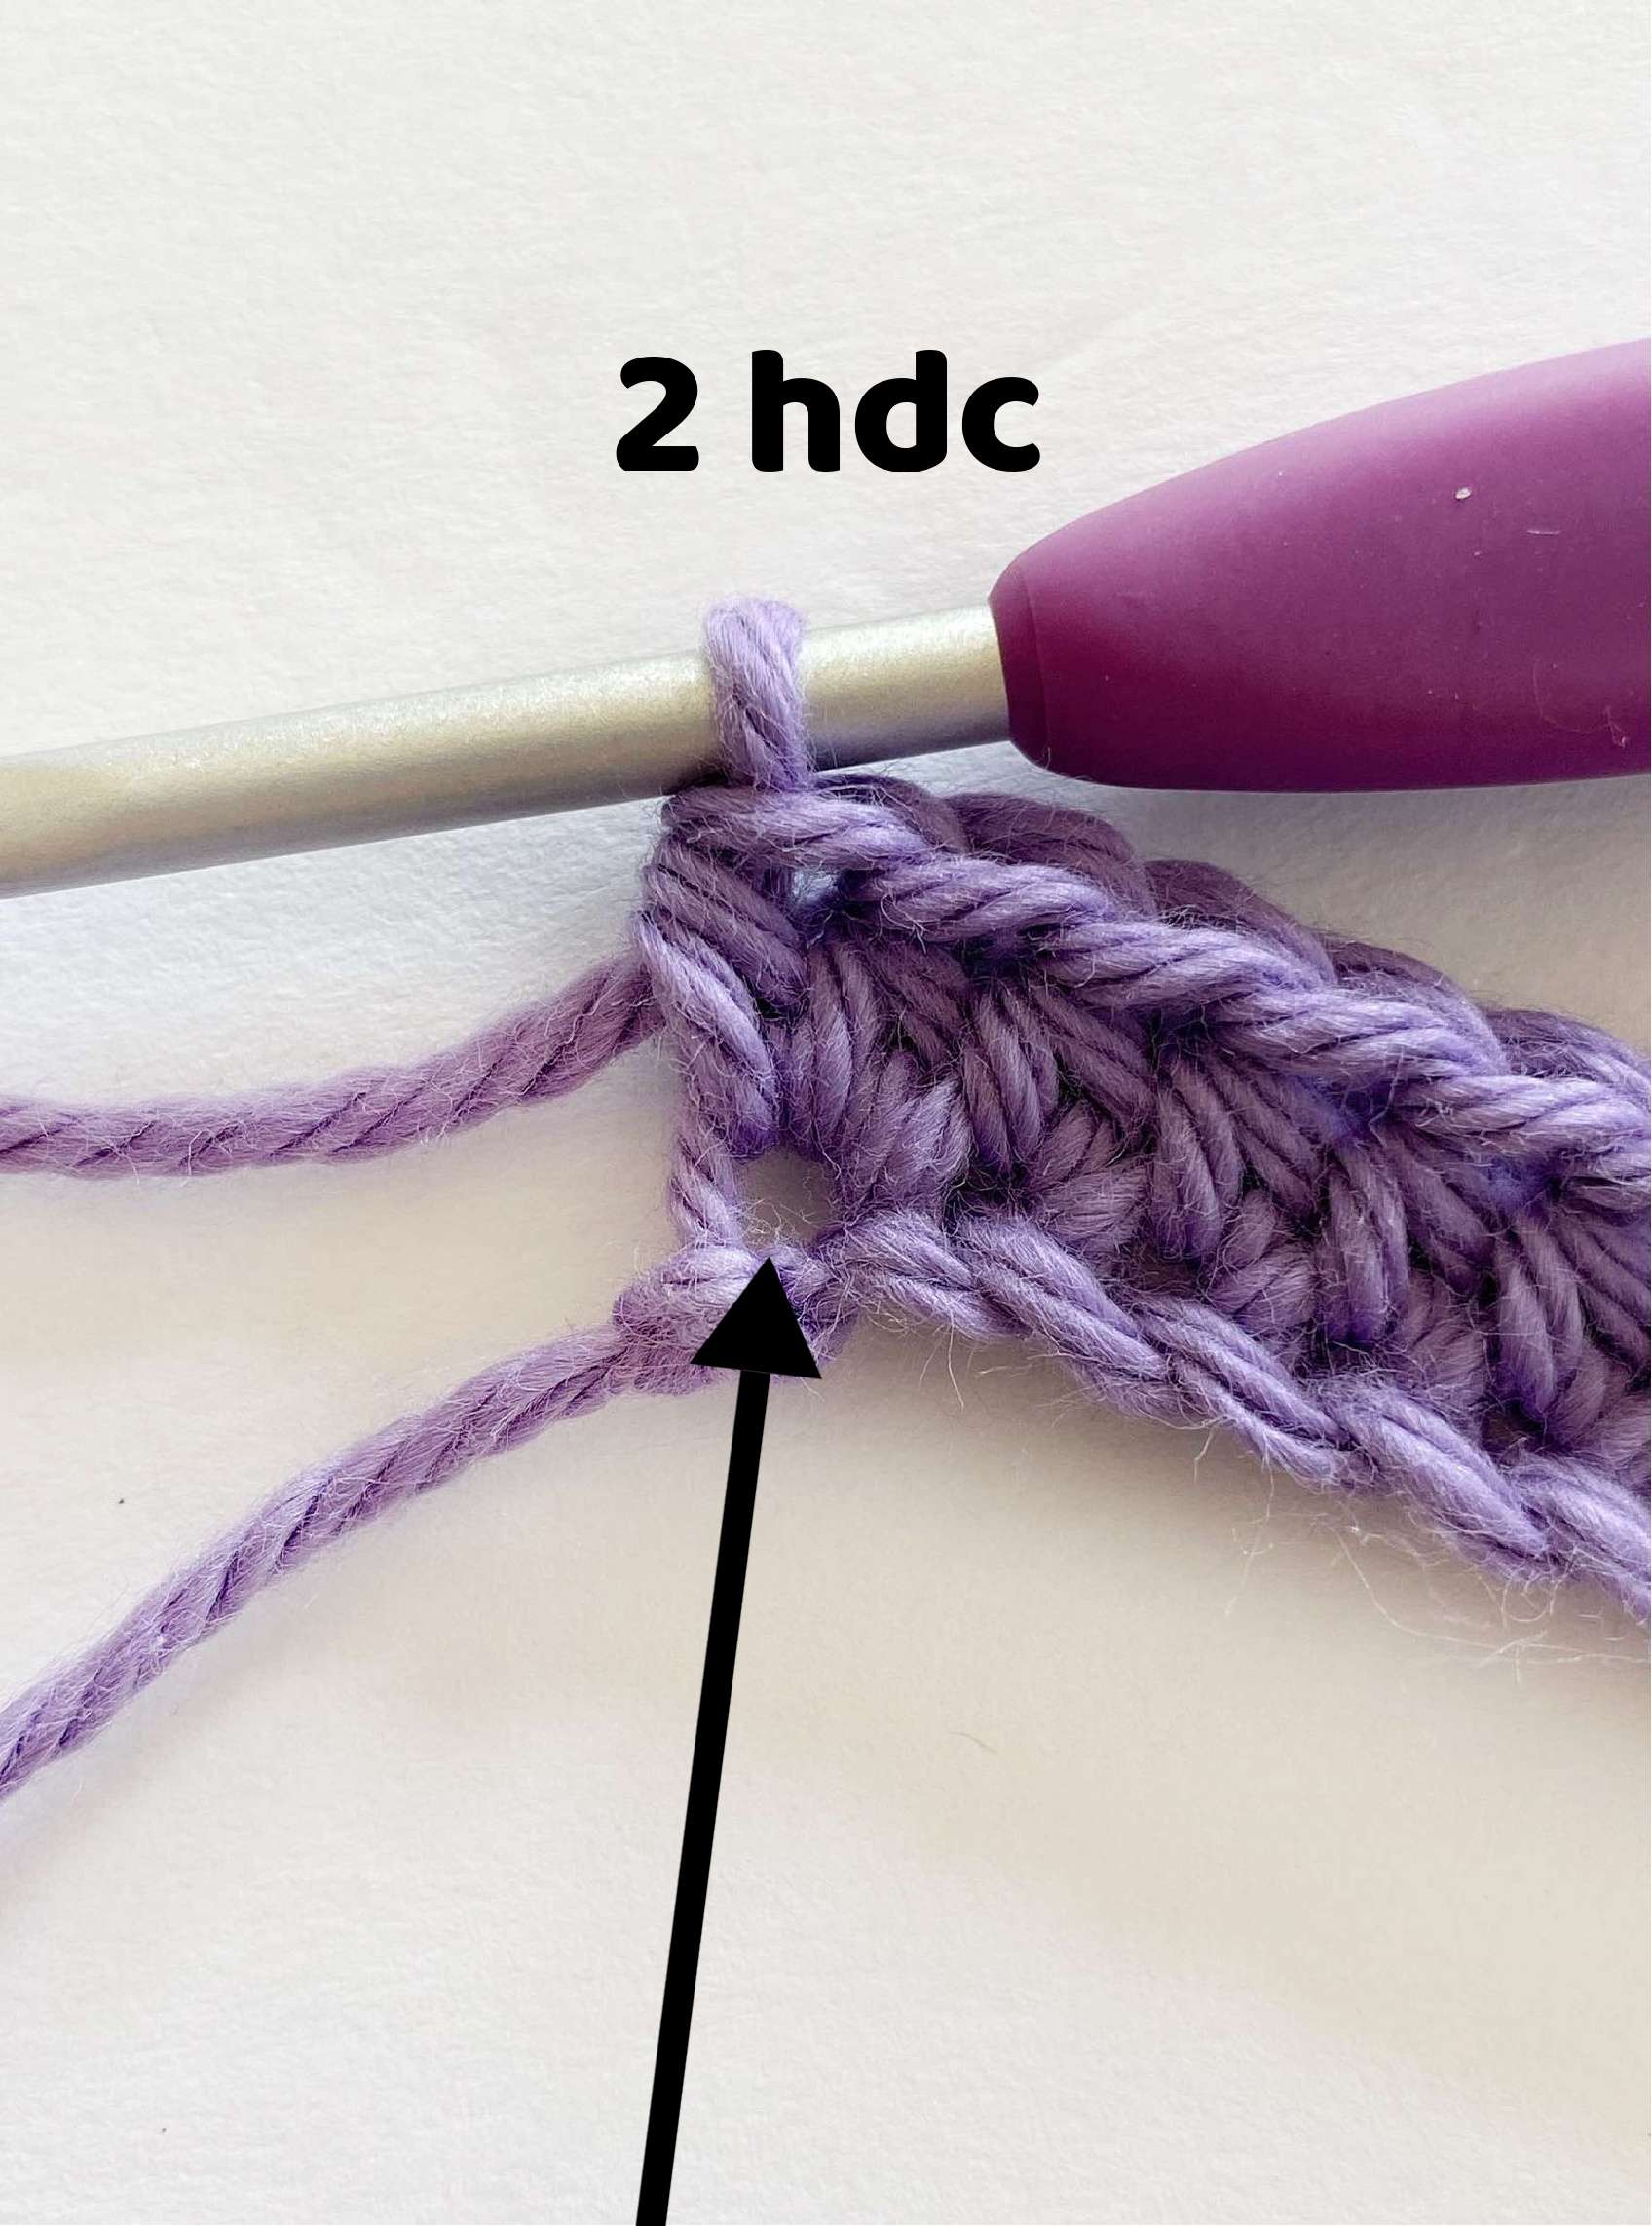
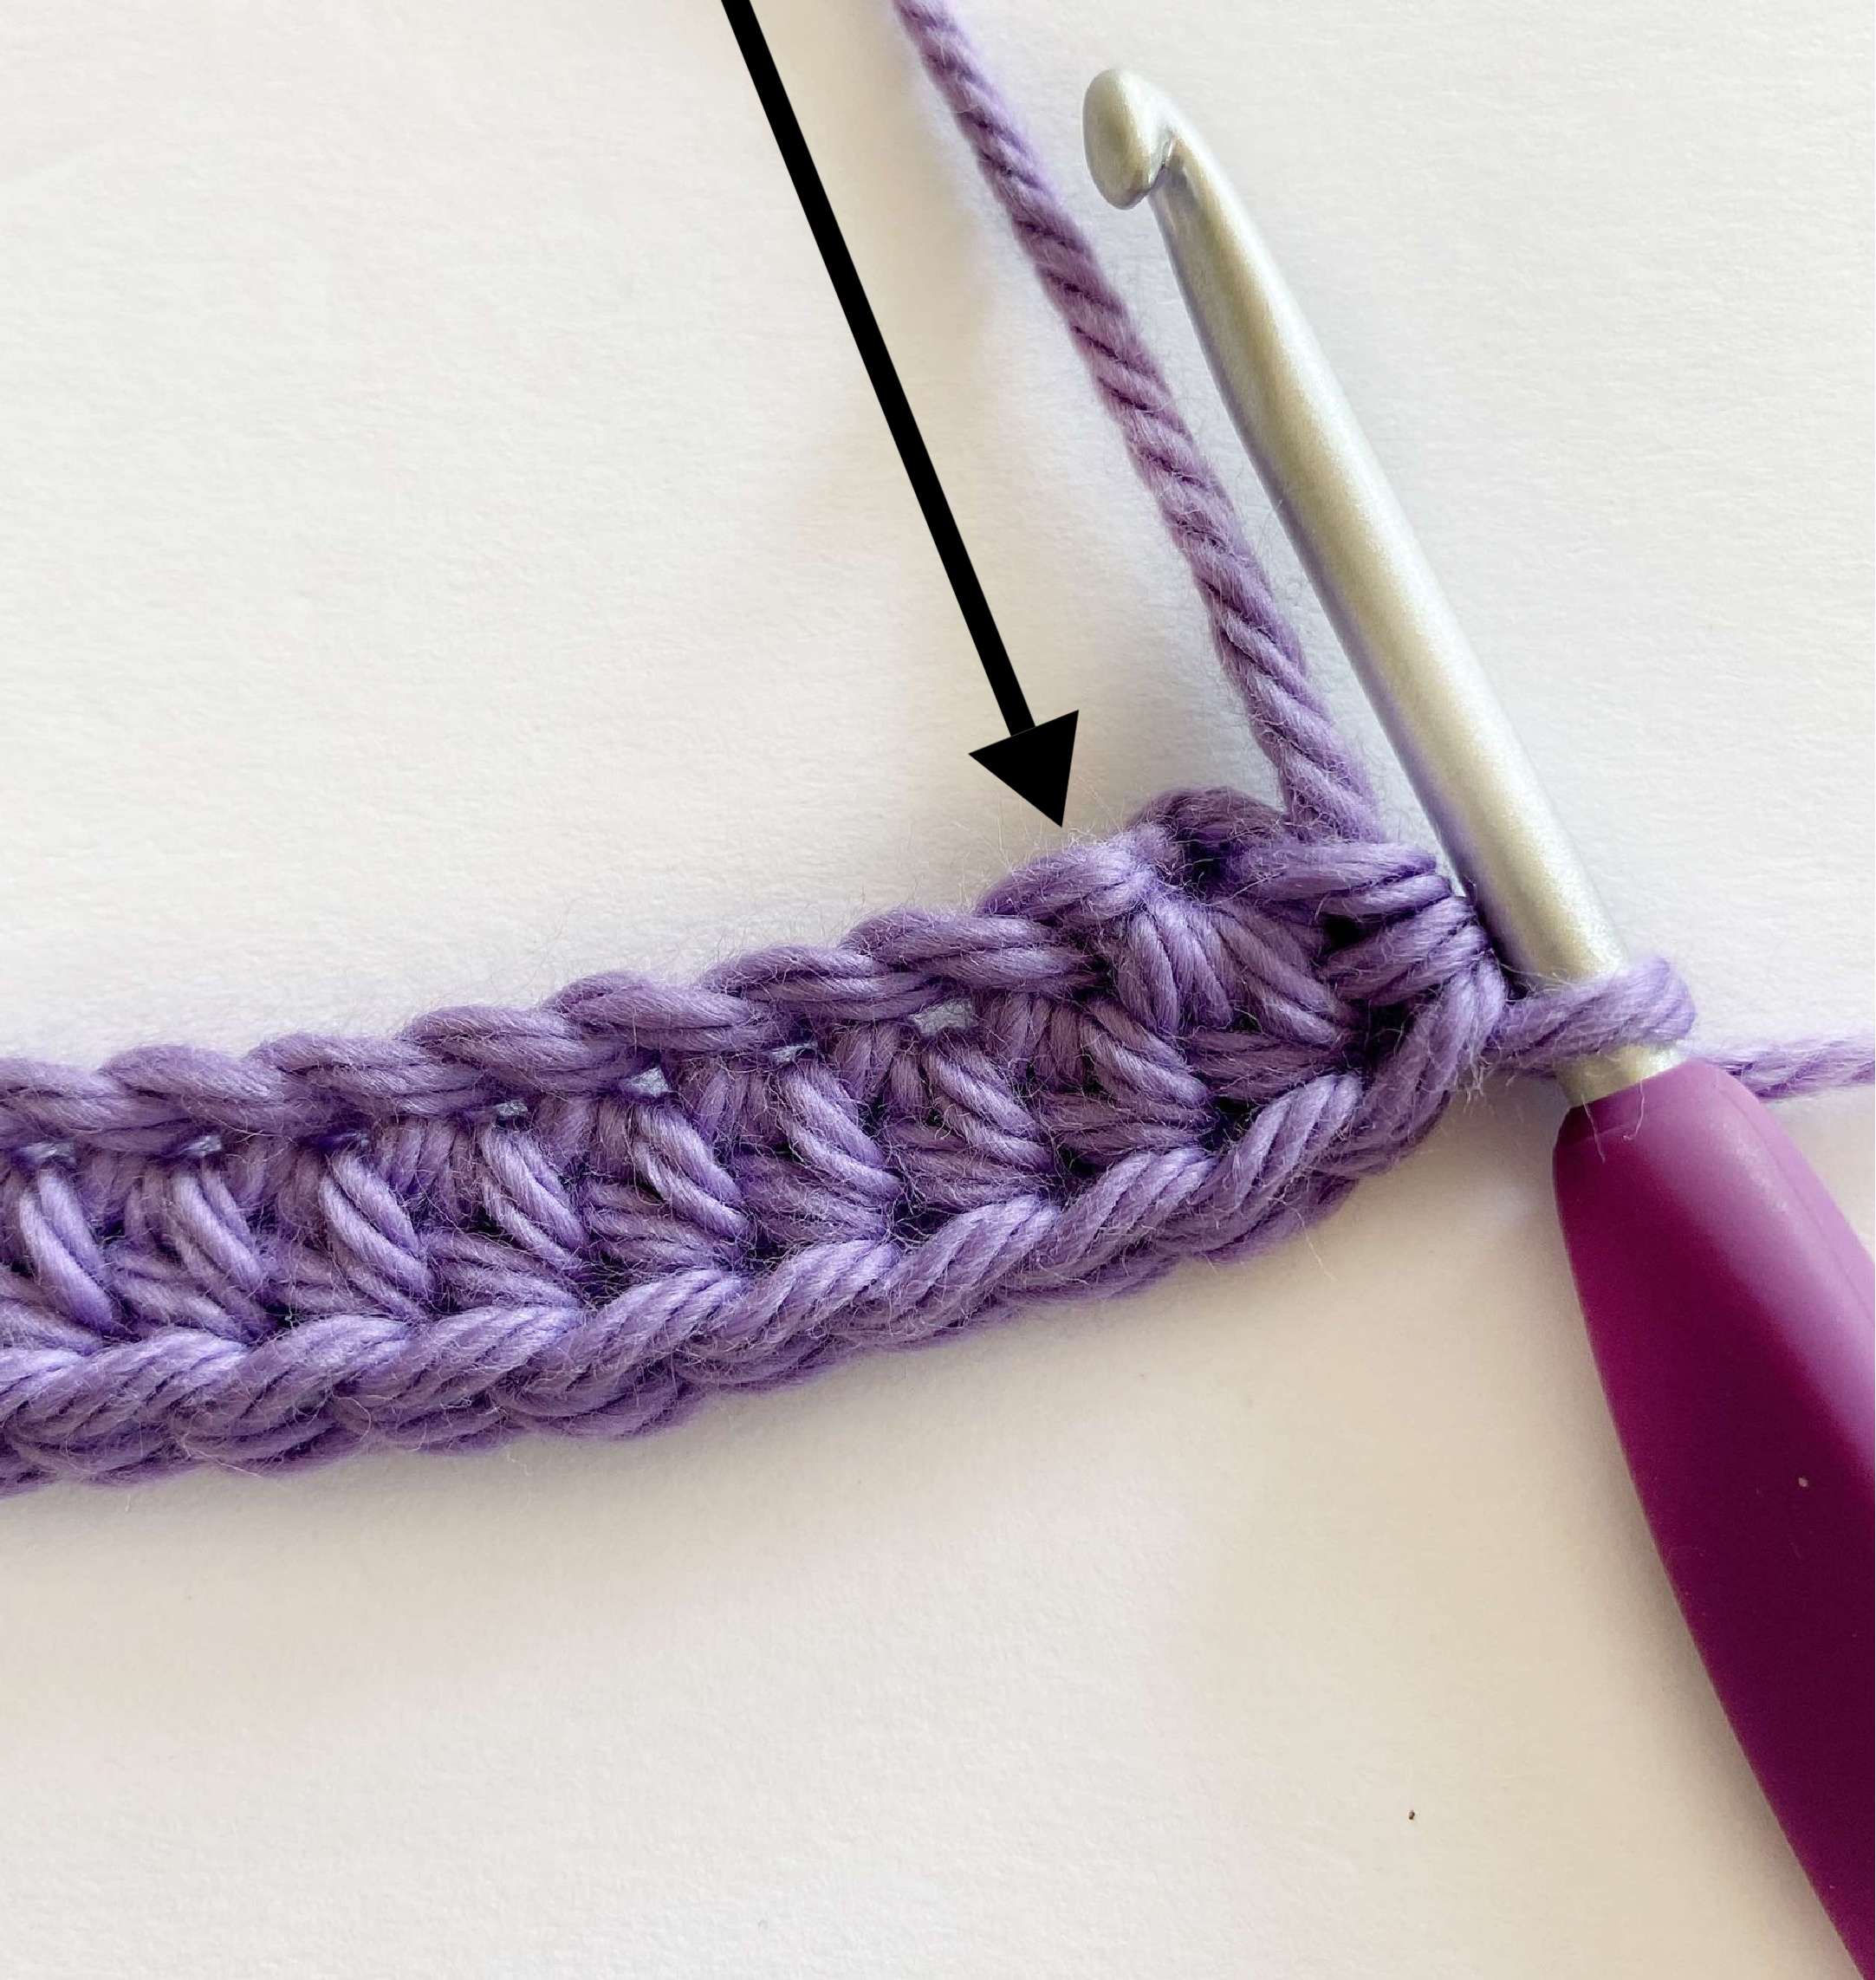
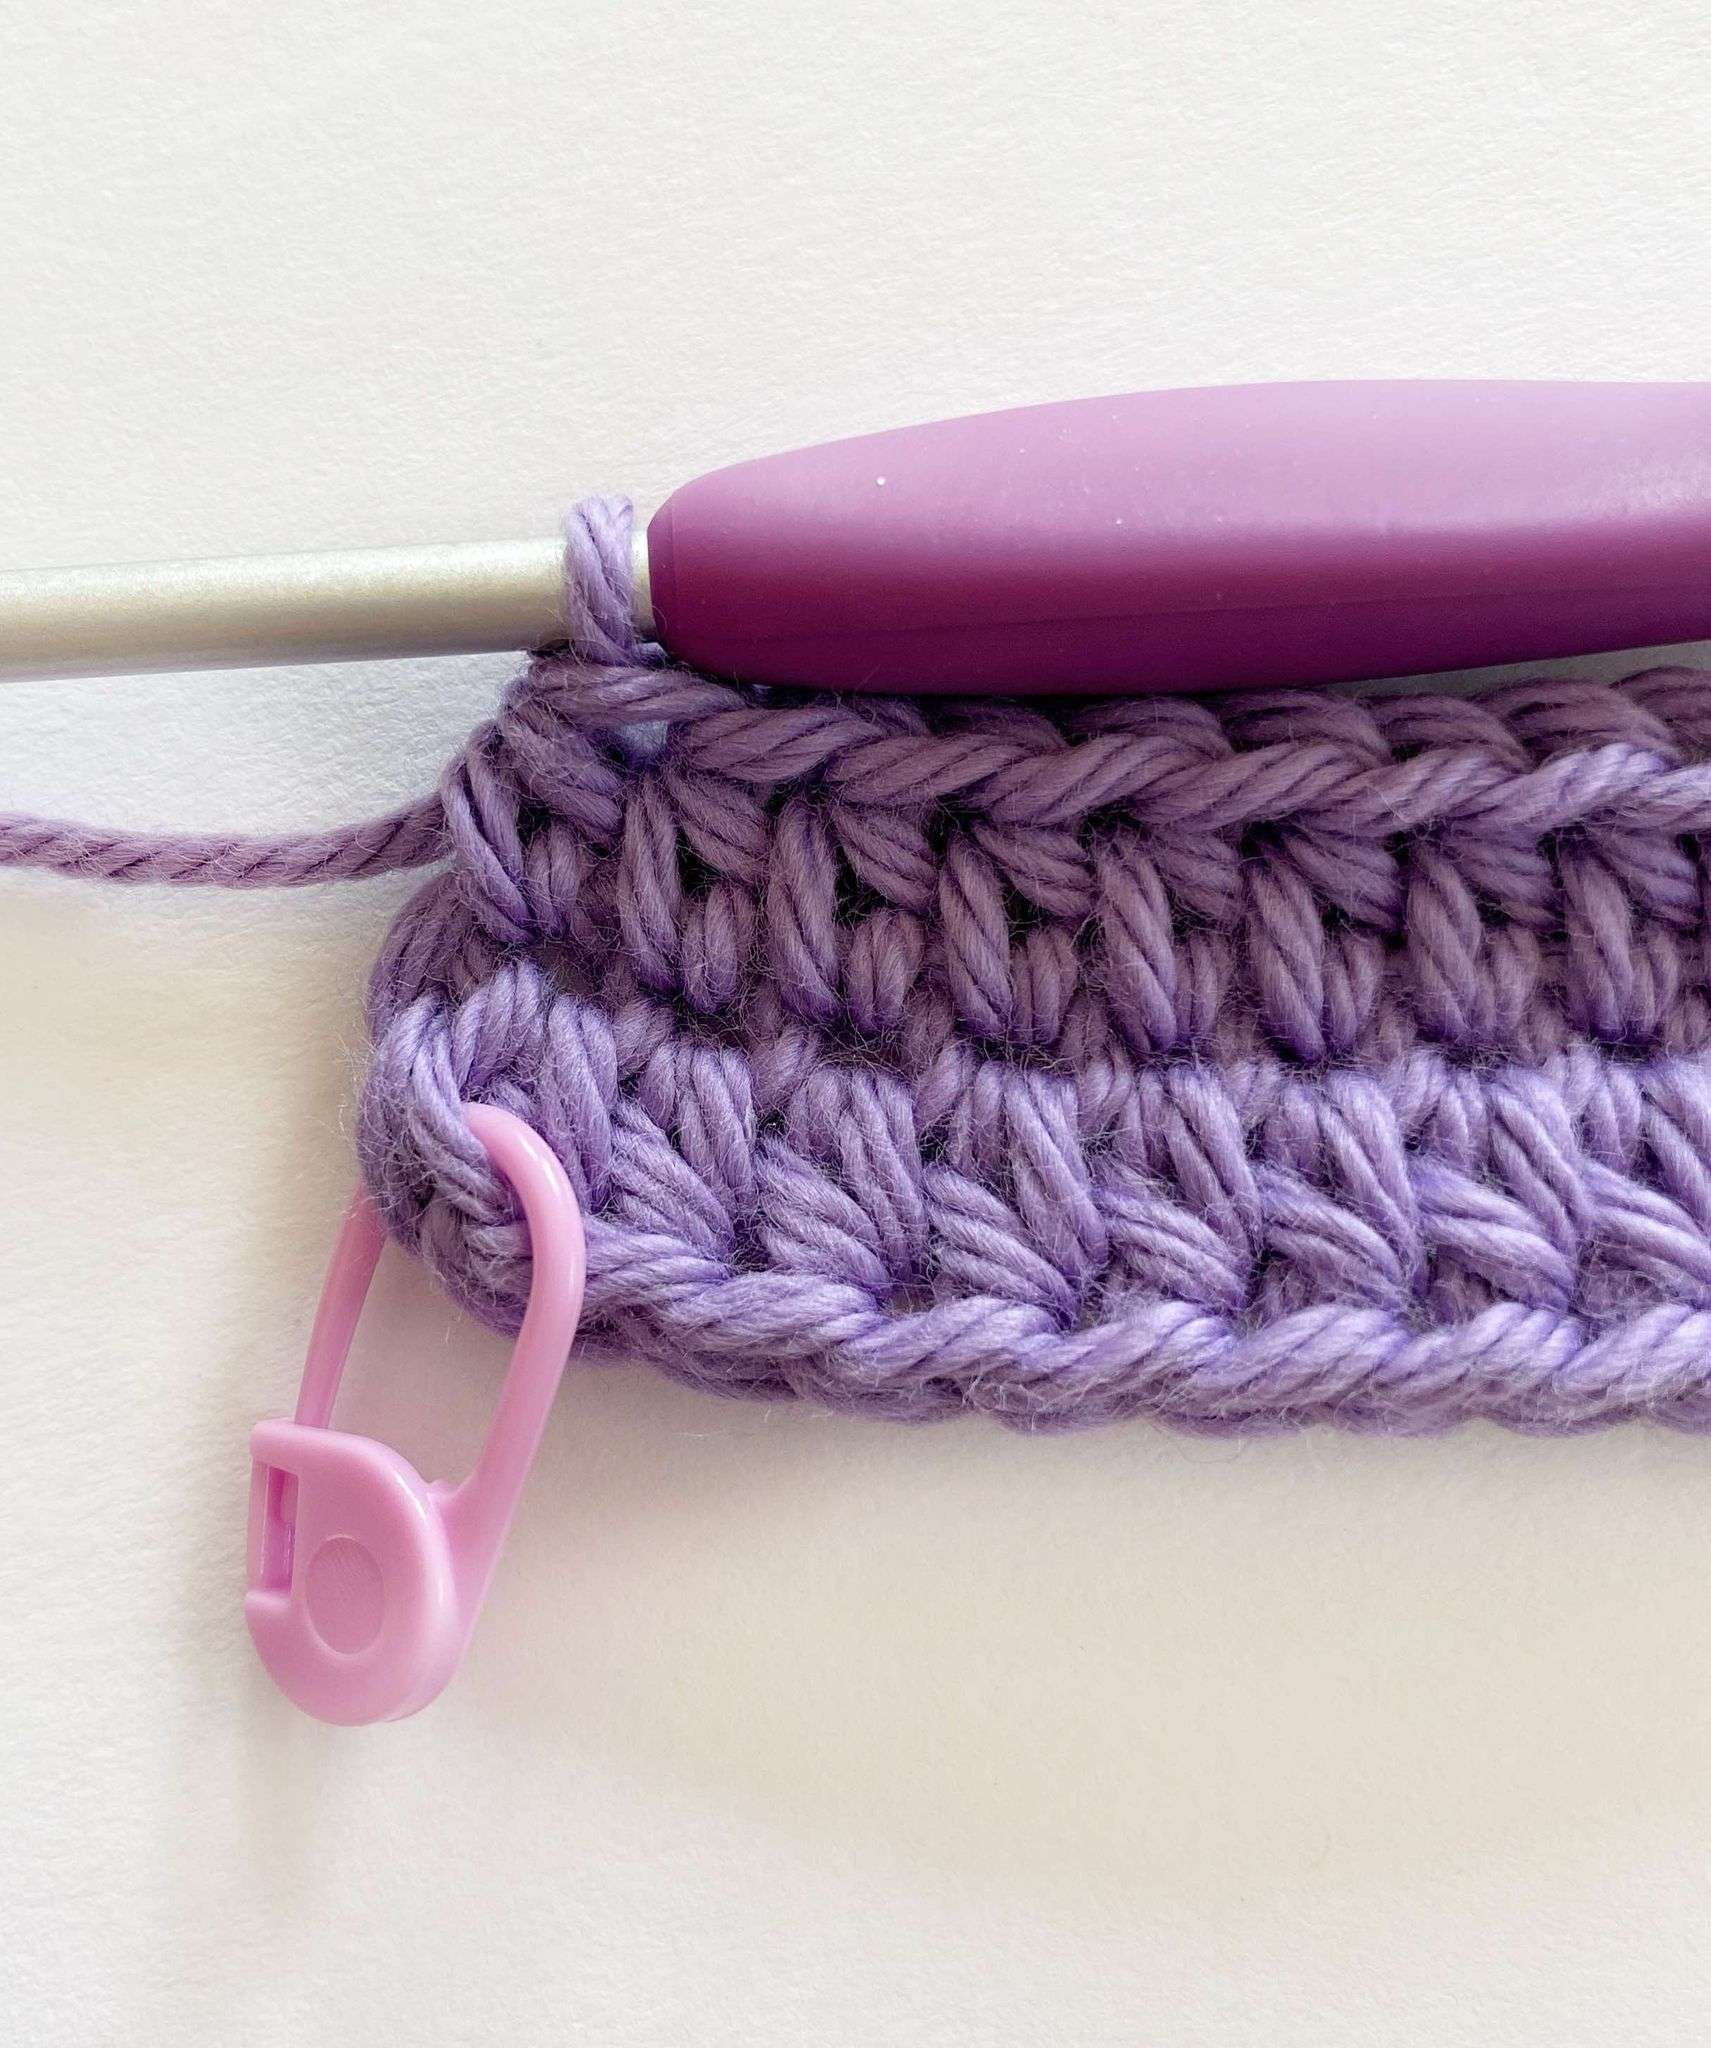
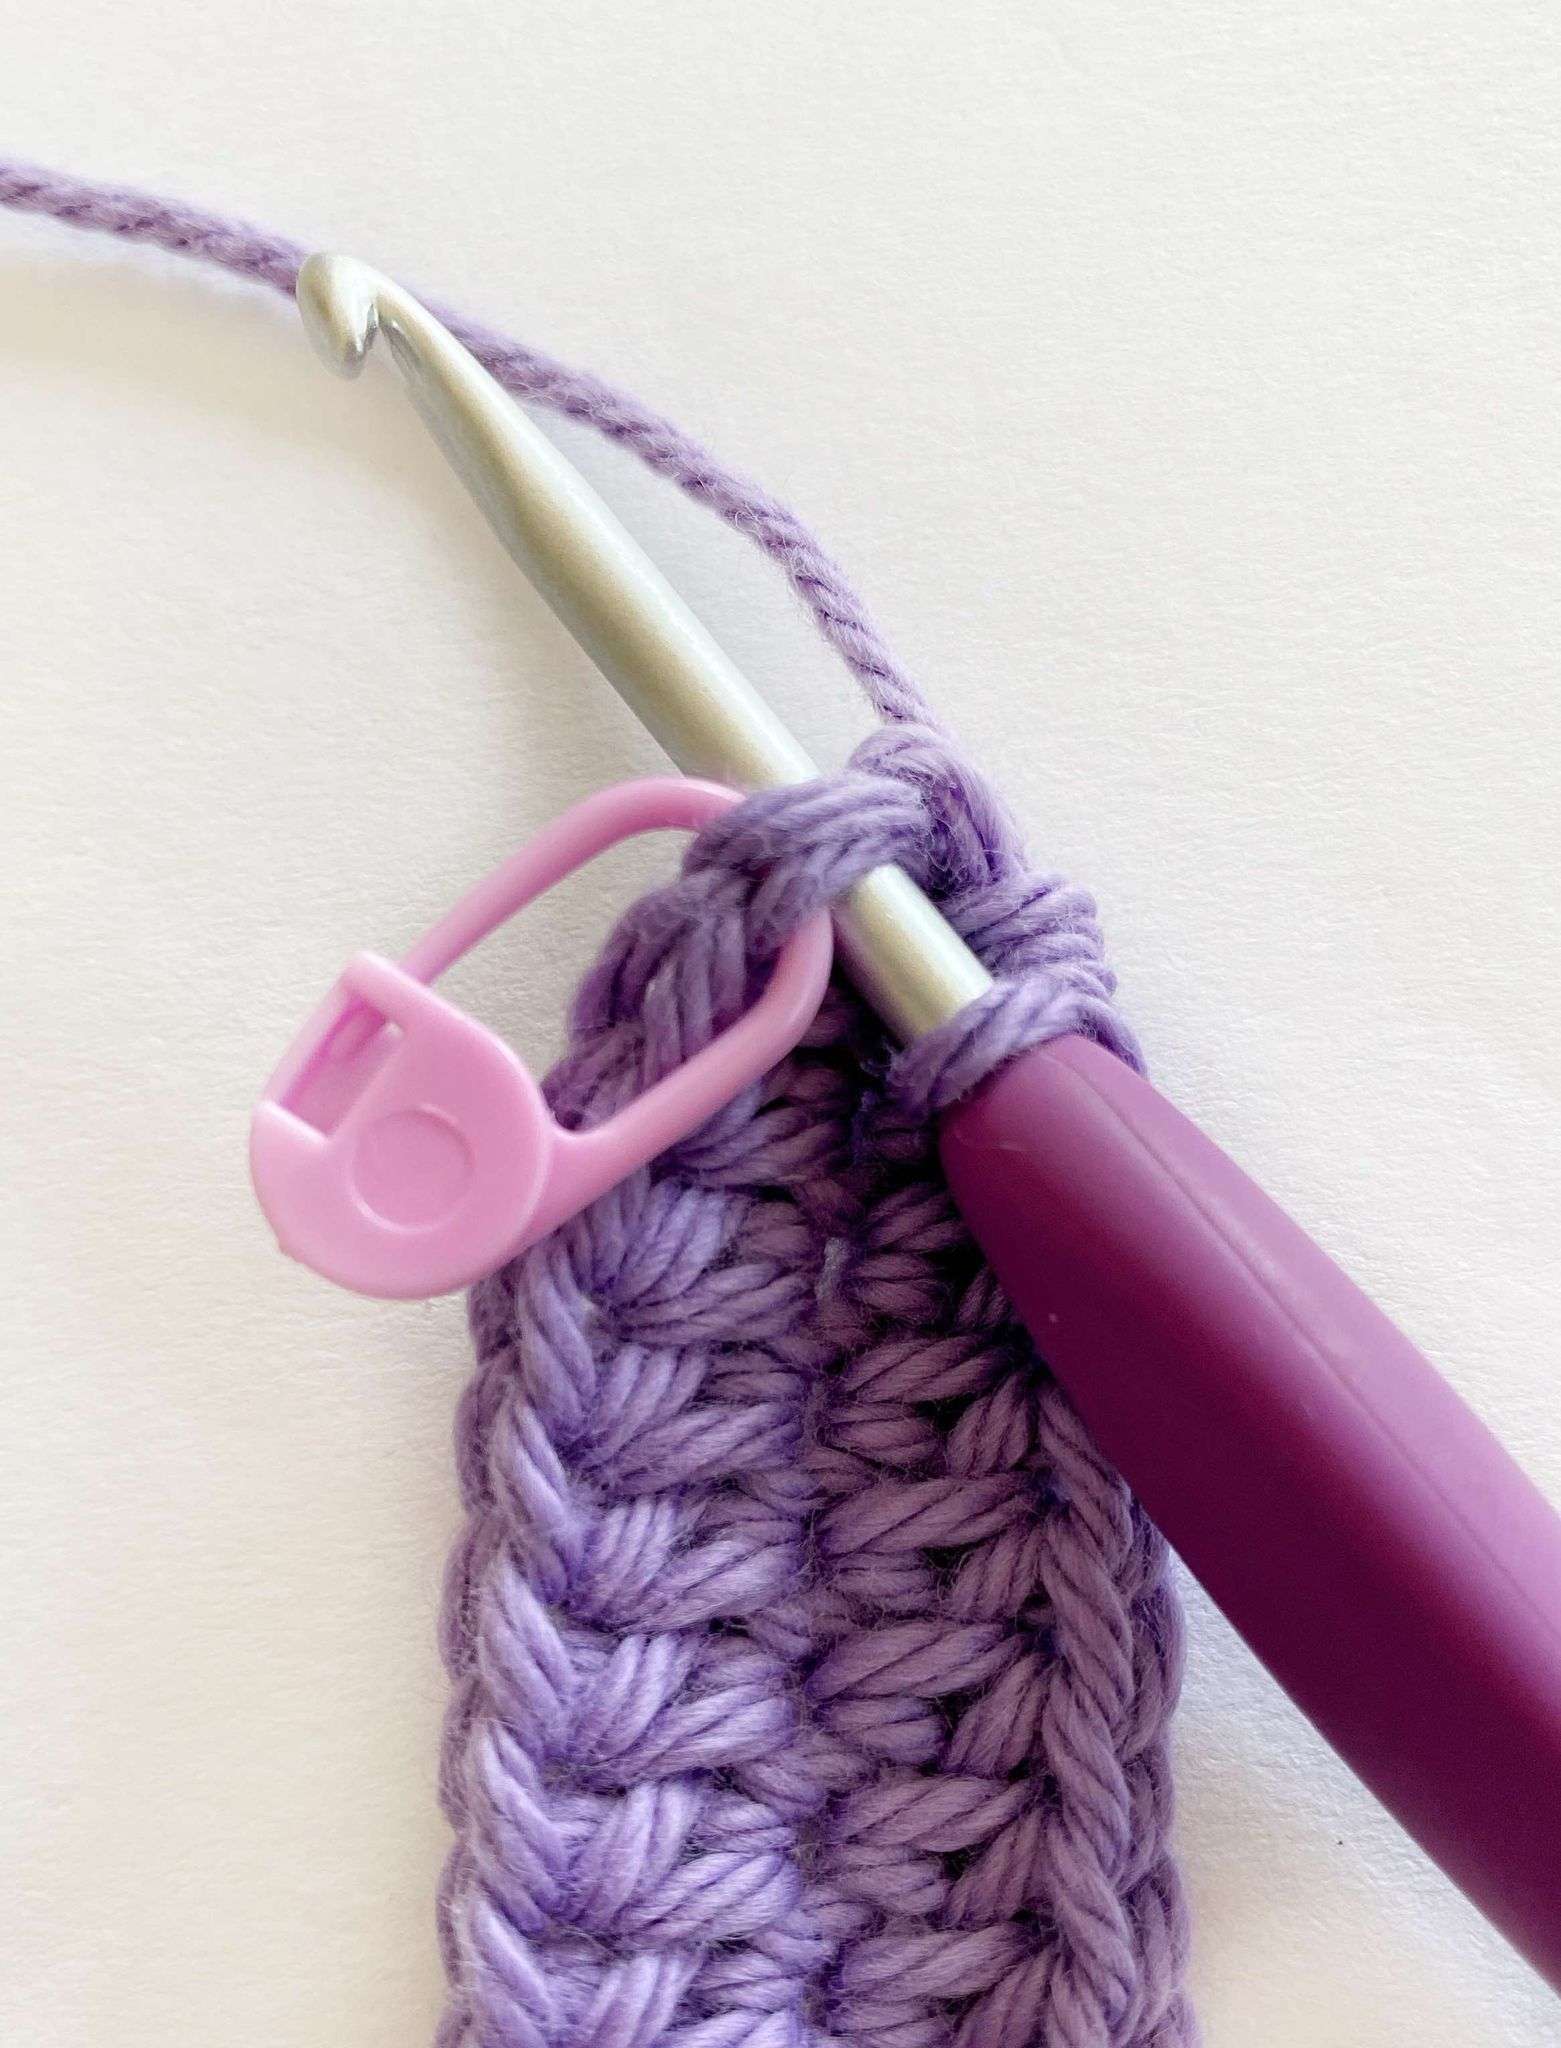
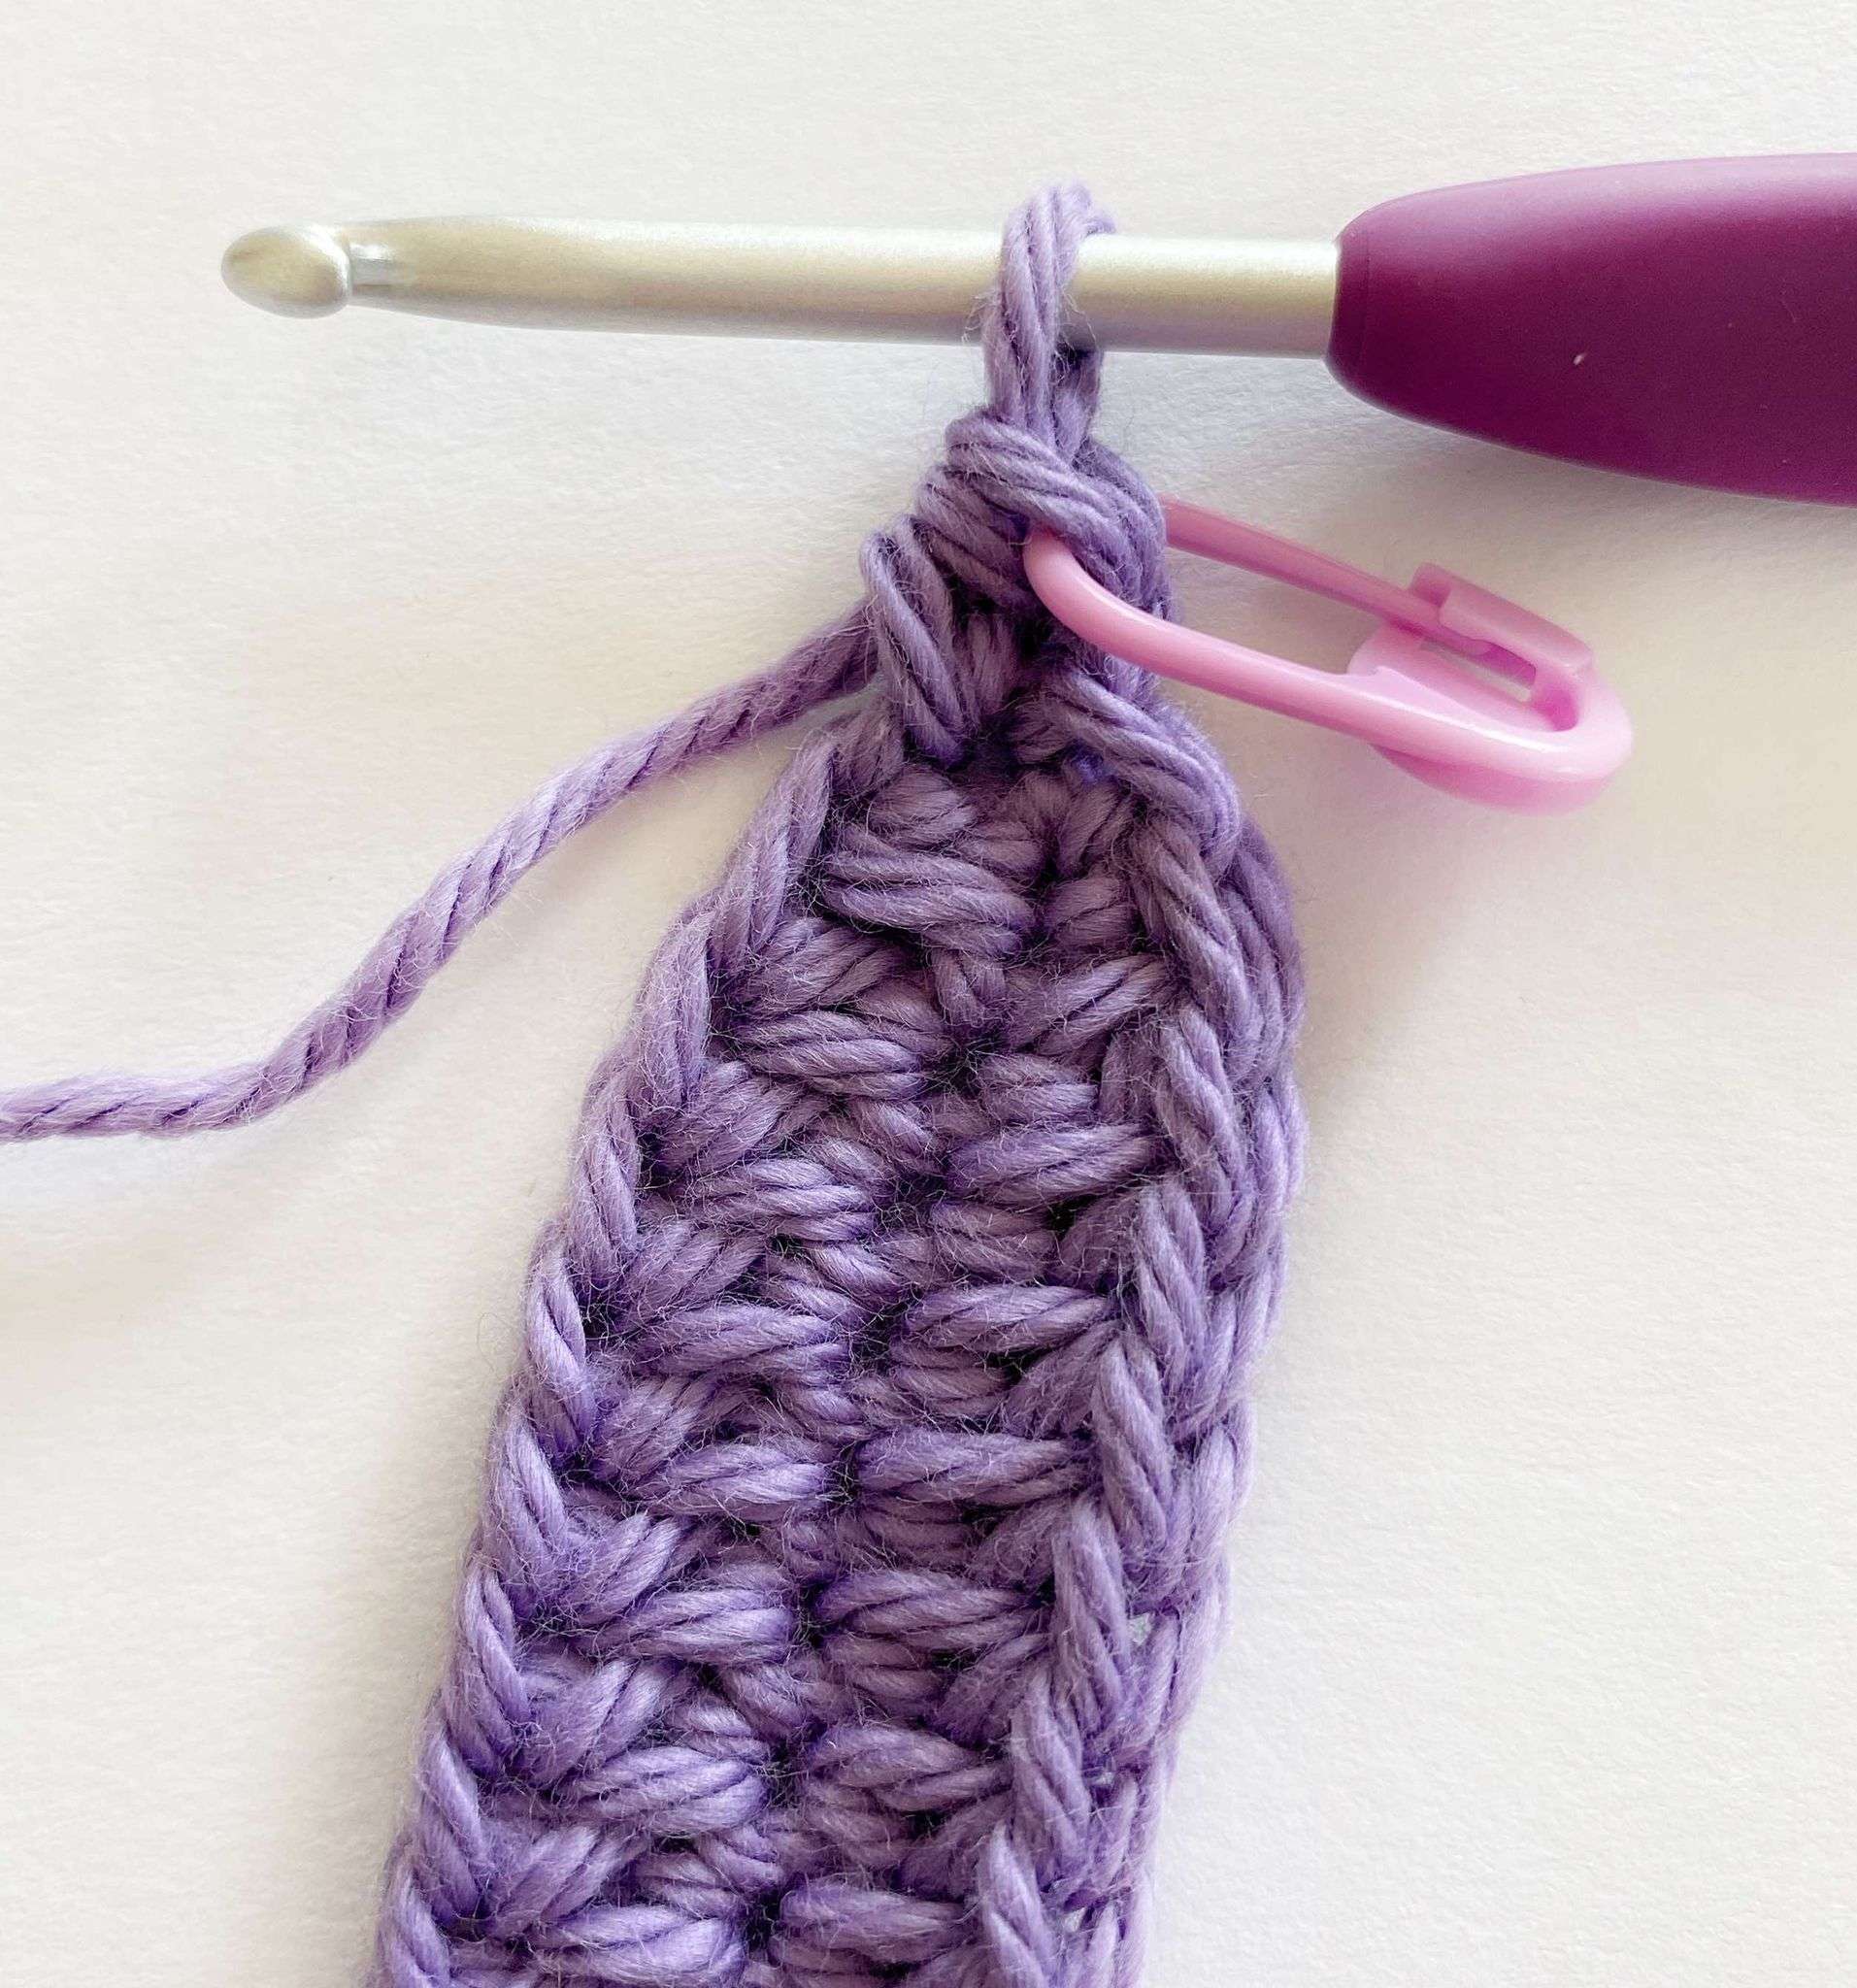
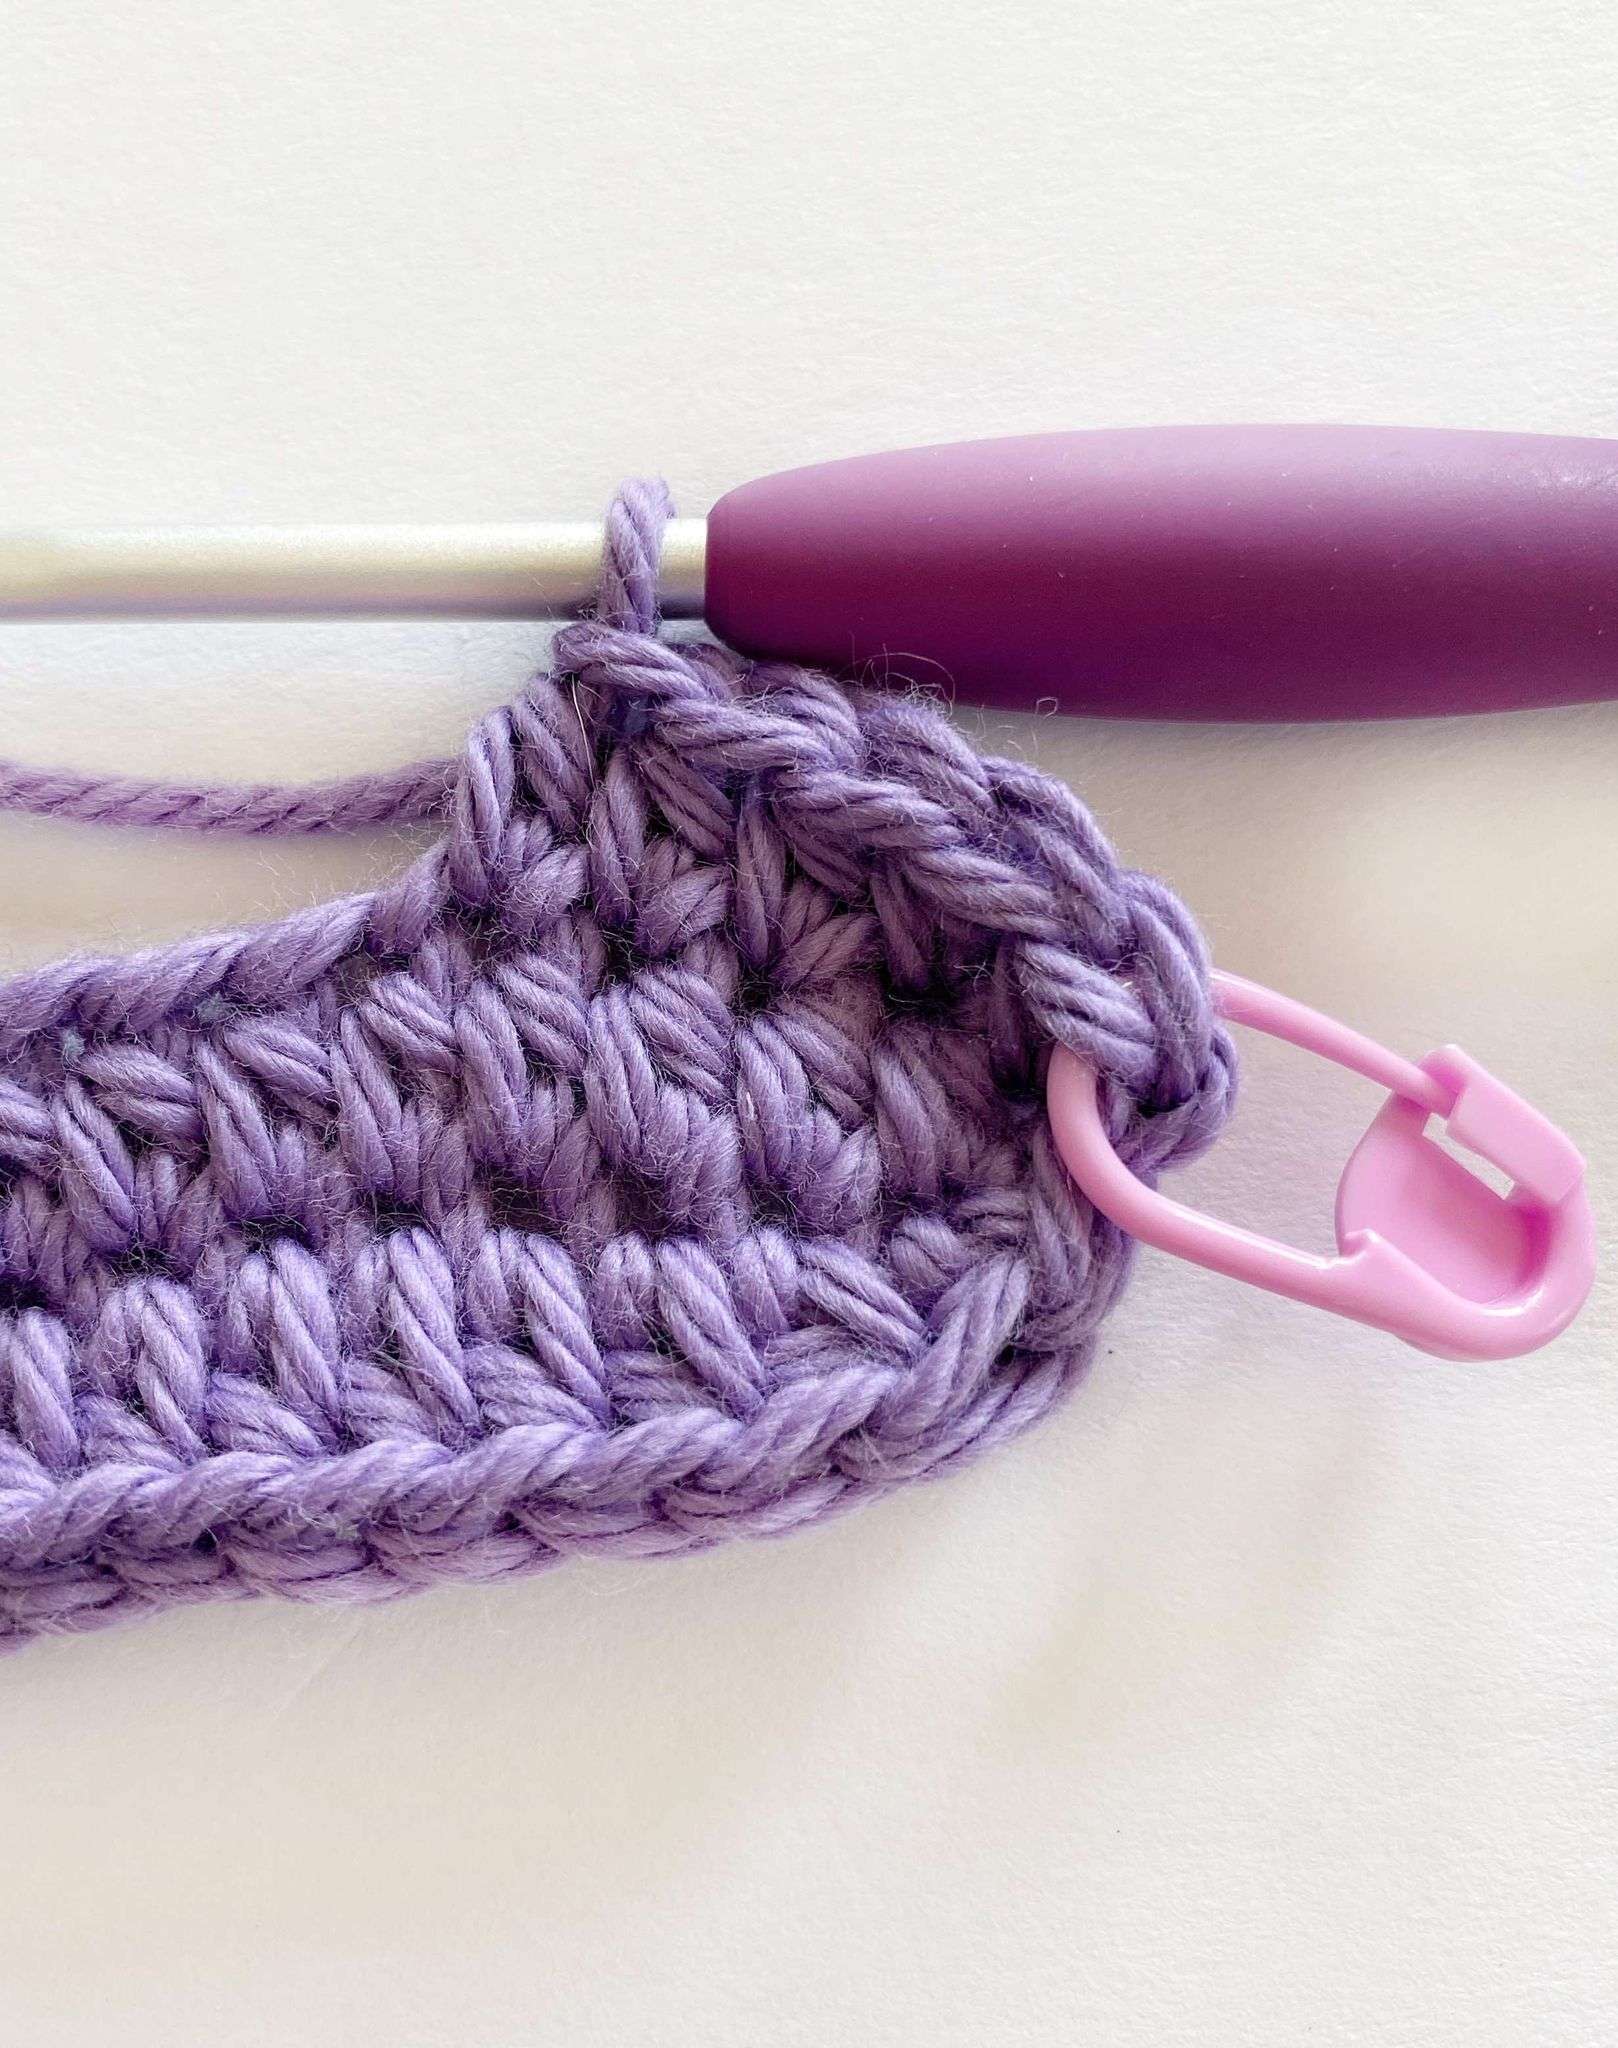
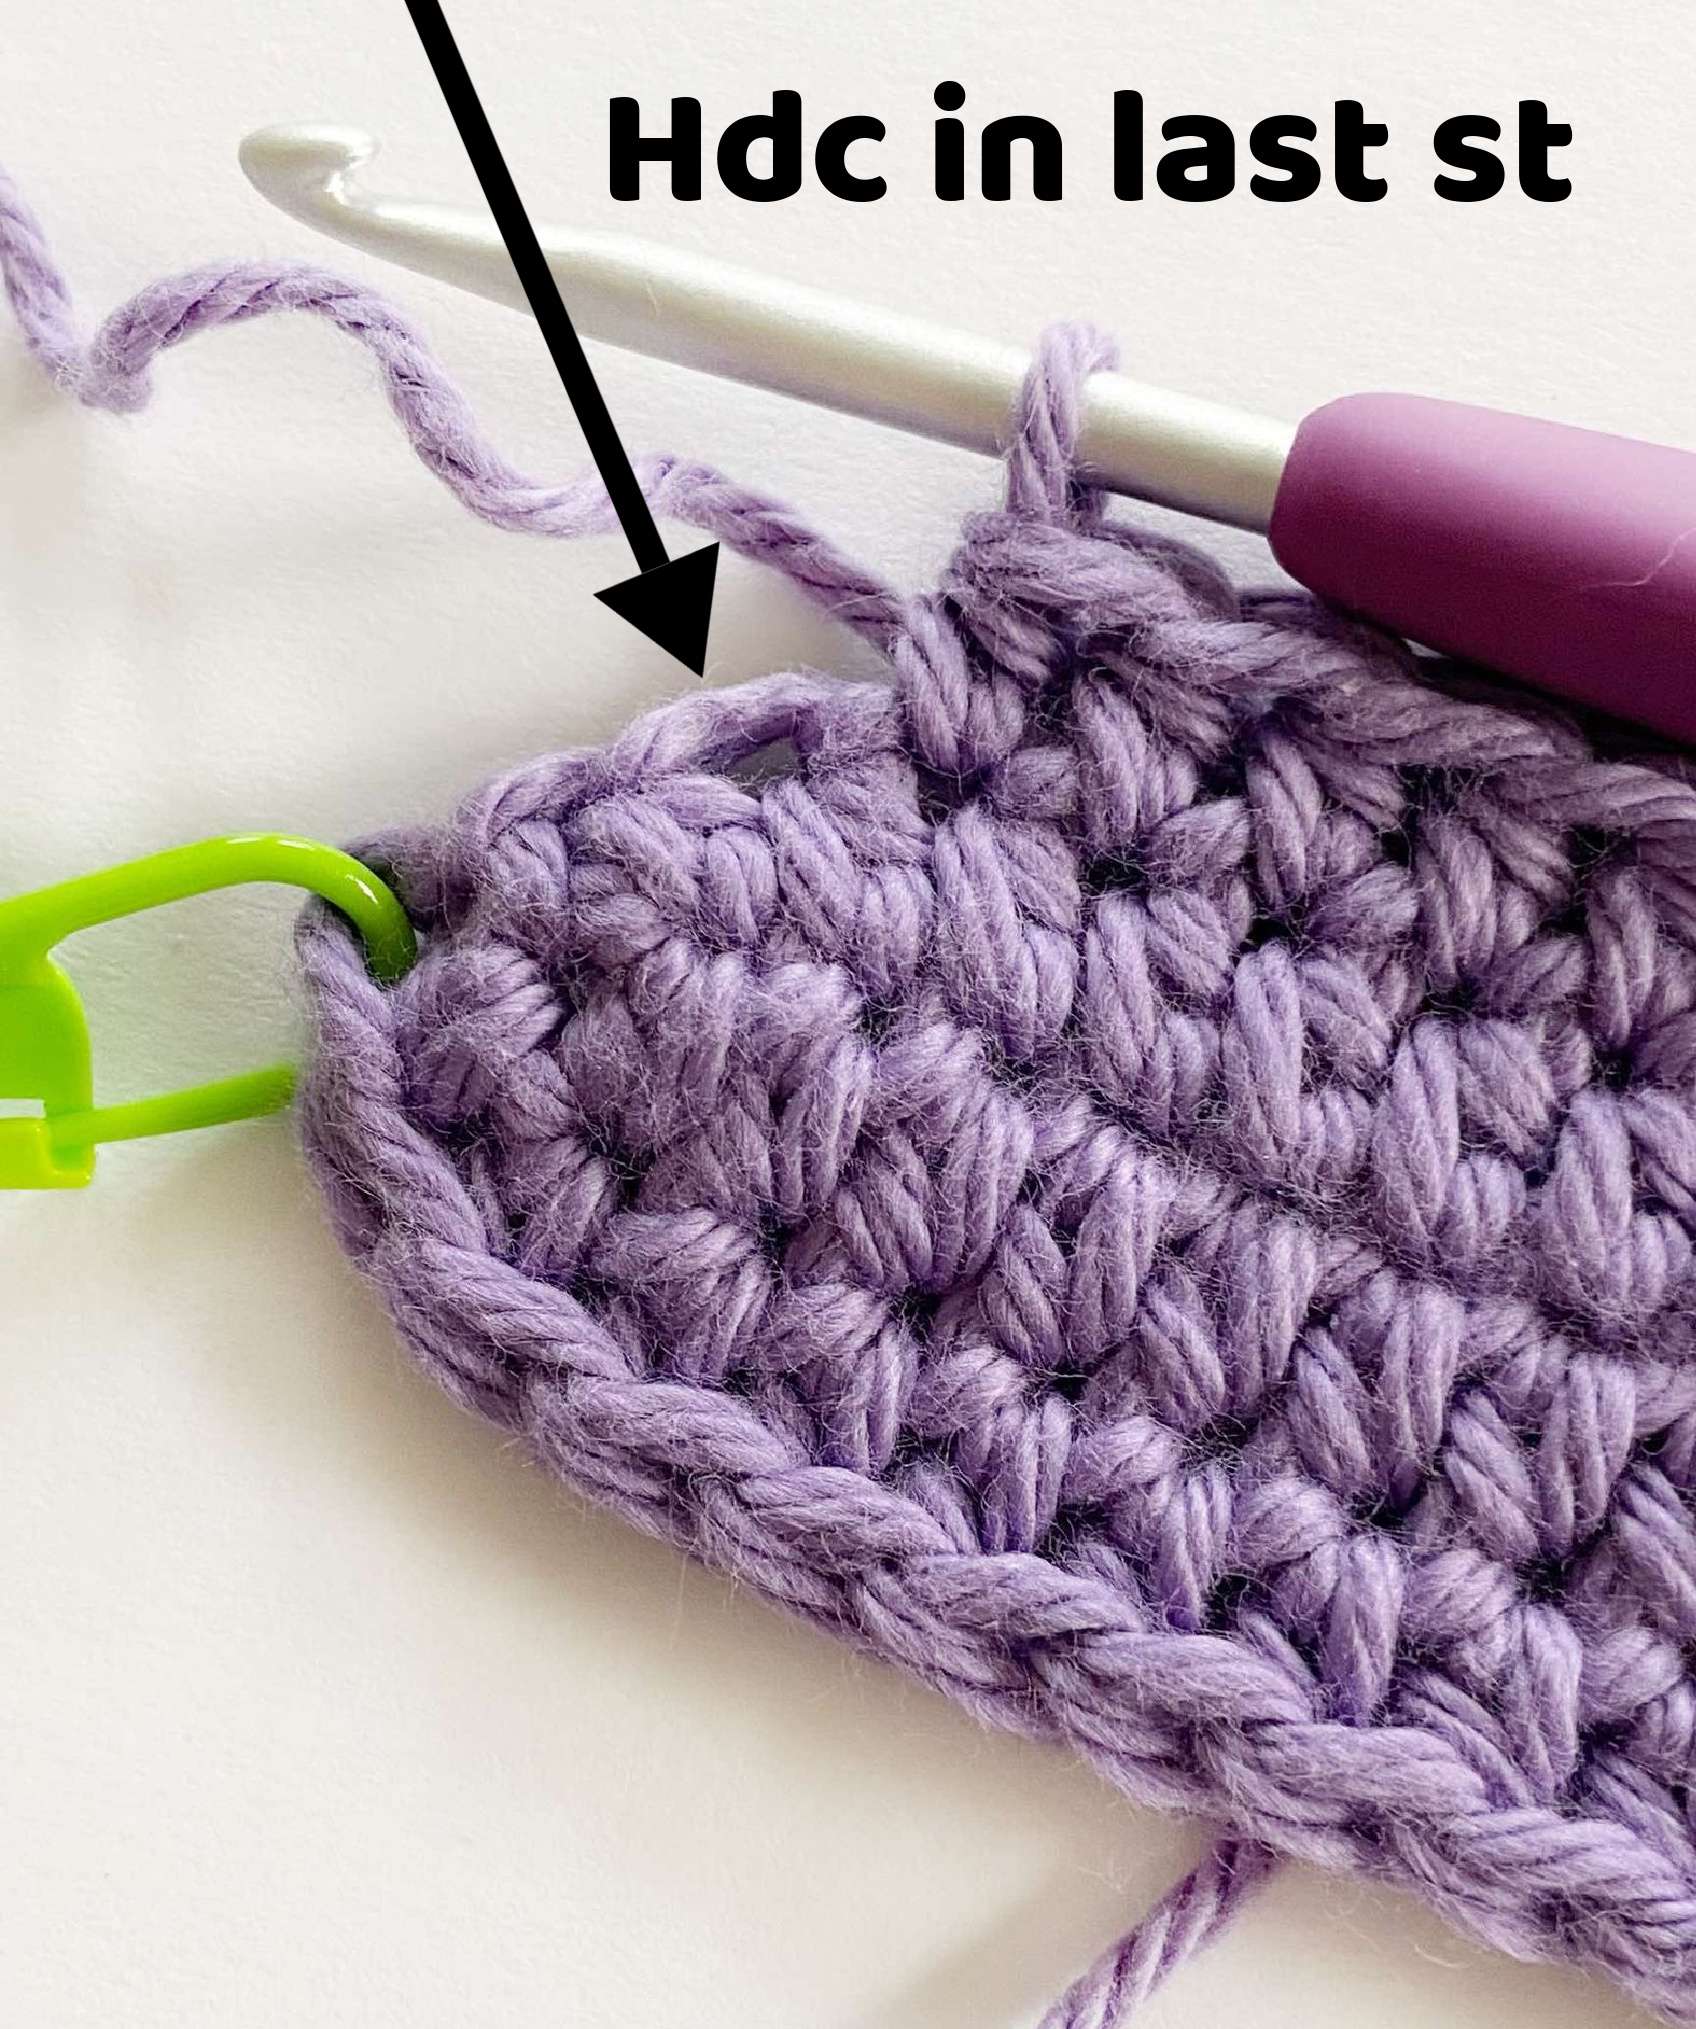
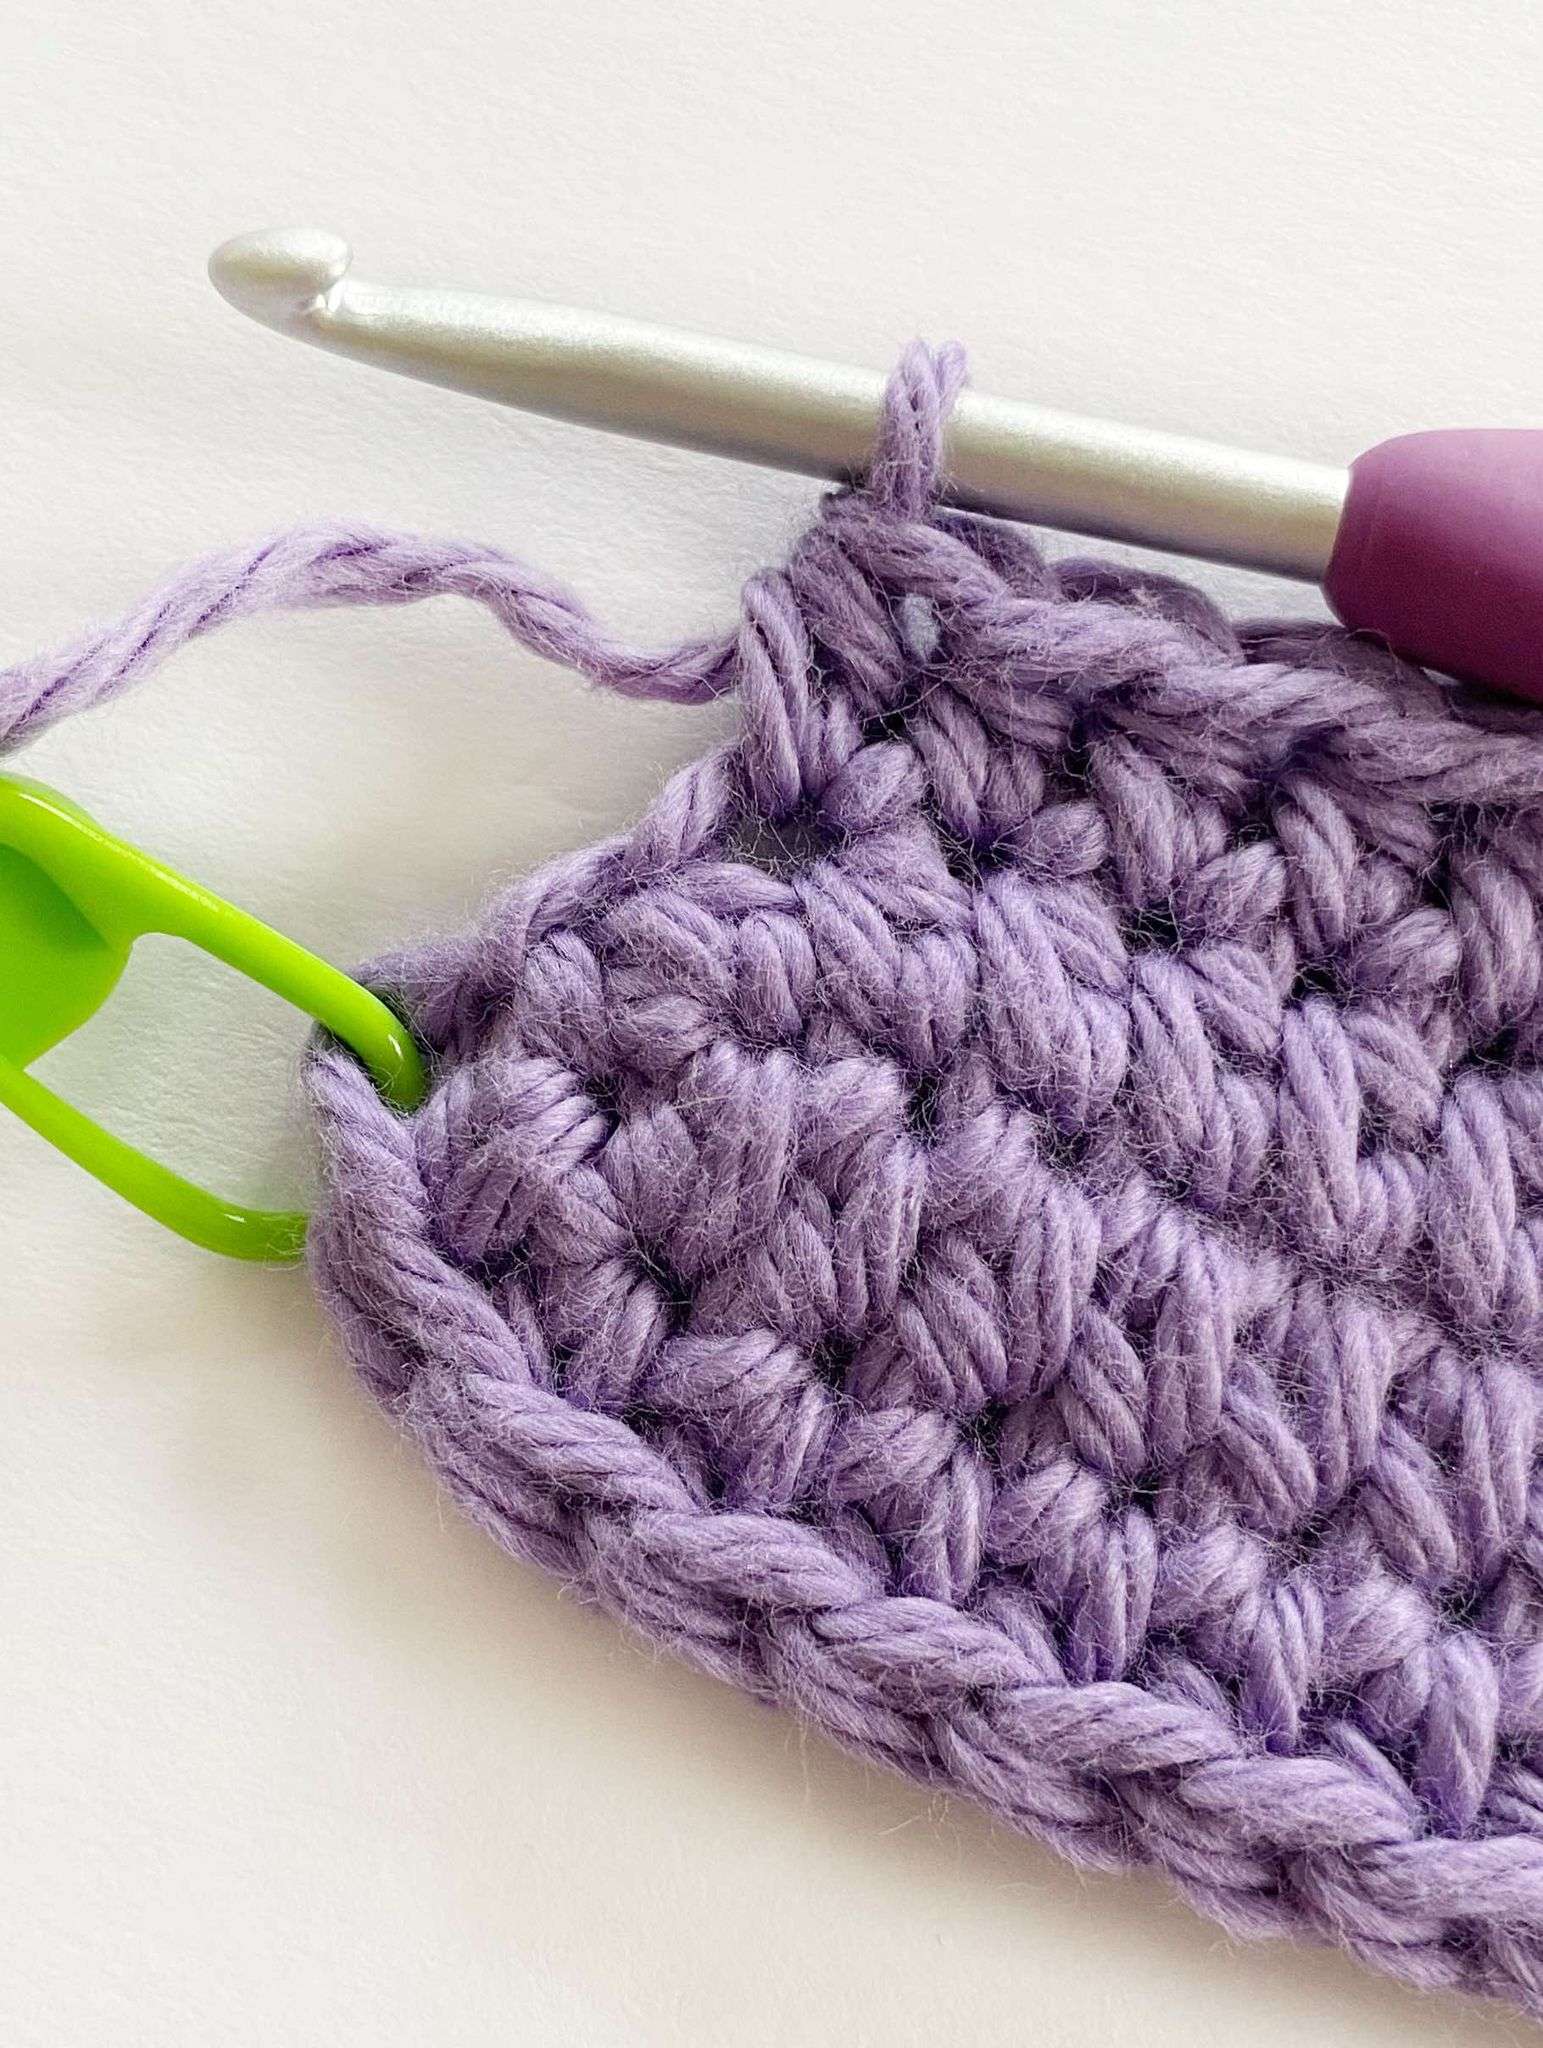
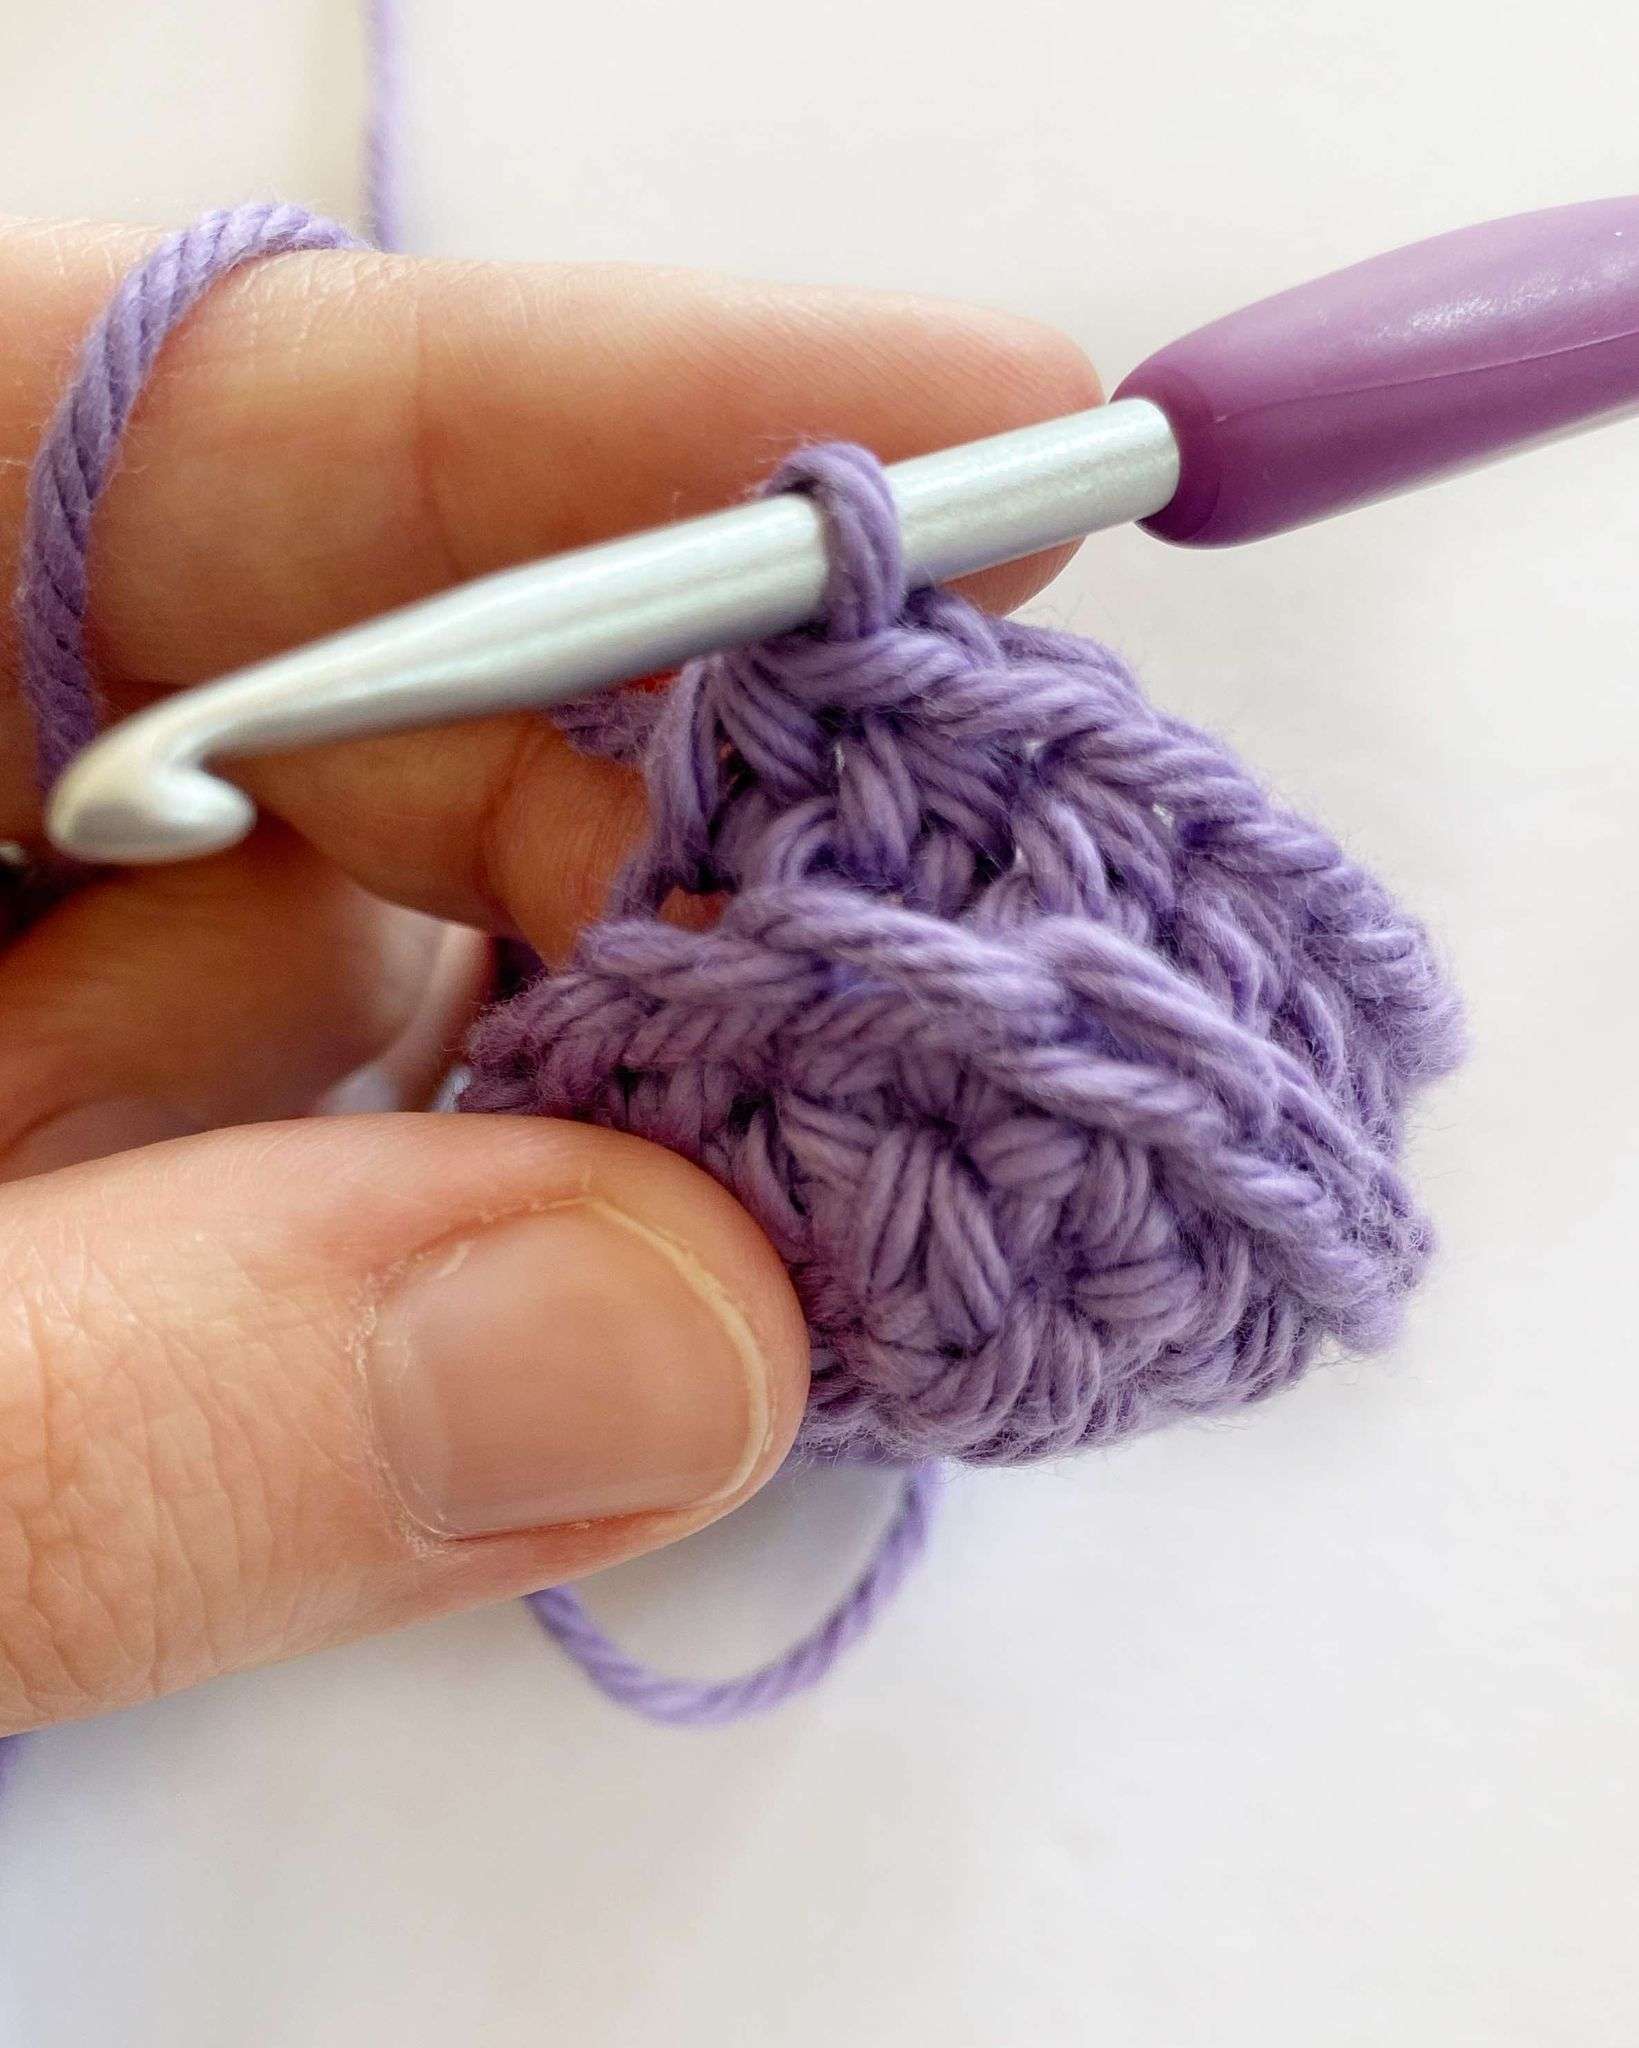
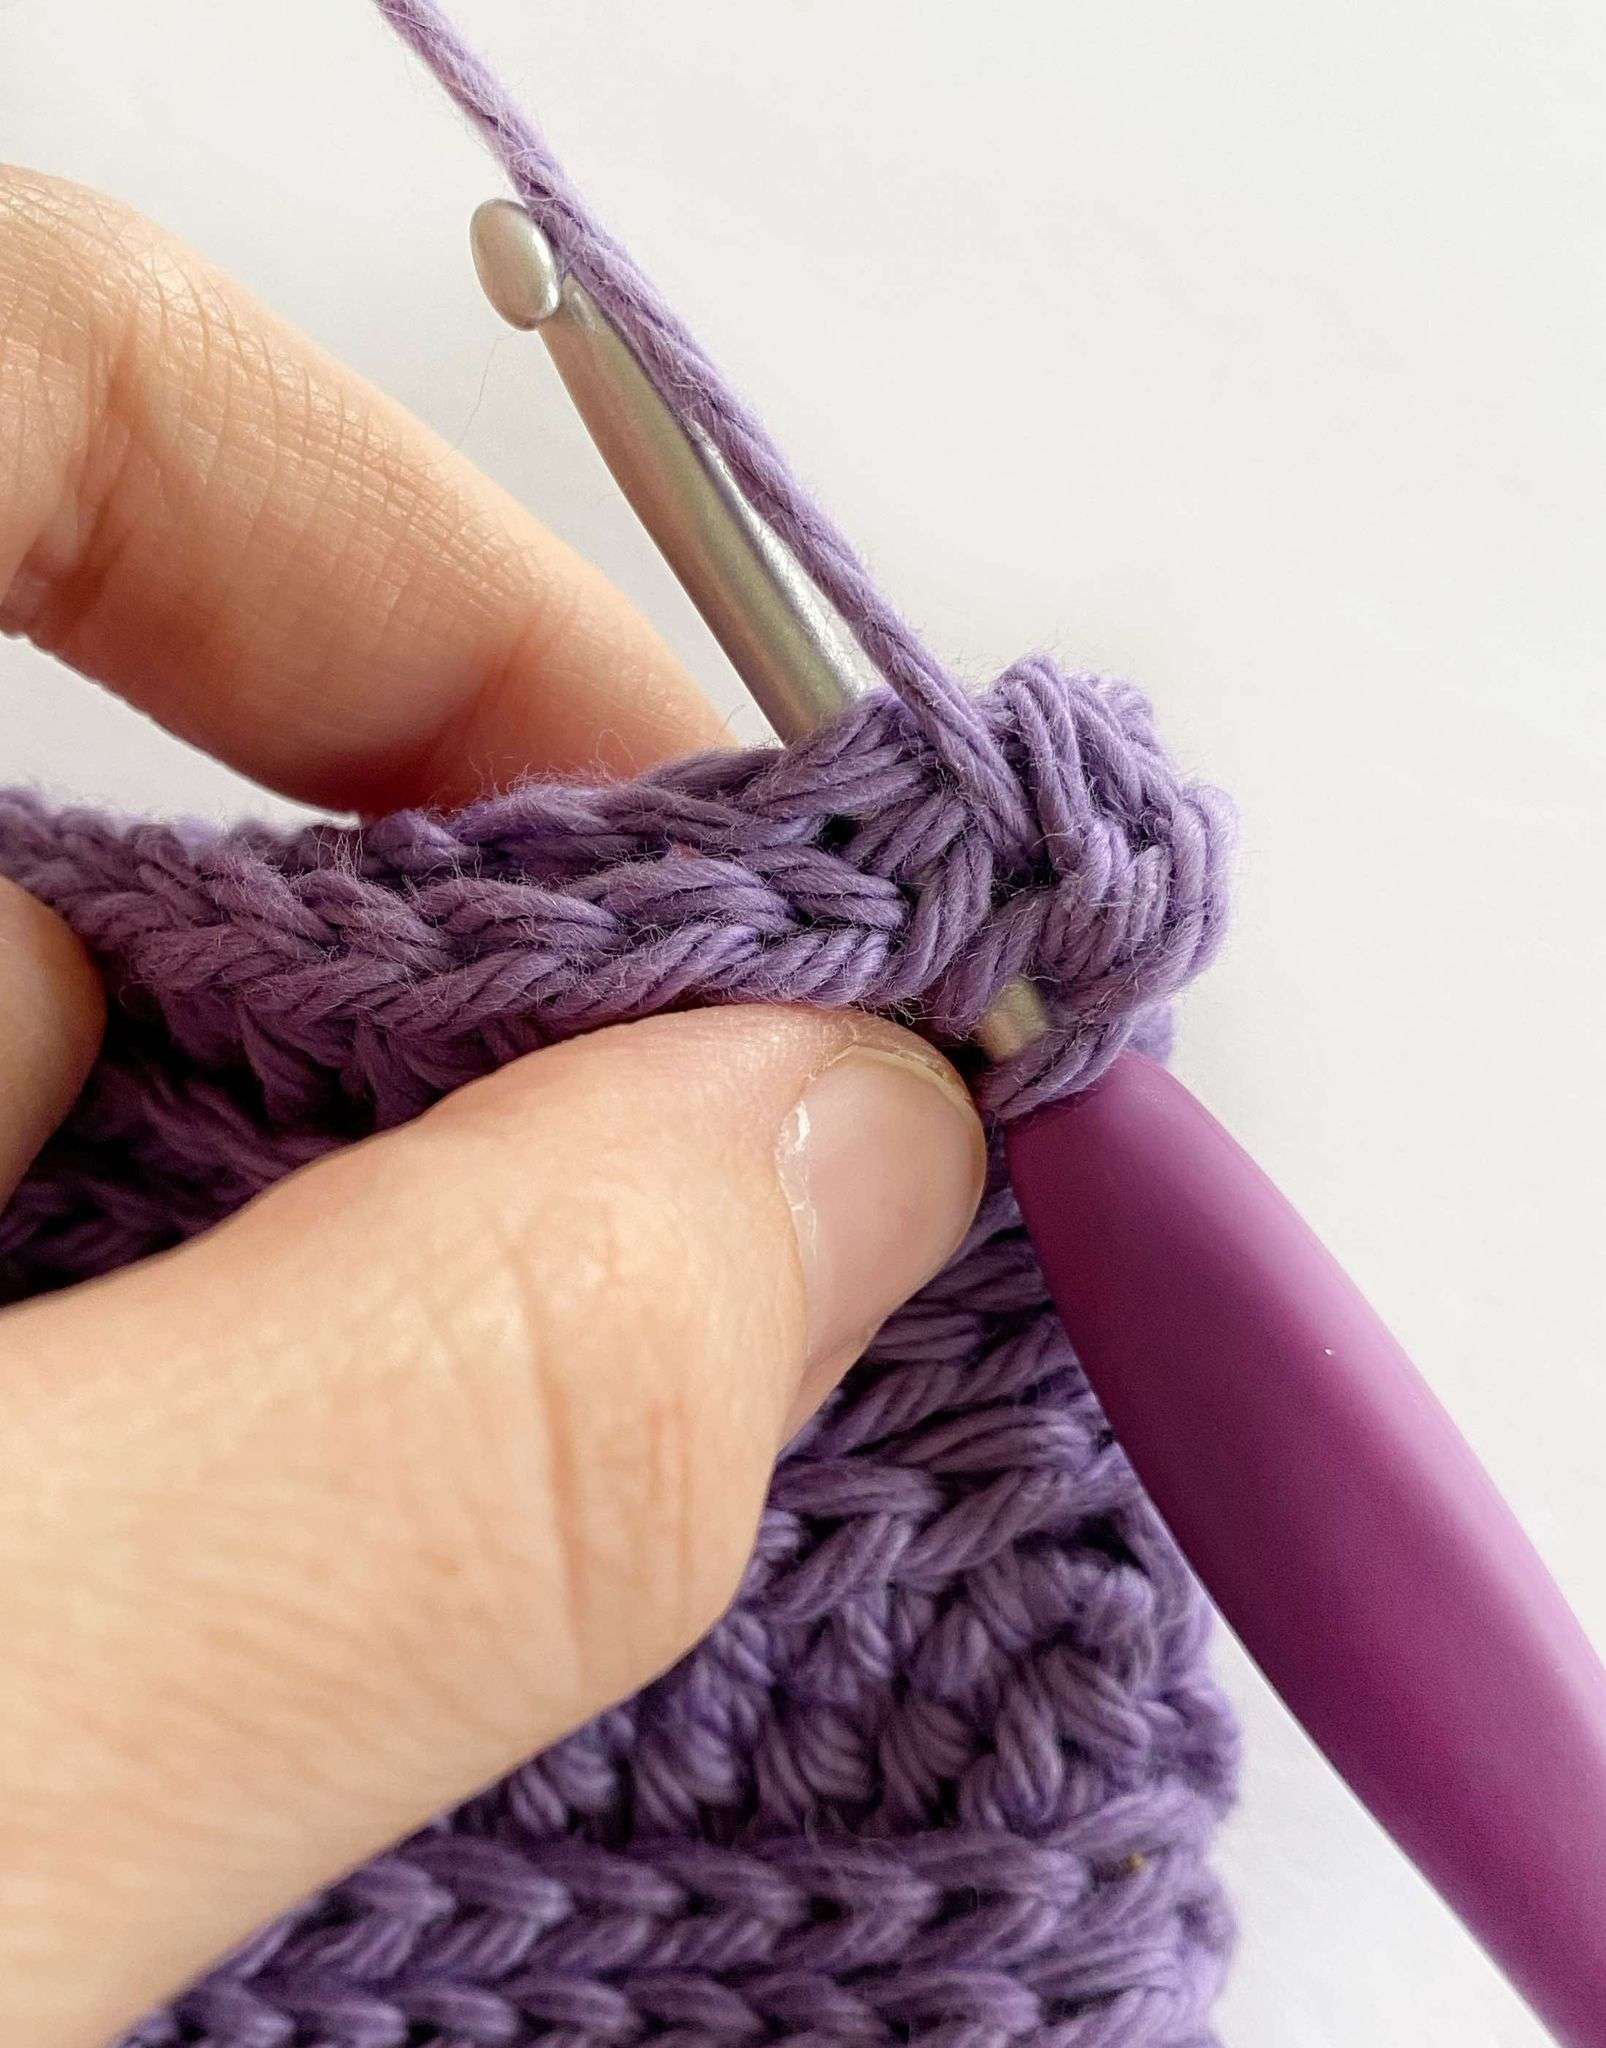
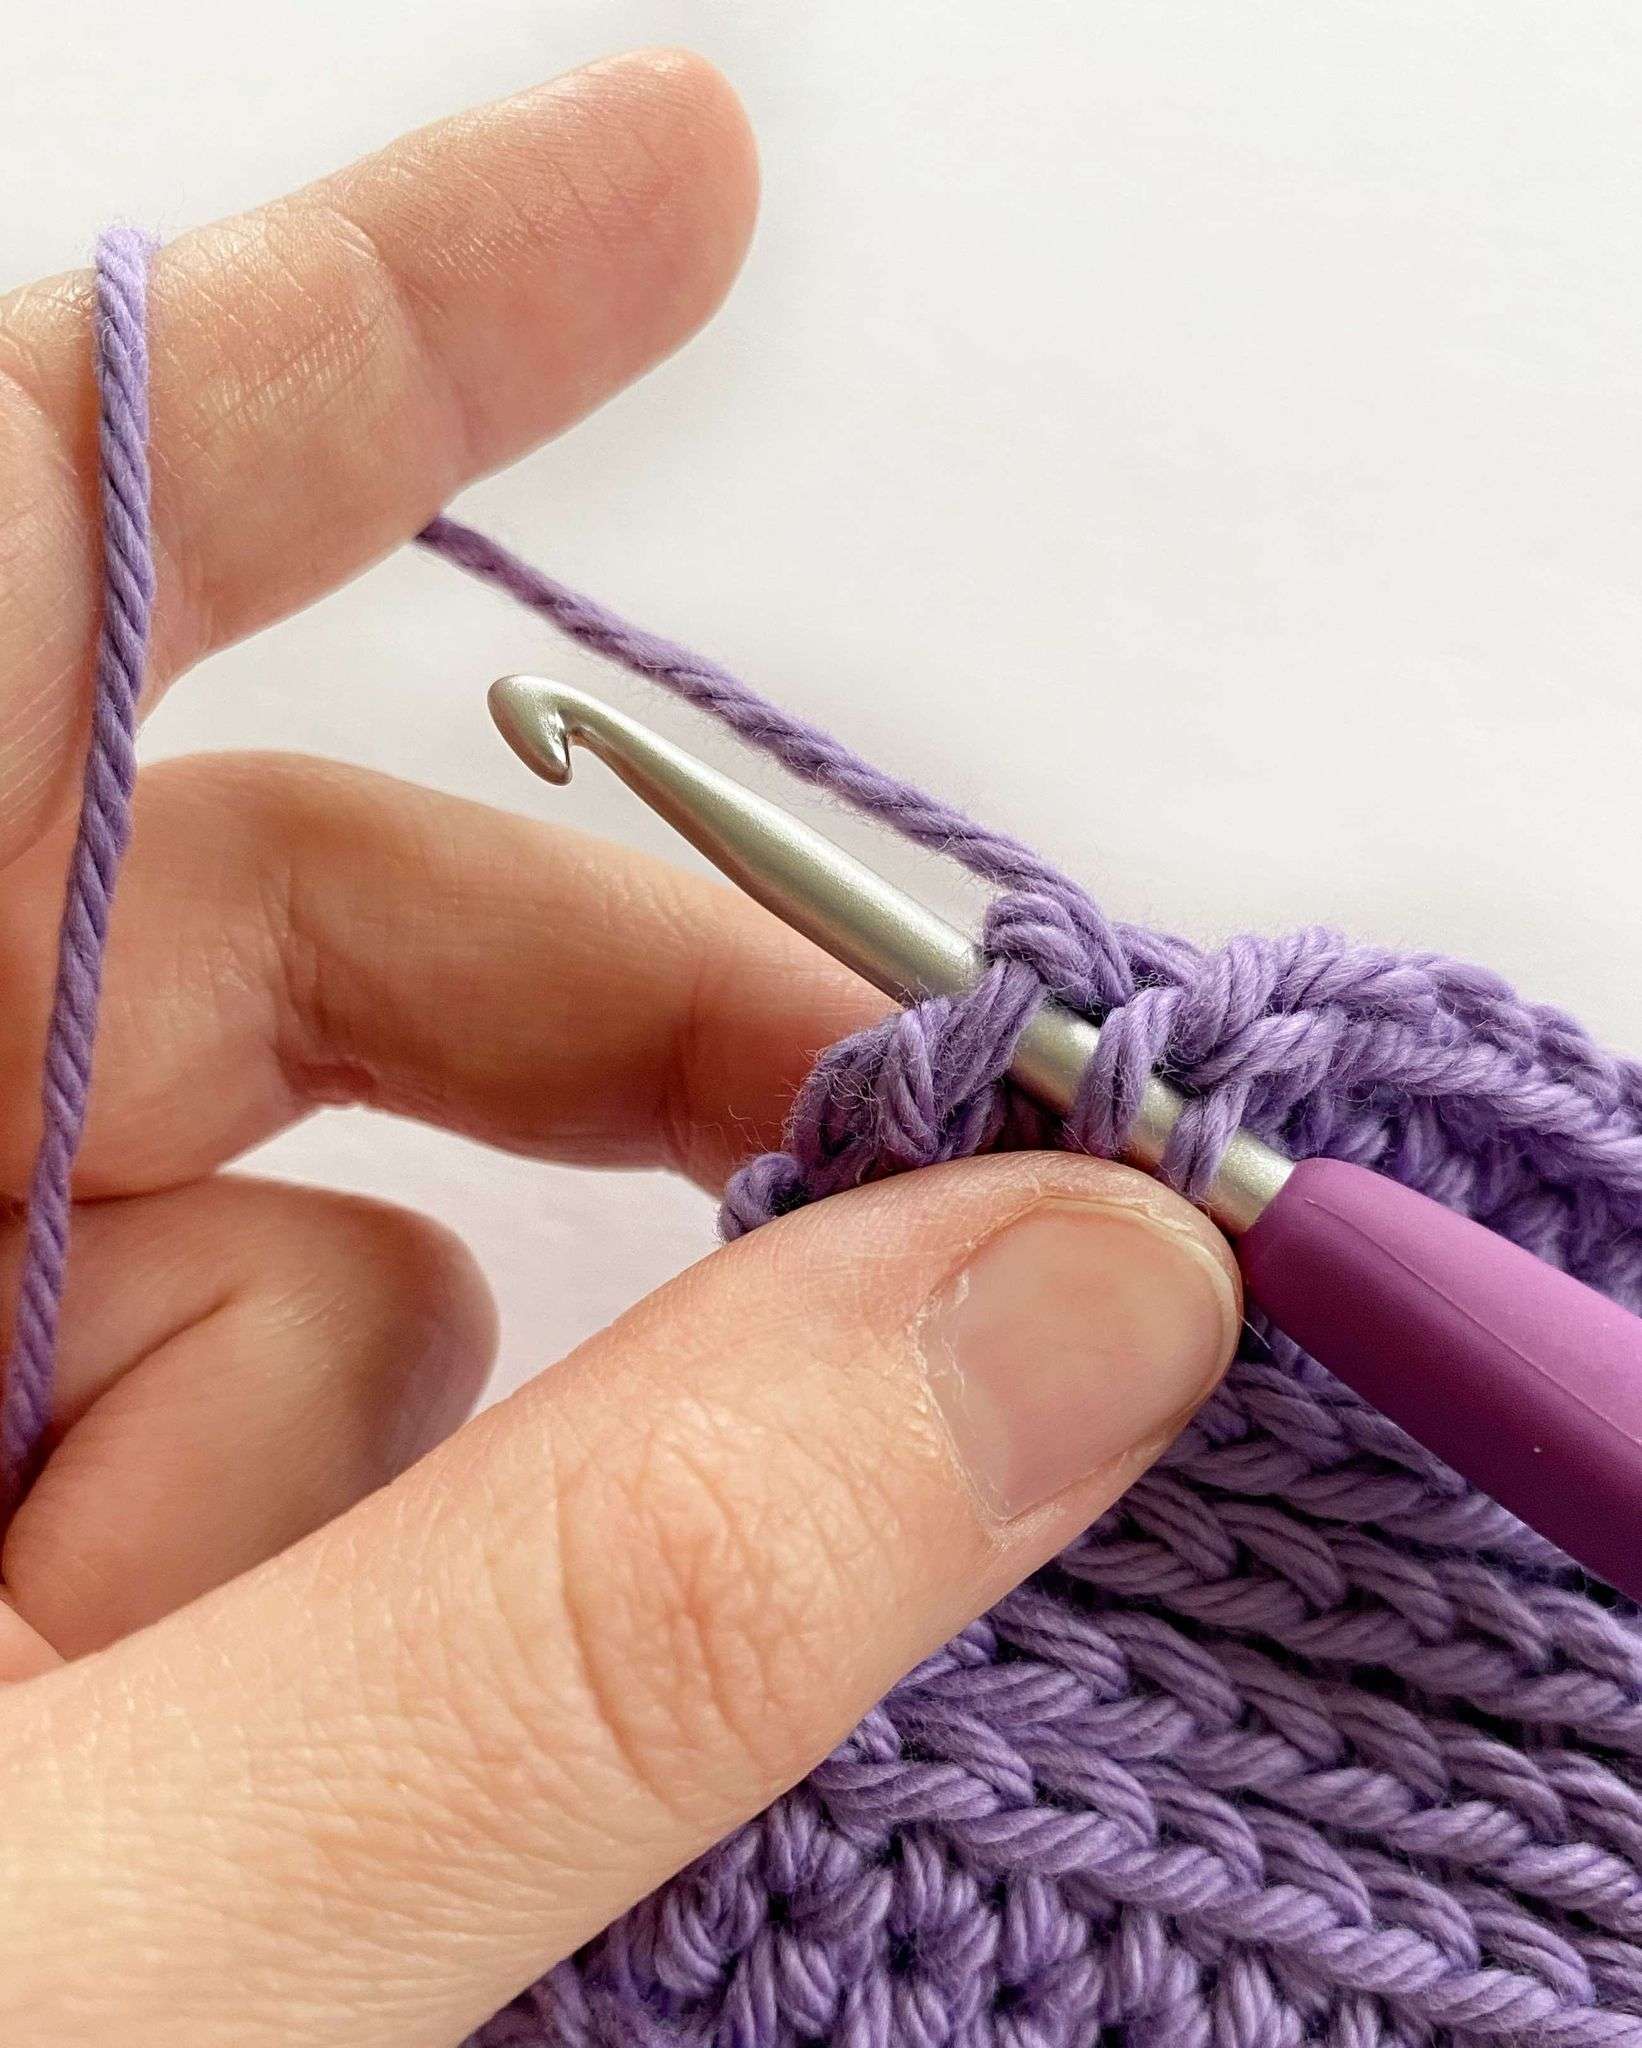
- Each crochet stitch has a front and back loop; these are the two loops that we normally work into when completing a stitch. However, each stitch also has a “third” loop.
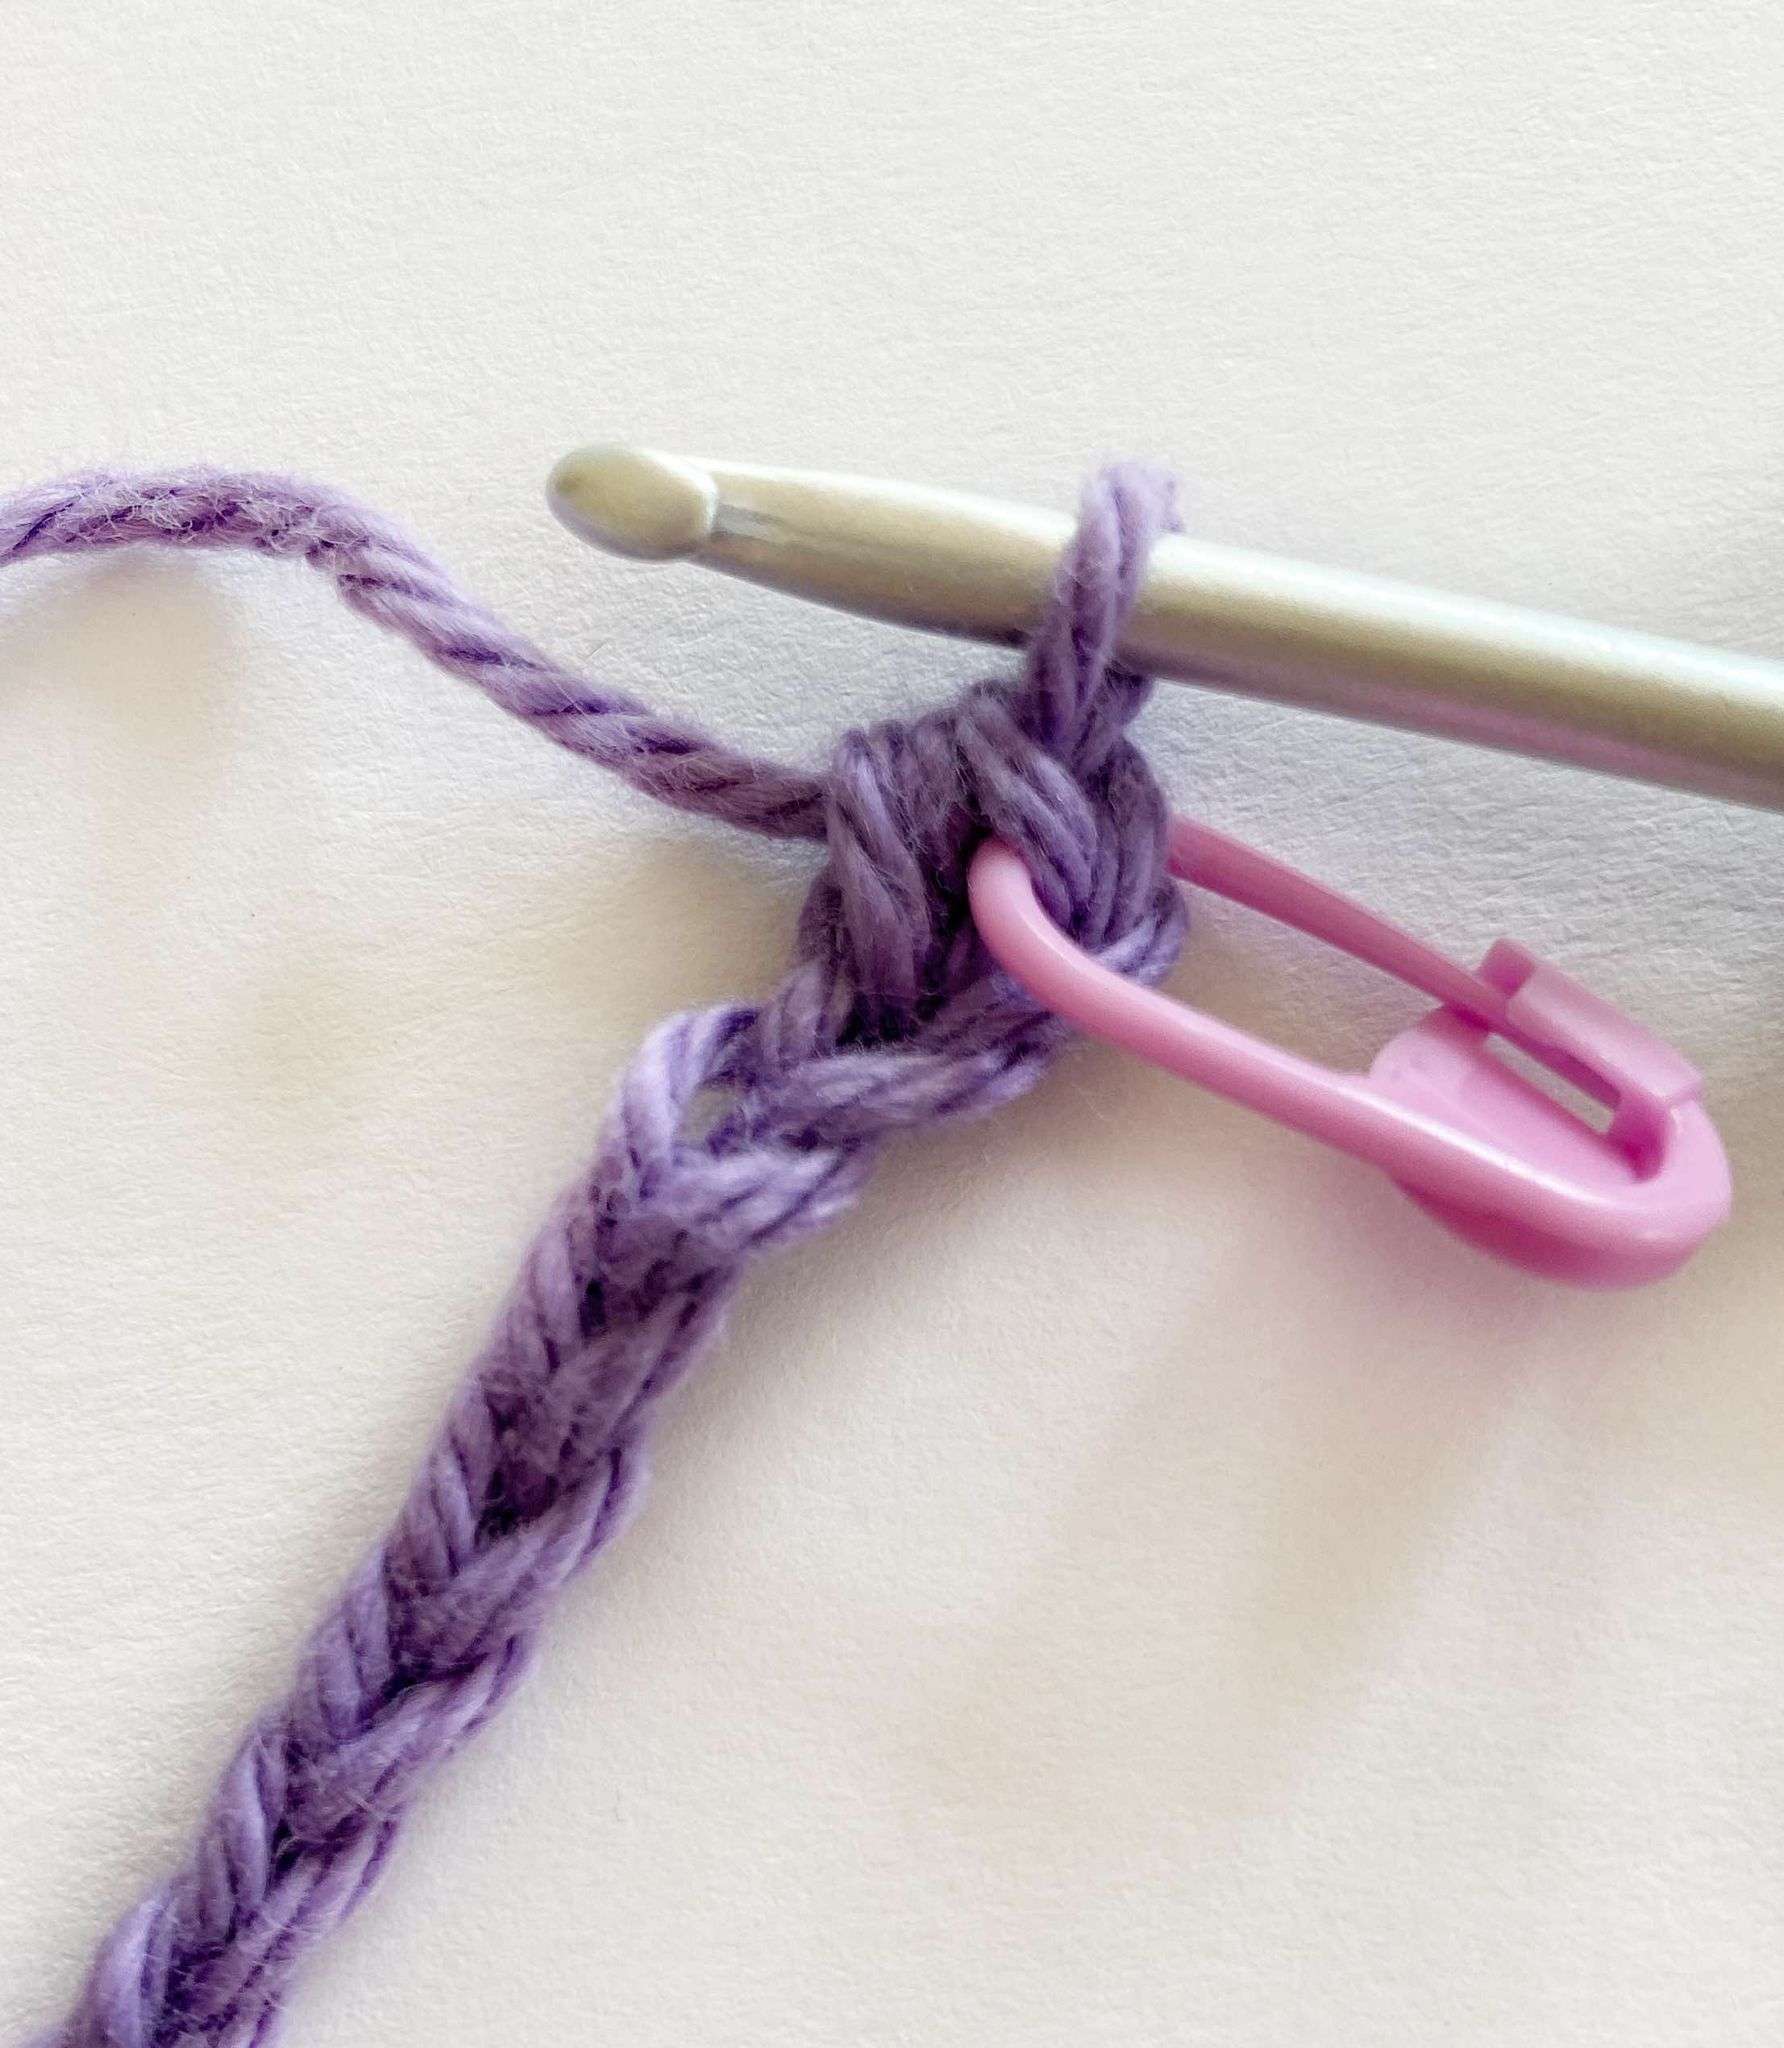
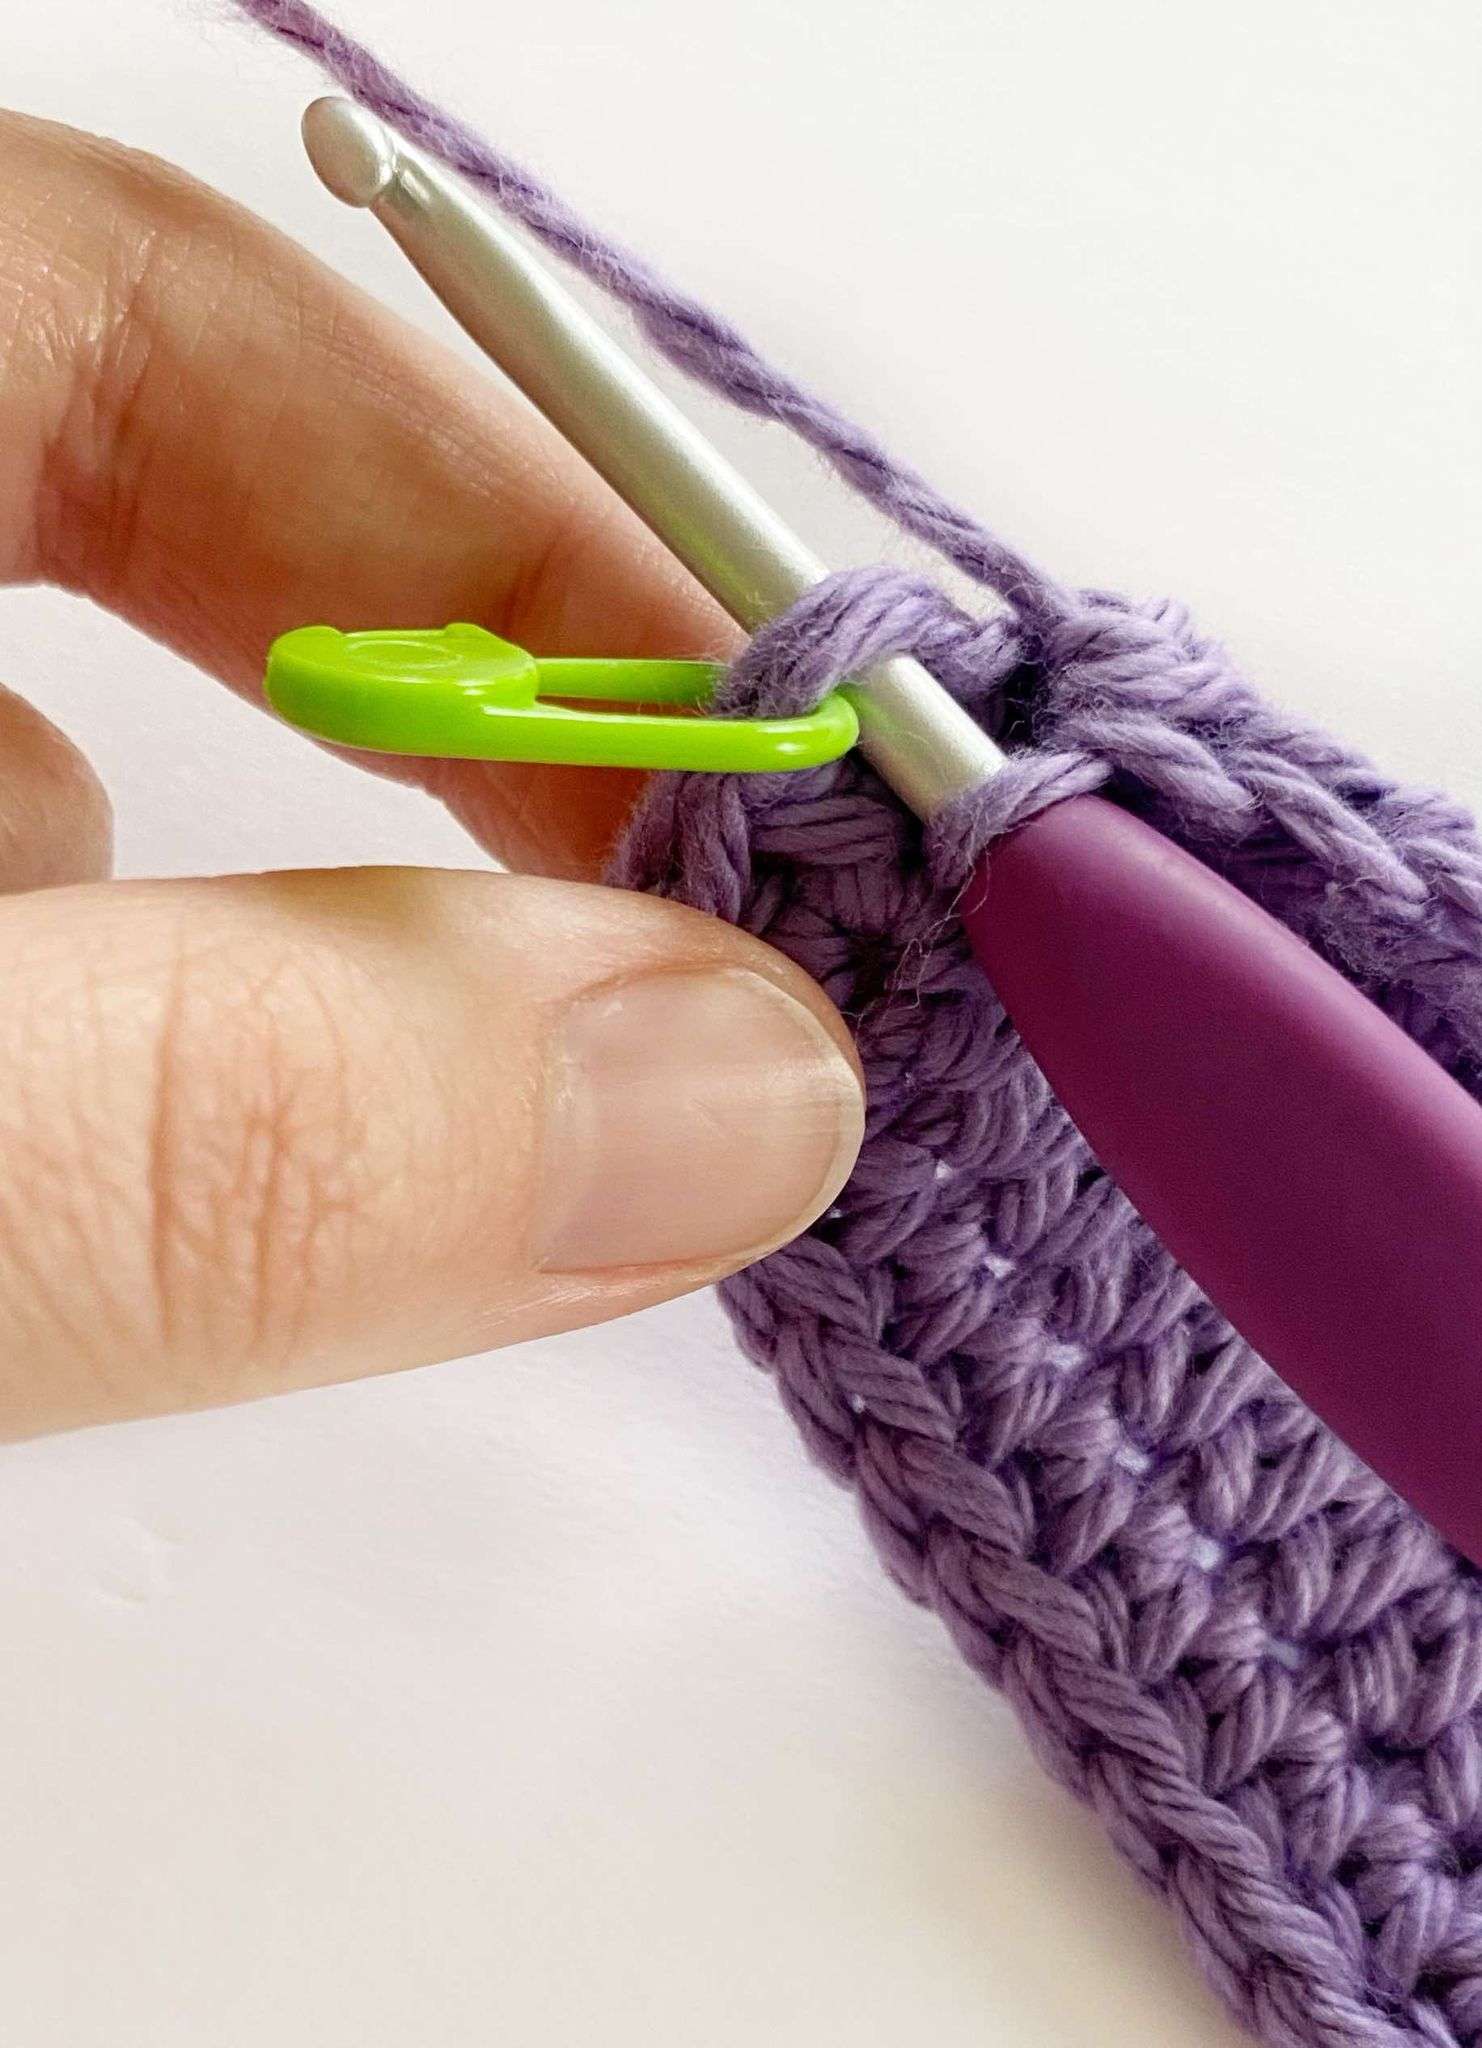
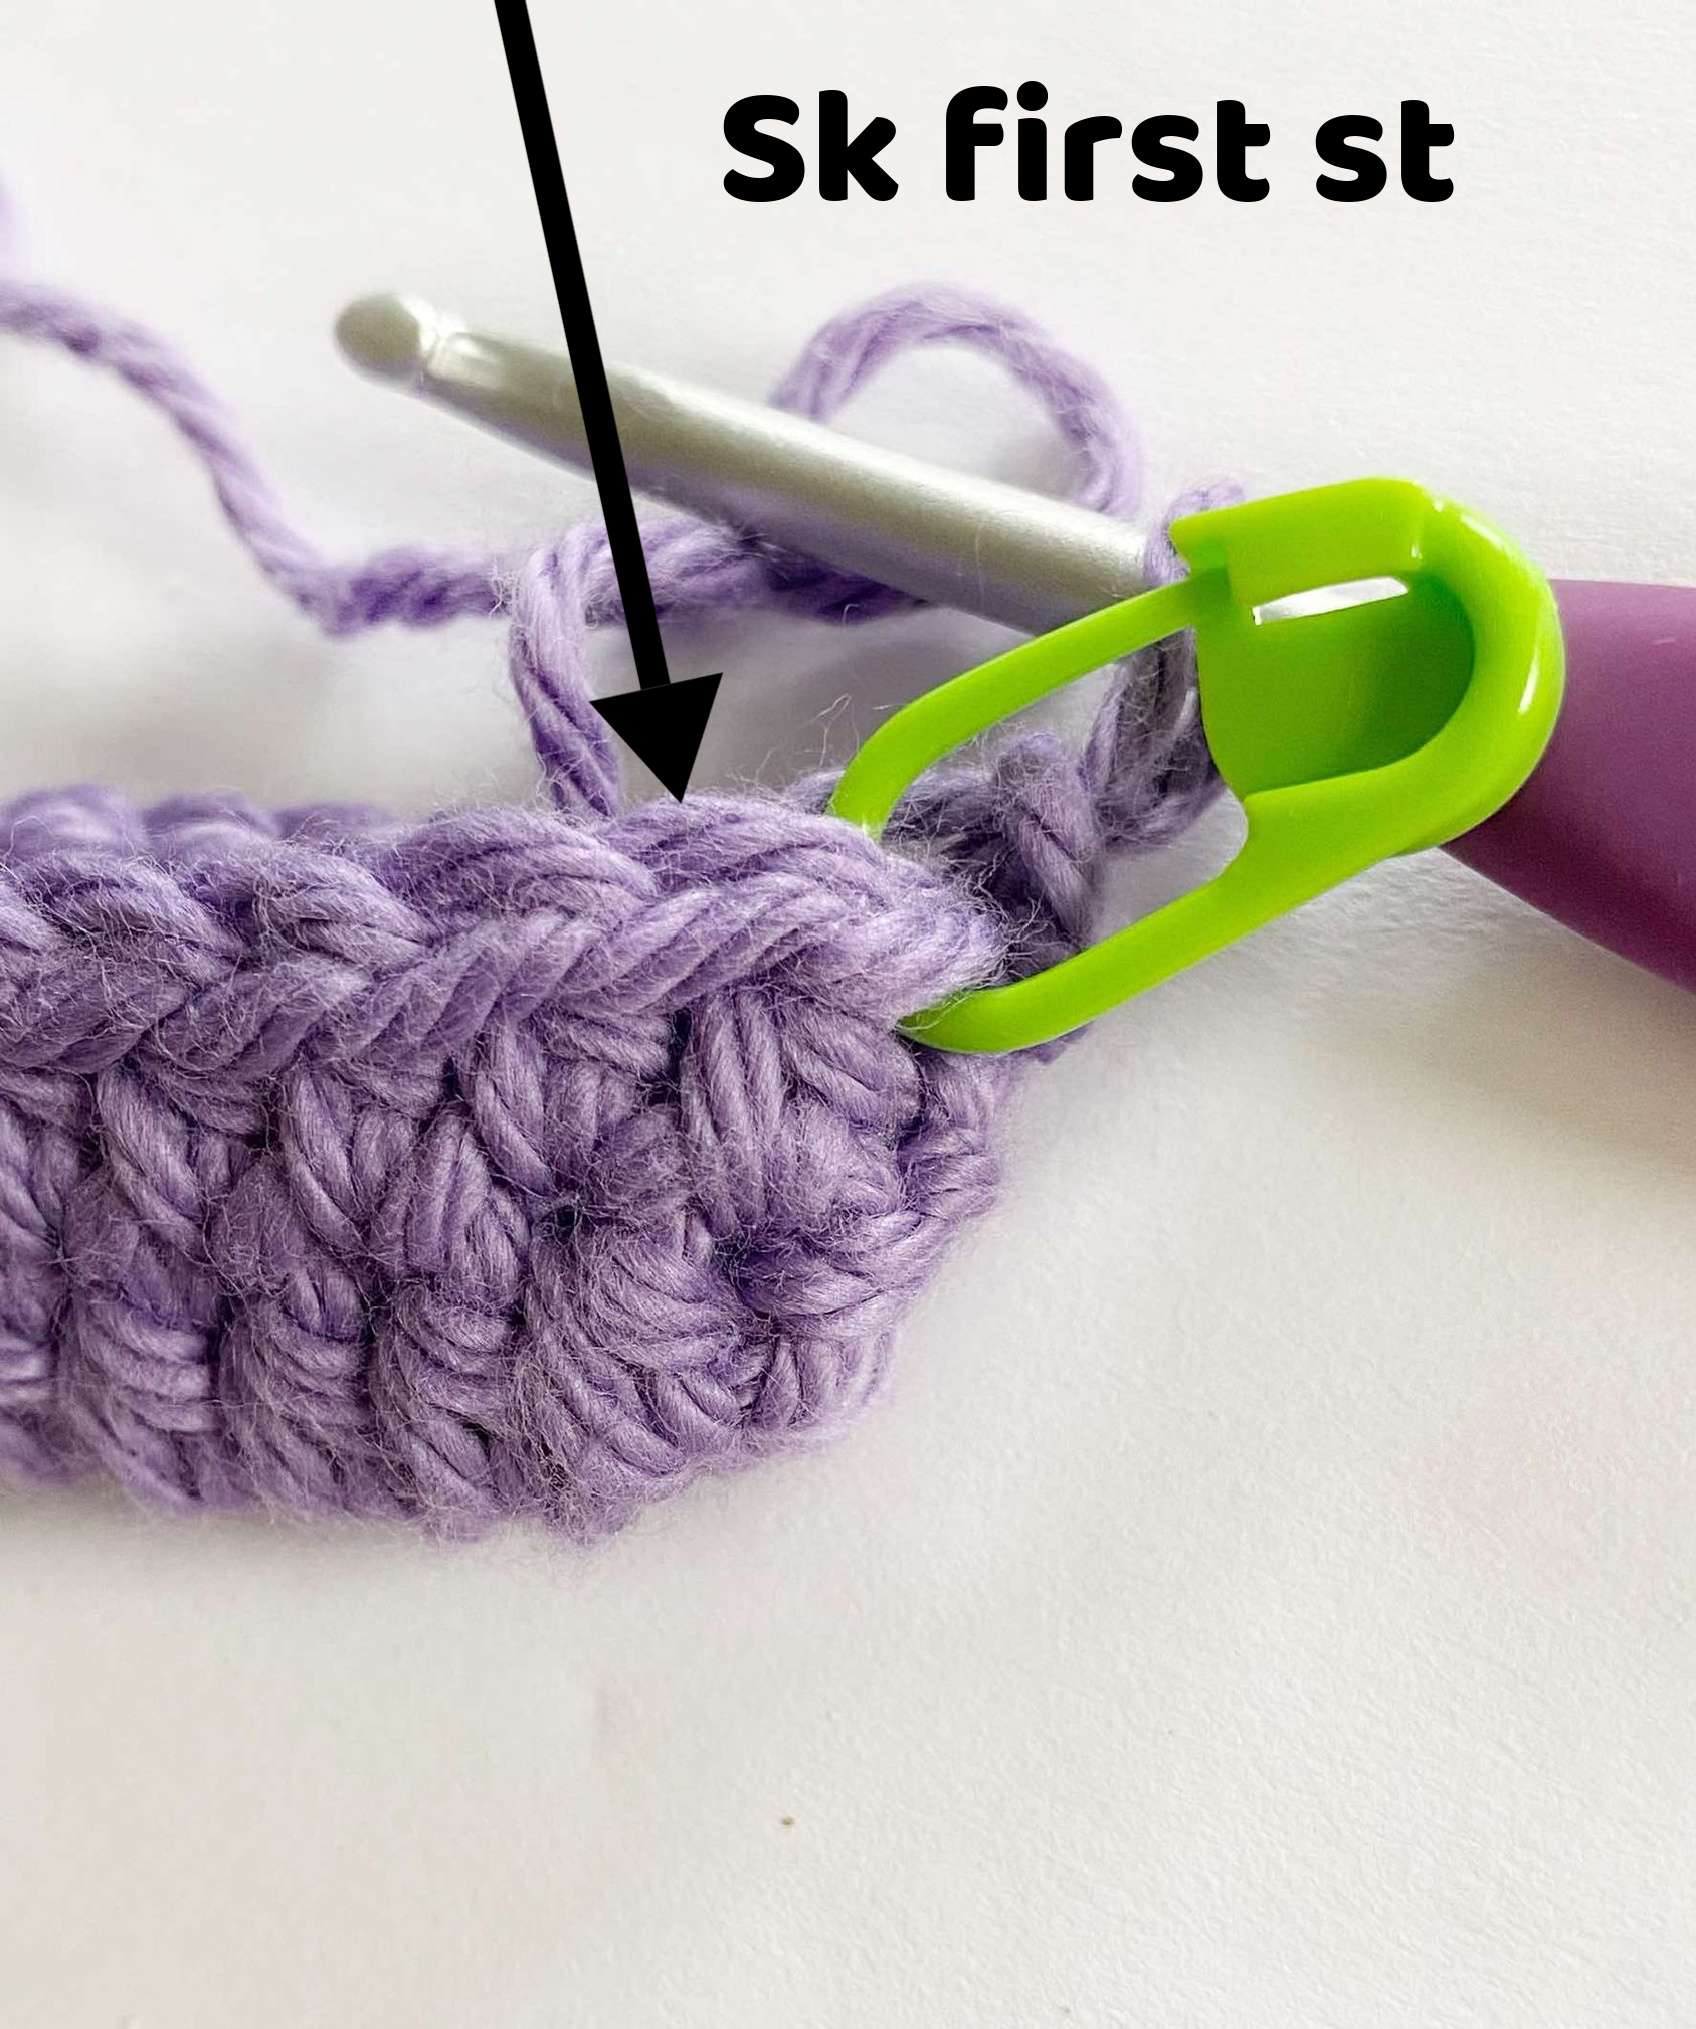
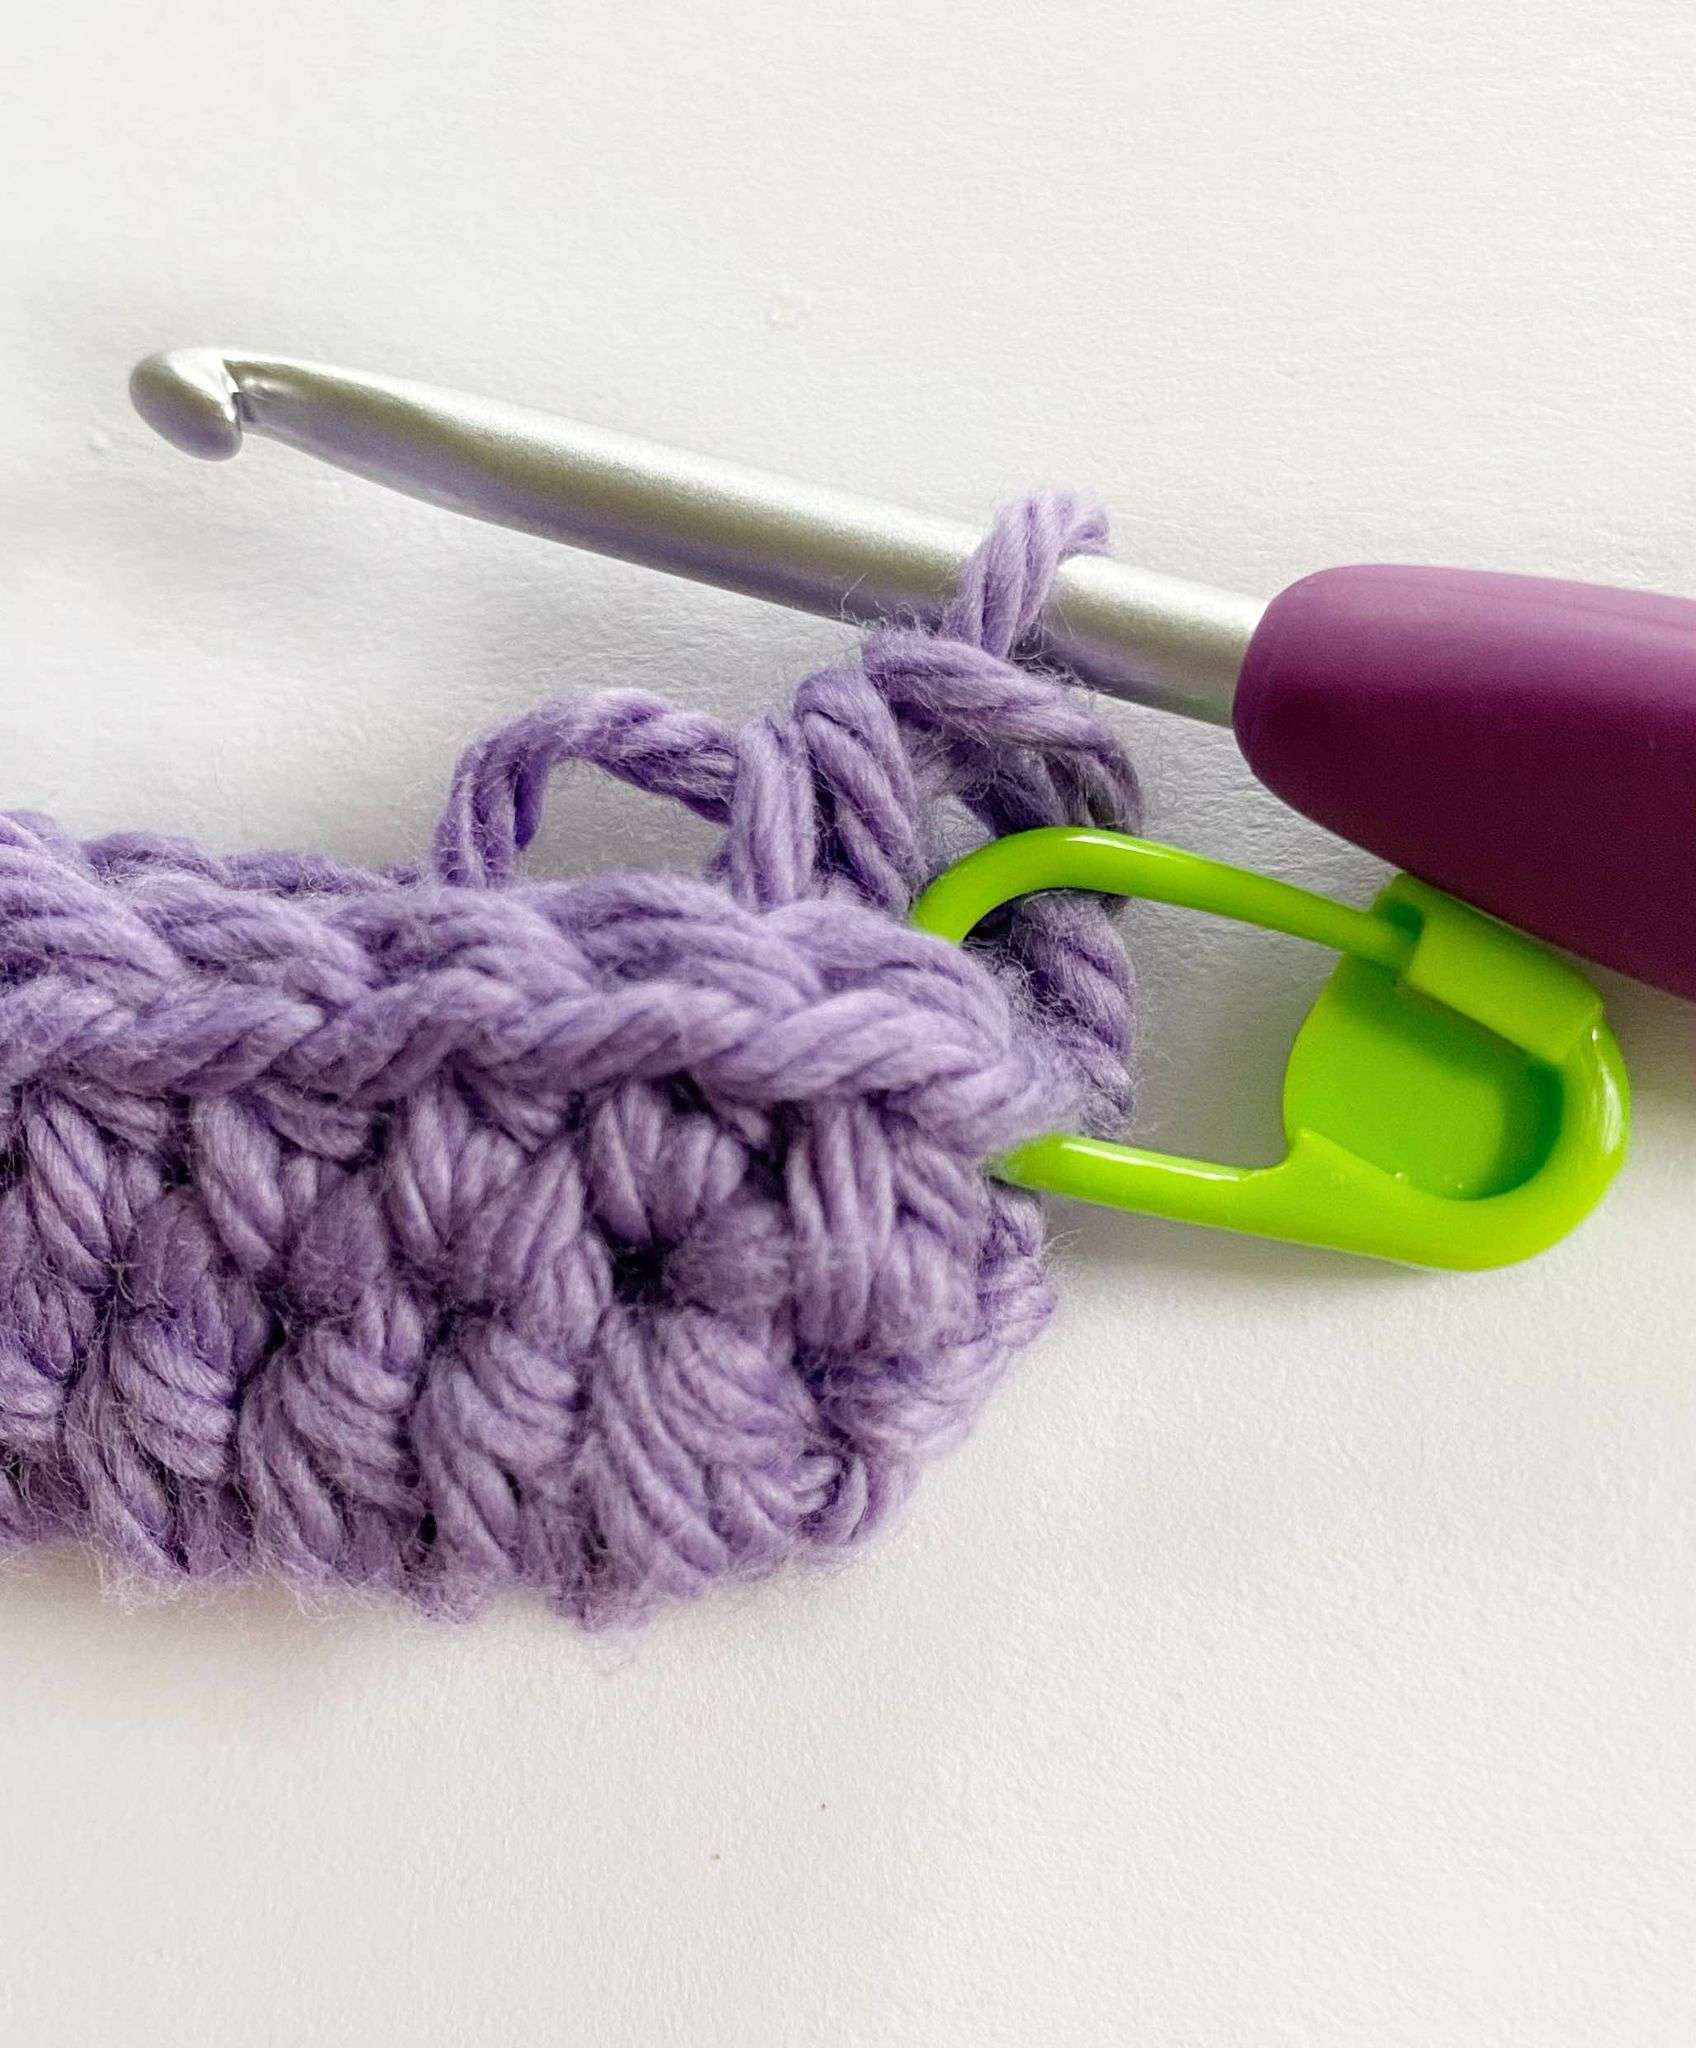
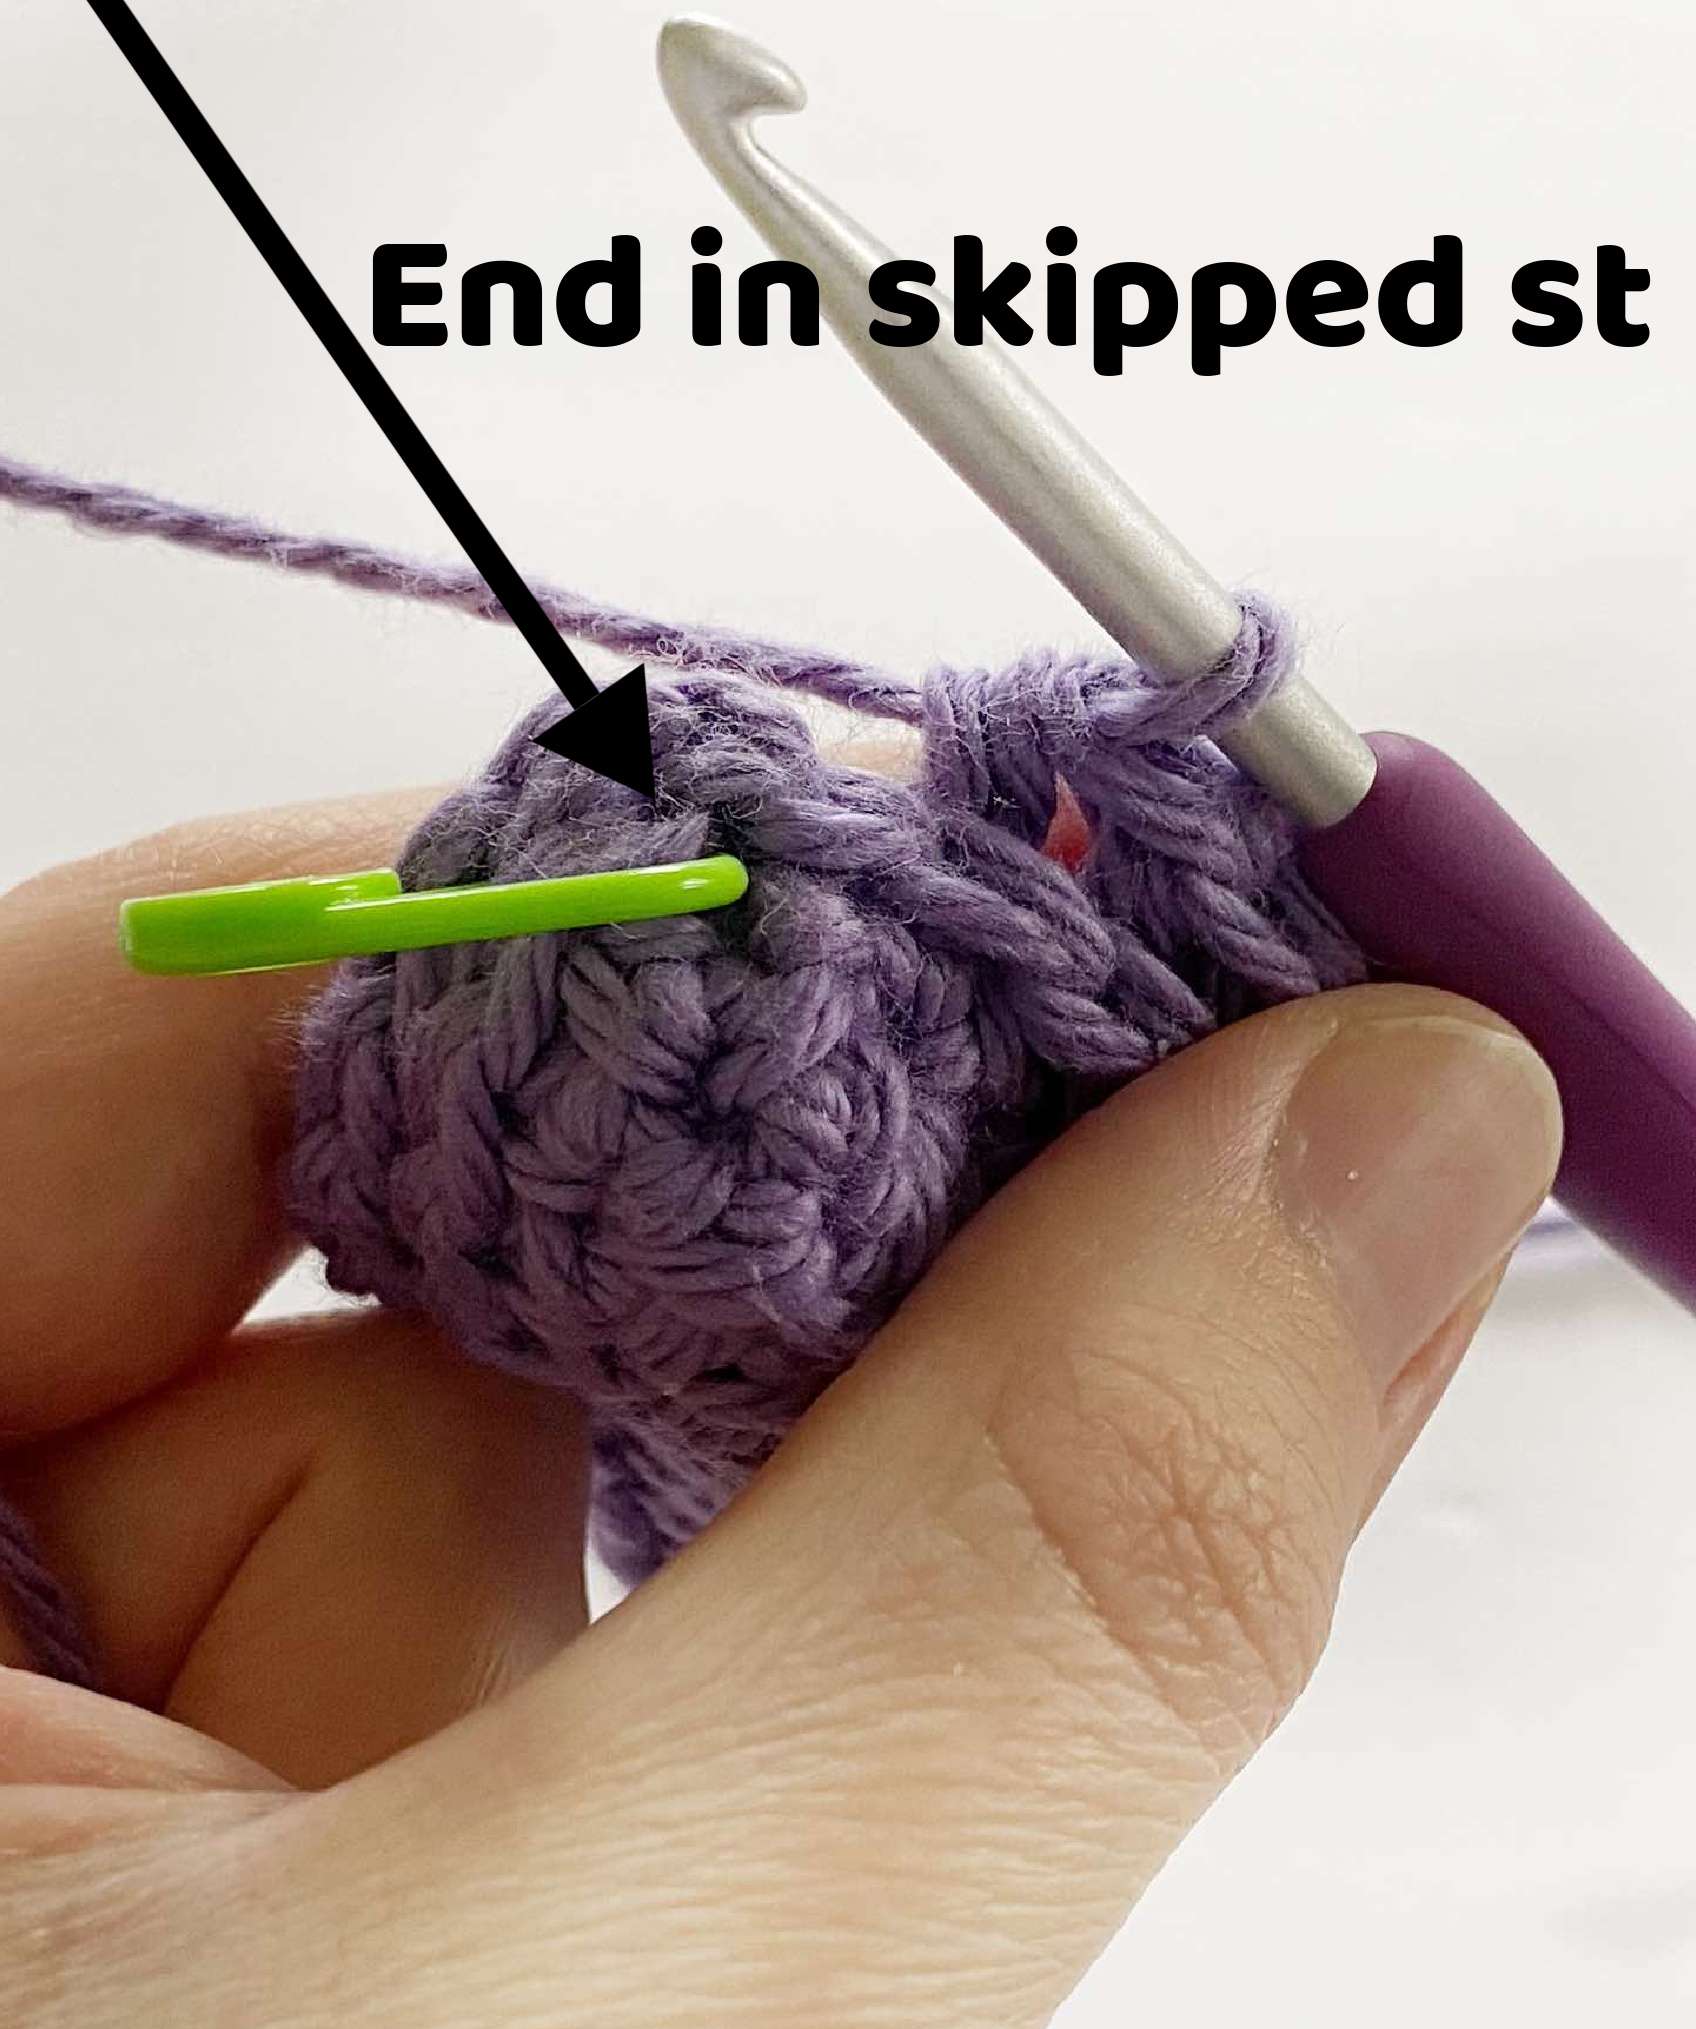
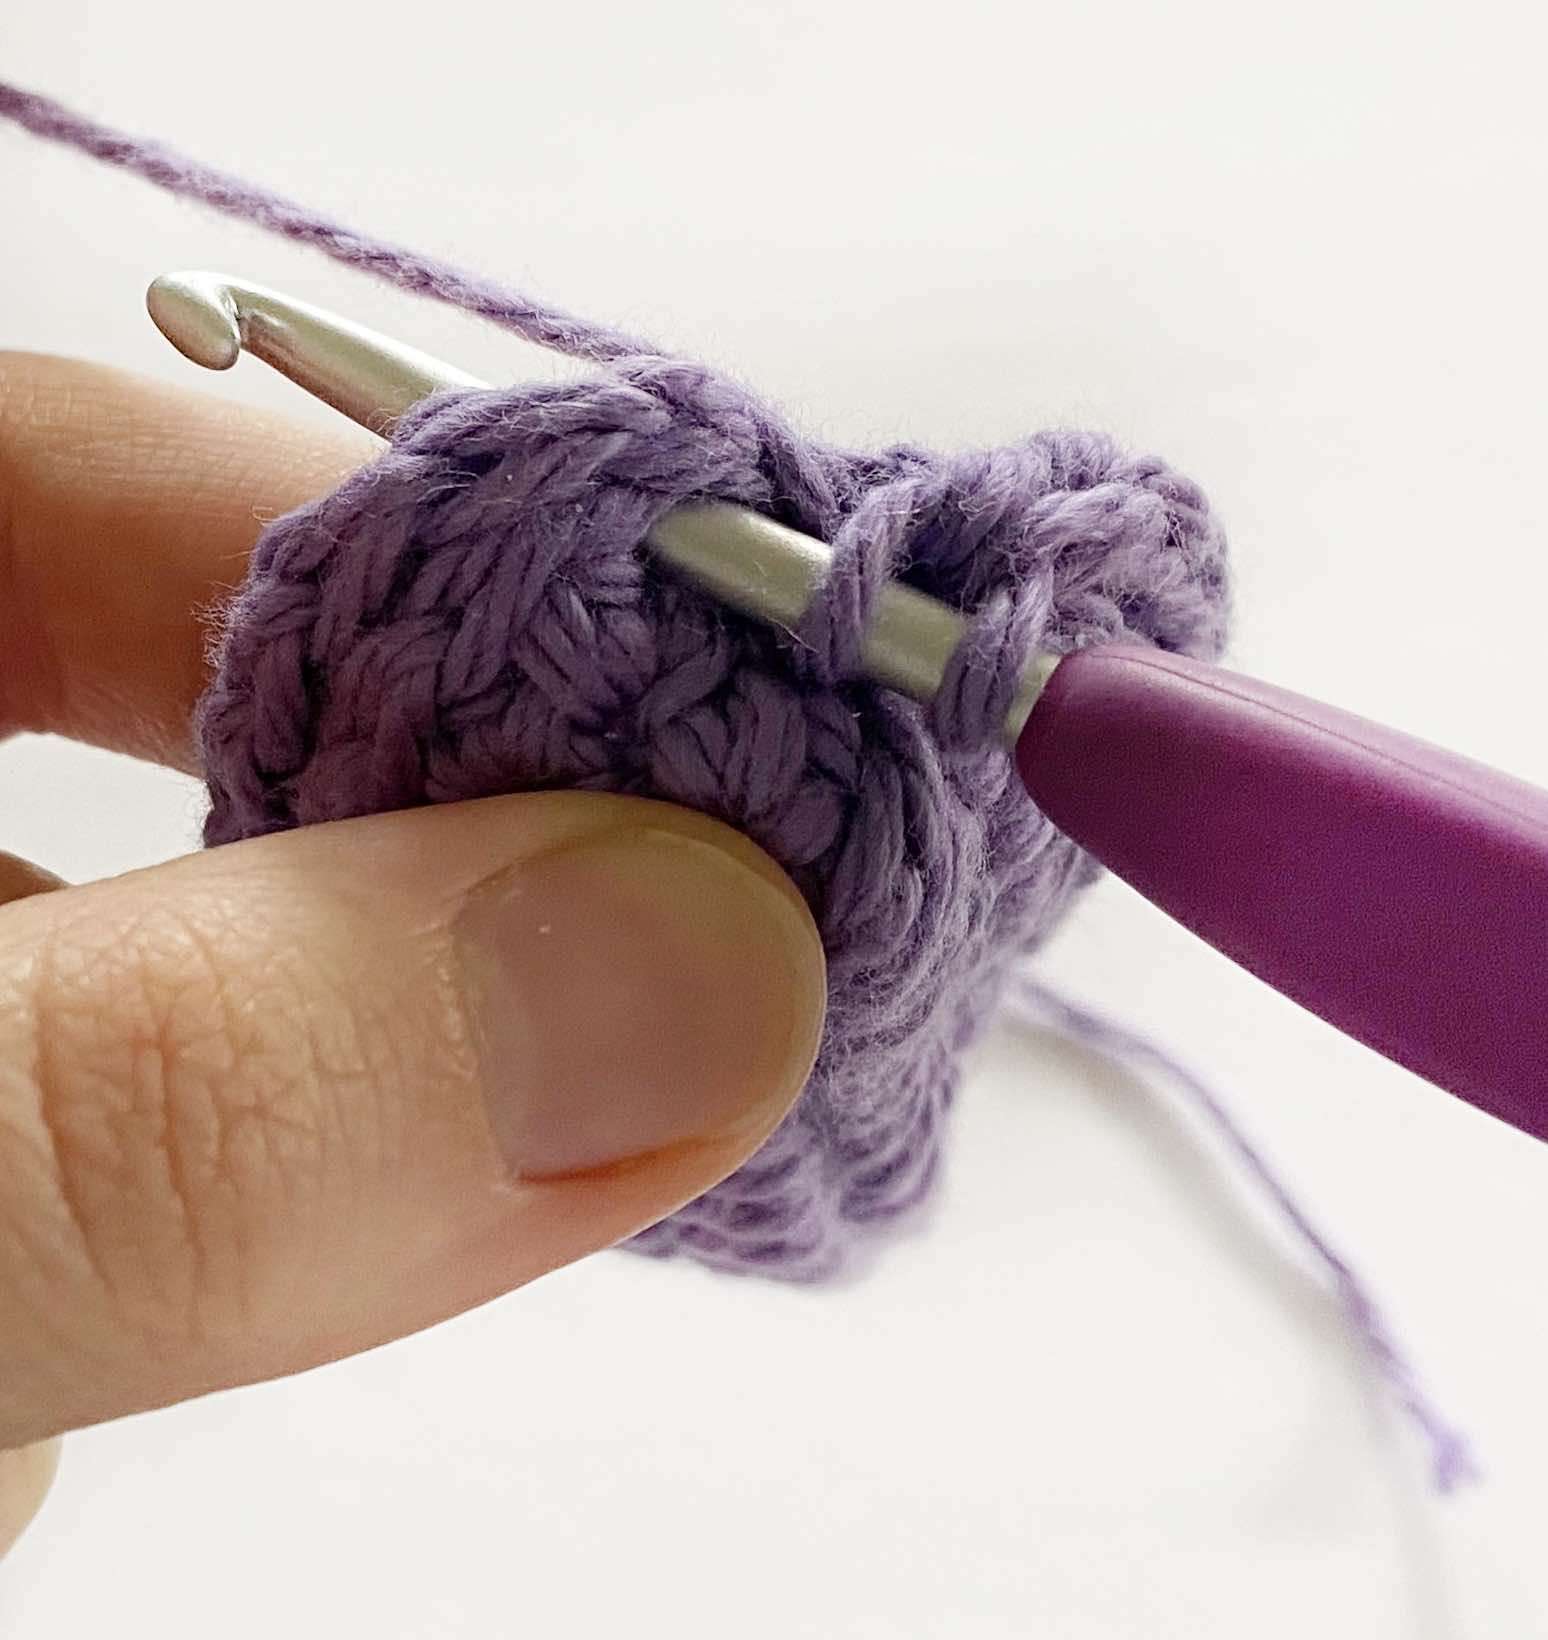
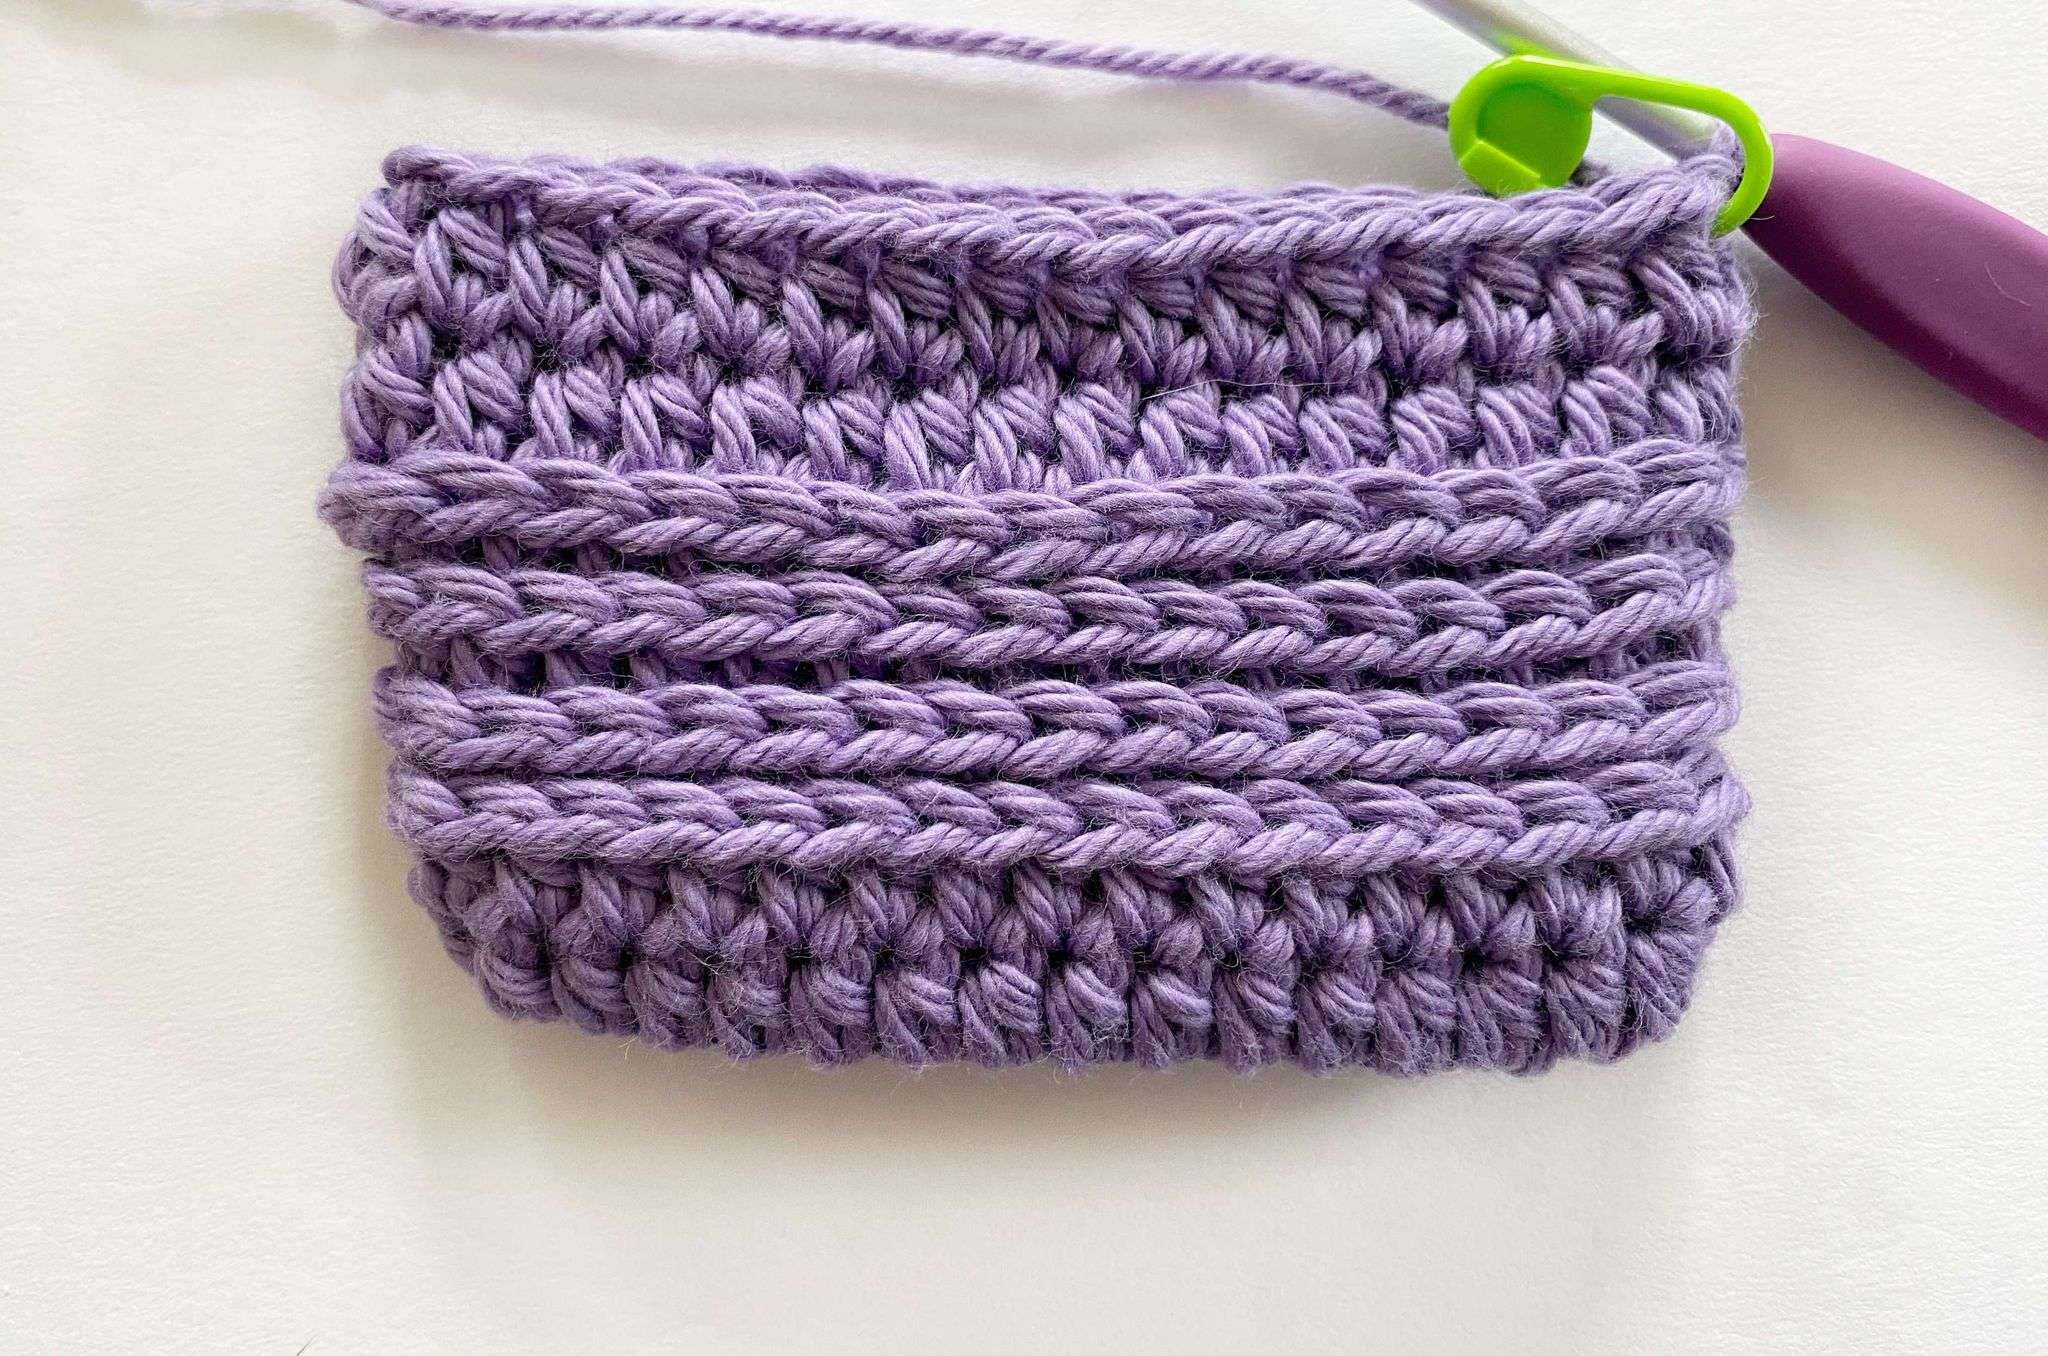
- When working in the round, the third loop appears behind and below the back loop of a stitch (Picture 1 & 2).
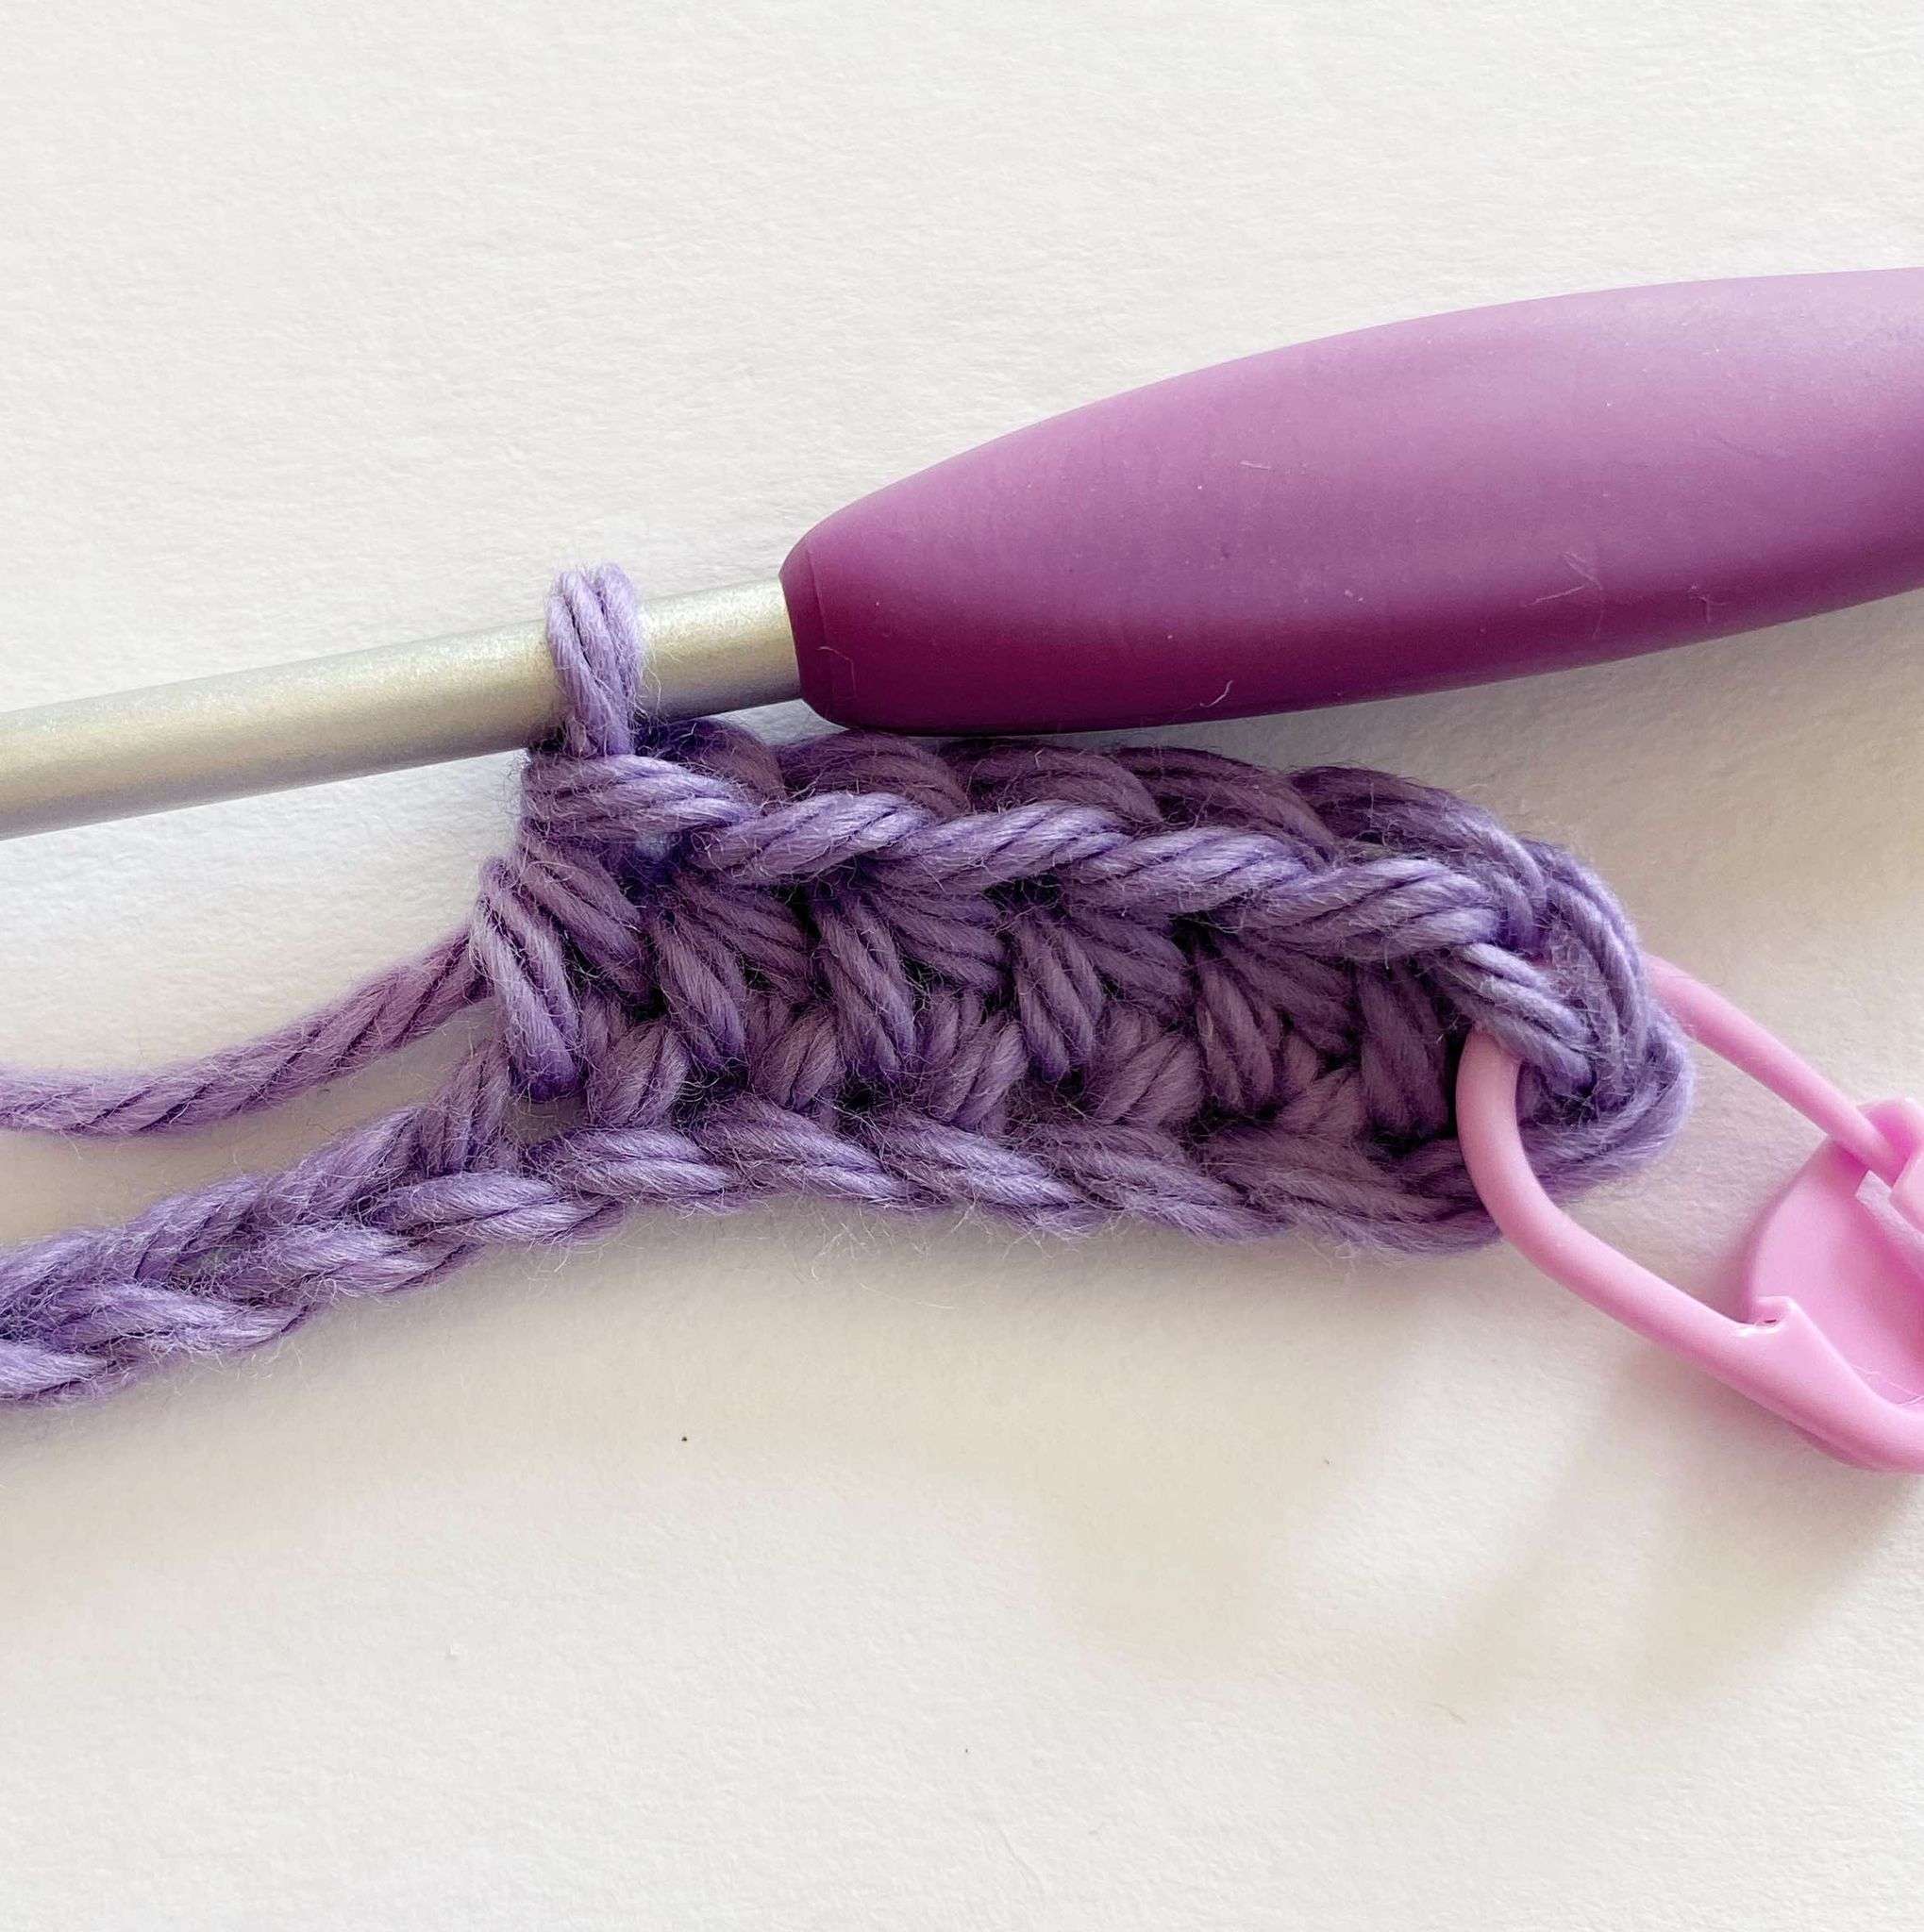
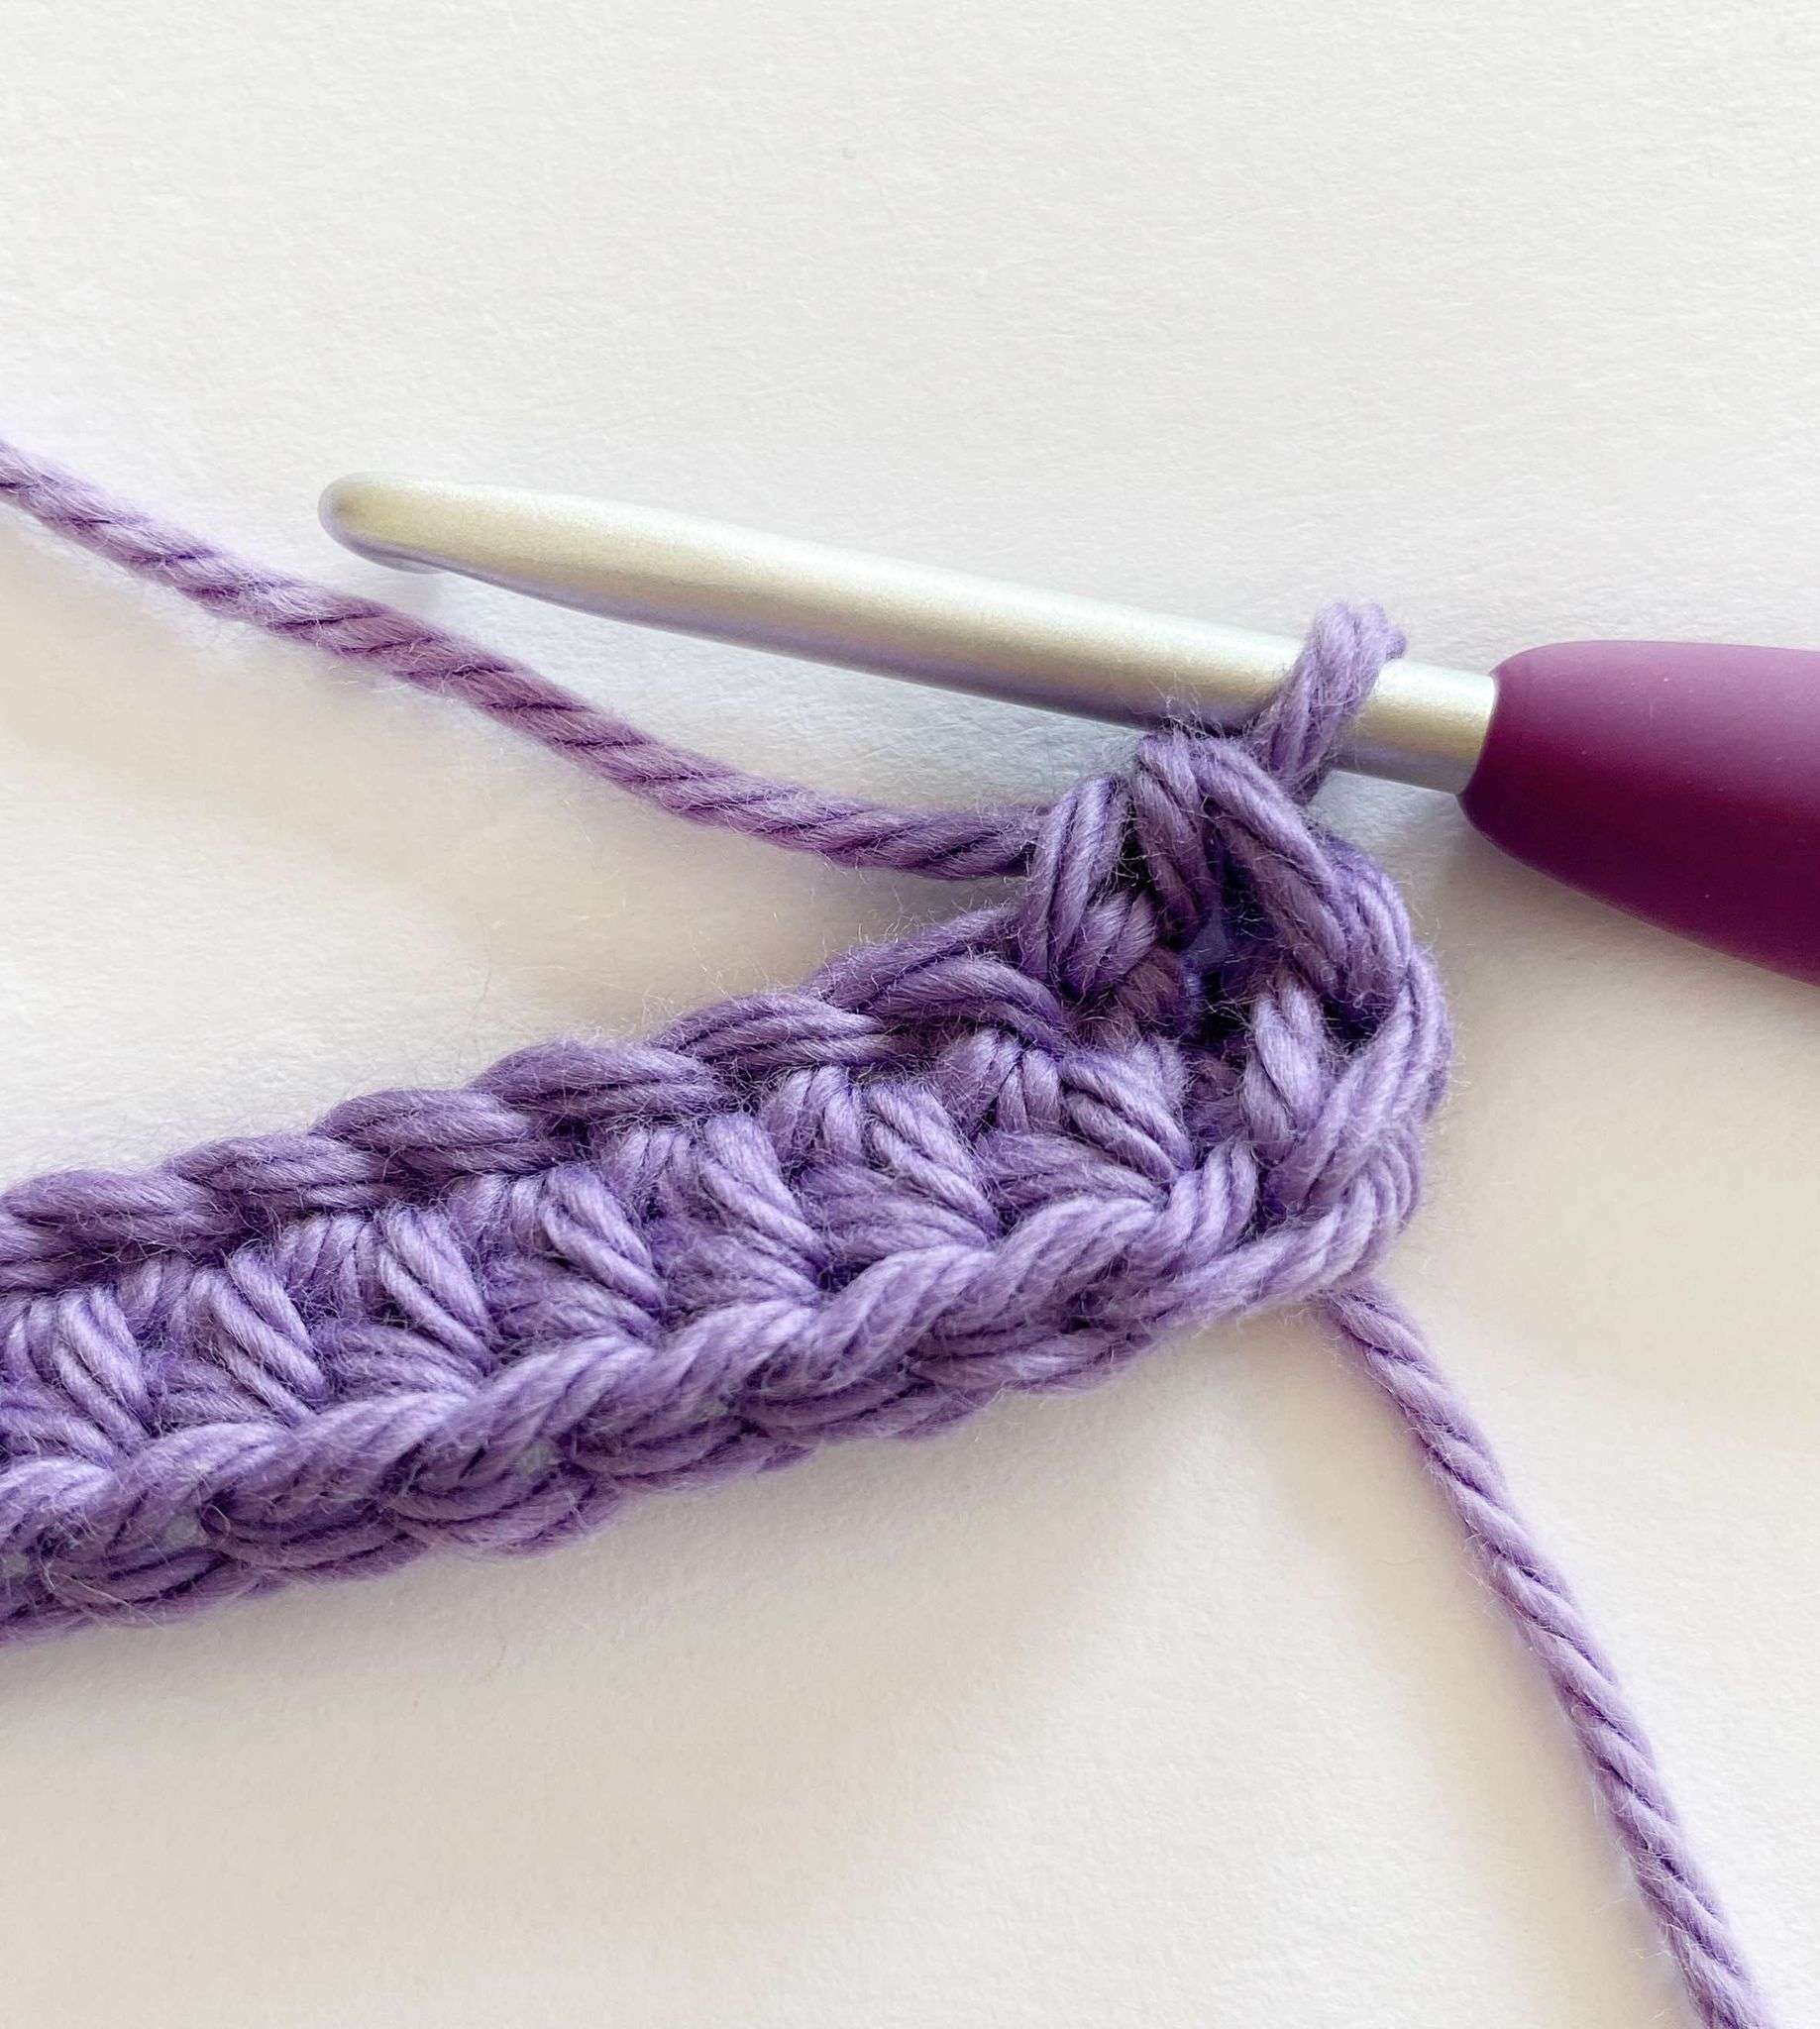
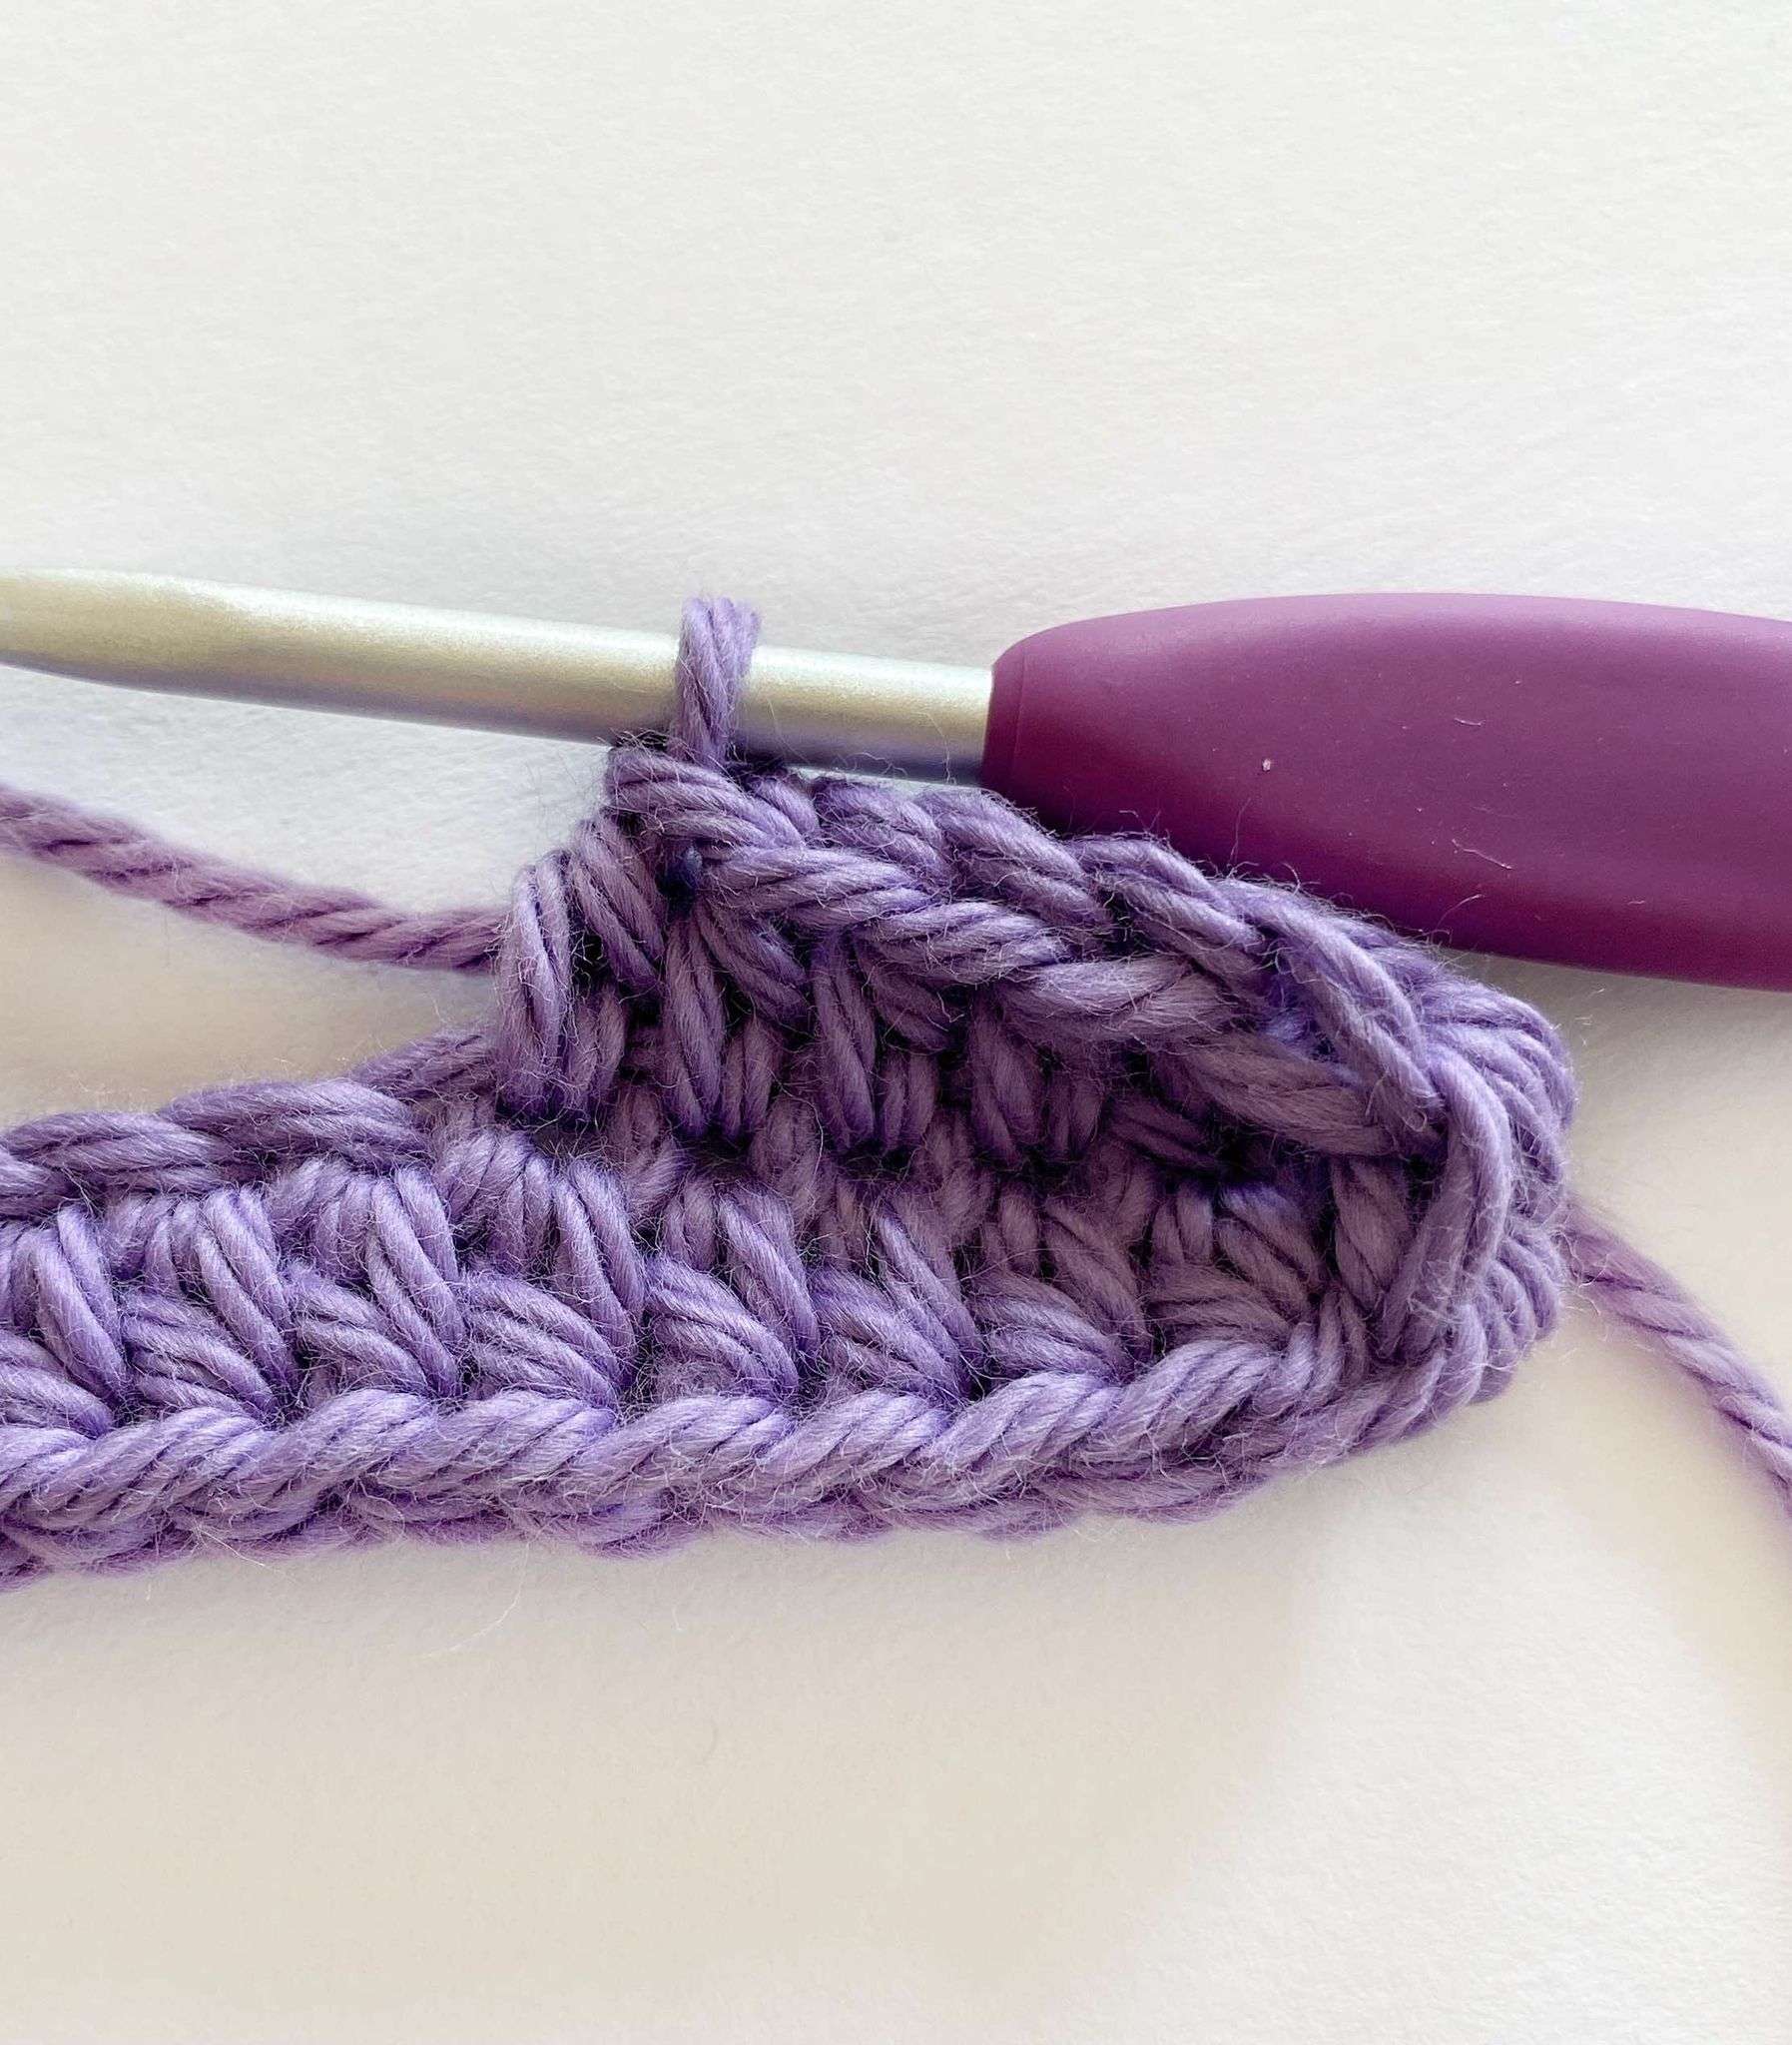
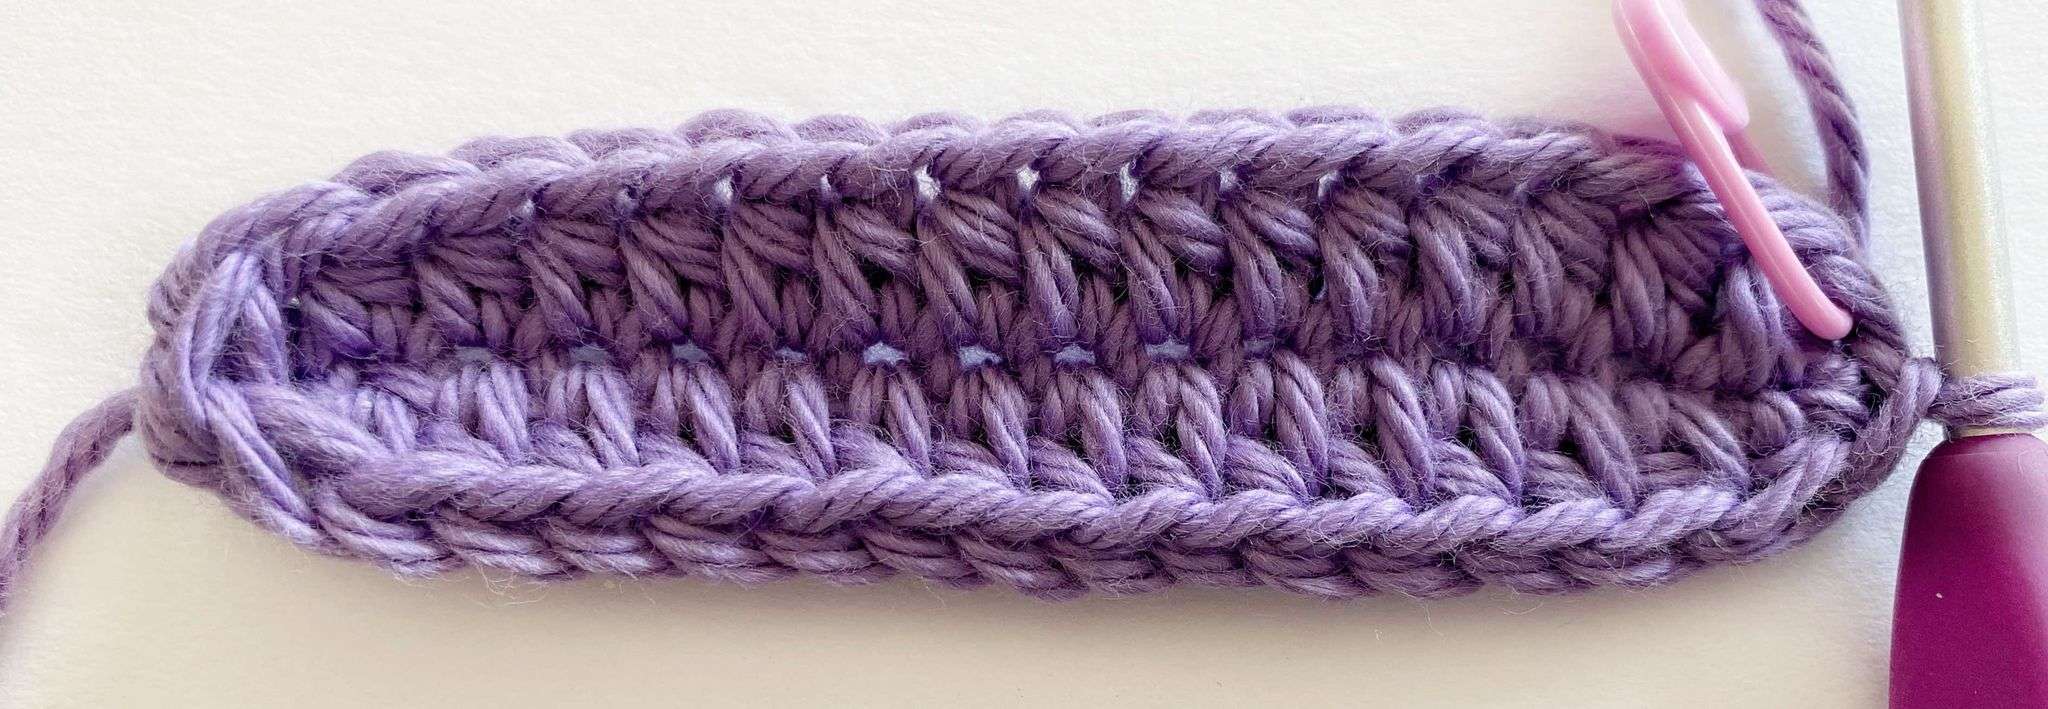
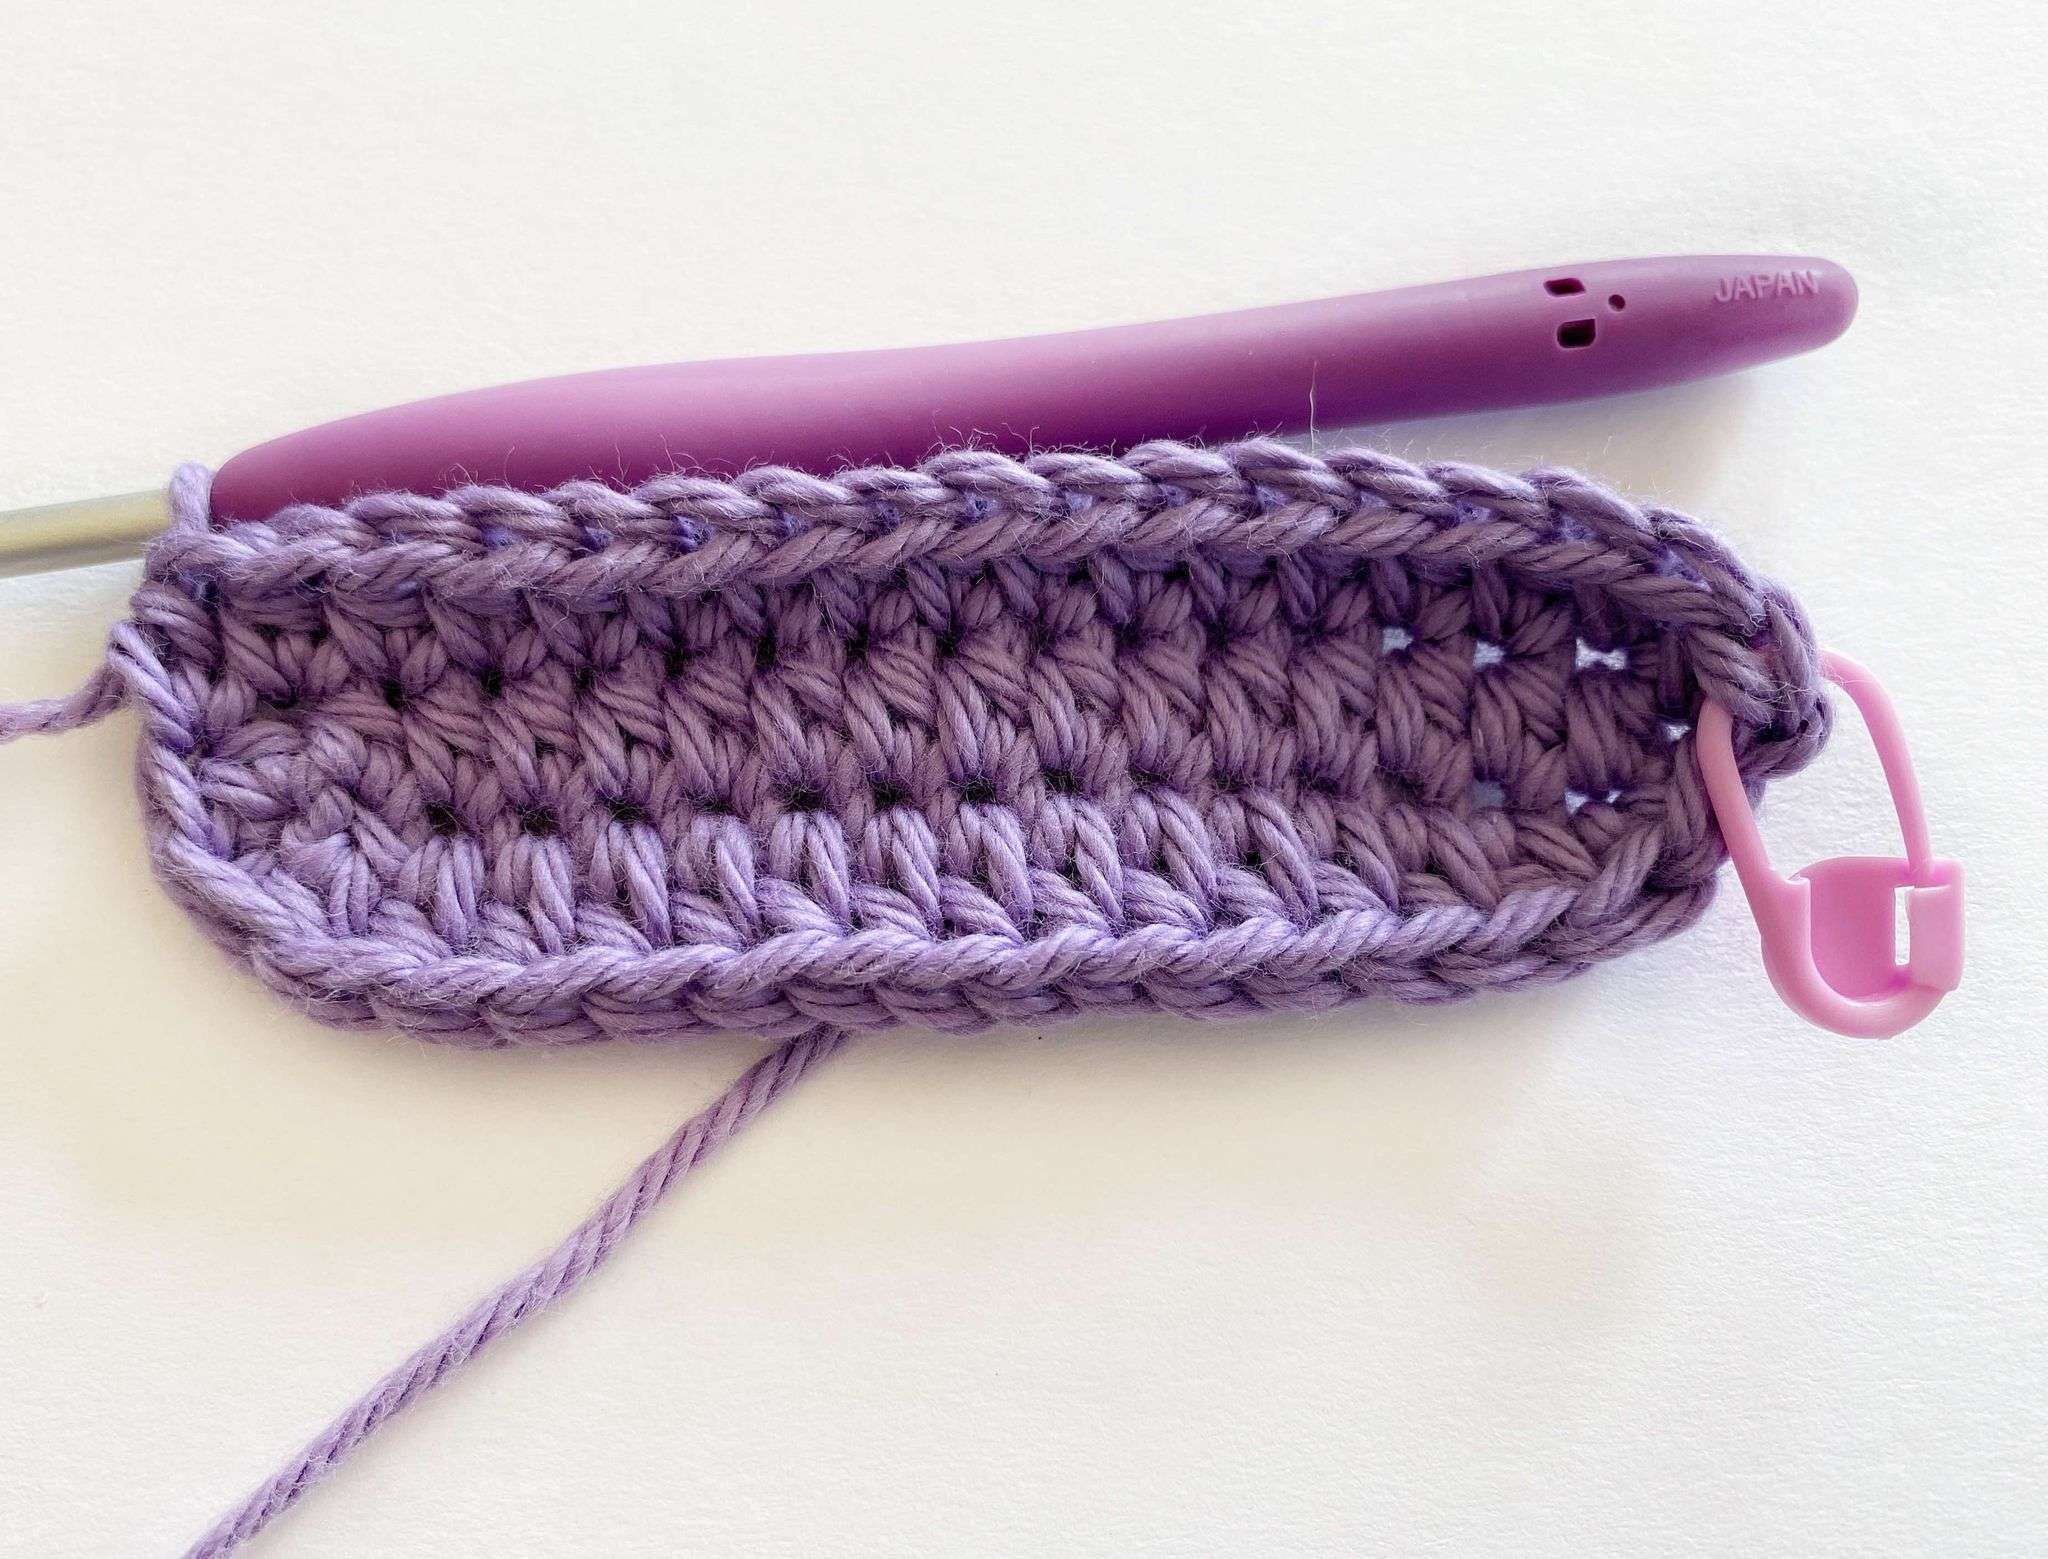
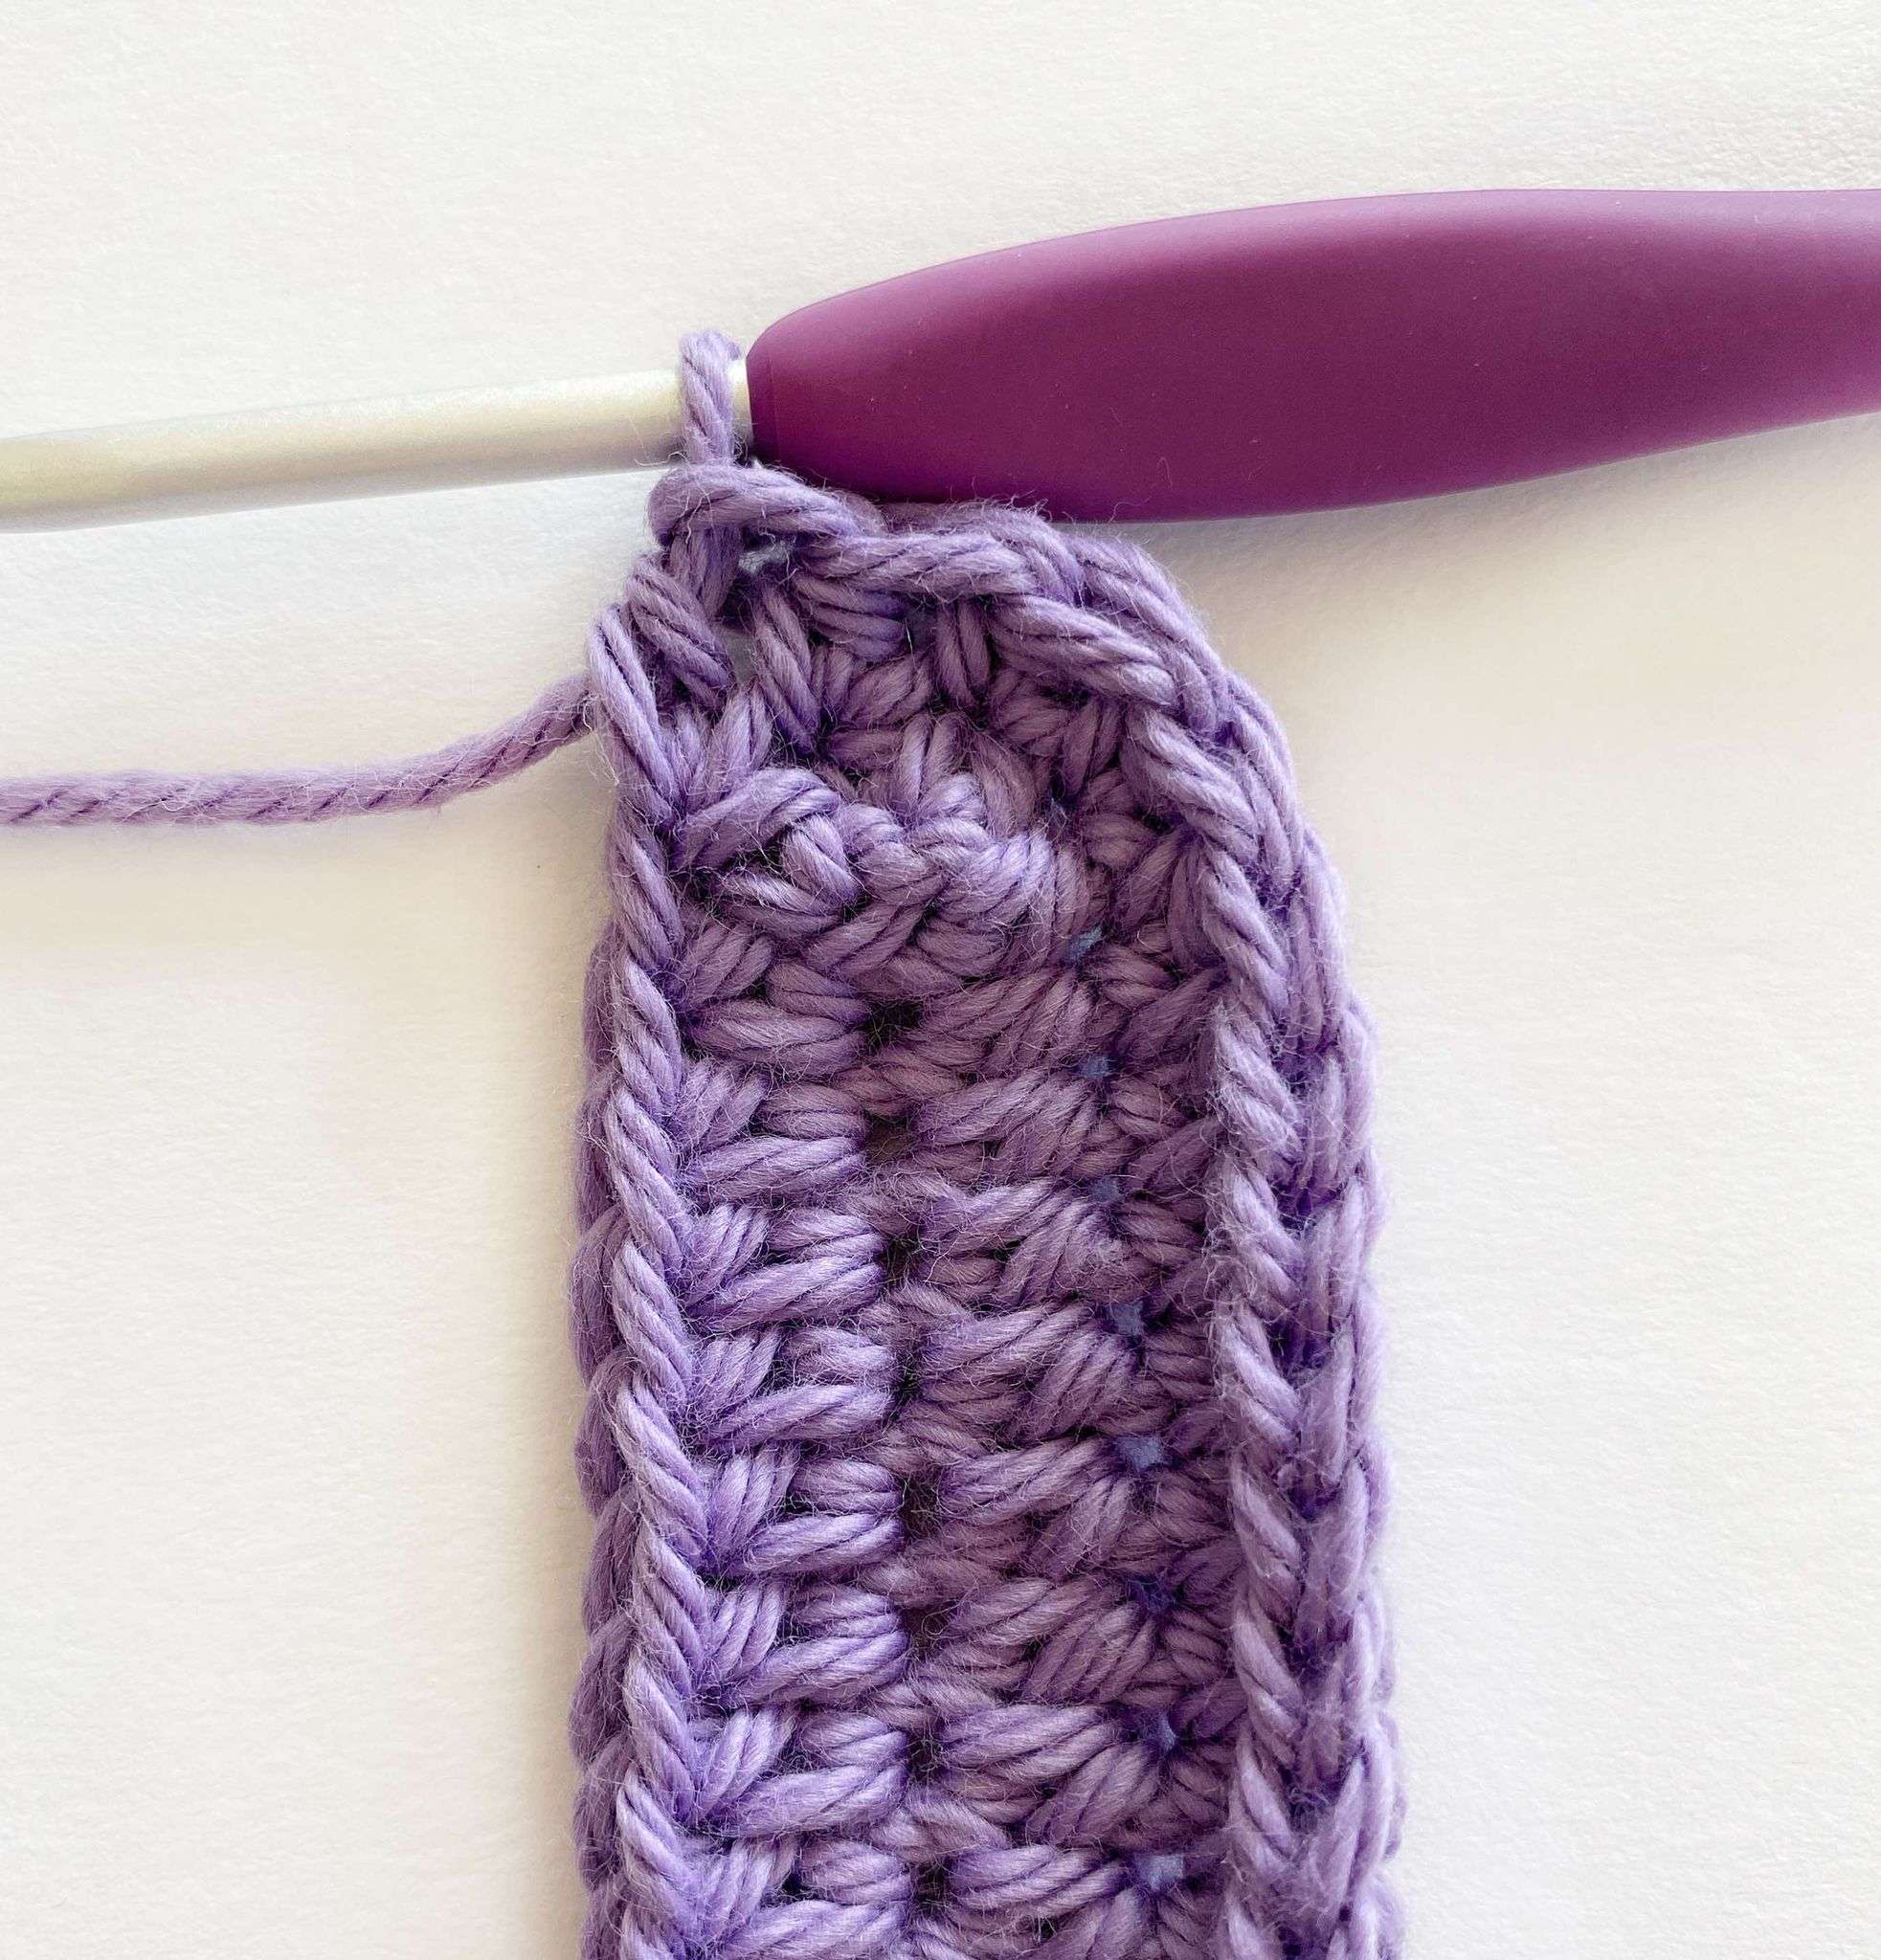
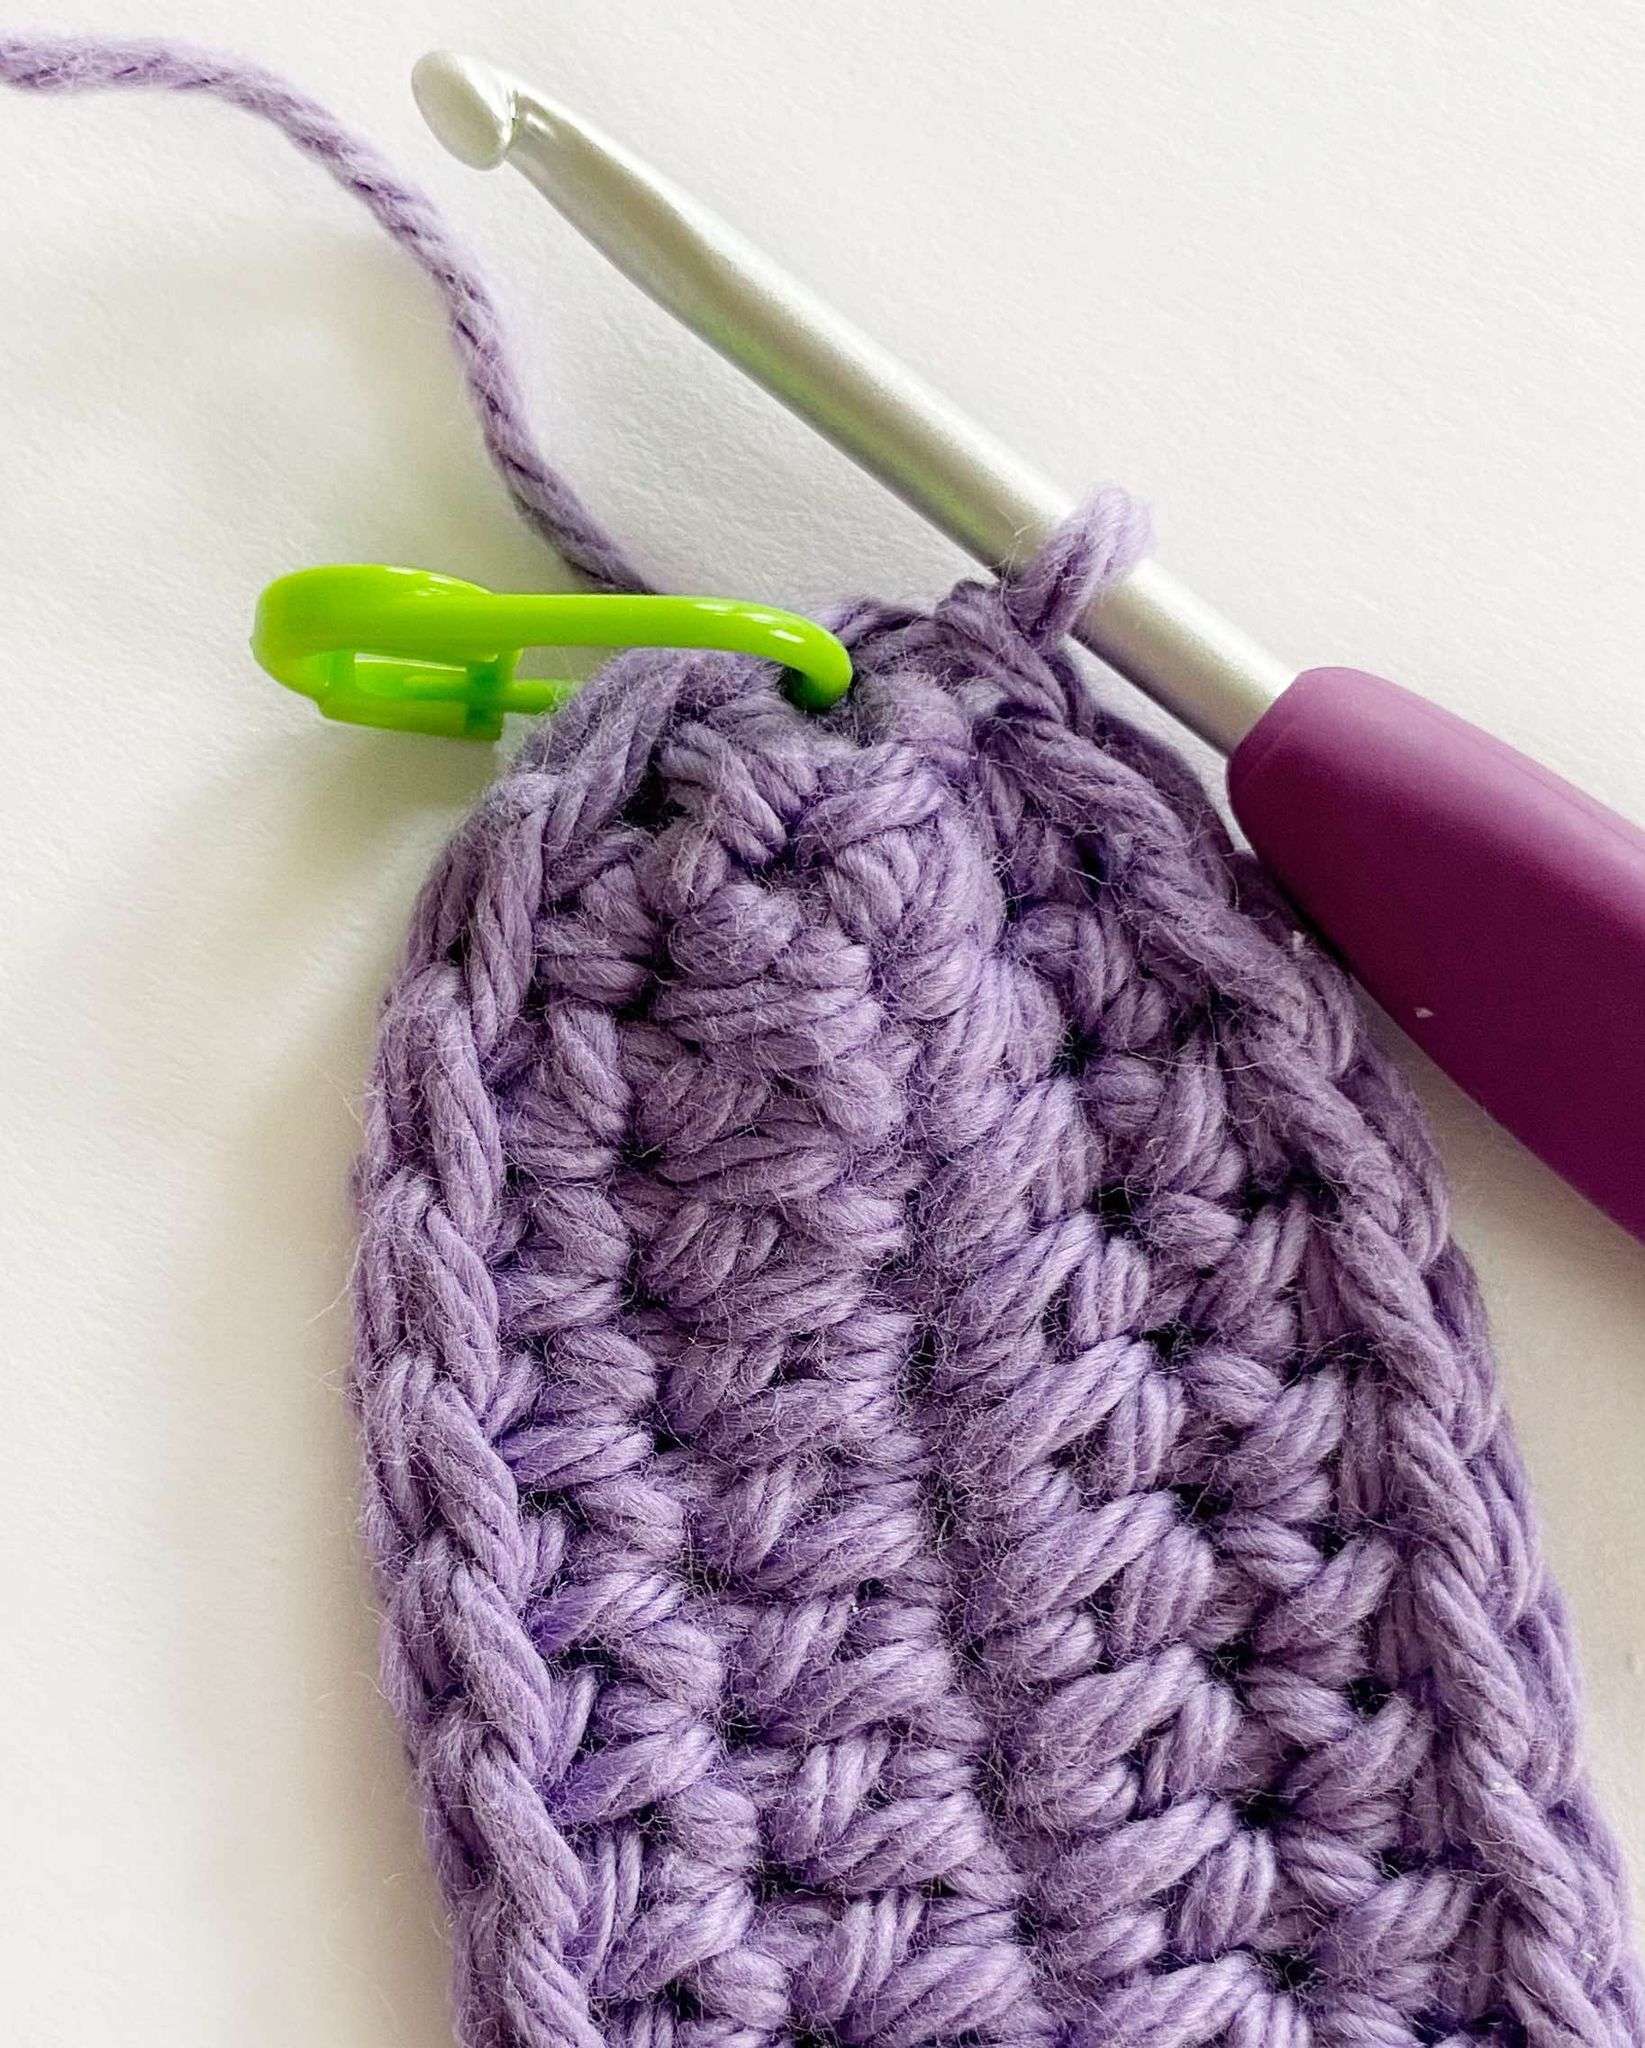
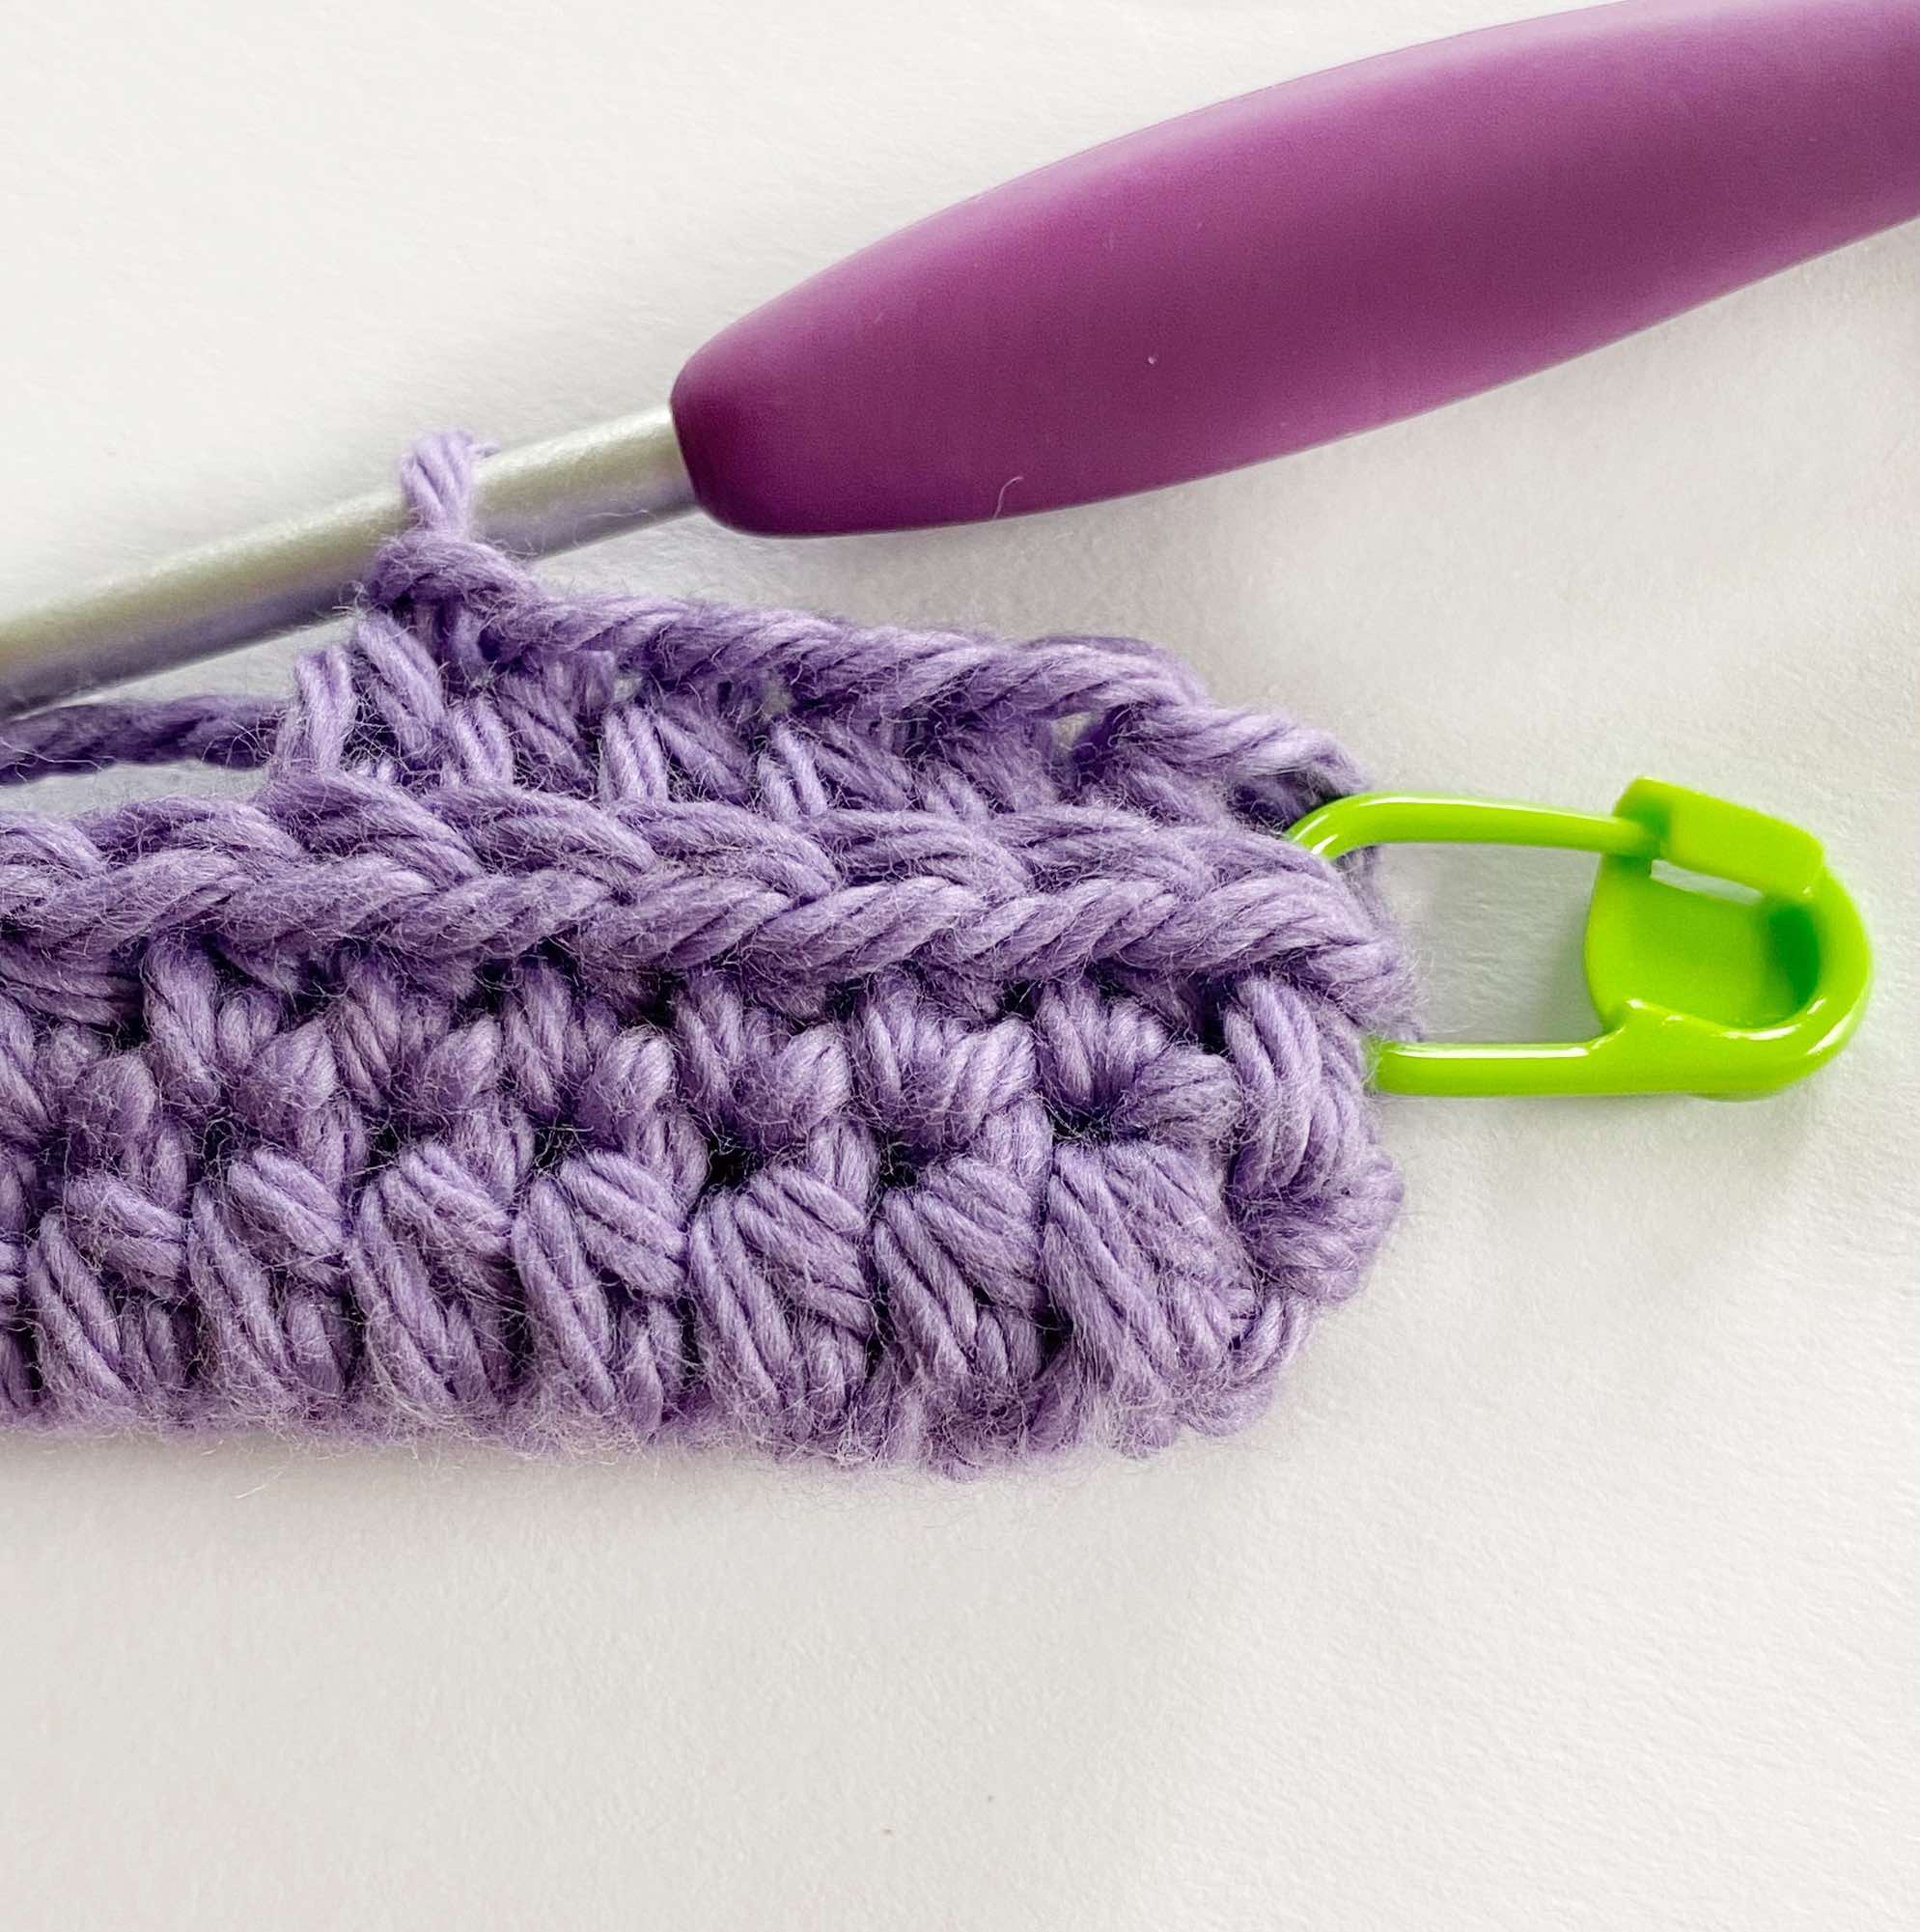
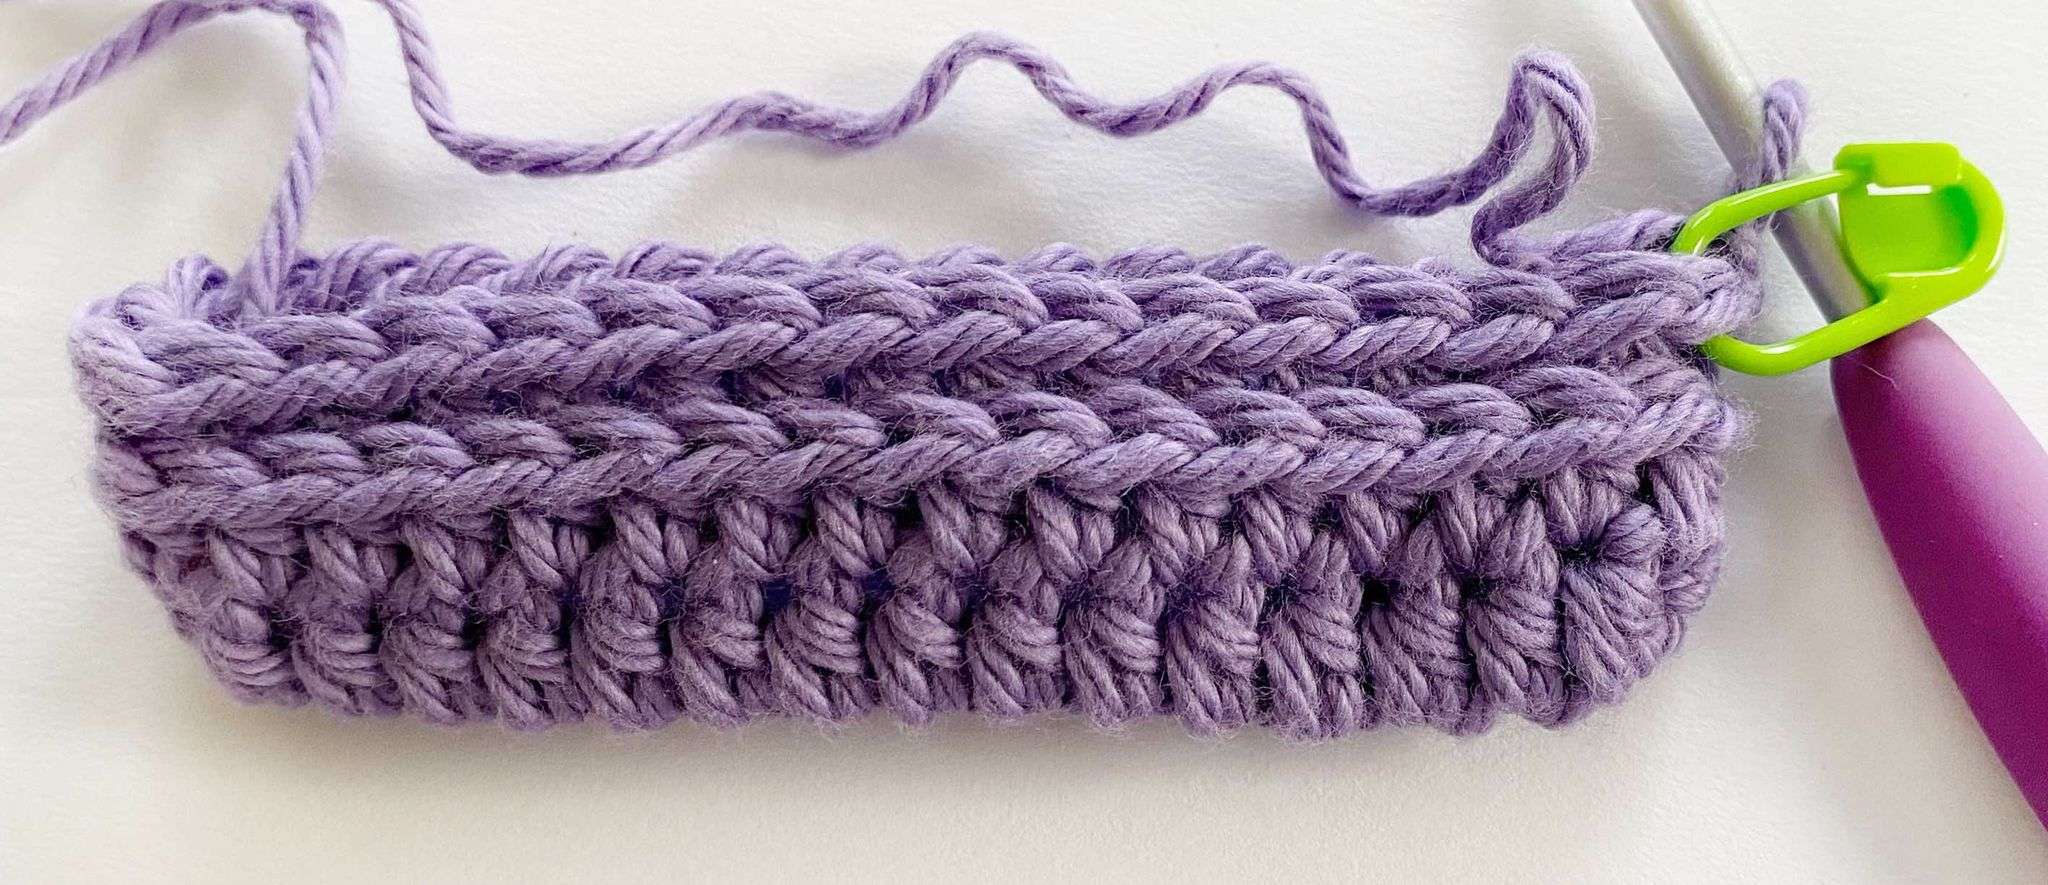
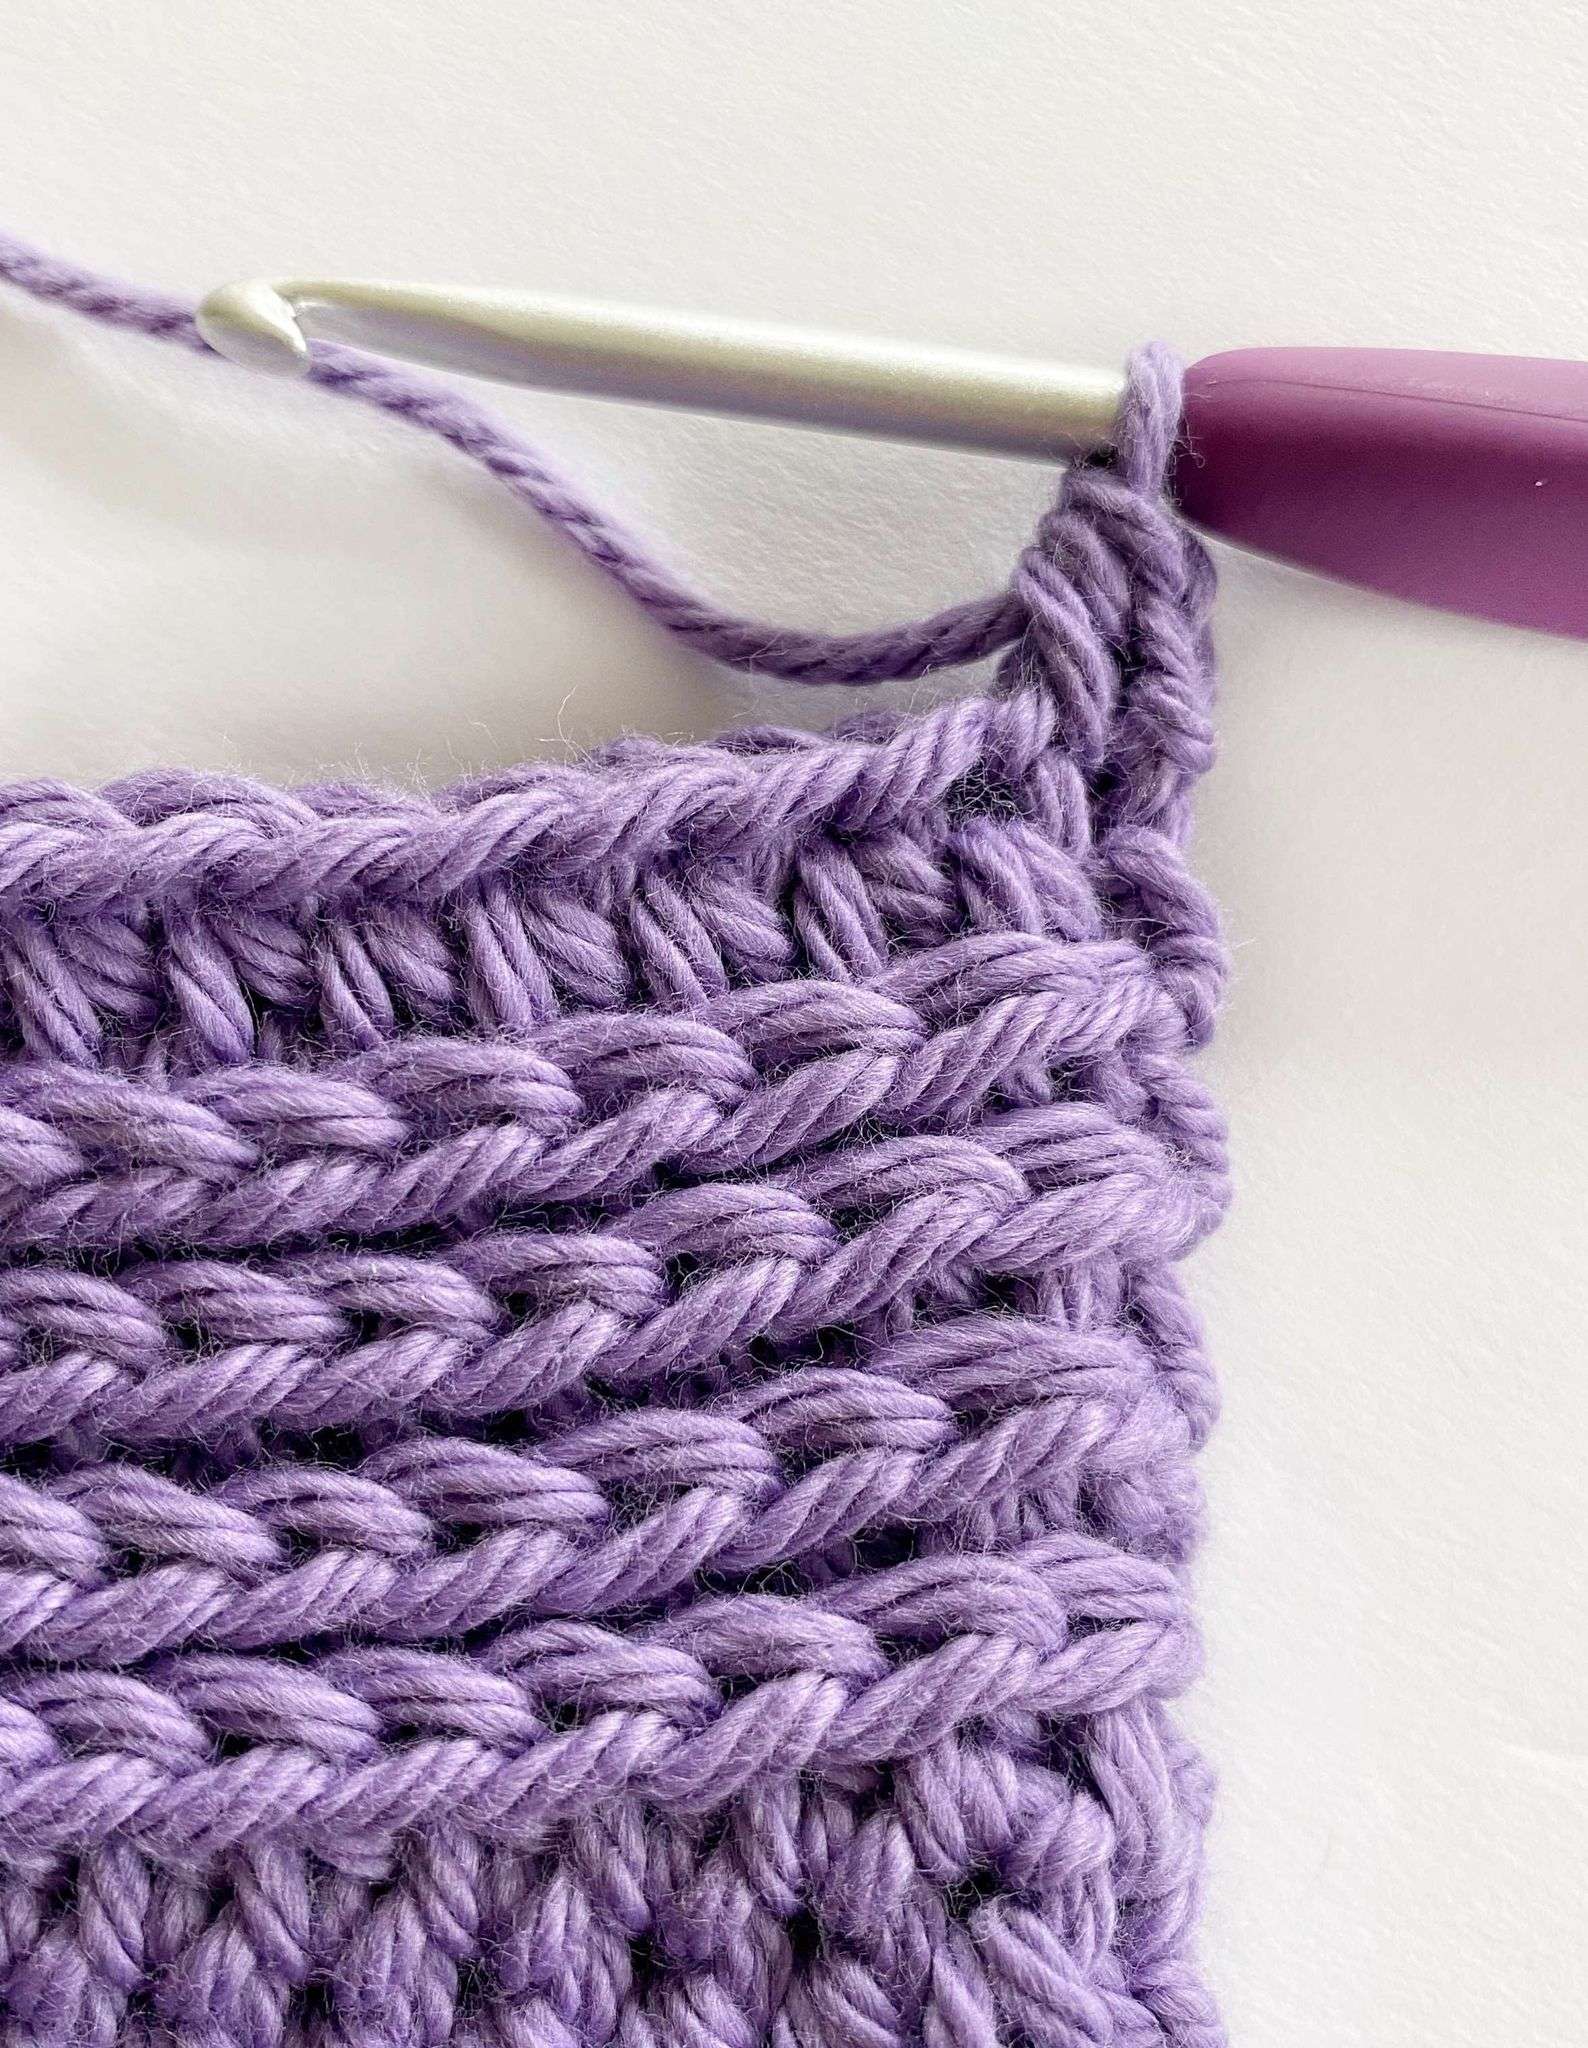
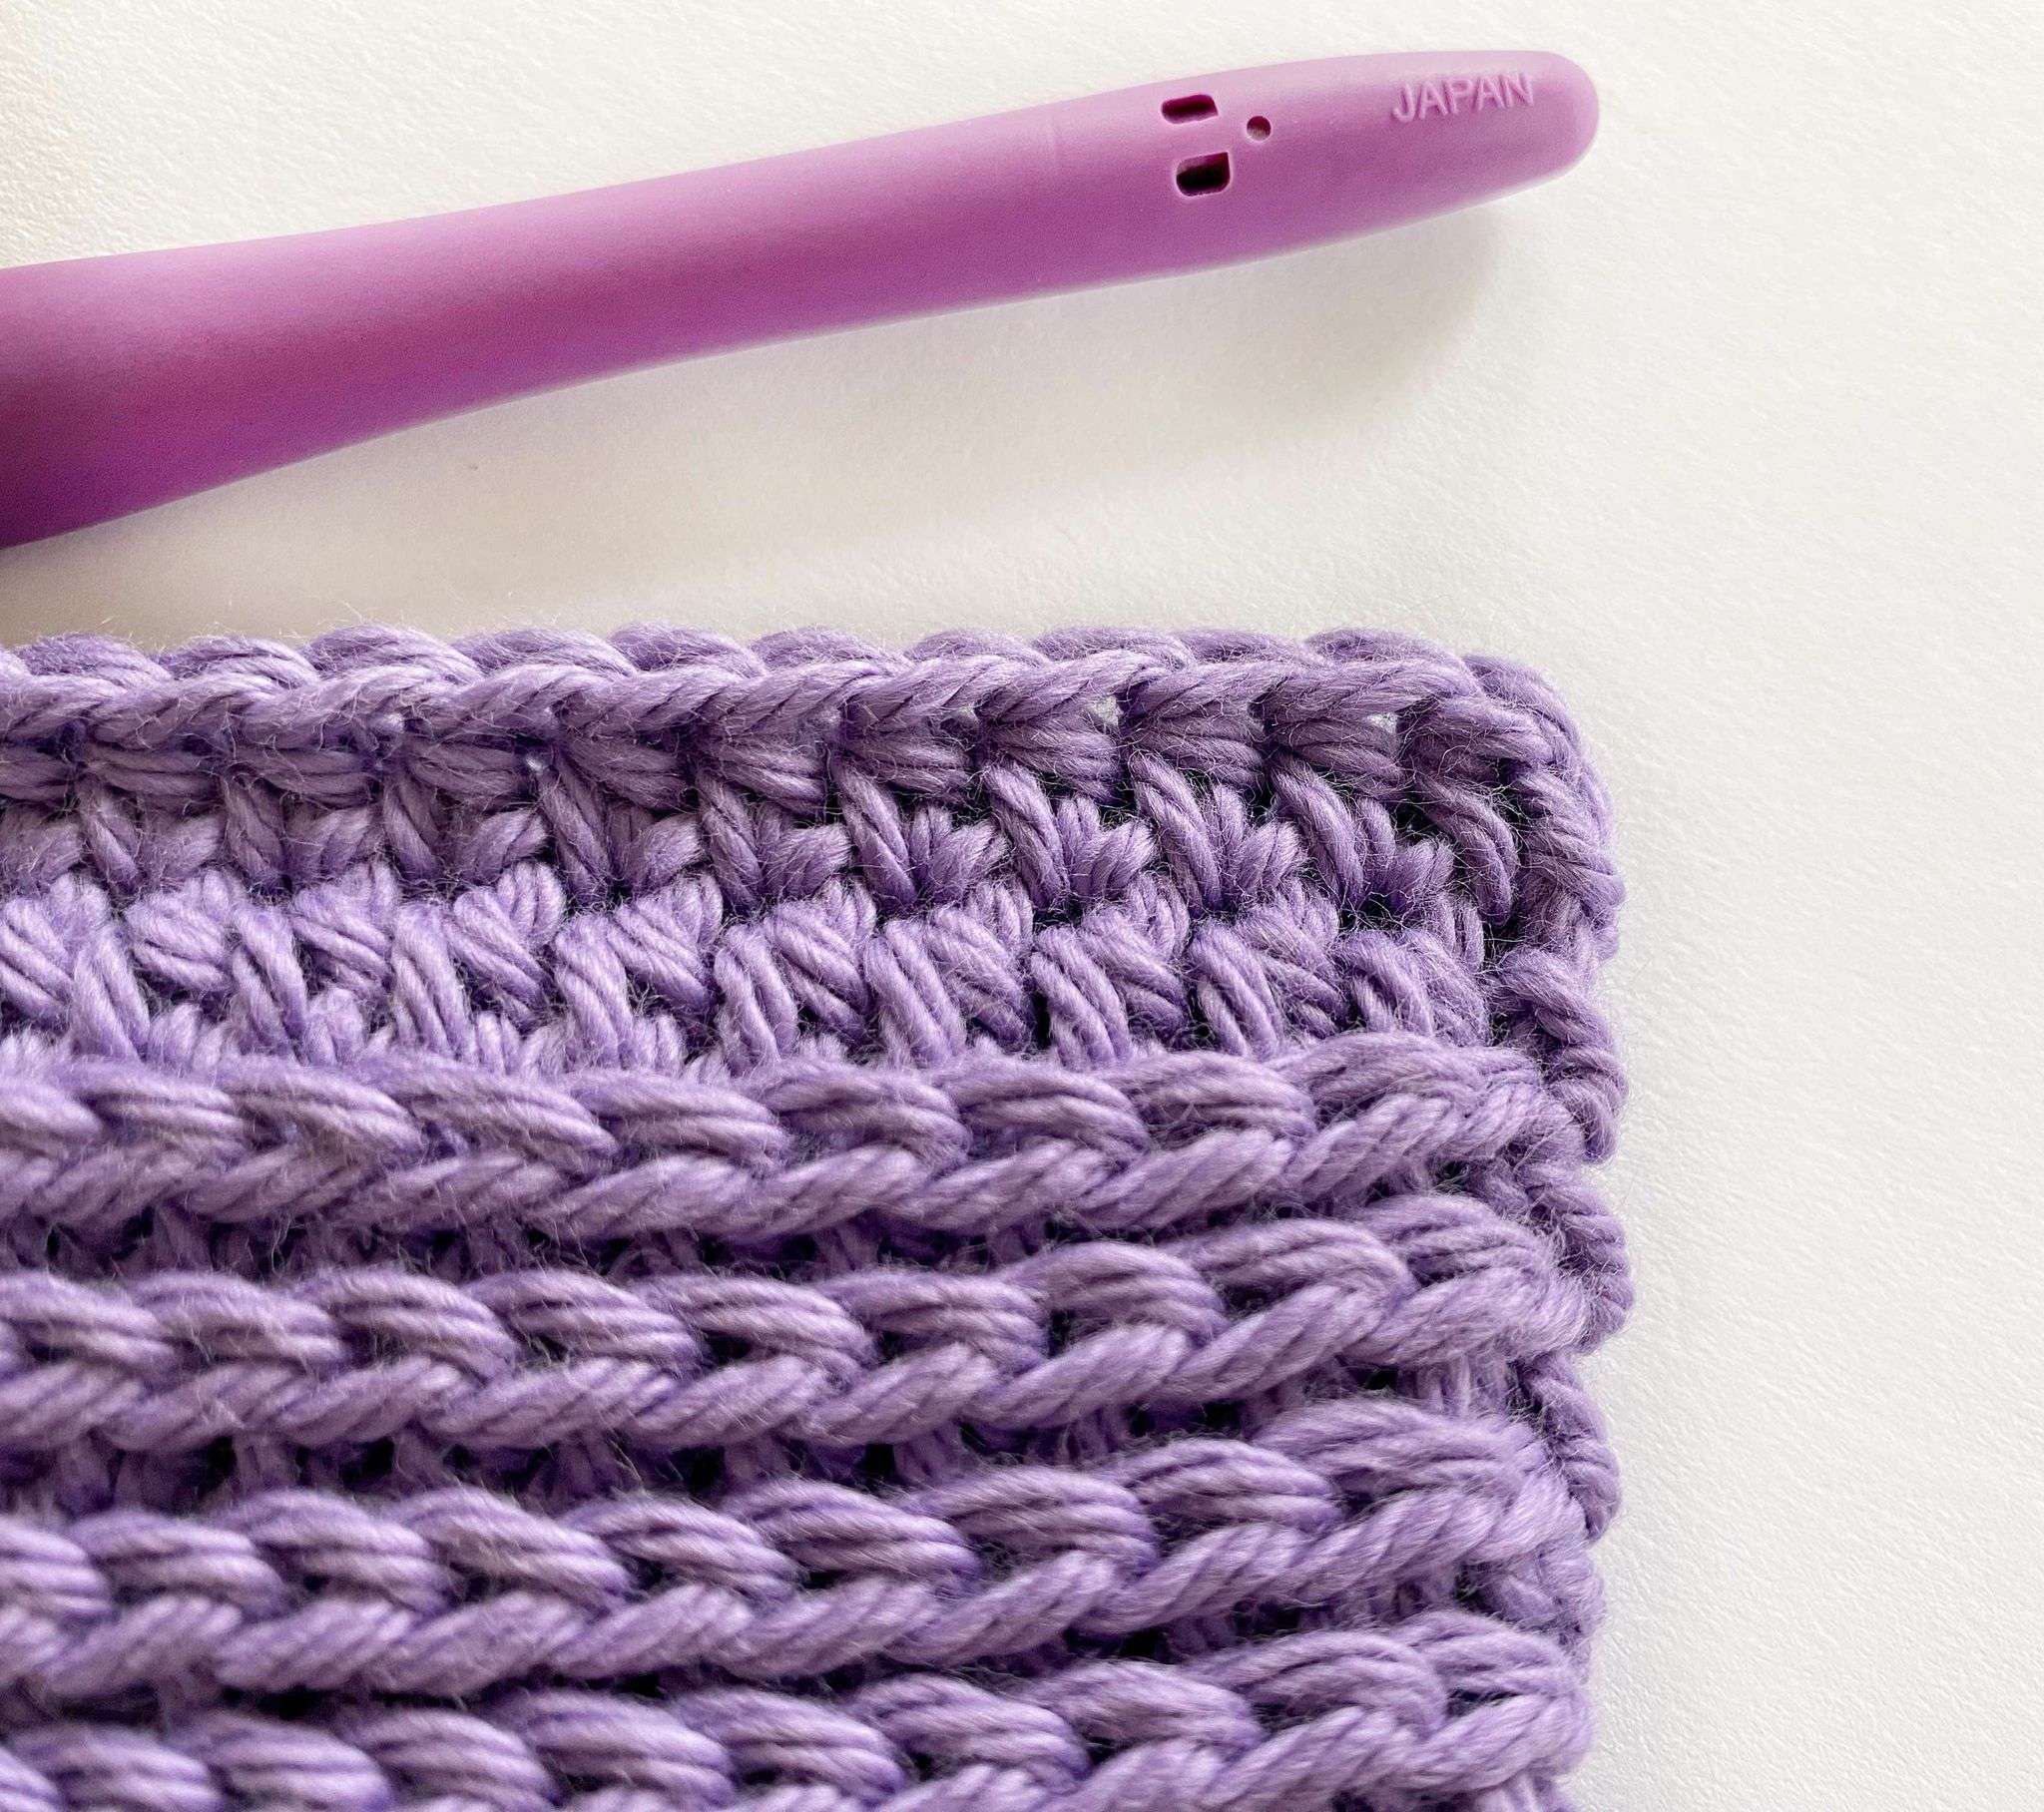
- You have done this stitch correctly if you can still see the front and back loop of the hdc in the previous round (Picture 3).
Creating a Straight Seam Along the Side:
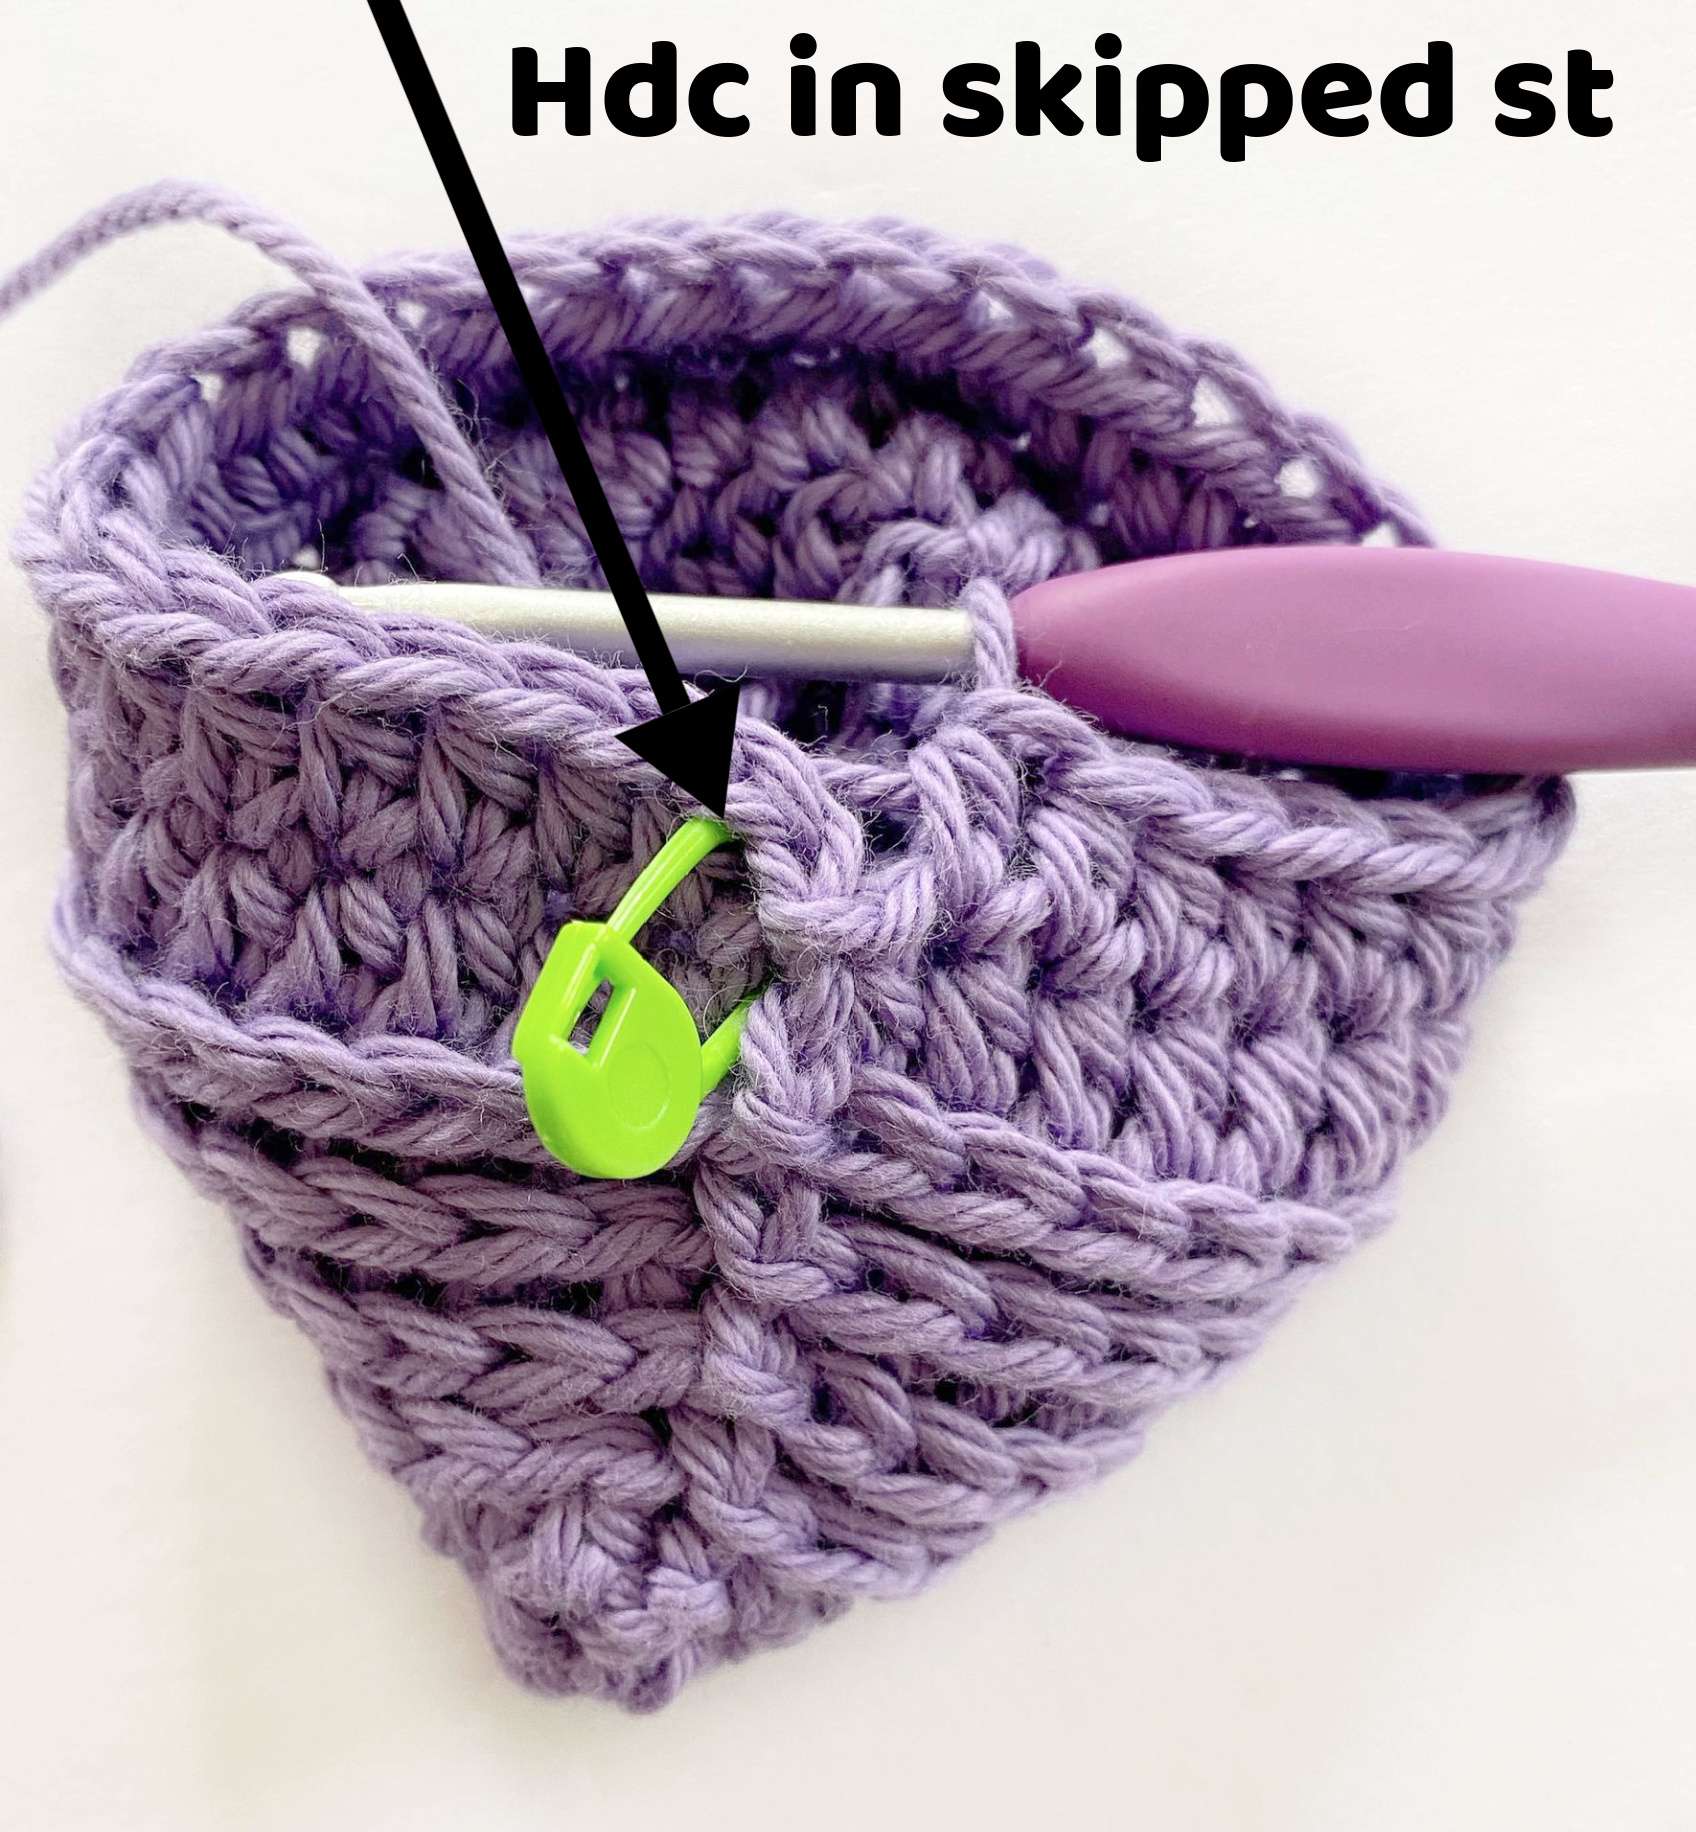
When working half double crochets in the round, the seam shifts to the left at the beginning of each round. This creates a noticeable diagonal seam across the potholder. To counteract this seam shift and create a straight seam along the side of the potholder, after Rnd 1 we’ll alternate between 2 rounds:
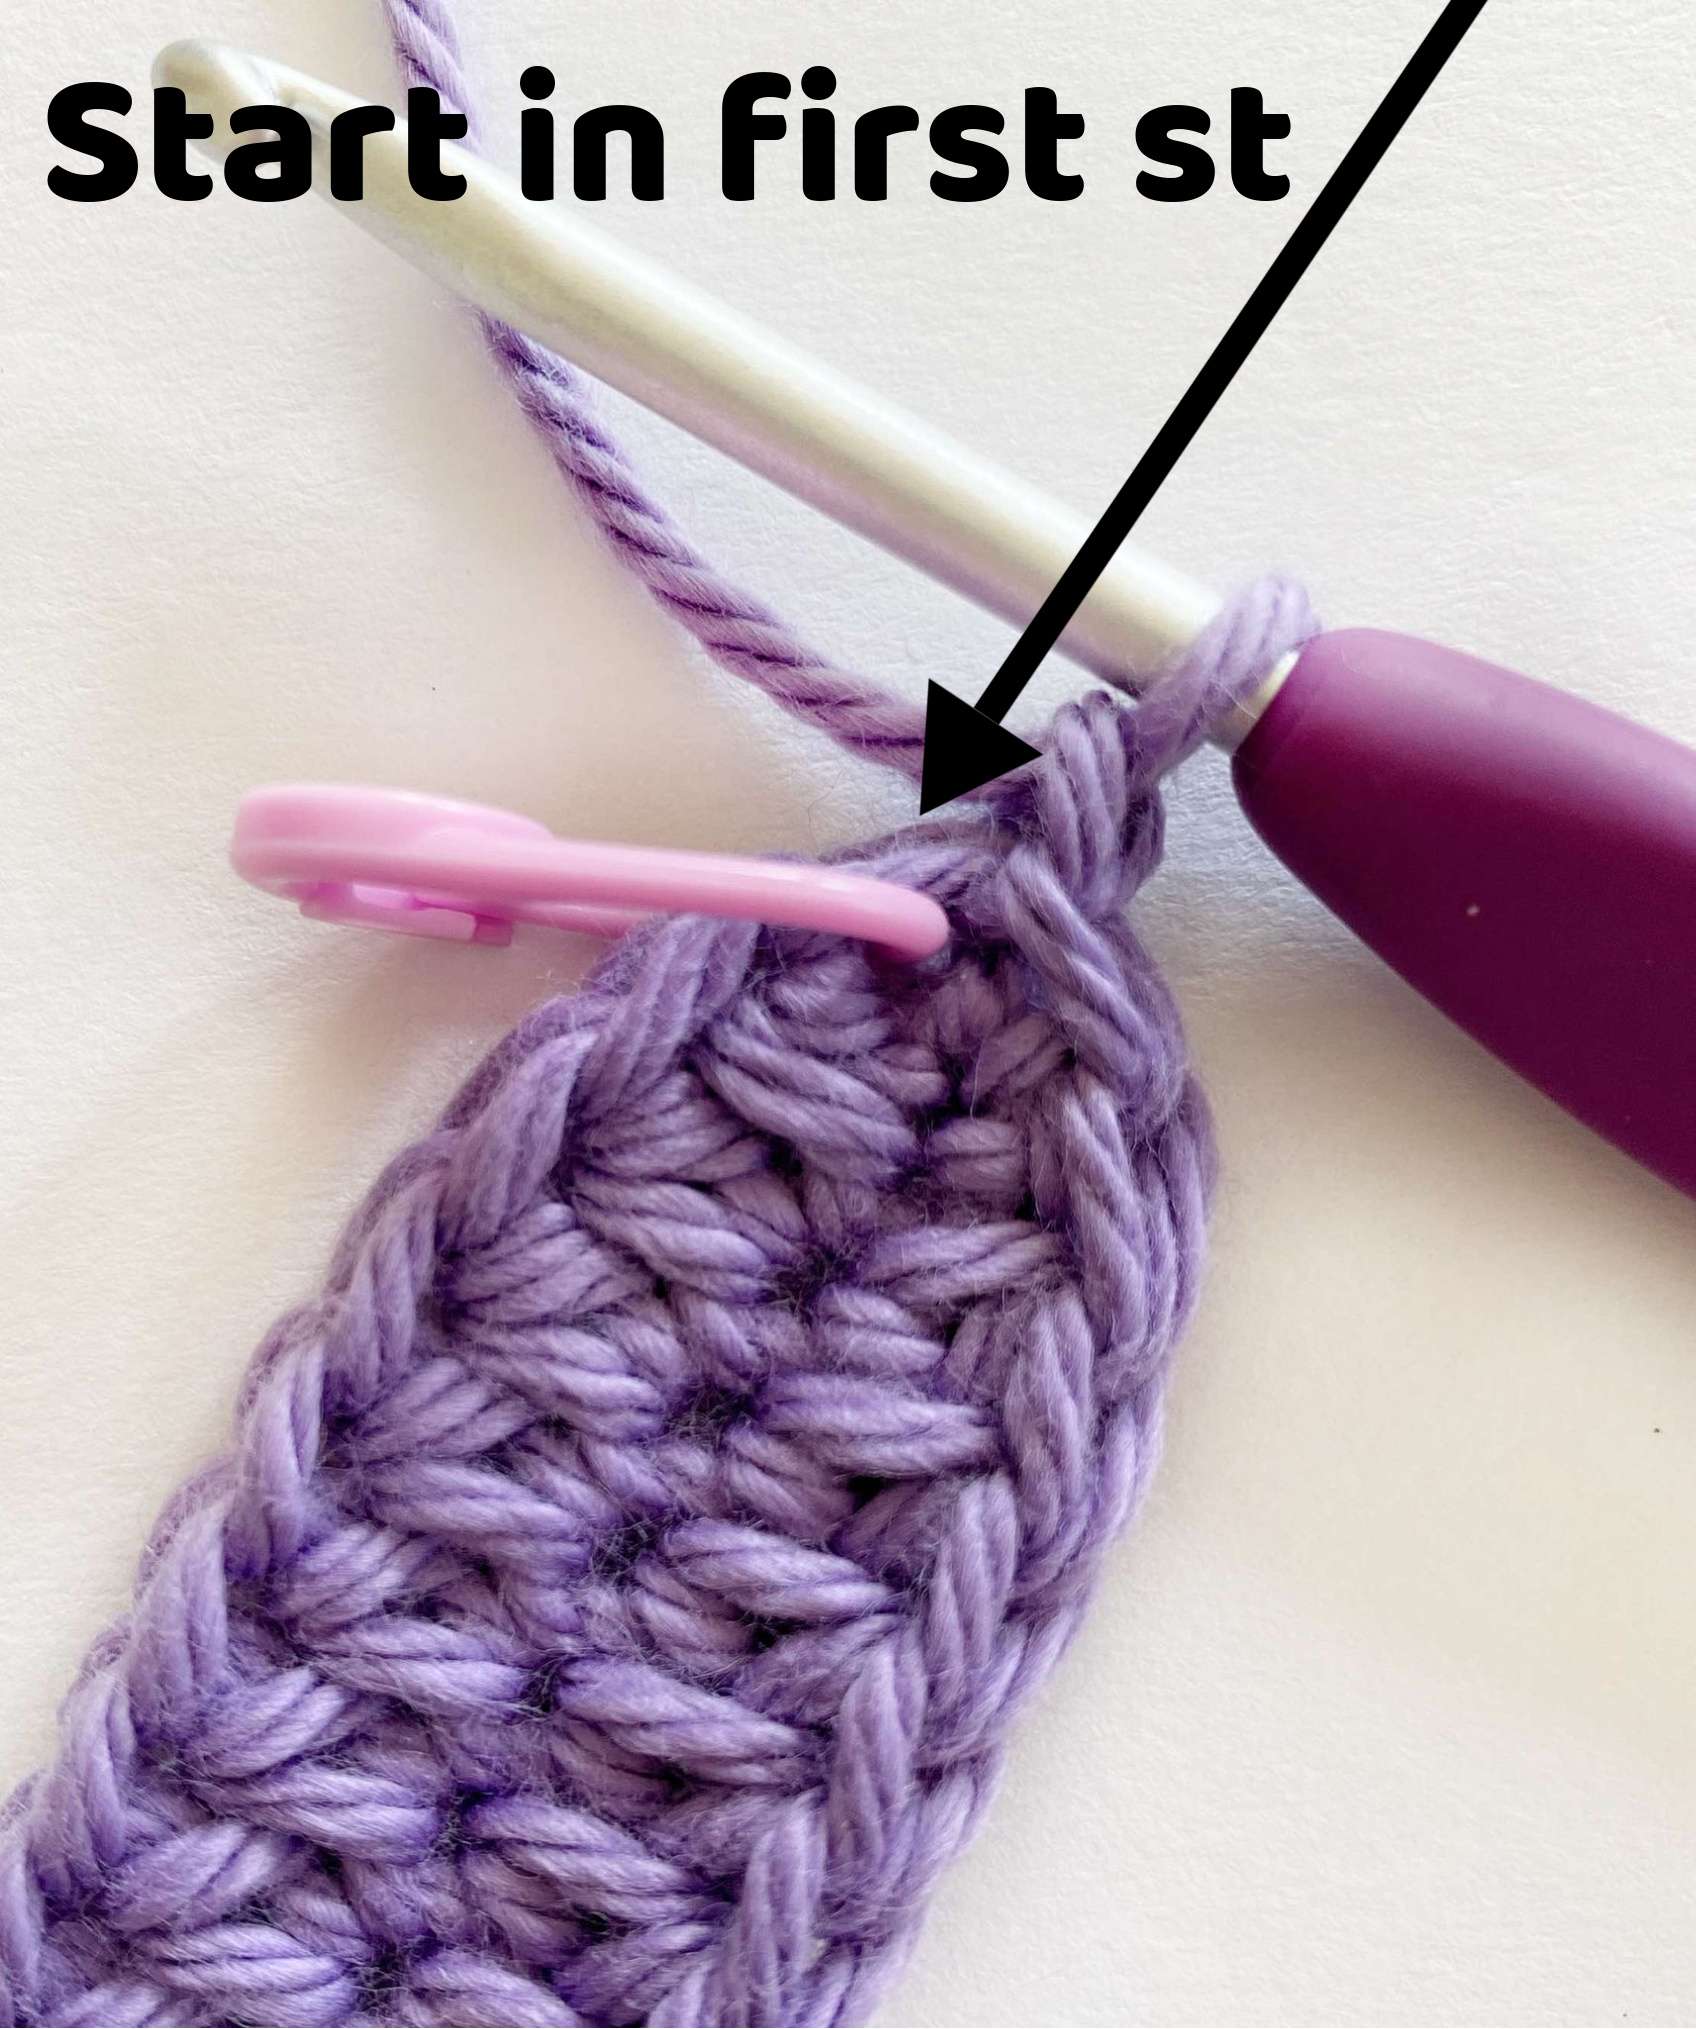
- Normal Round: Start in the first stitch of the round and end in the last stitch of the round.
- Skipped Round: Skip the first stitch of the round and start in the second stitch of the round; then end in the first stitch of the round.
Video Tutorial:
Pattern:
- Do not turn at the end of each rnd.
- The beginning ch 1 of each rnd does not count as a st.
- After Rnd 1, we alternate between normal and skipped rnds to create a straight seam. Odd numbered rnds are skipped rnds, and even numbered rnds are normal rnds (see above).
With Colour A, ch 35.
Rnd 1:
- Hdc in second ch from hook – mark with a stitch marker.
- Hdc in each ch across until 1 ch remains.
- 2 hdc in the last ch.
- Rotate your work 180 degrees clockwise, so you are working along the bottom of the chain.
- Sk last ch with 2 hdc. Hdc in next ch and in each ch across.
- Sl st into the first st of the rnd to join. Do not turn.
Stitch Count: 68 hdc
Rnd 2 (Normal):
- Ch 1, hdc in first st – mark with a stitch marker.
- Hdc in each st around.
- Sl st into the first st of the rnd to join. Do not turn.
Stitch Count: 68 hdc
Rnd 3 (Skipped):
- Ch 1, sk first marked hdc.
- Hdc in third loop only of next st and in each st around.
- Hdc in third loop only of first skipped st – mark with a stitch marker.
- Sl st into the first st of the rnd to join. Do not turn.
Stitch Count: 68 hdc
Rnd 4 (Normal):
- Ch 1, hdc in third loop only of first st – mark with a stitch marker.
- Hdc in third loop only of each st around.
- Sl st into the first st of the rnd to join. Do not turn.
Stitch Count: 68 hdc
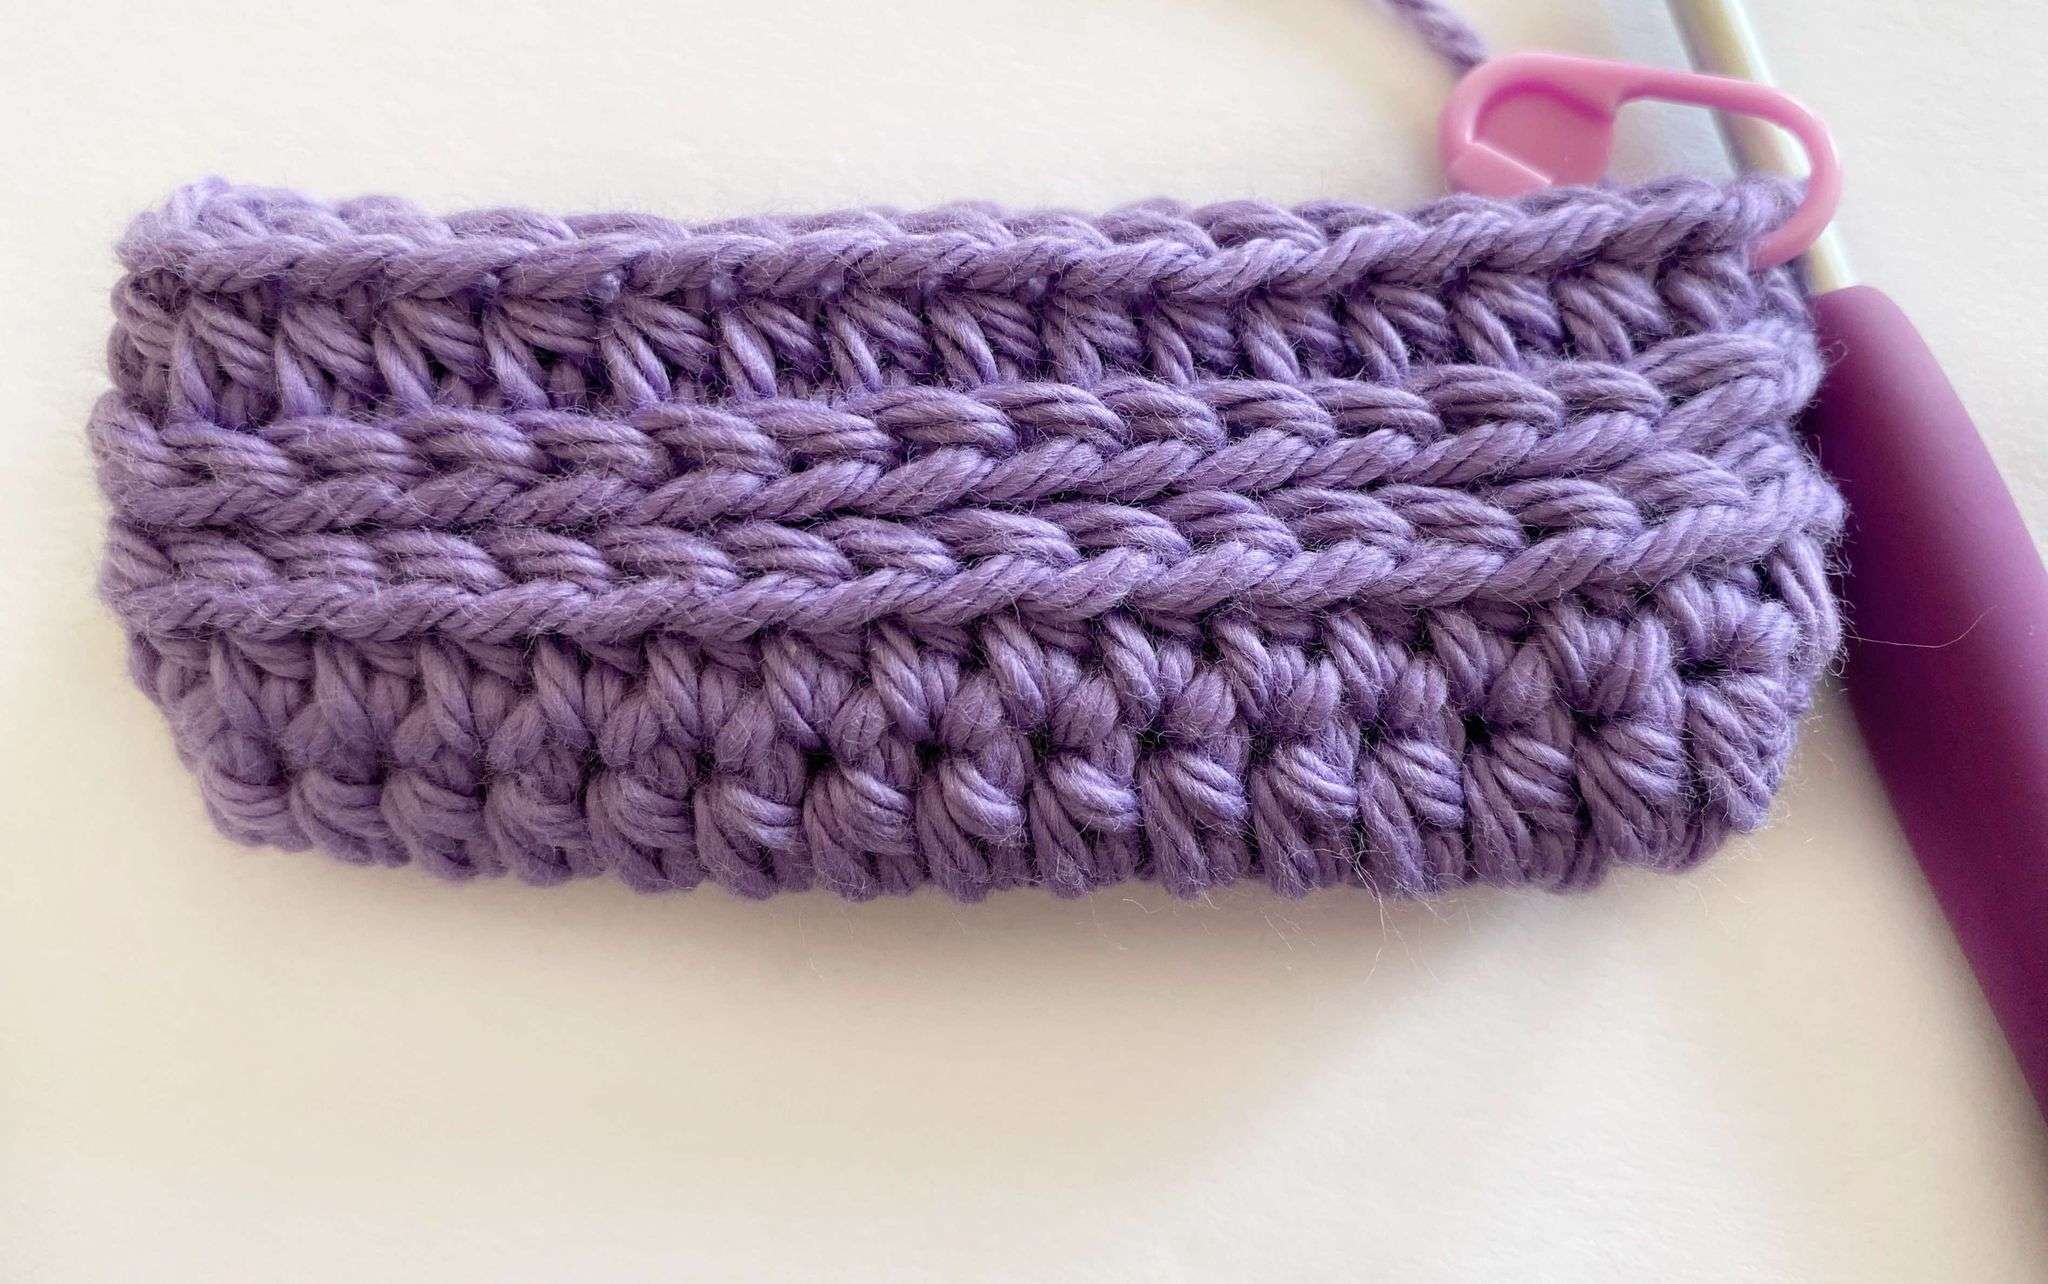
Rnds 5 – 6:
Repeat Rnds 3 – 4.
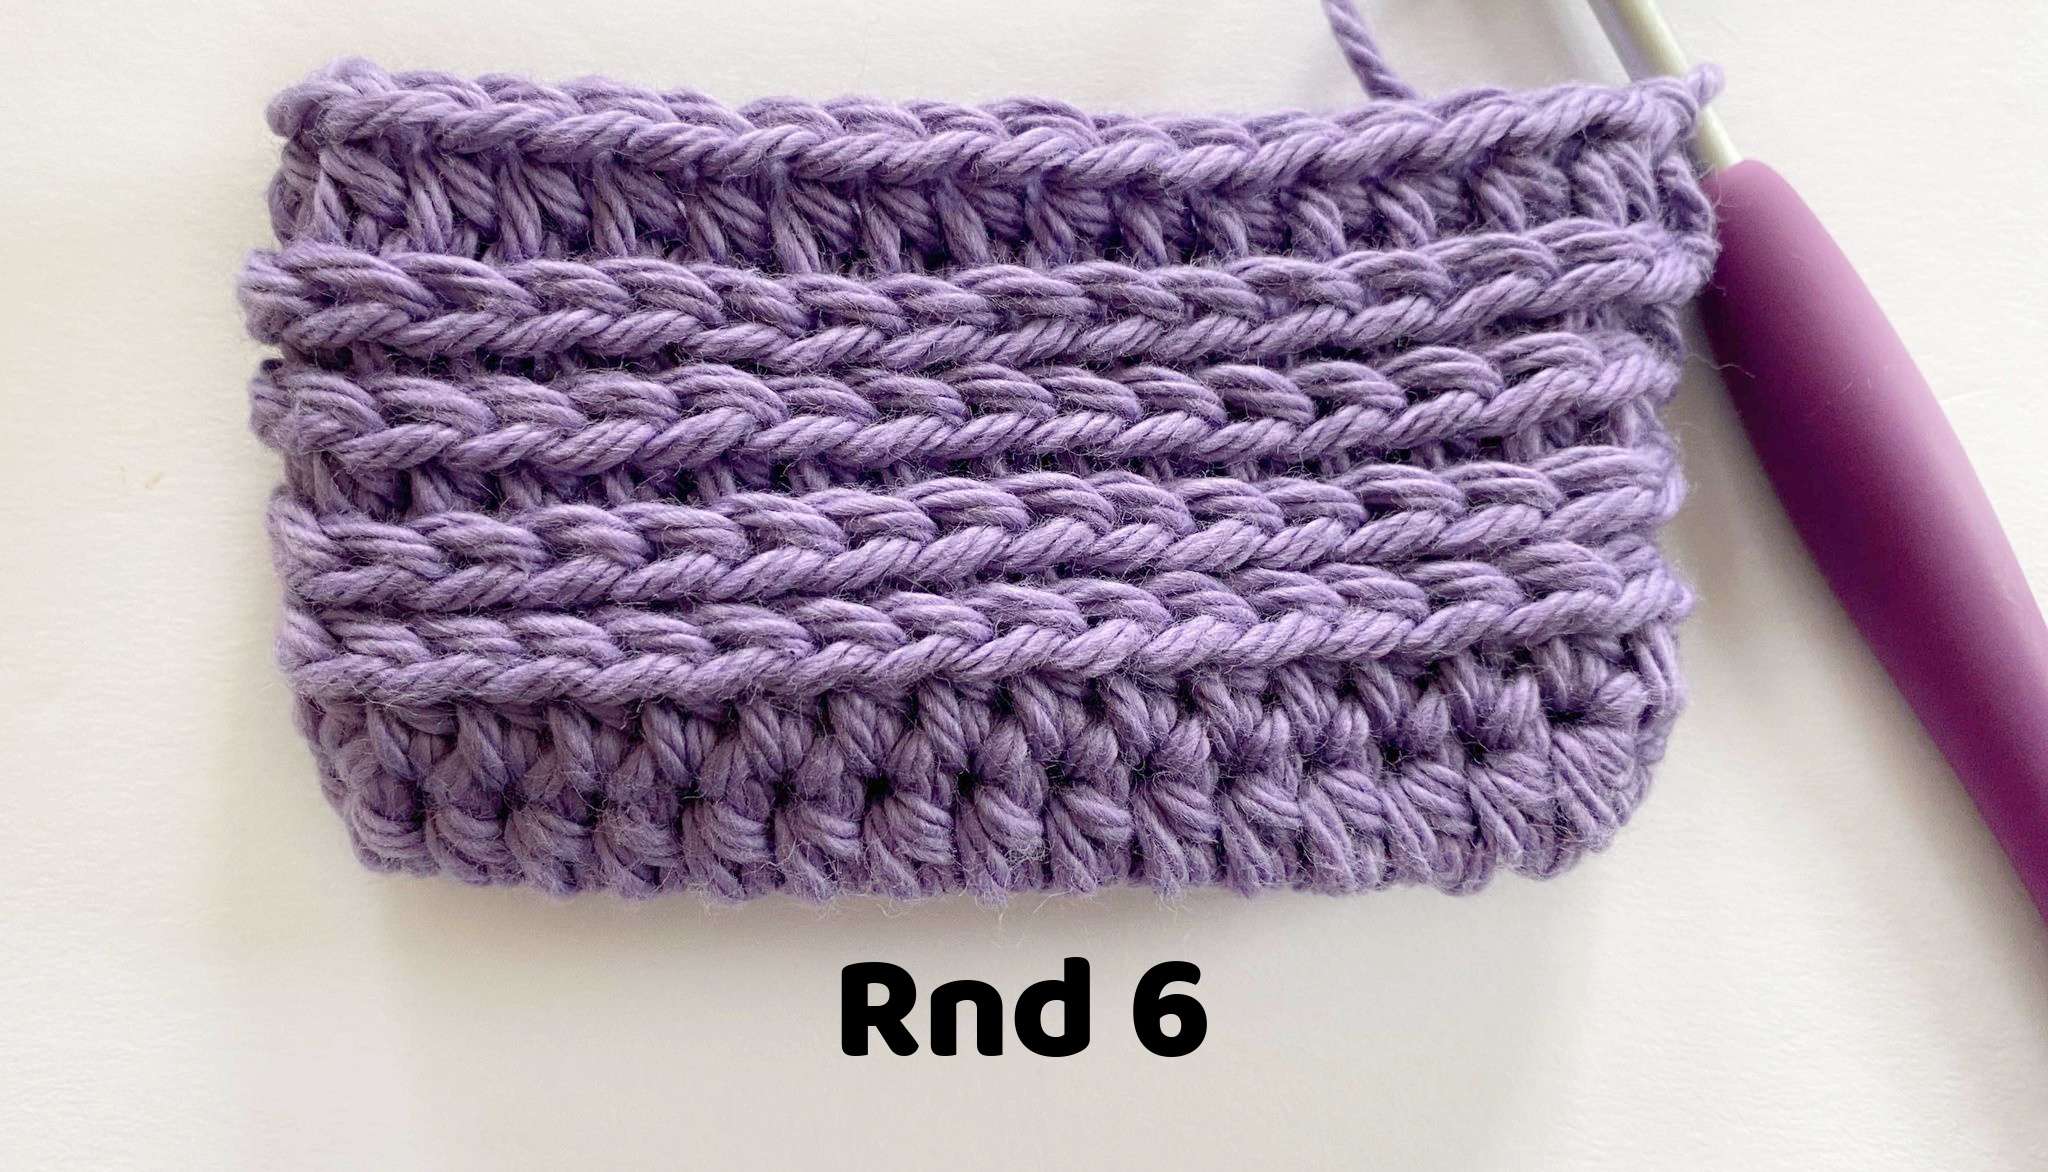
Rnd 7 (Skipped):
- Ch 1, sk first marked hdc.
- Hdc in next st and in each st around.
- Hdc in first skipped st – mark with a stitch marker.
- Sl st into the first st of the rnd to join. Do not turn.
Stitch Count: 68 hdc
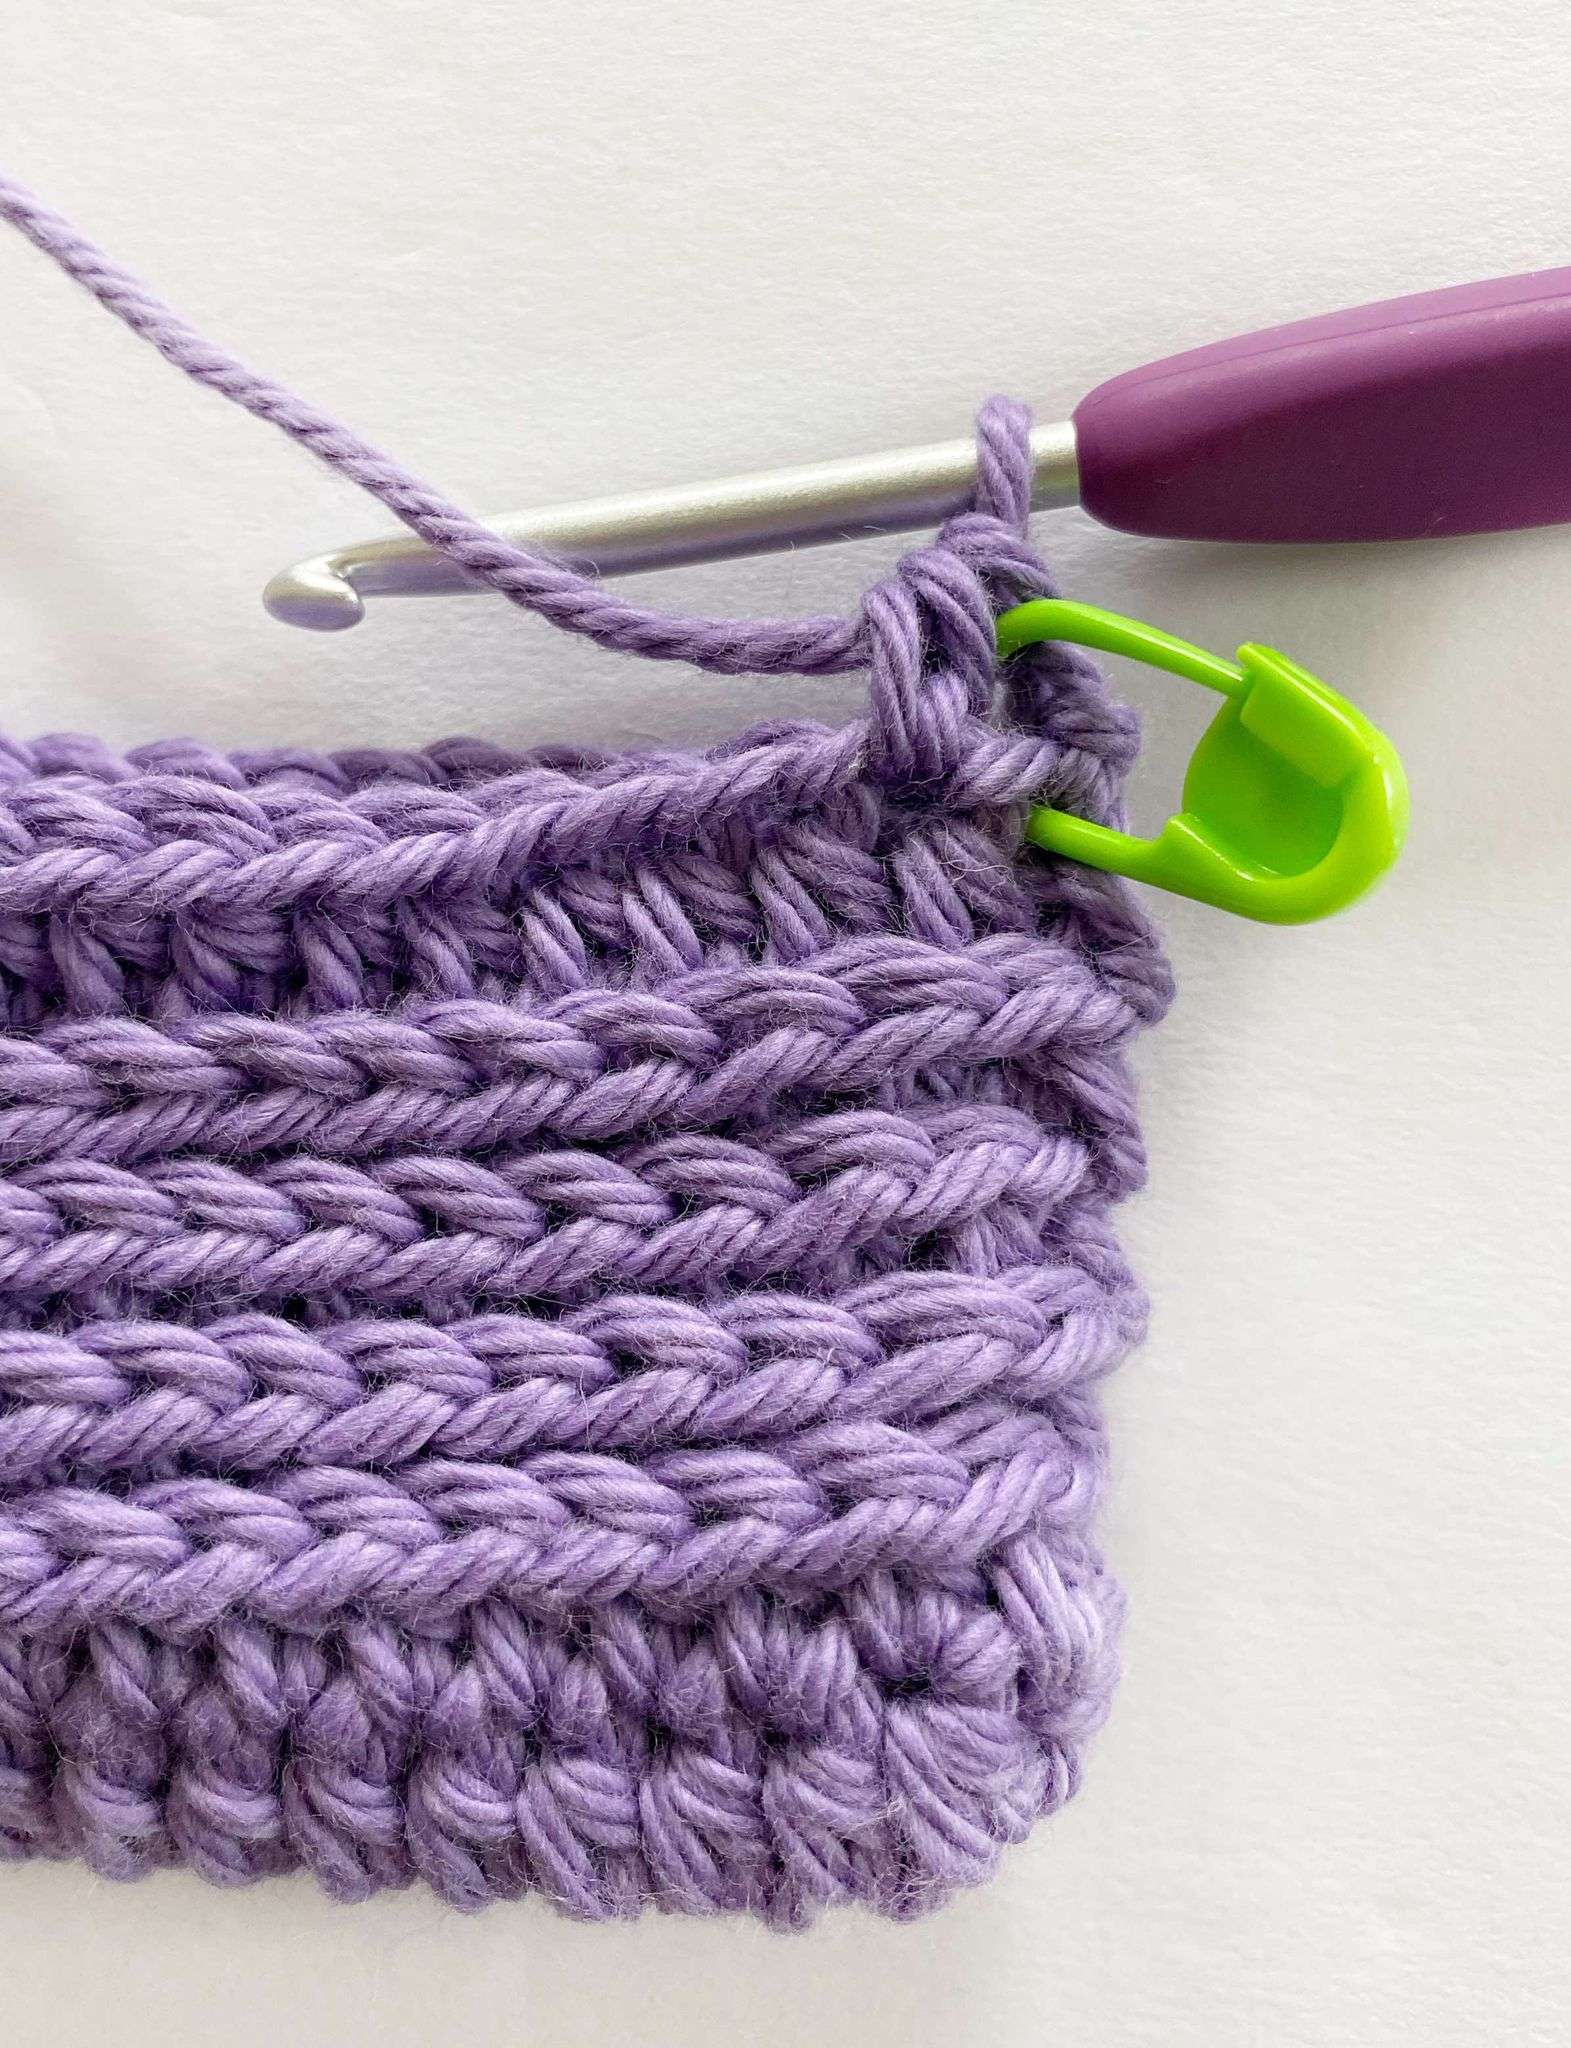
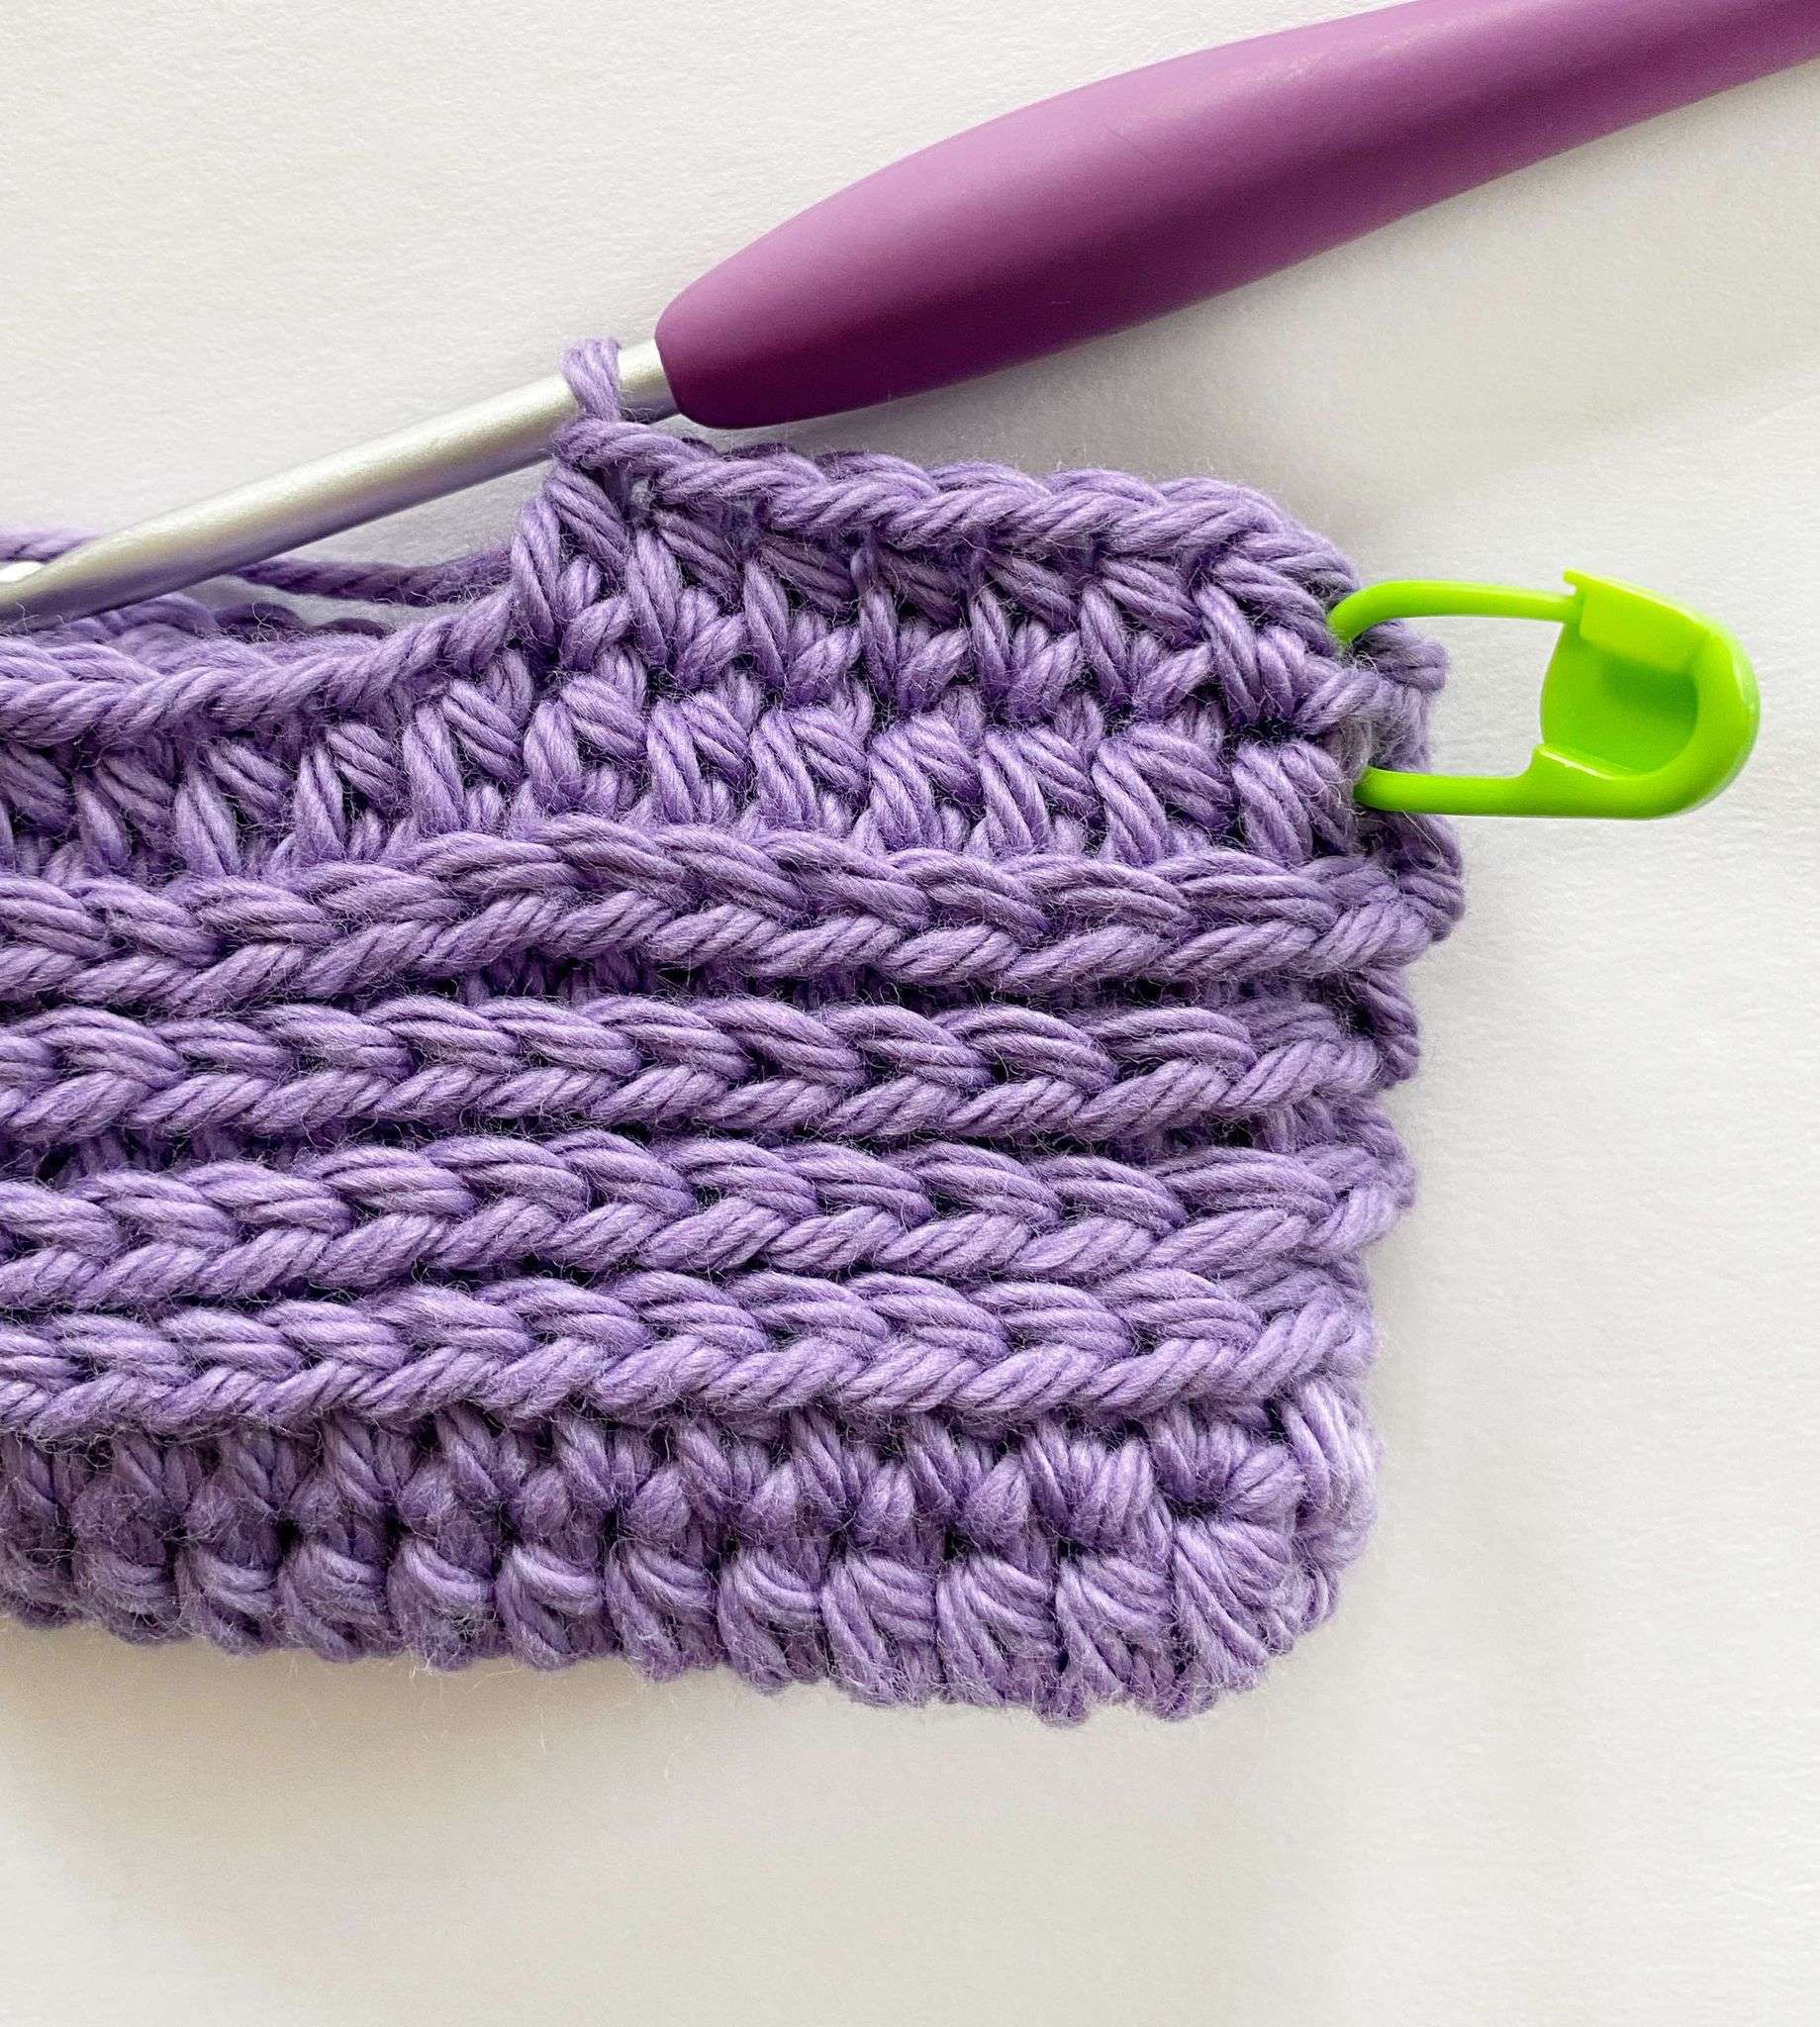
Rnd 8 (Normal):
- Ch 1, hdc in third loop only of first st – mark with a stitch marker.
- Hdc in third loop only of each st around.
- Sl st into the first st of the rnd to join. Do not turn.
Stitch Count: 68 hdc
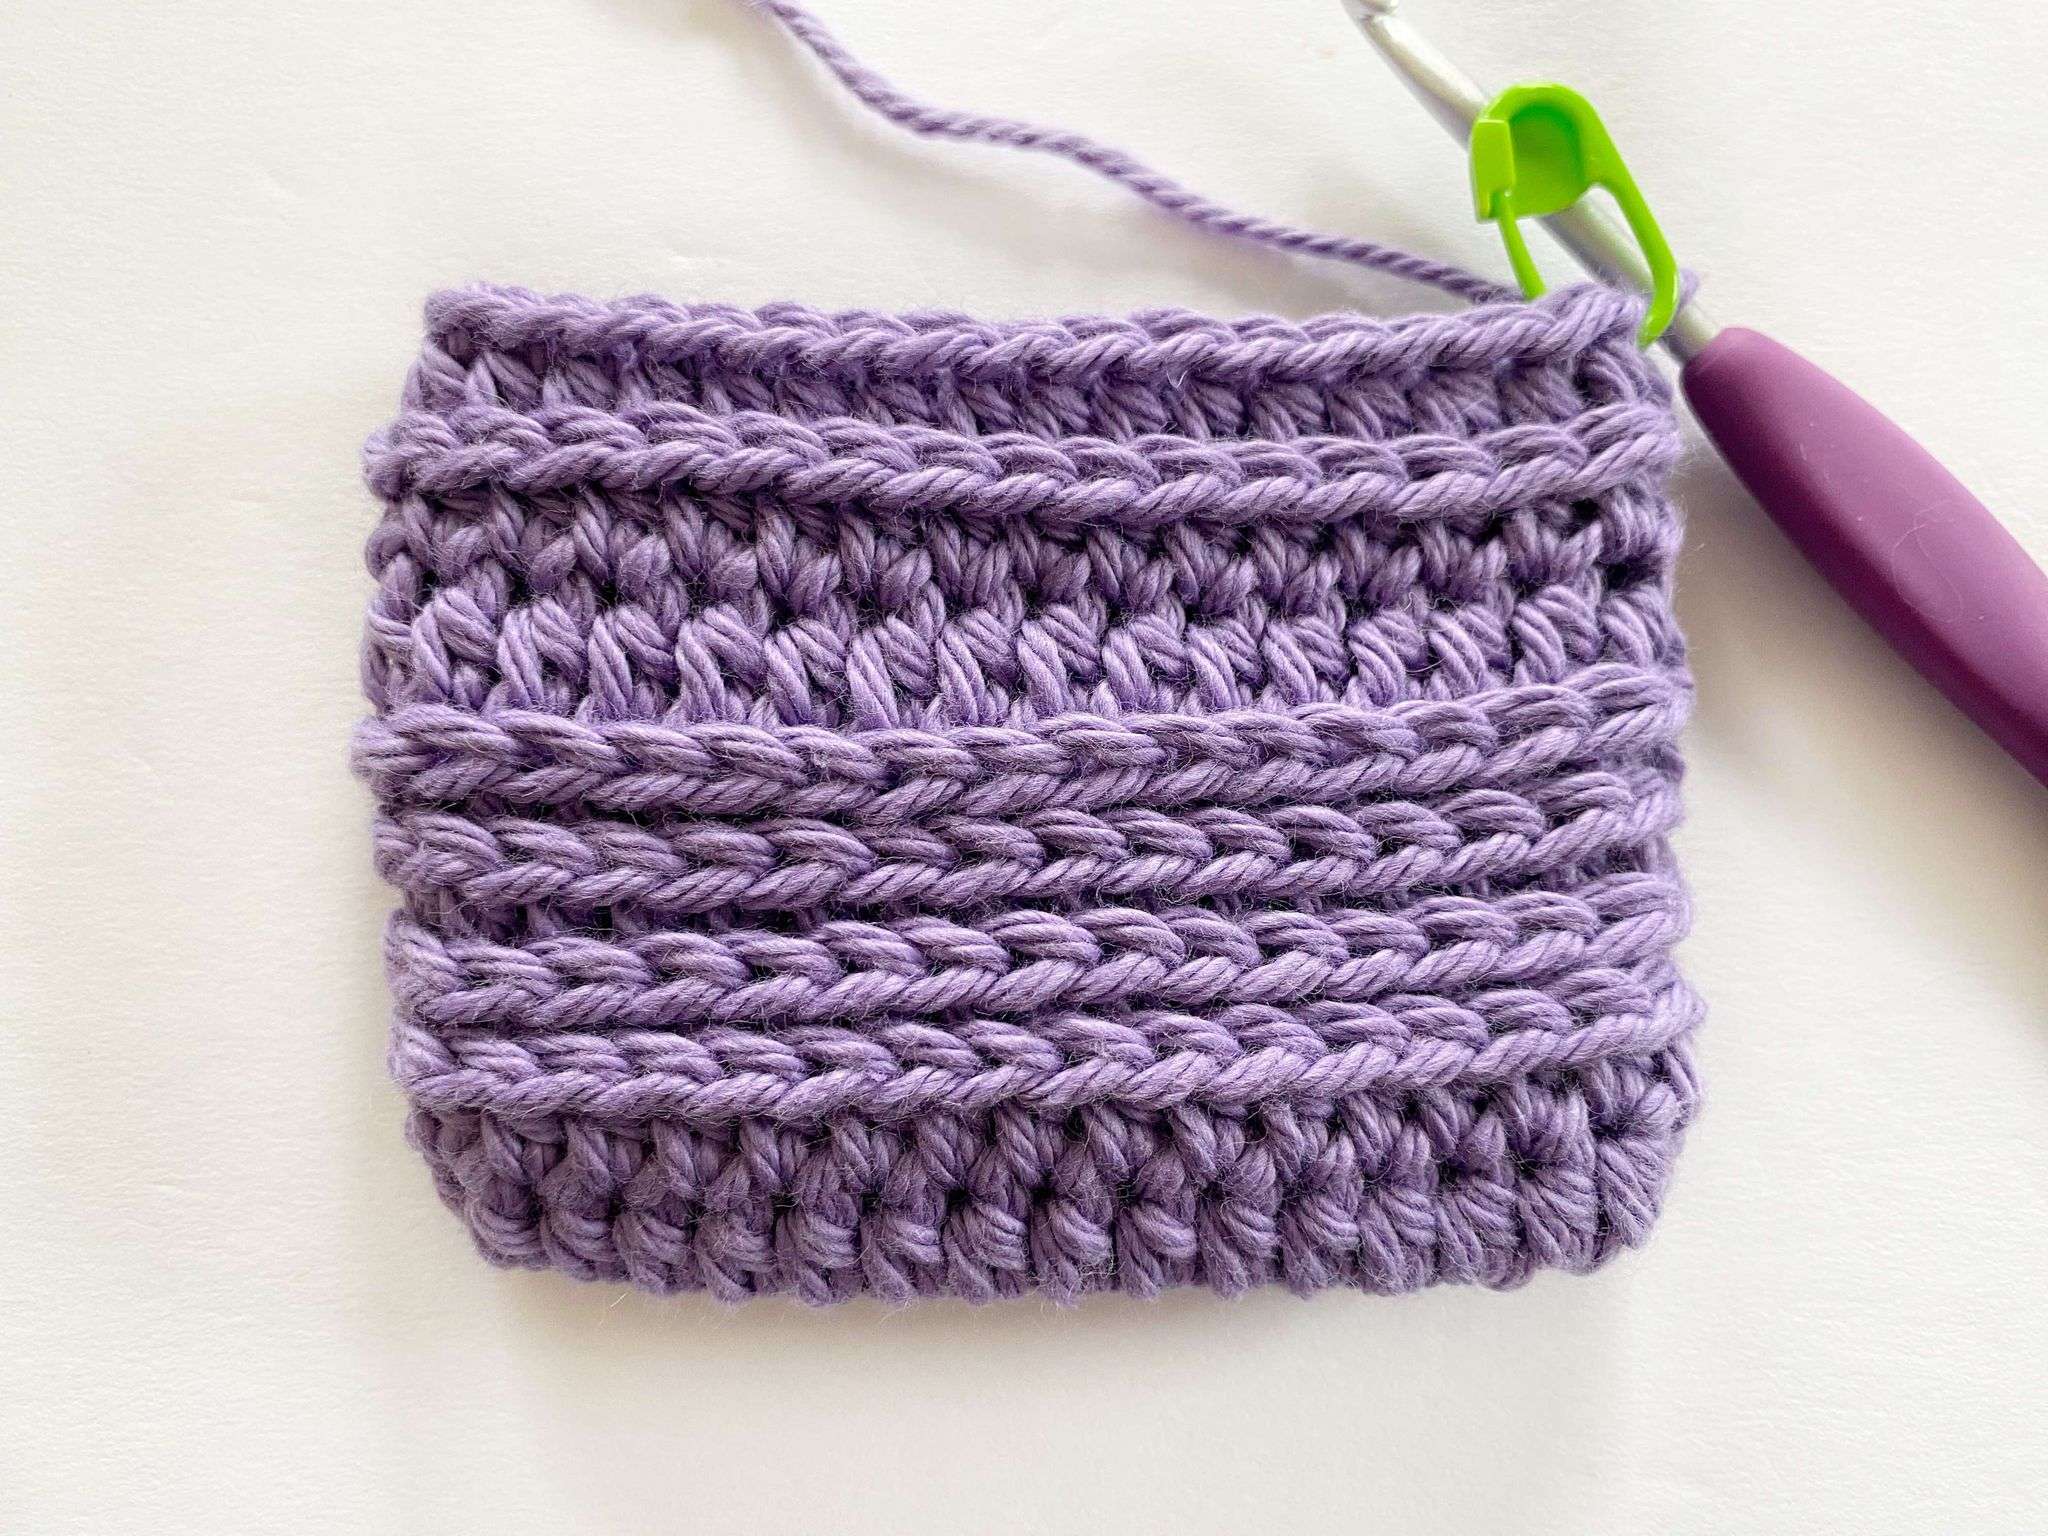
Rnd 9 (Skipped):
- Ch 1, sk first marked hdc.
- Hdc in third loop only of next st and in each st around.
- Hdc in third loop only of first skipped st – mark with a stitch marker.
- Sl st into the first st of the rnd to join. Do not turn.
Stitch Count: 68 hdc
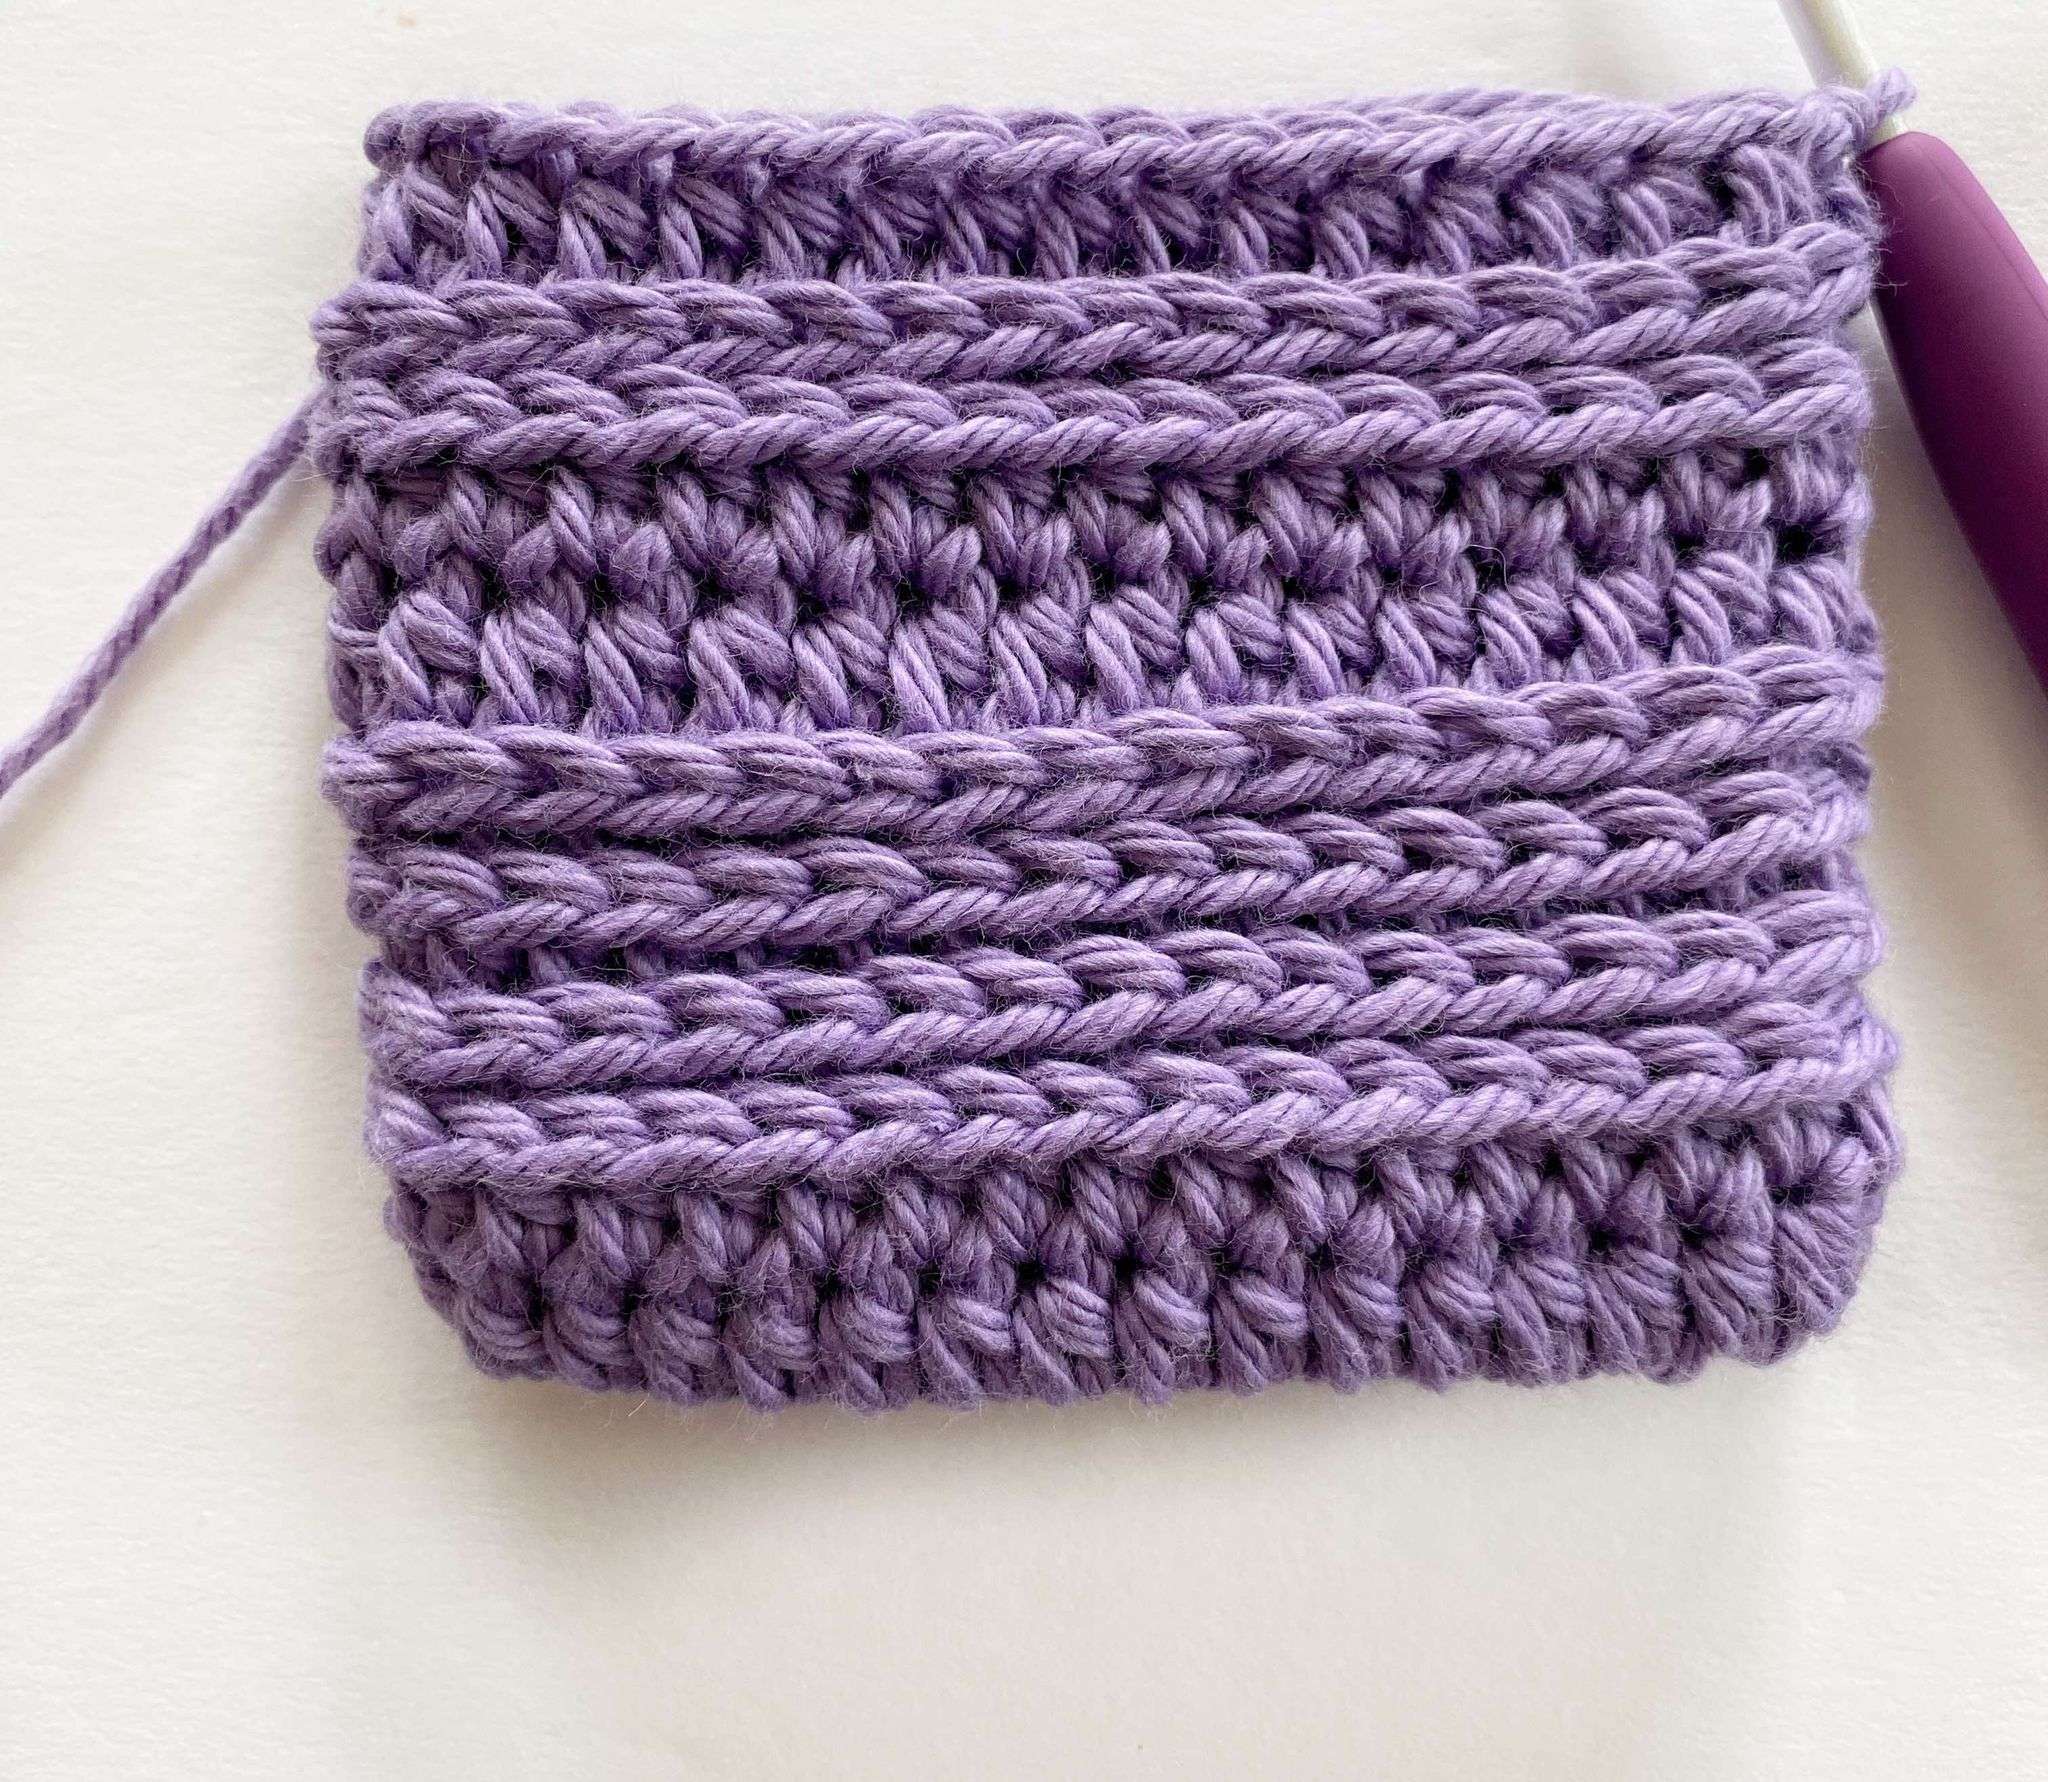
Rnd 10 (Normal):
- Ch 1, hdc in first st – mark with a stitch marker.
- Hdc in each st around.
- Sl st into the first st of the rnd to join. Do not turn.
Stitch Count: 68 hdc
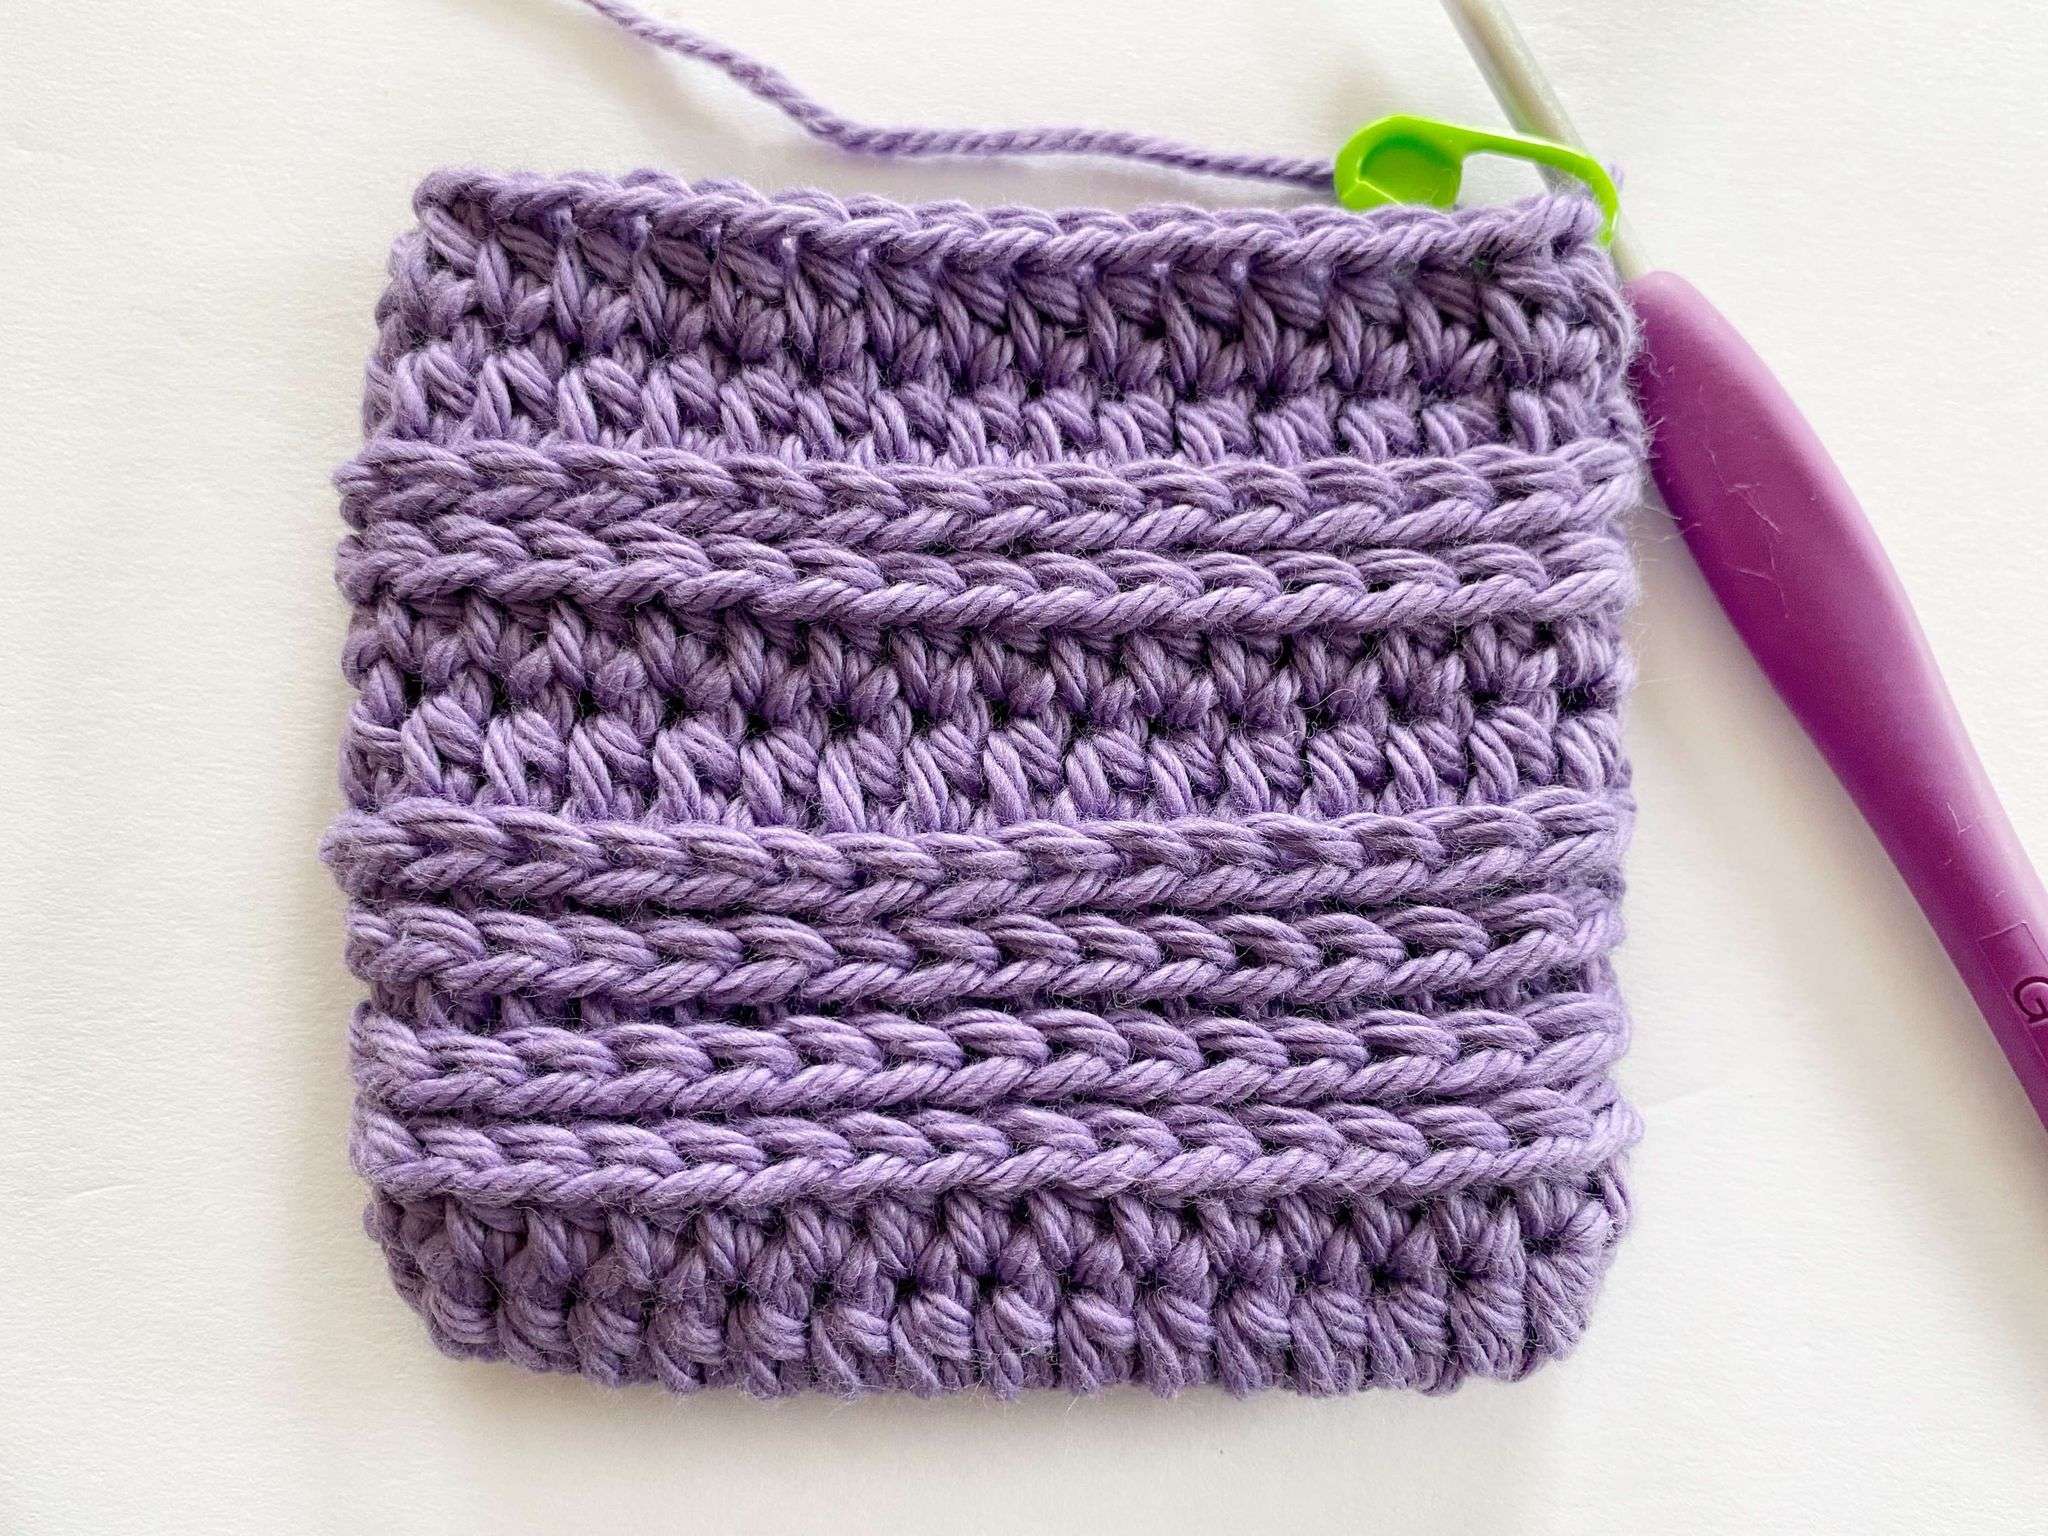
Rnds 11 – 18:
Repeat Rnds 3 – 10.
Rnds 19 – 22:
Repeat Rnds 3 – 6.
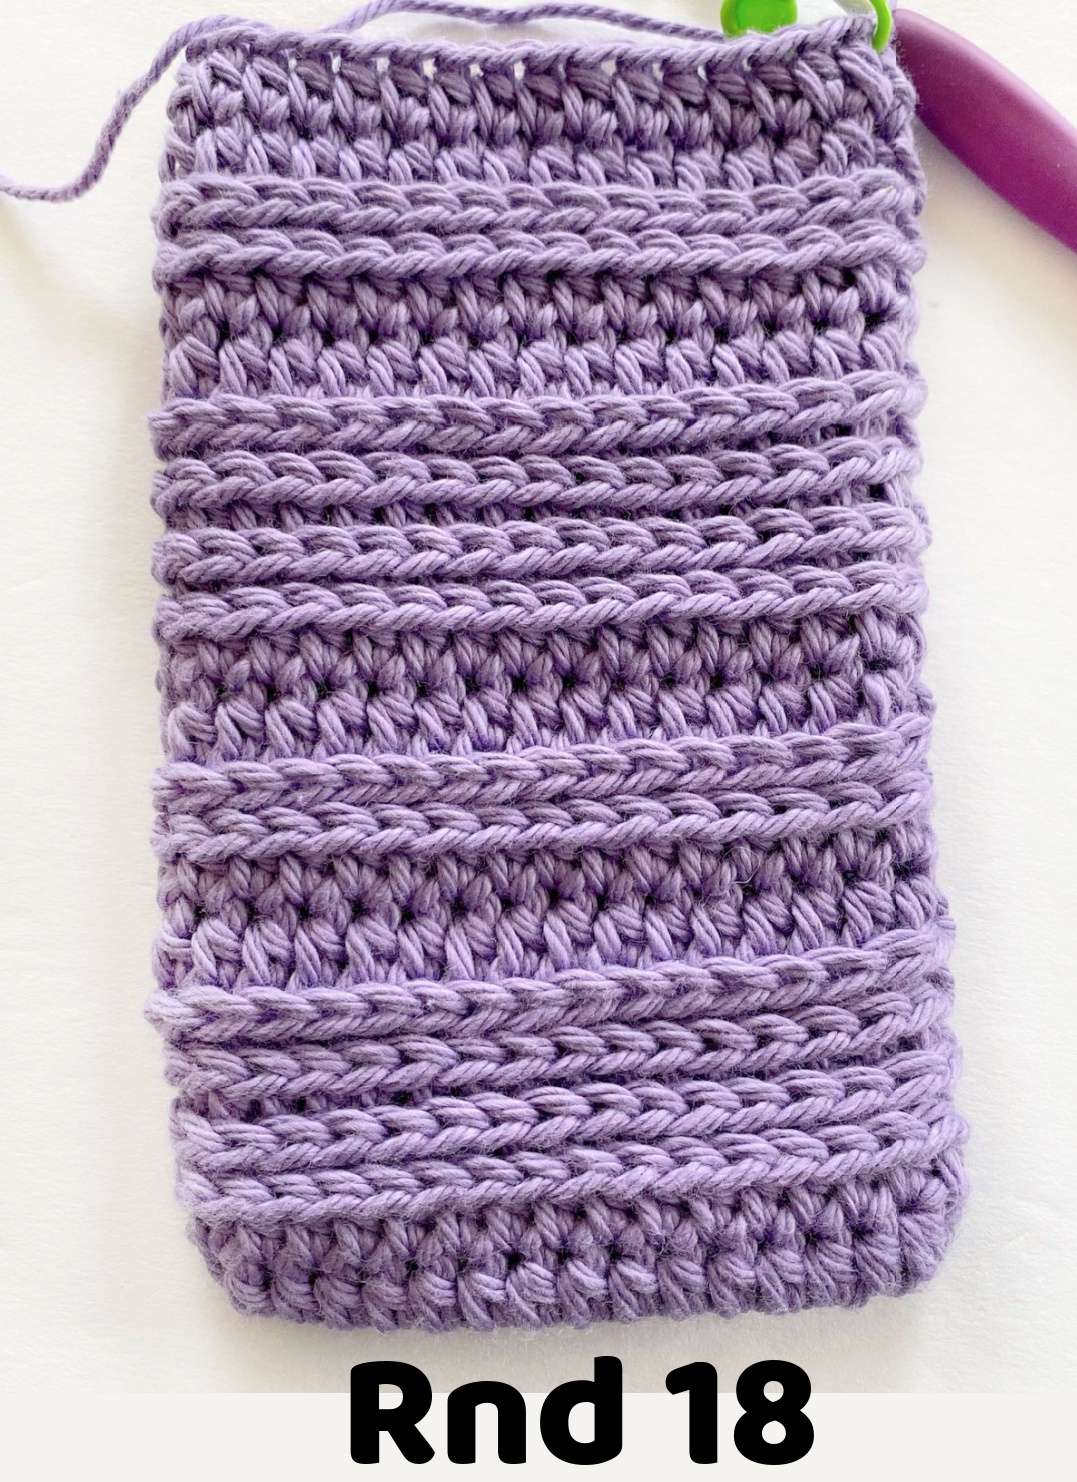
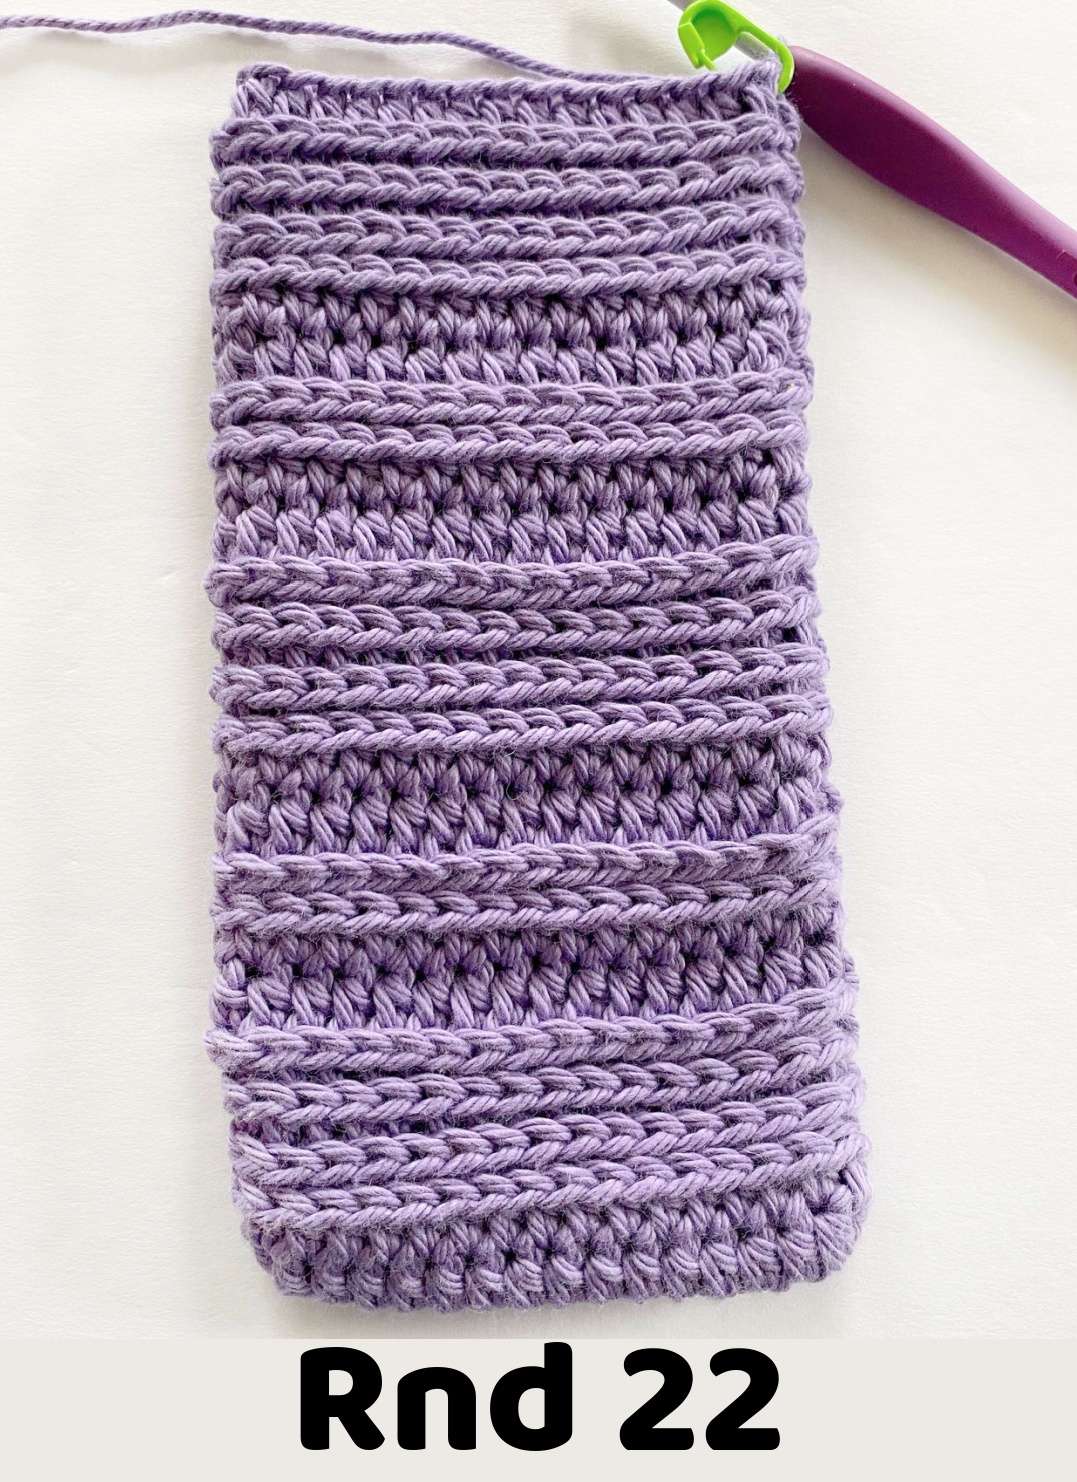
Do not fasten off, as you will need this yarn for closing the top of the potholder. Weave in all ends (except for the current yarn strand).
Crocheting the Potholder Closed:
- Lay the potholder flat, making sure the front side of the potholder is facing you, and line up the front and back stitches.
- Ch 1, insert hook into first st on the front, and the matching st on the back of the potholder, and make a hdc.
- Hdc in each st across, inserting the hook into the matching front and back st to join. Do not fasten off.
Stitch Count: 34 hdc
Adding a Ch-Circle:
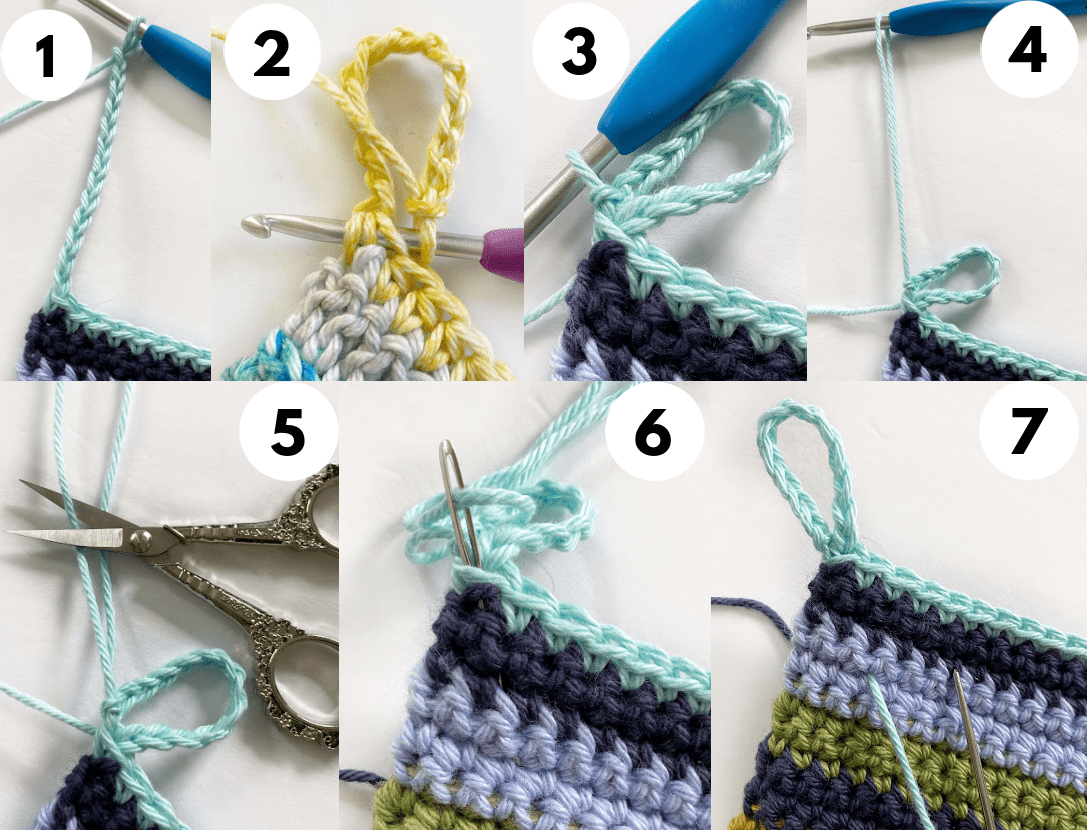
- After making the final hdc, ch 13 (Picture 1).
- Insert hook into front loop and two front bars of last hdc (going on a diagonal). Make a sl st to close the ch-circle. (Picture 2 & 3)
- Fasten off, leave a tail, and weave in the last end (Picture 4, 5, 6, 7).
Questions?
If you have any questions as you work through the pattern, please reach out to me. I am happy to help! Send me an email through my contact page or ask in the Facebook CAL Group.
Other Crochet Potholders You’ll Love!


End Notes:
Congratulations! You just finished your first Mystic Trail Camel Stitch Crochet Potholder. I hope you enjoyed making it.
If you’d like to make more potholders, or other crochet home decor items with your cotton yarn, explore some patterns by clicking on the button below:
The 10th potholder will be released on October 30, 2024!
Disclaimer: You are welcome to sell items that you’ve made from this pattern; however, you are not allowed to use my pictures or sell my pattern as your own (Copyright @ ThisPixieCreates).
Please share pictures of anything and everything related to the 2024 Potholders Galore Crochet-along in the Facebook Group HERE. I can’t wait to see your lovely potholder(s)!
I hope you have a wonderful day, and happy crocheting!
Sincerely,
Dayna